

Page 1
SALES AND TECHNICAL SERVICE CONTACTS
Australia:
Tel. (03) 9769.0666 • Fax (03) 9769.0699
China:
Tel. (10) 88570068 • Fax (10) 88570060
Egypt:
Tel. & Fax (02) 2758.683
Germany:
Tel. (07851) 9129-0 • Fax (07851) 9129-99
Greece:
Tel. (210) 823.5192 • Fax (210) 884.0210
Indonesia:
Tel. (21) 4584.2941 • Fax (21) 4584.2942
Japan:
Tel. (03) 3258.9565 • Fax (03) 3258.9567
Korea:
Tel. (02) 2278.5147 • Fax (02) 2264.1729
Malaysia:
Tel. (603) 5638.9940 • Fax (603) 5638.9829
Singapore:
Tel. 6296.7118 • Fax 6291.6906
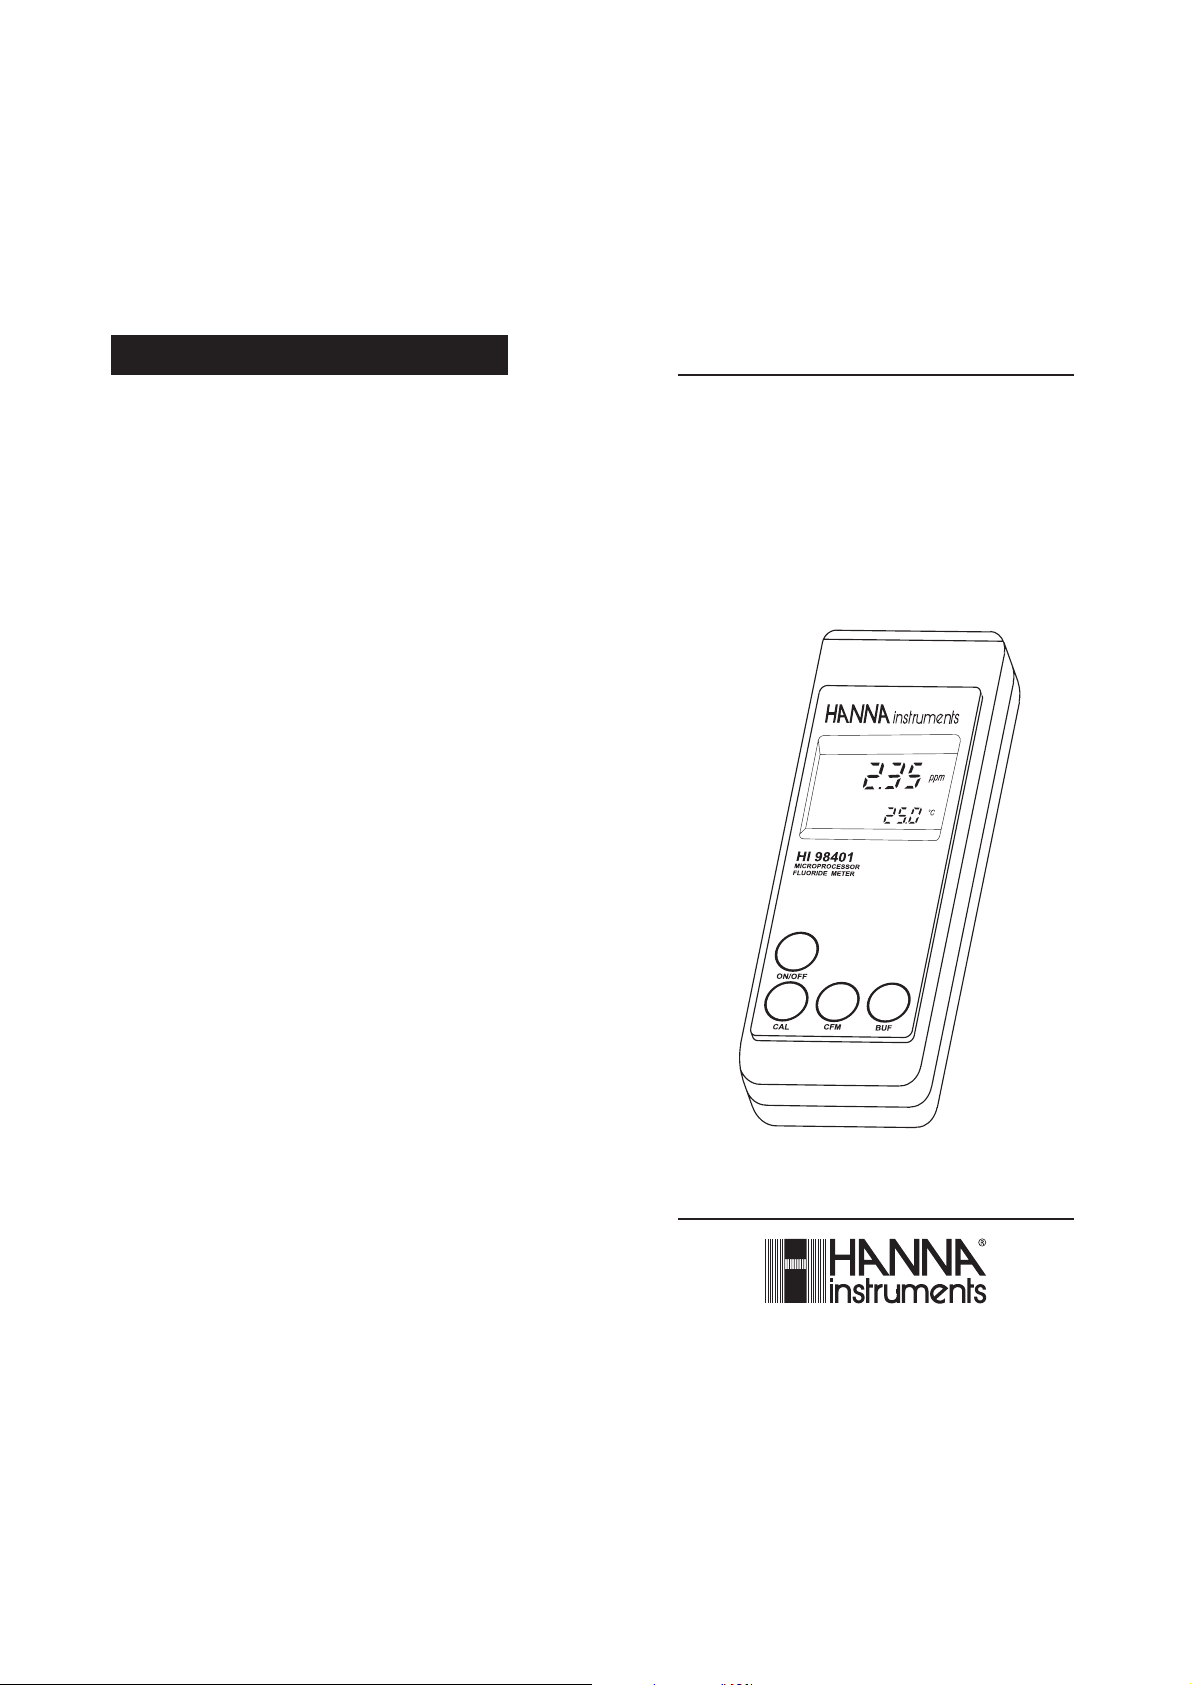
Instruction Manual
HI 98401
Waterproof and Accurate
Fluoride Meter
South Africa:
Tel. (011) 615.6076 • Fax (011) 615.8582
Taiwan:
Tel. 886.2.2739.3014 • Fax 886.2.2739.2983
Thailand:
Tel. 66.2619.0708 • Fax 66.2619.0061
United Kingdom:
Tel. (01525) 850.855 • Fax (01525) 853.668
USA:
Tel. (401) 765.7500 • Fax (401) 765.7575
For e-mail contacts and complete list of Sales and
Technical offices, please see www.hannainst.com
MAN98401R2 08/05
www.hannainst.com
Page 2
Dear Customer,
Thank you for choosing a Hanna product.
Please read this instruction manual carefully before using the meter.
This manual will provide you with the necessary information for a
correct use of the instrument, as well as a more precise idea of its
versatility.
If you need additional technical information, do not hesitate to e-mail
us at tech@hannainst.com.
This instrument is in compliance with the directives.
TABLE OF CONTENTS
PRELIMINARY EXAMINATION .................................................................. 3
GENERAL DESCRIPTION .......................................................................... 3
FUNCTIONAL DESCRIPTION ..................................................................... 4
SPECIFICATIONS ..................................................................................... 5
OPERATIONAL GUIDE .............................................................................. 6
CALIBRATION ......................................................................................... 8
TEMPERATURE CALIBRATION ................................................................ 10
ELECTRODE MAINTENANCE ................................................................... 12
BATTERY REPLACEMENT ....................................................................... 13
ACCESSORIES ....................................................................................... 14
WARRANTY .......................................................................................... 15
CE DECLARATION OF CONFORMITY ........................................................ 15
WARRANTY
All Hanna Instruments meters are warranted for two years against defects in
workmanship and materials when used for their intended purpose and maintained according to instructions. Electrodes and probes are warranted for a
period of six months.
This warranty is limited to repair or replacement free of charge. Damages due to
accidents, misuse, tampering or lack of prescribed maintenance are not covered.
If service is required, contact the dealer from whom you purchased the instrument. If under warranty, report the model number, date of purchase, serial
number and the nature of the failure. If the repair is not covered by the warranty,
you will be notified of the charges incurred. If the instrument is to be returned to
Hanna Instruments, first obtain a Returned Goods Authorization number from the
Customer Service department and then send it with shipping costs prepaid. When
shipping any instrument, make sure it is properly packaged for complete protection.
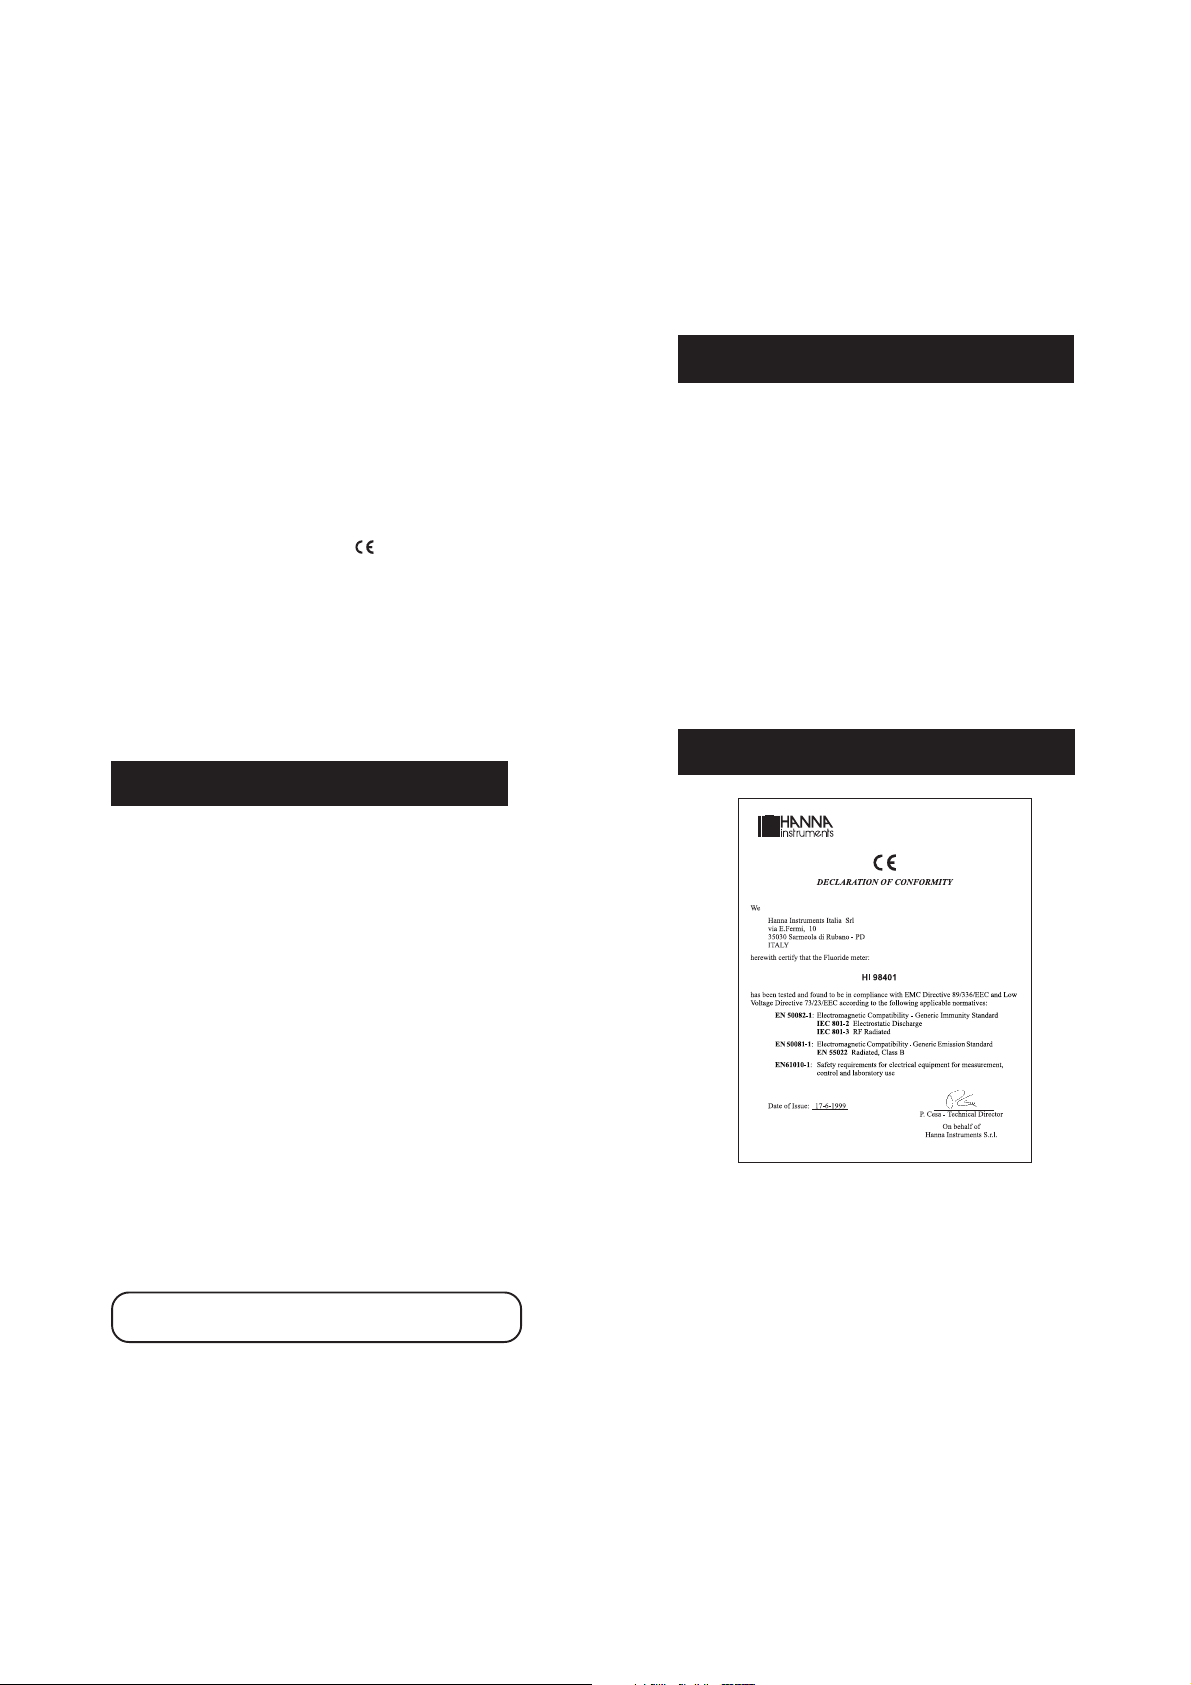
CE DECLARATION OF CONFORMITY
Hanna Instruments reserves the right to modify the design, construction and
appearance of its products without advance notice.
2
Recommendations for Users
Before using this product, make sure that it is entirely suitable for the environment in which it is used.
Operation of this instrument in residential areas could cause unacceptable interferences to radio and TV
equipment.
Any variation introduced by the user to the supplied equipment may degrade the instrument's EMC
performance. To avoid electrical shock, do not use these instruments when voltages at the measurement surface exceed 24 Vac or 60 Vdc.
To avoid damages or burns, do not perform any measurement in microwave ovens.
15
Page 3

ACCESSORIES
PRELIMINARY EXAMINATION
Calibration Solutions
HI 7023/1L TISAB fluoride solution,1 L bottle
HI 7023L TISAB fluoride solution, 500 mL bottle
HI 70701/1L 1 g/L fluoride solution, 1 L bottle
HI 70701L 1 g/L fluoride solution, 500 mL bottle
HI 70701M 1 g/L fluoride solution, 230 mL bottle
HI 70702/1L 10.0 mg/L fluoride solution, 1 L bottle
HI 70702L 10.0 mg/L fluoride solution, 500 mL bottle
HI 70702M 10.0 mg/L fluoride solution, 230 mL bottle
HI 70703/1L 100 mg/L fluoride solution, 1 L bottle
HI 70703L 100 mg/L fluoride solution, 500 mL bottle
HI 70703M 100 mg/L fluoride solution, 230 mL bottle
Maintenance Solutions
HI 7061M General purpose cleaning solution, 230 mL bottle
HI 8061M General cleaning solution, 230 mL FDA bottle
HI 7061L General cleaning solution, 500 mL bottle
HI 8061L General cleaning solution, 500 mL FDA bottle
HI 7073M Protein cleaning solution, 230 mL bottle
HI 8073M Protein cleaning solution, 230 mL FDA bottle
HI 7073L Protein cleaning solution, 500 mL bottle
HI 8073L Protein cleaning solution, 500 mL FDA bottle
HI 7077M Oil and fat cleaning solution, 230 mL bottle
HI 8077M Oil & fat cleaning solution, 230 mL FDA bottle
HI 7077L Oil and fat cleaning solution, 500 mL bottle
HI 8077L Oil & fat cleaning solution, 500 mL FDA bottle
HI 7082 3.5M KCl electrolyte solution, 4 x 50 mL bottle
HI 8082 3.5M KCl electrolyte solution, 4 x 50 mL FDA bottle
Other Accessories
FC 301B Fluoride electrode with BNC and 1 m (3.3') cable
HI 5313 Reference electrode with 1 m (3.3') cable
HI 7662 Temperature probe with 1 m (3.3') cable
HI 76405 Electrode holder
Remove the instrument from the packing material and examine it
carefully to make sure that no damage has occurred during shipping.
If there is any noticeable damage, immediately notify your dealer.
Each meter is supplied complete with:
• Batteries (4 x 1.5V AA)
• Instruction manual
• Rugged carrying case
Note: Save all packing materials until you are sure that the instru-
ment functions correctly. Any damaged or defective item must
be returned in its original packing materials together with the
supplied accessories.
GENERAL DESCRIPTION
HI 98401 measures fluoride from 0.05 mg/L to 1.9 g/L in 5 distinct
scales. With auto-ranging HI 98401 automatically selects the range
that provides the best resolution. All results are displayed directly in
fluoride concentration. In order to guarantee maximum repeatability,
measurements are performed using the FC 301B fluoride specific
electrode and the separate HI 5313 reference electrode.
HI 98401 compensates for temperature automatically from 5 to 35°C
using the optional HI 7662 stainless steel temperature probe. The
temperature measured together with fluoride concentrations are displayed on the large LCD simultaneously.
All operations are microprocessor controlled for added precision and
simplicity. The calibration is automatic at one or two points. The first
calibration point is in the middle of the range at 100 mg/L (ppm). The
slope can then be selected for low fluoride measurements at 10 mg/L,
or higher contents at 1000 mg/L.
HI 98401 is supplied in a rugged carrying casing complete with 4
batteries, that provide up to 120 hours of continuous operation.
14
3
Page 4

FUNCTIONAL DESCRIPTION
FLUORIDE ELECTRODE CLEANING
General: Rinse the fluoride electrode with deionized water.
Protein, oil and fat: clean the electrode tip with a cotton wool
soaked in alcohol, then rinse with deionized water.
IMPORTANT: After cleaning, rinse the fluoride electrode thoroughly
with deionized water and dry it attentively with a
non-abrasive cloth.
TROUBLESHOOTING
• Reading fluctuates: could be due to dirty or blocked reference
electrode junction. Follow the cleaning procedure above.
• Reading drifts: submerge the tip of the reference electrode in
HI 7082 solution at a temperature of 50-60°C for about 1 hour.
Afterwards, rinse with deionized water.
• No slope (meter always reads the same value): the bulb or
stem of the fluoride electrode might be cracked. Repeat the
measurement with a new fluoride electrode.
• Response (of the fluoride electrode) is sluggish: immerse the
fluoride electrode in HI 70702 solution for 3 hours.
1) Temperature probe connector
2) Reference electrode connector
3) BNC connector for fluoride electrode
4) Liquid Crystal Display (LCD)
5) ON/OFF button
6) CAL button
7) BUF button
8) CFM button
4
BATTERY REPLACEMENT
When the batteries become weak, the "LOBAT"
indication is displayed to warn the user. It is
recommended to change the batteries as
soon as possible.
Battery replacement must only take place in a
safe area and using 1.5V AA batteries.
For replacing batteries, remove the two screws
on the rear of the instrument and replace all
four batteries with new ones, while paying
attention to the correct polarity.
13
Page 5

ELECTRODE MAINTENANCE
SPECIFICATIONS
PREPARATION
The FC 301B fluoride electrode is shipped dry to
prolong its life. The HI 5313 reference electrode
HI 5313
instead should be maintained wet with storage solution in the protective cap.
Remove the protective cap from the HI 5313 reference
electrode.
Any salt deposit around the bottom of the electrode is
normal and it will dissolve if rinsed with water.
If the junction of the HI 5313 reference electrode is
dry, soak the tip in HI 7082 solution for at least one
hour prior to operation.
If the bulb of the FC 301B fluoride electrode is dry, soak the tip in
HI 70702 (10 mg/L fluoride) solution for at least three hours
before using it.
STORAGE
The FC 301B fluoride electrode must be stored dry to prolong its life.
After use, rinse it with deionized water, dry it attentively with a nonabrasive cloth and store it dry.
The HI 5313 reference electrode should be kept wet for a rapid
response. After use, rinse the electrode with deionized water and
store it with a few drops of HI 7082 solution in the protective cap.
PERIODIC MAINTENANCE
Periodically check electrodes and cables. The cables should be intact
and show no sign of wear and tear. The electrode bulb and stem
should present no cracks (in which case it, must be replaced). The
connectors must be clean and dry. Rinse the reference electrode with
deionized water to wash away any salt deposits that there might be.
Range 0.050 to 0.500 mg/L (ppm) / 0.50 to 5.00 mg/L
5.0 to 50.0 mg/L / 50 to 500 mg/L / 0.50 to 1.90 g/L Fluoride
0.0 to 50.0°C
Resolution 0.001 mg/L (ppm) / 0.01 mg/L
0.1 mg/L / 1 mg/L / 0.01 g/L Fluoride
0.1°C
Accuracy ±5% of reading or ±0.02 ppm Fluoride
(with ±3°C from calibration temperature)
±0.5 °C
Typical EMC Deviation ± 2% FS (Fluoride) / ±0.5°C
Calibration Automatic, 1 or 2 point at 100 mg/L and
10.0 mg/L or 1.00 g/L
Temperature Compensation
Automatic, 5 to 35 °C (with temperature probe)
Electrodes FC 301B fluoride electrode with BNC and 1 m (3.3') cable
HI 5313 reference electrode with 1 m (3.3') cable (not included)
Temperature Probe HI 7662 with 1 m (3.3') cable
Battery Type / Life 4 x 1.5V AA / approx. 120 hours of use
Environment 0 to 50°C (32 to 122°F); RH max 100%
Dimensions 196 x 80 x 60 mm (7.7 x 3.1 x 2.4")
Weight 500 g (1.1 lb.)
REFERENCE ELECTRODE CLEANING
General: immerse the reference electrode in HI 7061 general
cleaning solution for about one hour.
Protein: immerse the reference electrode in HI 7073 pro-
tein cleaning solution for about 15 minutes.
Oil and fat: rinse the electrode with HI 7077 cleaning solution.
12
5
Page 6

OPERATIONAL GUIDE
INITIAL PREPARATION:
The meter is supplied with 4 pieces of 1.5V AA-type alkaline batteries.
Remove the battery cover on the back of the meter and insert the
batteries while paying attention to their polarity.
Attach the fluoride electrode (#3 on
page 4), the reference electrode (#2)
F Electrod
and the temperature probe (#1) to their
respective connectors on top of the meter.
Press the ON/OFF key to turn the meter on.
Note: The temperature probe can also be used on its own to measure
the temperature independently.
Note: If the temperature probe is not con-
nected, the lower display will indicate
25.0°C with the “°C” symbol blinking.
MEASUREMENT OF FLUORIDE ION CONCENTRATION
Note: Please ensure the meter is calibrated prior to proceeding any
further. In order to obtain accurate results, calibrate the meter
at a temperature no more than ±3°C away from the sample
to be measured subsequently.
Note: If the fluoride electrode is new, or it has not been used for a
few days, it must be soaked in a solution of HI 70702 (10 ppm
of F-) for at least 3 hours prior to measurement.
• Pour about 10-20 mL of the sample in a clean beaker and add the
same quantity of HI 7023 (TISAB) solution to the beaker. Mix the
solution for a few minutes.
• Rinse the electrodes with deionized water and dry them attentively
with a non-abrasive cloth.
• Immerse the fluoride and the reference electrode as well as the
temperature probe to a depth of at least 1 cm
(½”) in the prepared sample. Make sure that
the electrodes are not touching the bottom of
the beaker. Position the temperature probe close
to the tip of the other electrodes.
Ref.
Temperature
probe
• The measured temperature is shown on the upper display.
• Immerse the temperature probe in a bath at 0.0°C.
• Press CAL. CAL and BUF will appear on the display with the
" " symbol blinking. The upper part of the display shows the
calibration point (0.0 °C).
• When CON appears on the display it means that the value has
been recognized and the reading is stable. Press CFM to confirm.
Nota: If the reading of the instrument is too far from the expected
value (in this case 0.0°C), the " "
symbol starts blinking to advise of an
error. In this case verify if the temperature of the bath is correct (for best
results, use a stirrer to agitate a solution of ice and water), and if the probe is functioning properly.
• Press CAL and then press BUF to visualize the second calibration
point (50.0 °C).
• Immerse the temperature probe in a bath at 50.0°C.
• When CON appears it means that the value has been recognized
and the reading is stable. Press CFM to confirm.
• Switch the meter off and back on again to return to normal
measurement mode.
6
11
Page 7

• Immerse the fluoride and the reference electrode to a depth of at least 1 cm (½”) in the
second buffer solution. Make sure that the electrodes are not touching the bottom of the beaker.
Immerse the temperature probe close to the tip
of the other electrodes.
• When the CON symbol appears, it means that the second calibration solution has also been recognized and the reading has
stabilized. Press CFM to confirm.
• Calibration is now complete and the meter automatically returns
to the normal operational mode.
TEMPERATURE CALIBRATION
(for technical personnel only)
All the meters are factory calibrated for temperature.
The temperature probes are interchangeable and no temperature cali-
bration is needed when they are replaced.
If, for any reason, the temperature measurements seem inaccurate,
temperature recalibration may be carried out.
For an accurate recalibration however contact your dealer or the
nearest Hanna Customer Service Center.
PREPARATION
• Prepare a vessel containing ice and water and another one containing hot water (at a temperature of around 50°C). Place
insulation material around the vessels to minimize temperature
changes.
• Connect the temperature probe (#1 on page 4) to the connector
on top of the instrument.
Note: If "°C" blinks, it means that the temperature probe is not
connected properly.
• Wait until the display stabilizes (about
10-15 minutes). The fluoride ion concentration and the temperature will be
displayed on the upper and lower displays, respectively.
Note: It is recommended to mix the sample during the measurement,
using a magnetic stirrer set at around 100 rpm.
MAGNETIC STIRRER
HI 190M
ON
POWER
OFF MAX
SPEED
Note: If the temperature probe is not connected, the meter will
naturally not compensate for the temperature variance. In this
case, accurate fluoride measurements are only possible if the
temperature of the sample and the calibration solutions are
close (no more than ±3°C apart).
TEMPERATURE MEASUREMENT
The temperature can be measured independently from fluoride concentration.
• Immerse the temperature probe to a depth of at
least 1 cm (½”) in the prepared sample.
• Wait for the reading to stabilize. The temperature
of the solution will be shown on the lower
part of the display.
CALIBRATION PROCEDURE
• With the instrument turned off, press and hold CAL and then the
ON/OFF switch.
+
10
7
Page 8

CALIBRATION
In order to obtain accurate measurements, frequent calibration is
recommended.
For better results, calibrate at a temperature close to that of the
solution to be tested (no more than ±3°C apart).
The instrument can be calibrated at 1 or 2 points. Two-point calibration is always recommended for better accuracy.
The first point of calibration is fixed at 100 ppm (HI 70703). The
second point can be selected between 10.0 (HI 70702) and 1000
ppm (HI 70701). If the sample to be tested has low ionic strength
(below 100 ppm), use HI 70702 for the second point. Likewise, with
sample concentrations above 100 ppm, use HI 70701 as the second
calibration point.
• Immerse the fluoride and the reference electrode as well as the temperature probe to a
depth of at least 1 cm (½”) in the prepared
buffer solution. Make sure that the electrodes
are not touching the bottom of the beaker.
Immerse the temperature probe close to the tip
of the other electrodes.
• Press CAL. The display will show “CAL” and “BUF” together with
an intermittent “~” symbol. The upper display will show the
calibration point (100 ppm) with the temperature of the solution
shown on the lower LCD.
PREPARATION
• Use only clean beakers.
Prepare two calibration solutions by mixing
sufficient quantity of 50% HI 70703 (100
ppm) and 50% HI 7023 (TISAB) solution in
one beaker and then 50% of HI 70702 (10.0
ppm) or HI 70701 (1000 ppm) solution and
50% HI 7023 (TISAB) in the other.
• Attach the fluoride electrode (#3 on page 4), the reference
electrode (#2) and the temperature probe (#1) to their respective connectors on top of the meter.
• Switch the meter on by pressing the ON/OFF button.
Note: For best results, it is recommended to prepare two beakers for
each calibration point: one beaker to rinse and the second one
to calibrate. This minimizes contamination of the calibration
solutions.
Note: Use plastic beakers to minimize electromagnetic interference.
CALIBRATION PROCEDURE
Note: If the fluoride electrode is new, or it has not been used for a
few days, it must be soaked in a solution of HI 70702 (10 ppm
of F-) for at least 3 hours prior to calibration.
• Rinse the electrodes with deionized water and dry them attentively
with a non-abrasive cloth.
8
• When the CON symbol appears, it means that the calibration
solution has been recognized and the reading has stabilized. Press
CFM to confirm the first calibration point.
Note: If the value of the calibration solution
measured by the meter is too far from
the ideal value, the “ “ symbol
starts blinking to indicate an error in
the calibration procedure. Ensure that the calibration solution is
fresh and the correct one (in this case 100 ppm), and that the
electrodes are in good working condition if necessary follow the
electrode maintenance procedure. Repeat the procedure with
fresh and/or new solutions and electrodes.
• After pressing CFM, the display will show
the second point of calibration (10.0 ppm).
Two-point calibration is always recommended, however, by pressing CAL one
can exit the calibration procedure at this point, having successfully
completed a one-point calibration.
• Press BUF to toggle between 10.0 and 1000
ppm and select the second calibration buffer.
9
 Loading...