

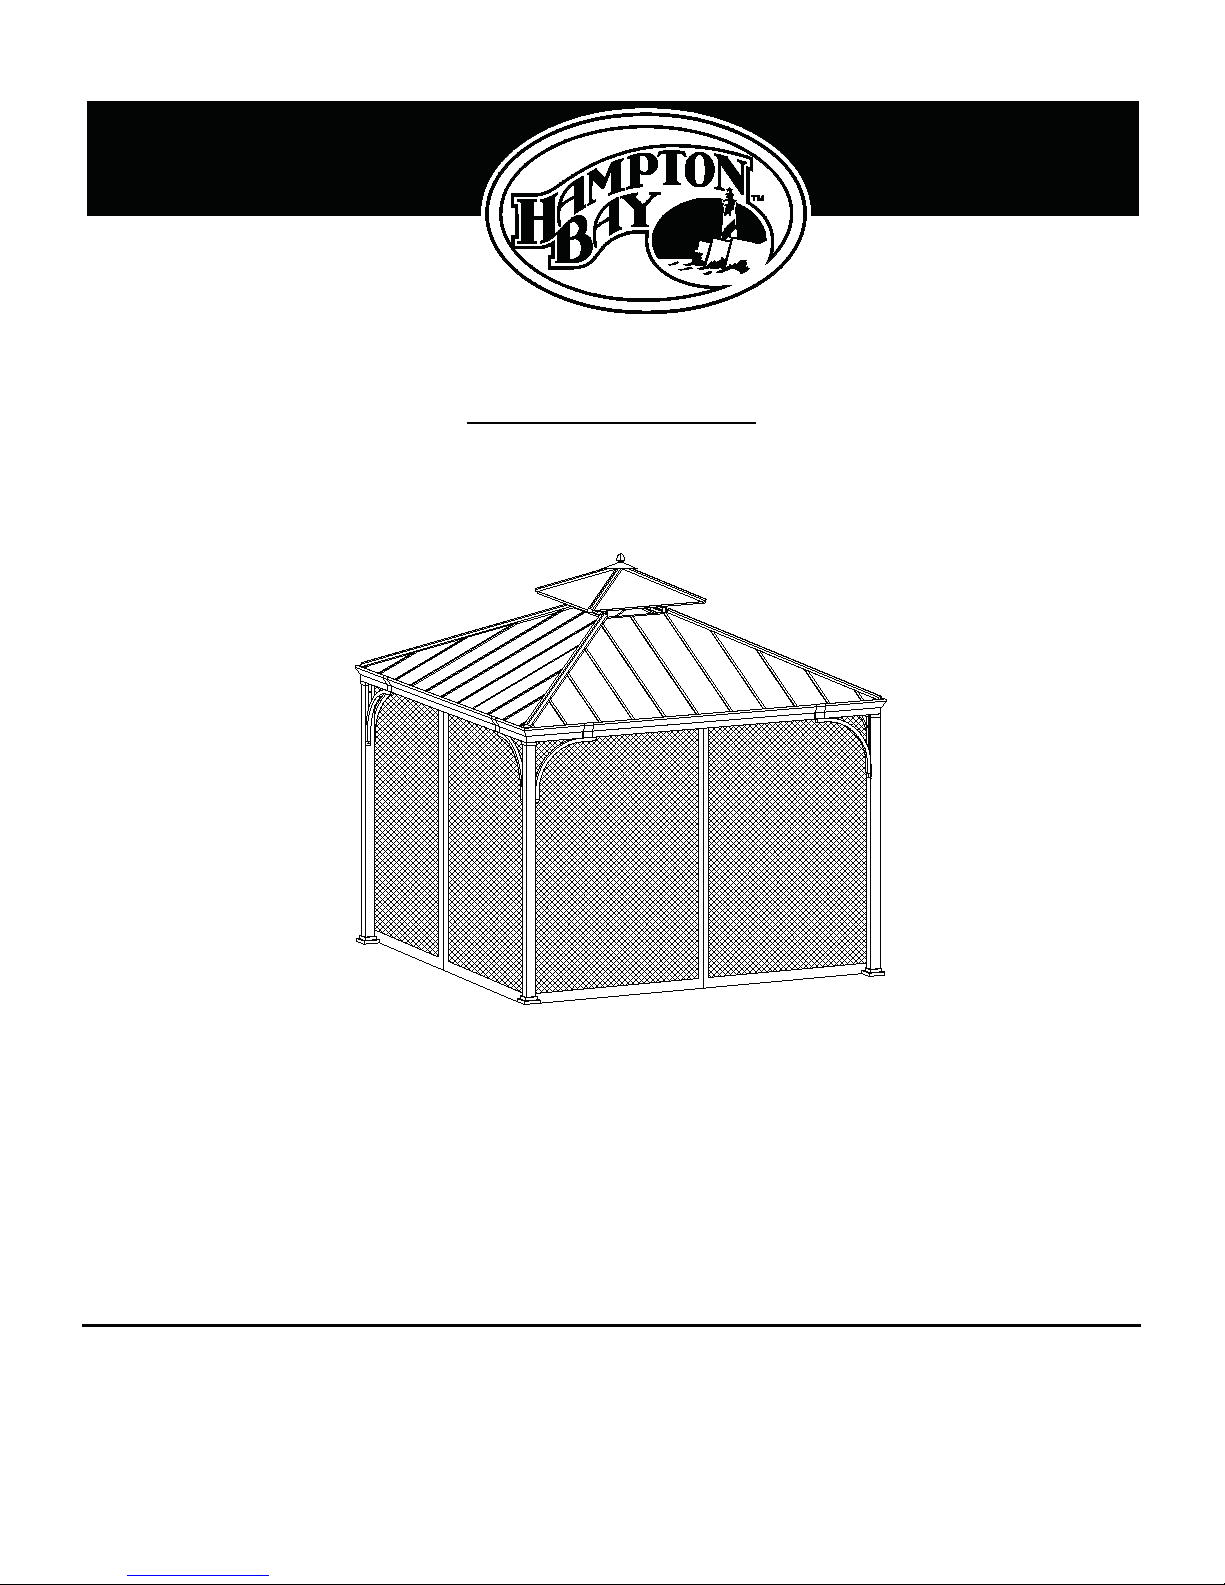
HAMPTON BAY HARPER, L-GZ680PST-O Use And Care Manual
THANK YOU
We appreciate the trust and confidence you have placed in Hampton Bay through the purchase of this gazebo. We strive to continually create quality
products designed to enhance your home. Visit us online to see our full line of products available for your home improvement needs. Thank you for
choosing Hampton Bay!
Item #1000 811 709
Model #L-GZ680PST-O
USE AND CARE GUIDE
HARPER GAZEBO 10 FT. X 10 FT.
Questions, problems, missing parts? Before returning to the store,
call Hampton Bay Customer Service
8 a.m. - 6 p.m., EST, Monday-Friday
1-877-527-0313
WWW.HOMEDEPOT.CA
2
Table of Contents
Table of Contents .......................................................... 2
Safety Information
......................................................... 2
Warranty
...............................................................................2
What is Covered
.......................................................................2
What is Not Covered ................................................................ 2
Pre-Assembly ................................................................ 3
Planning Installation ................................................................ 3
Hardware Included................................................................ . 3
Package Contents ................................................................ 4-5
Assembly ................................................................ . 6-12
Care and Cleaning ...................................................... 13
Safety Information
1. More than 6 persons is required for this assembly
2. Some parts may contain sharp edges. Wear protective
gloves.
3. When assembling and using this product, basic safety
precautions should always be followed to reduce the risk of
personal injury and damage to equipment. Please read all
instructions before assembly and usage.
DANGER: This unit is heavy! Do not assemble this item
alone.
WARNING: Do not leave the gazebo where there is a risk
of high wind, as possible damage will occur to the
structure.
CAUTION: Do not climb on top of the gazebo. Falling off
the gazebo can result in serious injury, possibly even death.
NOTICE: For outdoor use only.
Warranty
2 YEARS WARRANTY
WHAT IS COVERED
This limited warranty is extended to the original purchaser and applies to defects in materials and workmanship of your item provided the
item is maintained with care and used only for personal, residential purposes. The item is warranted to be free from defects in material or
workmanship for a period of 2 years.
WHAT IS NOT COVERED
We do not reimburse for transportation of delivery costs, or compensate the individual or any outside party for assembling or disassembling
the product.
Contact the Customer Service Team at 1-877-527-0313 or visit www.homedepot.ca.

3 WWW.HOMEDEPOT.CA
Please contact 1-877-527-0313 for further assistance.
Pre-Assembly
PLANNING INSTALLATION
Before beginning assembly of this product, make sure all parts are present. Compare parts with the Hardware Included
and Package Contents lists. If any part is missing or damaged, do not attempt to assemble the product. Contact
customer service for replacement parts.
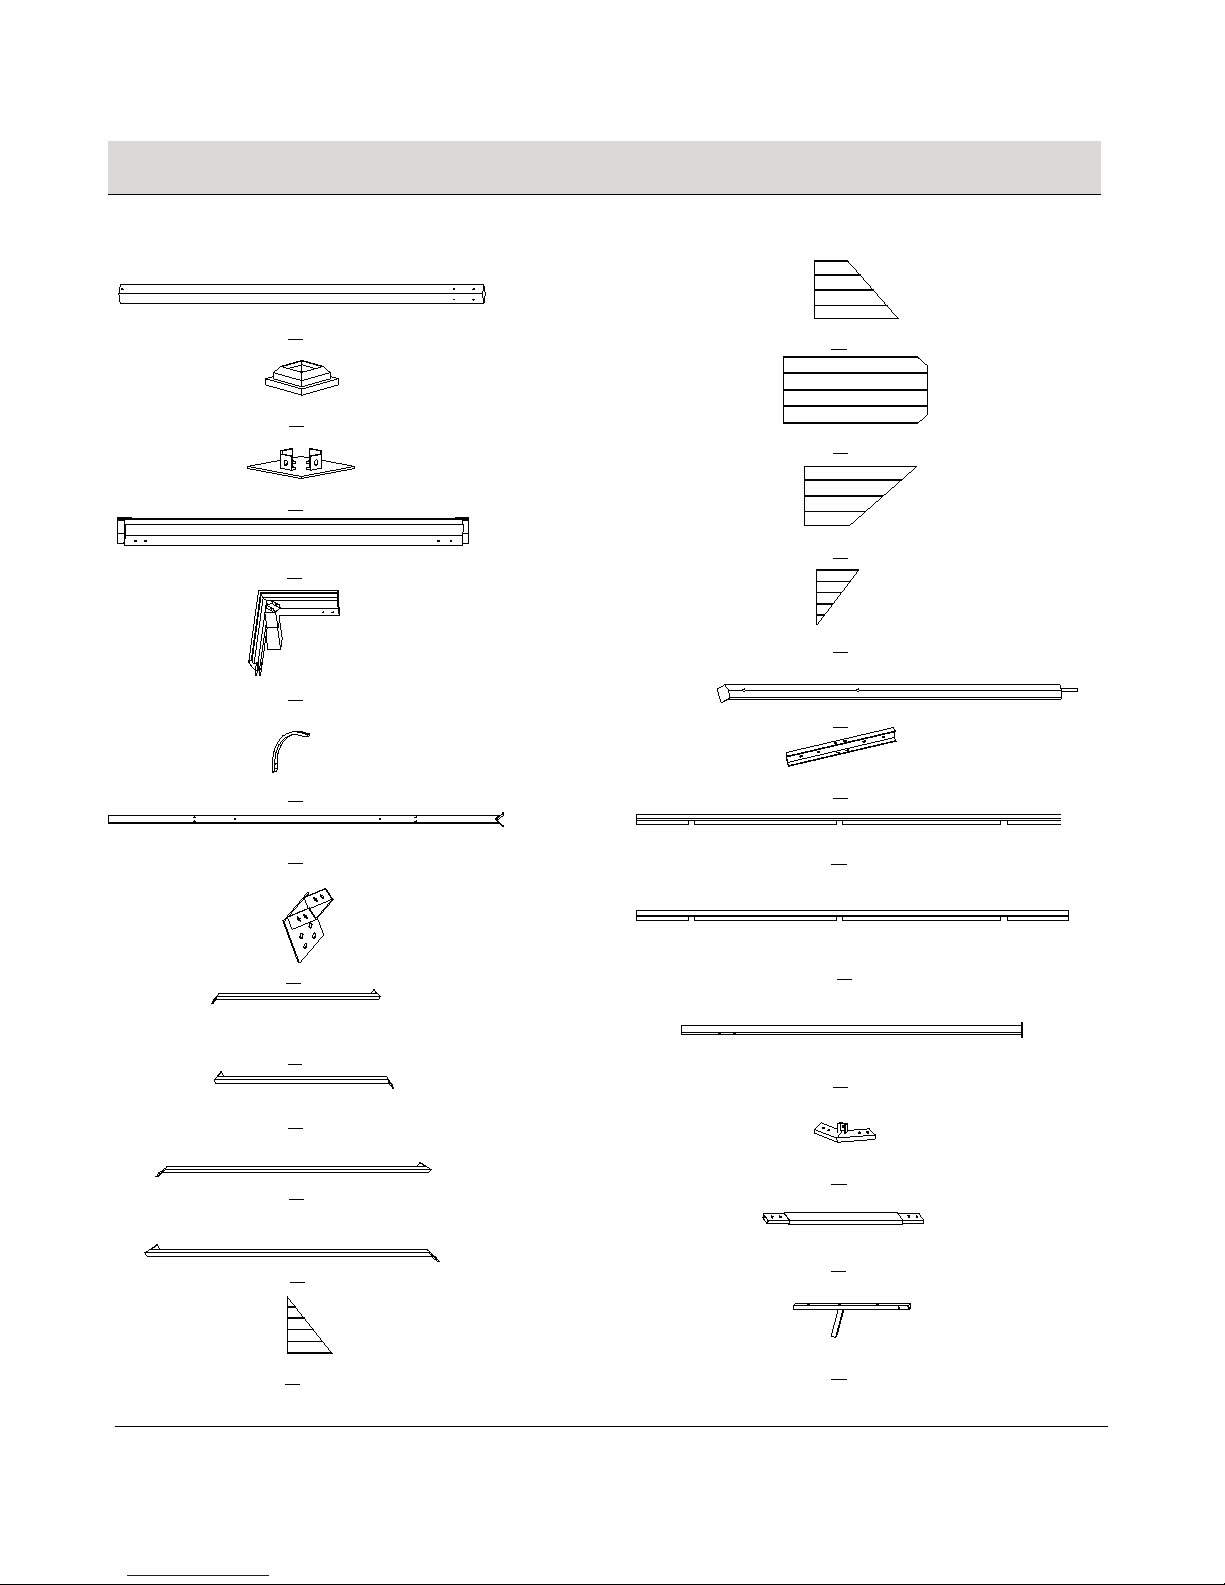
HARDWARE INCLUDED
NOTE: Hardware not shown to actual size.
AA BB CC DD
EE FF GG HH
II JJ
Part Description Quantity
AA M6X15 bolt 80
BB M6 flat washer 292
CC M6X15 screw 132
DD M6X60 screw 16
EE M6 nut 16
FF M6X50 screw 16
GG M6X40 bolt 32
HH Dia.8X250 stake 16
II M6 wrench 2
JJ Hook 48
4
Pre-Assembly (continued)
PACKAGE CONTENTS
A
B
C
D1
D2
E
F
G
H
I1
I2
I3
I4
J1
J2
J3
J4
J5
K
L
M1
O
N1
N2
M2

5 WWW.HOMEDEPOT.CA
Please contact 1-877-527-0313 for further assistance.
Part Description Quantity
A Post 4
B Cover 4
C Stake base 4
D1 Decorative groove 4
D2 Corner part 4
E Support 8
F Long beam 4
G Connector 4
H Middle beam 4
I1 Beam 1 4
I2 Beam 2 4
I3 Beam 3 4
I4 Beam 4 4
J1 Left small cover 4
J2 Left middle cover 4
Part Description Quantity
J3 Middle cover 4
J4 Right middle cover 4
J5 Right small cover 4
K Coping 4
L Decorative connector 8
M1 Cover tablet 1 4
M2 Cover tablet 2 4
N1 Top connector 4
N2 Top beam 4
O Small roof beam 4
P Small roof cover 4
Q Small roof board 4
R Small roof connector 1
S Small roof cap 1
T Finial 1
U Hook 1
V Netting tube 8
W Mosquito netting 1
P
Q
R
S
T
U
V
W
6
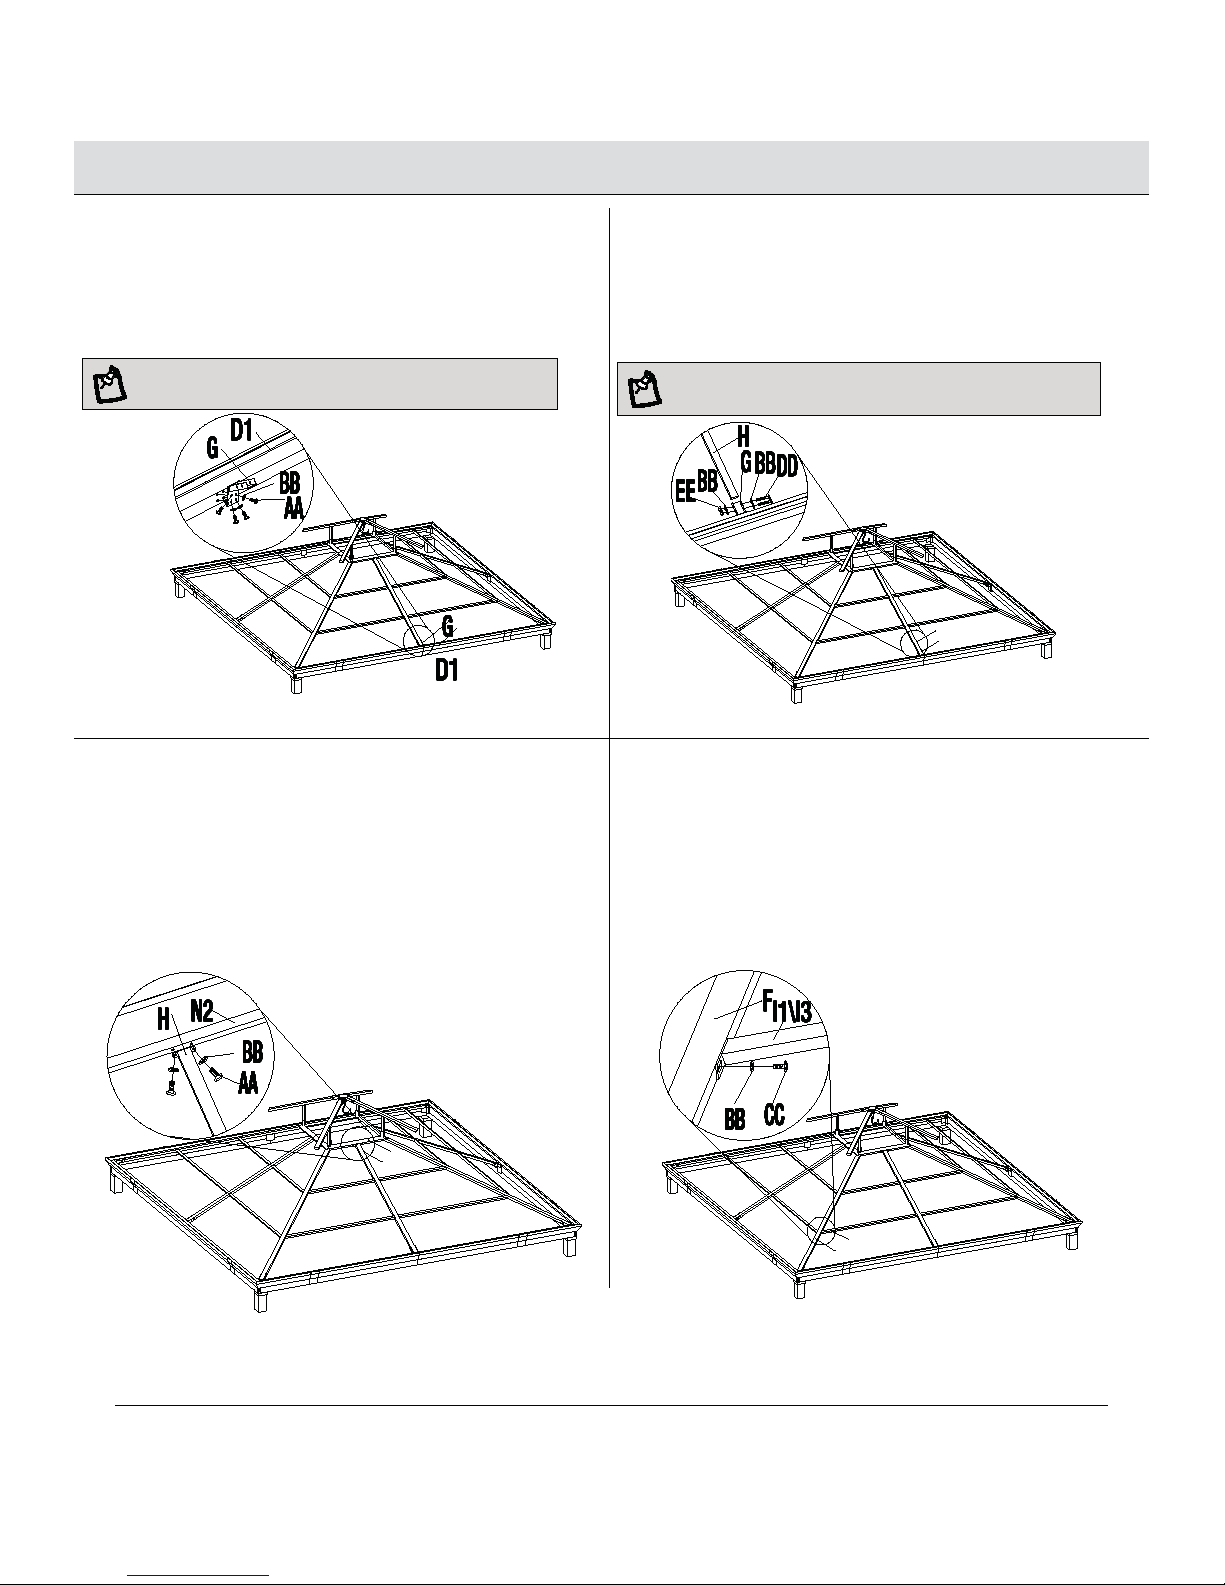
Assembly (continued)
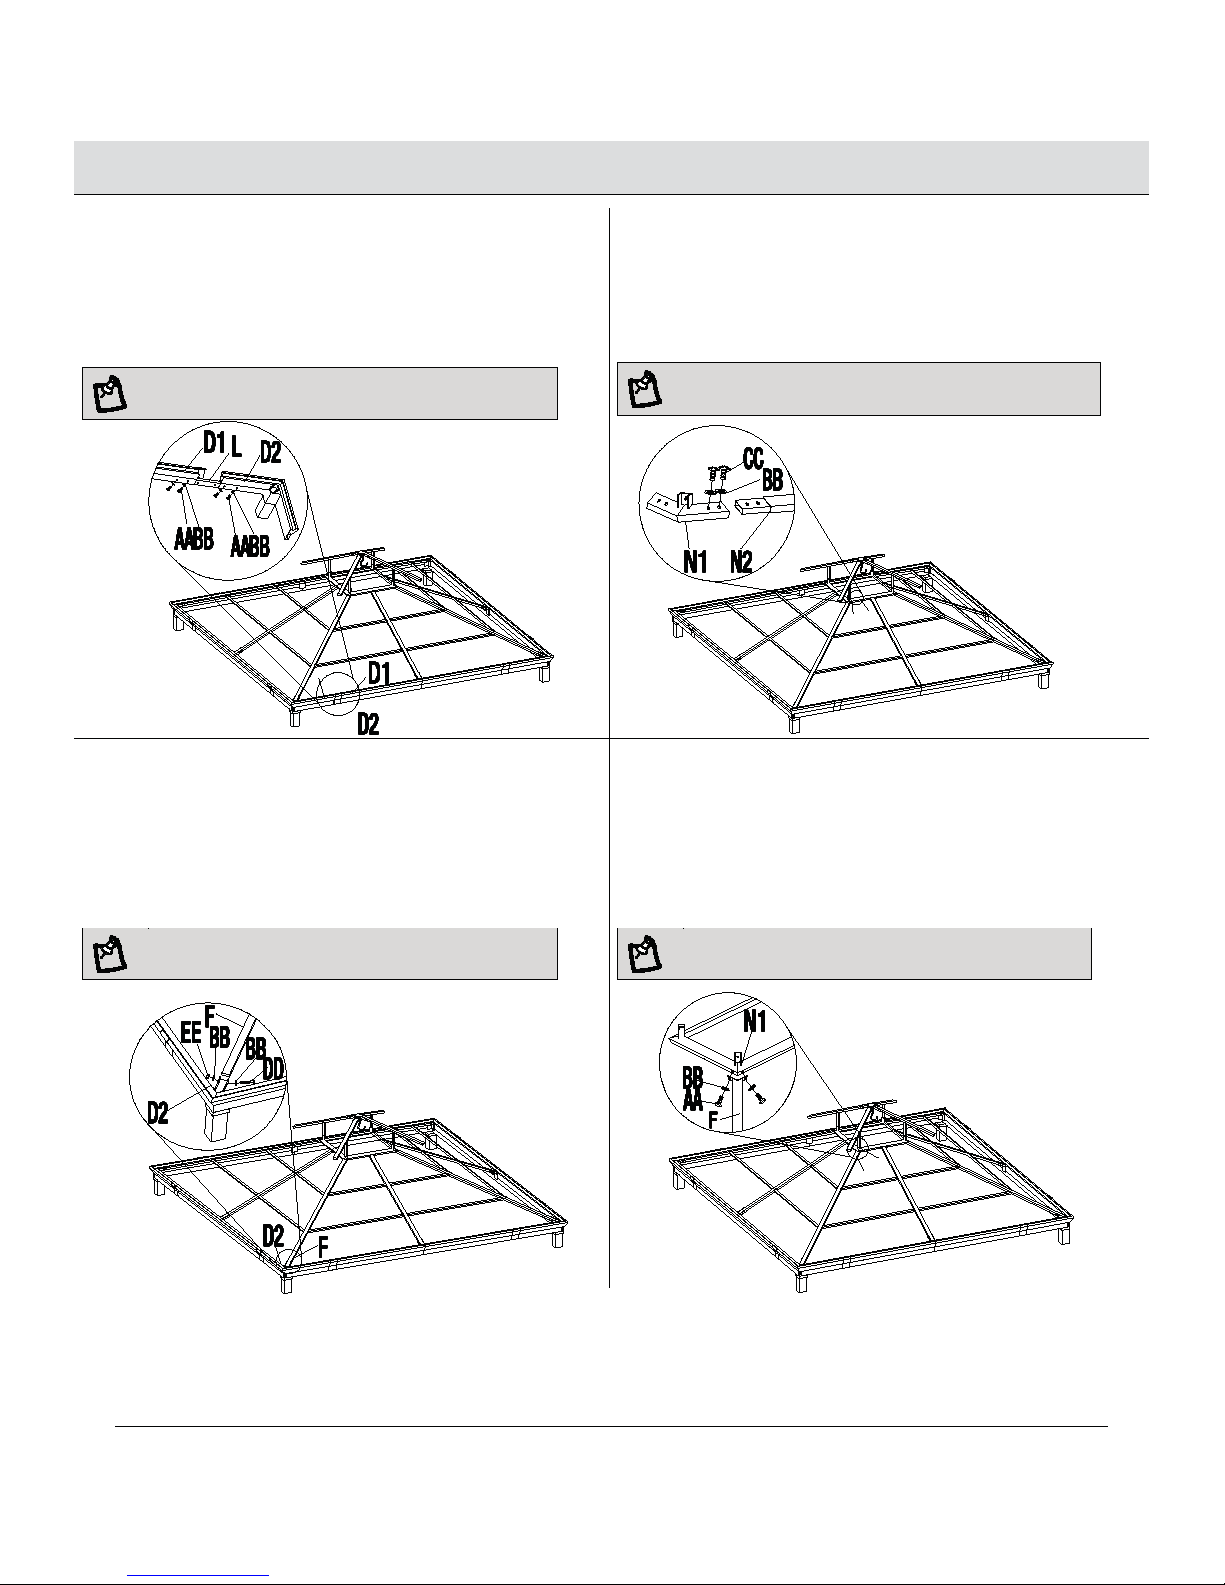
1
Attaching the decorative
connector
2
Attaching the top connector to the
top beam
Ƒ Insert the decorative connector (L) into the decorative groove
(D1) and corner part (D2). Then use bolts (AA) and flat washers
(BB) to secure.
NOTE: To avoid destroying the finish, please handle it with
care.
Ƒ Attaching the top connector (N1) to the top beam (N2) using
screw (CC) and flat washers (BB).
NOTE: To avoid destroying the finish, please handle it with
care
3
Attaching the beams
4
Securing the beams to the frame
Ƒ Insert the long beam (F) to the beam connector and secure using
screws (DD), flat washers (BB) and nuts (EE).
NOTE: To avoid destroying the finish, please handle it with
care.
Ƒ Secure the long beams (F) to the top connectors (N1) using bolts
(AA) and flat washers (BB).
NOTE: To avoid destroying the finish, please handle it with
care.
7 WWW.HOMEDEPOT.CA
Please contact 1-877-527-0313 for further assistance.
Assembly (continued)
5
Securing the connectors
6
Securing the middle beam to the
connector
Ƒ Secure the connector (G) to the decorative groove (D1) using
bolts (AA) and flat washers (BB).
NOTE: To avoid destroying the finish, please handle it with
care.
Ƒ Secure the middle beams (H) to the connectors (G) using
screws (DD), flat washers (BB), and nuts (EE).
NOTE: To avoid destroying the finish, please handle it with
care
7
Securing the middle beam to the
frame
8
Securing the beams to the long
beams
Ƒ Use bolts (AA) and flat washers (BB) to secure the middle beam
(H) to the frame (N).
Ƒ Secure the beam 1 (I1) and beam 3 (I3) to beams (F) using
screws (CC) and flat washers (BB). Repeat this step for beam
2 (I2) and beam 4 (I4).
8
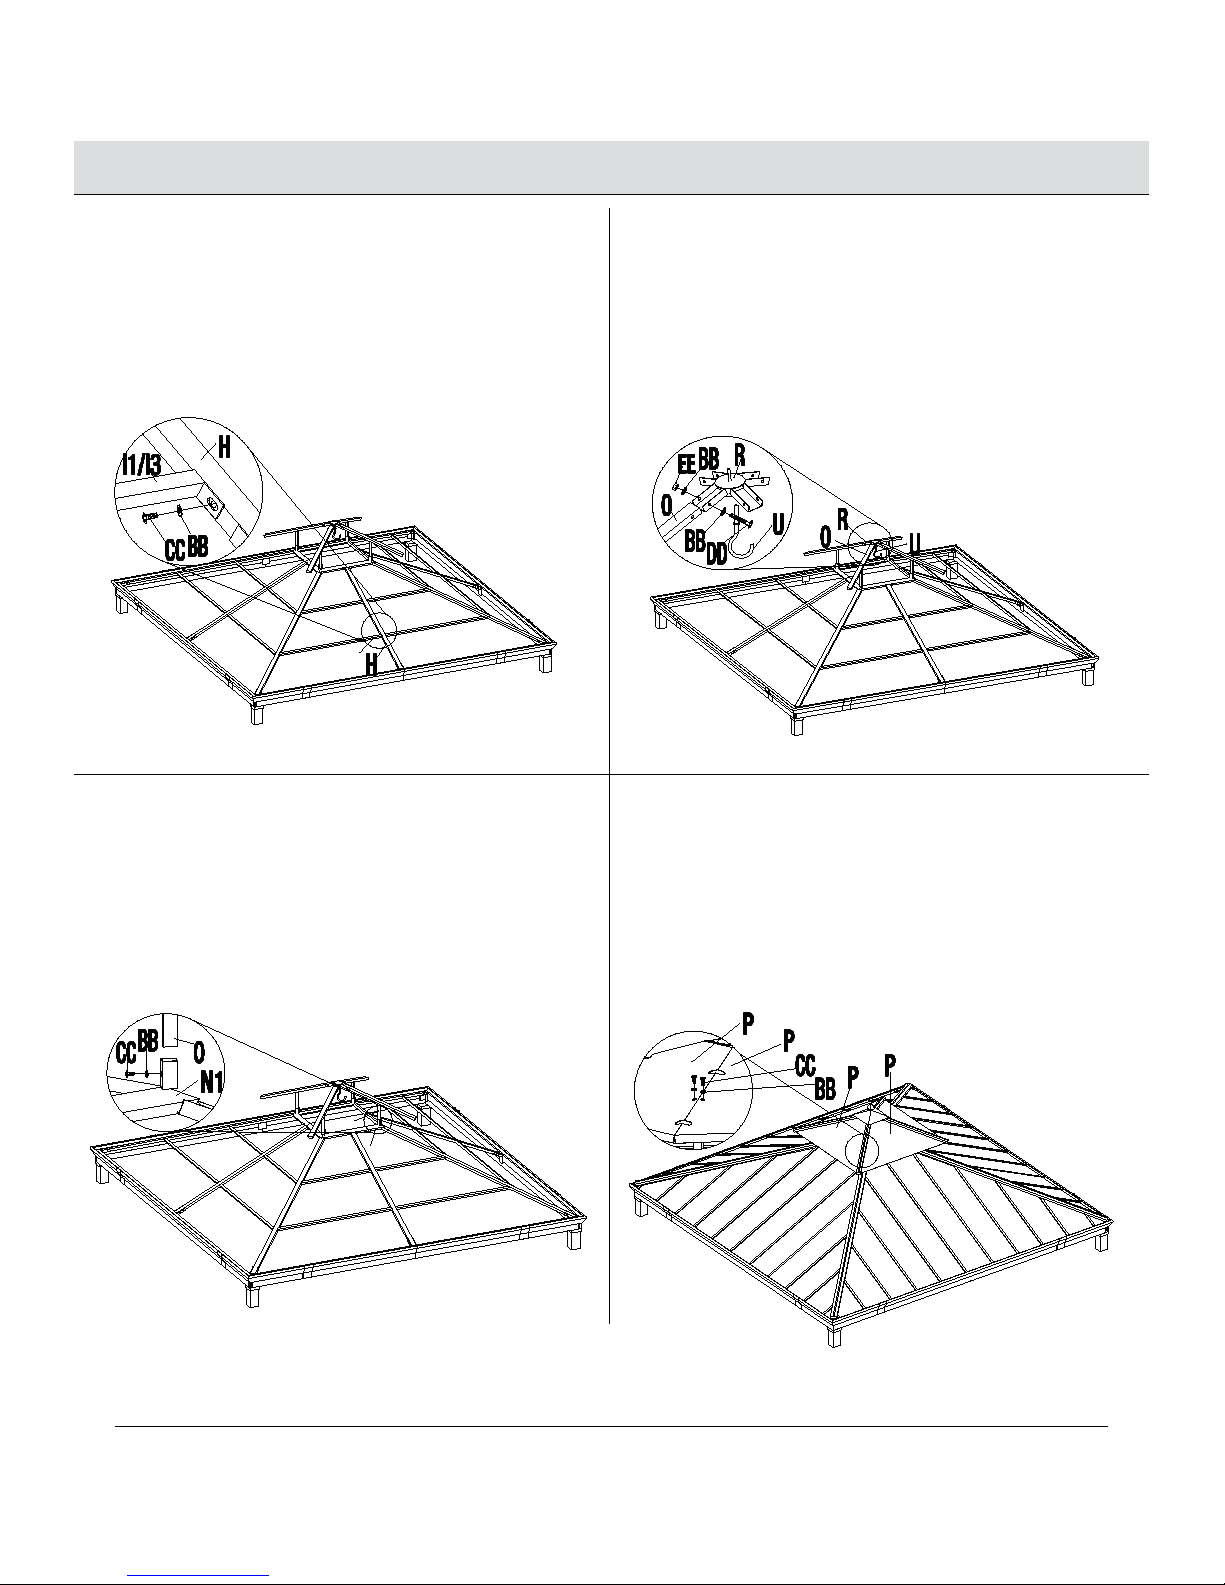
Assembly (continued)
9
Securing the beams to the middle
beams
10
Attaching the small roof beams
to the connector
Ƒ Secure the other end of beam 1 (I1) and beam 3 (I3) to the middle
beam (H) using a screw (CC) and flat washer (BB). Repeat this
step for beam 2 (I2) and beam 4 (I4).
Ƒ Attach the small roof beams (O) to the small roof connector
(R) using screws (DD), flat washers (BB), and nuts (EE). Then
install the hook (U) to the small roof connector (R).
11
Attaching the small roof beams to
the frame
12
Securing the small roof cover to
the small roof beam
Ƒ Attach the small roof beams (O) to the frame (N) using screws
(CC) and flat washer (BB).
Ƒ Secure the small roof covers (P) to the small roof beams (O)
using screws (CC) and flat washers (BB).
9 WWW.HOMEDEPOT.CA
Please contact 1-877-527-0313 for further assistance.
Assembly (continued)
13
Attaching the small roof boards
and covers to the roof beam
14
Attaching the small roof cap
and finial
Ƒ Attach the small roof boards (Q) to the small roof
covers (P) and secure them to the small roof beams (O) using
screws (FF) and flat washers (BB).
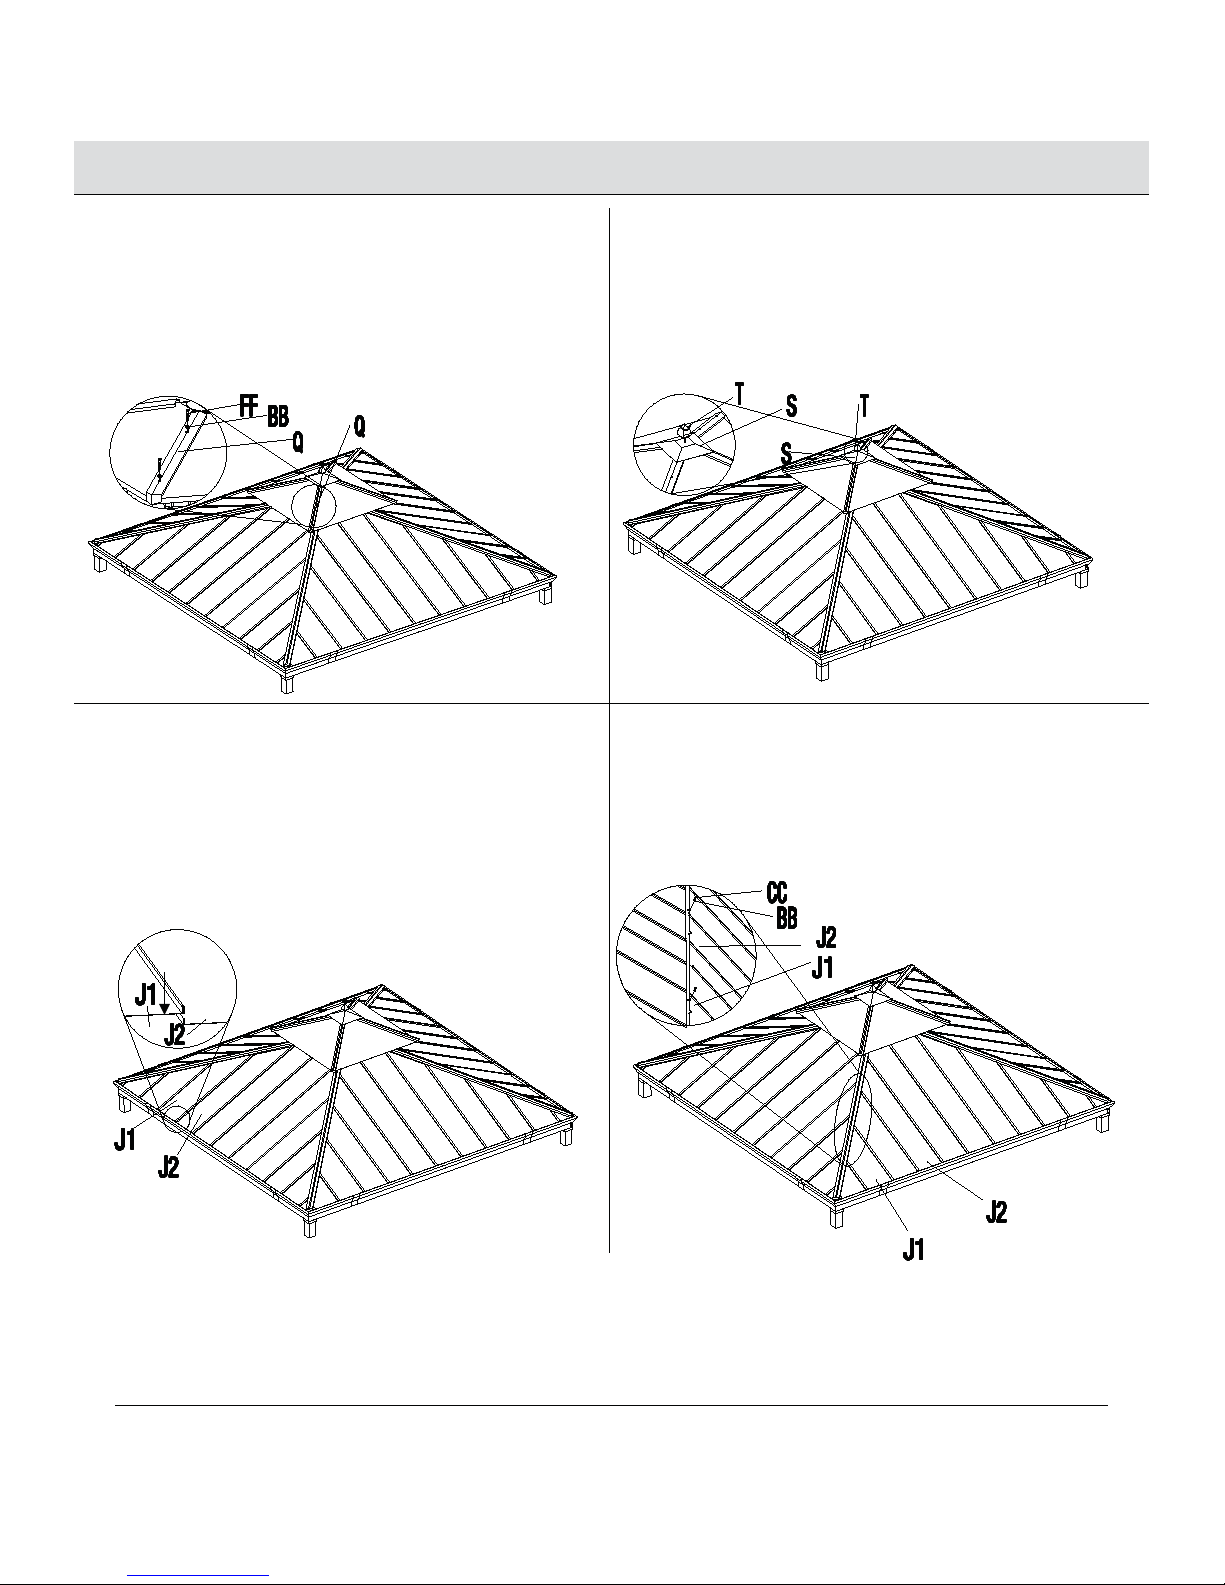
Ƒ Attach the small roof cap (S) to the small roof assembly.
Attach the finial (T) to the top of the small roof cap (S).
15
Attaching the left small and
middle covers
16
Securing the left middle and
left small covers
Ƒ Attach the left middle covers (J2) to the left small
covers (J1) as shown.
Ƒ Attaching the left middle covers (J2) and the left small
covers (J1) to beam.
 Loading...