

Page 1
USE AND CARE GUIDE
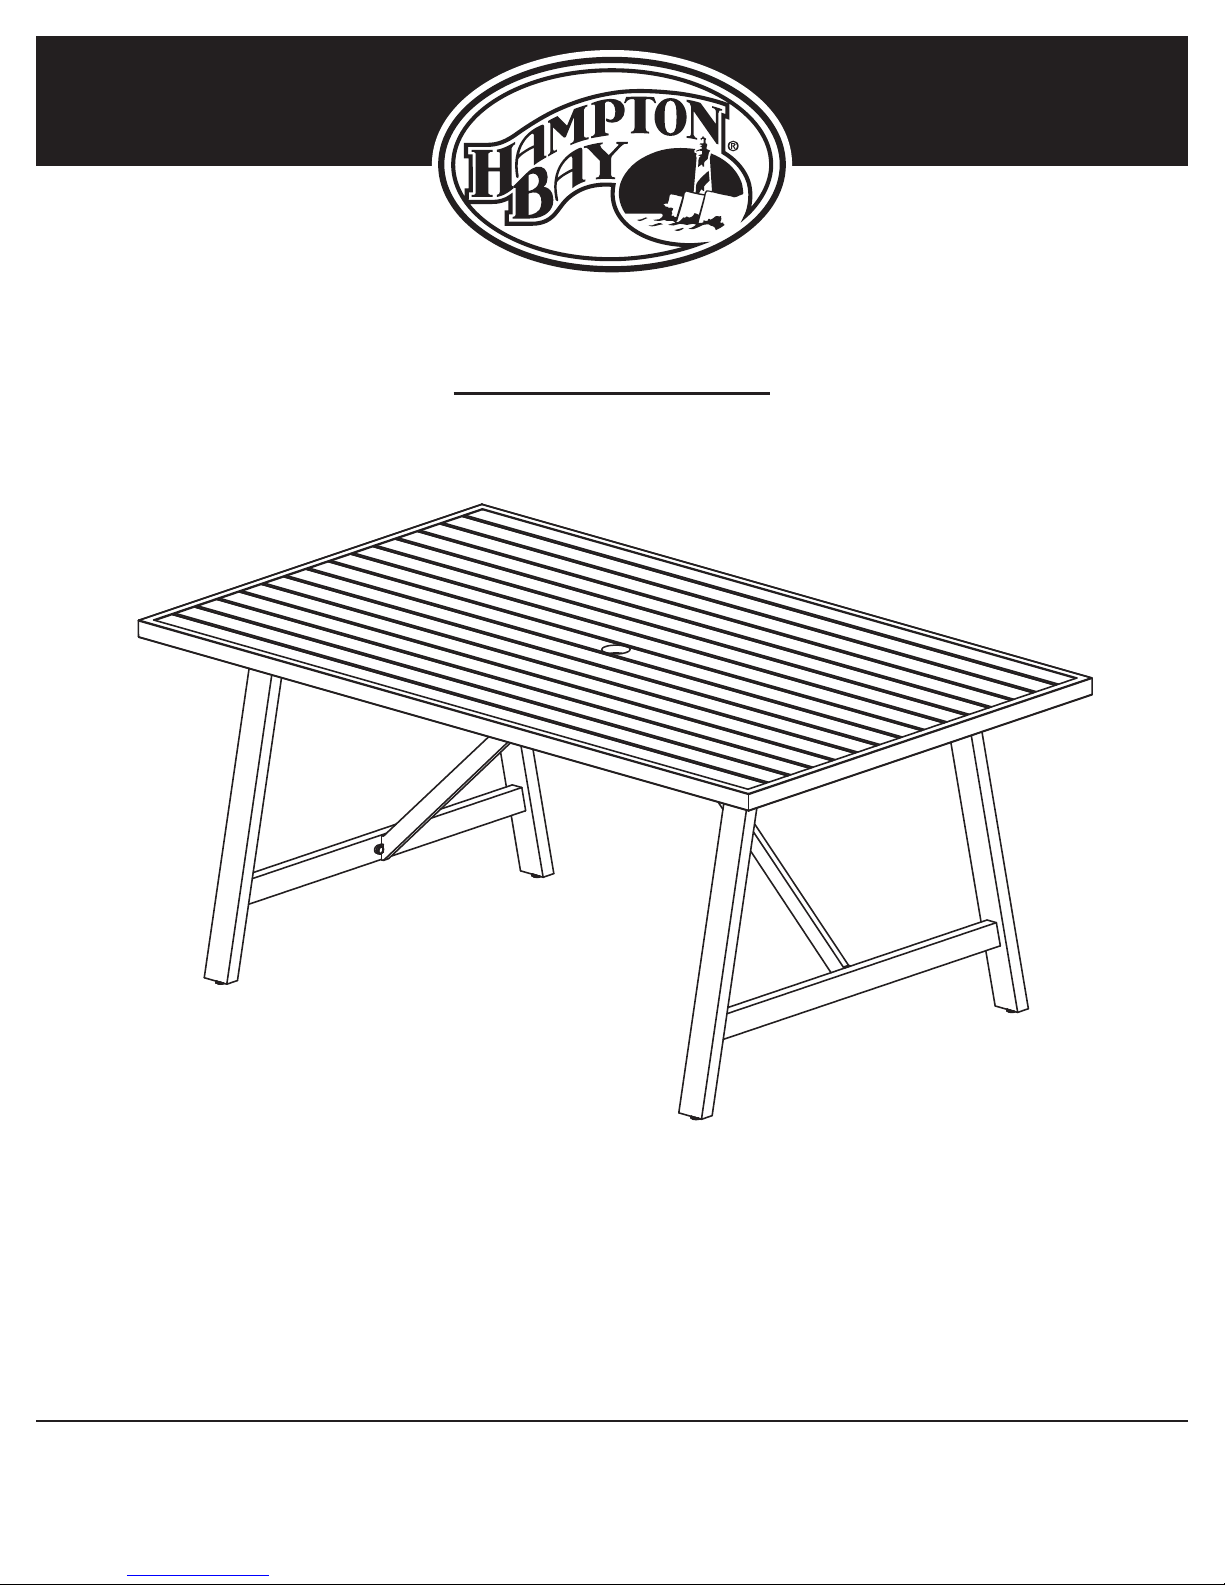
JAMISON PARK TABLE
Item #1000 000 000
Model #FRN-105260
Before returning to the store, call Hampton Bay Customer Service
8 a.m. - 7 p.m., EST, Monday – Friday, 9 a.m. – 6 p.m., EST, Saturday
We appreciate the trust and condence you have placed in Hampton Bay through the purchase of this table. We strive to continually create
quality products designed to enhance your home. Visit us online to see our full line of products available for your home improvement needs.
Questions, problems, missing parts?
1-855-HD-HAMPTON
HOMEDEPOT.CA
THANK YOU
Thank you for choosing Hampton Bay!
Page 2

Table of Contents
Safety Information ..................................2
Warranty ..........................................2
Care and Cleaning ..................................2
Pre-Assembly ......................................3
Planning Assembly .................................3
Hardware Included .................................3
Package Contents .................................3
Assembly. . . . . . . . . . . . . . . . . . . . . . . . . . . . . . . . . . . . . . . . 4-5
Safety Information
DANGER: Keep children out of the assembly area during
assembly.
WARNING: Do not sit or stand on the table.
CAUTION: Do not use sharp equipment such as a knife
and scissors when removing the protective material, as it
may damage the product.
Warranty
2 YEAR LIMITED WARRANTY
WHAT IS COVERED
The frame is warranted to be free of manufacturing defects for two years from the purchase date. If the frame of your furniture fails (ie.
broken frame or weld) within two years of ownership, Hampton Bay will repair, provide replacement parts, or replace the product at our
option. Frame nishes are warranted against blistering, cracking, or peeling for two years from purchase date. This is a residential use
warranty only. Warranty is void when product is used for commercial settings. This warranty is a limited warranty and applies to the original
purchase only. Proof of purchase is required.
Contact the Customer Service Team at 1-855-HD-HAMPTON or visit HOMEDEPOT.CA.
Care and Cleaning
□ Use mild soap and warm water to clean the table.
□ Rinse with clean water and dry thoroughly.
□ Any rust spots should be lightly sanded and treated with rust inhibitor, followed by an application of touch-up paint (not included).
2
Page 3

Pre-Assembly
PLANNING ASSEMBLY
Before beginning the assembly of this product, make sure all parts are present. Compare parts with Package Contents and Hardware
Included lists. If any part is missing or damaged, do not attempt to assemble the product, and return it to the place of purchase.
HARDWARE INCLUDED
NOTE: Hardware not shown to actual size.
AA BB CC DD
Part Description Quantity
AA Bolt (M6x20) 16
BB Washer 16
CC Bolt Cap 16
DD Hex Wrench 1
PACKAGE CONTENTS
A
Part Description Quantity
A Table Top 1
B Legs 2
C Leg Support 2
B
C
3 HAMPTONBAY.CA
Please contact 1-855-HD-HAMPTON for further assistance.
Page 4

Assembly
Note: Do not tighten all bolts until the last step. Please fully assemble the
unit on a at surface to level the product. Once leveled, tighten all bolts.
Attaching the Legs
1
□ Place the Table Top upside down on a soft, at surface.
□ Attach the Legs (B) to the Table Top (A) with the Bolts (AA)
and the Washers (BB).
□ Twist all of the Bolts (AA) with the Hex Wrench (DD), but do
not tighten.
B
A
AA
BB
B
Attaching the Leg Supports
2
□ Attach the Leg Supports (C) to the Table Top (A) and Legs
(B) with the Bolts (AA) and the Washers (BB).
□ Twist all of the Bolts (AA) with the Hex Wrench (DD), but do
not tighten.
BB
AA
AA
C
B
BB
4
Page 5

Assembly (continued)
Tightening All Bolts
3
□ Tighten all the Bolts (AA) and attach all the Bolt Caps (CC).
CC
Completing the Assembly
4
□ Place the Table Top upside down on a soft, at surface.
□ Attach the Legs (B) to the Table Top (A) with the Bolts
(AA) and the Washers (BB).
□ Twist all of the Bolts (AA) with the Hex Wrench (DD), but
do
CC
CC
5 HAMPTONBAY.CA
Please contact 1-855-HD-HAMPTON for further assistance.
Page 6

Questions, problems, missing parts? Before returning to the store,
8 a.m. - 7 p.m., EST, Monday – Friday, 9 a.m. – 6 p.m., EST, Saturday
call Hampton Bay Customer Service
1-855-HD-HAMPTON
HOMEDEPOT.CA
Retain this manual for future use.
 Loading...