

Page 1
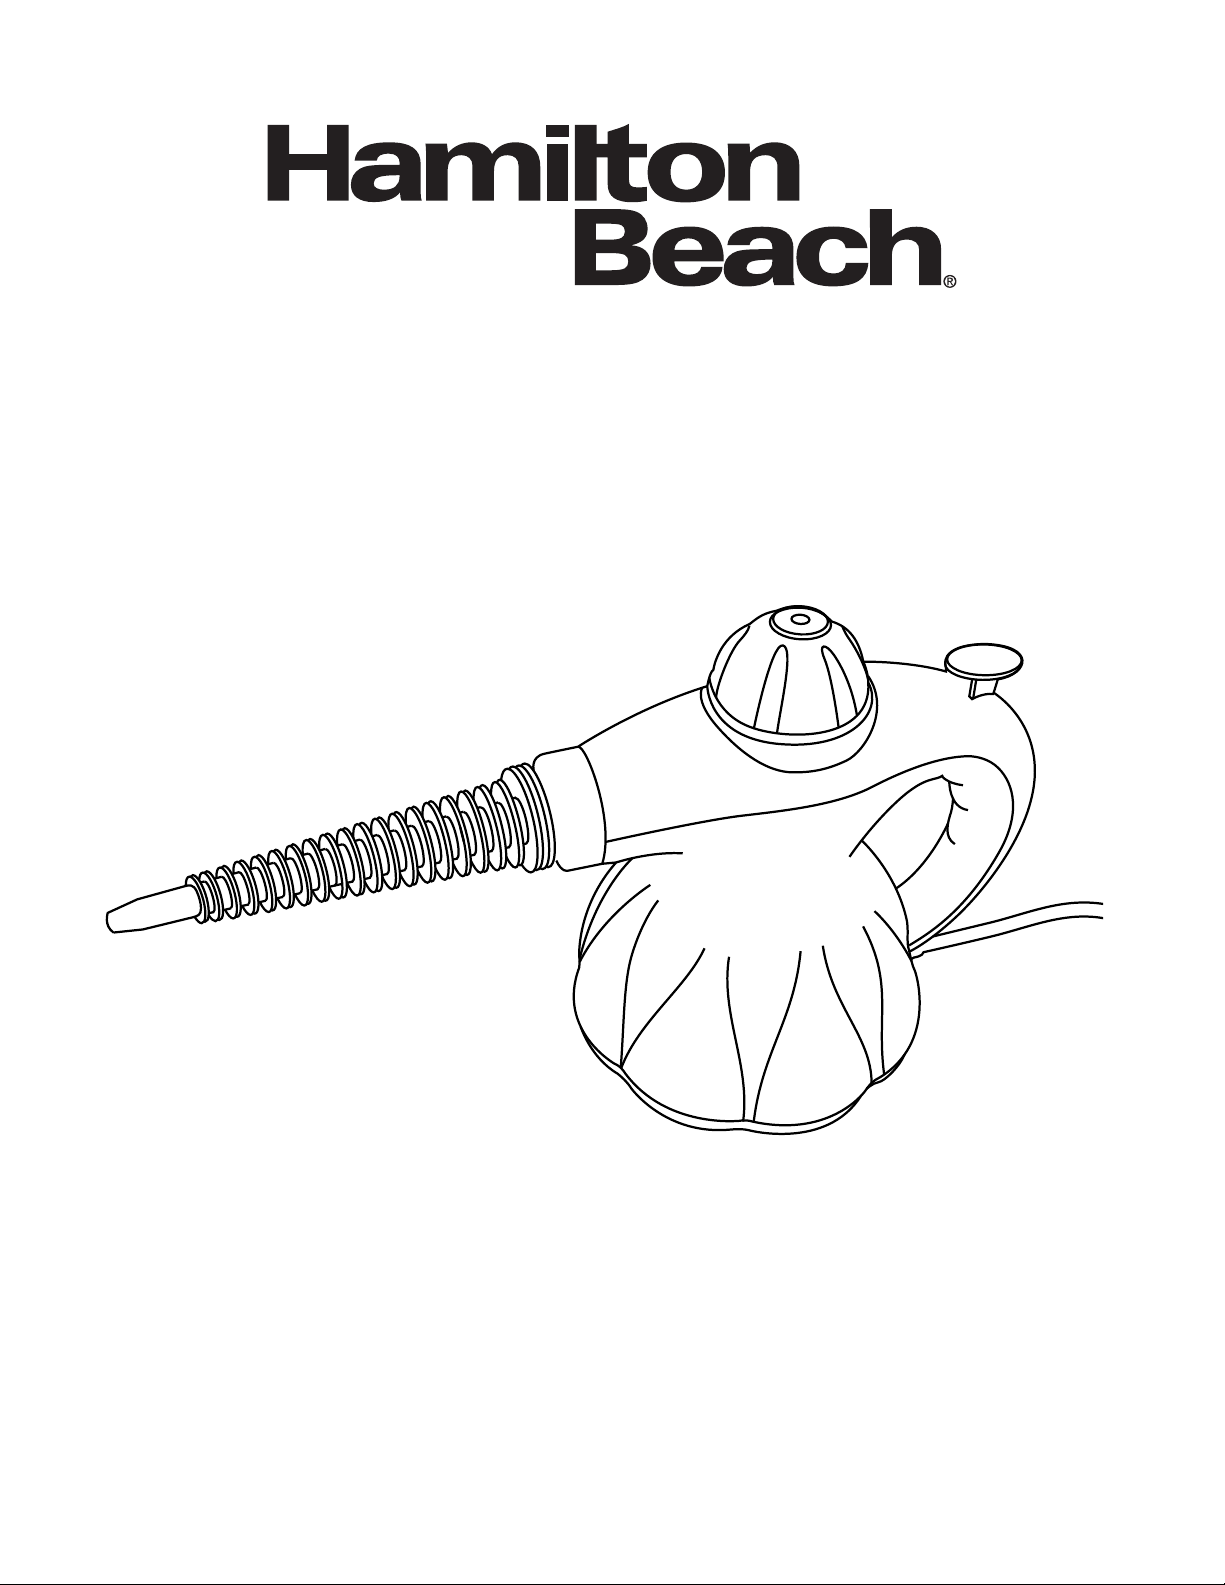
Steam Cleaner
Owner’s Manual
READ BEFORE USE
Model No. HB-165
Page 2

WELCOME!
Congratulations, you have acquired a high-quality Hamilton Beach® Steam Cleaner. This unit
is packed with many features that you will find convenient to use. It will provide you with
trouble-free use if you follow the safety precautions and operating instructions provided in this
easy-to-use manual. Please take the time to read it, and save these instructions for future use.
Please also remember to record the series number. This information is on a label located on the
bottom of the unit. Save your receipt by stapling it to this manual for convenient access.
Model No.: ______________________ Series number: ______________________
Date of purchase: ________________
Index
1. Important Safeguards ........................................................................... 1
2. Parts and Accessories .......................................................................... 3
3. How to Assemble ................................................................................. 4
4. How to Operate .................................................................................... 4
5. Attachments ......................................................................................... 6
6. General Maintenance ........................................................................... 7
HB-165
a. Preparing the Steam Cleaner
b. Techniques for Cleaning
c. Refilling the Steam Cleaner
a. Attaching to the Steam Cleaner
b. Using the Flexible Hose
c. Using the Remaining Accessories
7. Troubleshooting .................................................................................... 8
8. Warranty ............................................................................................... 9
2
Page 3

1. IMPORTANT SAFEGUARDS
WARNING! Shock Hazard: Always unplug the steam cleaner from the electrical outlet
before opening the container, or before connecting/disconnecting the attachments.
When using the steam cleaner, basic safety precautions should always be observed, including
the following.
READ ALL INSTRUCTIONS BEFORE USING THIS APPLIANCE
WARNING! To reduce the risk of fire, electric shock, or injury:
1. Always fully extend the power cord before use.
2. Do not handle the plug or steam cleaner with wet hands.
3. Do not use outdoors.
4. Never turn the steam cleaner over or on its side when in use. Never direct steam
towards people, animals, plants, and equipment with electrical components.
5. Do not immerse the steam cleaner into water or any other liquid. Always unplug the
power cord from the electrical socket when filling the steam cleaner with water.
6. Do not leave the steam cleaner unattended while plugged in.
7. Always unplug the steam cleaner before connecting or disconnecting the
accessories. To unplug, grasp the plug and not the cord.
8. This appliance is not intended for use by children or persons with reduced physical,
sensory or mental capabilities, or lack of experience and knowledge, unless they have
been given supervision or instruction concerning the use of the appliance by a person
responsible for their safety.
9. Never put descaling, aromatic, alcoholic or detergent products into the steam cleaner.
10. Do not operate without safety cap in place.
11. Before filling, proceed as follows:
1. Unplug the power supply.
2. Relieve the pressure by depressing steam delivery button.
3. Allow the steam cleaner to cool down for five (5) minutes.
4. Relieve any built up pressure again by depressing steam delivery button.
5. Slowly unscrew the safety cap and wait 30 seconds before removing.
12. Use only the recommended attachments. Use only as described in this manual.
13. The attachment nozzle tips will get hot during use. Do not touch any hot surfaces.
Allow the attachments to cool down before replacing them while the appliance is
being used.
1
Page 4

14. Do not use the steam cleaner if it has been dropped, damaged, left outdoors or
dropped into water.
15. Do not use the steam cleaner with a damaged cord or plug. If the cord or plug is
damaged, it must be replaced by a recommended service agent.
16. Do not pull or carry by the cord. Do not use the cord as a handle, close a door on the
cord or the hose or pull the cord around sharp edges or corners. Keep the cord away
from heated surfaces.
17. Do not unnecessarily obstruct any openings of the steam cleaner as this may cause
the unit to not work properly or may damage the unit. Do not use with any openings
blocked and do not restrict airflow. Keep all openings free of anything that might
reduce airflow.
18. Keep fingers and all parts of the body away from openings.
19. Do not use without the safety cap in place.
20. Use the steam cleaner in a well lit area.
21. Store the steam cleaner in a cool, dry area.
22. Use only CE-approved 13 amp extension cords. Non-approved cords may overheat.
Care should be taken to arrange the cord so that the cord cannot be tripped over.
23. Not for space heating purposes.
24. This appliance is intended for household use only.
IMPORTANT! On surfaces that have been treated with wax or some non-wax floors, the
sheen may be removed by the heat and steam action. Do not use on unsealed wood. This
could cause the wood grain to rise. It is recommended that a sample cleansing be done
on an isolated area of the surface to be cleaned. Also, check the use and care instructions
from the manufacturer on the object you want to clean. The steam cleaner is designed to
thoroughly clean hard surfaces and upholstery that will withstand high heat. Do not use on
soft plastics, unsealed wood, and cold glass.
SAVE THESE INSTRUCTIONS!
2
Page 5

2. PARTS AND ACCESSORIES
5.
10.
4.
3.
1.
2.
6.
1. Steam cleaner
2. Power indicator light
3. Handle
4. Steam delivery button
5. Safety cap*
6. Flexible hose*
7. Fabric nozzle tool*
8. Fabric cover*
13.
12.
14.
11.
15. 8.
9. Elbow nozzle*
10. Straight nozzle*
11. Scrub brush*
12. Glass cleaning tool*
. Measuring cup*
13
14
. Power cord
15. Funnel*
9.
7.
*Replacement parts or accessories can be purchased at an authorized dealer.
Call 1-888-960-0396 to find one nearest you.
3
Page 6

3. HOW TO ASSEMBLE
WARNING! Shock Hazard: Always unplug the steam cleaner from the electrical outlet
before opening the container, or before connecting/disconnecting the attachments.
a. Unpack the steam cleaner.
b. Remove the safety cap and check to make sure nothing is in the container.
c. Take the accessories out.
d. Firmly attach the straight nozzle to the steamer.
1. Align the two guide pins on the straight nozzle attachment with the two guide
openings on the nose of the steam cleaner where the steam exits. (Fig. 3/1)
Fig 3/1
2. Push the attachment into the opening until it stops against the steam cleaner’s
body.
3. While pushing the straight nozzle into the steam cleaner, turn a quarter turn in a
clockwise direction until the attachment locks into place. (Fig. 3/2)
Fig 3/2
4. The attachment is now locked into position and is safe to use.
4. HOW TO OPERATE
IMPORTANT! Do not plug in the steam cleaner before reading this carefully, filling with water
and attaching the accessories.
WARNING! Shock Hazard: This appliance has a polarized plug (one wide blade) that reduces
the risk of electric shock. The plug fits only one way into a polarized outlet. Do not defeat
the safety purpose of the plug by modifying the plug in any way or by using an adapter.
If the plug does not fit fully into the outlet, reverse the plug. If it still does not fit, have an
electrician replace the outlet.
FOR HOUSEHOLD USE ONLY
4
Page 7

a. Preparing the Steam Cleaner
1. Unscrew the safety cap. (Before the first use, turn the appliance over in order to
completely empty the steam cleaner.)
2. Fill the measuring cup with water to the marked waterline. (Fig. 4/1)
Fig 4/1
3. The steam cleaner takes only one measuring cup of water at a time. Do not
overfill. Use the funnel to pour the water into the steam cleaner. (Fig. 4/2)
Fig 4/2
4. Screw the safety cap back onto the steam cleaner.
5. Plug the appliance into an electrical outlet. The power light will come on (Fig, 4/3).
The steam will be ready after about 3 to 4 minutes. Never leave the appliance
unattended while waiting to use.
Fig 4/3
6. Press the steam delivery button to release steam. Once the nozzle emits steam,
start using.
b. Techniques for Cleaning
1. Begin by passing slowly over the surfaces to be cleaned. This is the ideal method
for thoroughly cleaning your surfaces.
2. To disinfect specific areas, leave the steam cleaner’s opening over the spot, no
more than 1 inch above the area and slowly move across the surface.
WARNING! Burn Hazard: Never turn the steam cleaner over when in use, direct
steam at a person, animal, or plant.
c. Refilling the Steam Cleaner
1. Unplug the steam cleaner.
2. Wait for 5 minutes.
3. Press the steam delivery button repeatedly until all pressure has been released.
WARNING! Burn Hazard: This unit is under pressure. When done with use or
before refilling, it is important to repeatedly press the steam delivery button until
all pressure has been released before removing the safety cap.
5
Page 8

4. Turn the safety cap slowly a half turn and wait for the hissing noise created by any
residual steam to stop. Unscrew the cap without removing it, wait 30 seconds
and then take off the cap and allow to cool.
5. Slowly pour one measuring cup of water into the steam cleaner using the funnel.
Do not overfill. Screw the safety cap back on the steam cleaner. Plug the steam
cleaner into electrical outlet and steam will emit shortly.
5. ATTACHMENTS
The steam cleaner comes with several attachments. The straight nozzle (Fig. 5/1), the
flexible hose (Fig. 5/2), and the fabric nozzle tool (Fig. 5/3). All attach directly to the steam
cleaner using the following directions.
Straight nozzle (Fig. 5/1) Flexible hose (Fig. 5/2) Fabric nozzle tool (Fig 5/3)
a. Attaching the Attachments to the Steam Cleaner
1. Align the two guide pins on the attachment with the guide openings on the
nose of the steam cleaner where the steam exits. Push the attachment into
the opening until it stops against the steamer’s body. Turn a quarter turn in a
clockwise direction until the attachment locks into place. The attachment is now
locked into position and safe to use.
b. Using the Flexible Hose
1. The straight nozzle and fabric nozzle tool also attach to the flexible hose for
mobility and an added reach.
2. Insert the straight nozzle or fabric nozzle tool in the same way and turn clockwise
until the attachment locks in place. To release, pull back the red safety pin at
the end of the flexible hose, turn the accessory counter clockwise and pull the
accessory to remove from the hose (Fig. 5/4).
Fig 5/4
c. Using the Remaining Accessories
1. The remaining accessories are to be used along with the above attachments. This
includes the following:
6
Page 9

• Elbownozzle–Attachestothestraightnozzleforcleaningsmallspots.
• Scrubbrush–Attachestothestraightnozzleforscrubbingsmallareas.
• Fabriccover–Attachestothefabricnozzletooltocleansmoothsurfaces.
• Glasscleaningtool–Attachestothefabricnozzletooltocleanwindowsand
counters.
NOTICE: Do not use the glass cleaning tool on cold glass as it may break the glass.
1. Attach the fabric nozzle tool to either the steam cleaner or the flexible hose.
2. To use the glass cleaning tool, locate the two open tabs on the back edge of the
fabric nozzle tool and the two hinges on the back edge of the glass cleaning tool
(Fig. 5/5).
3. Place the hinges into the open tabs, then swing the glass cleaning tool up against
the bottom of the fabric tool until the two pieces click together.
4. To remove the glass cleaning tool from the fabric nozzle tool press your thumb
against the fastener on the glass cleaning tool, they will separate (Fig. 5/6).
5. The fabric cover can also be used on fabric nozzle tool. Use the fabric cover to
clean a variety of surfaces, such as countertops and cabinets.
Fig 5/5 Fig 5/6
6. GENERAL MAINTENANCE
WARNING! Burn Hazard: The unit must be unplugged and allowed cool down before any
cleaning or maintenance. Limited Warranty
1. Let the unit cool down completely before cleaning it or putting it away.
2. After each use, open the safety cap by following steps 4.c.1 through 4.c.4 in “Refilling
the Steam Cleaner” above, then empty any remaining water from the unit.
3. Store in a dry and cool place.
4. In order to maintain the steam cleaner, the tank needs to be rinsed out with water
once a month to eliminate any accumulated calcium deposits. Do not use vinegar or
other descaling substances. While unplugged, put in one measure of water, replace
the safety cap and shake to loosen any accumulated deposits.
5. Remove safety cap and immediately empty water into a sink.
7
Page 10

WARNING! Shock Hazard: Never immerse the steam cleaner, cord or plug in water or any
other liquid.
7. TROUBLESHOOTING
WARNING! Shock Hazard: To reduce risk of personal injury, unplug steam cleaner before
servicing.
PROBLEM CAUSE SOLUTION
The steam cleaner won’t run It is not properly plugged into the
wall outlet.
There is no electricity in the wall
outlet.
The on/off switch is not turned on. Push on/off switch to on.
Blown fuse/tripped breaker in
home electrical box.
The accessories will not connect. The incorrect accessory is being
used.
There is a blockage in the guide
opening.
Clogged flexible hose. Remove obstructions.
An accessory will not disconnect
from the flexible hose.
Steam cleaner sprays out water
from nozzle.
The red safety pin is not being
pulled back.
Water level in reservoir may be too
high.
Steam cleaner not fully heated. Allow the steam cleaner to heat
Plug in firmly.
Check the home fuse or breaker.
Reset the electrical box circuit
breaker or replace fuse.
Refer to Attachments section for
proper instructions.
Remove debris from the guide
opening.
Refer to Attachments for proper
instructions.
Properly remove safety cap and
pour out excess water.
the water.
8
Page 11

Limited Warranty
What this limited warranty covers:
The manufacturer warrants that your Hamilton Beach® steam cleaner, model HB-165, for a
period of one year from the date of original purchase, will be free from all defects in material and
workmanship. This limited warranty is granted only to the original consumer purchaser or gift
recipient. Keep the original sales receipt, as proof of purchase is required to make a warranty
claim. This limited warranty is subject to the following provisions:
What this limited warranty does not cover:
• Expensesrelatedtopickup,deliveryorhousecalls.Youareresponsibleforallcosts
associated with returning the product or any component to us, and our returning a
product or component to you.
• Partsofthecleanerthatrequirereplacementundernormaluse.
• Damageormalfunctioncausedbyaccident,alteration,abuse,misuse,orusenotin
accordance with the Owner’s Manual.
• Damageormalfunctioncausedbyimproperserviceormaintenance,theuseofparts
other than genuine Hamilton Beach® parts or modifications made to the cleaner
without our prior written approval.
• CleanerspurchasedorusedoutsidetheUnitedStates.
This warranty is void if the product is used for other than single-family household use or
subjected to any voltage or waveform other than as specified on the rating label (e.g.,
120V ~ 60Hz).
The manufacturer will, at its option, repair or replace a defective steam cleaner or steam cleaner
part that is covered by this limited warranty. This is your exclusive remedy. As a matter of
warranty policy, the manufacturer will not refund the purchase price.
Warranty Registration:
To register for warranty please visit our website at www.essco.net and fill out a registration card.
Obtaining warranty service:
To obtain warranty service, call 888-960-0396 or e-mail us at hbvacsupport@essco.net.
If you prefer, you can write to: ESSCO
Attn: Hamilton Beach Warranty
1933 Highland Road
Twinsburg, OH 44087
When returning parts for repair, please include the model number and series number from the
data label located on the bottom of the steam cleaner.
9
Page 12

Further Limitations and Exclusions:
THE WARRANTY PROVIDED ABOVE IS EXCLUSIVE AND IN LIEU OF ALL OTHER EXPRESS
OR IMPLIED WARRANTIES. EVERY IMPLIED WARRANTY, INCLUDING ANY WARRANTY OF
MERCHANTABILITY OR FITNESS FOR A PARTICULAR PURPOSE IS DISCLAIMED EXCEPT
TO THE EXTENT PROHIBTED BY LAW, IN WHICH CASE SUCH WARRANTY IS LIMITED
TO THE DURATION OF THIS WRITTEN WARRANTY. UNLESS STATED HEREIN, ANY
STATEMENTS OR REPRESENTATIONS MADE BY ANY OTHER PERSON OR FIRM ARE VOID.
WE EXCLUDE ALL CLAIMS FOR LOSS, INCONVENIENCE OR DAMAGE INCLUDING DIRECT,
SPECIAL, INCIDENTAL OR CONSEQUENTIAL DAMAGES, RESULTING FROM THE USE OR
INABILITY TO USE THE STEAM CLEANER PRODUCT, WHETHER RESULTING FROM BREACH
OF WARRANTY OR ANY OTHER LEGAL THEORY. IN NO EVENT WILL HAMILTON BEACH’S
LIABILITY EXCEED THE PURCHASE PRICE OF THE STEAM CLEANER, LESS DEPRECIATION.
Some jurisdictions do not allow limitations on how long an implied warranty lasts and some
jurisdictions do not allow the exclusion or limitation of incidental or consequential damages,
so the above limitations and exclusions may not apply to you. This warranty gives you specific
legal rights, and you may also have other rights, which vary from jurisdiction to jurisdiction.
Hamilton Beach® is a registered trademark of Hamilton Beach Brands, Inc. used under license
by ESSCO.
10
 Loading...