

Hamilton Beach 87330 Instructions Manual
INTRODUCTION TO YOUR NEW HAMILTON BEACH
WATER DISPENSER (Model 87330)
Congratulations, you have acquired a high quality Hamilton Beach Water Dispenser for
bottled water. This unit is packed with many extra features that you will find convenient to use.
Multi-temperature capability allows you to enjoy a cool drink or a hot beverage. It will provide
you with many years of trouble free use if you follow the safety precautions and operating
instructions provided in this easy-to-use manual. Please take the time to read it, and save these
instructions for future use. Please also remember to record the model and series code. They are
on a label in back of the unit.
_________________ ___________________ __________________
Model number Series code Date of purchase
READ ALL INSTRUCTIONS BEFORE USING!
IMPORTANT SAFEGUARDS
When using electrical appliances, basic safety precautions should be followed, including the
following:
• WARNING: BURN HAZARD. The
dispenser heats water to a temperature of
approximately 190°F (88°C). Water
temperatures above 125°F (52°C) can
cause severe burns or death from
scalding. Children, the disabled and the
elderly are at highest risk of being
scalded. Children should be supervised by
an adult when using this product.
• WARNING: CRUSH AND FALL
HAZARD. Do not allow children to
climb, stand or hang on the outside of the
dispenser, or on the shelves inside the
storage cabinet. They could tip the
dispenser over or fall and seriously injure
themselves. Children should be
supervised by an adult when using this
product.
• WARNING: FIRE HAZARD. Do not
store or use gasoline or other flammable
vapors and liquids in the vicinity of this
or any other appliance. Do not operate
dispenser with a damaged cord. Do not
use with an underrated extension cord.
• WARNING: SHOCK HAZARD. Unplug
the water dispenser before cleaning or
wiping up spilled water on unit. Do not
attempt to service the dispenser. Do not
operate dispenser with a damaged cord.
• WARNING: TOXIC SUBSTANCE
HAZARD. Do not use with water that is
microbiologically unsafe or of unknown
quality. Do not dispense anything other
than water of known quality.
• CAUTION: SPOILED FOOD HAZARD.
The storage compartment in this unit is
not a refrigerator. Do not store
perishable food in compartment.
1
DANGER: CHILD ENTRAPMENT HAZARD.
PROPERLY DISPOSE OF THE WATER DISPENSER AS
DIRECTED BELOW.
Child entrapment and suffocation are not
problems of the past. Junked or abandoned
dispensers with storage areas are still
dangerous…even if they will sit for “just a
few days.” If you are getting rid of your old
water dispenser, please follow these
instructions to help prevent accidents.
BEFORE YOU THROW AWAY YOUR
OLD DISPENSER:
• Take off the doors and discard
separately.
• Leave the shelves in place so that
children may not easily climb inside.
• If the dispenser door has a lock, make it
unusable.
REFRIGERANT DISPOSAL:
Your old water dispenser may have used a
regulated refrigerant in its cooling system.
These refrigerants are believed to harm
stratospheric ozone. If you are throwing
away your old dispenser, make sure the
refrigerant is removed and recovered for
proper disposal by an EPA-certified
technician. If you intentionally release this
refrigerant, you can be subject to fines and
imprisonment under provisions of
environmental legislation.
SAVE THESE INSTRUCTIONS!
2
PROPER INSTALLATION AND LOCATION
1) Dispenser is for indoor use only. Do
not use outdoors.
2) To prevent algae growth, find a
location for your dispenser that is
protected from direct sunlight and
other sources of heat (e.g., radiators,
baseboard heaters, cooking appliances,
etc). Do not use when relative
humidity is greater than 90%.
3) Do not install the dispenser where the
surrounding air temperature will be
above 100°F (38°C) or below 50°F
(10°C).
GROUNDING INSTRUCTIONS
WARNING –
electric shock.
• This appliance must be grounded. In the
event of an electrical short circuit,
grounding reduces the risk of electric
shock.
• This appliance is equipped with a power
cord having a grounding wire with a
grounding plug. The plug must be
plugged into an outlet that is properly
installed and grounded.
• Consult a qualified electrician if the
grounding instructions are not completely
understood, or if doubt exists as to
whether the appliance is properly
grounded.
• If the outlet is a standard 2-prong wall
outlet, it is your personal responsibility
and obligation to have
it replaced with a properly grounded 3prong wall outlet.
Improper use of the grounding plug can result in a risk of
4) Place the dispenser on a level surface
that can support its weight with a full
water bottle on it.
5) To ensure that your water dispenser
works at the maximum efficiency,
leave at least 2 inches of clearance
between all sides of the dispenser and
any walls.
6) To prevent damage to dispenser, do
not plug dispenser into the power
outlet until reading the instructions
first!
• Do not under any circumstances cut or
remove the third (ground) prong from the
power cord.
• Do not use an adapter plug with this
appliance.
• Do not use an extension cord with this
appliance. If the power cord is too short,
have a qualified electrician install an
outlet near the appliance
• For best operation, plug the appliance
into its own electrical outlet on a
dedicated circuit to prevent flickering
of lights, blowing of fuse, or tripping
of circuit breaker.
3

GETTING FAMILIAR WITH YOUR HAMILTON BEACH
WATER DISPENSER
Features:
• Designed for in-home or office use.
• Front panel has three indicator lights; power indicator light will remain on at all times while
hot and cold indicator lights will alternate on and off since the heater and cooler do not draw
power continuously.
• Two power switches are located on the back of the dispenser. One is for cooling and one is
for heating.
• Designed with distinctive thermal isolation technology, this dispenser can minimize thermal
exchange between hot and cold water.
• Dual cooling chip system allows for a quiet, durable and high performance unit.
• Convenient, built-in, 0.50 cubic foot storage compartment for non-perishable items.
• There are two high-flow faucets on the front of the unit. The faucet with the red child-safety
button is for hot water and blue is for cold water.
• Hot water faucet has a child resistant hot water guard. To operate it, push the red tab to the
left to disengage the locking device, and then push the push button inward.
• Removable, easy-to-clean drip tray.
• The power cord has a grounded plug. Please make sure that your outlet is properly
grounded.
• Fits 3 or 5 gallon bottles
4
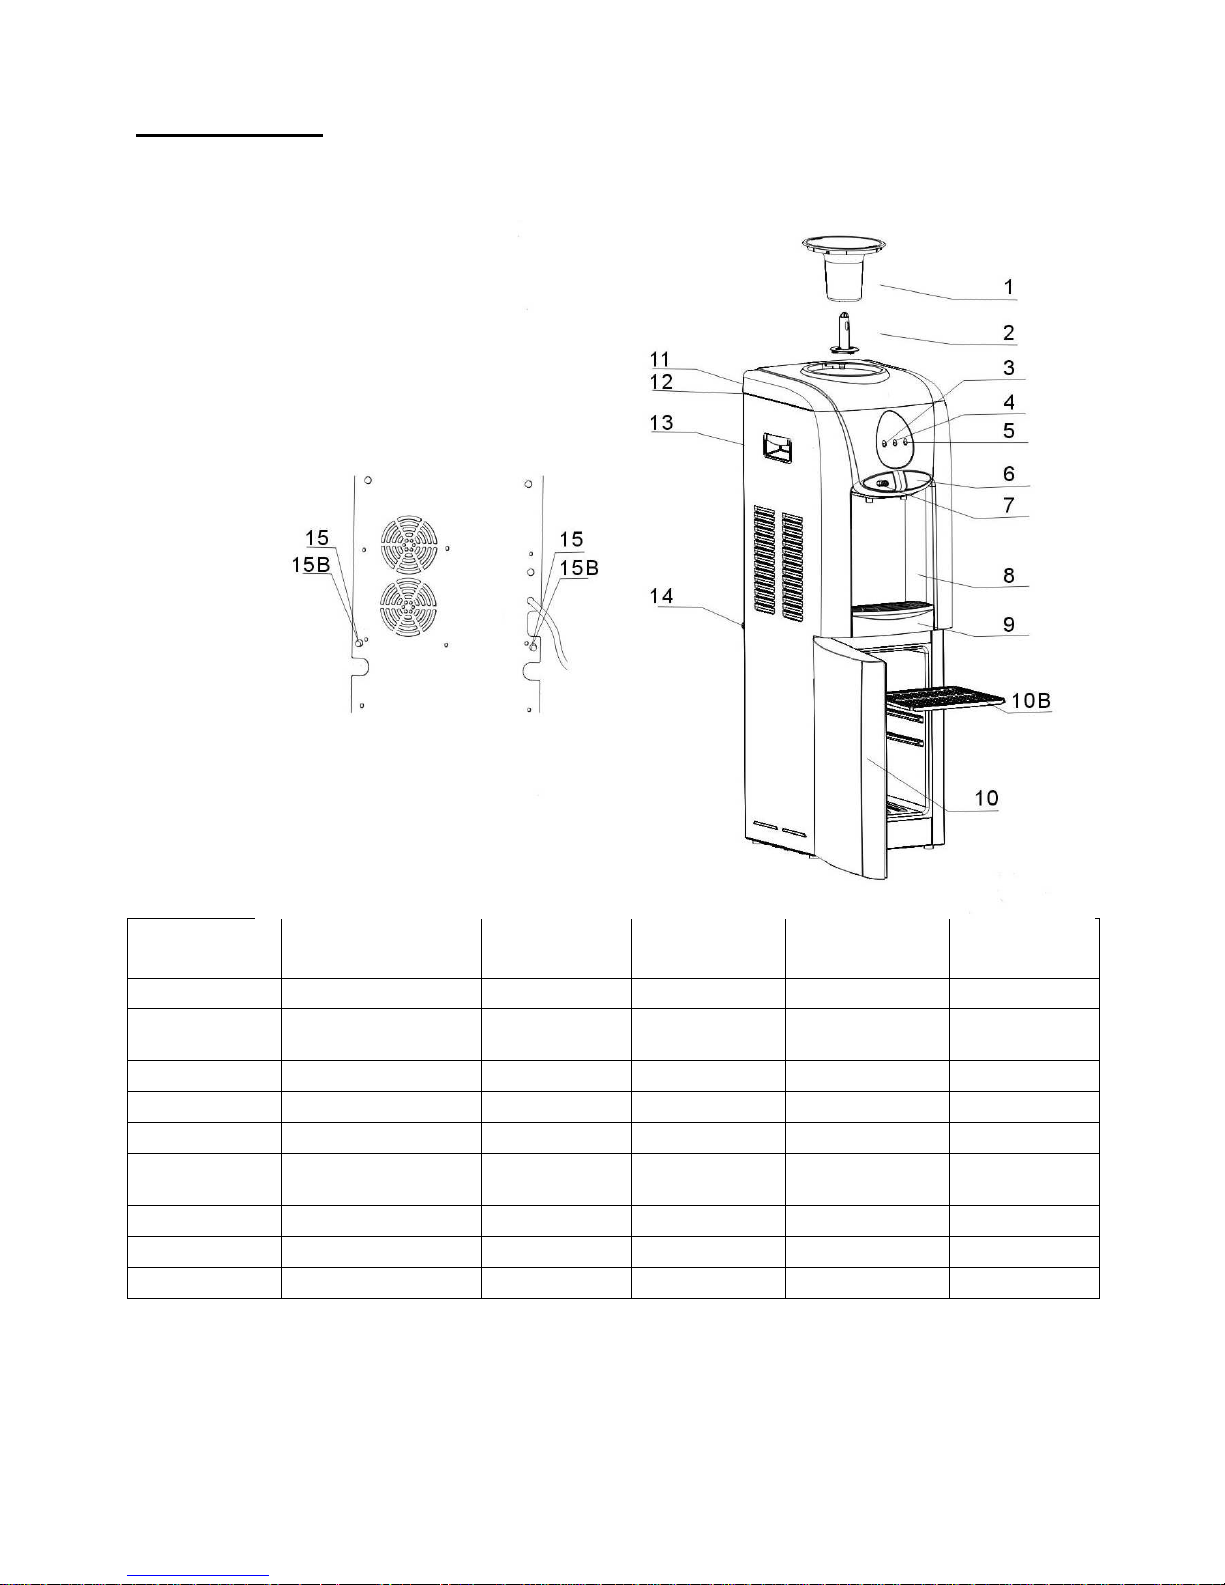
Parts Listing:
own
Part No. Shown
Part No.
HB-BS-1003
HB-CT-1005
Part Name
Bottle Supporter/Collar
Spill-Resistant
Piercing Valve
HB-GIL-1006 Green Indicator Light
HB-RIL-1007 Red Indicator Light
HB-BIL-1008 Blue Indicator Light
HB-CWF-1009 Cold Water Faucet
HB-HWF-1010 Hot Water Faucet
HB-CAS-1011
Casing
Part No. Sh
on Diagram
1
2
3
4
5
6
7
8
Part No.
HB-DT-1012
HB-SD-1013
Part Name
Drip Tray
Storage Door
HB-RS-1014 Removable Shelf
HB-HS-1015 Heating Switch
HB-CS-1016 Cooling Switch
HB-TH-1017
Thermostat
(Do not touch)
HB-PC-1018
Power Cord
HB-DOC-1019 Drain Outlet Cap
HB-SS-1020 Silicon Stopper
5
on Diagram
(under panel)
9
10
10B
11
12
13
14
15
15B

PREPARING, LOADING & OPERATING YOUR DISPENSER
1) Make sure that the dispenser is not plugged into the electrical outlet and that both the
HEATING and COOLING power switches (on the back of the dispenser) are set to the OFF
position.
NOTICE: To prevent leaking water due to damaged seals, do NOT turn ON the
HEATING switch without water in the dispenser.
2) Sanitize the dispenser water tanks prior to installing a full bottle of water for the first time
(see “Proper Care and Cleaning of Dispenser”).
3) The water bottle will have a cap. The cap may have a stopper that is intended to be pushed
into the bottle. (Sometimes these stoppers are covered by a removable paper/foil seal.) If
your bottle has a cap with a stopper, simply hold the water bottle vertically straight upside
down and place the water bottle into the support collar on top of the water dispenser. The
post in the collar will push the stopper into the bottle.
If the water bottle cap does not have a stopper that is intended to be pushed into the bottle,
first remove the support collar of the water dispenser by turning it counterclockwise and
pulling it straight up and off. Then remove the spill-resistant piercing valve from the
support collar. Reinsert the support collar onto the water dispenser and turn it clockwise to
lock back in place.
Rotate counterclockwise
and pull straight off
Remove the cap from the water bottle. Quickly lift the water bottle, turn it upside down, and
place the water bottle onto the top of the water dispenser. Wipe up any water that spills on
to the water dispenser or floor.
4) Wait 5 minutes and then plug in the unit into a grounded power outlet (see “Grounding
Instructions”). Dispense 4 cups of water from each faucet.
5) Set the Heating and Cooling power switches (located on the rear of the dispenser) to the ON
position. Indicators light up accordingly once the dispenser is functioning.
6) Allow 4 hours for water to reach hot and cold temperatures.
6
WARNING: BURN HAZARD. The dispenser heats water to a temperature of
approximately 190°F (88°C). Water temperatures above 125°F (52°C) can cause
severe burns or death from scalding. Children, the disabled and the elderly are at
highest risk of being scalded. Children should be supervised by an adult when using
this product.
7) The hot water temperature is preset to 190°F (88°C). The hot faucet is equipped with a
child water guard that reduces the risk of hot water being dispensed accidentally or by small
children.
8) When bottle is empty, vertically pull it out by two hands, and then replace it with another
bottle.
9) The spilled water in the drip tray must be removed regularly and cleaned properly. To
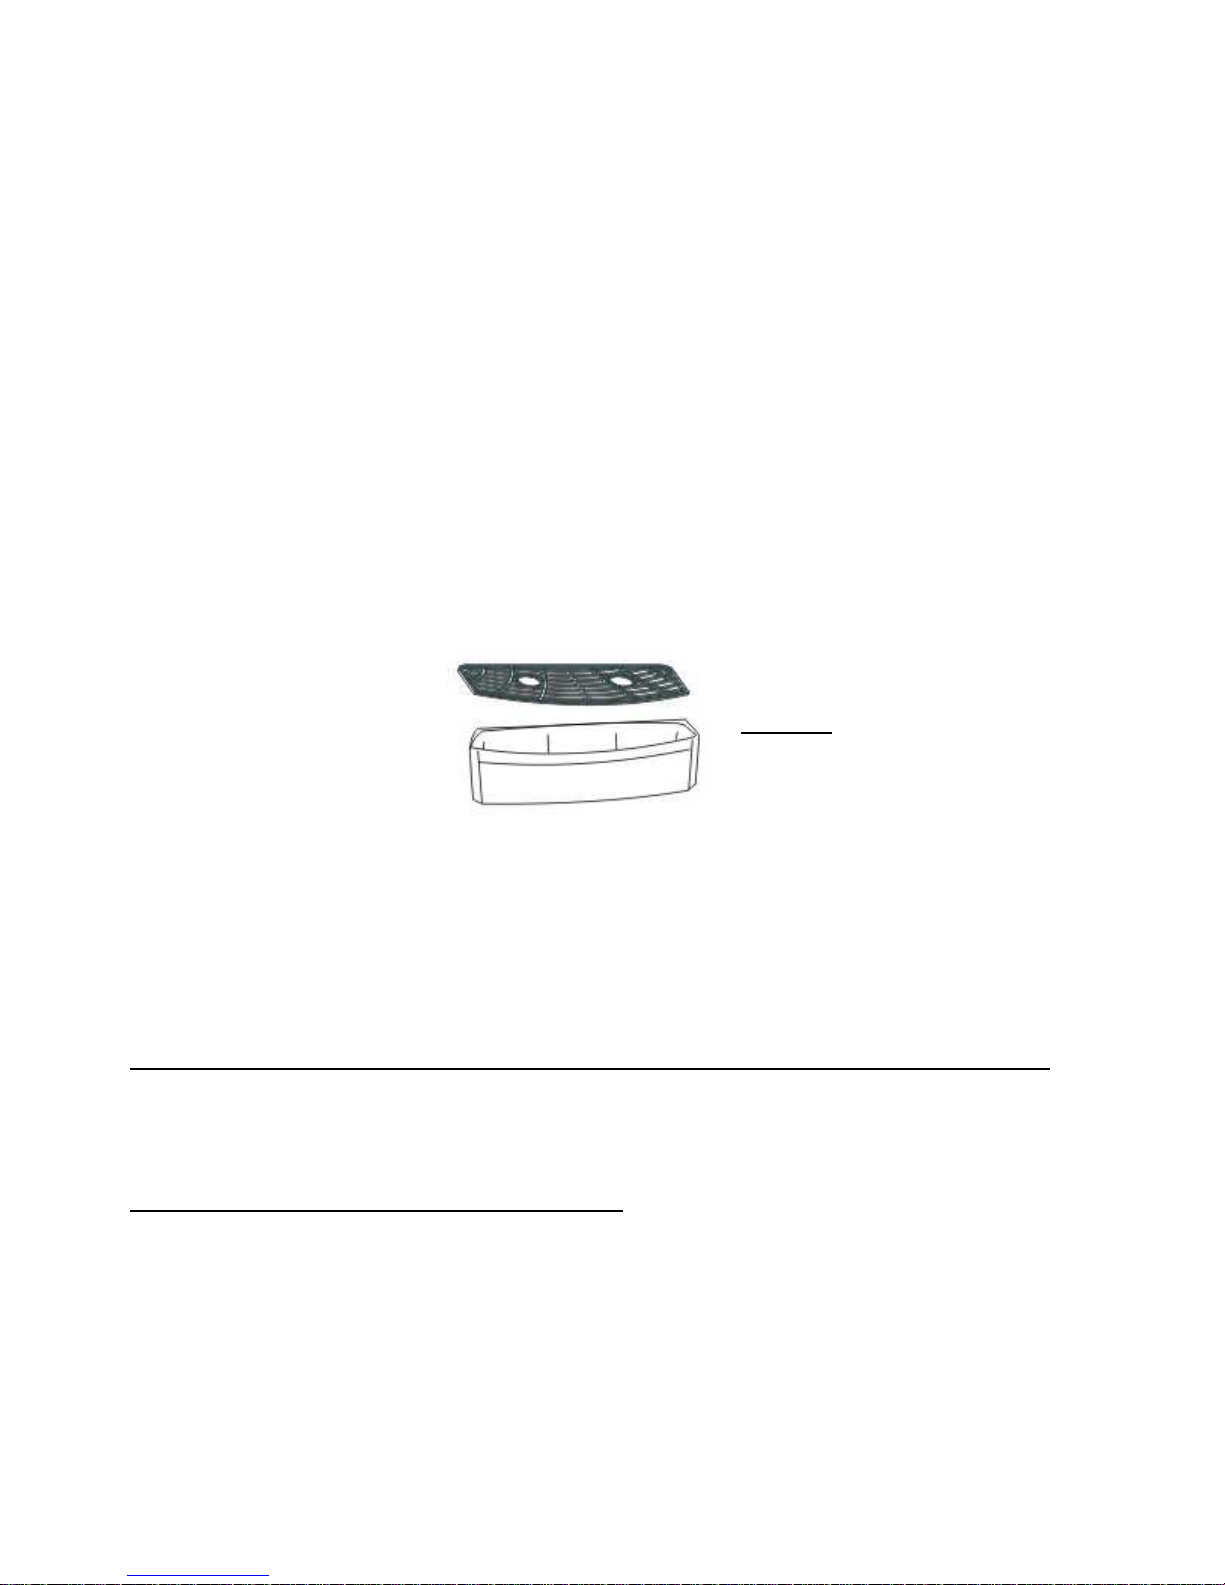
remove it, slide tray out.
______________ Drip Tray Grille
10) In case hot or cold water is not needed for an extended period of time, turn off the
switches accordingly to save power.
Drip Tray
PROPER CARE AND CLEANING OF DISPENSER_____________________
WARNING: SHOCK HAZARD. Unplug the water dispenser before cleaning.
Cleaning the Outside and Storage Compartment:
IMPORTANT: Set both power switches (on the back of the dispenser) to the OFF position and
unplug the water dispenser before cleaning.
The inside and outside of the cabinet can be washed with mild soap and water. Rinse thoroughly with
clear water. Never use commercial cleaners or abrasive scouring powders.
7
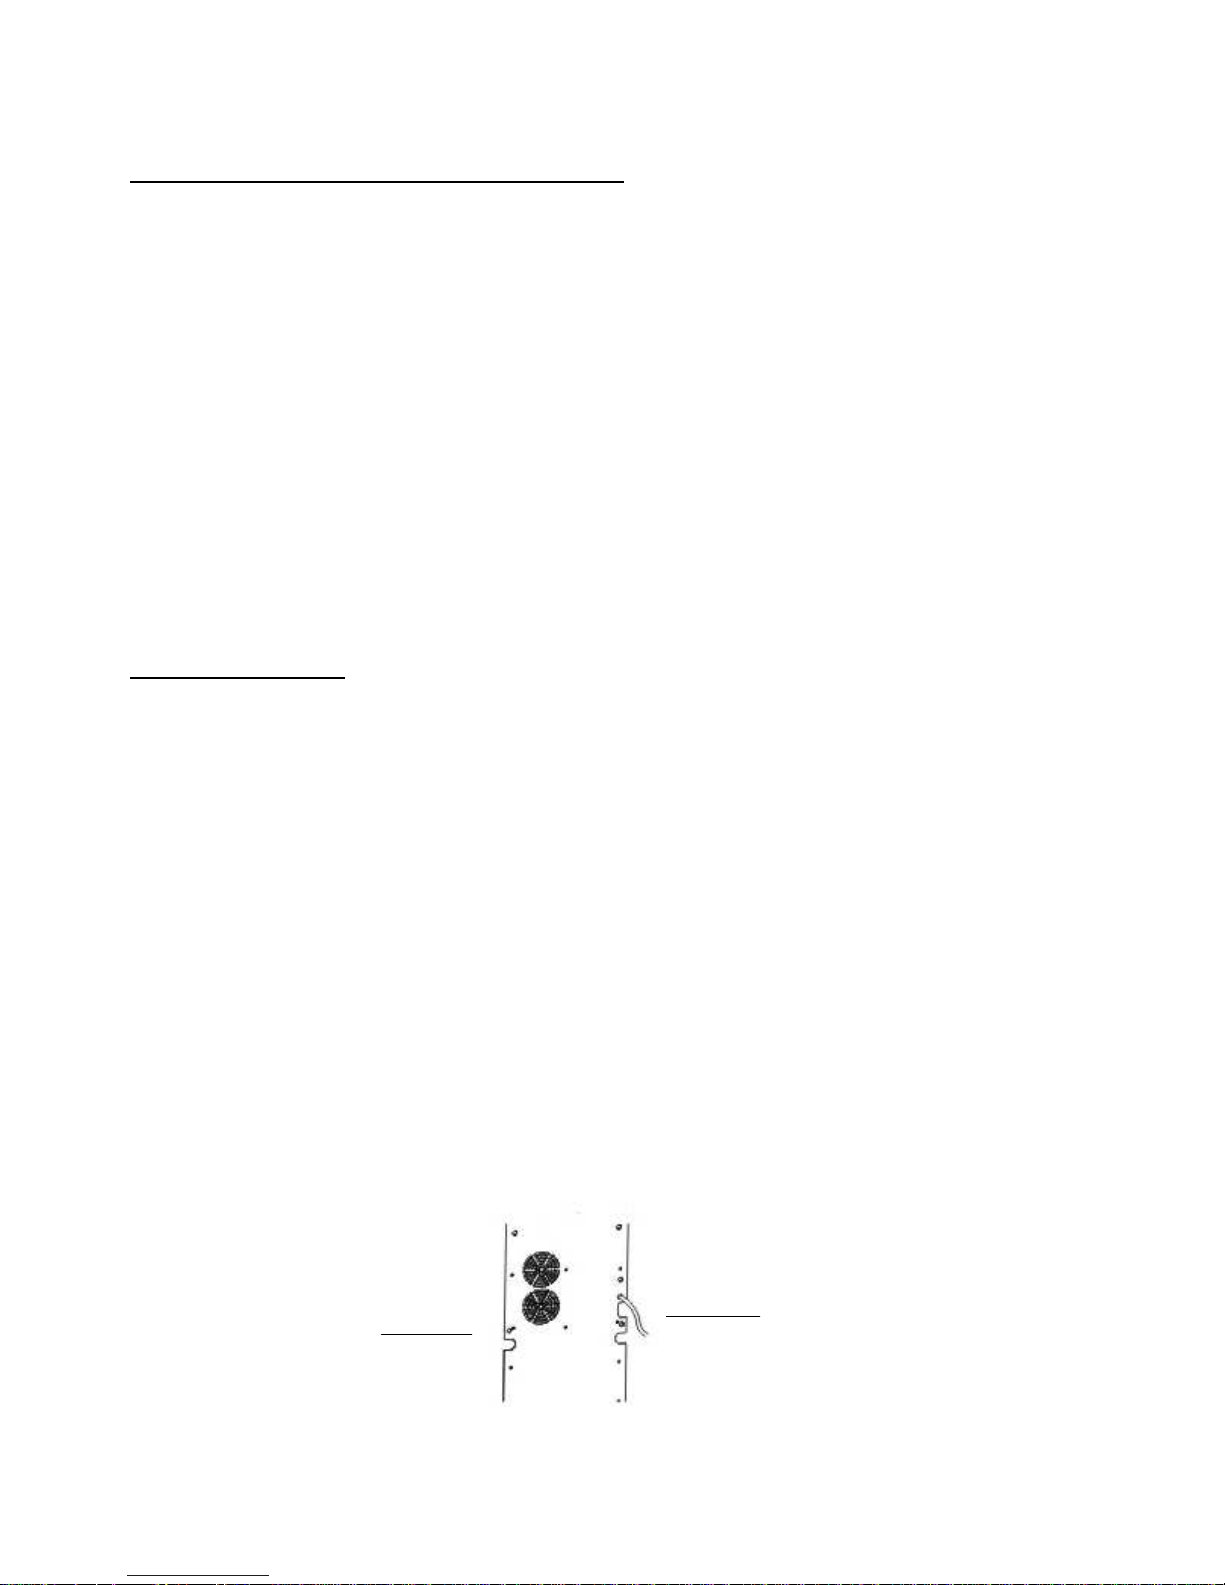
Drain Outlet for
Drain Outlet for cold
Cleaning the Inside of the Storage Compartment:
For prevention of odor, place an open box of baking soda in the storage compartment.
IMPORTANT: Set both power switches (on the back of the dispenser) to the OFF position and
unplug the water dispenser before cleaning.
Use a solution of warm water and baking soda (approximately one tablespoon of baking soda to one
quart of water). This will clean and neutralize odors. Then rinse and wipe dry.
Other parts of the storage compartment including door gaskets and plastic parts can be cleaned in the
same manner.
NOTICE: To prevent damage to the water dispenser, the plastic storage parts are not to be washed in
the dishwasher.
Draining Instruction:
The dispenser should be drained before cleaning the tanks and before leaving for long vacations or
absences.
1) Set both power switches (on the back of the dispenser) to the OFF position and unplug the
dispenser.
2) Dispense water from both buttons into container(s) until no more water can be dispensed
(about 1 quart of water still remains in the dispenser). Put a container that will withstand
hot water under the hot water faucet.
3) Remove the water bottle from the dispenser.
4) Place a large bucket beneath the drain outlets on the rear of the dispenser.
5) Remove the caps and silicon stoppers from the drain outlets and allow water to drain.
water
8

WARNING: BURN HAZARD. The dispenser heats water to a temperature of
approximately 190°F (88°C). Water temperatures above 125 ° F (52 °C) can cause
severe burns or death from scalding. There are two Drain outlet caps. The left hand
side’s drain outlet is to drain hot water and the right hand side’s is to drain cold
water. Children, the disabled and the elderly are at highest risk of being scalded.
Children should be supervised by an adult when using this product.
After draining, replace the silicon stoppers and caps.
6) Make sure to install a full bottle and dispense water from both water faucets before
plugging in and turning on the dispenser (see Preparing, Loading and Operating Your
Dispenser).
Cleaning the Drip Tray and Grill:
The drip tray is not self-draining. To reduce water spotting or deposits, the tray and its grill should be
emptied, cleaned and wiped dry regularly. Clean with mild soap or on the top rack in the dishwasher.
Sanitizing and Cleaning the Water Tanks:
Important: Periodically the water dispenser tanks must be sanitized to prevent unpleasant tastes in
the water and cleaned to remove mineral deposits that can impair flow.
To Sanitize:
Important: Before cleaning, set both power switches (on the back of the dispenser) to the OFF
position and unplug the water dispenser. Note: For first time installation, skip next three steps.
1) Empty the water bottle, and then remove it from the dispenser.
2) Drain the water tanks (see Draining Instructions).
3) Reinstall the silicon stopper and drain cap (see Draining Instructions).
4) DO NOT ADD BLEACH FIRST OR DIRECTLY TO THE DISPENSER.
Concentrated bleach may damage plastic.
5) Add ½ teaspoon (2.5 ml) of ordinary 6.0% maximum household bleach to a 2 quart (2 liter)
pitcher filled with tap water.
9

6) Pour the solution in the opening at the top of the dispenser.
7) Repeat last two steps until the dispenser is full.
8) Press the hot and cold dispenser buttons until the water just begins to flow from the faucets.
9) Allow to sit for 15-20 minutes.
10) Rinse out the bleach solution.
11) Drain the water tanks into a large bucket (see Draining Instruction).
12) Make sure that silicon stoppers and drain caps are NOT installed.
13) Clean, and then reinstall the collar.
14) Pour approximately 1 gallon (4 quarts or 4 liters) of fresh tap water into the top and allow
draining into the bucket.
15) Flush with an additional 1 gallon (4 quarts or 4 liters) of fresh tap water and allow draining
into the bucket.
16) Reinstall silicon stoppers and drain caps (see Draining Instructions).
17) Install a fresh water bottle (see Preparing and Loading Your Dispenser for Use).
18) Plug in the dispenser. Then turn on the hot and cold power switches (on the back of the
dispenser).
19) Dispense 1 quart (1 liter) of water from each faucet and taste to make sure the bleach solution
is completely removed.
20) If you continue to taste the chlorine from the bleach solution, repeat steps 11 – 20 until the
taste is gone.
To Remove Mineral Deposits:
Mix 2 quarts (2 liters) of water with two quarts of vinegar OR mix 1 gallon of water (4 liters) with 16
ounces (454 g) of citric acid crystals. Bleach does not remove mineral deposits. Do this in place of
step 6 above when removing mineral deposits.
10
 Loading...