

Hamilton Beach 56400 User Manual

840116600
Stay or Go™Personal Blending Jar is designed to fit all Hamilton
Beach or Proctor-Silex blenders. For blender models 56400 and
56409 (with two-piece collar), in U.S. call 1-800-851-8900 and in
Canada call 1-800-267-2826. Not intended for use with any other
blender brands.
Personal Blending Jar
Parts
1. Cap
2. Lid
3. Interior Cup
4. Exterior Cup
5. Nut
Easy Assembly
1. Jar
2. Gasket
3. Cutting Blade Assembly
4. Jar Nut or Retaining Ring
5. Blender Base
840116600 v04.qxd 7/16/03 9:49 AM Page 1

3
2
1. Read all instructions.
2. Blades are sharp; handle carefully.
3. Do not use a broken, chipped, or cracked blender jar.
4. Do not use broken, cracked, or loose blades.
5. Never place cutting unit blades on base without jar properly
attached.
6. Screw on jar retaining ring or jar nut firmly. Injury can result if
moving blades accidentally become exposed.
7. If jar should turn when motor is turned on, turn off immediately
and tighten jar in threaded retaining ring.
8. Do not blend hot foods or liquids in the jars. Pressure will build
up in the jars and hot liquid will spurt out when opened.
9. Observe the MAX fill line. Do not fill jar above this line.
10. Do not store jars with cutting assembly in place. Remove cutting
assembly and wash after each use.
IMPORTANT SAFEGUARDS
SAVE THESE INSTRUCTIONS!
How to Use
IMPORTANT: Your Hamilton Beach Stay or Go™Personal Blending Jar
and cutting blades are subject to wear during normal use. Always inspect
jar for nicks, chips, or cracks. Always inspect cutting blades for broken,
cracked, or loose blades. Do not use damaged jar or cutting blades. Call
our toll-free customer service number to obtain replacement parts.
1. Make sure blender is unplugged. Place blender base on clean, dry
surface to keep foreign particles from being pulled up into motor
during operation.
2. Place ingredients in personal blending jar. Do not exceed MAX fill
line.
3. Place cutting blades in retaining ring. Fit gasket over blades. The
gasket must lie flat. Set cutting assembly on top of jar and screw
on retaining ring or jar nut. Make sure the retaining ring or jar nut is
firmly screwed onto the jar. If not, it may loosen later when motor is
turned on.
4. Set personal blending jar in place on blender base, making sure it
is securely seated. If not, gently rock the jar until seated. Plug cord
into outlet. Follow the instructions provided with your blender for
operation.
NOTE: ALWAYS turn blender off and wait until blades have
stopped rotating before removing jar.
5. To remove personal blending jar after blending is complete:
• for blenders with a retaining ring, twist jar to unlock then lift the
jar straight up.
• for blender models with a jar nut, lift jar straight up.
If it is not easily removed, rock gently and lift.
NOTE: NEVER replace jar onto unit while motor is running.
6. Turn personal blending jar so that the cutting assembly is on top of
the jar. Unscrew cutting assembly then remove the retaining ring,
cutting blades and gasket.
7. Screw lid on personal blending jar clockwise.
840116600 v04.qxd 7/16/03 9:49 AM Page 2
5
4
LIMITED WARRANTY
This product is warranted to be free from defects in material and workmanship for a period of two
(2) years for Hamilton Beach Portfolio products or one (1) year for Hamilton Beach products from the
date of original purchase, except as noted below. During this period, we will repair or replace this
product, at our option, at no cost. THE FOREGOING WARRANTY IS IN LIEU OF ANY OTHER
WARRANTY, WHETHER EXPRESS OR IMPLIED, WRITTEN OR ORAL INCLUDING ANY
WARRANTY OF MERCHANTABILITY OR FITNESS FOR A PARTICULAR PURPOSE. ANY
LIABILITY IS EXPRESSLY LIMITED TO AN AMOUNT EQUAL TO THE PURCHASE PRICE PAID,
AND ALL CLAIMS FOR SPECIAL, INCIDENTAL AND CONSEQUENTIAL DAMAGES ARE
HEREBY EXCLUDED. There is no warranty with respect to the following, which may be supplied
with this product: glass parts, glass containers, cutter/strainer, blades, and/or agitators. This warranty
extends only to the original consumer purchaser and does not cover a defect resulting from abuse,
misuse, neglect, use for commercial purposes, or any use not in conformity with the printed
directions. This warranty gives you specific legal rights, and you may also have other legal rights
which vary from state to state, or province to province. Some states or provinces do not allow
limitations on implied warranties or special, incidental or consequential damages, so the foregoing
limitations may not apply to you.
If you have a claim under this warranty, DO NOT RETURN THE APPLIANCE TO THE STORE!
Please call our CUSTOMER SERVICE NUMBER. (For faster service please have model, series,
and type numbers ready for operator to assist you.)
CUSTOMER SERVICE NUMBERS
In the U.S. 1-800-851-8900 / In Canada 1-800-267-2826/ In Mexico 01-800-71-16-100
KEEP THESE NUMBERS FOR FUTURE REFERENCE!
How to Clean
1. Unplug blender from electrical outlet.
2. Wipe blender base, control panel, and cord with a damp cloth or
sponge. To remove stubborn spots, use a mild, non-abrasive
cleanser.
3. To clean personal blending jar, unscrew retaining ring and remove
cutting unit assembly from jar.
4. Carefully remove blades and gasket from bottom of retaining ring.
5. Carefully wash blades, retaining ring, gasket, jar, and cover in hot,
soapy water. Rinse and dry thoroughly. Do not soak. Do not wash
blades, retaining ring, gasket, or lid in a dishwasher. Personal
blending jar may be washed on top rack of the dishwasher.
6. Reassemble personal blender jar, and replace jar onto blender
base. Store personal blender jar with lid cap ajar to prevent
container odor.
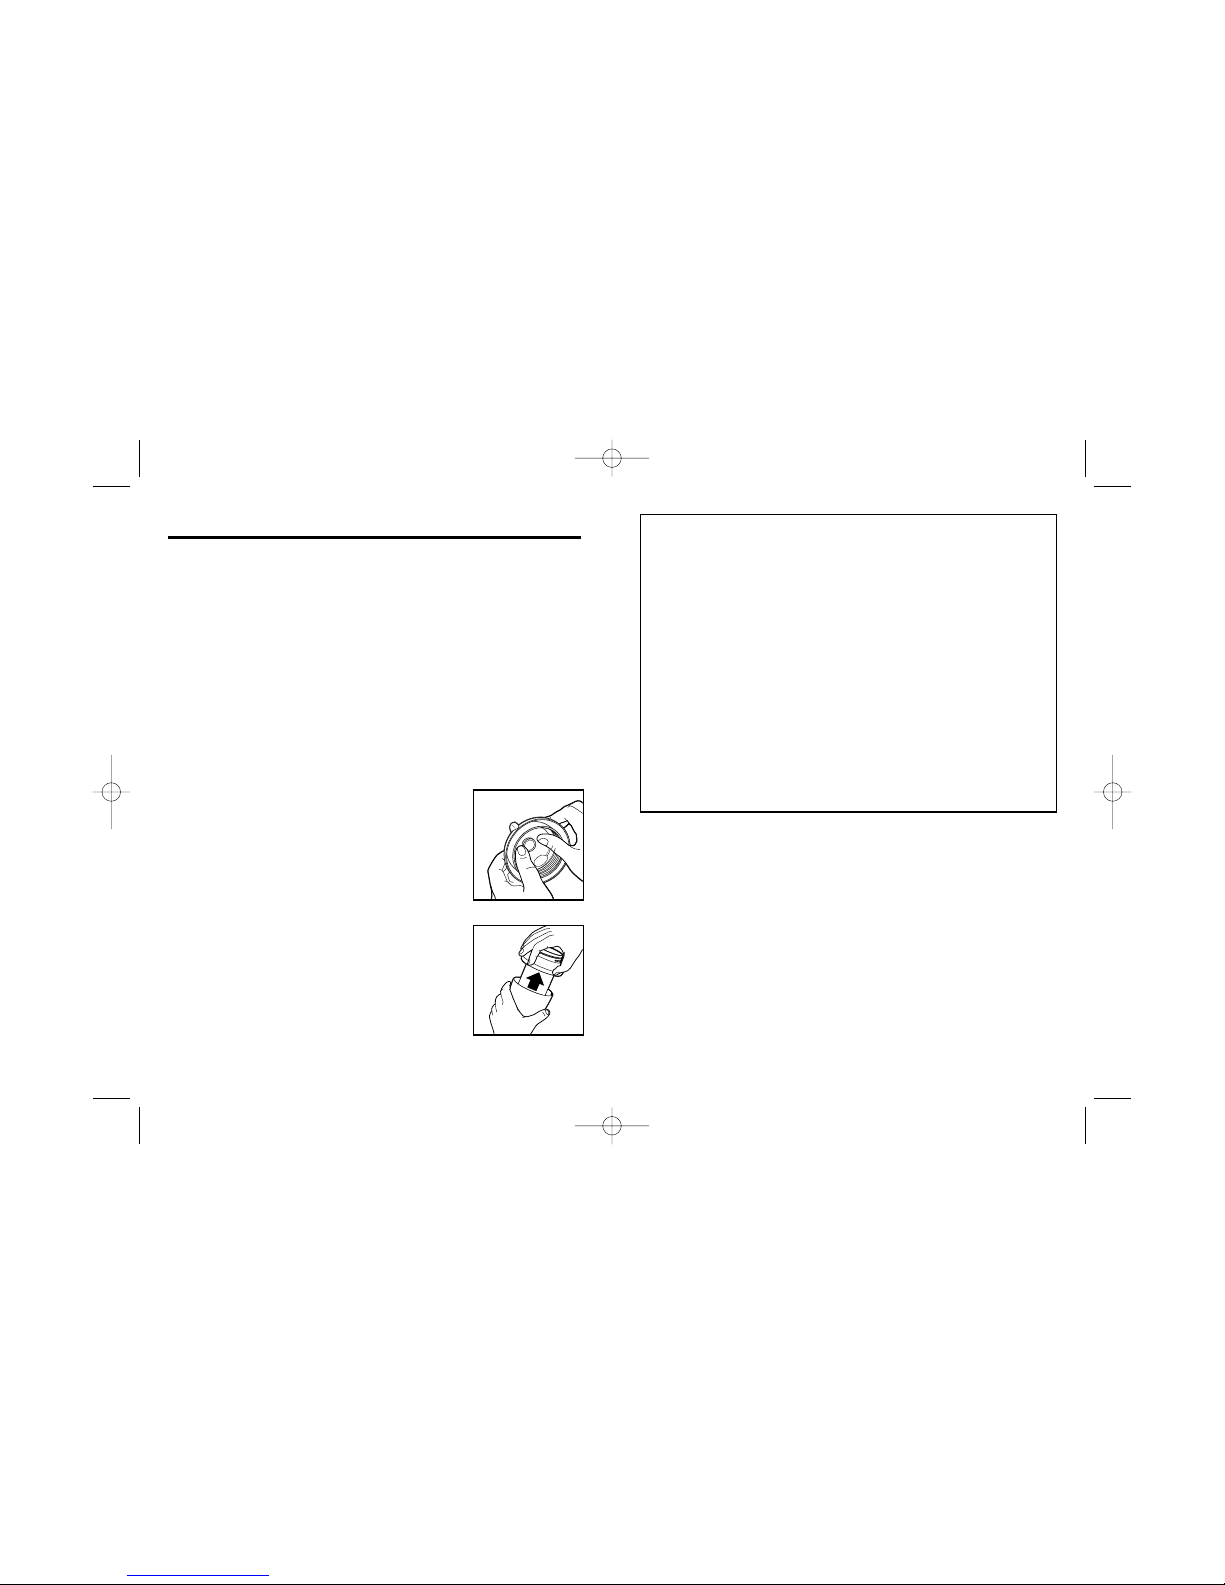
7. All personal blender jar parts may be
disassembled for cleaning as necessary.
To disassemble lid, press the inside top
portion while holding the sides of the lid.
To reassemble, place lid on a flat surface
then press lid cap into lid top.
8. To disassemble jar, unscrew base.
Lift interior cup out of exterior cup.
To reassemble, align notch of exterior cup
with tab of interior cup. Press both cup
pieces together. Screw on jar nut.
840116600 v04.qxd 7/16/03 9:49 AM Page 4
 Loading...