

Hama 00137451, 00137452 User Manual

5000mAhPower Pack ”Metallic”
00137451
00137452
Operating Instructions
Bedienungsanleitung
Mode d‘emploi
Instrucciones de uso
Руководство по эксплуатации
Gebruiksaanwijzing
Instrukcja obsługi
Návod k použití
Návod na použitie
Manual de instruções
Manual de utilizare
GB
D
F
E
RUS
NL
PL
CZ
SK
P
RO

G Operating instruction
Thank you forchoosing a Hamaproduct.
Take your time and read the following instructions and information completely. Please keep these
instructions in asafe place for future reference. If you sell the device, please pass these operating
instructions on tothe new owner.
1. Explanation of Warning Symbols and Notes
Warning
This symbol isused to indicate safety instructions or to draw your attention to specichazards
and risks.
Note
This symbol isused to indicate additional information or important notes.
2. Package Contents
•Power Pack, 5000 mAh
•Micro-USB charging/connecting cable
•Storage bag
•These operating instructions
3. Safety Notes
•The product is intended for private, non-commercial use only.
•Protect the product from dirt, moisture and overheating, andonly use it in a dry environment.
•Keep this product,as all electricalproducts, out ofthe reach of children!
•Do not drop the product and do not exposeit to any major shocks.
•Do not operate the product outside the power limitsgiven in the specications.
•Do not open the device or continue to operate it if it becomes damaged.
•Dispose of packaging material immediately according to locally applicable regulations.
•Since the battery is integrated and cannot be removed, you will need to dispose of the product as
a whole. Dothis in compliance with the legal requirements.
•Do not modify the product in any way.Doing so voids the warranty.
4. Operation
4.1 Charging the Power Pack
•Begin charging the power pack by connecting the included Micro-USB charging/connecting cable
to the powerpack’s Micro-USB (IN 5 V/1 A) input and to a suitable USB charger. Please refer to
the operating instructionsfor the USBcharger used.
•Charging begins and ends automatically.
•Charge the Power Pack fully before using it for the rst time.
2
Note – Capacity
•The capacity is always shown when the Power Pack is charging.
•Each status LED corresponds to 25% of the capacity. When an LED is permanently illuminated, this
indicates that thiscapacity level has already been reached. The Power Pack is charged to at least
75% if threeLEDs are illuminated, and the fourth is ashing.
•If all four status LEDs light up, the full capacity is available.
•Press the buttonof the Power Pack to switch iton and tocheck its currentcapacity.
•To switch the Power Pack off, press and hold the button until the status LEDs go out.
Warnung – Battery
•Only use suitable charging devices or USB connections for charging.
•As a rule, donot charge devices or USB connections that are defective and donot tryto repair them
yourself.
•Do not overcharge the product orallow thebattery to completely discharge.
•Avoid storing, charging orusing batteriesin extreme temperatures.
•When stored over along period of time, batteries should becharged regularly(at least every three
months).
4.2 Charging terminal devices
•Connect the included Micro-USB charging/connecting cable to the USBport on the power pack
(OUT 5V/1A) and to the Micro-USB port on your terminal device (mobile phone, smartphone,
etc.).
•The Micro-USB charging/connecting cable included maynot be suitable for the USB connection on
your terminal device.In this case, use the USB cable that was included with your terminal device.
•To start charging, press thebutton of thePower Pack. The status LEDs show the remaining capacity
when the Power Pack is charging.
•The current battery status of your terminal device will appear on this device.
•Press the button ofthe Power Pack to stopcharging and to switch it off. The status LEDs should
switch off.
•The Power Pack will automaticallyswitch off after 10 seconds if it is not connected to a terminal
device.
Warning – Connecting terminal devices
•Before connecting a terminal device, check whether the power output of the charger can
supply sucient powerfor the device.
•Ensure that the total power consumption of the connected terminal device does not exceed
1000 mA.
•Please refer to the instructions in theoperating manual of your terminal device.
•It is essential that you observe these specications and the safety instructions regarding the
power supply ofyour devices.
3

Note – Optimised charging
•Optimised charging means that the Power Pack recognises the connected terminal device and
supplies it withthe optimal currentto minimise chargingtime.
power output ofthe power pack is 1000 mA.
Warning
•N
ever connect thechar
Power Pack at thesame time. This could damage the battery.
•Do not connect any terminal devices while the Power Pack is charging. This could damage the
Power Pack and theconnected device.
5. Care and Maintenance
Only clean thisproduct with aslightly damp, lint-freecloth and donot use aggressivecleaning
agents.
6. Warranty Disclaimer
Hama GmbH &Co. KG assumes no liability and provides no warranty for damage resulting from
improper installation/mounting, improper use of the product or from failure toobserve the operating
instructions and/or safetynotes.
7. Service and Support
Please contact HamaProduct Consulting ifyou have anyquestions about this product.
Hotline: +49 9091502-115 (German/English)
Further support information can be found here:
www.hama.com
ging cable ofthe P
ower P
Please note thatthe maximum
ack to boththe input and the output of the
4

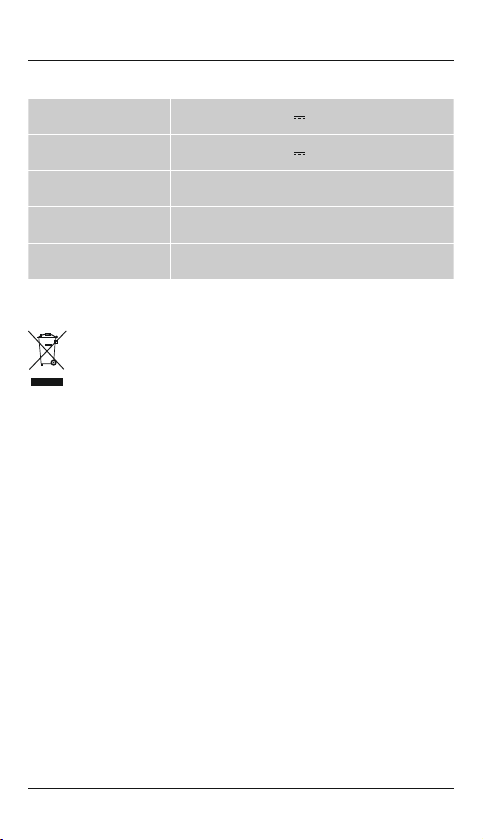
8. Technical Data
Input
Power output 5V 1000mA
Battery type 3.6V/Li-Ion
Min. capacity 5000mAh/18Wh
5V 1000mA
Typ. capacity
9. Recycling Information
Note on environmental protection:
After the implementationof the EuropeanDirective 2012/19/EU and2006/66/EU in the
national legal system,the following applies: Electric and electronic devices as wellas
batteries must notbe disposed of with household waste. Consumers are obliged by law to
return electrical and electronic devices aswell as batteries at the end of their service lives
to the publiccollecting points set up for this purpose or point of sale. Details to this are
dened by thenational law of the respective country. This symbol on the product, the instruction
manual or thepackage indicates that a product is subject to theseregulations. By recycling, reusing
the materials orother forms of utilising old devices/Batteries, you are making an important
contribution to protectingour environment.
5000mAh
5

D Bedienungsanleitung
Vielen Dank, dassSie sich für ein Hama Produkt entschieden haben!
Nehmen Sie sichZeit und lesen Sie die folgenden Anweisungen und Hinweise zunächst ganz durch.
Bewahren Sie dieseBedienungsanleitung anschließend aneinem sicheren Ortauf, um bei Bedarf
darin nachschlagen zukönnen. Sollten Siedas Gerät veräußern,geben Sie dieseBedienungsanleitung
an den neuenEigentümer weiter.
1. Erklärung von Warnsymbolen und Hinweisen
Warnung
Wird verwendet, umSicherheitshinweise zu kennzeichnenoder um Aufmerksamkeitauf
besondere Gefahren und Risiken zu lenken.
Hinweis
Wird verwendet, umzusätzlich Informationen oderwichtige Hinweise zukennzeichnen.
2. Packungsinhalt
•Power Pack 5000 mAh
•Micro-USB-Lade-/ Verbindungskabel
•Aufbewahrungstasche
•diese Bedienungsanleitung
3. Sicherheitshinweise
•Das Produkt ist für den privaten, nicht-gewerblichen Haushaltsgebrauch vorgesehen.
•Schützen Sie das Produkt vor Schmutz, Feuchtigkeit und Überhitzung und verwenden Sie es nur in
trockenen Umgebungen.
•Dieses Produkt gehört, wie alle elektrischen Produkte, nicht inKinderhände!
•Lassen Sie das Produkt nicht fallen und setzen Sie es keinen heftigen Erschütterungen aus.
•Betreiben Sie das Produkt nicht außerhalbseiner in den technischen Daten angegebenen
Leistungsgrenzen.
•Öffnen Sie das Produkt nicht und betreiben Sie esbei Beschädigungen nicht weiter.
•Entsorgen Sie das Verpackungsmaterial sofort gemäß denörtlich gültigen Entsorgungsvorschriften.
•Der Akku ist fest eingebaut und kann nicht entfernt werden, entsorgen Sie das Produkt alsGanzes
gemäß den gesetzlichenBestimmungen.
•Nehmen Sie keine Veränderungen am Produkt vor. Dadurch verlieren Sie jegliche
Gewährleistungsansprüche.
4. Betrieb
4.1. Laden des Power Pack
•Starten Sie den Ladevorgang des Power Packs, indem Sie das beiliegende Micro-USB-Lade-/
Verbindungskabel an den Micro-USB-Eingang des Power Packs (IN 5V/1A) und an ein geeignetes
USB-Ladegerät anschließen. BeachtenSie hierzu die Bedienungsanleitung des verwendeten
USB-Ladegeräts.
•Der Ladevorgang startet und endet automatisch.
•Laden Sie vor dem ersten Gebrauch das Power Pack zunächst einmal vollständig auf.
66

Hinweis – Kapazität
•Während des Ladevorgangs des Power Packs wird dieKapazität dauerhaft angezeigt.
•Jede Status-LED entspricht 25 % der Kapazität. Das dauerhafte Leuchten einer LED signalisiert
die bereits erreichte Kapazität. Leuchten dreiLEDs auf, und die vierteblinkt, ist das Power Pack
zu mind. 75% geladen.
•Leuchten alle vier Status-LEDs, ist die volle Kapazität verfügbar.
•Drücken Sie die Taste des Power Packs, um dieses einzuschalten und die aktuelle Kapazität des
Power Packs zu erfahren.
•Drücken und halten Sie die Taste bis die Status-LEDs erlöschen, um das Power Pack
auszuschalten.
Warnung – Akku
•Verwenden Sie nurgeeignete Ladegeräte oder USB-Anschlüsse zum Auaden.
•Verwenden Sie defekteLadegeräte oder USB-Anschlüssegenerell nicht mehrund versuchen Sie
nicht, diese zureparieren.
•Überladen oder tiefentladen Sie das Produkt nicht.
•Vermeiden Sie Lagerung,Laden und Benutzung bei extremen Temperaturen.
•Laden Sie bei längerer Lagerung regelmäßig (mind. vierteljährig) nach.
4.2. Laden von Endgeräten
•Verbinden Sie dasbeiliegende microUSB-Lade-/ Verbindungskabel mit dem USB-Anschluss
des Power Packs (OUT 5V/1A) und mit dem microUSB-Anschluss Ihres Endgerätes (Handy,
Smartphone, etc.).
•Unter Umständen ist das beiliegende Lade-/ Verbindungskabel für den endgeräteseitigenUSBAnschluss unpassend. Verwenden Sie dann das USB-Kabel des Endgerätes.
•Starten Sie den Ladevorgang, indem Siedie Ta ste des Power Packs drücken. Während des
Ladevorgangs zeigen dieStatus-LEDs die noch verfügbare Kapazität des Power Packs an.
•Der aktuelle Akku-Ladestatus Ihres Endgerätes wird auf diesem angezeigt.
•Beenden Sie den Ladevorgang und schalten Sie das Power Pack aus, indem Sie die Taste des Power
Packs drücken. Die Status-LEDs erlöschen.
•Für den Fall, dass kein Endgerät angeschlossen wird, schaltet sich das Power Pack automatisch
nach ca. 10Sekunden ab.
Warnung – Anschluss von Endgeräten
•Prüfen Sie vor Anschluss eines Endgerätes, ob dieses mit der Stromabgabe des Power Packs
ausreichend versorgt werden kann.
•Stellen Sie sicher, dass die gesamte Stromaufnahme des angeschlossenen Endgerätes 1000 mA
nicht überschreitet.
•Beachten Sie die Hinweise in der Bedienungsanleitung Ihres Endgerätes.
•Beachten Sie unbedingt die dort aufgeführten Angaben und Sicherheitshinweise zur
Stromversorgung Ihrer Geräte.
77

Hinweis – Optimiertes Laden
•Optimiertes Laden bedeutet, dass das Power Pack das angeschlossene Endgerät erkennt, mit der
optimalen Stromstärke versorgt unddadurch die Ladezeit auf ein Minimum reduziert. Beachten
Sie, dass diejeweilige Stromabgabe des Powerpacks maximal 1000 mA beträgt.
Warnung
•Schließen Sie das Ladekabel des Power Packs nie an dessen Ein- und Ausgang gleichzeitig an.
Der Akku kanndadurch beschädigt werden.
•Schließen Sie während des Ladevorgangs des Power Packs keine Endgerätean. Dadurch
können das Power Pack und die angeschlossenenEndgeräte beschädigt werden.
5. Wartung und Pflege
Reinigen Sie diesesProdukt nur miteinem fusselfreien, leichtfeuchten Tu ch und verwenden Sie keine
aggressiven Reiniger.
6. Haftungsausschluss
Die Hama GmbH& Co. KG übernimmt keinerlei Haftung oder Gewährleistung für Schäden, die aus
unsachgemäßer Installation, Montageund unsachgemäßem Gebrauchdes Produktes odereiner
Nichtbeachtung der Bedienungsanleitungund/oder der Sicherheitshinweise resultieren.
7. Service und Support
Bitte wenden Siesich bei Fragenzum Produkt gernean die Hama-Produktberatung.
Hotline: +49 9091502-115 (Deu/Eng)
Weitere Supportinformationen ndensie hier:
www.hama.com
8

8. Technische Daten
Stromaufnahme 5V 1000mA
Stromabgabe 5 V 1000 mA
Batterietyp 3.6V/Li-Ion
Min. Kapazität 5000 mAh / 18 Wh
Typ. Kapazität 5000mAh
9. Entsorgungshinweise
Hinweis zum Umweltschutz:
Ab dem Zeitpunktder Umsetzung der europäischen Richtlinien 2012/19/EUund 2006/66/
EG in nationalesRecht gilt folgendes: Elektrische und elektronische Geräte sowie
Batterien dürfen nichtmit dem Hausmüll entsorgt werden. DerVerbraucher ist gesetzlich
verpichtet, elektrische undelektronische Geräte sowieBatterien am Endeihrer
Lebensdauer an dendafür eingerichteten, öffentlichen Sammelstellen oder an die
Verkaufsstelle zurückzugeben. Einzelheiten dazu regelt das jeweilige Landesrecht. Das Symbol auf
dem Produkt, derGebrauchsanleitung oder der Verpackung weist auf diese Bestimmungen hin. Mit
der Wiederverwertung, derstoichen Verwertung oder anderenFormen der Verwertung von
Altgeräten/Batterien leisten Sieeinen wichtigen Beitragzum Schutz unsererUmwelt.
9

F Mode d‘emploi
Nous vous remercionsd’avoir choisi un produit Hama.
Veuillez prendre le temps de lirel‘ensemble des remarqueset consignes suivantes.Veuillez conserver
ce mode d‘emploià portée de main an de pouvoir le consulter en cas de besoin. Transmettez-le au
nouveau propriétaire avec l’appareil le cas échéant.
1. Explication des symboles d‘avertissement et des remarques
Avertissement
Ce symbole estutilisé pour indiquer des consignes de sécurité ou pour attirer votre attentionsur
des dangers etrisques particuliers.
Remarque
Ce symbole estutilisé pour indiquer des informations supplémentaires ou des remarques
importantes.
2. Contenu de l‘emballage
•Bloc d‘alimentation 5000 mAh
•Câble de connexion / de charge Micro-USB
•Sac de rangement
•Mode d‘emploi
3. Consignes de sécurité
•Ce produit est destiné à une installation domestique non commerciale.
•Protégez le produit de toute saleté, humidité, surchauffe et utilisez-le uniquement dans des locaux
secs.
•Cet appareil, comme tout appareil électrique, doit être gardé hors de portée des enfants !
•Protégez le produit des secousses violentes et évitez tout choc ou toute chute.
•N‘utilisez pas le produit en dehors des limites de puissance indiquées dans les caractéristiques
techniques.
•Ne tentez pas d‘ouvrir le produiten cas dedétérioration et cessezde l’utiliser.
•Recyclez les matériaux d’emballage conformément aux prescriptions locales en vigueur.
•La batterie est installée de façon permanente et ne peut pas être retirée ; recyclez leproduit en
bloc conformément auxdirectives légales.
•N’apportez aucune modication à l’appareil. Des modications vous feraient perdre vos droits de
garantie.
4. Fonctionnement
4.1 Charge de la batterie
•Démarrez le cycle de charge du bloc d'alimentation enconnectant le câble micro USB de
connexion / chargeà l'entrée micro USB du bloc d'alimentation (IN 5V/1A) et à unchargeur USB
adapté. Veuillez vous référerdans ce casau mode d’emploidu chargeur USButilisé.
•Le cycle de charge commence et se termine automatiquement.
•Veuillez charger entièrement le bloc d‘alimentation lors dela première utilisation.
10

Remarque – Capacité
•La capacité du bloc d‘alimentation apparaît en permanence pendant le cycle de charge.
•Chaque LED d’état correspond à 25 % de la capacité. L’allumage en permanence d’unvoyant
LED indique lacapacité atteinte. La charge du blocd’alimentation atteint au moins 75 %
lorsque trois voyantsLED sont alluméset le quatrièmeclignote.
•La pleine capacité est disponible lorsque les quatre voyants LED s‘allument.
•Appuyez sur la touche du bloc d‘alimentation an devérier la capacitéactuelle du bloc
d‘alimentation.
•Pour mettre lebloc d’alimentation horstension, appuyez surla touche et maintenez cette
touche enfoncée jusqu’àextinction des LED d’état.
Avertissement –
concernant les batteries
•Utilisez exclusivement un chargeur approprié ou une connexion USBlors de la recharge.
•Cessez d‘utiliser tout chargeur défectueux ou toute connexion USB défectueuse et ne tentez
pas de réparerces derniers.
•Ne surchargez ou ne déchargez pastotalement le produit.
•Évitez un stockage, une charge ou une utilisation à des températures extrêmes.
•Rechargez régulièrement le produit (au moinsune fois partrimestre) en casde longue période
de stockage.
4.2 Charge d'appareils
•Branchez le câble micro USB de connexion / de charge au port USB du bloc d'alimentation (OUT
5V/1A) et auport micro USBde votre appareil (téléphone portable, smartphone, etc.).
•Il est possible que le câble Micro-USB de connexion / de charge fourni ne soitpas compatible avec
le port USBde votre appareil. Utilisez, dans ce cas, le câbleUSB de votre appareil.
•Appuyez à nouveau sur la touche de la face supérieure du bloc d‘alimentation an de démarrer le
cycle de charge.Les voyants LEDindiquent la capacitédisponible du bloc d‘alimentation pendant
la charge.
•L‘état actuel de charge de la batterie de votre appareil apparaît sur ce dernier.
•Appuyez sur la touche de la face supérieure du bloc d‘alimentation an de terminer le cycle de
charge et mettre le bloc d‘alimentation hors tension.Les voyants LEDs‘éteignent.
•Le bloc d’alimentation se met automatiquement hors tension au bout de 10 s lorsqu’aucun
appareil n’est branché.
Avertissement concernant la connexion‚
d‘appareils
•Avant de raccorder un appareil, veuillez contrôler que ledébit de courantdu bloc
d‘alimentation est susant pour ce type d‘appareil.
•Assurez-vous que laconsommation totale de courant de l’appareilbranché ne dépasse pas
1000 mA.
•Veuillez respecter les consignesdu mode d‘emploide votre appareil.
•Veuillez impérativement respecter les indications et les consignes de sécurité mentionnées
concernant l‘alimentation en électricité de vos appareils.
11

Remarque – Optimised charging
•Une optimisation de la charge signie que le bloc d’alimentation reconnaît l’appareil
connecté, l’alimente avecla puissance électrique optimale et réduit ainsi le temps de charge
au maximum.
Veuillez noter que le courant de sortie du bloc d’alimentation est d’au maximum
1000 mA.
Avertissement
•N
anchez en aucuncas le câble de char
e br
entrée et àsa sortie. Risque de détérioration de la batterie.
•Ne connectez aucun appareil pendant le cycle de charge du bloc d‘alimentation. Risque de
détérioration du blocd‘alimentation et des appareils connectés.
5. Soins et entretien
Nettoyez le blocd‘alimentation uniquement à l’aide d’un chiffon non breux légèrement humide ;
évitez tout détergentagressif.
6. Exclusion de garantie
La société HamaGmbH & Co. KG décline toute responsabilité en cas dedommages provoqués par
une installation, unmontage ou une utilisation non conformes du produit ou encore provoqués par
un non respect des consignes du mode d‘emploi et/ou des consignes de sécurité.
7. Service et assistance
En cas dequestion concernant le produit, veuillez vousadresser au serviceaprès-vente de Hama.
Ligne téléphonique directe: +49 9091502-115 (allemand/anglais)
Vous trouverez ici de plus amplesinformations concernant l‘assistance : www.hama.com
alimentation simultanément àson
ge du blocd‘
12
8. Caractéristiques techniques
Consommation de courant 5V 1000mA
Débit de courant 5V
Type de pile 3.6V/lithium ion
Min capacité 5000mAh / 18 Wh
Type capacité 5000mAh
9. Consignes de recyclage
Remarques concernant la protection de l’environnement:
Conformément à ladirective européenne 2012/19/EU et 2006/66/CE, et an d‘atteindre
un certain nombred‘objectifs en matière de protection de l‘environnement, les règles
suivantes doivent êtreappliquées: Les appareils électriques et électroniques ainsi que les
batteries ne doiventpas être éliminésavec les déchetsménagers. Le pictogramme“picto”
présent sur leproduit, son manueld‘utilisation ou sonemballage indique que le produit
est soumis àcette réglementation. Le consommateur doit retourner le produit/la batterie usager aux
points de collecteprévus à cet effet. Il peut aussi le remettre à un revendeur. En permettant enn le
recyclage des produits ainsi que lesbatteries, le consommateur contribuera à laprotection de notre
environnement. C‘est unacte écologique.
1000mA
13

E Instrucciones de uso
Le agradecemos quese haya decididopor un productode Hama.
Tómese tiempo yléase primero lassiguientes instrucciones eindicaciones. Después, guardeestas
instrucciones de manejoen un lugar seguro para poderconsultarlas cuando seanecesario. Si vende
el aparato, entregue estas instrucciones de manejo al nuevo propietario.
1. Explicación de los símbolos de aviso y de las indicaciones
Aviso
Se utiliza paracaracterizar las indicaciones de seguridad o para llamar la atención sobre peligros
y riesgos especiales.
Nota
Se utiliza paracaracterizar informaciones adicionales o indicaciones importantes.
2. Contenido del paquete
•Universal Power Pack 5000 mAh
•Cable de carga/conexión Micro-USB
•Bolsa
•Estas instrucciones de manejo
3. Instrucciones de seguridad
•El producto es para el usodoméstico privado, no comercial.
•Utilice el producto sólo conectado a una toma de corriente autorizada. La toma de corriente debe
estar colocada cercadel producto y de forma accesible.
•Este aparato, como todos los aparatos eléctricos, no debeestar en manos de los niños.
•No deje caer el producto ni lo someta a sacudidas fuertes.
•No opere el producto fuera delos límites depotencia indicados enlos datos técnicos.
•No abra el producto y nolo siga operandode presentar deterioros.
•Deseche el material de embalaje en conformidad con las disposiciones locales sobre el desecho
vigentes.
•La pila recargable está montada de forma ja y no se puede retirar, deseche el producto como una
unidad y enconformidad con los reglamentos locales
•No realice cambios en el aparato. Esto conllevaría la pérdida de todos los derechos de la garantía.
4. Funcionamiento
4.1 Charge de la batterie
•Inicie el proceso de carga del Power Pack conectando elcable de carga/conexiónMicro USB
adjunto a laentrada Micro USB del Power Pack (IN 5V/1A) y aun cargador USBadecuado. Para
ello, tenga encuenta las instrucciones de manejo del cargador USB utilizado.
•La carga se inicia y naliza de forma automática.
•Antes de utilizar por primera vez el Power Pack, cárguelopor completo.
14

Nota – Capacidad
•La capacidad se muestra en todo momento durante el proceso de carga del Power Pack.
•Cada LED de estado se corresponde con un 25 % de la capacidad. Si un LED se muestra
iluminado de formacontinua, indica la capacidad ya alcanzada. Si se iluminan tres LEDs yel
cuarto LED parpadea,el Power Pack cuenta con una carga mínima del 75 %.
•Si se iluminan el cuatro LEDs de estado, dispone de capacidad de carga plena.
•Pulse la tecla del Power Pack para encenderlo y consultar la capacidad actual del Power Pack.
•Pulse y mantenga pulsada la tecla
Power Pack.
Aviso - Pila recargable
•Utilice sólo cargadores adecuados o conexionesUSB para cargar.
•No siga utilizando cargadores o conexionesUSB defectuosos y no intente repararlos.
•Evite almacenar, cargar y usar las pilas en condiciones de temperatura extrema.
•En caso de almacenamiento prolongado, cargue regularmente (mín. trimestralmente).
4.2 Carga de terminales
•Conecte el cable de carga/conexión microUSB adjunto con elpuerto USB del Power Pack (OUT
5V/1A) y conel puerto microUSBde su terminal(teléfono, smartphone, etc.).
•En casos concretos, es posible que el cable de carga/conexión Micro-USB adjuntono sea
compatible con elpuerto USB del terminal. En tal caso, utilice el cable USB del terminal.
•Inicie el proceso de carga pulsando la tecla del Power Pack. Durante elproceso de carga, la
capacidad restante del Power Pack se muestra a través de los LEDs de estado.
•Podrá visualizar el estado actual de la carga de su terminal en el mismo.
•Finalice el proceso de carga y apague el Power Pack pulsando la tecla del Power Pack. Los LEDs de
estado se apagan
•En caso de no conectar ningún terminal, el Power Pack se apaga automáticamente tras aprox. 10
segundos.
•Antes de conectar un terminal, compruebe si éste se puede alimentar de manera suciente con
la salida decorriente del Power Pack.
•Asegúrese de queel consumo decorriente total del terminal conectado no supera los 1000mA.
•Observe las indicaciones contenidas en las instrucciones de manejo de su terminal.
•Observe siempre los datos y las indicaciones de seguridad relativos a la alimentación de
corriente de susdispositivos contenidos en las mismas.
.
Aviso – Conexión de terminales
hasta que losLEDs de estado se apaguen para apagar el
15
 Loading...