

HAMA 00121703 User Manual

Active DVB-T2 Indoor Antenna
Aktive DVB-T2 Zimmerantenne
00
121703
Operating Instructions
Bedienungsanleitung
Mode d‘emploi
Instrucciones de uso
Руководство по эксплуатации
Istruzioni per l‘uso
Gebruiksaanwijzing
Οδηγίες χρήσης
Instrukcja obsługi
Használati útmutató
Návod kpoužití
Návod na použitie
Manual de instruções
Kullanma kılavuzu
Manual de utilizare
Bruksanvisning
Käyttöohje
GB
D
F
E
RUS
I
NL
GR
PL
H
CZ
SK
P
TR
RO
S
FIN


Pic. 1
Pic. 2a
LED ON/OFF
USB
1 3 4 2
Pic. 2b
TV
Set top box
Pic. 3a
USB
TV
Set top box
Pic. 2c
AC 220 V
USB
TV
Set top box
Pic. 3b
5 5

G Operating instruction
Thank you for choosing aHama product.
Take your time and read the following instructions and information completely.Please keep these instructions in asafe
place for futurereference. If you sellthe device, please pass
these operating instructions on to the new owner.
Controls and Displays
1. Micro-USB input
2. Antenna cable
3. Operating LED
4. On/off switch
5. Fastening screw for base /wall bracket
1. Explanation of Warning Symbols and Notes
Warning
This symbol is used to indicate safety instructions or to draw
your attention to specichazards and risks.
Note
This symbol is used to indicate additional information or
important notes.
2. Package Contents
• DVB-TIndoor Antenna
• USB cable
• Base /wall bracket
• These operating instructions
3. Safety Notes
• The product is intended for private, non-commercial use
only.
• The product is intended for indoor use only.
• Use the product for its intended purpose only.
• Protect the product from dirt, moistureand overheating and
use it in dry rooms only.
• Children should be supervised to ensurethat they do not
play with the device.
• Do not use the product in areas wherethe use of electronic
devices is not permitted.
• Connect the product only to asocket that has been approved for the device. The electrical socket must always be
easily accessible.
• Disconnect the product from the network using the power
button –ifthis is not available, unplug the power cordfrom
the socket.
• Lay all cables so that they do not pose atripping hazard.
• Do not bend or crush the cable.
• Do not drop the product and do not expose it to any major
shocks.
• Dispose of packaging material immediately according to
locally applicable regulations.
• Do not modify the device in any way.Doing so voids the
warranty.
2
Warning
• Do not use the product if the AC adapter,adapter cable or
power cable is damaged.
• Do not attempt to service or repair the device yourself.
Leave any service work to qualied experts.
• Do not open the device or continue to operate it if it
becomes damaged.
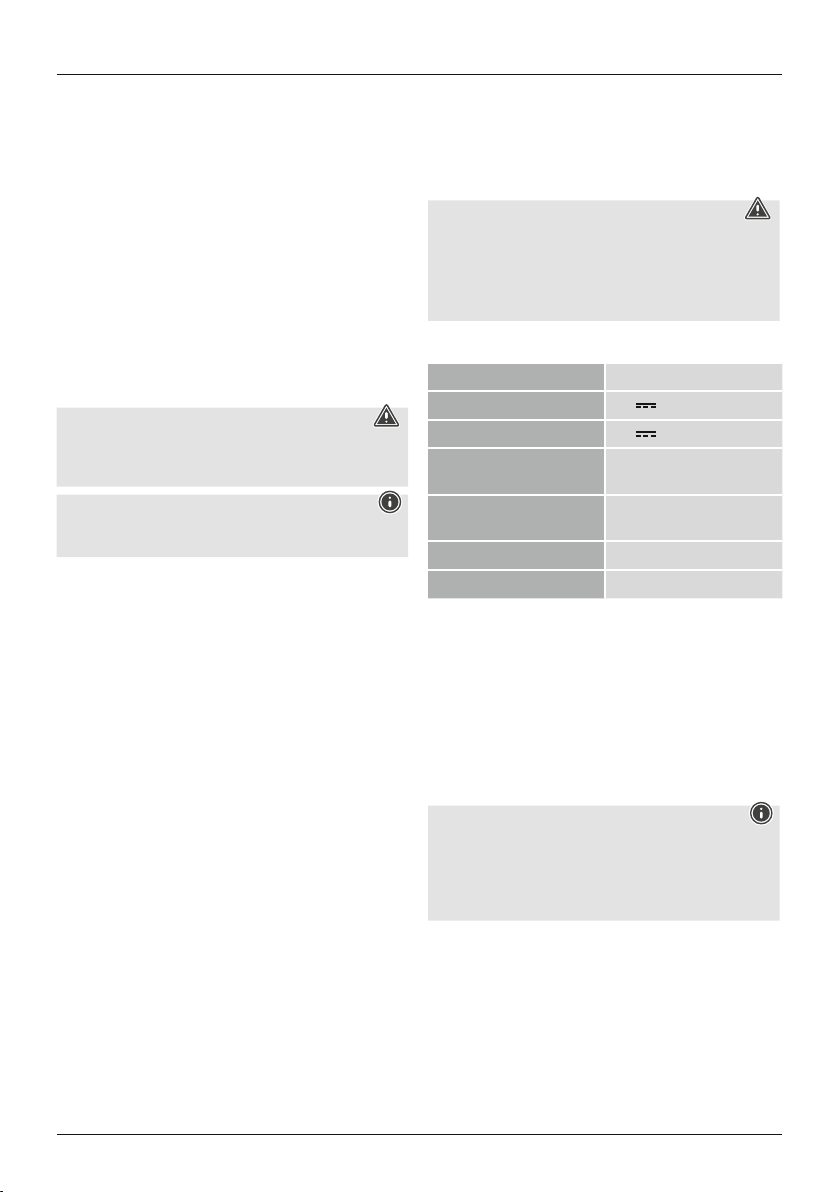
4. Specications
Rated power consumption max. 25 mA
Supply voltage antenna 5V
Power supply 5V 25 mA via USB
Frequency band(s)
Active antenna gain
Connection coax plug
Ambient temperature -20 to +40° C
5. Getting started and operation
5.1 Powering the antenna using the antenna cable
(Fig. 2a)
• Connect the coaxial cable of the antenna to the antenna
input on the digital TV or set-top box.
• Switch the antenna on using the on/off switch (4). The LED
(3) lights up.
• Switch on the digital TV (and the set-top box, if present).
Note
Powering the antenna directly from the set-top box or digital
TV requires asupply voltage of 5V.Note that the voltage of
+5 Visprovided by the set-top box and/or digital TV.Make
any necessary settings in the menu.
5.2 Powering the antenna directly using the USB port
of the digital TV /set-top box (Fig. 2b)
• Connect the coaxial cable of the antenna to the digital TV
or set-top box.
• Connect the USB cable to an unused USB port on your TV
or set-top box.
• Switch the antenna on using the on/off switch (4). The LED
(3) lights up.
• Ensurethat the set-top box or digital TV is switched on.
5.3 Powering the antenna using an external power
supply unit (Fig. 2c)
• Connect the coaxial cable of the antenna to the antenna
input on the digital TV or set-top box.
• Connect the USB cable to the antenna and to asuitable USB
power supply unit (not included) and plug the latter into a
socket.
UHF: 470 –790 MHz
VHF: 174 –230 MHz
UHF: 6–15dBi
VHF: 5–14dBi

• Switch the antenna on using the on/off switch (4). The LED
(3) lights up.
• Switch on the digital TV (and the set-top box, if present).
5.4 Standing the antenna (Pic 3a) /wall mounting (Pic 3b)
The antenna can be stood vertically or horizontally thanks to a
base that can be exibly xed in place; or it can be mounted
to awall. Release the fastening screw (5) and securethe base
with the screw in accordance with how you would like to stand
the antenna. Forwall mounting, please use suitable screws and
wall anchors (not included in the delivery package) to attach
the bracket (base) to the wall.
Note –Wall mounting
• Beforemounting, check that the wall you have chosen
is suitable for the weight to be mounted Also make sure
that thereare no electric, water,gas or other lines running
through the wall at the mounting site.
• After the product has been mounted, check that it is
suciently secure. Youshould repeat this check at regular
intervals.
5.5 TV reception
Note
Please note that the number and quality of stations received
may vary depending on the position of the antenna and
local conditions.
5.6 Radio reception:
• The antenna can also be used for DABreception.
• As most audio devices have an F-plug connection, please use
acoax socket-F socket adapter (not included).
Note
Please note that the number and quality of stations received
may vary depending on the position of the antenna and
local conditions.
6. Careand Maintenance
Only clean this product with aslightly damp, lint-free cloth and
do not use aggressive cleaning agents.
9. Recycling Information
Note on environmental protection:
After the implementation of the European Directive
2012/19/EU and 2006/66/EU in the national legal
system, the following applies: Electric and electronic
devices as well as batteries must not be disposed of
with household waste. Consumers areobliged by law to return
electrical and electronic devices as well as batteries at the end
of their service lives to the public collecting points set up for
this purpose or point of sale. Details to this aredened by the
national law of the respective country.This symbol on the
product, the instruction manual or the package indicates that a
product is subject to these regulations. By recycling, reusing the
materials or other forms of utilising old devices/batteries, you
aremaking an important contribution to protecting our
environment.
10. Declaration of Conformity
Hereby,Hama GmbH &CoKGdeclares that the radio
equipment type [00121703] is in compliance with
Directive 2014/53/EU.The full text of the EU
declaration of conformity is available at the following internet
address: www.hama.com-> 00121703-> Downloads.
7. Warranty Disclaimer
Hama GmbH &CoKGassumes no liability and provides no
warranty for damage resulting from improper installation/
mounting, improper use of the product or from failureto
observe the operating instructions and/or safety notes.
8. Service and Support
Please contact Hama Product Consulting if you have any
questions about this product.
Hotline: +49 9091 502-115 (German/English)
Further support information can be found here:
www.hama.com
3
D Bedienungsanleitung
Vielen Dank, dass Sie sich für ein Hama Produkt entschieden
haben!
Nehmen Sie sich Zeit und lesen Sie die folgenden Anweisungen und Hinweise zunächst ganz durch. Bewahren Sie diese
Bedienungsanleitung anschließend an einem sicheren Ort auf,
um bei Bedarf darin nachschlagen zu können. Sollten Sie das
Gerät veräußern, geben Sie diese Bedienungsanleitung an den
neuen Eigentümer weiter.
Bedienungselemente und Anzeigen
1. Micro-USB-Eingang
2. Antennenkabel
3. Betriebs-LED
4. Ein-/Ausschalter
5. Befestigungsschraube für Standfuß/Wandhalterung
1. Erklärung von Warnsymbolen und Hinweisen
Warnung
Wirdverwendet, um Sicherheitshinweise zu kennzeichnen
oder um Aufmerksamkeit auf besondereGefahren und
Risiken zu lenken.
Hinweis
Wirdverwendet, um zusätzlich Informationen oder wichtige
Hinweise zu kennzeichnen.
2. Packungsinhalt
• DVB-TZimmerantenne
• USB-Kabel
• Standfuß/Wandhalterung
• Diese Bedienungsanleitung
3. Sicherheitshinweise
• Das Produkt ist für den privaten, nicht-gewerblichen Haushaltsgebrauch vorgesehen.
• Das Produkt ist nur für den Gebrauch innerhalb von Gebäuden vorgesehen.
• Verwenden Sie das Produkt ausschließlich für den dazu
vorgesehenen Zweck.
• Schützen Sie das Produkt vor Schmutz, Feuchtigkeit und
Überhitzung und verwenden Sie es nur in trockenen Räumen.
• Kinder sollten beaufsichtigt werden, um sicher zu stellen,
dass sie nicht mit dem Produkt spielen.
• Benutzen Sie das Produkt nicht in Bereichen, in denen
elektronische Geräte nicht erlaubt sind.
• Betreiben Sie das Produkt nur an einer dafür zugelassenen
Steckdose. Die Netzsteckdose muss jederzeit leicht erreichbar
sein.
• Trennen Sie das Produkt mittels des Ein-/Ausschalters vom
Netz –wenn dieser nicht vorhanden ist, ziehen Sie die
Netzleitung aus der Steckdose.
• Verlegen Sie alle Kabel so, dass sie keine Stolpergefahr
darstellen.
• Knicken und quetschen Sie das Kabel nicht.
• Lassen Sie das Produkt nicht fallen und setzen Sie es keinen
heftigen Erschütterungen aus.
• Entsorgen Sie das Verpackungsmaterial sofort gemäß den
örtlich gültigen Entsorgungsvorschriften.
• Nehmen Sie keine Veränderungen am Produkt vor.Dadurch
verlieren sie jegliche Gewährleistungsansprüche.
• Verwenden Sie das Produkt nicht, wenn der AC-Adapter,das
Adapterkabel oder die Netzleitung beschädigt sind.
Warnung
• Versuchen Sie nicht, das Gerät selbst zu warten oder zu
reparieren. Überlassen Sie jegliche Wartungsarbeit dem
zuständigen Fachpersonal.
• Öffnen Sie das Produkt nicht und betreiben Sie es bei
Beschädigungen nicht weiter.
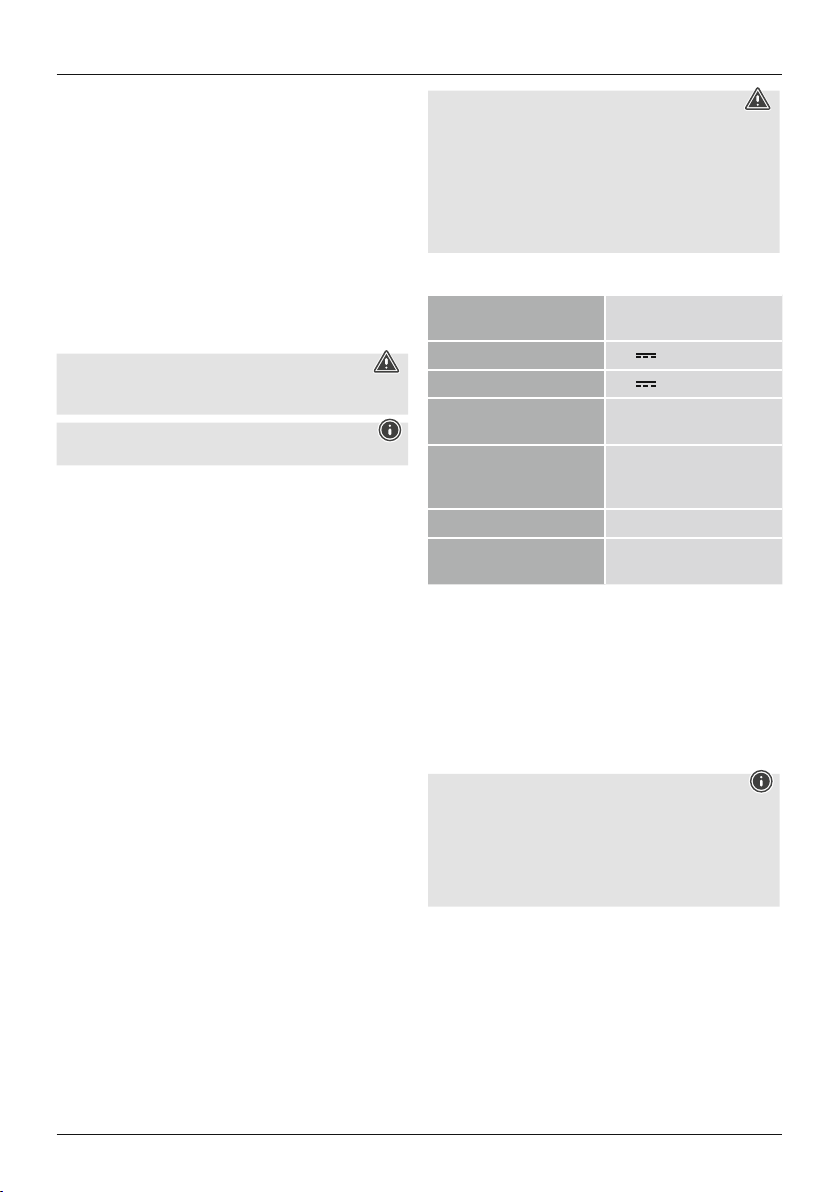
4. Technische Daten
Nennstromaufnahme max. 25 mA
Nennspannung Antenne 5V
Stromversorgung 5V 25 mA über USB
Frequenzband/
Frequenzbänder
Aktiver Antennengewinn
Anschluss Koax-Stecker
Umgebungstemperatur -20 bis +40 °C
5. Inbetriebnahme und Betrieb
5.1 Stromversorgung der Antenne über das Antennenkabel (Abb. 2a)
• Verbinden Sie das Koaxialkabel der Antenne mit dem Antenneneingang des Digitalfernsehers oder der Set-Top-Box.
• Schalten Sie die Antenne mit dem Ein-/Ausschalter (4) ein.
Die LED (3) leuchtet.
• Schalten Sie den Digitalfernseher ein (oder Set-Top-Box und
Fernseher).
Hinweis
Für die direkte Stromversorgung der Antenne über die SetTop-Box bzw.des Digitalfernsehers wirdeine Speisespannung
von 5V benötigt. Beachten Sie, dass die Spannung von +5V
durch die Set-Top-Box bzw.des Digitalfernsehers bereitgestellt werden. Eventuell Einstellungen im Menü vornehmen.
5.2
Direkte Stromversorgung der Antenne über den USB-
Anschluss des Digitalfernseher/ Set-Top-Box (Abb. 2b)
• Verbinden Sie das Koaxialkabel der Antenne mit dem Digitalfernseher oder Set-Top-Box.
• Verbinden Sie das USB-Kabel mit einem freien USB Eingang
Ihres Fernsehers oder der Set-Top-Box.
• Schalten Sie die Antenne mit dem Ein-/Ausschalter (4) ein.
Die LED (3) leuchtet.
• Stellen Sie sicher,dass die Set-Top-Box oder der Digitalfernseher) eingeschaltet ist.
UHF: 470 –790 MHz
VHF: 174 –230 MHz
UHF: 6–15dBi
VHF: 5–14dBi
4

5.3 Stromversorgung der Antenne über externes USB
Netzteil (Abb. 2c)
• Verbinden Sie das Koaxialkabel der Antenne mit dem Antenneneingang des Digitalfernsehers oder der Set-Top-Box.
• Verbinden Sie das USB-Kabel mit der Antenne und einem
geeigneten USB Netzteil (nicht im Lieferumfang enthalten)
und verbinden Sie das Netzteil mit einer Steckdose.
• Schalten Sie die Antenne mit dem Ein-/Ausschalter (4) ein.
Die LED (3) leuchtet.
• Schalten Sie den Digitalfernseher oder Set-Top-Box und
Fernseher ein.
5.4 Aufstellen (Pic 3a) /Wandmontage (Pic 3b)
Die Antenne kann dank einem variabel xierbaren Fuss im
Hoch- oder Querformat aufgestellt werden oder auch an der
Wand montiert werden. Dazu die Befestigungsschraube (5)
lösen, den Standfuss mittels der Schraube entsprechend der
gewünschten Aufstellart xieren. Bei der Wandmontage
bitte geeignete Schrauben und Dübel (nicht im Lieferumfang
enthalten) verwenden, um die Halterung (Standfuss) an der
Wand zu befestigen.
Hinweis -Wandmontage
• Prüfen Sie vor Montage die Eignung der vorgesehenen
Wand für das anzubringende Gewicht und vergewissern
Sie sich, dass sich an der Montagestelle in der Wand
keine elektrischen Leitungen, Wasser-, Gas- oder sonstige
Leitungen benden.
• Nach Montage des Produktes ist dieses auf ausreichende
Festigkeit zu überprüfen. Diese Prüfung ist regelmäßig zu
wiederholen.
5.5 Fernseh-Empfang
Hinweis
Bitte beachten Sie, dass die Anzahl und Qualität der
empfangenen Sender von der Position der Antenne und
örtlichen Gegebenheiten abhängen kann.
5.6 Radio-Empfang:
• Die Antenne kann auch für den DAB-Empfang verwendet
werden.
• Da die meisten Audiogeräte einen F-Stecker-Anschluss
haben, bitte einen Adapter Koax-Kupplung/F-Kupplung
verwenden (nicht im Lieferumfang enthalten).
Hinweis
Bitte beachten Sie, dass die Anzahl und Qualität der
empfangenen Sender von der Position der Antenne und
örtlichen Gegebenheiten abhängen kann.
6. Wartung und Pege
Reinigen Sie dieses Produkt nur mit einem fusselfreien, leicht
feuchten Tuch und verwenden Sie keine aggressiven Reiniger.
7. Haftungsausschluss
Die Hama GmbH &CoKGübernimmt keinerlei Haftung oder
Gewährleistung für Schäden, die aus unsachgemäßer Installation, Montage und unsachgemäßem Gebrauch des Produktes
oder einer Nichtbeachtung der Bedienungsanleitung und/oder
der Sicherheitshinweise resultieren.
8. Service und Support
Bitte wenden Sie sich bei Fragen zum Produkt gerne an die
Hama-Produktberatung.
Hotline: +49 9091 502-115 (Deu/Eng)
WeitereSupportinformationen nden Sie hier:
www.hama.com
9. Entsorgungshinweise
Hinweis zum Umweltschutz:
Ab dem Zeitpunkt der Umsetzung der europäischen
Richtlinien 2012/19/EU und 2006/66/EG in nationales
Recht gilt folgendes: Elektrische und elektronische
Geräte sowie Batterien dürfen nicht mit dem
Hausmüllentsorgt werden. Der Verbraucher ist gesetzlich
verpichtet, elektrische und elektronische Geräte sowie
Batterien am Ende ihrer Lebensdauer an den dafür
eingerichteten, öffentlichen Sammelstellen oder an die
Verkaufsstelle zurückzugeben. Einzelheiten dazu regelt das
jeweilige Landesrecht. Das Symbol auf dem Produkt, der
Gebrauchsanleitung oder der Verpackung weist auf diese
Bestimmungen hin. Mit der Wiederverwertung, der stoichen
Verwertung oder anderen Formen der Verwertung von
Altgeräten/Batterien leisten Sie einen wichtigen Beitrag zum
Schutz unserer Umwelt.
10. Konformitätserklärung
Hiermit erklärt die Hama GmbH &CoKG, dass der
Funkanlagentyp [00121703]der Richtlinie 2014/53/
EU entspricht. Der vollständige Text der EU-Konformitätserklärung ist unter der folgenden Internetadresse verfügbar:
www.hama.com-> 00121703
->Downloads.
5

F Mode d‘emploi
Nous vous remercions d’avoirchoisi un produit Hama.
Veuillez prendreletemps de lirel‘ensemble des remarques et
consignes suivantes. Veuillez conserver ce mode d‘emploi à
portée de main andepouvoir le consulter en cas de besoin.
Transmettez-le au nouveau propriétaireavec l’appareil le cas
échéant.
Éléments de commande et d’achage
1. Entrée microUSB
2. Câble d‘antenne
3. LED de fonctionnement
4. Interrupteur de mise sous/hors tension
5. Vis de xation pour le pied /lesupport mural
1. Explication des symboles d‘avertissement et des
remarques
Avertissement
Ce symbole est utilisé pour indiquer des consignes de
sécurité ou pour attirer votreattention sur des dangers et
risques particuliers.
Remarque
Ce symbole est utilisé pour indiquer des informations
supplémentaires ou des remarques importantes.
2. Contenu de l‘emballage
• Antenne d‘intérieur DVB-T
• Câble USB
• Pied /support mural
• Mode d‘emploi
3. Consignes de sécurité
• Ce produit est destiné àune installation domestique non
commerciale.
• Ce produit est destiné àune utilisation exclusivement à
l‘intérieur d‘un bâtiment.
• Utilisez le produit exclusivement conformément àsadesti-
nation.
• Protégez le produit de toute saleté, humidité, surchauffe et
utilisez-le uniquement dans des locaux secs.
• Les enfants doivent êtresurveillés ndegarantir qu‘ils ne
jouent pas avec le produit.
• N‘utilisez pas le produit dans les zones dans lesquelles
l‘utilisation d‘appareils électroniques est interdite.
• Branchez l‘appareil àune prise de courant appropriée.
La prise de courant doit êtrefacilement accessible àtout
moment.
• Coupez le produit du secteur àl‘aide de l‘interrupteur -
débranchez la prise de courant en cas d‘absence d‘interrupteur.
• Posez tous les câbles de telle sorte qu’ils ne présentent aucun
risque de chute.
• Faites attention ànepas plier ni coincer le câble.
• Protégez le produit des secousses violentes et évitez tout
choc ou toute chute.
• Recyclez les matériaux d’emballage conformément aux
prescriptions locales en vigueur.
• N’apportez aucune modication àl’appareil. Des modica-
tions vous feraient perdrevos droits de garantie.
Avertissement
• Cessez d‘utiliser le produit si l‘adaptateur CA,lecâble
adaptateur ou le câble d‘alimentation est endommagé.
• Ne tentez pas de réparer l’appareil vous-même ni
d’effectuer des travaux d’entretien. Déléguez tous travaux
d‘entretien àdes techniciens qualiés.
• Ne tentez pas d‘ouvrir le produit en cas de détérioration et
cessez de l’utiliser.
4. Caractéristiques techniques
Courant nominal 25 mA maxi
Tension nominale
antenne
Alimentation en
électricité
Bandes de fréquences
Gain d‘antenne actif
Connexion che coaxiale mâle
Températureambiante
5. Mise en service et fonctionnement
5.1 Alimentation électrique de l’antenne àl’aide du
câble d’antenne (g. 2a)
• Raccordez le câble coaxial de l’antenne àl’entrée antenne du
téléviseur numérique ou du décodeur (set top box).
• Mettez l’antenne sous tension àl’aide de l’interrupteur (4). La
LED (3) s’allume.
• Allumez le téléviseur numérique (ou le décodeur et le
téléviseur).
Remarque
Une tension d’alimentation de 5Vest nécessairepour
alimenter l’antenne directement via le décodeur (set top
box) ou le téléviseur numérique. Notez qu’une tension de +
5Vest fournie par le décodeur (set top box) /letéléviseur
numérique. Vous devrez éventuellement procéder àdes
réglages dans le menu.
5V
5V
25 mA via USB
UHF: 470 –790 MHz
VHF: 174 –230 MHz
UHF: 6–15dBi
VHF: 5–14dBi
de -20 à+40 °C
6
5.2 Alimentation électrique directe de l’antenne via la
prise USB du téléviseur numérique /dudécodeur (set
top box) (g. 2b)
• Raccordez le câble coaxial de l’antenne au téléviseur numérique ou au décodeur (set top box).
• Branchez le câble USB àunport USB libredevotretéléviseur ou du décodeur (set top box).
• Mettez l’antenne sous tension àl’aide de l’interrupteur (4).
La LED (3) s’allume.
• Assurez-vous que le décodeur (set top box) ou le téléviseur
numérique est activé.
5.3 Alimentation électrique de l’antenne àl’aide du
bloc secteur USB externe (g. 2c)
• Raccordez le câble coaxial de l’antenne àl’entrée antenne
du téléviseur numérique ou du décodeur (set top box).
• Branchez le câble USB àl’antenne et àunbloc secteur USB
adapté (non fourni) et branchez ce dernier àune prise de
courant.
• Mettez l’antenne sous tension àl’aide de l’interrupteur (4).
La LED (3) s’allume.
• Allumez le téléviseur numérique ou le décodeur (set top box)
et le téléviseur.
5.4 Mise en place (g. 3a) /installation murale (g. 3b)
La xation du pied permet de placer l’antenne àlaverticale
ou l’horizontale ou encoredel’installer àunmur.Pour
installerl’antenne,desserrez la vis de xation (5), puis xez le
pied dans la position souhaitée àl’aide de la vis de xation.
Pour une xation murale, utilisez des vis et des chevilles (non
fournies) pour xer le support (pied) au mur.
Remarque concernant l’installation murale
• Avant l‘installation, vériez que le mur prévu pour
l‘installation dispose d‘une force portante susante et
qu‘aucune conduite d‘électricité, d‘eau, de gaz ni aucune
autreconduite ne passe dans cette partie de la cloison.
• Contrôlez la solidité de la xation du produit après son
installation. Réitérez régulièrement ce contrôle.
5.5 Réception télévisuelle
Remarque
Veuillez noter que le nombred‘émetteurs reçus et leur
qualité de réception sont susceptibles de dépendredela
position de l‘antenne et de la conguration des lieux.
5.6 Réception radio :
• L’antenne peut également êtreutilisée pour la réception DAB.
• Comme la plupart des appareils audio disposent d’une che
àconnecteur F, veuillez utiliser un adaptateur che coaxiale
femelle – che F(non fourni).
Remarque
Veuillez noter que le nombred‘émetteurs reçus et leur
qualité de réception sont susceptibles de dépendredela
position de l‘antenne et de la conguration des lieux.
6. Soins et entretien
Nettoyez la balance uniquement àl’aide d’un chiffon non
breux légèrement humide ;évitez tout détergent agressif.
7. Exclusion de garantie
La société Hama GmbH &CoKGdécline toute responsabilité
en cas de dommages provoqués par une installation, un
montage ou une utilisation non conformes du produit ou
encoreprovoqués par un non respect des consignes du mode
d‘emploi et/ou des consignes de sécurité.
8. Service et assistance
En cas de question concernant le produit, veuillez vous adresser au service de conseil produits de Hama.
Ligne téléphonique directe :+49 9091 502-115
(allemand/anglais)
Vous trouverez ici de plus amples informations concernant
l‘assistance :www.hama.com
9. Consignes de recyclage
Remarques concernant la protection de l’environne-
ment:
Conformément àladirective européenne 2012/19/EU
et 2006/66/CE, et and‘atteindreuncertain nombre
d‘objectifs en matièredeprotection de l‘environne-
ment, les règles suivantes doivent êtreappliquées:
Les appareils électriques et électroniques ainsi que les
batteries ne doivent pas êtreéliminés avec les déchets
ménagers. Le pictogramme “picto” présent sur le produit, son
manuel d‘utilisation ou son emballage indique que le produit
est soumis àcette réglementation. Le consommateur doit
retourner le produit/la batterie usager aux points de collecte
prévus àcet effet. Il peut aussi le remettreàunrevendeur.En
permettant ennlerecyclage des produits ainsi que les
batteries, le consommateur contribueraàlaprotection de
notreenvironnement. C‘est un acte écologique.
10. Déclaration de conformité
Le soussigné, Hama GmbH &CoKG, déclareque
l‘équipement radioélectrique du type [00121703]est
conforme àladirective 2014/53/UE. Le texte complet
de la déclaration UE de conformité est disponible àl‘adresse
internet suivante:
www.hama.com-> 00121703
->Downloads.
7

E Instrucciones de uso
Le agradecemos que se haya decidido por un producto de
Hama.
Tómese tiempo yléase primerolas siguientes instrucciones e
indicaciones. Después, guarde estas instrucciones de manejo
en un lugar seguroparapoder consultarlas cuando sea
necesario. Si vende el aparato, entregue estas instrucciones de
manejo al nuevo propietario.
Elementos de manejo eindicadores
1. Entrada micro-USB
2. Cable de antena
3. Led de funcionamiento
4. Interruptor On/Off
5. Tornillo de jación parapie/soporte de pared
1. Explicación de los símbolos de aviso ydelas
indicaciones
Aviso
Se utiliza paracaracterizar las indicaciones de seguridad o
parallamar la atención sobrepeligros yriesgos especiales.
Nota
Se utiliza paracaracterizar informaciones adicionales o
indicaciones importantes.
2. Contenido del paquete
• Antena TDTinterior
• Cable USB
• Pie/soporte de pared
• Estas instrucciones de manejo
3. Instrucciones de seguridad
• El producto es paraeluso doméstico privado, no comercial.
• El producto está diseñado sólo paraeluso dentrode
edicios.
• Emplee el producto exclusivamente paralafunción parala
que fue diseñado.
• Proteja el producto de la suciedad, la humedad yel
sobrecalentamiento yutilícelo sólo en recintos secos.
• Se debe vigilar alos niños paraasegurarse de que no juegan
con el aparato.
• No utilice el producto en áreas donde no se permitan
aparatos electrónicos.
• Utilice el producto sólo en una toma de corriente autorizada.
La toma de corriente debe estar fácilmente accesible en todo
momento.
• Desconecte el producto de la redeléctrica mediante el
interruptor on/off –denoexistir éste, desenchufe el cable
eléctrico de la toma de corriente.
• Tienda todos los cables de modo que no constituyan un
peligrodetropezar.
• No doble ni aplaste el cable.
• No deje caer el producto ni lo someta asacudidas fuertes.
• Deseche el material de embalaje en conformidad con las
disposiciones locales sobreeldesecho vigentes.
• No realice cambios en el aparato. Esto conllevaría la pérdida
de todos los derechos de la garantía.
Aviso
• No utilice el producto si el adaptador de AC,eladaptador
del cable oelcable eléctrico están dañados.
• No intente mantener oreparar el aparato por cuenta
propia. Encomiende cualquier trabajo de mantenimiento
al personal especializado competente.
• No abraelproducto ynolosiga operando de presentar
deterioros.
4. Datos técnicos
Consumo nominal de
corriente
Tensión de red antena 5V
Alimentación de
corriente
Banda obandas de
frecuencia
Ganancia de antena
activa
Conexión Conector coaxial
Temperaturade
funcionamiento
5. Puesta en marcha yfuncionamiento
5.1 Alimentación de corriente de la antena através de
la fuente de alimentación (fig. 2a)
• Conecte el cable coaxial de la antena con la entrada de
antena del televisor digital odel decodicador.
• Encienda la antena con el interruptor On/Off (4). El LED (3)
se ilumina.
• Encienda el televisor digital (o la combinación de
decodicador ytelevisor).
Nota
Para alimentar con corriente la antena de forma directa
mediante el decodicador oeltelevisor digital, se requiere
una tensión de alimentación de 5V.Asegúrese de que el
decodicador oeltelevisor digital proporcionan la tensión
de +5 V. Si es necesario, realice las conguraciones en el
menú.
5.2 Alimentación de corriente de la antena directa
mediante la conexión USB del televisor digital/
decodificador (fig. 2b)
• Conecte el cable coaxial de la antena alaentrada de antena
del televisor digital odel decodicador.
• Conecte el cable USB con una entrada USB libredel televisor
odel decodicador.
máx. 25 mA
5V 25 mA vía USB
UHF: 470 –790 MHz
VHF: 174 –230 MHz
UHF: 6–15dBi
VHF: 5–14dBi
-20 a+40 °C
8

• Encienda la antena con el interruptor On/Off (4). El LED (3)
se ilumina.
• Asegúrese de que el decodicador odel televisor digital está
conectado.
5.3 Alimentación de corriente de la antena mediante
fuente de alimentación USB externa (fig. 2c)
• Conecte el cable coaxial de la antena con la entrada de
antena del televisor digital odel decodicador.
• Conecte el cable USB alaantena yauna fuente de
alimentación USB adecuada (no incluida en el volumen de
suministro) yconecte esta aunenchufe.
• Encienda la antena con el interruptor On/Off (4). El LED (3)
se ilumina.
• Encienda el televisor digital olacombinación de
decodicador ytelevisor.
5.4 Instalación (fig. 3a) /instalación en la pared (fig. 3b)
La antena se puede instalar en formato vertical uhorizontal
oenlapared gracias auna base que se puede jar de forma
variable. Aoje el tornillo de jación (5) y je el soporte con el
tornillo según el tipo de montaje deseado. Para el montaje en
la pared, emplee tornillos ytacos adecuados (no incluidos en
el volumen de suministro) para jar el soporte (pie) alapared.
Nota: montaje en la pared
• Es necesario que compruebe antes del montaje que la
pared elegida puede soportar el peso que se va amontar.
Asimismo, asegúrese de que por el punto de montaje
no pasan cables eléctricos, tuberías de agua, gas ode
cualquier otrotipo.
• Una vez nalizado el montaje del producto, se
debe comprobar la rmeza del mismo. Repita esta
comprobación de forma regular.
5.5 Recepción de televisor
Nota
Recuerde que el númeroylacalidad de las emisoras
recibidas puede depender de la posición de la antena yde
las condiciones locales.
5.6 Recepción de radio:
• La antena se puede utilizar también pararecepción DAB.
• Como la mayoría de los dispositivos de audio tiene
una conexión de conector F, utilice un adaptador de
acoplamiento coaxial/acoplamiento F(no incluido en el
volumen de suministro).
Nota
Recuerde que el númeroylacalidad de las emisoras
recibidas puede depender de la posición de la antena yde
las condiciones locales.
6. Mantenimiento ycuidado
Limpie este producto sólo con un paño ligeramente
humedecido que no deje pelusas ynoutilice detergentes
agresivos.
7. Exclusión de responsabilidad
Hama GmbH &CoKGno se responsabiliza ni concede
garantía por los daños que surjan por una instalación,
montaje omanejo incorrectos del producto opor la no
observación de las instrucciones de manejo y/o de las
instrucciones de seguridad.
8. Servicio ysoporte
Si tiene que hacer alguna consulta sobreelproducto, diríjase
al asesoramiento de productos Hama.
Línea directa: +49 9091 502-115 (Alemán/Inglés)
Encontrar más información de soporte aquí:
www.hama.com
9. Instrucciones paradesecho yreciclaje
Nota sobrelaprotección medioambiental:
Después de la puesta en marcha de la directiva
Europea 2012/19/EU y2006/66/EU en el sistema
legislativo nacional, se aplicaralosiguiente: Los
aparatos eléctricos yelectrónicos, así como las
baterías, no se deben evacuar en la basuradoméstica. El
usuario está legalmente obligado allevar los aparatos
eléctricos yelectrónicos, así como pilas ypilas recargables,
al nal de su vida útil alos puntos de recogida comunales
oadevolverlos al lugar donde los adquirió. Losdetalles
quedaran denidos por la ley de cada país. El símbolo en
el producto, en las instrucciones de uso oenelembalaje
hace referencia aello. Gracias al reciclaje, al reciclaje del
material oaotras formas de reciclaje de aparatos/pilas
usados, contribuye Usted de forma importante ala
protección de nuestromedio ambiente.
10. Declaración de conformidad
Porlapresente, Hama GmbH &CoKG, declaraque el
tipo de equipo radioeléctrico [00121703] es
conforme con la Directiva 2014/53/UE. El texto
completo de la declaración UE de conformidad está disponible
en la dirección Internet siguiente:
www.hama.com-> 00121703-> Downloads.
9
R Руководство по эксплуатации
Благодарим за покупку изделия фирмы Hama.
внимательно ознакомьтесь снастоящей инструкцией.
Храните инструкцию внадежном месте для справок вбудущем. Вслучае передачи изделия другому лицу приложите
иэту инструкцию.
Органы управления ииндикации
1. Разъем Micro-USB
2. Антенный кабель
3. Светодиодный индикатор режима работы
4. Вкл/Выкл
5. Крепежный винт для подставки/настенногодержателя
Предупредительные пиктограммы иинструкции
1.
Внимание
Данным значком отмечены инструкции, несоблюдение
которых можетпривести копасной ситуации.
Примечание
Дополнительная или важная информация.
2. Комплект поставки
• Комнатная антенна DVB-T
• USB-кабель
• Подставка/настенный держатель
• Настоящая инструкция
3. Техника безопасности
• Изделие предназначено только для домашнего применения.
• Запрещается эксплуатировать вне помещений.
• Запрещается использовать не по назначению.
• Беречь от грязи, влаги иперегрева. Эксплуатировать
только всухих помещениях.
• Не оставлять детей без присмотра во избежание их
доступа кустройству.
• Не применять взапретных зонах.
• Разрешается подключать только ксоответствующей
розетке электросети. Розетка электросети должна быть
легко доступна.
• Отключать спомощью выключателя электросети, апри
его отсутствии вытащить провод из розетки.
• Кабели не должны создавать помехи перемещению
людей.
• Кабель не сгибать инезажимать.
• Не ронять. Беречь от сильных ударов.
• Утилизировать упаковку всоответствии сместными
нормами.
• Запрещается вносить изменения вконструкцию. Впротивном случае гарантийные обязательства аннулируются.
Внимание
• Запрещается эксплуатация при неисправном блоке
питания или поврежденном кабеле питания.
• Запрещается самостоятельно ремонтировать
устройство. Ремонт разрешается производить только
квалифицированному персоналу.
• Изделие не открывать. Запрещается эксплуатировать
неисправное изделие.
4. Технические характеристики
Номинальный ток
потребления
Напряжение антенна 5 В
Питание 5 В 25 мА через USB
Диапазон/диапазоны
частот
Активный
коэффициент усиления
антенны
Подключение Коаксиальный штекер
Температура
окружающей среды
5. Ввод вэксплуатацию иэксплуатация
5.1 Питание антенны через антенный кабель (рис.2a)
• Подключите коаксиальный кабель антенны кантенному
входу цифрового телевизора или телевизионной приставки.
• Включите антенну (4). Светодиодный индикатор (3)
загорится.
• Включите цифровой телевизор (или телевизионную
приставку ителевизор).
Примечание
Для прямогопитания антенны через телевизионную
приставку или цифровой телевизор требуется
напряжение 5 В. Обратите внимание, чтонапряжение
+5Вобеспечивается приставкой или цифровым
телевизором. При необходимости выполните настройки
вменю.
5.2
Прямое питание антенны через USB-разъем циф-
рового телевизора/телевизионной приставки (рис.2b)
• Подключите коаксиальный кабель антенны кцифровому
телевизору или телевизионной приставке.
• Подключите USB-кабель ксвободному разъему USB
телевизора или телевизионной приставки.
• Включите антенну (4). Светодиодный индикатор (3)
загорится.
• Включите питание телевизионной приставки или цифрового телевизора.
макс.25мА
UHF: 470 –790
VHF: 174 –230
UHF: 6–15дБи
VHF: 5–14дБи
от -20 до +40 °C
МГц
МГц
10
 Loading...