

Haier WQP12-ABM2 User Manual
600mm
820mm
600mm
open
Electrical,drain and
water supply line entrances must be confined to shaded areas
to avoid interference
with components.
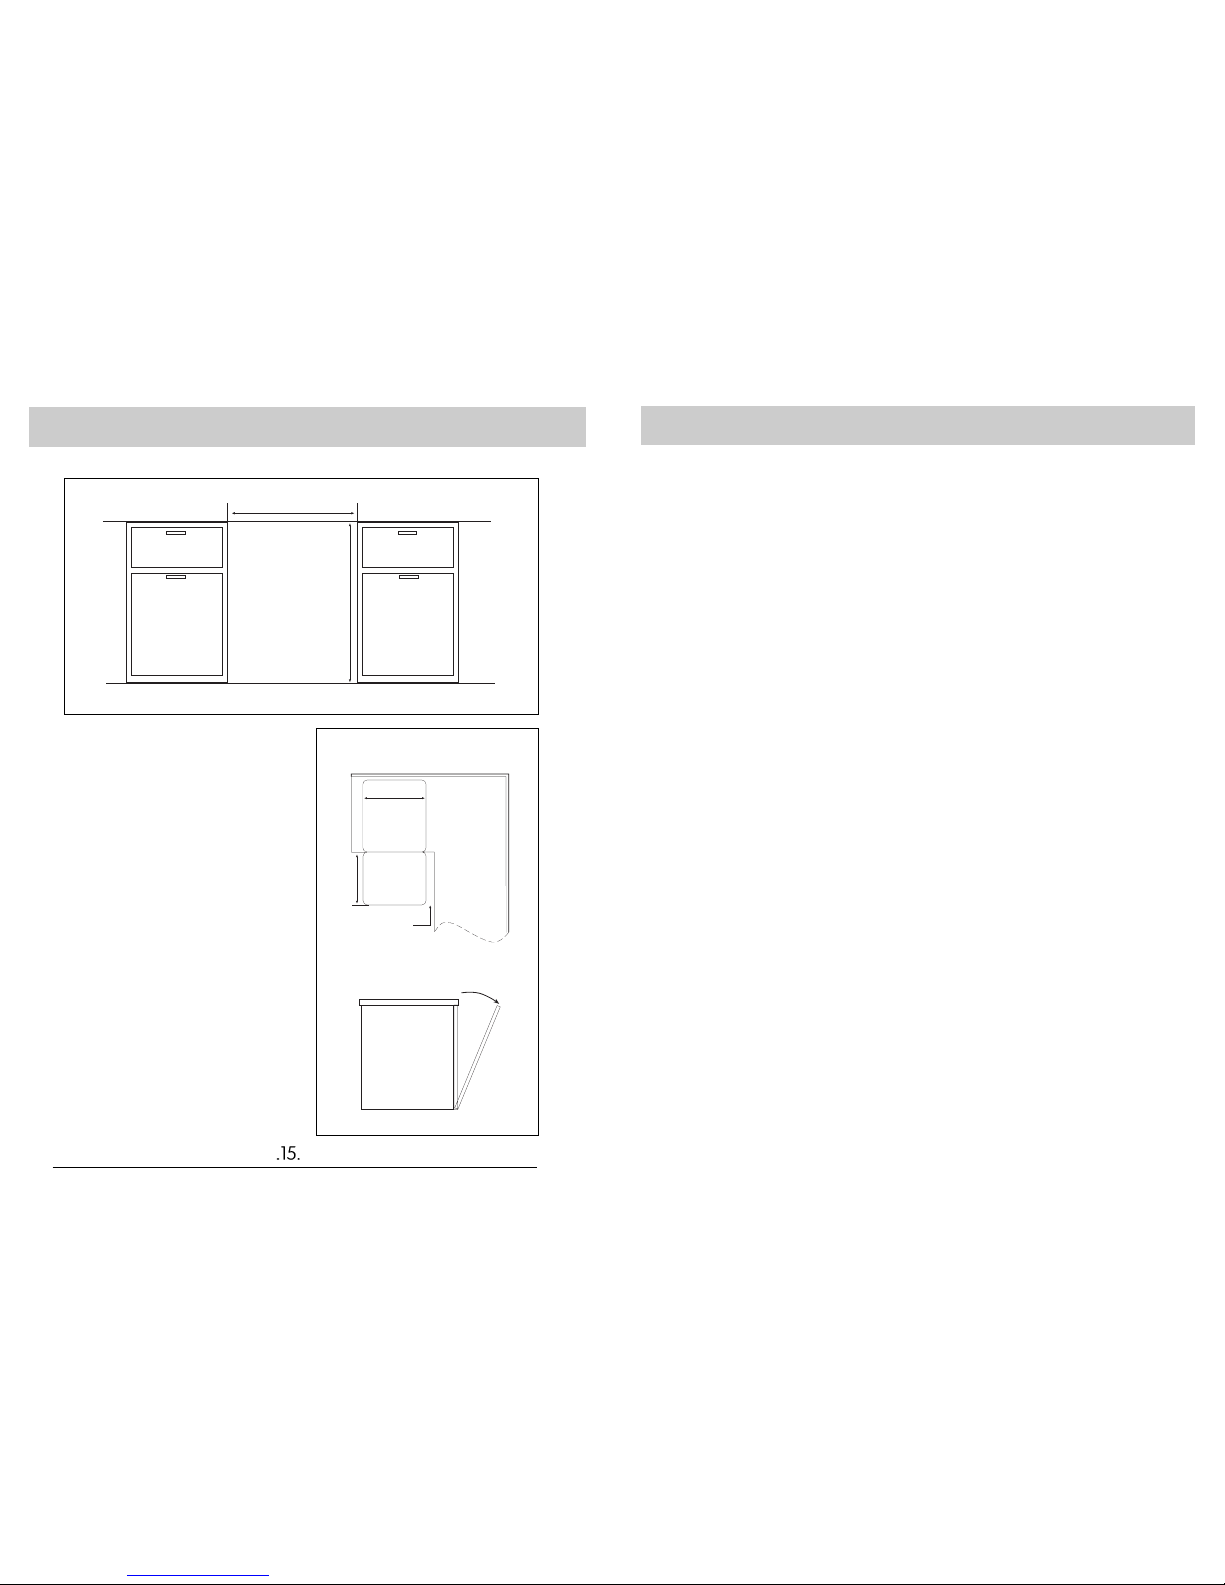
Most of the installation work should be done before the dishwasher is moved into place .First,select a location as close to the sink as possible for
ready access to water and drain lines. For proper
operation and appearance of the dishwasher,the
cabinet opening should be square and have dimensions as shown in Fig. 1.lf the dishwasher is to be
installed in a corner,there must be sufficient clearance to open the door as shown in Fig. 2.A minimum clearance of 2" is recommended.
Rough-in the water,electrical,and drain lines before
proceeding with the installation. The lines should
run straight to their connections on the dishwasher.
Note:Make sure that the lines do not cross in
front of the dishwasher motor or its legs.
Fig.1.
Fig.2.
Installation
Installation
Positioning the Appliance
Positioning the appliance in the desired
location.The back should rest against the wall
behind it,and the sides,along the adjacent cabinets or wall.The dishwasher is equipped with
water supply and drain hoses that can be positioned to the right or the left to facilitate proper
installation.
Levelling the Appliance
Once the appliance is positioned,adjust the
feet (screwing them in or out) to adjust the
dishwasher,making it level.In any case,the appliance should not be inclined more than 2
.
If the appliance is level,it will help ensure
proper performance.
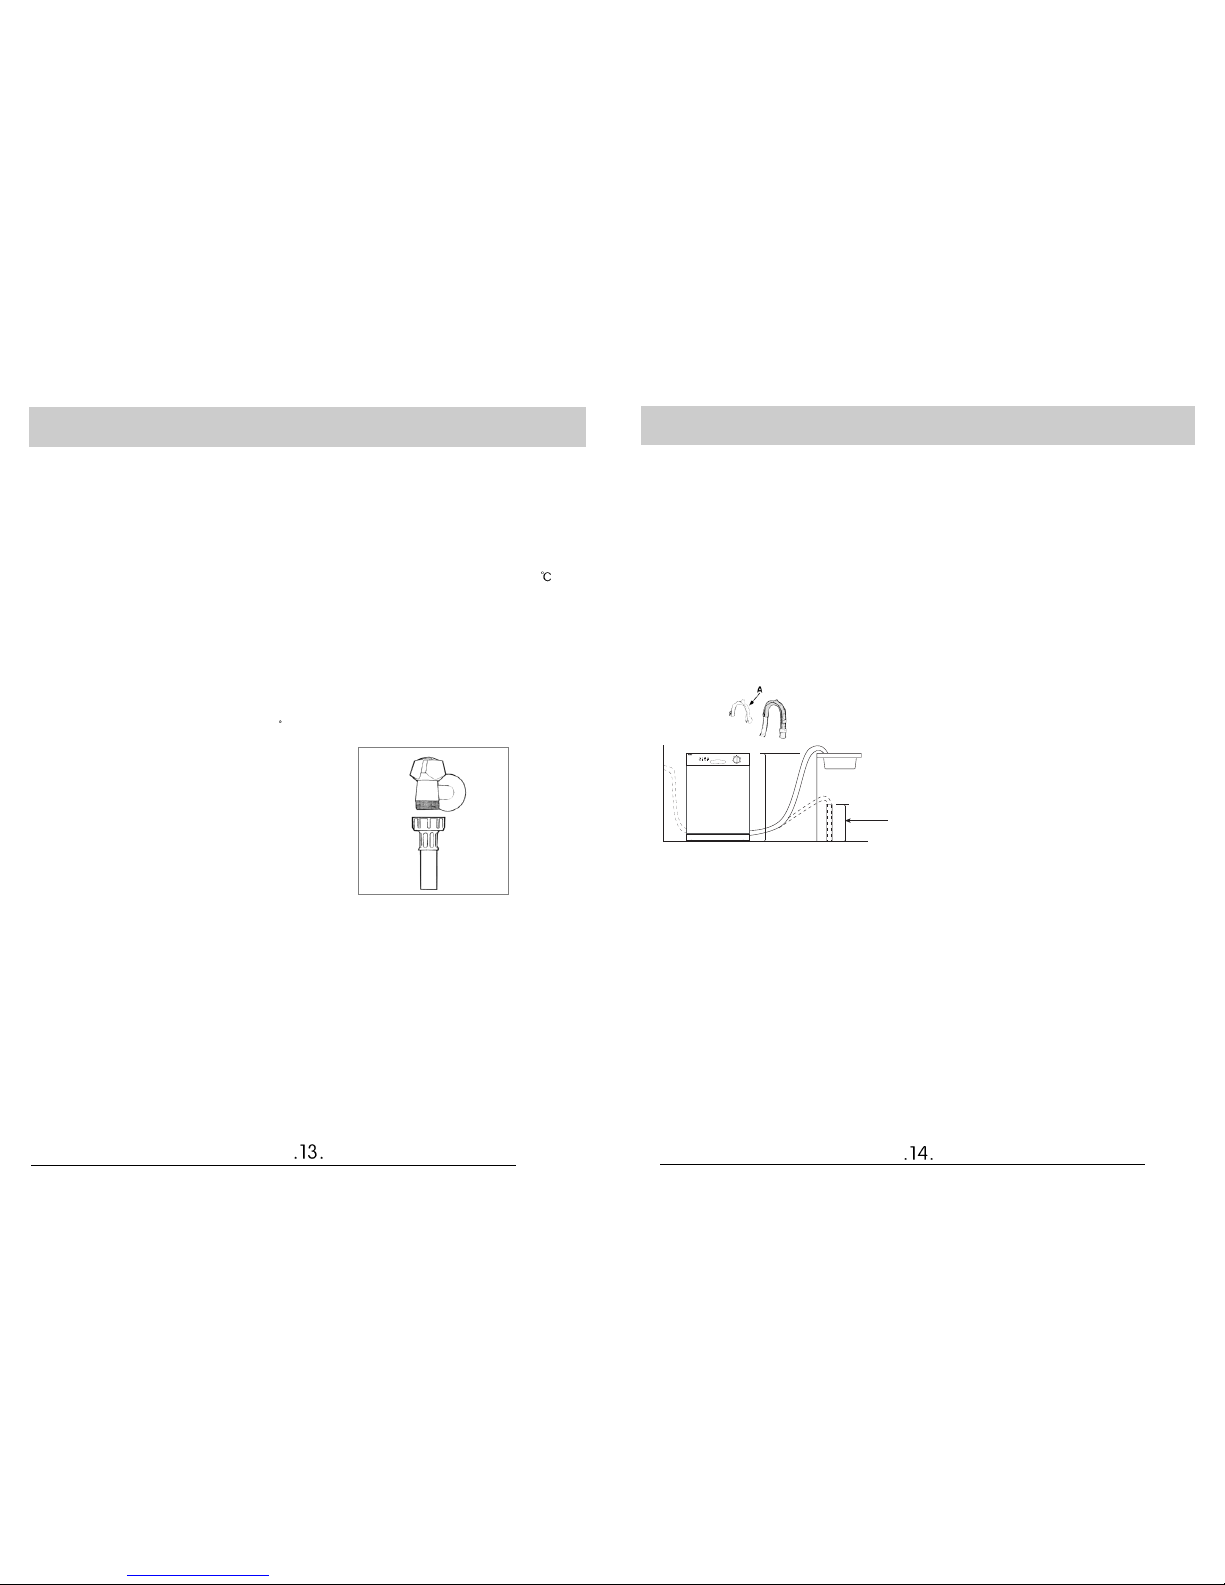
Cold Water Connection
Connect the cold water supply hose to a
threaded 3/4(gas)connector and make sure
that it is fastened tightly in place (see fig.1/A).
SOme models have an "Acquablock" water
supply pipe (see fig.1/B) with filter in the
threaded inlet.
If the water pipes are new or have not been
used for an extended period of time,let the
water run to make sure that the water is clear
and free of impurities.If this precaution is not
taken,there is a risk that the water inlet can
get blocked and damage the appliance.
Drain Hose Connection
Insert the drain hose into a drain pipe with a
minimum diameter of 4cm,Or let it run into
the sink,making sure to avoid bending or
crimping it.Use the speical plastic support that
comes with the appliance (see fig .C).The free
end of the hose must be at a height between
40 and 100 cm and must not be immersed in
water.
Attention:
The special plastic hose support must be solidly fastened to the wall to prevent the drain
hose from moving and allowing water to spill
outside the drain.
Electrical Connection
After making sure that the voltage and
frequency values for the current in the home
correspond to those on the rating plate
(located on the staunless steel inner door of
the appliance) and that the electrical system
is sizedd for the maximum voltage on the rating plate,insert the plug into an electrical
socket which is earthed properly (the earthing
of the appliance is a safety requirement mandated by law).
If the electrical socket to which the appliance
must beconnected is not appropriate for the
plug,replace the plug ,rather than using
adpators or the like as they could cause overheating and burns.
Installation
Hot Water Connection
The water supply to the appliance can also be
connected to the house's hot water line
(centralised system,heating system),as long as
it does not exceed a temperature of 60
.
In this case,the wash cycle time will be shortened by about 15 minutes and the wash efficiency slightly reduced.
The connection must be made to the hot water
line following the same procedures as those
for the connection to the cold water line.
MAX 100 MIN 4
0
S
WQP12-ABM2
ONOFF
R
fig.C
1/ B
1/A
Cleaning and Special Maintenance
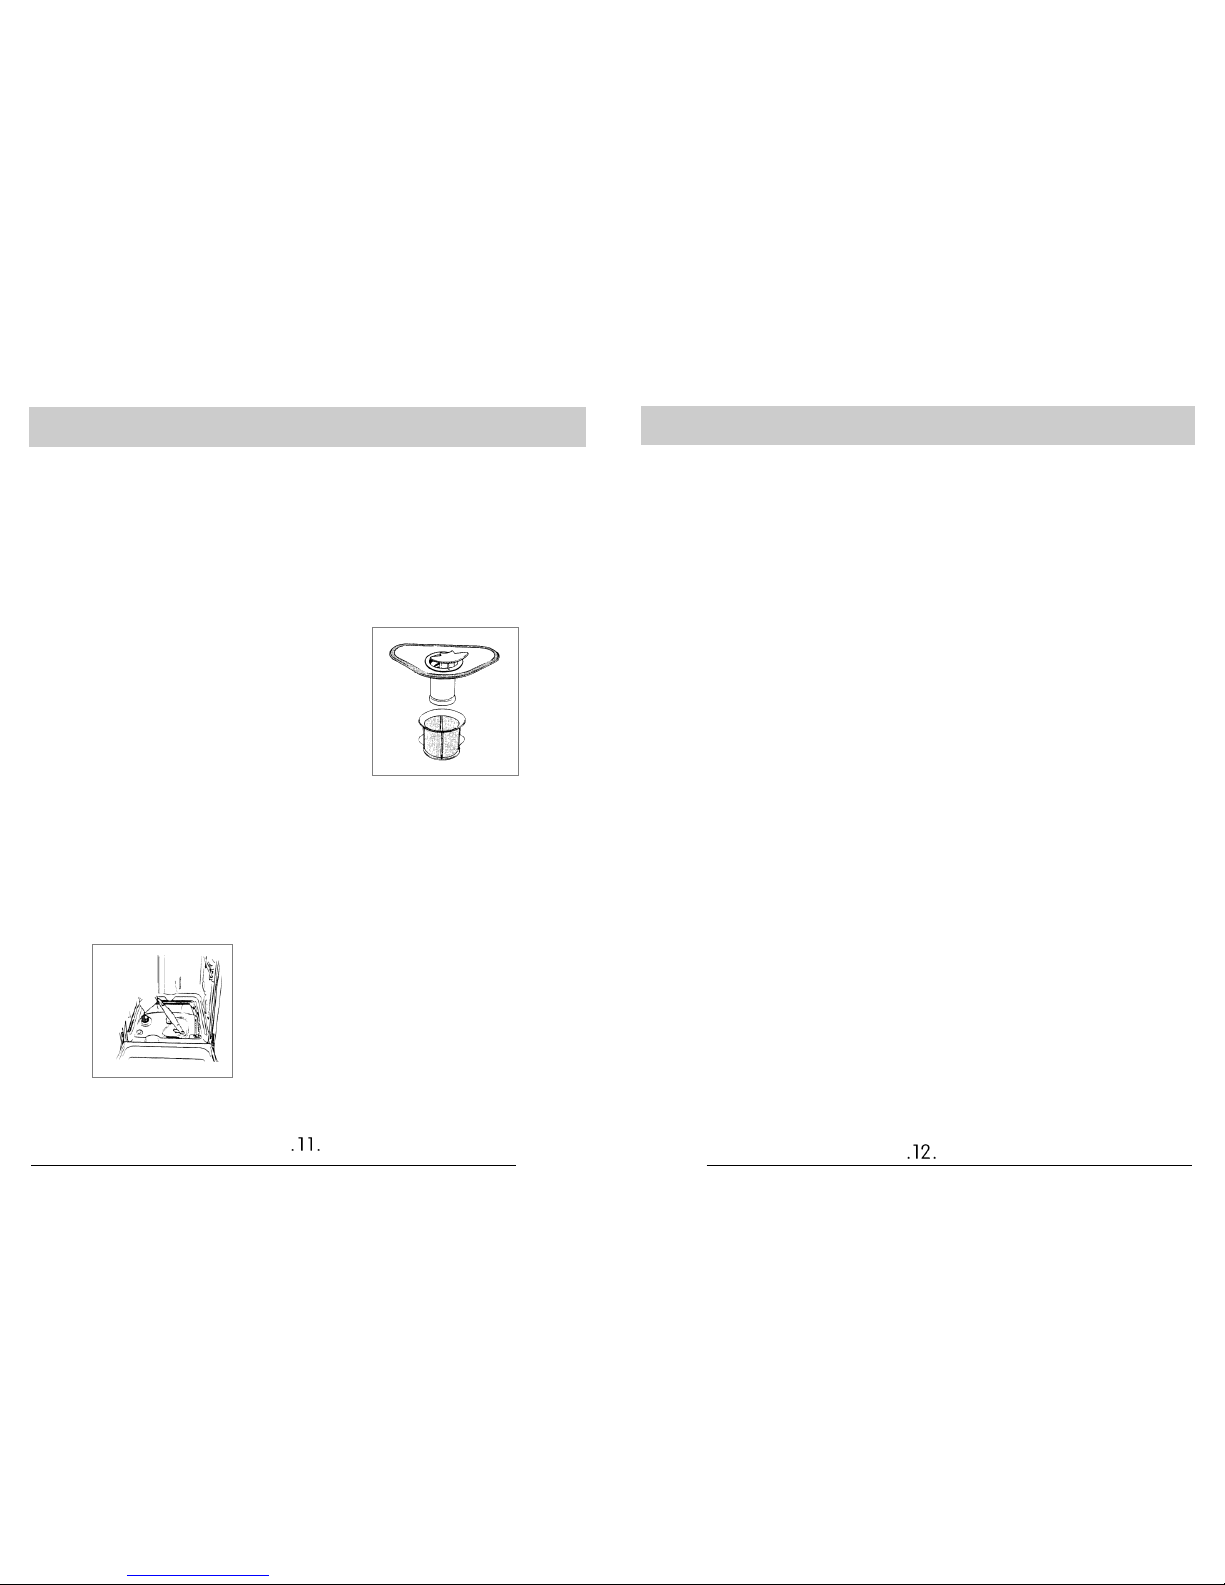
Filter Assembly
For best performance and results, the filter assembly must be cleaned.
The filter efficiently removes food particles
from the wash water,allowing it to be recirculated during the cycle.For this reason ,it is a
good idea to remove the larger food particles
trapped in the filter after each wash cycle by
rinsing the"A"semi-circular filter and cup under running water.To remove the filter
assembly,pull on the cup handle in the upward
direction. The entire filter assembly (made up
of the "A" semicircular filter and the"B" fine
filter)should be cleaned at ;least once a month.
To clean the filter and the fine filter,use a cleaning brush .Then,reassemble the filter parts as
shown in the figures below and reinsert the
entire aseembly in the dishwasher,positioning
in its seat and pressing downward.
The dishwasher must never be used without
the filters.Improper replacement of the filters
may reduce level of the appliance and damage dishes and utensils.
Cleaning the Sprayer Arms
It may happen that food particle become encrusted on the sprayer arms and block the
hole. Check the sprayer arms periodically and
clean them when needed. (see "Close up view
[interior]",letters C-E ).
Troubleshooting
It may occur that the dishwasher does not
function or dows not function properly.Before
calling for assistance,Iet us see what can be
done first:have you forgot to press one of the
buttons or to perfom an essential operation?
The Dishwasher Does Not Start
Have you checked whether:
- the plug is pushed into the socket correctly;
- the power is on in the house;
- the door is closed properly;
- the ON-OFF swith is on "ON";
- the water supply is turned on.
The Dishwasher Does Not Load Water
Have you checked whether:
- the water is turned on and the hose is
connected properly;
- the water supply to the house on and has
sufficient pressure;
- the water supply hose is crimped or bent;
- the filter for the water supply hose is clogged.
The Dishes Are Not Clean
Have you checked whether:
- the water is turned on and the hose is
connected properly;
- the water supply to the house on and has
sufficient pressure;
- the water supply hose is crimped or bent;
- the filter for the water supply hose is clogged.
The Dishwasher Does Not Drain
Have you checked whether:
- the drain hose is crimped or bent.
Lime Deposits or a White Film Form on
the Dishes
Have you checked whether:
- the lid to the salt container is closed properly;
- the rinse aid dosage is correct.
If,despiste all these checks,the dishwasher still
does not function and/or the problem persists,
contact the nearest authorised service centre
and provide them with the following
information:
- the nature of the problem;
- the model type number (Mod...)and the
serial number (S/N...),which are indicated on
the plate located on the side of the inner part
of the door.
Never call on unauthorised technicians
and refuse to allow parts to be installed
that are not original spare parts.
A
B
Cleaning the Water Inlet Filter
Periodically clean the water inlet filter(see figure 1/A) located on the outlet of the water supply tap.
After turning off the water tap, unscew the end
of the water supply hose,remove the filter and
clean it carefully under running water.Then,
return the filter to its place and tighten the water
supply hose back into position.
 Loading...