

Page 1
Hot and Cold Water Dispenser
Chaude ou Froide Distributeur d'Eau
Fría y Caliente Urtidor de Agua
User Manual
Guide de l’Utilisateur
Manual del Usuario Modelo
WDNS32BW
WDNS115BW
Quality n Innovation n Style
Page 2

English
SAFETY PRECAUTIONS
When using this appliance, always exercise basic safety
precautions, including the following:
1. Read all of the instructions before using this appliance.
2. Use this appliance only for its intended purpose as described in this use and
care guide.
3. This water dispenser must be properly installed in accordance with the
installation instructions before it is used. See the grounding instructions in the
installation section.
4. Never unplug your water dispenser by pulling on the power cord. Always
grasp the plug firmly and pull straight out from the outlet.
5. Repair or replace immediately, all electric service cords that have become
frayed or otherwise damaged. Do not use a cord that shows cracks or
abrasion damage along its length, on the plug or at the connector end.
6. Unplug your water dispenser before cleaning and making any repairs.
Note: If for any reason this product requires service, we strongly
recommend that a certified technician perform the service.
7. This water dispenser should not be recessed or built into an enclosed
cabinet. It is designed for freestanding installation only.
8. This appliance is designed for INDOOR USE ONLY and should not be
used outdoors.
9. Do not operate your water dispenser in the presence of explosive fumes.
10. Close supervision is necessary when any appliance is used by or
near children.
11. To protect against electric shock, do not immerse the cord, plug, or any other
part of the water dispenser in water or other liquids.
SAVE THESE INSTRUCTIONS
Thank you for purchasing our Haier
product. This easy-to-use manual
will guide you in getting the best
use of your water dispenser.
Remember to record the model and
serial number. They are on a label
in back of the unit.
Staple your receipt to your manual. You will need it to obtain
warranty service.
1
Model number
Serial number
Date of purchase
Page 3

TABLE OF CONTENTS
PAGE
SAFETY PRECAUTIONS ......................................................................1
PARTS AND FEATURES ...................................................................3-4
INSTALLATION INSTRUCTIONS .........................................................5
START-UP INSTRUCTIONS .................................................................. 6
OPERATING YOUR WATER DISPENSER ............................................ 7
Cold/Hot Water Release Buttons ............................................................. 7
Cold/Hot Water Release Levers ............................................................... 7
Cold/Hot Water Power Switches ............................................................. 7
Cold/Hot Water Indicator Lights .............................................................. 8
ELECTRICAL CONNECTIONS............................................................... 8
Grounding Instructions ............................................................................ 8
Wiring Requirements ..............................................................................8
Extension Cords ..................................................................................... 8
Power Interruptions .................................................................................8
PRECAUTIONS ....................................................................................9
English
PROPER CARE AND CLEANING .................................................. 9-10
General ................................................................................................ 9
Cleaning the Condenser Coils ............................................................... 10
For Long Vacations or Absences / Moving .............................................10
TROUBLESHOOTING GUIDE ............................................................11
WARRANTY......................................................................................12
2
Page 4
English
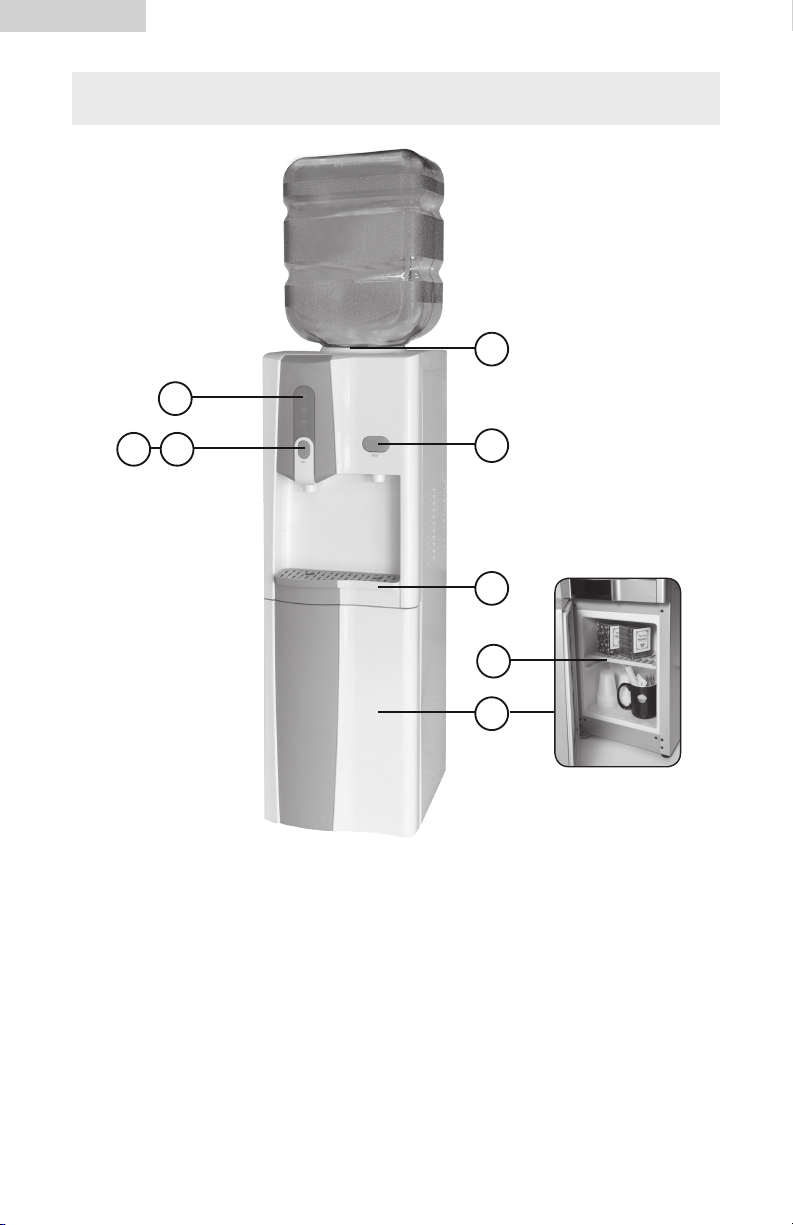
PARTS AND FEATURES - WDNS115BW
1
8
76
1. Water Receptacle
2. Cold Water Button
3. Removable Drip Tray
4. Removable Shelf
5. Storage Compartment
6. Hot Water Button
2
3
4
5
7. Child Safety Lock
8. Hot Water, Cold Water and
Power Indicator Lights
9. Drain (not shown/back of unit)
10. Cold Water Switch (on back)
11. Hot Water Switch (on back)
3
Page 5
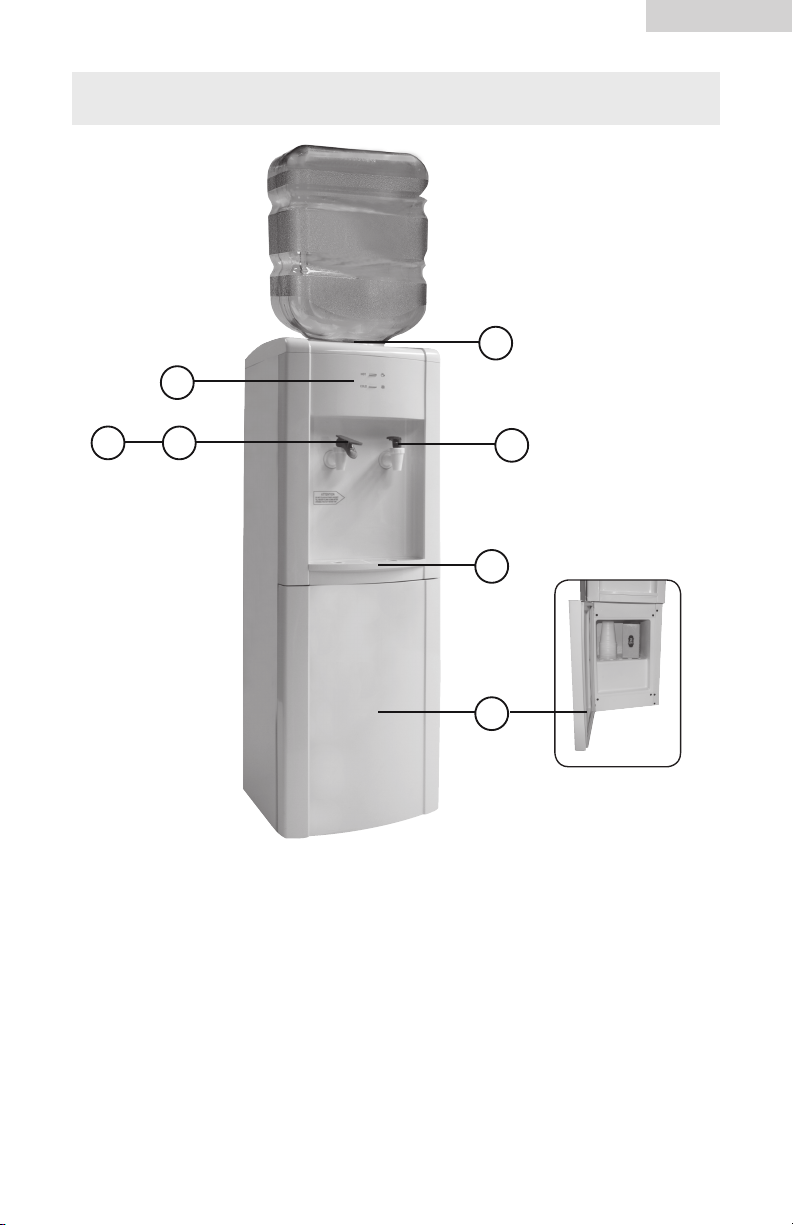
PARTS AND FEATURES - WDNS32BW
1
7
English
5
1. Water Receptacle
2. Cold Water Button (Blue)
3. Removable Drip Tray
4. Storage Compartment
5. Hot Water Button (Red)
6
2
3
4
6. Child Safety Lock
7. Hot and Cold Water Indicator Lights
8. Drain (not shown/back of unit)
9. Cold Water Switch (on back)
10. Hot Water Switch (on back)
4
Page 6

English
INSTALLATION INSTRUCTIONS
1. Remove all packing materials. This includes the foam base and all adhesive
tape holding the accessories inside and outside.
2. Inspect and remove any remaining packaging, tape and printed material
before turning on the water dispenser.
Note: Allow the water dispenser to stand in an upright position for at least
12 hours before turning on the power.
PROPER LOCATION
• To ensure that your water dispenser works at the maximum efficiency it was
designed for, you should install it in a location where there is proper air
circulation and electrical connections.
• The following are the recommended clearances around the water dispenser.
Sides 2" (50mm)
Back 4" (100mm)
• Do not install your water dispenser in any location that is not properly
insulated or heated because the unit is not designed to operate in room
temperature below 55˚F / 13˚C. The water dispenser is for indoor use only.
Room temperature should not exceed 97° F / 36° C.
Note: Thermostats maintain the hot and cold water temperatures
automatically. On the compressor cooled water coolers the hot water
temperature will be between 190˚-203˚ F/ 88˚- 95˚ C and the cold
water temperature will be between 43˚- 50˚ F/ 6˚-10˚ C.
• Select a suitable location for the unit on a hard even surface away from
direct sunlight and heat sources (e.g., radiators, baseboard heaters, cooking
appliances, etc.).
CAUTION: DO NOT plug in the water dispenser until full bottle is
installed first and water flows from both Hot and Cold
water faucets.
Note: Hot and cold water will not be instantly available as the unit will need
time to heat up and cool down the water.
PREPARATION BEFORE FIRST OPERATION
Before connecting the unit to the power source, Let it stand upright for
approximately 12 hours. This will reduce the possibility of a malfunction in the
cooling system from handling during transportation.
The water dispenser is pre-cleaned at the factory but the reservoir and water
lines should be flushed with fresh water before use as follows:
1. Do NOT plug in the water dispenser.
2. Check and make sure the drain cap on the back of the water dispenser is
firmly closed.
5
Page 7

English
3. Fill water tank with tap water full to capacity, wait 5 minutes until water settles.
4. Activate the child safety button and press the hot water lever until water starts
to come out, then stop.
5. Plug the dispenser into the electrical socket.
6. Press the hot water switch (back of unit) to the ON position, the switch should
be lit.
A. Press the cold water switch (back of unit) to the ON position, the switch should
be lit.
B. Wait for the hot water to reach temperature in approximately 10 minutes
C. Wait for the cold to reach temperature in other 40 minutes approximately.
7. Press the hot and cold water switch to turn them OFF and unplug the dispenser
from the electrical outlet.
8. Drain the water by pressing hot water button and then cold water button, until
no more water remains (to facilitate this operation, use a large container).
9. Drain any water left in the tanks by opening the drain cap located on the back
side of the dispenser, until the water drains completely. Please remember to
close the drain cap firmly after the drainage.
10. Place a 5 gallon or 3 gallon bottle of water onto the water intake of the
dispenser; allow water to stand for approximate one minute.
11. Push water faucet buttons to insure water flows from both faucets.
12. Plug the dispenser into the electrical socket.
13. Now you are ready to use your water dispenser.
START-UP INSTRUCTIONS
Read carefully and understand all installation instructions before
installing the water dispenser.
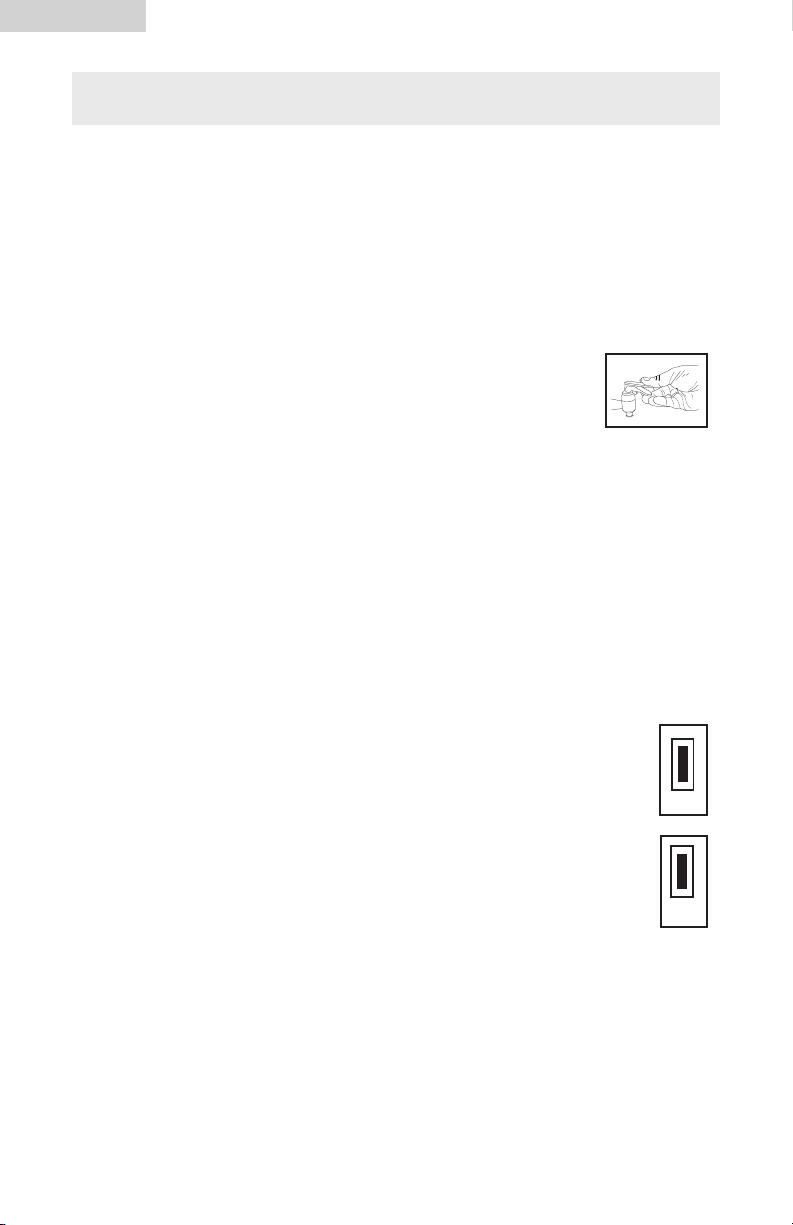
1. Remove the cap from the water bottle first. Lift up the water bottle and quickly
place it into the water receptacle. (The water bottle is not included.)
2. DO NOT plug in the water dispenser until you have checked that
water flows out of both faucets when the hot and cold water
release levers are pressed. Never turn on the water dispenser
without water. Doing so may cause the unit to catch fire or
malfunction.
3. Check that water flows out by pressing both the hot and cold water faucets
one at a time.
4. Plug the power cord into an 115volt / 60 Hz outlet.
5. To activate the water heater and cooler, press the hot water and cold water
switches to the ON position, the switches should be lit.
6
Page 8
English
COLD HOT
OPERATING YOUR WATER DISPENSER
This water dispenser maintains instant hot and cold water for your cooking and
drinking needs. It accepts 3 or 5-gallon water bottles.
WDNS32BW COLD (BLUE) / HOT (RED) WATER RELEASE
BUTTONS
• Press the button down to release the water flow.
• Pull the tap lever up to stop the water flow.
Note: The hot (red) water button is equipped with a child safety
lock to prevent accidental spilling of hot water. To release
the hot water flow, the tap lever must be squeezed and
then pushed down.
WDNS115BW COLD / HOT WATER RELEASE LEVERS
Press the button to release the water flow.
Note: The hot water faucet is equipped with a child safety lock to prevent
accidental spilling of hot water. To release the hot water flow, push the
child safety lock button down and as you push in the hot water button.
Caution: Be careful when carrying hot water in your cup or container to avoid
any injury or harm from spills.
COLD (GREEN) / HOT (RED) WATER POWER SWITCHES
(Back of unit)
Cold Water Switch (green):
The cold water switch activates the cooling process when turned ON.
• Press the switch to the ON position. The switch should become lit.
Note: When turning on the unit for the first time, it will take some
Hot Water Switch (red):
The hot water switch activates the heating process when turned ON.
• Press the switch to the ON position. The switch should become lit.
Caution! Be careful when carrying hot water in your cup or container
7
time to chill the water.
to avoid any injury or harm from spills.
Page 9

English
HOT
HOT
POWER
COOL
COLD
COLD (GREEN) / HOT (RED) WATER INDICATOR LIGHTS
When the green and red lights are illuminated on the front of the unit, the heating
and cooling process is in progress. When the cold and hot water has reached
their proper temperatures, both lights will turn off automatcially. Normally, hot
water reaches proper temperature first.
WDNS115BW WDNS32BW
ELECTRICAL CONECTIONS
GROUNDING INSTRUCTIONS
This appliance must be grounded. In the event of an electrical short circuit,
grounding reduces the risk of electric shock by providing an escape wire for the
electric current. This appliance is equipped with a cord containing a grounding
wire and a grounded plug. The plug must be inserted into an outlet that is properly installed and grounded.
• Improper use of the plug may result in the risk of electric shock.
• Consult a qualified electrician or service technician if the grounding
instructions are not completely understood or if in doubt as to whether
the appliance has been properly grounded.
WIRING REQUIREMENTS
This appliance must be plugged into a 15Amp, 115 Volt, 60Hz
GROUNDED OUTLET.
Note: Where a standard two-prong outlet is encountered, it is the personal
responsibility and obligation of the consumer to have it replaced with a
properly grounded three-prong outlet.
EXTENSION CORDS
We do not recommend the use of an extension cord with
this unit.
POWER INTERRUPTIONS
Occasionally, there may be power interruptions due to thunderstorms or
other causes. Remove the power cord from wall outlet when a power outage occurs. When power has been restored, re-plug the power cord into
wall outlet.
8
Page 10

English
PRECAUTIONS
• This appliance is not intended for use by persons (including children) with
reduced physical, sensory or mental capabilities, or lack of experience and
knowledge, unless they have been given supervision or instruction concerning
use of the appliance by a person responsible for their safety.
• Do not use mechanical devices or other means to accelerate the defrosting
process, other than those recommended by the manufacturer.
• Do not damage the refrigerant circuit.
• Do not use electrical appliances inside the food storage compartments of
appliance, unless they are of the type recommended by the manufacturer.
• To avoid a hazard due to instability of the appliance, it must be fixed in
accordance with the instructions.
PROPER CARE AND CLEANING
Caution: Before using any cleaning product, always read and follow the
manufacturer’s instructions and warnings to avoid personal injury and/
or product damage.
Note: It is best to clean the dispenser and its surrounding area when replacing
the empty bottle with a new one. This way you can move the unit easily
without the weight of the bottle.
GENERAL
• Before cleaning, place a dust cover on top of the water guard to prevent dust
and debris from going into the dispenser while cleaning.
• Prepare a cleaning solution of 3-4 tablespoons of baking soda mixed with
warm water. Use a sponge or a soft cloth dampened with the cleaning solution
to wipe down the unit.
9
Page 11
English
Always unplug the unit before cleaning to avoid electric shock.
Failure to do so may result in death or injury.
• Wipe with clean warm water and dry with a soft cloth.
• Do not use harsh chemicals, abrasives, ammonia, chlorine bleach, concentrated
detergents, solvents or metal scouring pads. Some of these chemicals may
dissolve, damage and/or discolor the unit.
• The spilled water in the drip tray must be removed regularly and cleaned
properly to avoid any bacteria and residue build-up.
• We recommend that you clean the water dispenser at least twice a year. When
cleaning, you do not need to take anything apart. Simply pour the baking
soda/water solution through the water guard. Then rinse with plenty of water
and allow the water to drain.
• Remove the accumulated water from the drip tray, and wipe the compartment
clean.
WARNING!
CLEANING THE CONDENSER COILS
We recommend that you move the dispenser away from the wall and vacuum
or brush the coils on the rear of the unit at least 4 times a year. Some operating
environments may require more frequent cleaning.
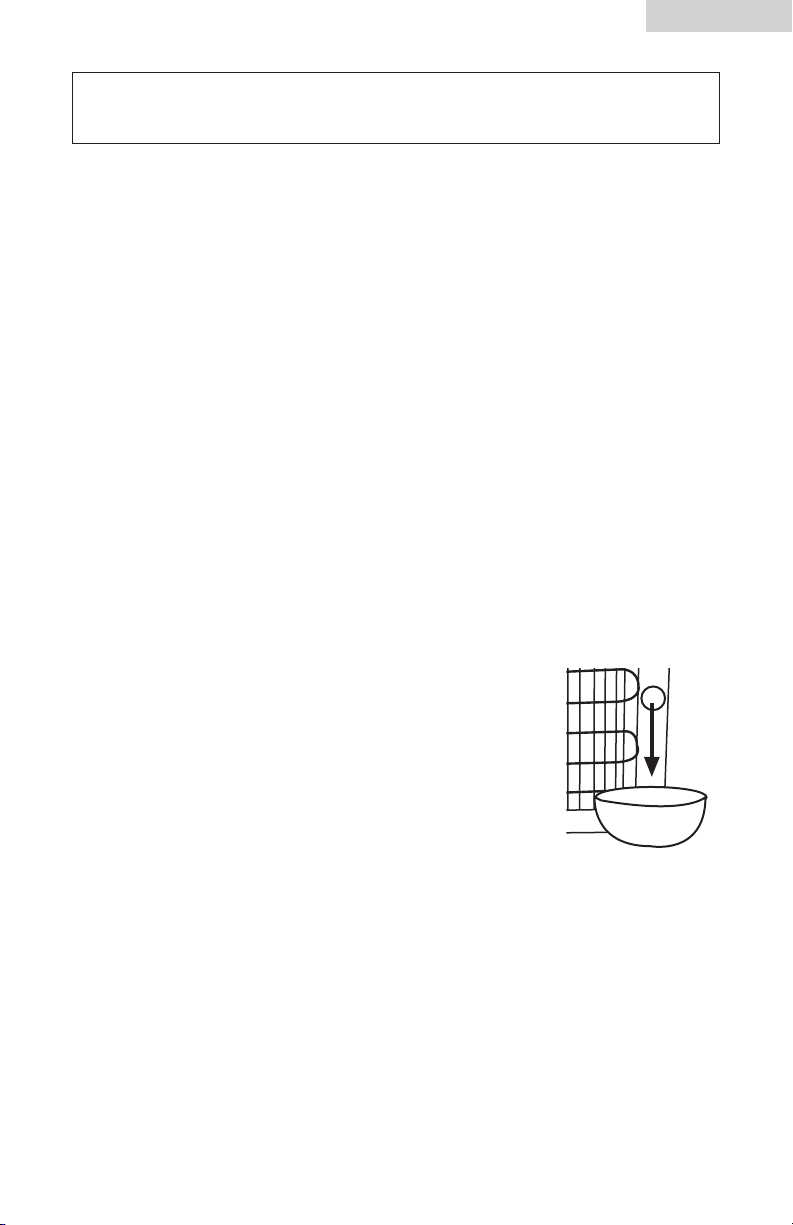
FOR LONG VACATIONS OR ABSENCES / MOVING
• Turn OFF water dispenser.
• Unplug the unit.
• If bottle still contains water, remove it quickly and
carefully to avoid spillage.
• Put a container or bucket on the floor under the drain on
the back of the unit to catch the water released from the
drain tube.
• Remove the drain plug located on the side of the unit to
release the water and empty both the tanks.
Note: Remove drain plug by turning it in a “clockwise direction”. Please note not
to use any tools to remove or install the drain plug. Use hands only.
• After completing the drain process, replace the drain plug to its
original position.
• You must store the unit at room temperature.
• Avoid storing the unit where the temperature is at or below freezing.
• When moving, the unit must be moved vertically. DO NOT move the unit in
horizontal position as this may cause possible damage to internal parts.
• You must cover the unit to avoid dust and debris from entering the
water guard.
10
Page 12

English
TROUBLESHOOTING GUIDE
If the power is switched on and the compressor will not start up:
• Make sure the power cord is plugged in properly
• If the water dispenser is brought indoors in the winter, give it a few hours to
warm up to room temperature before plugging it in. Cold bottled water or
the temperature of the water dispenser itself may affect the thermostat setting.
If the room temperature is lower than the thermostat setting or the water
dispenser itself is cold the compressor will not start up. We do not advise
that you make any adjustments to the thermostat setting.
If water dispenser operation is noisy:
• Make sure the water dispenser sits on a level surface. If the dispenser is
noisy after its first use, unplug it for half an hour and try again.
If the condenser becomes too hot:
• When the compressor is working, it is normal for the condenser to be hot. If
you are concerned that the temperature is too high, check to see that there is
enough room around the water dispenser to allow proper ventilation.
If the cold water tap doesn’t work and the cold water tank freezes
• The cold water tap may freeze under extreme conditions. If the water is
not being used, the cooling compartment is loaded and the compressor is
running continuously, the cold water tank can freeze.
• To thaw the cold water tank, turn off the power, unplug the unit and remove
the water bottle. Keep draining hot water and pouring it back into the water
receptacle. Once the tank has thawed, place the bottle on the unit, plug the
unit in again, and turn the hot and cold switches back on.
If the water is not cold enough:
• This is due to either a compressor malfunction or the cold water may be in
the OFF position.
• Check if the cold water is in the ON position.
• Cold water is used very frequently.
If water is dripping from the dispenser onto the floor:
• The water bottle may have small pinholes or cracks and may be leaking.
• The drain plug in the rear may be improperly fastened. Check that the soft
rubber seal is not torn or damaged.
• The drip tray may be full of water. Take out the drip tray and empty it before
replacing it.
11
Page 13

LIMITED WARRANTY
English
What is covered and for how
long?
This warranty covers all defects in
workmanship or materials for a period
of:
12 months labor (carry-in only)
12 months parts
The warranty commences on the date
the item was purchased and the original purchase receipt must be presented
to the authorized service center before
warranty repairs are rendered.
EXCEPTIONS: Commercial or
Rental Use warranty
90 days labor (carry-in only)
90 days parts
No other warranty applies
What is covered.
1. The mechanical and electrical parts,
which serve as a functional purpose
of this appliance, for a period of
12 months. This includes all parts
except finish, and trim.
What will be done?
1. We will repair or replace, at our
discretion, any mechanical or
electrical part which proves to be
defective in normal usage during the
warranty period so specified.
2. There will be no charge to the
purchaser for parts and labor on
any covered items during the initial
12
month period. Beyond this period,
only parts are covered in the
remaining warranty. Labor is not
provided and must be paid by the
customer.
3. Contact your nearest authorized
service center. For the name of the
nearest service center please visit
our website at www.HaierAmerica.
com or call 1-877-337-3639 for
more information.
THIS WARRANTY COVERS
APPLIANCES WITHIN THE
CONTINENTAL UNITED STATES,
PUERTO RICO AND CANADA.
IT DOES NOT COVER
THE FOLLOWING:
Damages from improper installation.
Damages in shipping.
Defects other than manufacturing.
Damage from misuse, abuse, accident,
alteration, lack of proper care and
maintenance or incorrect current or
voltage.
Damage from other than household
use.
Damage from service by other than an
authorized dealer or service center.
Decorative trims or replaceable light
bulbs.
Transportation and shipping.
Labor (after the initial 12 months).
THIS LIMITED WARRANTY IS GIVEN
IN LIEU OF ALL OTHER WARRANTIES,
EXPRESSED OR, INCLUDING THE
WARRANTIES OF MERCHANTABILITY
AND FITNESS FOR A PARTICULAR
PURPOSE.
The remedy provided in this warranty
is exclusive and is granted in lieu of all
other remedies.
This warranty does not cover incidental or consequential damages, so the
above limitations may not apply to
you. Some States do not allow limitations on how long an implied warranty
lasts, so the above limitations may not
apply to you.
This warranty gives you specific legal
rights, and you may have other rights,
which vary, from state to state.
Haier America
New York, NY 10018
12
Page 14

Français
CONSIGNES DE SÉCURITÉ
Lors de l'utilisation de cet appareil, des consignes de sécurité de
base doivent être respectées, y compris ce qui suit :
1. Lisez toutes les instructions avant d'utiliser cet appareil.
2. N'utilisez cet appareil qu'aux fins prévues, comme il est décrit dans ce guide
d'utilisation et d'entretien.
3. Ce distributeur d’eau doit être installé correctement conformément aux
instructions d'installation avant d'être utilisé. Consultez les instructions de mise
à la terre dans la section traitant de l'installation.
4. Ne débranchez jamais votre distributeur d’eau en tirant sur le cordon
d'alimentation. Saisissez toujours la fiche fermement et tirez-la en ligne droite
pour la sortir de la prise de courant.
5. Réparez ou remplacez immédiatement tous les cordons d'alimentation
électrique qui s'effilochent ou autrement endommagés. N'utilisez pas de
cordon si celui-ci, la fiche ou l'embout du connecteur présente des fissures ou
d'autres dommages causés par l'abrasion.
6. Débranchez votre distributeur d’eau avant de le nettoyer ou de procéder à des
réparations.
Remarque: Si pour une raison ou une autre ce produit nécessite un entretien,
nous vous recommandons fortement de faire appel aux services
d'un technicien agréé.
7. Ce distributeur d’eau ne doit pas être encastré ou incorporé dans une armoire
Il est conçu pour une installation amovible seulement.
8. Cet appareil est conçu pour un USAGE À L'INTÉRIEUR SEULEMENT et ne doit
pas être utilisé à l'extérieur.
9. Ne faites pas fonctionner votre distributeur d’eau en présence de vapeurs
explosives.
10. Vous devez exercer une étroite surveillance lorsque cet appareil est utilisé
par des enfants ou en présence d'enfants.
11. Pour éviter les chocs électriques, n'immergez pas le cordon, la prise ou toute
autre partie du distributeur d’eau dans l'eau ou tout autre liquide.
CONSERVEZ CES INSTRUCTIONS
Nous vous remercions d’avoir choisi ce
produit de la marque Afficionado. Ce
guide convivial vous indiquera comment tirer le maximum de votre cave
á vin.
Rappelez-vous de prendre en note les
numéros de modèle et de série. Ces
numéros se trouvent sur une étiquette
apposée au dos de l’appareil.
Brochez votre reçu de caisse à votre guide. Vous en aurez besoin
pour obtenir des services en vertu de la garantie.
1
Numéro de modèle
Numéro de série
Date d’achat
Page 15

Français
TABLE DES MATIÈRES
PAGE
PRÉCAUTIONS DE SÉCURITÉ .............................................................. 1
PIÈCES ET CARACTÉRISTIQUES .......................................................3-4
INSTRUCTIONS D’INSTALLATION ..................................................... 5
INSTRUCTIONS DE DÉMARRAGE ...................................................... 6
FONCTIONNEMENT DE VOTRE DISTRIBUTEUR D’EAU ..................... 7
Boutons d’eau chaude/froide .................................................................. 7
Leviers d’eau chaude/froide .................................................................... 7
Interrupteurs d’eau chaude/froide ............................................................ 7
Témoins lumineux d’eau chaude/froide ....................................................8
CONNEXIONS ÉLECTRIQUES .............................................................8
Instructions de mise à terre ...................................................................... 8
Exigences de filage ................................................................................8
Rallonges électriques .............................................................................. 8
Interruptions de courant ..........................................................................8
PRÉCAUTIONS ....................................................................................9
NETTOYAGE ET ENTRETIEN ......................................................... 9-10
Général ................................................................................................ 9
Nettoyage des serpentins du condensateur .............................................10
Déménagement/Absences longues.........................................................10
GUIDE DE DÉPANNAGE ...................................................................11
GARANTIES ......................................................................................12
2
Page 16

Français
PIÈCES ET CARACTÉRISTIQUES – WDNS115BW
1
8
76
1. Récipient d’eau
2. Bouton pour l’eau froide
3. Égouttoir amovible
4. Tablette amovible
5. Espace de rangement
6. Bouton pour l’eau chaude
7. Verrou de sécurité
2
3
4
5
8. Témoins lumineux pour l’eau
chaude, l’eau froide et le
fonctionnement
9. Drain (non-illustré/à l’arrière de
l’appareil)
10. Interrupteur d’eau froide
(à l’arrière)
11. Interrupteur d’eau chaude
(à l’arrière)
3
Page 17

PIÈCES ET CARACTÉRISTIQUES – WDNS32BW
1
7
Français
5
1. Récipient d’eau
2. Bouton pour l’eau froide (bleu)
3. Égouttoir amovible
4. Espace de rangement
5. Bouton pour l’eau chaude (rouge)
6. Verrou de sécurité
6
2
3
4
7. Témoins lumineux pour l’eau chaude
et l’eau froide
8. Drain (non-illustré/à l’arrière de
l’appareil)
9. Interrupteur d’eau froide (à l’arrière)
10. Interrupteur d’eau chaude
(à l’arrière)
4
Page 18

Français
INSTRUCTIONS D'INSTALLATION
1. Retirez tous les matériaux d'emballage. Cela inclut la base en styromousse
ainsi que tous les rubans adhésifs retenant des accessoires à l'intérieur et à
l'extérieur.
2. Inspectez l'appareil et enlevez tout résidu d'emballage, de ruban adhésif ou
de matériel imprimé avant de mettre le distributeur d’eau en marche.
Remarque: Laissez le distributeur d’eau en position verticale pendant au moins
12 heures avant de le mettre sous tension.
LE BON EMPLACEMENT
• Afin d'assurer l'efficacité maximale de votre distributeur d’eau, vous devez
l'installer dans un emplacement où il y a une bonne circulation d'air et des
connexions électriques appropriées.
• Les dégagements suivants sont recommandés autour du distributeur d’eau.
Côtés 2 po (50 mm)
Arrière 4 po (100 mm)
• N'installez pas votre distributeur d’eau dans un endroit qui n'est pas
adéquatement isolé et chauffé car l'appareil n'est pas conçu pour fonctionner
à des températures inférieures à 55 ˚F/13 ˚C. Le distributeur d’eau est destiné
à un usage à l'intérieur seulement. La température ambiante ne doit pas
dépasser 97 °F/36 °C.
Remarque: Les thermostats conservent les températures chaudes et froides
automatiquement. Sur les refroidisseurs d'eau froide du
compresseur, la température de l'eau chaude sera entre 190 et
203 ˚F/ 88 et 95 ˚C et la température de l'eau froide sera entre
43 et 50 ˚F/6 et 10 ˚C.
• Choisissez un emplacement qui convient à l'appareil, sur une surface plane et
dure, à l'abri du rayonnement direct du soleil et des sources de chaleur (p. ex.,
les radiateurs, plinthes chauffantes, appareils de cuisson, etc.
MISE EN GARDE:
NE branchez PAS le distributeur d'eau avant d'avoir installé une bouteille pleine
et que l'eau s'écoule des robinets d'eau chaude et d'eau froide.
Remarque: L'eau chaude et l'eau froide ne seront pas instantanément
disponibles, car l'appareil a besoin de temps pour réchauffer et
refroidir l'eau.
PRÉPARATION AVANT LA PREMIÈRE UTILISATION
Avant de brancher l'appareil à la source d'alimentation, laissez-le debout
pendant environ 12 heures. Cela réduira la possibilité de défaillance du système
de refroidissement due à la manutention pendant le transport.
Le distributeur d'eau est prénettoyé à l'usine, mais le réservoir et la tuyauterie
d'alimentation d'eau doivent être rincés à l'eau fraîche avant l'utilisation comme
suit:
5
Page 19

Français
1. NE branchez PAS le distributeur d'eau.
2. Assurez-vous que le bouchon de vidange à l'arrière du distributeur d'eau est
bien fermé.
3. Remplissez le réservoir à sa pleine capacité avec l'eau du robinet, attendez 5
minutes pour que l'eau se clarifie.
4. Activez le bouton de sécurité des enfants et appuyez sur le levier d'eau
chaude jusqu'à ce que l'eau commence à s'écouler, puis arrêtez.
5. Branchez le distributeur dans la prise de courant.
6. Appuyez sur l'interrupteur d'eau chaude (à l'arrière de l'appareil) pour le
mettre en position de marche (ON), l'interrupteur devrait être illuminé.
A. Appuyez sur l'interrupteur d'eau froide (à l'arrière de l'appareil) pour le mettre
en position de marche (ON), l'interrupteur devrait être illuminé.
B. Attendez que l'eau chaude atteigne sa température dans environ 10 minutes.
C. Attendez que l'eau froide atteigne sa température dans environ 40 minutes.
7. Fermez les interrupteurs d'eau chaude et d'eau froide et débranchez le
distributeur de la prise de courant.
8. Videz l'eau en appuyant sur le bouton d'eau chaude, puis sur le bouton d'eau
froide jusqu'à ce qu'il ne reste plus d'eau (pour faciliter cette opération, utilisez
un grand récipient).
9. Pour vider toute eau restée dans le réservoir, ouvrez le bouchon de vidange
situé à l'arrière du distributeur et laissez l'eau s'écouler complètement.
N’oubliez pas de bien refermer le bouchon de vidange après la vidange.
10. Placez une bouteille d'eau de 3 ou 5 gallons sur la prise d'eau du
distributeur; laisser reposer l'eau pendant environ une minute.
11. Appuyez sur les boutons des robinets d'eau pour vous assurer que l'eau
s'écoule des deux robinets.
12. Branchez le distributeur dans la prise de courant.
13. Vous êtes maintenant prêt à utiliser votre distributeur d'eau.
INSTRUCTIONS DE DÉMARRAGE
Lisez attentivement et assurez-vous de bien comprendre toutes les
instructions d'installation avant d'installer le distributeur d'eau.
1. Enlevez d'abord le bouchon de la bouteille d'eau. Soulevez la bouteille d'eau
et placez-la rapidement dans le récipient à eau. (La bouteille d'eau n'est pas
comprise.)
2. NE branchez PAS le distributeur d'eau avant d'avoir vérifié que l'eau s'écoule
des deux robinets lorsque vous appuyez sur les leviers d'eau chaude et d'eau
froide. N'allumez jamais le distributeur d'eau quand il est vide. Cela pourrait
enflammer l'appareil ou causer une défaillance.
3. Vérifiez que l'eau s'écoule en appuyant en même temps sur les robinets d'eau
chaude et d'eau froide.
4. Branchez le cordon d'alimentation dans une prise de courant de 115 V 60 Hz.
5. Pour activer le chauffe-eau ou le refroidisseur d'eau, appuyez sur les
interrupteurs d'eau chaude et d'eau froide de l'appareil pour les mettre en
position de marche (ON), les interrupteurs devraient être illuminés.
6
Page 20

COLD HOT
Français
FONCTIONNEMENT DE VOTRE DISTRIBUTEUR D’EAU
Ce distributeur d’eau garde de l’eau chaude et froide en tout temps pour vos
besoins en cuisson et en boisson.
WDNS32BW – BOUTONS POUR L’EAU FROIDE (BLEU) ET L’EAU
CHAUDE (ROUGE)
• Appuyez sur le bouton pour activer de débit de l’eau
• Tirez sur le levier pour arrêter le débit de l’eau
NOTE: Le bouton d’eau chaude (rouge) est muni d’un verrou de
sécurité pour prévenir le débit accidentel de l’eau chaude.
Pour activer le débit d’eau chaude, le levier doit être
comprimé puis abaissé.
WDNS115BW – LEVIERS POUR L’EAU FROIDE ET L’EAU
CHAUDE
Appuyez sur le levier pour activer le débit d’eau
NOTE: Le levier d’eau chaude (rouge) est muni d’un verrou de sécurité pour
prévenir le débit accidentel de l’eau chaude. Pour activer le débit d’eau
chaude, , appuyez sur le bouton de verrou de sécurité lorsque vous
activez le levier.
ATTENTION: Soyez prudent lorsque vous transportez de l’eau chaude
dans une tasse ou un contenant pour éviter tout risque
de blessure.
INTERRUPTEUR D’EAU FROIDE (VERT) ET D’EAU CHAUDE
(ROUGE) (à l’arrière de l’appareil)
Interrupteur d’eau froide (vert):
L’interrupteur d’eau froide met en marche le système de refroidissement
d’eau
• Appuyez sur l’interrupteur pour le mettre en position « ON ».
L’interrupteur devrait s’illuminer
NOTE: Lors que vous utilisez l’appareil pour la première fois, cela prend un
certain temps avant que l’eau soit refroidie.
INTERRUPTEUR D’EAU CHAUDE (ROUGE) :
L’interrupteur d’eau chaude met en marche le système de chauffage d’eau.
• Appuyez sur l’interrupteur pour le mettre en position « ON ». L’interrupteur
devrait s’illuminer
ATTENTION! Soyez prudent lorsque vous transportez de l’eau chaude dans une
tasse ou un contenant pour éviter tout risque de blessure.
7
Page 21

HOT
HOT
POWER
COOL
COLD
Français
TÉMOINS LUMINEUX L’EAU CHAUDE (ROUGE) ET L’EAU FROIDE (VERT)
Lorsque les témoins lumineux sont allumés sur l’avant de l’appareil, les systèmes
de chauffage de et refroidissement de l’eau sont en marche. Lorsque l’eau froide
et l’eau chaude on atteint leur températures respectives, les témoins s’éteignent
automatiquement. Normalement, l’eau chaude atteint sa température en premier.
WDNS115BW WDNS32BW
CONNEXIONS ÉLECTRIQUES
INSTRUCTIONS DE MISE À TERRE
Cet appareil doit être mis à terre. Dans l’éventualité d’un court circuit électrique,
la mise à la terre réduit les risques de choc électrique en fournissant un moyen de
fuite pour le courant électrique. Cet appareil est muni d’un fil électrique contenant
un fil et une fiche de mise à terre. La fiche doit être branchée dans une prise qui
est installé et mise à terre correctement.
• L’usage abusif de la fiche peut résulter en choc électrique
• Consulter un électricien qualifié ou un technicien si les instructions de
mise à terre ne sont pas complètement comprises ou s’il y a doute à
savoir si l’appareil est mis à terre correctement.
EXIGENCES DE FILAGE
Cet appareil doit être branché dans une prise MISE À TERRE de 15Amp, 115
Volt, 60Hz.
Note : S’il s’agit d’une prise standard à deux broches,
la responsabilité et l’obligation revient au consommateur
de la faire remplacer par une prise adéquate mise à terre.
RALLONGES ÉLECTRIQUES
Nous ne recommandons pas l’usage de rallonges
électriques avec cet appareil.
INTERRUPTIONS DE COURANT
Occasionnellement, il se peut qu’il y ait des interruptions de courant dues
aux orages ou autres. Débranchez le fil électrique de la prise lors d’une
panne de courant. Lorsque le courant est rétabli, rebranchez le fil électrique dans la prise.
8
Page 22

Français
CONSIGNES DE SÉCURITÉ
• Cet appareil n'est pas conçu pour être utilisé par des personnes (y compris les
enfants) dont les capacités physiques, sensorielles ou mentales sont réduites,
ou qui manquent d'expérience et de connaissances, à moins d'être supervisées
ou d'avoir reçu des instructions concernant l'utilisation de l'appareil par une
personne responsable de leur sécurité.
• N'utilisez aucun dispositif mécanique ou autre moyen pour accélérer le
dégivrage, à part ceux recommandés par le fabricant.
• N'endommagez pas le circuit du fluide frigorigène.
• N'utilisez pas d'appareils électriques à l'intérieur des compartiments à
nourriture de l'appareil, sauf s'ils sont du type recommandé par le fabricant.
• Afin d'éviter les dangers dus à l'instabilité de l'appareil, celui-ci doit être fixé
conformément aux instructions.
ENTRETIEN ET NETTOYAGE APPROPRIÉS
Mise en garde:
Avant d'utiliser un produit nettoyant, lisez et respectez toujours les instructions
et avertissements du fabricant pour éviter de vous blesser ou d'endommager le
produit.
Remarque:
Il est préférable de nettoyer le distributeur et les surfaces environnantes lorsque
vous remplacez une bouteille vide par une nouvelle bouteille. Ainsi, vous pouvez
déplacer l'appareil facilement sans le poids de la bouteille.
GÉNÉRALITÉS
• Avant de nettoyer, placez un pare-poussière sur le réservoir d'eau afin
d'empêcher la poussière et les débris d'entrer dans le distributeur pendant le
nettoyage.
• Préparez une solution nettoyante avec 3 ou 4 cuillérées à table de bicarbonate
de soude dissoutes dans de l'eau chaude. Pour nettoyer l'appareil, servez-vous
d'une éponge ou d'un linge doux, humidifié avec la solution nettoyante.
9
Page 23

Français
AVERTISSEMENT: Avant de le nettoyer, débranchez toujours l'appareil pour
éviter les chocs électriques. Le non-respect de cette consigne peut entraîner
• Rincez avec de l'eau propre et chaude, puis séchez avec un linge doux.
• N'utilisez pas de substances chimiques fortes, d'abrasifs, d'ammoniaque,
d'agent chloré de blanchiment, de détergents concentrés, de solvants ou de
tampons à récurer métalliques. Certains de ces produits chimiques peuvent se
dissoudre et endommager ou décolorer l'appareil.
• L'eau déversée dans le plateau d'égouttage doit être enlevée régulièrement
et le plateau doit être nettoyé soigneusement pour éviter toute accumulation de
bactéries et de résidus.
• Nous vous recommandons de nettoyer le distributeur d'eau au moins deux fois
par année. Lorsque vous le nettoyez, il n'est pas nécessaire de démonter quoi
que ce soit. Versez simplement la solution de bicarbonate de soude et d'eau
dans le réservoir d'eau. Puis, rincez abondamment avec de l'eau et laissez
s'écouler l'eau.
• Enlevez l'eau du plateau d'égouttage et nettoyez le compartiment avec un
chiffon.
NETTOYAGE DU SERPENTIN DU CONDENSATEUR
Nous vous recommandons d'éloigner le distributeur du mur et de passer
l'aspirateur ou une brosse sur le serpentin à l'arrière de l'appareil au moins
quatre fois par année. Il peut être nécessaire de nettoyer plus fréquemment dans
certains environnements.
la mort ou une blessure.
LONGUES VACANCES OU ABSENCES/DÉMÉNAGEMENT
• Éteignez le distributeur d'eau.
• Débranchez l'appareil.
• Si la bouteille contient encore de l'eau, enlevez-la
rapidement en faisant attention à ne pas renverser l'eau.
• Placez un récipient ou un sceau sous le drain à l'arrière
de l'appareil pour recueillir l'eau qui s'écoulera du tuyau
de vidange.
• Ôtez le bouchon de vidange situé sur le côté de
l'appareil pour laisser sortir l'eau et vider les deux
réservoirs.
Remarque: Ôtez le bouchon de vidange en le tournant
dans le sens des aiguilles d'une montre.
Prenez note que vous ne devez pas utiliser d'outil pour enlever ou
mettre le bouchon de vidange. Utilisez vos mains seulement.
• Quand la vidange est terminée, replacez le bouchon de vidange à sa position
originale.
• Vous devez ranger l'appareil à la température ambiante.
• Évitez de ranger l'appareil dans un endroit où la température est de zéro ou
sous zéro.
• Lorsque vous déménagez, déplacez l'appareil verticalement. NE déplacez PAS
l'appareil en position horizontale, car cela pourrait endommager des pièces à
l'intérieur de l'appareil.
• Vous devez recouvrir l'appareil pour empêcher la poussière et les débris de
s'introduire dans le réservoir d'eau.
10
Page 24

Français
GUIDE DE DÉPANNAGE
Si l'appareil est mis en marche et que le compresseur ne démarre
pas:
• Assurez-vous que le cordon d'alimentation est bien branché.
• Si le distributeur d'eau est apporté à l'intérieur durant l'hiver, laissez-le
réchauffer pendant quelques heures à la température ambiante avant de le
brancher. L'eau froide embouteillée ou la température du distributeur d'eau luimême peuvent influencer le réglage du thermostat. Si la température ambiante
est inférieure au réglage du thermostat ou si le distributeur d'eau lui-même est
froid, le compresseur ne démarrera pas. Il n'est pas recommandé d'effectuer
des ajustements au réglage du thermostat.
Si le distributeur d'eau fonctionne bruyamment:
• Assurez-vous que le distributeur d'eau repose sur une surface plane. Si le
distributeur est bruyant après le premier usage, débranchez-le pendant une
demi-heure et réessayez.
Si le condensateur devient trop chaud:
• Quand le compresseur fonctionne, il est normal que le condensateur soit
chaud. Si vous pensez que la température est trop élevée, vérifiez si le
dégagement est suffisant autour du distributeur d'eau pour permettre une bonne
ventilation.
Si le robinet d'eau froide ne fonctionne pas et que le réservoir
d'eau froide gèle:
• Le robinet d'eau froide peut geler dans des conditions extrêmes. Si l'eau n'est
pas utilisée, le compartiment de refroidissement est chargé et le compresseur
fonctionne continuellement, le réservoir d'eau froide peut geler.
• Pour dégeler le réservoir d'eau froide, éteignez l'appareil, débranchez-
le et enlevez la bouteille d'eau. Faites s'écouler l'eau chaude et versez-la
à nouveau dans le récipient à eau. Une fois que le réservoir est dégelé,
replacez la bouteille sur l'appareil, rebranchez ce dernier et appuyez sur les
interrupteurs d'eau chaude et d'eau froide.
Si l'eau n'est pas assez froide:
• Cela peut être dû à une défaillance du compresseur ou l'interrupteur d'eau
froide peut être à la position d'arrêt (OFF).
• Vérifiez si l'interrupteur d'eau froide est en position de marche (ON).
• L'eau froide est utilisée très fréquemment.
Si l'eau dégoutte du distributeur sur le plancher:
• La bouteille a peut-être des trous d'épingle ou des fissures et peut couler.
• Le bouchon de vidange à l'arrière est peut-être mal fermé. Vérifiez si le joint
d'étanchéité en caoutchouc mou est déchiré ou endommagé.
• Le plateau d'égouttage est peut-être plein d'eau. Retirez le plateau
d'égouttement et videz-le avant de le replacer.
11
Page 25

GARANTIE LIMITÉE
Français
Que recouvre la garantie et pour
combien de temps ?
Cette garantie recouvre tous les défauts
de fabrication ou de matériaux pour une
période de :
12 mois pour la main d’œuvre (au
service uniquement)
12 mois pour les pièces (au service
uniquement)
5 ans pour système frigorifique (au
service uniquement)
La garantie prend effet à compter de la date
d’achat de l’article et l’original de la facture
doit être présenté au centre de services
agréé avant d’effectuer toute réparation.
EXCEPTIONS : garantie pour une
utilisation commerciale ou en cas
de location
90 jours pour la main d’œuvre (au
service après-vente uniquement)
90 jours pour les pièces Aucune
autre
garantie applique
Qu’est-ce qui est couvert ?
1. Les pièces mécaniques et électriques
essentielles au bon fonctionnement de cet
appareil sont garanties pendant 12 mois.
Cela comprend toutes les pièces sauf la
finition et l’habillage.
2. Les composants du système frigorifique
comme le compresseur, le condensateur
et l’évaporateur sont couverts par la
garantie pour tout défaut de détérioration
de ce type de composant provoquée
par une mauvaise utilisation du matériel,
une mauvaise manipulation ou lors du
transport n’est pas couverte par cette
garantie.
Quelles seront mesures prises
1. Nous nous réservons le droit de réparer
et de remplacer toute pièce mécanique
ou électrique défectueuse lors d’une
utilisation normale pendant la période de
garantie spécifiée.
2. Les pièces et la main d’œuvre ne seront
facturées à l’acheteur pour aucun article
couvert par la garantie pendant la
période initiale de 12 mois.
3. Veuillez contacter votre centre de services
agréé le plus proche. Pour obtenir le
nom de votre centre de services le plus
proche, veuillez appeler le 1-877-337-
3639.
CETTE GARANTIE COUVRE LES
APPAREILS ÉLECTROMÉNAGERS SUR
LE CONTINENT NORD-AMÉRICAIN
(ÉTATS-UNIS ET CANADA) ET À
PORTO RICO.
ELLE NE COUVRE PAS CE QUI SUIT :
Les dommages dus à une mauvaise
installation.
Les dommages survenus pendant le
transport.
Les vices autres que de fabrication.
Les dommages dus à une mauvaise
utilisation, à une utilisation excessive, à une
altération, au manque d’entretien et à une
tension ou un voltage incorrects.
Les dommages imputables à une utilisation
autre que domestique.
Les dommages dus à une réparation
effectuée par un service autre que le
revendeur agréé ou le centre de services.
L’habillage et les ampoules.
Le transport et l’expédition.
La main d’œuvre (après les 12 mois
initiaux).
IL N’EXISTE AUCUNE AUTRE GARANTIE
QUE CETTE GARANTIE LIMITÉE, EXPRIMÉE
OU IMPLICITE, INCLUANT LES GARANTIES
DE QUALITÉ MARCHANDE OU
D’APTITUDE DANS UN BUT PARTICULIER.
Les réparations fournies par la présente
garantie sont exclusives et remplacent toute
autre réparation.
Cette garantie ne couvre pas les dommages
indirects ou secondaires. Dans ce cas, les
limitations ci-dessus peuvent ne pas être
applicables. Certains états n’autorisent pas
les limitations sur la durée d’une garantie
implicite. Dans ce cas, les limitations
ci-dessus peuvent ne pas être applicables.
Cette garantie vous reconnaît certains
droits juridiques ; Il est possible que vous
disposiez d’autres droits, pouvant varier
d’un état à l’autre.
Haier America
New York, NY 10018
12
Page 26

Español
PRECAUCIONES DE SEGURIDAD
Siempre que opere esta unidad tenga en cuentas las normas
básicas de seguridad incluyendo las siguientes:
1. Lea todas las instrucciones antes de utilizar esta unidad.
2. Utilice esta unidad sólo para su uso entendido, como se describe en este
manual y guía de cuidados.
3. Este Dispenser de agua debe instalarse adecuadamente de acuerdo a las
instrucciones provistas en este manual antes de utilizarse. Vea las instrucciones
de conexión a tierra.
4. Nunca desenchufe esta unidad tirando del cable. Siempre sostenga
firmemente el enchufe y tire hacia atrás.
5. Repare o reemplace inmediatamente los cables de corriente que estén
dañados o presenten abrasiones. No utilice cables que muestren rajaduras a
lo largo del mismo ni enchufes o conectores dañados.
6. Desenchufe la unidad antes de limpiar o antes de hacer alguna reparación.
Nota: Si por alguna razón este producto necesita ser reparado nosotros
recomendamos que la reparación sea realizada por un service
calificado.
7. Este dispenser no debe ubicarse en un gabinete cerrado. Esta diseñado para
la instalación libre únicamente.
8. No opere el dispenser en presencia de gases explosivos.
9. Se necesita una supervisión cercana cuando es operado por chicos.
10. Para protegerse de shocks eléscricos no sumerja el cable, enchufe o alguna
otra parte del dispenser en agua u otros líquidos.
11. Para proteger contra el golpe eléctrico, no sumerge la cuerda, el tapón, ni
cualquier otra parte del abastecedor de agua en el agua ni otros líquidos.
GUARDE ESTAS INSTRUCCIONES
Gracias por utilizar nuestro
producto Haier. Este manual de
fácil uso lo guiará para obtener los
mejoresresultados de este producto.
Recuerde de tomar nota del
modelo y número de serie. Estos
se encuentran en la etiqueta en la
parte trasera de la unidad
Abroche su recibo al manual. Lo necesitará para obtener
el servicio de garantía.
1
Número de modelo
Número de serie
Fecha de compra
Page 27

CONTENIDOS
PAGE
PRECAUCIONES DE SEGURIDAD ...................................................... 1
PIEZAS Y FUNCIONES ...................................................................3-4
INSTRUCCIONES DE INSTALACIÓN ................................................. 5
INSTRUCCIONES PARA LA PUESTA EN MARCHA ............................ 6
FUNCIONAMIENTO DE SU SURTIDOR DE AGUA ............................7
Botones de agua fría y caliente ............................................................... 7
Palancas de agua fría y caliente ............................................................. 7
Interruptores de encendido del agua fría y caliente ...................................7
Luces indicadoras de agua fría y caliente ................................................. 8
CONEXIONES ELÉCTRICAS................................................................. 8
Instrucciones para la conexión a tierra ..................................................... 8
Requisitos para la instalación eléctrica .................................................... 8
Cables de prolongación .........................................................................8
Cortes de energía .................................................................................. 8
PRECAUCIONES .................................................................................9
Español
CUIDADO ADECUADO Y LIMPIEZA ............................................. 9-10
General ................................................................................................ 9
Limpieza de los serpentines del condensador .......................................... 10
Vacaciones o ausencias prolongadas / Mudanza ...................................10
GUÍA DE RESOLUCIÓN DE PROBLEMAS .........................................11
GARANTÍA .......................................................................................12
2
Page 28

Español
PIEZAS Y FUNCIONES - WDNS115BW
1
8
76
1. Receptáculo para agua
2. Botón para el agua fría
3. Bandeja de goteo extraíble
4. Bandeja extraíble
5. Compartimiento para el guardado
6. Botón para el agua caliente
7. Dispositivo de seguridad para niños
2
3
4
5
8. Luces indicadoras de agua caliente,
agua fría y encendido
9. Desagüe (no se muestra/parte
posterior de la unidad)
10. Interruptor para el agua fría (en la
parte trasera)
11. Interruptor para el agua caliente
(en la parte trasera)
3
Page 29

PIEZAS Y FUNCIONES - WDNS32BW
1
7
Español
5
1. Receptáculo para agua
2. Botón para el agua fría (azul)
3. Bandeja de goteo extraíble
4. Compartimiento para el guardado
5. Botón para el agua caliente (rojo)
6. Dispositivo de seguridad para niños
6
2
3
4
7. Luces indicadoras de agua
caliente y fría.
8. Desagüe (no se muestra/parte
posterior de la unidad)
9. Interruptor para el agua fría (en la
parte trasera)
10. Interruptor para el agua caliente
(en la parte trasera)
4
Page 30

Español
INSTRUCCIONES DE INSTALACIÓN
1. Quite todos los materiales de empaque. Esto incluye la base de espuma y
toda la cinta adhesiva que sostiene los accesorios por dentro y por fuera.
2. Revise y quite los restos de embalaje, cinta o materiales impresos antes de
encender el surtidor de agua.
Nota: Deje el surtidor de agua en posición vertical durante al menos 12 horas
antes de encender la unidad.
UBICACIÓN CORRECTA
• Para asegurarse de que el surtidor de agua funcione con la eficiencia máxima
para la que fue diseñado, debe instalarlo en un lugar donde haya una
circulación de aire adecuada y conexiones eléctricas.
• Los siguientes son las áreas despejadas recomendadas alrededor del surtidor
de agua.
Lados 2" (50mm)
Atrás 4” (100mm)
• No instale el surtidor de agua en lugares en los que no esté correctamente
aislado o calefaccionado dado que la unidad no fue diseñada para funcionar
a temperaturas ambiente inferiores a 55ºF / 13ºC. Este surtidor de agua fue
diseñado para ser usado únicamente en el interior.
La temperatura ambiente no debe superar los 97º F / 36º C.
Nota: Los termostatos mantienen las temperaturas del agua caliente y fría
automáticamente. En el compresor [On the compressor cooled water coolers
the hot water temperature will be] la temperatura del agua caliente será de
entre 190º-203º F/ 88º- 95º C y la temperatura del agua fría será de entre
43º- 50º F/ 6º-10º C.
• Seleccione una ubicación adecuada para la unidad en una superficie dura y
pareja, lejos de la luz directa del sol y de las fuentes de calor (por ejemplo,
radiadores, zócalos radiantes, artefactos de cocina, etc.).
PRECAUCIÓN: NO enchufe el surtidor de agua hasta que el botellón lleno
NOTA: El agua caliente y fría no estará disponible instantáneamente, ya que
la unidad necesitará tiempo para calentar y enfriar el agua.
se instale y el agua fluya de los grifos de agua caliente y
fría.
PREPARATIVOS ANTES DE LA PRIMERA PUESTA EN MARCHA
Antes de conectar la unidad con la fuente de energía, déjela en posición vertical
durante aproximadamente 12 horas. De esta manera se reduce la posibilidad de
mal funcionamiento del sistema de enfriamiento provocado por la manipulación
de la unidad durante su transporte.
El surtidor de agua recibió una limpieza previa en la fábrica, pero el depósito
y las tuberías de agua deben enjuagarse con agua fresca antes del uso de la
siguiente manera:
1. NO enchufe el surtidor de agua.
2. Asegúrese de que el tapón de desagüe que se encuentra en la parte posterior
del surtidor de agua esté firmemente cerrado.
5
Page 31

Español
3. Llene el tanque de agua con agua del grifo hasta que esté lleno, espere 5
minutos hasta que el agua se asiente.
4. Deslice el botón de seguridad para niños y presione la palanca de agua
caliente hasta que el agua comience a salir, luego deténgase.
5. Enchufe el surtidor en el tomacorriente.
6. Presione el botón ON/OFF (encendido/apagado).
A. Presione HOT/+ (CALIENTE/+)
B. Presione Cold/- (Fría/-)
C. Espere hasta que el agua caliente alcance la temperatura correcta,
aproximadamente 10 minutos.
D. Espere hasta que el agua fría alcance la temperatura correcta,
aproximadamente 40 minutos.
7. Presione el botón ON/OFF (ENCENDIDO/APAGADO) y desenchufe el surtidor
del tomacorriente.
8. Desagüe el agua presionando el botón de agua caliente y luego el botón de
agua fría, hasta que no quede nada de agua (para facilitar esta operación,
use un recipiente grande).
9. Desagüe el agua que pueda quedar en los tanques abriendo el tapón de
desagüe ubicado en la parte posterior del surtidor, hasta que no haya agua.
Recuerde cerrar el tapón de desagüe con firmeza después del desagüe.
10. Coloque un botellón de agua de 5 o 3 galones en la entrada de agua del
surtidor; deje que el agua se asiente durante aproximadamente un minuto.
11. Presione los botones de los grifos de agua para asegurarse de que el agua
fluya por los dos grifos.
12. Enchufe el surtidor en el tomacorriente.
13. Ahora está listo para usar el surtidor de agua.
INSTRUCCIONES PARA LA PUESTA EN MARCHA
Lea detenidamente e interprete todas las instrucciones antes de
instalar el surtidor de agua.
1. Primero, retire la tapa del botellón de agua. Levante el botellón de agua y
colóquelo rápidamente en el receptáculo para el agua. (El botellón de agua
no está incluido.)
2. NO enchufe el surtidor de agua hasta haber verificado que el
agua fluya por los dos grifos cuando se presionan las palancas
de agua caliente y fría. No encienda nunca el surtidor sin agua.
Si lo hace, la unidad puede incendiarse o funcionar mal.
3. Verifique que el agua fluya presionando los grifos de agua caliente y fría de a
uno por vez.
4. Enchufe el cable de energía en un tomacorriente de 115 voltios / 60 Hz.
5. Para activar el enfriador y el calentador del agua, presione el botón On/Off
(Encendido/Apagado), luego presione Hot/+ (Caliente/+) y Cold/- (Fría/-).
6
Page 32

COLD HOT
Español
FUNCIONAMIENTO DE SU SURTIDOR DE AGUA
Este surtidor de agua mantiene el agua caliente y fría de manera instantánea
tanto para cocinar como para beber. Puede utilizarse con botellones de agua de
3 o 5 galones.
BOTONES DE AGUA FRÍA (AZUL) / CALIENTE (ROJO) DE
WDNS32BW
• Presione el botón para liberar el flujo de agua.
• Jale la palanca hacia arriba para detener el flujo de agua.
NOTA: El botón de agua caliente (rojo) está equipado con un
dispositivo de seguridad para niños para evitar que se
derrame agua caliente accidentalmente. Para liberar el
flujo del agua caliente, debe apretarse la palanca y luego
presionarla para abajo.
PALANCAS DE AGUA FRÍA Y CALIENTE DE WDNS115BW
Presione el botón para liberar el flujo de agua.
NOTA: El grifo de agua caliente está equipado con un dispositivo de seguridad
para niños para evitar que se derrame agua caliente accidentalmente.
Para liberar el flujo de agua caliente, presione el botón del dispositivo
de seguridad para niños mientras presiona el botón del agua caliente.
PRECAUCIÓN: Tenga cuidado cuando lleve agua caliente en su taza o
recipiente para evitar que se derrame y provoque lesiones o
daños.
INTERRUPTORES DE ENCENDIDO DEL AGUA FRÍA
(VERDE) Y CALIENTE (ROJO)
(Parte posterior de la unidad)
Interruptor de agua fría (verde):
El interruptor de agua fría activa el proceso de enfriamiento cuando se
enciende.
• Presione el interruptor hasta ponerlo en la posición ON
(ENCENDIDO). Debe encenderse el interruptor.
NOTA: Cuando se enciende la unidad por primera vez, lleva un poco de tiempo
enfriar el agua.
Interruptor de agua caliente (rojo)
El interruptor de agua caliente activa el proceso de calentamiento cuando se
enciende.
• Presione el interruptor hasta ponerlo en la posición ON (ENCENDIDO).
Debe encenderse el interruptor.
PRECAUCIÓN! Tenga cuidado cuando lleve agua caliente en su taza o
recipiente para evitar que se derrame y provoque lesiones o
daños.
7
Page 33

HOT
HOT
POWER
COOL
COLD
Español
LUCES INDICADORAS DE AGUA FRÍA (VERDE) Y CALIENTE
(ROJO)
Cuando se iluminan las luces verde y roja en el frente de la unidad, están en
funcionamiento los procesos de calentamiento y enfriamiento. Cuando el agua
fría y caliente alcanzan las temperaturas adecuadas, las dos luces se apagan
automáticamente. Normalmente, el agua caliente alcanza la temperatura
adecuada primero.
WDNS115BW WDNS32BW
CONEXIONES ELÉCTRICAS
INSTRUCCIONES DE PUESTA A TIERRA
Este artefacto debe tener conexión a tierra. En el caso de un cortocircuito
eléctrico, la conexión a tierra reduce el riesgo de descarga eléctrica al
proporcionar un cable de escape para la corriente eléctrica. Este artefacto
está equipado con un cable que cuenta con conexión a tierra y un enchufe
con descarga a tierra. El enchufe debe insertarse en un tomacorriente que se
encuentre debidamente instalado y con conexión a tierra.
• El uso indebido del enchufe puede representar un riesgo de descarga
eléctrica.
• Consulte a un electricista o técnico de reparaciones calificado si no
comprende completamente las instrucciones de puesta a tierra o si no
está seguro de si el artefacto cuenta con la conexión a tierra apropiada.
REQUISITOS PARA LA INSTALACIÓN ELÉCTRICA
Este artefacto debe enchufarse en un TOMACORRIENTE CON DESCARGA A
TIERRA de 15 amperes, 115 Voltios, 60Hz.
NOTA: Cuando se cuenta con un tomacorriente estándar de pared de dos
agujeros, es responsabilidad y obligación personal del usuario
reemplazarlo por un tomacorriente de pared con
tres agujeros con la adecuada conexión a tierra.
CABLES DE PROLONGACIÓN
No recomendamos el uso de cables de prolongación con
esta unidad.
CORTES DE ENERGÍA
Ocasionalmente, puede haber cortes de energía debido
a tormentas eléctricas u otras causas. Desenchufe el cable de alimentación
del tomacorriente de la pared cuando haya un corte de energía. Una vez que
se restablezca la energía, vuelva a enchufar el cable de alimentación en el
tomacorriente de la pared.
8
Page 34

Español
PRECAUCIONES
• Este artefacto no fue diseñado para que lo usen personas (niños incluidos)
con capacidades físicas, sensoriales o mentales disminuidas, ni falta de
experiencia y conocimiento, a menos que, por su seguridad, una persona
responsable los supervise o instruya en relación con el uso del artefacto.
• No utilice dispositivos mecánicos ni otros medios para acelerar el proceso de
descongelamiento, a excepción de lo recomendado por el fabricante.
• No dañe el circuito refrigerante.
• No use artefactos eléctricos dentro del compartimiento de guardado de
alimentos del artefacto, a menos que sean del tipo recomendado por el
fabricante.
• Para evitar riesgos debido a la inestabilidad del artefacto, éste debe estar fijo
de acuerdo con las instrucciones.
CUIDADO Y LIMPIEZA ADECUADOS
PRECAUCIÓN: Antes de utilizar productos de limpieza, lea y siga siempre las
instrucciones del fabricante, así como también las advertencias,
para evitar lesiones personales y daños al producto.
NOTA: Se recomienda limpiar el surtidor y el área que lo rodea cuando se
reemplaza el botellón de agua con uno nuevo. De esta manera puede
mover la unidad con facilidad sin el peso del botellón.
GENERAL
• Antes de limpiar, coloque una funda para proteger del polvo sobre el protector
del agua para evitar que pase polvo y suciedad al surtidor cuando se lo
limpia.
• Prepare una solución de limpieza con 3 o 4 cucharadas de bicarbonato de
sodio mezcladas con agua tibia. Utilice una esponja o paño suave.
9
Page 35

Español
Desenchufe siempre la unidad antes de limpiarla para evitar descargas
eléctricas. Si no se cumple con este paso, las consecuencias pueden ser la
muerte o lesiones personales.
¡ADVERTENCIA!
• No utilice productos químicos fuertes, abrasivos, amoníaco, blanqueador con
cloro, detergentes concentrados, solventes o esponjas de metal texturizado.
Algunos de estos productos químicos pueden disolver, dañar o desteñir la
unidad.
• El agua que se derrama en la bandeja para goteo debe quitarse con
regularidad y limpiarse adecuadamente para evitar la formación de bacterias
y residuos.
• Le recomendamos que limpie el surtidor de agua al menos dos veces al año.
Cuando lo limpie, no es necesario que desarme todo. Simplemente vierta
la solución de bicarbonato de sodio/agua por el protector del agua. Luego
enjuague con abundante agua y permita que el agua drene.
• Retire el agua acumulada de la bandeja para goteo y limpie el
compartimiento.
LIMPIEZA DE LOS SERPENTINES DEL CONDENSADOR
Le recomendamos que aleje el surtidor de la pared y aspire o cepille los
serpentines que se encuentran en la parte posterior de la unidad al menos 4
veces al año. Algunos ambientes de funcionamiento pueden requerir de limpiezas
más frecuentes.
VACACIONES O AUSENCIAS PROLONGADAS / MUDANZA
• Apague el surtidor de agua.
• Desenchufe la unidad.
• Si el botellón aún contiene agua, retírela rápidamente y
con cuidado para evitar que se derrame.
• Coloque un recipiente o balde en el piso debajo del
desagüe en la parte de atrás de la unidad para que
caiga el agua del tubo de desagüe.
• Retire el tapón de desagüe ubicado al costado de la
unidad para que caiga el agua y se vacíen los dos
tanques.
Note: Retire el tapón de desagüe girándolo hacia la
derecha. Tenga en cuenta que no deben utilizarse herramientas para
retirar o instalar el tapón de desagüe. Utilice únicamente las manos.
• Después de finalizar el proceso de desagüe, vuelva a colocar el tapón de
desagüe en su posición original.
• Debe guardar la unidad a temperatura ambiente.
• Evite guardar la unidad en lugares en los que la temperatura esté en el punto
de congelación o por debajo de este punto.
• Cuando mueva la unidad, ésta debe estar en posición vertical. NO mueva la
unidad en posición horizontal, ya que se pueden producir daños en las piezas
internas.
• Debe cubrir la unidad para evitar que entre polvo o suciedad en el protector
para el agua.
10
Page 36

Español
GUÍA PARA LA DETECCIÓN Y SOLUCIÓN DE PROBLEMAS
Si la unidad está encendida y el compresor no se pone en
funcionamiento:
• Asegúrese de que el cable de energía esté bien enchufado
• Si el surtidor de agua se ubica en el interior en el invierno, permita que llegue
a la temperatura ambiente antes de enchufarlo. El agua fría embotellada o la
temperatura del surtidor mismo pueden afectar la configuración del termostato.
Si la temperatura ambiente es inferior a la configuración del termostato, o el
surtidor de agua mismo está frío, éste no se pondrá en funcionamiento. No le
recomendamos que realice ajustes a la configuración del termostato.
Si el funcionamiento del surtidor de agua es ruidoso:
• Asegúrese de que el surtidor de agua esté apoyado en una superficie
nivelada. Si el surtidor es ruidoso después de su primer uso, desenchúfelo
durante media hora e intente nuevamente.
Si el condensador se calienta demasiado:
• Cuando el compresor está funcionando, es normal que el condensador esté
caliente. Si le preocupa que la temperatura sea demasiado elevada, verifique
que haya suficiente espacio alrededor del surtidor de agua para que la
ventilación sea adecuada.
Si el grifo de agua fría no funciona y el tanque de agua fría se
congela
• El grifo de agua fría puede congelarse en condiciones extremas. Si el agua
no se está utilizando, el compartimiento de enfriamiento está cargado y
el compresor funciona de manera continua, el tanque de agua fría puede
congelarse.
• Para descongelar el tanque de agua fría, apague la unidad, desenchúfela y
retire el botellón de agua. Siga drenando el agua caliente y vuelva a verterla
en el receptáculo para el agua. Una vez que el tanque se descongele, coloque
el botellón en la unidad, enchúfela nuevamente y vuelva a encender los
interruptores de agua fría y caliente.
Si el agua no está lo suficientemente fría:
• Esto se debe a un mal funcionamiento del compresor o a que el agua fría esté
en la posición OFF (APAGADO).
• Verifique que el agua fría esté en la posición ON (ENCENDIDO).
• El agua fría se utiliza con mucha frecuencia.
Si gotea agua del surtidor al piso:
• El botellón de agua puede tener agujeros pequeños o grietas y puede estar
goteando.
• El tapón de desagüe que se encuentra en la parte posterior de la unidad
puede estar mal cerrado. Verifique que la junta suave de goma no esté
rasgada o dañada.
11
Page 37

GARANTIA LIMITADA
Español
Que es lo que cubre y por
cuanto tiempo?
Esta garantía cubre todos los defectos
en el funcionamiento o materiales por
un período de tiempo de:
12 meses labor (En el lugar de
centro de servicios)
12 meses partes
La garantía comienza desde la fecha
de compra del producto, la factura
original de compra debe presentarse
en el centro de atención autorizado
antes de hacer uso de los servicios de
la garantía.
EXEPCIONES: Uso comercial o
renta
90 días labor (en lugar del
centro de servicios)
90 días partes No aplica
ninguna otra garantía
Qué cubre?
1. Las partes mecánicas y eléctricas
que hacen al funcionamiento de
la unidad por un período de 12
meses. Esto incluye todas las partes
a excepción del acabado y pintura.
Que se hará y como se obtiene
el servicio?
1. Nosotros repararemos o
cambiaremos a nuestra discreción
cualquier parte mecánica o eléctrica
que se muestre defectuosa en la
operatoria normal y dentro del
período especificado.
2. No habrá cargos para el
comprador por la labor sobre los
ítem mencionados que se realizara
dentro de los 12 meses iniciales.
Luego de este período inicial sólo
las parte serán cubiertas en la
garantía restante. La labor debe ser
abonada por el cliente.
3. Contacte a su centro de servicios
autorizado por HAIER más cercano.
Para obtener el nombre del Centro
de Servicios más cercano llame al:
1-877-337-3639 o visite nuestro
sitio web www.haieramerica.com
ESTA GARANTIA ACANZA A
TODOS ELECTRODOMESTICOS
DENTRO DE LOS ESTADOS
UNIDOS, CANADA Y PUERTO
RICO. NO ALCANZA LO
SIGUIENTE:
Daños por instalación inadecuada
Daños en el embarque.
Daños por desuso, accidente, abuso,
alteración, falta de cuidado y
mantenimiento adecuado, uso del
voltaje inapropiado.
Daños por otro uso que no sea el
doméstico.
Daños realizados por un técnico o
persona no autorizada por HAIER.
Adornos decorativos, lámpara de
luz, vidrio.
Transporte y gastos de embarque.
Labor (luego de los 12 meses iniciales)
ESTA GARANTIA LIMITADA ESTA
DADA EN LUGAR DE CUALQUIER
OTRA GARANTIA, EXPRESAS O NO,
INCLUYENDO LA GARANTIA DE
COMERCIALIZACION O PARA UN
PROPOSITO EN PARTICULAR.
Las soluciones provistas en esta
garantía son exclusivas y concedidas
en lugar de cualquier otra garantía.
Esta garantía no cubre daños
incidentales o consiguientes, de modo
que las limitaciones anteriores pueden
no alcanzarlo. Algunos Estados no
permiten limitaciones en cuanto la
duración de una garantía implícita, de
modo que las limitaciones anteriores
pueden no alcanzarlo.
Esta garantía le da derechos legales
específicos, y usted gozará de otros
derechos los cuales varían de Estado
a Estado.
Haier América
New York, NY 10018
12
Page 38

IMPORTANT
Do Not Return This Product To The Store
If you have a problem with this product, please contact the
“Haier Customer Satisfaction Center” at 1-877-337-3639.
DATED PROOF OF PURCHASE REQUIRED FOR WARRANTY SERVICE
IMPORTANT
Ne pas Réexpédier ce Produit au Magasin
Pour tout problème concernant ce produit, veuillez contacter le service des
consommateurs ‘Customer Satisfaction Center’ au 1-866-327-5817.
UNE PREUVE D’ACHAT DATEE EST REQUISE POUR BENEFICIER DE LA GARANTIE.
IMPORTANTE
Si tiene algún problema con este producto, por favor contacte el “Centro de Servicio al
NECESITA UNA PRUEBA DE COMPRA FECHADA PARA EL SERVICIO DE LA GARANTIA
No regrese este producto a la tienda
Consumidor de Haier” al 1-877-337-3639 (Válido solo en E.U.A).
115V, 60Hz
Made in China
Fabriqué en Chine
Hecho en China
New York, NY 10018
101223 WDNS32BW, WDNS115BW
©
2010 Haier America Trading, LLC. All Rights Reserved.
Haier America
 Loading...