

Page 1
Water Dispenser
Fontaine d'eau Réfrigérée
Dispenser de Agua
WDLS056
Installation Manual
Instructions dínstallation
Instrucciones de Instalación
Quality •Innovation •Style
WDLT165
WDLS056
WDLT165
Page 2

English
SAFETY PRECAUTIONS
Read all of the instructions before using this appliance.
When using this appliance, always exercise basic safety
precautions, including the following:
1. Use this appliance only for its intended purpose as described in this use and
care guide.
2. This water dispenser must be properly installed in accordance with the
installation instructions before it is used. See the grounding instructions in the
installation section.
3. Never unplug your water dispenser by pulling on the power cord. Always
grasp the plug firmly and pull straight out from the outlet.
4. Repair or replace immediately, all electric service cords that have become
frayed or otherwise damaged. Do not use a cord that shows cracks or
abrasion damage along its length, on the plug or at the connector end.
5. Unplug your water dispenser before cleaning and making any repairs.
Note: If for any reason this product requires service, we strongly
recommend that a certified technician perform the service.
6. This water dispenser should not be recessed or built into an enclosed
cabinet. It is designed for freestanding installation only.
7. This appliance is designed for INDOOR USE ONLY and should not be used
outdoors.
8. Do not operate your water dispenser in the presence of explosive fumes.
9. Close supervision is necessary when any appliance is used by or near
children.
10. To protect against electric shock, do not immerse the cord, plug, or any other
part of the water dispenser in water or other liquids.
SAVE THESE INSTRUCTIONS
For Future Use
Thank you for purchasing our Haier
product. This easy-to-use manual
will guide you in getting the best
Model number
use of your water dispenser.
Remember to record the model and
Serial number
serial number. They are on a label
in back of the unit.
Date of purchase
Staple your receipt to your manual. You will need it to obtain
warranty service.
1
Page 3

TABLE OF CONTENTS
PAGE
SAFETY PRECAUTIONS............................................................................1
English
UNPACKING
PARTS AND FEATURES........................................................................3-4
PROPER LOCATION
ASSEMBLY INSTRUCTIONS ....................................................................5
Installing Your Water Dispenser ..................................................................5
ELECTRICAL CONNECTIONS
Grounding Instructions ..............................................................................6
Wiring Requirements ..................................................................................6
Extension Cords ........................................................................................6
Power Interruptions ....................................................................................6
OPERATING YOUR WATER DISPENSER ................................................7
Cold/Hot Water Faucets ............................................................................7
Cold/Hot Water Switches............................................................................7
Cold/Hot Water Indicator Lights..................................................................7
Using the Refrigerator Compartment ..........................................................7
PROPER CARE AND CLEANING..........................................................8-9
General ....................................................................................................8
Cleaning the Condenser Coils....................................................................9
For Long Vacations or Absences / Moving ..................................................9
TROUBLESHOOTING GUIDE................................................................10
WARRANTY
............................................................................................2
................................................................................5
..................................................................6
............................................................................................11
UNPACKING
1. Remove all packing materials. This includes the foam base and all adhesive
tape holding the accessories inside and outside.
2. Inspect and remove any remaining packaging, tape and printed materials
before turning on the water dispenser
Note: Allow the water dispenser to stand in an upright position for at least
8 hours before turning on the power
.
.
2
Page 4

English
PARTS AND FEATURES
Model:
WWDDLLSS00556
6
Water Dispenser with Refrigerator
1
2
3
4
5
6
13
&
14
10
11
9
8
12
15
7
1. Water Bottle (not included)
2. Water Bottle Guard
3. Hot Water Faucet
4. Child Lock Button
5. Removable Drip Tray
6. Refrigerator Compartment
7. Removable Adjustable Shelf
8. Cold Water Faucet (blue)
9. Cold Water Indicator Light (green)
3
10.Hot Water Indicator Light (red)
11. Power On Indicator Light (yellow)
12. Vent (right and left sides)
13. Hot Water On/Off Power Switch
(red) (not shown, in the rear)
14.Cold Water On/Off Power Switch
(green) (not shown, in the rear)
15.Drain (not shown, in the rear)
Page 5
PARTS AND FEATURES
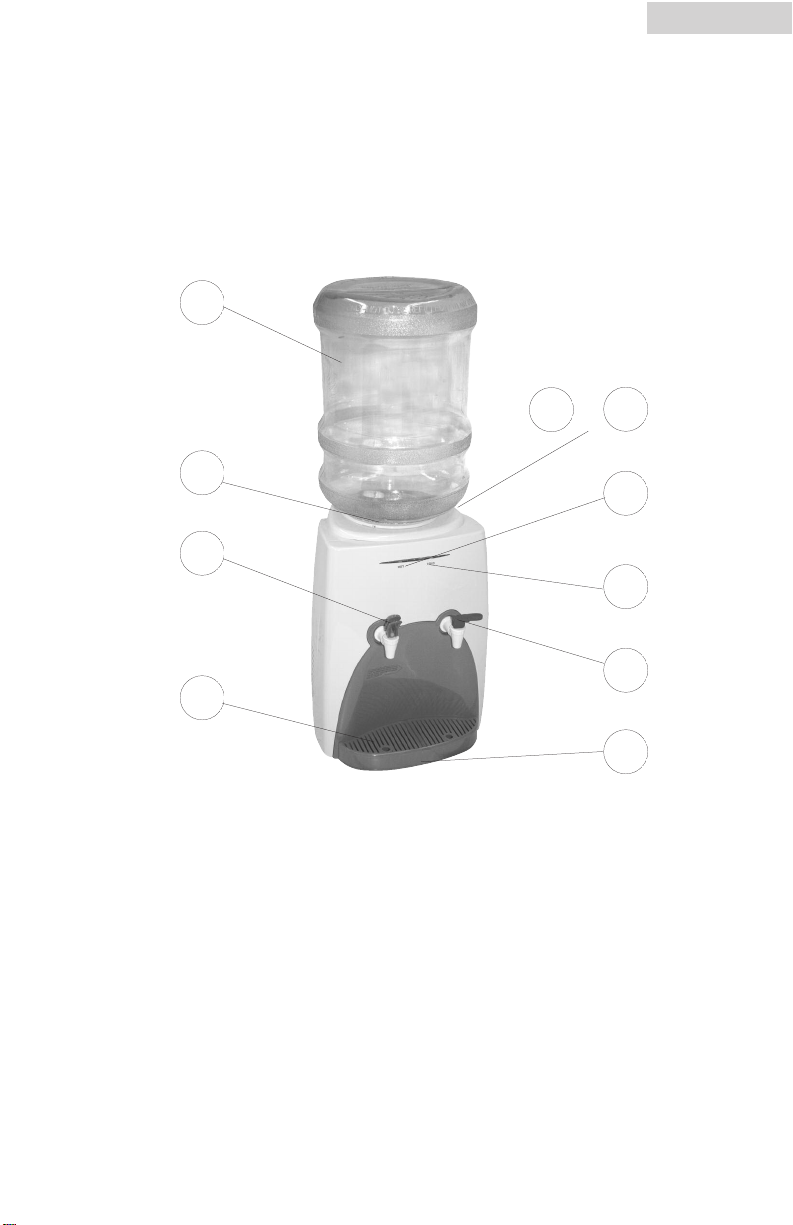
Model: WDLT165
Water Dispenser with Refrigerator
1
2
3
English
&
8
9
7
6
4
1. Water Bottle (not included)
ater Bottle Guard
W
2.
aucet (red)
ater F
Hot W
3.
Removable Drip T
4.
5. Cold Water Faucet (blue)
ater Indicator Light (green)
Cold W
6.
ray
5
10
7. Hot Water Indicator Light (red)
ater On/Off Power Switch
Cold W
8.
(green) (not shown, in the rear)
9. Hot Water On/Off Power Switch
(red) (not shown, in the rear)
Drain (not shown - located under
10.
the unit)
4
Page 6
English
PROPER LOCATION
• To ensure that your water dispenser works at the maximum efficiency it was
designed for, you should install it in a location where there is proper air
circulation and electrical connections.
• The following are the recommended clearances around the water dispenser.
Sides 3/4" (19mm)
Back 2" (50mm)
• Do not install your water dispenser in any location that is not properly insulated
or heated because the unit is not designed to operate in temperature settings
below 55˚F / 13˚C.
:
:
Note
The built-in thermostat maintains the hot and cold temperatures
automatically. On the compressor cooled water coolers the hot water
temperature will be between 185˚-197˚ F/ 85˚-92˚ C and the cold
water temperature will be between 42.8˚-50˚ F/ 6˚-10˚ C.
On the thermal electric cooled water coolers the hot water temperature
will be between 185˚-197˚ F/85˚-92˚ C and the cold water
temperature will be between 50˚- 59˚ F/ 10˚-15˚ C.
• Select a suitable location for the unit on a hard even surface away from direct
sunlight and heat sources (e.g., radiators, baseboard heaters, cooking
appliances, etc).
Note: Hot and cold water will not be instantly available as the unit will
need time to heat up and cool down the water.
CAUTION: DO NOT plug in the water dispenser until water flows
through both Hot and Cold water faucets.
ASSEMBLY INSTRUCTIONS
Read carefully and understand all installation instructions before installing the
water dispenser.
Installing Your Water Dispenser
Follow the steps below to install the water dispenser.
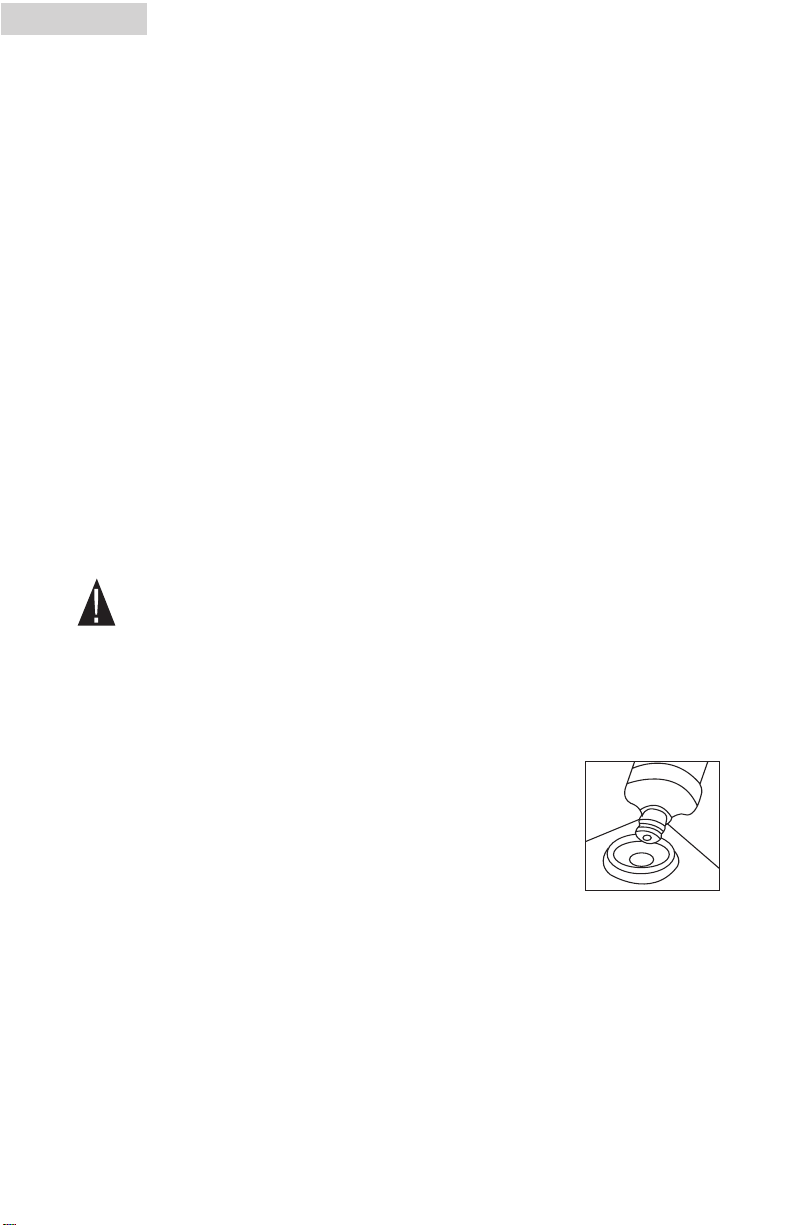
1. Remove the cap from the water bottle first. Lift up the water
bottle and quickly place it into the water guard. Make sure it
is standing in an upright position. (The water bottle is not
included.)
DO NOT plug in the water dispenser until you have checked that
2.
water flows out when either of the faucets are pressed. Never turn
on the water dispenser without water in it. Doing so may cause the
unit to catch fire or malfunction.
Check that water flows out by pressing both the Hot and Cold faucets one at a
3.
time.
4. Plug the power cord into an 115Volt / 60Hz outlet.
5. To activate the water heater and cooler, turn ON the red and green switches
on the back of the unit. The hot & cold indicators in the front will be lit.
5
Page 7
English
ELECTRICAL CONNECTIONS
GROUNDING INSTRUCTIONS
This appliance must be grounded. In the event of an electrical short circuit,
grounding reduces the risk of electric shock by providing an escape wire for the
electric current. This appliance is equipped with a cord containing a grounding
wire and a grounded plug. The plug must be inserted into an outlet that is
properly installed and grounded.
• Improper use of the plug may result in the risk of electric shock.
• Consult a qualified electrician or service technician if the grounding
instructions are not completely understood or if in doubt as to whether
the appliance has been properly grounded.
WIRING REQUIREMENTS
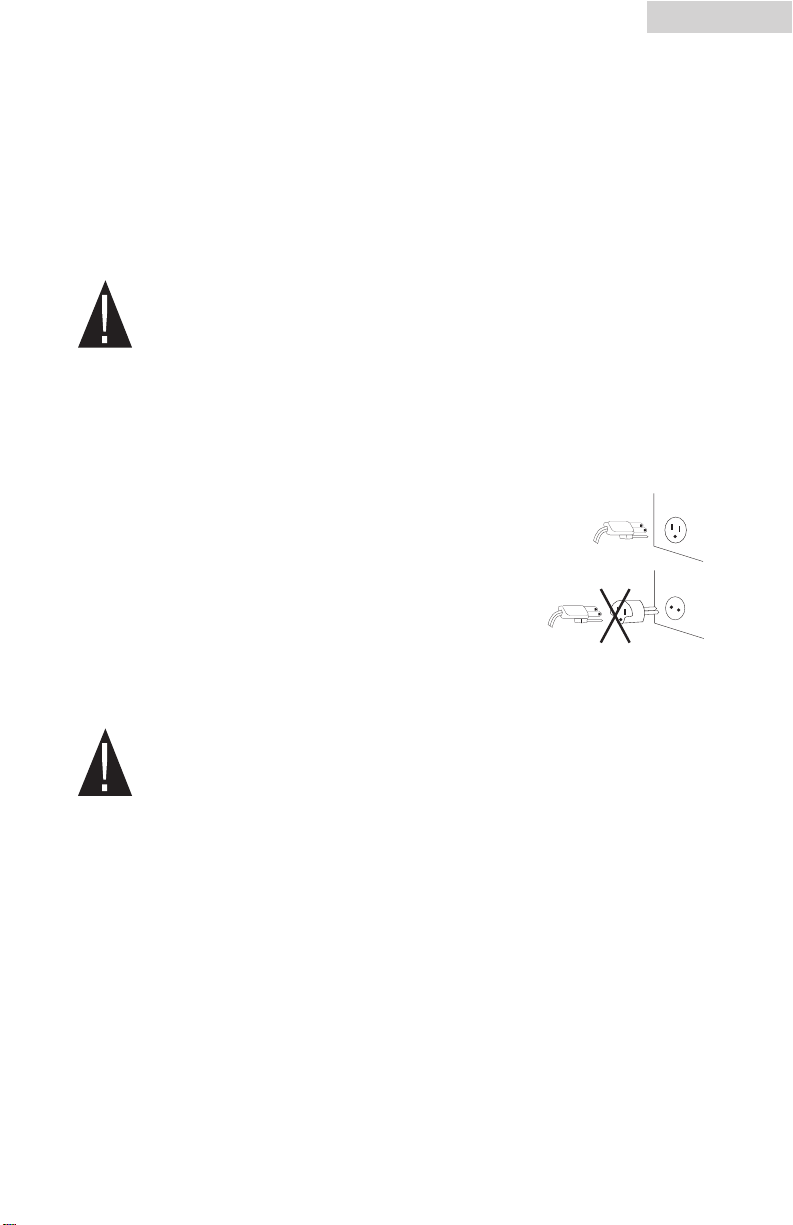
This appliance must be plugged into a 15Amp, 115 Volt, 60Hz GROUNDED
OUTLET.
Note: Where a standard two-prong outlet is encountered,
it is the personal responsibility and obligation of
the consumer to have it replaced with a properly
grounded three-prong outlet.
EXTENSION CORDS
We DO NOT recommend the use of an extension cord
with this unit.
POWER INTERRUPTIONS
Occasionally, there may be power interruptions due to thunderstorms or
other causes. Remove the power cord from wall outlet when a power
outage occurs. When power has been restored, re-plug the power cord
into wall outlet.
6
Page 8

English
COLD HOT
OPERATING YOUR WATER DISPENSER
This water dispenser maintains instant hot and cold water for your cooking and
drinking needs. It accepts 2, 3 or 5-gallon water bottles.
Cold (blue) / Hot (red) Water Faucets (WDLT165)
• Press the tap lever down to release the water flow.
• Pull the tap lever up to stop the water flow.
Note: The hot (red) water faucet is equipped with a child
safety lock to prevent accidental spilling of hot water. To
release the hot water flow, the tap lever must be squeezed
and then pushed down.
• In the case of WDLT165 press in the hot water safety child
lock and then push down. Release the lever to stop the
water flow.
• In case of WDLS056 push the red child safety button to
the left and press in the button for hot water. For cold
water just push the right button in.
Cold (green) / Hot (red) Water Switches (located on the rear of the unit)
Cold Water Switch (green):
The cold water switch activates the cooling process when turned ON.
• Press the switch to the ON position. The switch should become lit.
Note: When turning on the unit for the first time, it will take some time
to chill the water.
Hot Water Switch (red):
The hot water switch activates the heating process when turned ON.
• Press the switch to the ON position. The switch should become lit.
Caution! Be careful when carrying hot water in your cup or container
to avoid any injury or harm from spills.
Red Child
Safety Button
Hot Water
Cold Water
Cold (green) / Hot (red) Water Indicator Lights
When the green and red lights are illuminated on the front of the unit, the heating
and cooling process is in progress. When the cold and hot water has reached their
proper temperatures, both lights will turn off automatically. Normally, hot water
reaches proper temperature first.
USING THE REFRIGERATOR COMPARTMENT (Not in all models)
The convenient refrigerator compartment can be very useful in storing beverages
and other perishable food items.
• When the dispenser is turned on for the first time, avoid food
• The refrigerator is frost free. During the automatic defrost cycle, ice build-up on
7
spoilage by waiting at least 8 hours before putting any food or beverages into the compartment, as the compartment may not be cool
enough to store foods.
the rear interior wall of the compartment will melt and drip into the water-collecting tray and then evaporate naturally.
Page 9

English
PROPER CARE AND CLEANING
Caution! Before using any cleaning product, always read and follow the
manufacturer’s instructions and warnings to avoid personal injury
and/or product damage.
Note: It is best to clean the dispenser and its surrounding area in between
replacing the empty bottle with a new one. This way you can move the unit
easily without the weight of the bottle.
WARNING!
Always unplug the unit before cleaning to avoid electric shock.
Failure to do so may result in death or injury.
GENERAL
• Before cleaning, place the dust cover on top of the water guard to prevent dust
and debris from going into the dispenser while cleaning.
• Prepare a cleaning solution of 3-4 tablespoons of baking soda mixed with warm
water. Use a sponge or a soft cloth dampened with the cleaning solution to wipe
down the unit.
• Wipe with clean warm water and dry with a soft cloth.
• Do not use harsh chemicals, abrasives, ammonia, chlorine bleach, concentrated
detergents, solvents or metal scouring pads. Some of these chemicals may
dissolve, damage and/or discolor the unit.
• The spilled water in the drip tray must be removed regularly and cleaned
properly to avoid any bacteria and residue build-up.
• We recommend that you clean the water dispenser at least twice a year. When
cleaning, you do not need to take anything apart. Simply pour the baking
soda/water solution through the water guard. Then rinse with plenty of water
and allow the water to drain.
8
Page 10

English
W
ATER REFRESHMENT CENTER
WATER REFRESHMENT CENTER
CLEANING THE CONDENSER COILS (Not in all models)
• We recommend that you move the dispenser away from the wall and vacuum
or brush the coils on the rear of the unit at least 4 times a year. Some
operating environments may require more frequent cleaning.
FOR LONG VACATIONS OR ABSENCES / MOVING
• Turn OFF the cold and hot water switches.
• Unplug the unit.
• Drain the unit completely and remove the empty water
bottle. Put a container or bucket on the floor under the
drain on the back of the unit to catch the water released
from the drain tube.
Note: The location of the drain may vary depending on the
model type.
• Remove the drain plug to release the water.
• After completing the drain process, replace the drain plug to its original
position.
• You must store the unit at room temperature.
• Avoid storing the unit where the temperature is at or below freezing.
• When moving, the unit must be moved vertically. DO NOT move the unit in
horizontal position as this may cause possible damage to internal parts.
• You must cover the unit to avoid dust and debris from entering the water
guard.
9
Page 11

English
TROUBLESHOOTING GUIDE
The unit does not operate.
• Check if your water dispenser is plugged in.
• Check the circuit breaker and the fuse to make sure there is power at the
outlet.
There is no water from the faucet.
This is due to an improper setting of the water bottle or from blocked airflow.
• Adjust the position of the bottle properly on the water bottle guard so the air
opening is not blocked.
There is no hot water coming from the faucet.
• Too much hot water was used in too short a period of time.
• You may need to wait awhile for more water to be heated.
• Check if the hot water switch is in the ON position.
The water is not cool.
This is due to either a compressor malfunction (for units with compressor) or the
cold water switch may be in the OFF position.
• Check if the cold water button is in the ON position.
Compressor runs too frequently.
This may be necessary to maintain a constant temperature during hot and humid
days.
• Clean the condenser coils on the back of the unit. (not in all units)
The water is leaking from the drip tray.
This is due to over-spilling of the water in the drip tray.
• You must remove the drip tray from the dispenser and empty out the water.
• Replace it once you have emptied the water.
What happens if the water dispenser is running dry (without the
water)?
• You must never let the water dispenser run dry as this may cause damage to the
unit and create a fire. DO NOT let the dispenser run without water.
• You must replace the empty bottle immediately.
What size of water bottle can I use with this water dispenser?
• You can use 2, 3 or 5-gallon bottles with our water dispenser.
10
Page 12

English
LIMITED WARRANTY
What is covered and for how
long?
This warranty covers all defects in
workmanship or materials for a period
of:
12 months labor (carry-in only)
12 months parts
The warranty commences on the date
the item was purchased and the original purchase receipt must be presented
to the authorized service center before
warranty repairs are rendered.
EXCEPTIONS: Commercial or
Rental Use warranty
90 days labor (carry-in only)
90 days parts
No other warranty applies
What is covered.
1. The mechanical and electrical parts,
which serve as a functional purpose
of this appliance, for a period of 12
months. This includes all parts
except finish, and trim.
What will be done?
1. We will repair or replace, at our
discretion, any mechanical or
electrical part which proves to be
defective in normal usage during
the warranty period so specified.
2. There will be no charge to the
purchaser for parts and labor on
any covered items during the initial
12
month period. Beyond this period,
only parts are covered in the
remaining warranty. Labor is not
provided and must be paid by the
customer
Contact your nearest authorized
3.
service center
nearest service center please visit
our website at
.
or the name of the
. F
www.HaierAmerica.com or call
1-877-337-3639 for more
information.
THIS WARRANTY COVERS
APPLIANCES WITHIN THE
CONTINENTAL UNITED STATES,
PUERTO RICO AND CANADA.
IT DOES NOT COVER
THE FOLLOWING:
Damages from improper installation.
Damages in shipping.
Defects other than manufacturing.
Damage from misuse, abuse, accident,
alteration, lack of proper care and
maintenance or incorrect current or
voltage.
Damage from other than household
use.
Damage from service by other than an
authorized dealer or service center.
Decorative trims or replaceable light
bulbs.
Transportation and shipping.
Labor (after the initial 12 months).
THIS LIMITED WARRANTY IS GIVEN IN
LIEU OF ALL OTHER WARRANTIES,
EXPRESSED OR, INCLUDING THE
WARRANTIES OF MERCHANTABILITY
AND FITNESS FOR A PARTICULAR
PURPOSE.
The remedy provided in this warranty is
exclusive and is granted in lieu of all
other remedies.
This warranty does not cover incidental
or consequential damages, so the
above limitations may not apply to
you. Some States do not allow limitations on how long an implied warranty
lasts, so the above limitations may not
apply to you.
This warranty gives you specific legal
rights, and you may have other rights,
which vary, from state to state.
Haier America
New York, NY 10018
11
Page 13

Français
CONSIGNES DE SÉCURITÉ
Lisez toutes les instructions avant d'utiliser cet appareil. Lorsque vous
utilisez cet appareil, veillez à toujours respecter les consignes de
sécurité les plus élémentaires, les suivantes:
1. Utilisez cet appareil uniquement pour l'usage auquel il est destiné comme
indiqué dans ce manuel.
2. Cette fontaine d'eau réfrigérée doit être montée conformément aux instructions
d'installation avant de l'utiliser. Voir les instructions de la section d'installation.
3. Ne débranchez jamais votre fontaine d'eau réfrigérée en tirant sur le câble
d'alimentation. Saisissez fermement la fiche et tirez tout droit sur cette
dernière.
4. Remplacez immédiatement tout cordon ou câble électrique effiloché ou
endommagé. Veillez à ne pas utiliser un câble présentant des craquelures ou
des abrasions au niveau du cordon, de la fiche ou de l'extrémité du connecteur.
5. Débranchez la fontaine d'eau réfrigérée avant de la nettoyer ou de la réparer.
Remarque: Si pour une raison ou pour une autre, cet appareil doit être
6. Cette fontaine d'eau réfrigérée ne doit pas être placée en retrait ou encastré à
l'intérieur d'une cavité armoire. Cet appareil être placé tout seul et sans
support.
7. Cet appareil doit être utilisé À L’INTÉRIEUR UNIQUEMENT et ne doit en aucun
cas être utilisé à l’extérieur.
8. N'utilisez pas la fontaine d'eau réfrigérée en présence de vapeurs explosives.
9. Il est nécessaire de surveiller attentivement les enfants lorsque vous utilisez cet
appareil à proximité des enfants.
10.Pour éviter tout risque d'électrocution, ne pas immerger le câble électrique, la
fiche ou toutes autres pièces de la fontaine réfrigérée l'eau ou tout autre
liquide.
réparé, il est fortement agréé effectue la réparation.
CONSERVEZ CES INSTRUCTIONS
Afin de pouvoir les consulter ultérieurement
Nous vous remercions d'avoir fait
l'achat de cet appareil Haier. Cette
notice facile à consulter vous aidera
Numéro du modèle
à utiliser au mieux votre fontaine
d'eau réfrigérée.
Numéro de série
N'oubliez pas de noter le modèle et
numéro de série. Ces derniers se
trouvent sur une étiquette au dos de
Date d'achat
l'appareil.
Agrafez le reçu de vente sur votre notice. Vous en aurez besoin
afin de bénéficier de la couverture offerte par la garantie.
1
Page 14

Français
SOMMAIRE
PAGE
CONSIGNES DE SÉCURITÉ
DÉBALLAGE
PIÈCES ET CARACTÉRISTIQUES
CHOISIR L’EMPLACEMENT DE LA FONTAINE........................................5
INSTRUCTIONS D’INSTALLATION ........................................................5
Montage de la fontaine d'eau réfrigérée......................................................5
RACCORDEMENTS ÉLECTRIQUES ..........................................................6
Instructions de mise à la masse ..................................................................6
Raccordements électriques..........................................................................6
Rallonges électriques..................................................................................6
Coupures de courant..................................................................................6
UTILISATION DE LA FONTAINE D’EAU RÉFRIGÉREE............................7
Robinets Froid/Chaud ................................................................................7
Interrupteurs Froid/Chaud ..........................................................................7
Voyants Froid/Chaud..................................................................................7
Utilisation du compartiment réfrigérateur ....................................................7
ENTRETIEN ET NETTOYAGE
Nettoyage général et maintenance..............................................................8
Nettoyage des serpentins condenseurs ........................................................9
Vacances / Absences de longue durée / Déménagement ............................9
GUIDE DE DÉPANNAGE ......................................................................10
............................................................................................2
......................................................................1
..........................................................3-4
................................................................8-9
GARANTIE ............................................................................................11
DÉBALLAGE
1. Retirez tout le matériau d'emballage, y compris le socle en mousse et le ruban
adhésif retenant les accessoires de la fontaine à l’intérieur et à l’extérieur.
Vérifiez la fontaine et retirez tout matériau d’emballage restant, ruban et doc-
2.
umentaion avant de mettre en marche la fontaine réfrigérée.
Note: Laissez la fontaine réfrigérée demeurer debout pendant au moins 8
heures avant de la mettre en marche.
2
Page 15

PIÈCES ET CARACTÉRISTIQUES
Modèle: WDQS055
Fontaine d'eau avec réfrigérateur
Français
1
2
3
4
5
6
13
&
14
10
11
9
8
12
15
7
1. Bouteille de l'eau (non inclus)
2. Logement de protection pour
bouteille d'eau
3. Robinet d'eau chaude
Child Lock Button
4.
5. Bac ramasse -gouttes amovible
6. Compartiment réfrigérateur
7. Clayette réglable amovible
8. Robinet d'eau froide
9. Voyant d'eau froide (vert)
10. Voyant d'eau chaude (rouge)
11. Power On Indicator Light (yellow)
12. Ouvertures d’aération (côtés, à
droite et à gauche)
13. Interrupteur de marche/arrêt
(On/Off) - eau chaude (rouge)
(non montré, dans l'arrière)
14. Interrupteur de marche/arrêt
(On/Off) - eau froide (vert) (non
montré, dans l'arrière)
15. Orifice d'évacuation (non montré,
dans l'arrière)
3
Page 16

Français
PIÈCES ET CARACTÉRISTIQUES
Modèle: WDLT165
Fontaine d'eau réfrigérée de table
1
2
3
&
8
9
7
6
4
1. Bouteille de l'eau (non inclus)
2. Logement de protection pour
bouteille d'eau
3. Robinet d'eau chaude (rouge)
4. Bac ramasse
5. Robinet d'eau froide (bleu)
oyant d'eau froide (vert)
6. V
7. Voyant d'eau chaude (rouge)
4
-gouttes amovible
5
10
8. Interrupteur d’alimentation et d’eau
chaude (rouge) (non montré)
9. Interrupteur d’alimentation et d’eau
froide (noir) (non montré, dans l'arrière)
10. Orifice d'évacuation (non indiqué,
situé sous l’appareil) (non montré,
dans l'arrière)
Page 17

Français
CHOISIR L’EMPLACEMENT DE LA
FONTAINE
• Pour être certain que votre fontaine fonctionne à plein rendement, placez-la dans
un endroit largement ventilé et où il existe des prises de courant électriques.
• Les distances suivantes sont les distances de sécurité recommandées autour de
la fontaine:
Côtés ....3/4 po. (19mm)
Dos ..........2 po (50mm)
• N'installez pas votre fontaine d'eau réfrigérée dans un endroit non-chauffé ou
ne présentant pas une isolation adéquate car l'appareil n'a pas été conçu afin
de fonctionner à des températures inférieures à 55˚F (13˚C).
Remarque: Le thermostat incorporé permet de maintenir constante la
température de l'eau chaude et de l'eau froide. La température de
l'eau chaude demeurera entre 185º et 197˚F (85 à 92˚C) et celle
de l'eau froide entre 42.8˚ et 50˚F (6 à 10˚C).
Sur le coolers d'eau refroidi, électrique et thermique la température
d'eau chaude sera entre 185°-197° F/85°-92° LE C et la température d'eau froide seront entre 50°- 59° F/10°-15° C.
• Recherchez un endroit adéquat et installez l'appareil sur une surface dure et
plane, à l'abri des source de chaleur (radiateurs, appareils de cuisine, etc.)
Remarque: Vous n'obtiendrez pas de l'eau chaude ou froide immédiatement
Ne PAS branche sur l'eau plus fraîche jusqu'à ce que vous avez
essayé ce flux d'eau’le s par les robinets d'eau chauds et froids.
car il faudra un peu de temps à l'appareil afin de réchauffer ou
refroidir l'eau.
INSTRUCTIONS DE MONTAGE
Veuillez lire et comprendre toutes les instructions d’installation
avant l’installer votre fointaine réfrigérée.
Montage de votre Fontaine d'eau réfrigérée
Veuillez respecter la suivre suivante installer la fontaine.
1. Tout d'abord, retirez la capuchon de la bouteille d'eau.
Soulevez la bouteille d'eau et placez-la rapidement dans le
logement de protection. Assurez-vous qu'elle demeure droite
(la bouteille d'eau n'est pas fournie).
2. Ne PAS branche sur l'eau plus fraîche jusqu'à ce que vous avez vérifié ce flux
d'eau’le s des robinets rouges et bleus quand a appuyé. Ne jamais allume le
distributeur d'eau sans l'eau dans il. P
attraper le feu.
Pour mettre en marche le dispositif de chauffe de l'eau chaude et le dispositif
3.
de refroidissement de l'eau froide, allumez les interrupteurs chaud et froid au
dos de l'appareil.
Branchez le câble d'alimentation sur une prise électrique 115 volts / 60 Hz.
4.
Assurez-vous que l'eau sort des robinets et pressant l'un après l'autre les
5.
robinets rouge et bleu.
our ainsi faire peut causer l'unité pour
5
Page 18

Français
RACCORDEMENTS ÉLECTRIQUES
Instructions de mise à la masse
Cet appareil doit être mis à la masse! En cas de court-circuit électrique, la mise à
la terre de l'appareil réduit le risque d'électrocution en offrant un fil par lequel
s'échappe le courant électrique. Cet appareil est équipé d'un cordon avec fil de
masse et d'une fiche de masse. La fiche doit être introduite dans une prise
correctement installée avec un contact de mise à la terre.
• Toute utilisation incorrecte de la fiche risque d'entraîner électrocution.
• Consultez un électricien ou réparateur qualifié si vous ne comprenez
pas complètement les instructions de mise à la masse ou si un doute
persiste en ce qui concerne la mise à la masse de l'appareil.
Besoins électriques
Le câble électrique de l'appareil doit être branché sur une
PRISE AVEC CONTACT DE MASSE d'au moins 15 AMPÈRES,
115-120 VOLTS, et 60 HZ.
Remarque: En présence d'une prise à deux broches, il
incombe à l'utilisateur de la remplacer par une
prise avec contact de mise à la terre capable
d'accueillir une fiche à 3 broches.
Rallonges
Il est DÉCONSEILLÉ d'utiliser une rallonge avec cet appareil.
Coupures de courant
Des coupures de courant peuvent se produire en raison d'orages.
Débranchez le cordon électrique de la prise de courant CA en cas de
coupure de courant. Une fois le courant rétabli, rebranchez le cordon
électrique sur la prise CA.
6
Page 19

COLD HOT
Français
UTILISATION DE LA FONTAINE D'EAU
RÉFRIGÉRÉE
Cette fontaine d'eau réfrigérée contient de l'eau glacée et de l'eau chaude
disponibles instantanément pour la cuisson ou pour boire. Cette fontaine
peut bouteilles d'eau de 2, 3 ou 5 gallons (7,5 , 11,3 et 18,9 litres).
Robinets d'eau chaude (rouge) ou froide (bleu) (WDLT165)
• Pressez le levier afin d’entraîner l’arrivée d'eau.
• Tirez sur le levier afin d'arrêter le débit d'eau.
Remarque: Le robinet d'eau chaude (rouge) est équipé d'un
dispositif de verrouillage destiné à la protection des
enfants afin d'éviter de répandre de l'eau chaude accidentellement.
Pour ouvrir le robinet d'eau chaude, serrez puis pressez avec les
doigts levier.
• En cas de poussée WDLT165 le bouton rouge de sûreté
d'enfant vers la gauche et enfoncent le bouton pour
l'eau chaude. Pour la poussée juste d'eau froide le bouton droit dedans.
Interrupteurs d'eau (bleu) et d'eau chaude
(rouge) (placé sur l'arrière de l'unité)
Interrupteurs d'eau froide (vert):
L'interrupteur d'eau froide enclenche le processus de refroidissement.
• Réglez l’interrupteur sur la position . L’interrupteur devrait s’allumé.
Remarque: Lorsque vous allumez l’appareil pour la première fois,
vous devrez attendre un certain pour que l’eau soit
réfrigérée et glacée.
Interrupteur d'eau chaude (rouge)
L'interrupteur d'eau chaude enclenche le processus de chauffage.
• Réglez l’interrupteur sur la position marche. L’interrupteur devrait
s’allumé.
Attention! Faîtes preuve d'une extrême précaution lorsque vous portez de l'eau
chaude dans un récipient ou une tasse afin d'éviter tout débordement
et tout risque de blessure.
Le Bouton de Sûreté
Enfant rouge
Eau chaude
Eau froide
Voyants d’eau froide (vert) et d’eau chaude (rouge)
Lorsque les voyants rouge et vert s'allument à l'avant de l'appareil, ceci indique
que le processus de chauffage ou de refroidissement est en train de fonctionner.
Lorsque l'eau chaude ou froide a atteint la température adéquate, les deux
voyants s'éteindront automatiquement.
Utilisation du Compartiment Réfrigérateur (Pas dans
tous modèles)
Le compartiment réfrigérateur est pratique et permet de ranger des
boissons et autres aliments périssables.
7
Page 20

Français
• Lorsque vous mettez en marche la fontaine pour la première fois, évitez que
les aliments deviennent avariés en attendant au moins 8 heures avant de les
ranger dans le compartiment car la fontaine risque de ne pas être suffisammnet froide pour conserver des aliments.
• Le réfrigérateur est sans givre. Lors du cycle de dégivrage automatique, la
glace qui se sera formée sur la paroi intérieure arrière du compartiment
fondra et gouttera dans le bac ramasse-gouttes puis s’évaporera
naturellement.
ENTRETIEN ET NETTOYAGE
Attention! Avant d'utiliser des produits de nettoyage, veuillez lire et respecter les
instructions du fabricant afin d'éviter d'endommager l'appareil et de
ne pas vous blesser.
Remarque: Il est recommandé de nettoyer la fontaine réfrigérée et le périmètre
immédiat à chaque fois que la bouteille d’eau est vide afin que
vous puissiez déplacer l’appareil snas le poids de la bouteille.
AVERTISSEMENT!
Pour éviter tout risque d'électrocution, veillez à toujours débrancher
l'appareil avant de le nettoyer. Le non-respect de cette risque d'entraîner
des blessures graves, voire la mort.
Nettoyage Général
• Avant de nettoyer la fontaine réfrigérée, placez le cache-poussière sur le
logement de protection de la bouteille d’eau afin d'éviter toute formation de
poussière et accumulation de débris dans la fontaine lors du nettoyage.
• Préparez une solution de nettoyage en ajoutant 3 à 4 cuillères de bicarbonate
de soude avec de l'eau chaude. Utilisez une éponge ou un chiffon doux,
trempé dans la solution afin d'essuyer l'appareil.
• Rincez avec de l'eau tiède propre et séchez avec un chiffon doux.
• N'utilisez pas de produits chimiques puissants, abrasifs, ammoniaque, ou eau
de javel, détergents concentrés, solvants ou tampons à récurer en fibres
métalliques. Certains de ces produits chimiques risquent de dissoudre,
d'endommager et ou de décolorer votre appareil.
• L'eau répandue dans le bac ramasse-gouttes doit être retirée régulièrement et
le bac doit être nettoyé afin d'éviter toute accumulation de résidus et la
prolifération de bactéries.
• Nous vous recommandons de nettoyer la fontaine d’eau réfrigérée au moins
deux fois par an. L
tout simplement la solution de bicarbonate de soude et d’eau chaude dans le
logement de protection destiné à la bouteille. Ensuite, rincez avec beaucoup
d’eau et laissez l’eau s’évacuer.
8
ors du nettoyage, il est inutile de démonter l’appareil. Versez
Page 21

Français
W
ATER REFRESHMENT CENTER
WATER REFRESHMENT CENTER
Nettoyer les Serpentins Condenseurs (Pas dans tous modèles)
• Nous vous recommandons de placer la fontaine loin du
mur et aspirez avec un aspirateur ou brossez les serpentins
situés à l’arrière de l’appareil au moins 3 à 4 fois par an.
Dans certains cas selon l’environnement, il sera nécessaire
de nettoyer l’appareil plus souvent.
Vacances / Absences de longue durée / Déménagement
• Éteignez l’appareil, les interrupteurs d’eau chaude et d’eau froide doivent être
sur arrêt.
• Débranchez l’appareil.
• Videz complètement l’eau de l’appareil. Retirez la bouteille d'eau vide de
l'appareil et placez un récipient ou un seau par terre sous l'orifice d'évacuation
au dos de l'appareil afin qu'il récupère toute l'eau sortant du tube d'évacuation.
Remarque: The location of the drain may vary depending on the model type.
• Retirez le bouchon d’évacuation afin de libérer l’eau.
• Après avoir purgé l’appareil, replacez le bouchon d’évacuation à sa position
d’origine.
• Remisez l'appareil à la température ambiante.
• Évitez de remiser l'appareil dans un endroit où la température est inférieure à
32˚F (0˚C).
• Si vous comptez déménager, l'appareil doit être déplacé à la verticale. NE
transportez PAS l'appareil à l'horizontale car vous risquez d'endommager les
pièces internes de l'appareil.
Recouvrez l'appareil afin d'éviter toute formation de poussière et accumulation
•
de débris dans le logement de protection de la bouteille d'eau.
9
Page 22

Français
GUIDE DE DÉPANNAGE
L'appareil ne fonctionne pas.
• Assurez-vous que l'appareil est branché.
• Assurez-vous que la prise de courant est alimentée en électricité en vérifiant le
disjoncteur et le fusible.
L'eau ne sort pas du robinet.
La bouteille d'eau ne repose pas correctement ou l'ouverture d'air est bouchée et
bloque la sortie de l'eau.
• Réglez la position de la bouteille dans le logement de protection afin que
l'ouverture d'air ne soit pas bouchée.
Le ne produit pas d’eau.
• L'eau chaude trop beaucoup d'a été utilisée dans trop court une période de
temps.
• Vous pouvez avoir besoin d'attendre un instant pour plus d'eau être chauffé.
• Vérifier si l'eau chaude change est dans le SUR la position.
Le robinet ne produit pas d’eau chaude.
Vous avez utilisez trop d'eau chaude en très peu de temps, ou l'interrupteur d'eau
chaude se trouve sans doute sur "OFF" (arrêt).
• Assurez-vous que l'interrupteur d'eau chaude se trouve sur "On" (marche).
Le compresseur fonctionne trop fréquemment.
Ceci est probablement normal afin de maintenir constante la température de l'eau
lors des jours très chauds et humides.
• Nettoyez les serpentins du condenseur situées au dos de l'appareil. (pas sur
toutes unités)
L'eau fuit du bac ramasse-gouttes.
Le bac déborde d'eau.
• Retirez le bac et videz-le.
• Replacez-le après l'avoir vidée.
Que se passe-t-il si la fontaine manque d’eau ou fonctionne sans eau?
• Ne laissez jamais la fontaine manquer d’eau ou fonctionner à sec car vous
risquez d’endommager l’appareil. NE PAS laisser la fontaine fonctionner eau.
• Remplacez immédiatement toute bouteille vide.
Quelle taille de gourde que peux-j'utiliser avec ce distributeur d'eau?
ous pouvez utiliser 2, 3 ou bouteilles de 5 gallons avec notre distributeur
V
•
d'eau.
10
Page 23

IMPORTANT
Do Not Return This Product To The Store
If you have a problem with this product, please contact the
"Haier Customer Satisfaction Center" at 1-877-337-3639.
DATED PROOF OF PURCHASE REQUIRED FOR WARRANTY SERVICE
IMPORTANT
Ne pas Réexpédier ce Produit au Magasin
our tout problème concernant ce produit, veuillez contacter le service des
P
consommateurs ‘Haier Customer Satisfaction Center’
UNE PREUVE D’ACHAT DATEE EST REQUISE POUR BENEFICIER DE LA GARANTIE.
au 1-877-337-3639.
IMPORTANTE
No regrese este producto a la tienda
Si tiene algún problema con este producto, por favor contacte el "Centro de Servicio al
NECESITA UNA PRUEBA DE COMPRA FECHADA PARA EL SERVICIO DE LA GARANTIA
Consumidor de Haier" al 1-877-337-3639 (Válido solo en E.U.A).
Issued: March 06
115V, 60Hz
Made in China
Fabriqué en Chine
Hecho en China
Haier America
New York, NY 10018
Part #
 Loading...