

Haier MT5311 User Manual

MT5311 Training Documents

Installation
Connecting to a DC input .................................................. 29
Connecting to an Antenna input .................................... 29
Choose Your Connection .................................................... 30
Connecting to an AV Device.............................................. 30
Connecting to an Audio Device .................................... 31
Connecting to a PC ............................................................ 32
Connecting Headphones ................................................ 33
Introduction
Controls .............................................................................................. 25
Connection Options ...................................................................... 26
Universal Remote control ............................................................ 27
Accessories ....................................................................................... 28
Install the Stand .............................................................................. 28
Install the Wall Mount ................................................................... 28
6.

7.
Operation
Channel menu .................................................... 33
Video menu ........................................................ 36
Audio menu ........................................................ 37
Function menu ................................................... 38
Lock Menu .......................................................... 42
Other Functions ................................................. 45
Playing External Media .................................... 54
Universal Remote Control
Setting Up Your Remote Control ...................... 58
Remote Control Codes ...................................... 63
Maintenance 63
Specication 63
8.
9.
10.
11
12
13
64
65
77
78
79
88


1366 768
16.7M
ATSC/NTSC
10
75
m/mts/AC-3


T.MT5311.81B
CNA2
CN5
CN22
CN18
CON1
CON2
T.MT5311.81B
T.MT5311.81B
3
4
MINI AV
IN
SPDIF
OUT
LINE OUT
1
2
1
ETHERENT

CNA2
CN5
CN18

CON1
NC
Logic Level Control (Default For High Level)
No Connection
I2C SCL
I2C SDA
CN22
L-
L+
RR+
Audio Left Channel Output+
Audio Left Channel OutputAudio Right Channel OutputAudio Right Channel Output+
CON2
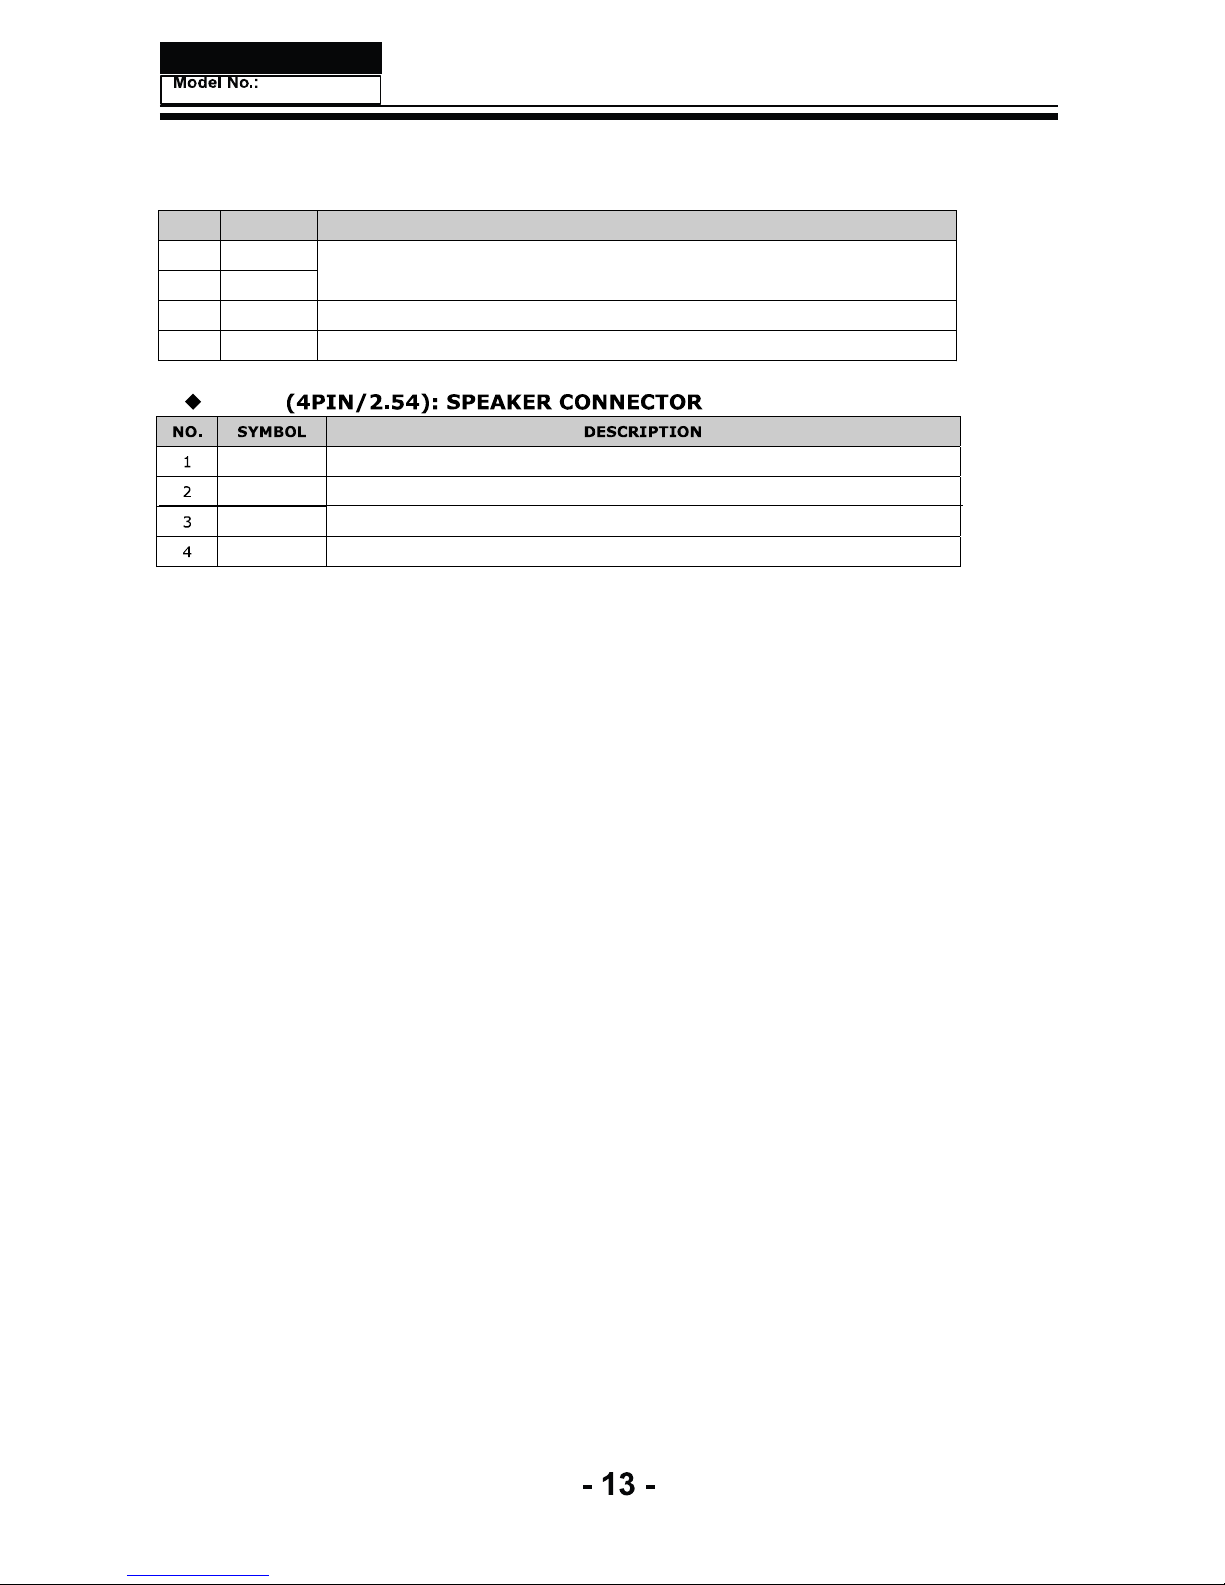
ƹ CON1 (4PIN/2.54): AMPLIFIER POWER SUPPLY
CONNECTOR
NO. SYMBOL DESCRIPTION
124V
+24V DC Power Supply
224V
3 GND Ground
4 GND Ground


TC315B601

5 . INTER FACE PIN CO N N E C TION
5 .1 T F T L C D MODULE
CNF1 Co n n ecto r Pin Assignment
etoNnoitpircseDlobmyS.oNniP
1 V C C supply:+ 12V
2 V C C supply:+ 12V
3 V C C supply:+ 12V
4 V C C
Powe
r
supply:+ 12V
5 G N D Ground
6 G N D Ground
7 G N D Ground
8 G N D Ground
)6()2(tamrofatadSDVLtceleSSDVLLES9
)6()3(noitceleSelbaTpukooLevirdrevOLESDO01
11 G N D Ground
0lexipfoatad-0XR21
d+0XR31
a
ta of pixel0
14 G N D Ground
1lexipfoatad-1XR51
1lexipfoatad+1XR61
17 G N D Ground
18 R X 2- Negative transmission data of pixel2
19 R X 2+ Positive data of pixel2
20 G N D Ground
21 R X C LK -
o
f clock
22 R X C LK + of clock
23 G N D Ground
3lexipfoatad-3XR42
3lexipfoatad+3XR52
26 G N D Groun
d
)4(edoMgnigAEGA_TST72
28 N C N
oconnection
(5)
29 G N D Ground
30 G N D Ground
N ote (1) Connector type:S TA R C O N N 093G30 -B 0001A or P -TWO 187053-30091 or compatible
LV D S connector pin orderdefined as follows
transmission
transmission
transmission
transmission
transmission
transmission
transmission
Negative
Negative
Negative
Negative
Positive
Positive
Positive
Positive
Powe
r
Powe
r
Powe
r
-17-

Note (2) Low = Open or c onnect to G ND: VE SA F ormat, High = Connect to +3.3V: J E IDA F ormat.
Please refer to 5. 5 LVDS INTE RFAC E
Note (3) Overdrive lookup table selection. The Overdrive lookup table should be selec ted in accordance to the
frameratetooptimizeimagequality.
3.2 B ACKL IGHT UNIT
3.2.1 LE D LIGHT BARCHARACTE R ISTICS (
Ta=25±2ºC)
(21)
Value
Parameter Symbol
Min. Typ. Max.
Unit Note
L i ght B ar I nput Vol tage V
LED
V
DC
(Duty 100%)
Light Bar InputCurrent I
LED
mA
DC
(Duty 100%)
per string
Power Consumption P
LED
-- -- W (1)
LED Life Time L
BL
(30000) -- -- Hrs (2)
Note (1) P
LED
=(I
LED
7) V
LED
Note(2) The lifetime of LED is defined as thetimewhen it continues to operate under the conditions at Ta = 25
2andI=
12
0
mA(Per E A ) until the bri ghtn es s becomes
50%of its original value.
LED
Converter
LED
Backlight
Module
V
LED ILED
(17)
(19)
()
,LEDmatrix is 6
S
6
P.
(120)
--
--
15.96
ºC


9

6


Introduction
Haier LED HDTV EN-4
Introduction
Controls
This is a simplied representation of the TV front panel, side panel control buttons and side inputs.
TV Side panel controls and connections
1
MENU
Menu display. Press to access the on-screen
menu display.
2
INPUT
Press to access the input source mode. Press
repeatedly to change the source to the one
you want to watch. In the MENU screen, the
INPUT button serves as the ENTER button.
3
VOL +/-
Press to adjust the volume. In the MENU screen,
these buttons serve as left/right buttons.
4
CH +/-
Press to scan through channels.To scan quickly
through channels, press and hold down either
+/- . In the MENU screen, these buttons serve
as up/down buttons.
5
POWER Press to turn on and off the TV.
6
Remote Sensor
Receives IR signals from the remote control.
Do not put anything near the sensor, which
may block the remote control signal.
7
Power indicator
CHVOL
INPUT MENU
7
6
1
2
4
5
-25-

-26-
Introduction
EN-5 Haier LED HDTV
Connection Options
Back panel connections
8
ETHERNET Connect a ETHERNET cable to the Network.
6
Headphone
jack
Headphone audio output terminal.
7
USB
Input x2
images or
music, and support wifi.
1
HDMI In x4
Connect a HDMI device to receive digital audio
and uncompressed digital video.
Note
HDMI 1 supports (ARC)Audio Return 5
Channel.
2
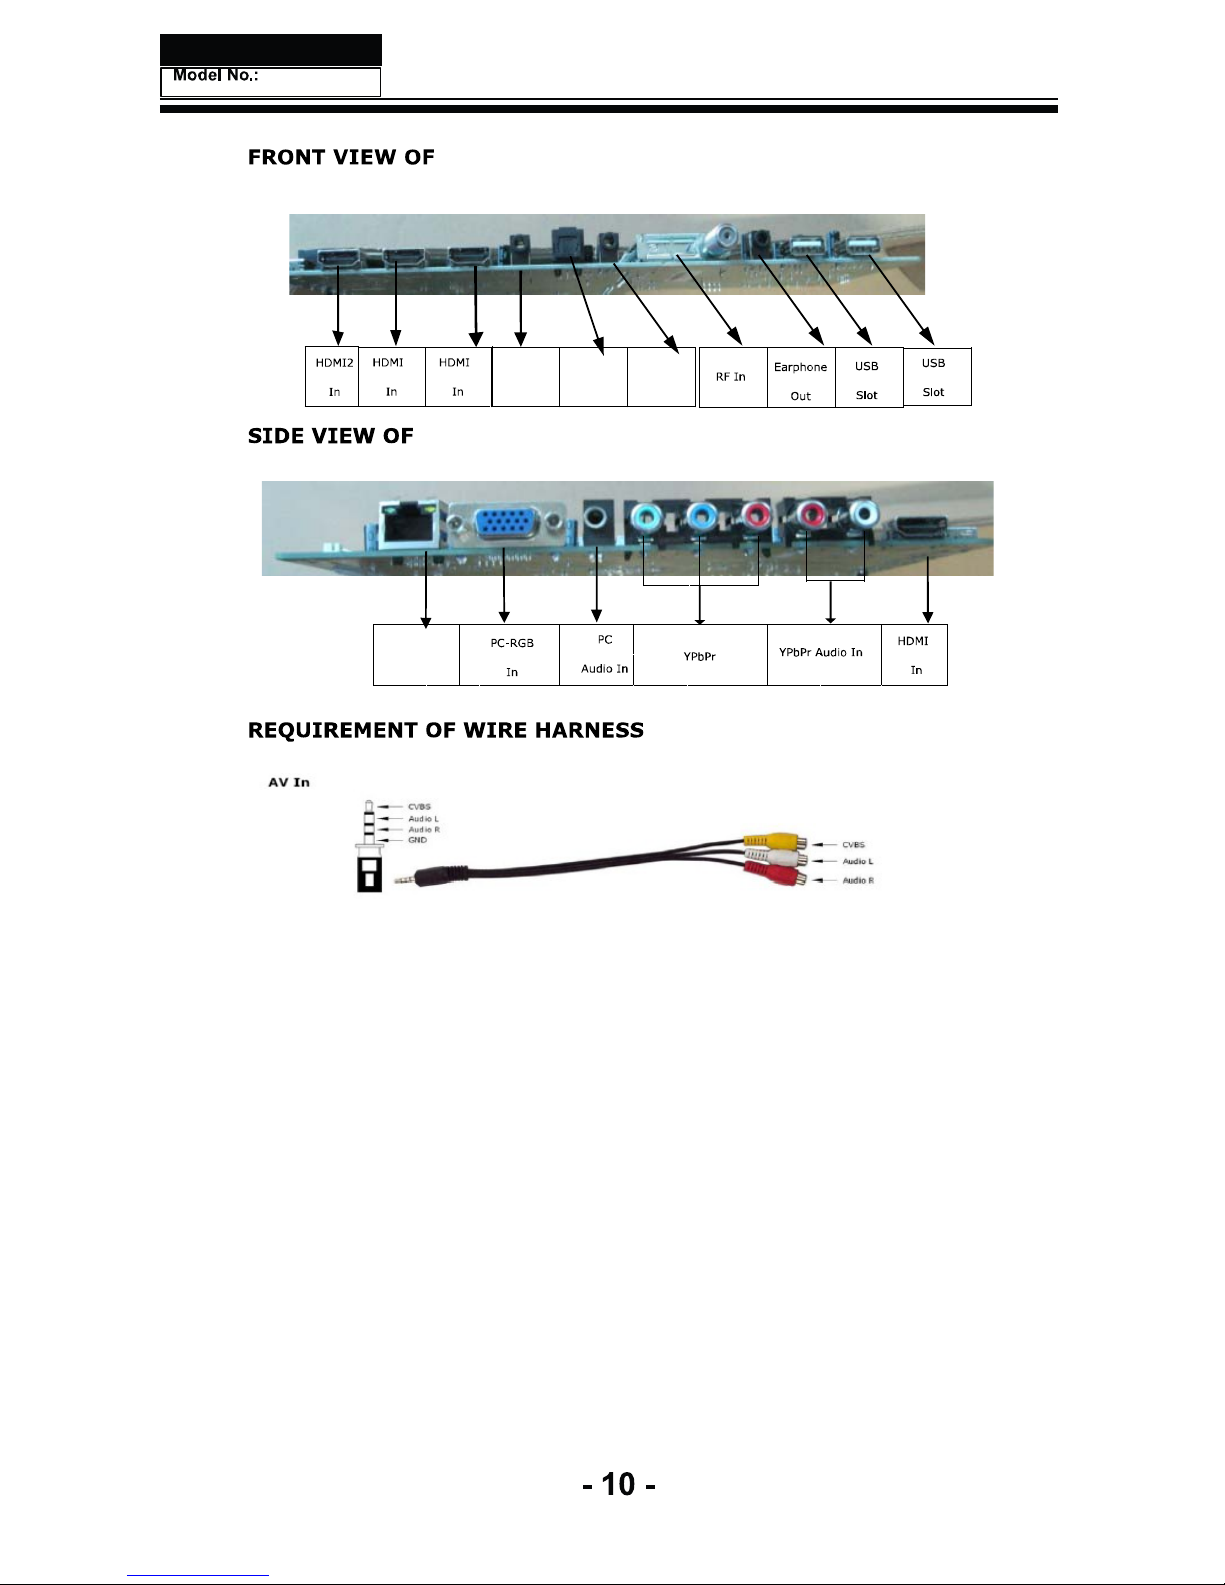
MINIAV In
Connect the video and audio signal from a video
device with the converter cable.
5
Antenna
Input
Connect cable or antenna signals to the TV, either
directly or through your cable box.
9
PC Video In
Connect a video cable from a computer.
3
Optical
Connect to the digital audio equipment.
4
AUDIO Out
Connect the audio L/R cables to your audio equipment.
10
PC Audio In
Connect the audio cable from a computer.
12
Component
AUDIO In
Connect the audio L/R cables from the component
source or an AV audio.
11
Component
Video In
Connect a component video device or an AV
composite video.
ETHERNET PC AUDIO Y Pb Pr R-AUDIO-L HDMI1
IN
COMPONENT
HDMI2 HDMI3 HDMI4 AV IN OPTICAL AUDIO ANT IN
USB1 USB2
IN IN IN
MINI
OUT

Introduction
Haier LED HDTV EN-6
Universal Remote control
The remote control cannot be operated unless the batteries are properly loaded.
When using the remote control, aim it at the remote sensor on the TV.
15
16
17
18
19
20
21
22
23
24
25
26
1
2
3
4
5
6
7
8
9
10
11
12
13
14
Function introduction
1
Power Press to turn on and o the TV
2
TV DVD CABLE VCR
To select one of the system modes in which the remote control
can be used.
3
Number buttons Press to change a channel.
4
tCVUUPO
Press to select digital channels. For example, to
enter “54-3” ,
QSFTTiwitwBOEiw
5
VOLUME UP/DOWN Press to adjust the volume.
6
CH.LIST
Display the channel list in TV mode.
7
CCD(closed caption)
Select a closed caption.
8
FAV.LIST
Press to
display the favorite channel list in TV mode.
9
NETFLIX
Press to launch Netix.
0
MENU
Press to display the on-screen menu
A
Arrow keys (Up/Down/
Left/Right)
Allows you to navigate the on-screen menus and adjust the
system settings.
B
RETURN
Return to the previous menu.
C
R G Y B
Buttons used in the
Channel list, Media Play menu, etc.
D
Media Player Functions
/ Rewind / Fast / Backward /Forward Stop
Play/Pause
E
MTS/SAP Select MONO, STEREO, SAP in NTSC system
F
INPUT Show the input source list.
G
RECALL Press to jump back and forth between two channels.
H
CHANNEL UP/DOWN
Press to scan through channels. To scan quickly between the last
two channels, press and hold down either ġ/Ģ.
I
MUTE
Switches the sound on or off.
J
DISPLAY
Press to display the TV status information on the top of the TV screen.
K
YAHOO!
Launches Yahoo Connected TV!
L
Net Content
Display the Net Connect main menu, which includes Yahoo,
Netix, Multimedia, and more.
M
TOOLS
Quickly select frequently used functions.
N
ENTER
Accesses the highlighted item in the on-screen menu
O
EXIT
Clears all on-screen displays and returns to TV viewing from any
menu
P
REC Press to start the
timeshift process.
-27-
 Loading...