

Page 1

LED LCD TV
OWNER' S MANUAL
MODEL: LE40B7500
Please READ this manual carefully
before operating your TV, and retain
it for future reference
Page 2

Contents
1. SAFETY AND WARNINGS .......................................................................................................................... 2
2. INTRODUCTION ..........................................................................................................................................4
3. INSTALLATION ............................................................................................................................................5
4. REMOTE CONTROLLER ........................................................................................................................... 10
5. TV OPERATION .......................................................................................................................................... 11
6. TROUBLE SHOOTING ............................................................................................................................... 22
-1-
Page 3
SAFETY AND WARNINGS
IMPORTANT SAFETY INSTRUCTION
1) Read these instructions.
2) Keep these instructions.
3) Heed all warnings.
4) Follow all instructions.
5) Do not use this apparatus near water.
6) Clean only with dry cloth.
7) Do not block any ventilation openings, install in
accordance with the instructions.
8) Do not install near any heat sources such as radiations,
heat registers, stoves, or other apparatus (including
ampliers) that produce heat.
9) Do not defeat the safety purpose of the polarized plug. If
the provided plug does not t into your outlet, consult an
electrician for replacement of the obsolete outlet.
10) Protected the power cord from being walked on or
pinched particularly at plugs, convenience receptacles,
and the point where they exit from the apparatus.
11) Only use attachments/accessories specied by the
manufacturer.
12) Unplug this apparatus during lighting storms or when
unused for long periods of time.
13) Refer all servicing to qualied service personnel.
Servicing is required when the apparatus has been
damaged in any way, such as power-supply cord or plug
is damaged, liquid has been spilled or objects have fallen
into the apparatus, the apparatus has been exposed to
rain or moisture, does not operate normally, or has been
dropped.
14) Mains plug is used as the disconnect device, the
disconnect device shall remain readily operable.
15) The ventilation should not be impeded by covering the
ventilation openings with items, such as newspapers,
table-cloth, curtains, etc.
16) No naked ame sources, such as lighted candles, should
be placed on the apparatus.
17) Attention should be drawn to the environmental aspects
of battery disposal.
18) The use of apparatus in moderate climate.
19) The apparatus shall not be exposed to dripping or
splashing and that no objects lled with liquids, such as
vases, shall be placed on the apparatus.
CAUTION
RISK OF ELECTRIC SHOCK
DO NOT OPEN!
TO REDUCE THE RISK OF ELECTRIC SHOCK, DO
NOT REMOVE COVER (OR BACK).NO USER
SERVICEABLE PARTS INSIDE. REFER SERVICING
TO QUALIFIED SERVICE PERSONNEL.
CAUTION
The symbol indicates that dangerous voltages
constituting a risk of electric shock are present
within this unit.
The symbol indicates that there are important
operating and maintenance instructions in the
literaturaccompanying this unit.
WARNING:
To reduce the risk of re or electric shock, do not expose
this apparatus to rain or moisture.
WARNING:
The batteries shall not be exposed to excessive heat such as
sunshine, re or the like.
Please act according to your local rules and do not dispose of
your old products with your normal household waste.
Correct disposal of your old product helps to prevent
potential negative consequences for the environment and
human health.
This product complies with all implemented RoHS type
regulations worldwide, including but not limited to, EU,
Korea, Japan, US States (e.g. California), Ukraine, Serbia,
Turkey, Vietnam and India.
We continue to monitor, inuence and develop our processes
to comply with upcoming proposed RoHS type regulations,
including but not limited to, Brazil, Argentina, Canada.
This symbol indicates that this product incorporates
double insulation between hazardous mains voltage and
user accessible parts. When servicing use only identical
replacement parts.
Restriction on Hazardous Substances statement (India)
This product complies with the “India E-waste Rule 2011”
and prohibits use of lead, mercury, hexavalent chromium,
polybrominated biphenyls or polybrominated diphenyl ethers
in concentrations exceeding 0.1 weight % and 0.01 weight %
for cadmium, except for the exemptions set in Schedule 2 of
the Rule.
-2-
Page 4
SAFETY AND WARNINGS
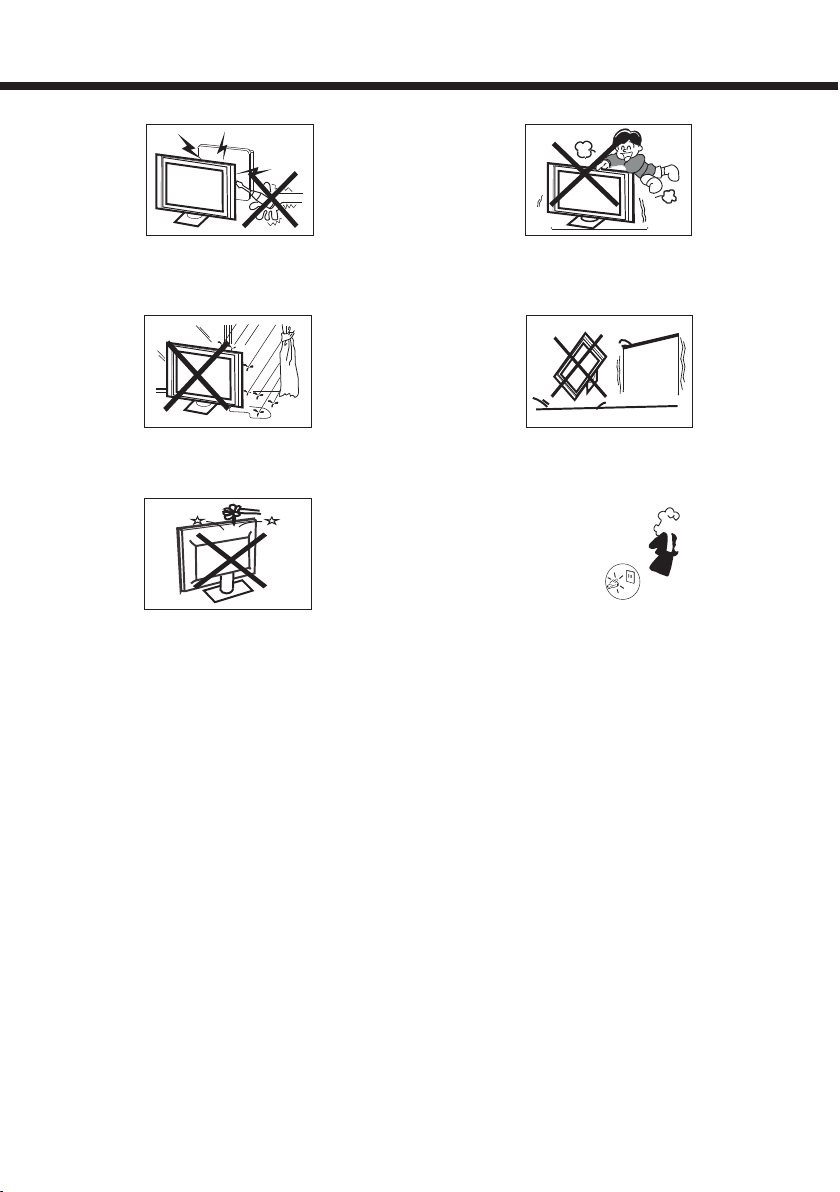
High voltages are used in the operation of this television
receiver. Do not remove the cabinet back from your set.
Refer servicing to qualied service personnel.
To prevent re or electrical shock hazard, do not expose the
television receiver to rain or moisture.
Never stand on, lean on, or suddenly push the television or
its stand. You should pay special attention to children.
Serious injury may result if it falls.
Do not place your television on an unstable cart, stand, shelf
or table. Serious injury to an individual , and damage to the
television, may result if it falls.
-3-
Page 5
INTRODUCTION
Main features
Used as Television, display terminal, PC display;
1
High luminance, wide viewing angle;
2
Can store 200 TV programs;
3
HDMI interface;
4
Multi-Media player (USB);
5
Accessories
LED LCD TV.................................1 User Manual....................................1
Bottom Stand..................................1
Screws............................................4 Quick Set Up Guide........................1
Remote Control..............................1 E-waste Guideline Booklet.............1 (Only for India)
Battery(AAA).................................2 AV Adapter Cable...........................1
Warranty Card.................................1 (For Hong Kong/Indonesia/
Philippines/India)
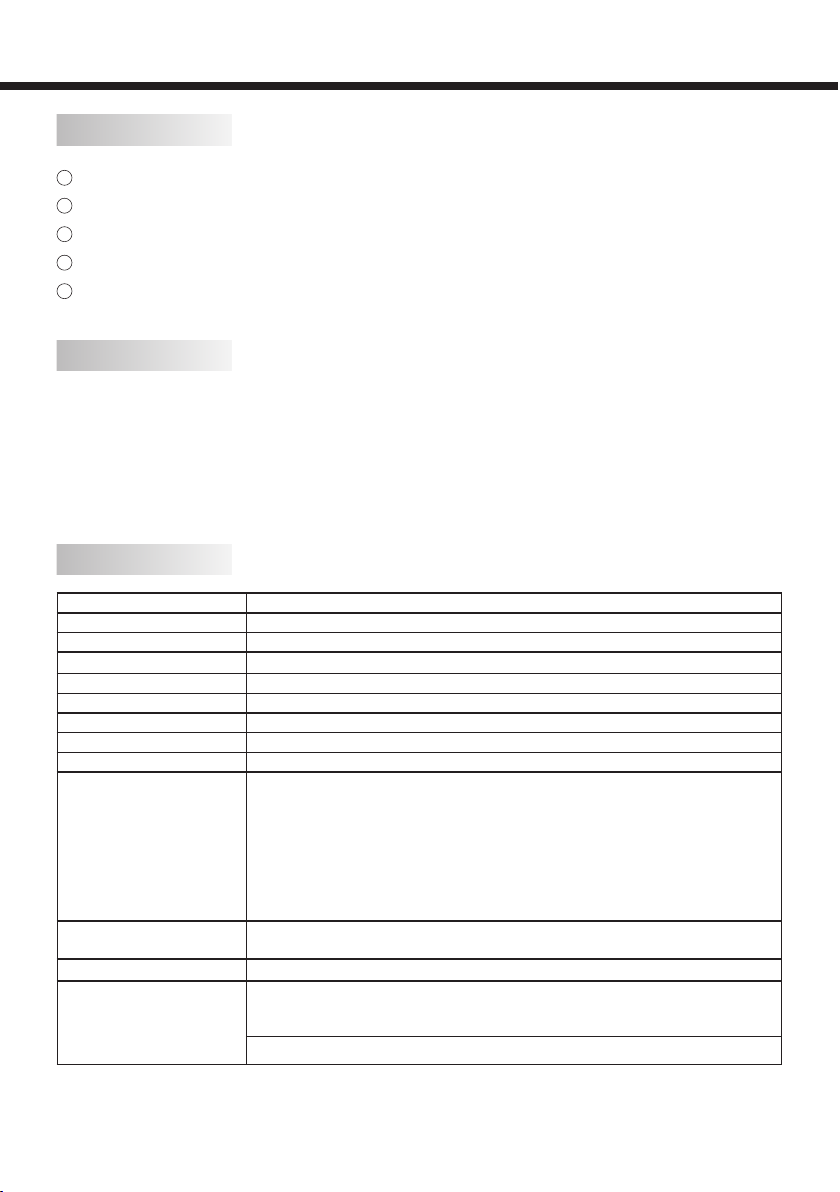
Main parameter
Model Name LE40B7500
Resolution 1920 x 1080
Aspect Ratio 16:9
TV System
Video Signal System PAL/SECAM/NTSC
Receiving Channel 1-200
Input Power Voltage AC 100-240V 50/60Hz
Power consumption 80W
Audio Output Power(THD≤7%) 2 x 8W
Signal Input
Horizontal denition (TV line)
Ambient Temperature 0 to 45 degree Celsius
Wall mount
PAL B/G
Analog RGB(VGA) x 1
High-Denition Multimedia Interface (HDMI) x 2
Composite Video Input x 1
Composite AV Output x 1
Audio Input x 1
YCb (Pb )Cr (Pr) x 1
USB x 1
RF x 1
Composite Video input >=350
Y Cb(Pb ) Cr(Pr) >=400
VESA mount pattern: 200 x 200mm
Screw: M4
Length: 18mm
This product does not include wall-mount braket module.
-4-
Page 6
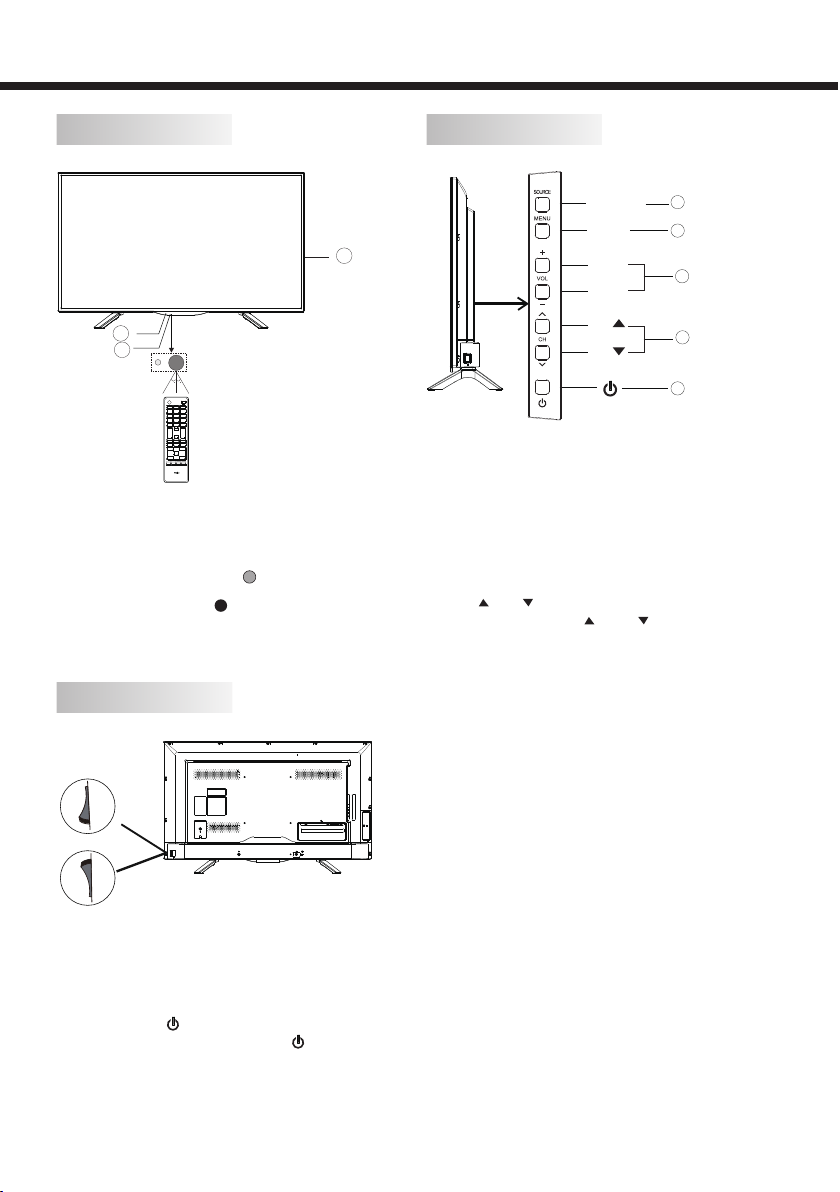
Front panel
KEYBOARD
2
1
30 30
1: Remote control sensor.
2: Indicator LED: LED OFF POWER ON.
RED STANDBY.
3: Key board
Back side
Power On state
SOURCE
MENU
3
VOL+
VOL-
CH
CH
1
2
3
4
5
1. SOURCE :
Display the input source menu.
2. MENU :
Press to show the on-screen menu.
3. VOL+/ VOL- :
Adjust sound level.
In Menu mode, press " VOL+" or "VOL-" to adjust the
item that you selected.
4. CH / CH :
In TV mode, press CH or CH to change the channel
up and down.
Power Off state
Power switch
1. Turn on the power switch on the side of the TV.
2. If the Standby indicator is not lighted, press the
power switch on the side of the TV.
3. If the standby indicator is red, press (StandbyOn) on the remote control and the standby
indicatior switches to red.
-5-
Page 7
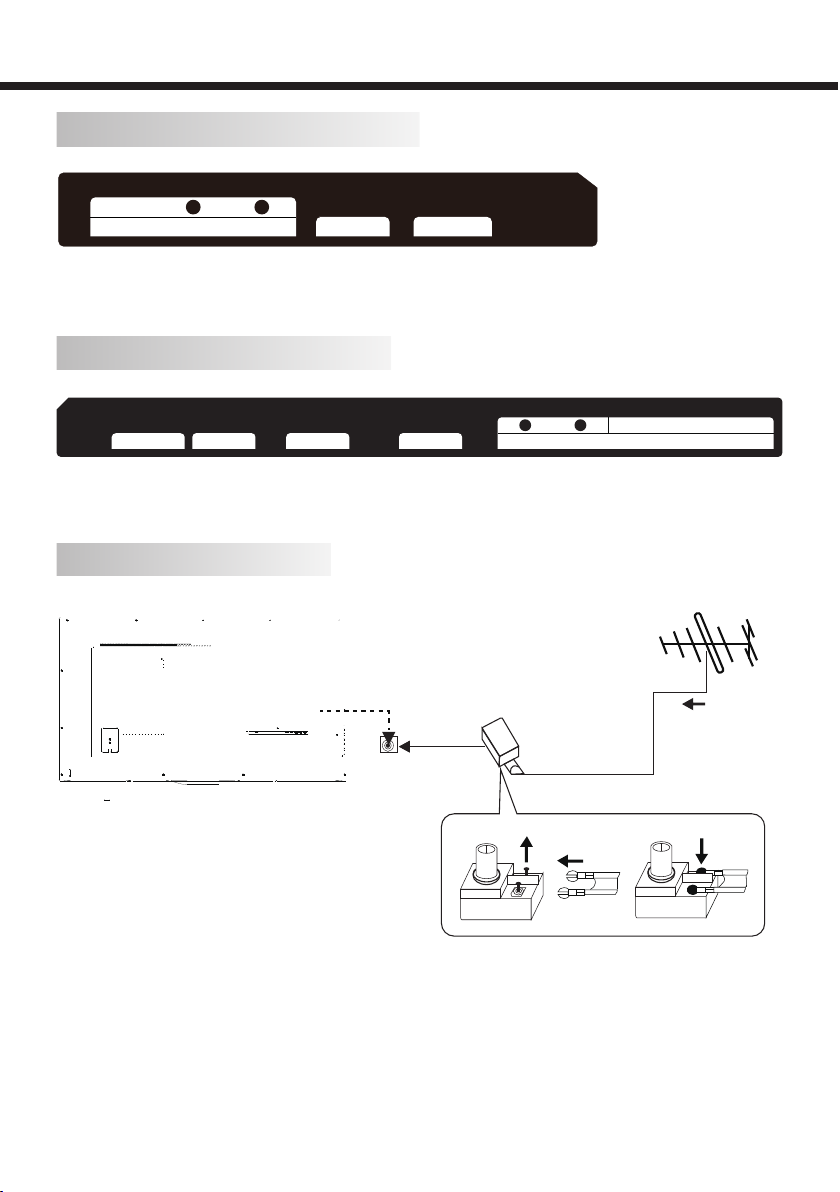
REAR AV Connections(SIDE)
Video
L
-
audio -
R
AntennaAV Input
USB
All the terminals are (from up to down):
USB, ANTENNA, AV INPUT(AUDIO L/R ,VIDEO).
REAR AV Connections
L
HDMI 1 VGA INPUTAV OUTPUT
HDMI 2
- audio -
All the terminals are (from left to right):
AV OUTPUT, HDMI 1, HDMI 2,VGA INPUT, Component Input ( AUDIO L/R, Y/ Pb/Pr).
ANTENNA
R
Y
Component Input
Pb Pr
-6-
Page 8
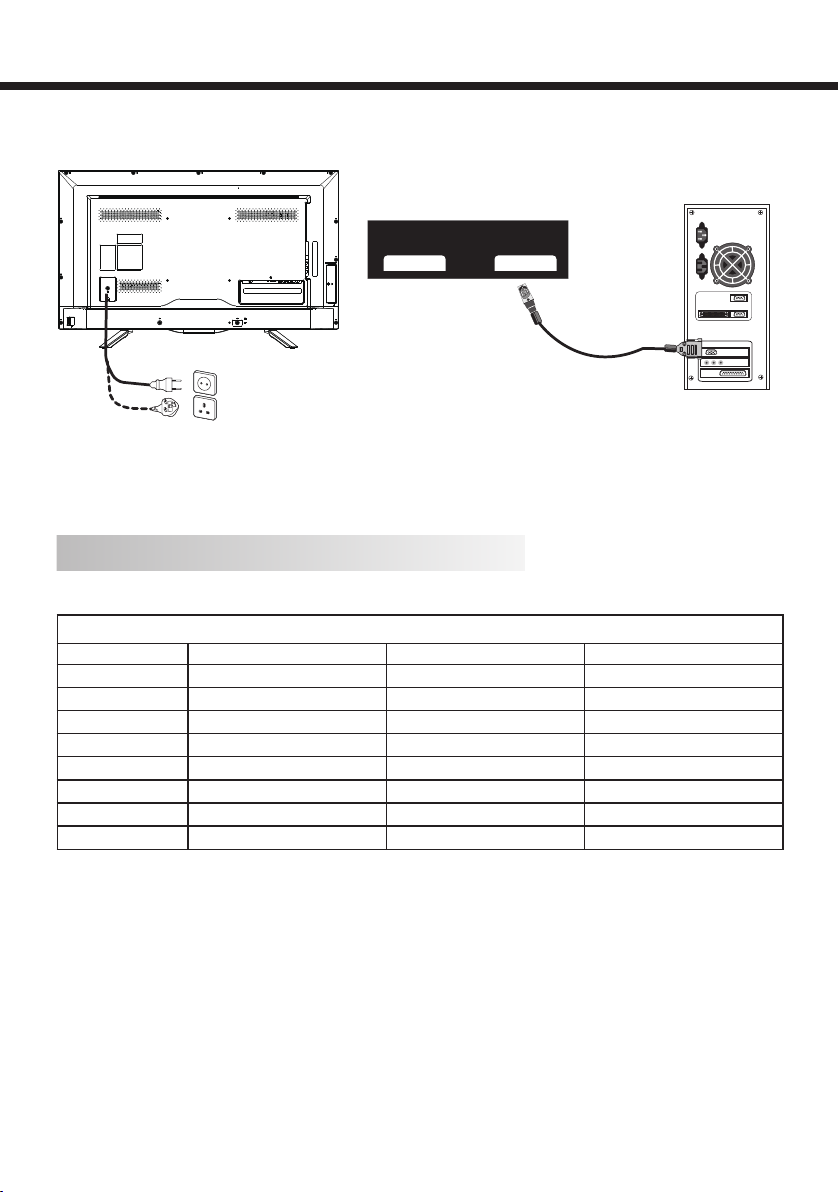
3. Power on the TV switch to PC mode.
Component Input
Y
L
- audio -
R
4. Power on the PC.
This sequence is very important.
INSTALLATION
8
HDMI 2
VGA INPUT
Note: Appearance in the book is a schematic diagram, please buy the real.
PC Input Signal Reference Table
Connect a computer to your TV set and set up the computer output signal in accordance with table below.
Default computer mode
Item Resolution Horizontal Frequency (kHz) Vertical Frequency(Hz)
1 640 × 480 31.469 59.94
2 720 × 400 31.469 70.087
3 800 × 600 37.879 60.317
4 1024 × 768 48.363 60.004
5 1360 × 768 47.72 59.799
6 1440 × 900 55.469 59.901
7 1680 × 1050 65.29 59.954
8 1920 × 1080* 66.587 59.934
*Recommended resolution
-7-
Page 9

INSTALLATION
DVI/ PC HDMI Input Signal Reference Table
When DVI port is being used: connect the DVI port of video device to your TV set with a DVI-to-HDMI line and set up the
output signal of the video device in accordance with table below.
When HDMI port is being used: connect the HDMI ports of your computer and TV set with one HDMI wire and set up the
output signal of the video device in accordance with table below.
Default HDMI Mode
Standard Resolution Horizontal Frequency (kHz) Vertical Frequency(Hz)
1 640 × 480 31.469 59.94
2 800 × 600 37.879 60.317
3 1024 × 768 48.363 60.004
4 1360 × 768 47.72 59.799
5 1920 × 1080* 66.587 59.934
*Recommended resolution
Video Input Signal Reference Table
Connect the component signal or HDMI port of video device to your TV set and set up the output signal of the video device in
accordance with table below.
If your computer display card supports signals of video format then you can set up following output signal.
Default Component or HDMI Mode
Standard Resolution Horizontal Frequency (kHz) Vertical Frequency (Hz)
SD 640 × 480p 25.175 60
SD 720 × 480i 15.734 60
SD 720 × 480p 31.5 60
SD 720 × 576i 15.625 50
SD 720 × 576p 31.25 50
HD 1280 × 720p 37.5 50
HD 1280 × 720p 45 60
HD 1920 × 1080i 28.125 50
HD 1920 × 1080i 33.75 60
FHD 1920 × 1080p 56.25 50
FHD 1920 × 1080p 67.5 60
Video Input Signal Reference Table
Video System Supported in TV and Video Modes
PAL B/G
Standard Denition Interface
You can also enjoy traditional program by using a DVD player or VCR Player. Connect this equipment to your TV via the
Composite Input on the back of your TV.
-8-
Page 10
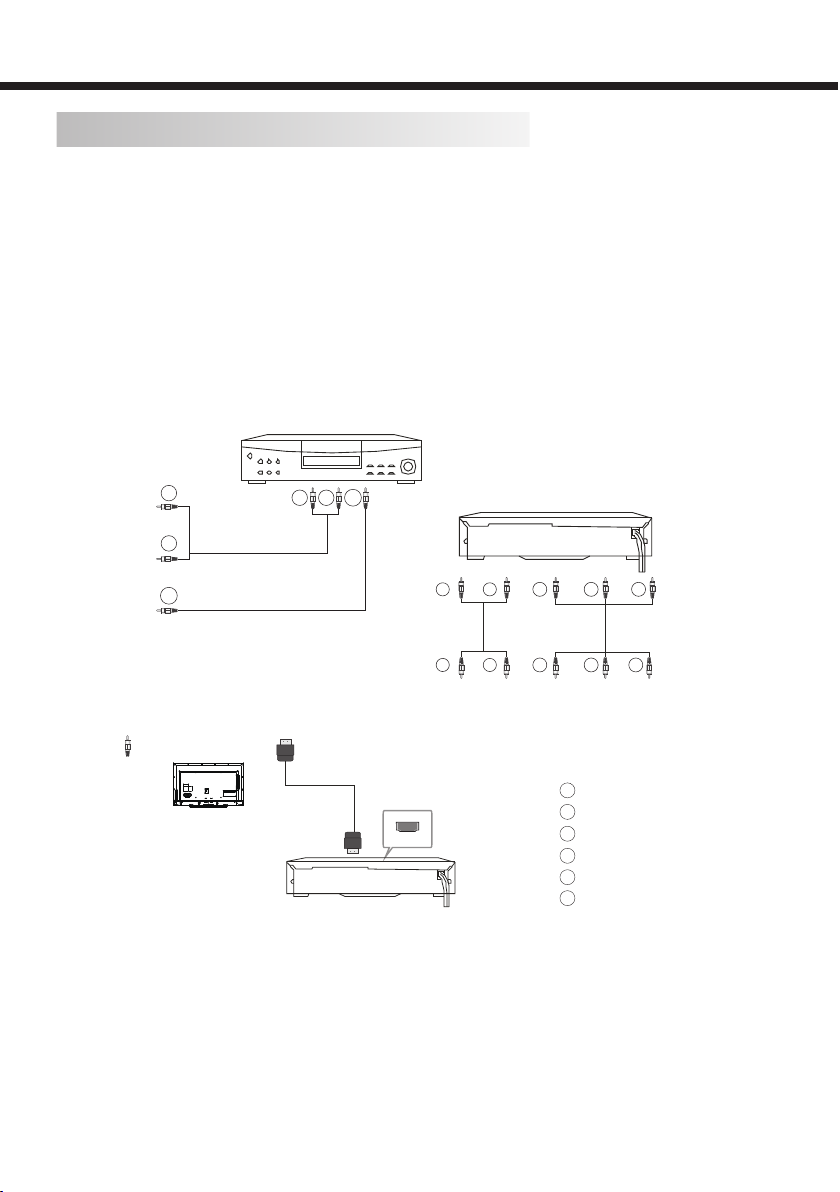
AV EQUIPMENT
This TV provides two group of AV, one group of YPbPr for convenient connection to VCR, DVD or other video equipment.
Please refer to the owner's manual of the equipment to be connected as well.
You can use the input terminals on TV set rear as follows.
VIDEO E QUIPMENT
AV ADAPTER
CABLE
TO VIDEO OUTPUTS
R
W
TO AUDIO OUTPUTS
Y
TO VIDEO OUTPUTS
VIDEO EQUIPMENT
W R
W R
Y/Pb/Pr EQUIPMENT
B
G
G B R
Y
Yellow (video)
R
Red (audio R)
W
White (audio L)
R
Red (Pr or Cr)
B
Blue (Pb or Cb)
G
Green (Y)
R
R
W
Y
HDMI
-9-
Page 11
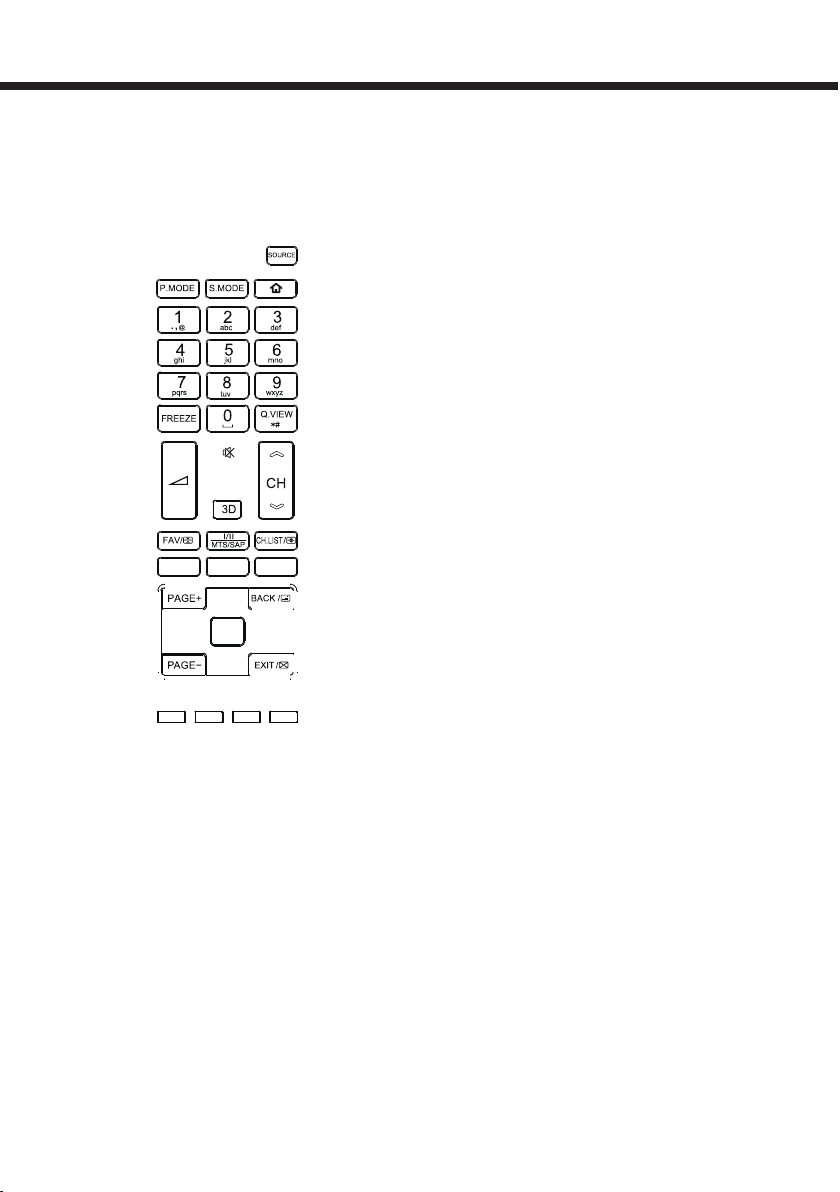
The remote control cannot be operated unless the batteries are properly loaded inserted.
When using the remote control, aim it at the remote control sensor on the TV.
Function introduction
REMOTE CONTROLLER
-10-
Page 12

TV OPERATION
: Press to REVEAL TTX.
24. I/II/MTS/SAP
I/II: Stereo Sound Switch.
MTS/SAP: No function.
25. INFO/
INFO: Display information of current signal.
: Press to update TTX.
26. BACK/
Back: Press to upper level in USB Mode.
: Mixed mode in Teletext.
27. OK
Press to activate the setting/selection of OSD.
28. EXIT/
EXIT: Press to return to the previous menu.
: No function.
Picture Setup
Smart Picture Personal
Audio
TV
Setting
Parental
Brightness
Contrast
Color
Sharpness
Color Temp.
Advanced Control
MENU
Exit
Select
Video
Items Description
Personal User can set their favorite setting.
Vivid For Enhances picture contrast and sharpness.
Smart Picture
Standard For standard picture settings. Recommended for home entertainment.
ECO Decrease backlight level to save the power
Movie For viewing lm-based content. Most suitable for viewing in a theater-like environment.
Brightness To brighten the dark parts of the picture.
Contrast To sharpen the picture quality.
Color To add or reduce Color.
Sharpness To improve details.Not available in PC mode.
Normal Natural whitish color
Color Temp.
Cool Bluish white color
Warm Reddish white color
Cool
50
50
50
50
OK
Enter
29. (forward)
a. Fast forward USB Video/ Music/Text
b. Press to go to next page when scan le in USB
c. Yellow key in Teletext mode.
30. (stop)
a.EXIT USB Video/ Music/Text play
b. Delete,delete chanels in Channel Edit menu.
c. Blue key in Teletext mode.
31. / (Sub-MENU)
: Subtitle in Teletext.
: No function.
32. (H.LOCK)
No function.
-11-
Page 13

TV OPERATION
Noise
Reduction
To lter out and reduces the image noise and improve picture quality.
Backlight Control the brightness of the backlight.
Advanced control
DCR
DCC
Dynamic contrast ratio: Setup the contrast of the TV set to vary in accordance with the
brightness and darkness of the TV set when it is set to on.
Dynamic Color Control: Using DCC image on the LCD display become more vivid and
superior color saturation. (Not supported in PC source mode).
Note:Certain screen setups may be unavailable or have different options in accordance with the input sources.
Audio Setup
Smart Sound
Video
Balance
Bass
TV
Setting
Parental
Treble
Virtual surround
AVL
MENU
Exit
Select
Audio
Items Description
Standard Suitable for spoken dialog.
Music Ehance treble and bass
Smart Sound
Speech Ehance treble and keep the bass at medium level
Personal Adjust sound mode as per personal requirement.
Sound Mode can also be accessed by pressing the S.MODE button on the remote control.
Balance Adjust the balance between left and right speakers to adapt to your listening position.
Bass Adjust the bass effect.(Increases or decreases lower-pitched sounds)
Treble Adjust the treble effect.(Increases or decreases high-pitched sounds)
Virtual surround TV provides surround sound effect with rich bass and clear dialog when DSS effect is On.
AV L Automatically reduces sudden volume changes,for example,when switching between the channels.
Personal
Off
On
0
50
50
OK
Enter
-12-
Page 14
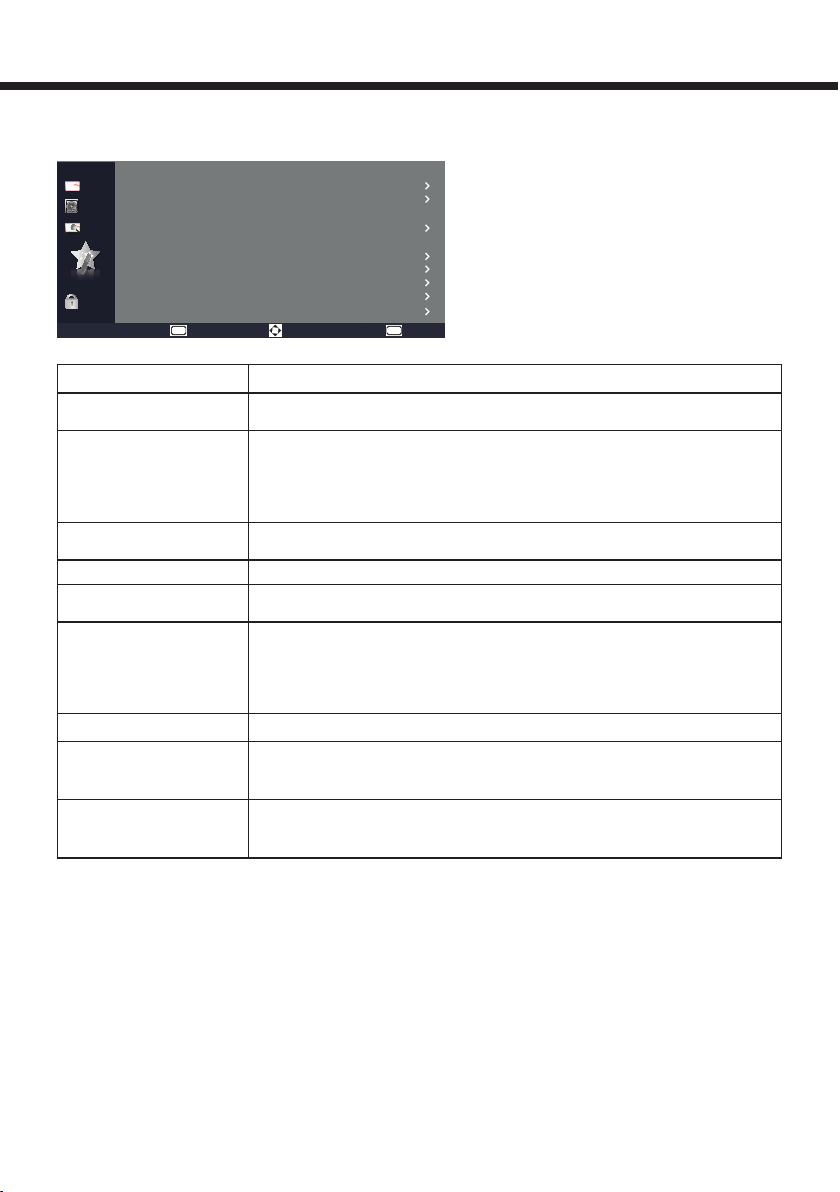
Features Setup
Menu Language English
Video
TTX Language
Audio
Picture Format
Menu Timeout
TV
Menu Transparency
Power On Status
Parental
Freeze
Blue Screen
Time Setup
System Reset
MENU
Exit
Select
Setting
Items Description
Menu Language
Select an OSD menu language can be displayed. Default English is selected as menu
language.
Select a Teletext language in TTX mode.
West: Western Europe
TTX Language
East: Eastern Europe
Russian: Russian
Arabic: Arabic
Picture Format
Resize the aspect ratio of the picture for optimum viewing. Available formats : 16:9, 4:3,
Zoom1 and Zoom2.
Menu Timeout Set up the period of time that the OSD menu screen is to be displayed.
Menu Transparency
Select an OSD menu transparency as Off, Low, Middle, High, by default OSD transparency
is set to Low.
Select desired TV turn on condition, when AC power switch is turned on.
Standby: TV will be in stand by condition and can be turned on by press Power key on remote
Power On Status
control.
Power On: TV will turn on as soon as AC power switch is turned on.
Keep Last Memory: TV will turn on as per the last power on settings.
Freeze When the Freeze Switch is On, picture is frozen while changing the channel.
To select the transition type required while changing from one channel to another.
Blue Screen
Select Off : No blue screen function
Select On : Blue screen will appear while changing the channel.
Color System
To Support Auto, PAL, PAL_60, NTSC, NTSC4.43, SECAM. (This feature is only available
in AV mode.)
West
16:9
Off
Off
Keep Last Memory
Off
Off
OK
Enter
TV OPERATION
-13-
Page 15

Time
Time
Setup
Sleep Timer
Auto Sleep Auto Sleep can be set to Off, 1 Hour, 2 Hours or 5 Hours
System Reset
Parental Setup
Video
Channel Lock
Input Block
Audio
Keypad Locked
Change Password
TV
Clean All
Setting
TV OPERATION
Date : Enter TV date in year, month and date format YYYY/MM/DD. Default date is
2000/01/01.
Time : Enter desire TV time in hour, minute and second format HH:MM:SS. Default time
start from 00:00:00.
Power On Timer : Turn on TV from standby mode with pre-dened channel/source at
specied time automatically.
On : TV will turn on daily at specied time with specied channel / source.
Once : TV will turn on only once at specied time and channel/source and resets to Off.
Timer: Set turn on/off time
Power On Setting: Select channel/source when turn on TV
Power Off Timer : Turn off the TV at the specied time.
On : TV will turn off daily at specied time.
Once : TV will turn off only once and resets to Off.
Note: Date and time will be reseted to default if AC power is turned off.
Power On Timer will work only when TV is in standby mode.
Set a time period after which the TV will be turned off and enter stand by mode.
Sleep timer can be set to Off,10,20,30,40,50,60,90 & 120 minutes.
You can restore the factory default picture and sound settings of your TV.
The channel installation settings and Child lock remains the same.
Off
Parental
MENU
Back
Select
OK
Enter
Press the original password of 0000 to enter parental menu.
Items Description
Channel Lock Lock or unlock the selected chanels.
Input Block Lock or unlock the selected input source.
Keypad Locked Lock or unlock the key pad.
Change Password Change parental password.
Clean All Clear the lock status of channels, source, key pad.
-14-
Page 16

Channel Setup
This setup is available in TV mode only.
Auto Search
Video
Update Scan
Audio
Manual search
Channel Edit
Setting
Parental
Clean Channel List
MENU
Exit
TV
Select
TV OPERATION
OK
Enter
Items Description
TV automatically searches for the channel in the available frequency band and stores
sequentially.
Auto Search
Select
TV
menu.
Select Auto search and press OK key or ► arrow key to tune channels automatically and store.
Update Scan
During auto searching Press
Updates your channel list by adding new/missed channels to the end of the list without disturbing
previously stored channels.Consequently, it takes more time than Auto channel scan.
key to stop search.
Menu
Search for the channels manually and store it to the desired channel number.
Manual Search
It can also be used for editing of channels searched by auto search if required.
Please refer to Manual Search description in next page for details.
Channel Edit Edit the selected channel, including channel swap, insert, delete, skip, channel name.
Clean Channel List Clear the channel list.
Note: Make sure you have connected RF signal cable before performing channel search.
Manual search description
1. Select TV menu and select Channels.
2. Select Manual Search and press OK key or ►arrow key to get Manual search sub-menu.
3. Select Start Frequency to input frequency you want to start
4. Select End Frequency to input frequency you want to end
5. Select Start Search and OK key or ►key to search
Video
Audio
TV
Setting
Parental
Search for Analoge Channels
Start Frequency (MHz)
End Frequency (MHz)
Start Search
MENU
Back
Select
0 %
49.75
865.25
OK
Enter
-15-
Page 17

Computer Setup
This setup function is available in computer mode.
TV OPERATION
Video
Audio
TV
Setting
Parental
Auto Adjust
H.Position
V.Position
Phase
Clock
MENU
Exit
Select
50
50
50
50
OK
Enter
Items Decsription
Auto Adjust Press arrow Button to adjust the screen automatically to the optimal position of the picture.
H.position Adjusts the horizontal position of the picture.
V.position Adjusts the vertical position of the picture.
Phase Eliminate the horizontal interfering lines.
Clock Eliminate the vertical interfering lines.
Note:
If the PC is connected to the TV and no signal has been input from the PC for more than 30 seconds,the TV enters the standby
mode automatically.
-16-
Page 18

Hotel Model
Please press "Menu +100108+ Back " key to enter Hotel menu.
Hotel Mode
Hotel Mode Operation
Max Volume 100
OSD Display
Local Key Lock
Remote Control Lock Off
Channel Default 1
Input Source Change Auto
Move Select Exit
Menu
Off
20Volume Default
On
Off
USB Clone
AQ/PQ Restore Off
Source Key Lock
Power On
Items Decsription
Hotel Mode
Operation
Set Hotel model on/ off.
Max Volume Set max volume limited. This option allows you to set Max Vloume level.
Volume Default Select default volume for hotel mode reset.
OSD Display Turn the menu lock state on/off.
Local Key Lock No keys on the panel except the Power key can be operated.
Remote Control Lock Turn on/off remote controller lock state.
Channel Default
Input Source Change
USB Clone
Select the display channel with TV on DC ON/OFF by using the left and right keys to select a channel
within the channel range.
Select the input source with TV on DC ON/OFF, by using the left and right keys to select a start input
source within the input source sequence.
Copy the preset user settings from a USB device into the TV or copy the current TV settings into a USB
device.
AQ/PQ Restore Store the settings for AQ and PQ.
Control whether the function and station search submenus can be entered.
Installation
Music channel: When select [0] or [2] in [Installation], you can select one of music channels in the TV
sub-menu.
Source Key Lock Turn on/off signal source key lock state.
Power On The hotel user can select a state after the TV is powered on.
Hotel Mode
Off
Off
Standby
Move Select Exit
Menu
1Installation
TV OPERATION
Press Menu key in the Hotel Menu to exit.
-17-
Page 19

USB Media Center
MusicOKVideo TextPhoto
Select Enter
TV USB port can be used to view JPEG photos, play mp3 music and Video les,and read text present in USB devices.
Entering to USB Media
Press USB key on remote to get USB Media menu as shown above
Or Press the Source key and keys on remote and select USB source to get USB Media menu as shown above.
Select the Media type (Photo/ Music/ Movie/ Text) to be viewed and press OK key to enter into USB Media
and When USB drive is detected by the TV, USB drive is displayed as a folder on the screen as shown below.
Press OK key to view subfolder or les in the USB drive.
Note: * Files of selected Media type can only be viewed through USB. Media type can be any one amoung Photo / Music /
Movie / Text.
After entering the multimedia le selection interface, press the Menu button allows you to execute the following control
functions:
1. [Sort]: Sort the multimedia les according to Date or Name.
2. [Media Type]: Select the multimedia le type to playback.
3. [Thumbnail Size]: Select the size of the multimedia le thumbnail.
4. [Copy]: Select the multimedia les to copy.
5. [Paste]: Paste the copied multimedia le.
6. [Delete]: Delete the selected multimedia le.
Viewing Photos
Select Enter
OK
Back
Back
-18-
Page 20

3. Press key to play/ pause slideshow. Press PAGE- , PAGE+ to view previous or next image.
USB menu settings for Photo Slide show
TV OPERATION
Pause
Repeat
Random
Duration
Effect
Information
Press Menu key to get following Menu setup shown above.
1. [Play/Pause]: Play/Pause photo play.
2. [Repeat]: Select the repeat mode as None, Repeat One, Repeat All.
3. [Random]: Select Shufe mode as Shufe Off, Shufe On.
4. [Duration]: Select play time as Short, Medium,Long.
5. [Effect]: Select effect of transition
6. [Information]: Display the information of the le.
None
Disintegrate
Wipe from right
Wipe from left
Wipe from up
Wipe from down
Playing Music les
1. Thumbnail of the available music les will be displayed on the screen. If no les are displayed then select the folder
containing the music les.
2. To play particular music le select the required le and press OK key.
3. Press key to play/pause music. Press PAGE- , PAGE+ to play previous or next track.
USB menu settings for Music play
Music
MENU
None
MENU
Music
Press Menu key to get following Menu setup shown above.
1. [Play/Pause]: Play/Pause music play.
2. [Repeat]: Select the repeat mode as None, Repeat One, Repeat All.
3. [Random]: Select Shufe mode as Shufe Off, Shufe On.
4. [Infomation]: Display the information of the le.
5. [Show Spectrum/Hide Spectrum]: Select show or hide Spectrum.
6. [Smart Sound]: Select the sound mode as Standard,Personal, Music, Speech.
7. [Lyric Option]: Select on or off to turn on or off lyric display.
00:00:42 00:03:58
OK
1 / 1
My Love.mp3
Enter
-19-
Page 21

TV OPERATION
8. [Audio Only]: Select it to turn off dispaly and to get only sound from TV.
Playing Video les
1. Thumbnail of the available video les will be displayed on the screen. If no les are displayed then select the folder
containing the video les.
2. To play particular video le select the required le and press OK key.
3. Press key to play/pause video. Press PAGE- , PAGE+ to play previous or next video.
USB menu settings for Video play
Video
MENU
MENU
1x
00:00:42 00:03:58
1 / 1
None
My Video.VOB
Enter
OK
1 / 1
Press Menu key to get following Menu setup shown above.
1. [Play/Pause]: Play/Pause movie play.
2. [Repeat]: Select the repeat mode as None, Repeat One, Repeat All.
3. [Information]: Display the information of the le.
4. [Smart Picture]: Select the picture mode as Vivid, Standard, Movie, Personal,Eco.
5. [Screen Mode]: Select the screen mode as 4:3, Zoom1, Zoom2, 16:9.
6. [Subtitle Display]: Select the subtitle mode of the movie.
7. [Track]: Select the track mode of the audio.
Reading Text les
1. Thumbnail of the available text les will be displayed on the screen. If no les are displayed, then select the folder
containing the text les.
2. To read particular text le select the required le and press OK key.
3. Press keys to browse the text.
USB menu settings for text read
Beijing int'l airport's passenger volume up 4.2 pct
BEIJING, Jan. 5 (Xinhua) -- Beijing Capital International Airport said Saturday that it remained
the world's second-busiest airport in 2012 in terms of passengerthroughput.
Passenger volumes grew 4.2 percent year on year to reach 81.8 million people last year,
according to a statement from the airport.
The number of daily passengers exceeded 278,000 during peak travel periods in
2012, the statement said.
The airport has become increasingly busy in the last decade due to China's robust economic
growth. Ninety-four airlines were using it as a flight hub as of the end of last year, operating
flights to 236 destinations, according to the statement.
Text
None
ENGLISH.txt
FB FF
1 / 1
1
NextPr ev.
Press Menu key to get following Menu setup shown below.
-20-
Page 22

1. [Play/Pause]: Play/Pause text read.
2. [Repeat]: Select the repeat mode as None, Repeat One, Repeat All.
3. [Random]: Select the shufe mode as Shufe Off, Shufe On.
4. [Infomation]: Display the information of the le.
Formats supported to multimedia mode: Photo, Music, Movie and Text.
.
Format Resolution Type Note
Picture
JPEG Base-line:15360 x 8640
Progressive:1024 x 768
bmp 9600 x 6400
Base-line
Progressive
png 9600 x 6400
Format Sample Rate Date Rate Channel
Audio
MP3 32KHz-48KHz 32Kbps-320Kbps Mono/Stereo
Format File Extension Codec Data Rate
Real media .RM/.RMVB RealVideo 8/9 20Mbit/sec
Movie
MPEG1/2 .DAT/.MPG MPEG-1/2 Video 20Mbit/sec
MPEG4 .AVI /.MP4 H.264 20Mbit/sec
Text
Format Note
txt
Remarks:
1. USB interface of digital multimedia player is not all-purpose. So when some USB devices could not be recognized, the
problem is usually not the performance failure but due to device driver.
2. Because USB devices and memory capability are different, the time needs for multimedia player to read information are
also different. So the information reading speed of the player temporarily getting slow are not the performance failure.
3. The voltage supplied to USB interface is 5V, and the most electrical current is 500mA. When some interface criteria of
USB devices are different from standard USB protocol, digital multimedia player may be unable to recognize USB devices
correctly, which is normal status.
4. USB could be used as an interface to update software.
5. If some les source could not play because of the parameter decoding-limitation, the problem is not performance failure.
6. The system only applies to memory medium with FAT32 and NTFS format.
7. Does not support connecting of removable devices to the USB hub.
8. Does not support displaying of subtitles of video les with subtitles.
9. Does not support thumbnail display of png and Bmp format images.
10. The USB device does not support copying and pasting for NTFS system.
-21-
Page 23

TROUBLE SHOOTING
Trouble phenomenon
Inspection
Picture Audio
Snow Noise antenna position, direction or connection
Ghost Normal audio antenna position, direction or connection
Interfere
Normal Picture Mute
No picture Mute
No color Normal audio color control
Noise
electronic equipment,car/
motorcycle,uorescent light
Volume(inspect wether the mute function
on the remote control are started , or
audio system are correct or not)
Power cord is not inserted
Power switch is not opened
Contrast and brightness/volume setup
Press standby key on the remote control
for inspecting
Scramble Normal audio or weak retune channel
No color Noise Audio system
-22-
Page 24

X41G40MV67202B
 Loading...