

Haier L42A8A-A1 User Manual
L26A8A-A1
L32A8A-A1
L37A8A-A1
L40A8A-A1
L42A8A-A1
L26A8A-A1
L32A8A-A1
L37A8A-A1
L40A8A-A1
L42A8A A1-
LCD COLOUR TELEVISION
OPERATING
INSTRUCTIONS
◆Wide view-angle display, high contrast
◆Nicam
◆Teletext
◆HDMI
◆Double scarts
03
0090500457
1
CONTENTS
Warning and caution...........................................................................................2
Buttons and interface position............................................................................5
Wall mount switching support assembly instructions.............................................6
Base disassembly/assembly method.........................................................................6
Preparation for remote control..........................................................................7
Remote control panel..........................................................................................8
Basic operation.................................................................................................9
Screen display...................................................................................................10
TV program setting..........................................................................................11
Im age c o nt r ol. ... ... ... . .. . ... ... ... ... ... . .. . ... ... ... ... . .. . ... ... ... ... ... . .. . ... ... ... ... 1 4
Audio control...................................................................................................15
Functi on se tting... ........ ........ ........ ........ ........ ........ ........ ........ ........ ........ ...16
Time setting...........................................................................................................18
Signal source setting..............................................................................................19
Child lock setting..................................................................................................20
Teletext function.....................................................................................................21
Other setting function... ... ........ ... ........... ........... ........... ........... ... ........ ... .23
External audio and video equipment connection..............................................24
Using your TV as a computer display..............................................................25
Specifications...................................................................................................26
Troubleshooting guide............................................................................................27
WARNING AND CAUTION
CAUTION:
TO REDUCE THE RISK OF ELECTRIC SHOCK, DO NOT REMOVE
COVER (OR BACK). NO USER SERVICEABLE PARTS INSIDE.FOR
ANY PROBLEM, REFER SERVICING TO QUALIFIED SERVICE
PERSONNEL.
THERE IS A LIGHTNING ARROW SYMBOL IN THE TRIANGLE:
THIS SYMBOL INDICATES HIGH VOLTAGE IS PRESENT INSIDE.
IT IS DANGEROUS TO MAKE ANY KIND OF CONTACT WITH ANY
INSIDE PART OF THIS PRODUCT.
THERE IS A EXCLAMATION MARK IN THE TRIANGLE: THIS
SYMBOL ALERTS YOU THAT IMPORTANT LITERATURE
CONCERNING OPERATION AND MAINTENANCE HAS BEEN
INCLUDED WITH THIS PRODUCT.
CAUTION
DO NO T OPENDO NO T OPEN
RIS K OF ELEC TRIC SH OCK RIS K OF ELEC TRIC SH OCK
!!
!!
CAUTION:
TO REDUCE THE RISK OF ELECTRIC SHOCK AND FIRE,
DO NOT PUT THE TV SET NEAR SOURCES OF HUMIDITY.
DO NOT USE ANY ABRASIVE CLEANSERS WHICH MAY
SCRATCH OR DAMAGE THE LCD SCREEN. AVOID CONTACT
WITH OBJECTS THAT MAY SCRATCH THE LCD SCREEN.
NOTE: SERVICING THE UNIT YOURSELF IS UNAUTHORIZED
AND COULD LEAD TO INJURY OR PRODUCT DAMAGE.
2
WARNING AND CAUTION
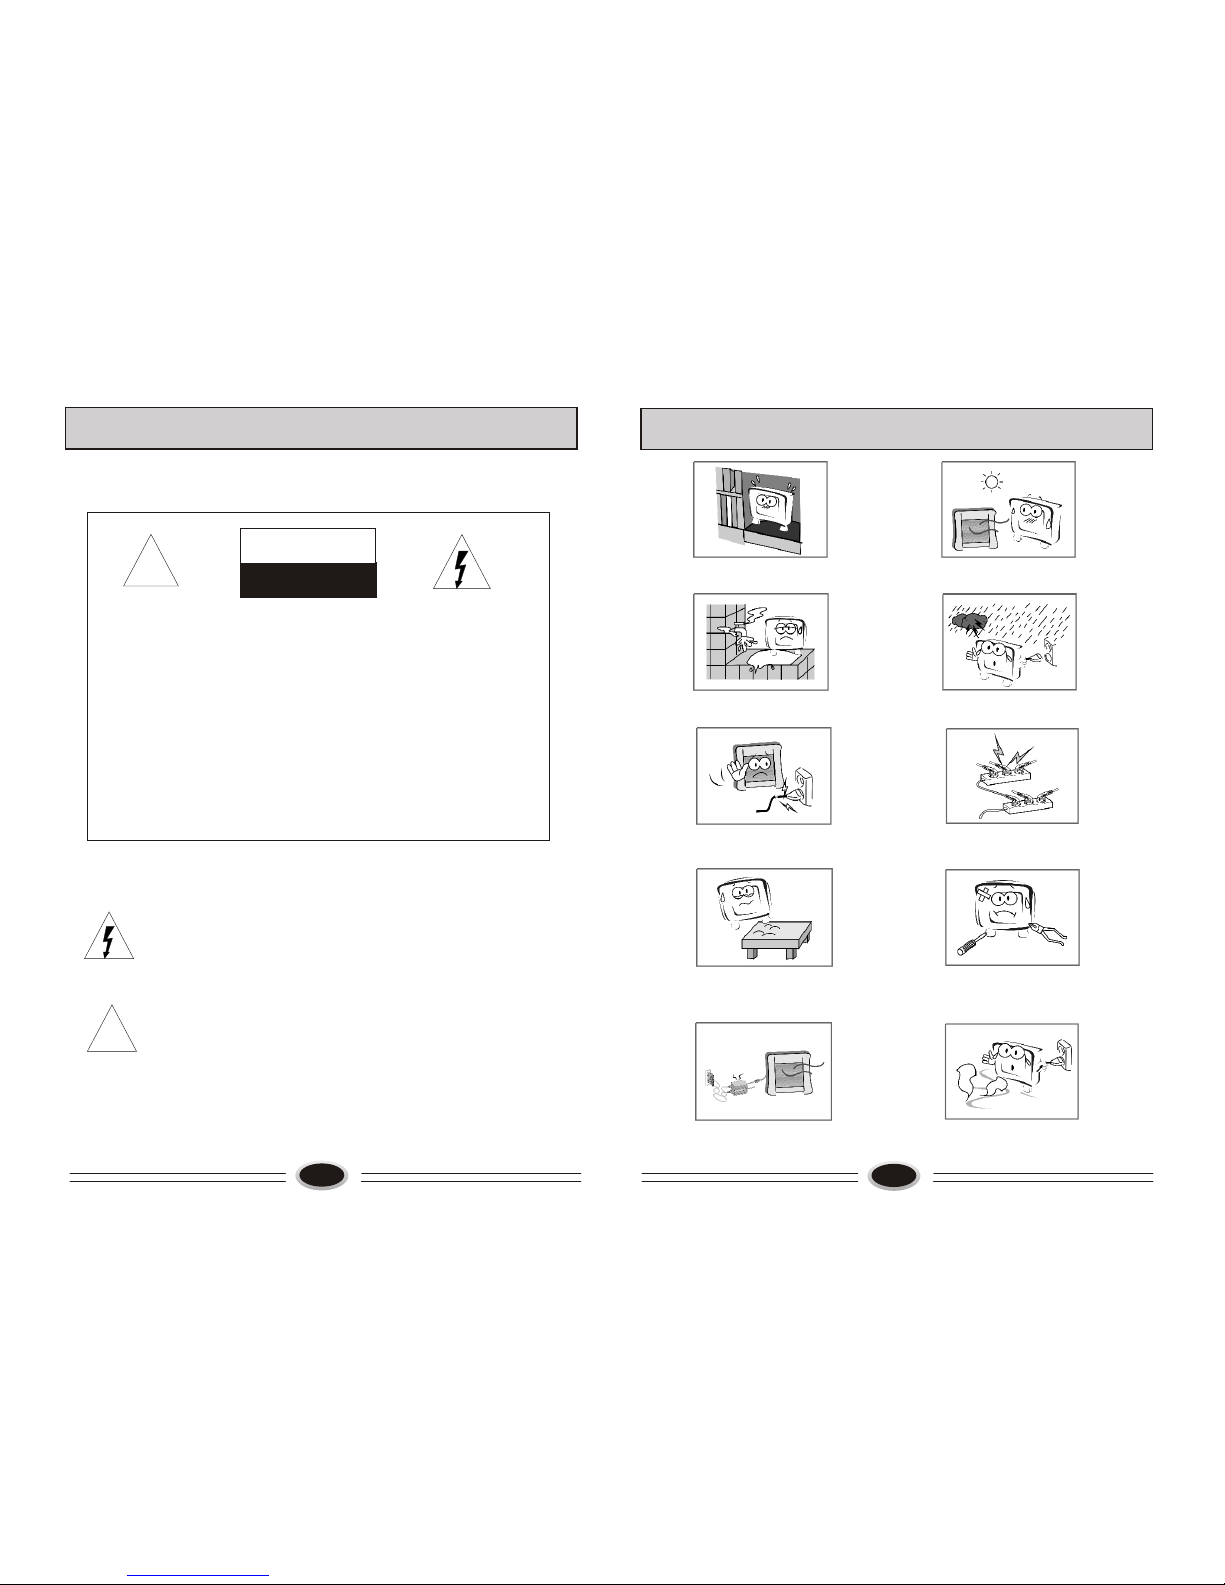
Please ensure that the set has adequate
ventilation.
Do not put the unit near water or oil as it
may cause a fire.
During thunderstorms, unplug both the
antenna and power plug to prevent
damage.
Do not use a damaged power plug or put
the power supply wire near a heat source
as it may cause electric shock or fire.
To prevent potential fire, do not overload
an electrical outlet with too many plugs.
Place the set on a level surface to
prevent it from tipping and potential
damage.
Do not remove the cover of the set
or try to service. This may result in
electric shock or fire. All service
work must be completed by an
authorized technician.
Do not place the power adapter near
a heat source or it may cause a fire.
If there are any abnormal sounds or
smells from the unit, unplug
immediately and contact an authorized
service provider.
3
Do not place the set near a heat source or
in direct sunlight.
WARNING AND CAUTION
4
To prevent fire, do not use or store any
flammable materials near the unit.
To prevent fire, do not place the unit near
a damp wall.
To prevent electric shock, ensure that
any external antenna connected to the set
is clear of contact with any power lines.
Do not plug / unplug the unit while your
hands are wet. This may cause an electric
shock.
Please ensure a solid connection with
the AC wall socket in order to avoid
shock and potential fire.
To prevent electric shock or fire, please
note to prevent rain from entering the set
along the wire connected to the outside
antenna.
When cleaning, please unplug the unit.
Use a soft cotton cloth. Do not use any
abrasive cleansers, and prevent water
from entering the set.
If any plugs or input wires are dirty, unplug
the set and clean. This will prevent risk of
electric shock or fire.
If the set is not going to be used for an
extended period, unplug the unit from
the AC wall outlet.
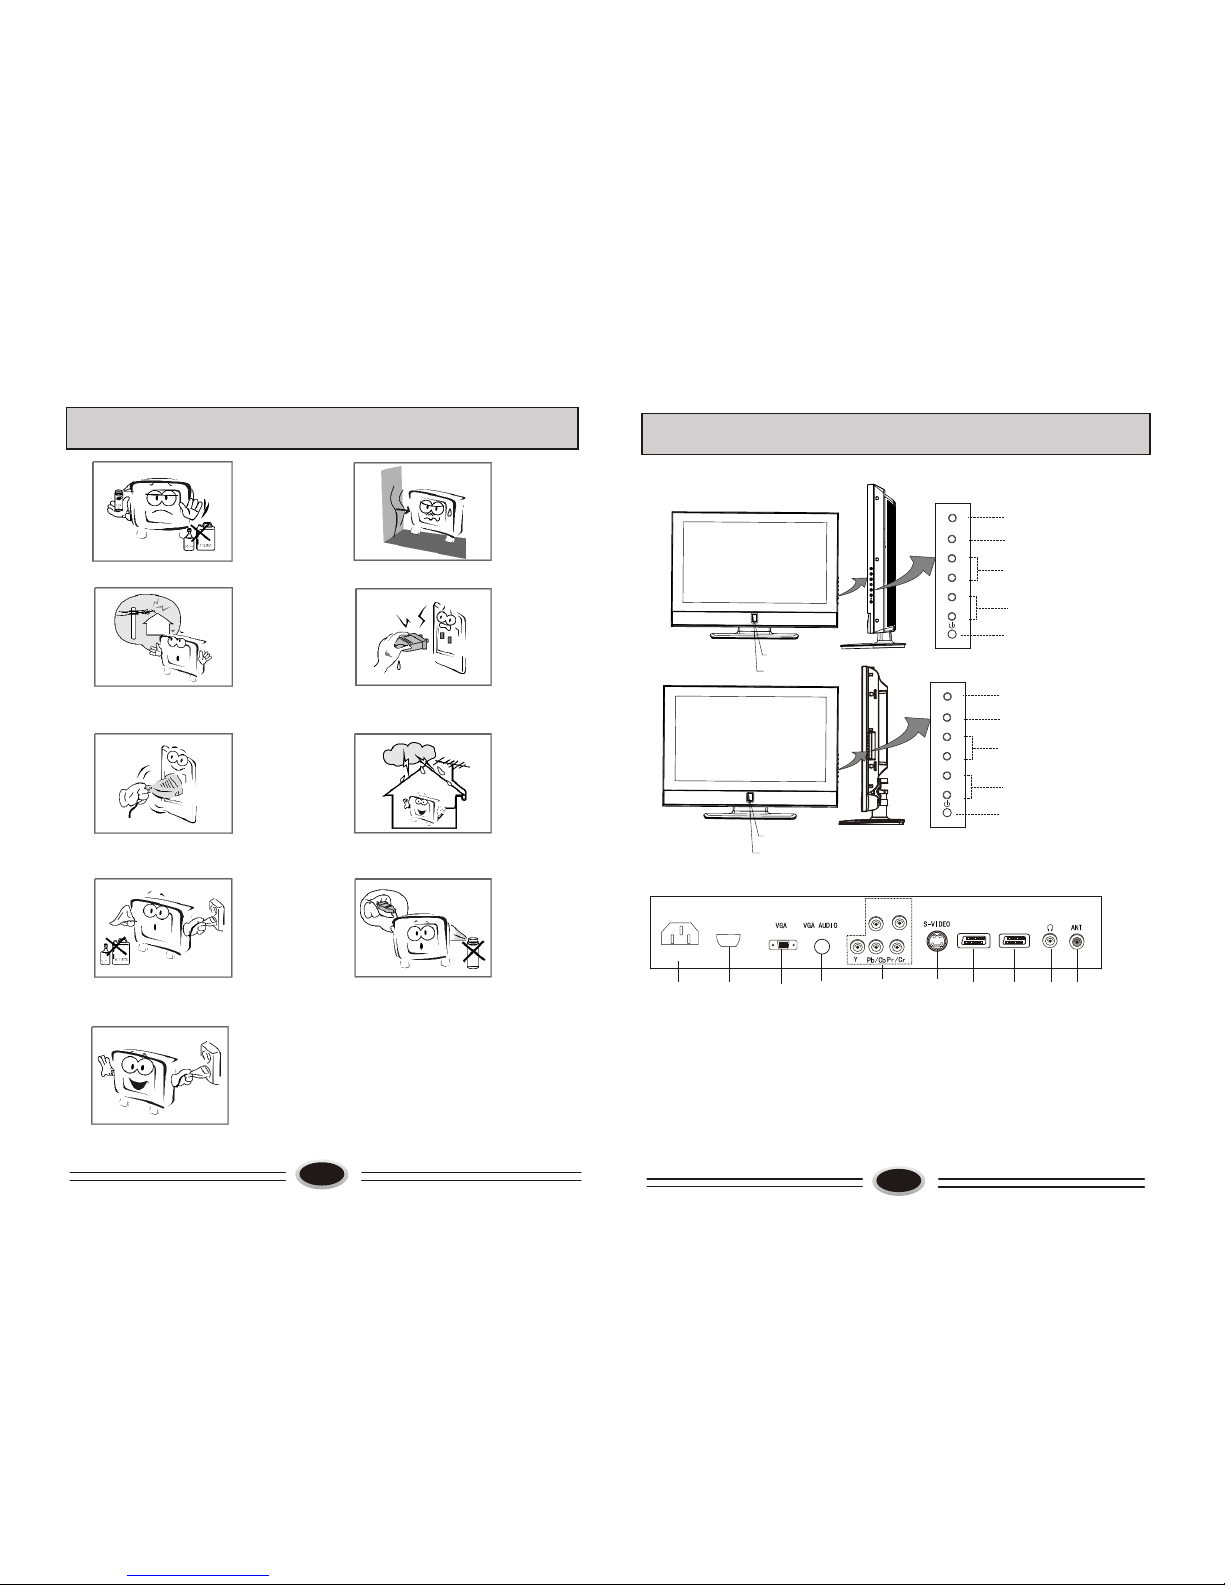
BUTTONS AND INTERFACE POSITION
5
Front control panel
Back interface
1. Antenna input
2. Earphone output
3. SCART2 input
4. SCART1 input
5. S-VIDEO input
6. YPbPr input
7. VGA audio input interface
8. VGA input
9. HDMI input
10.Power input socket
CH-
TV/AV
MENU
Power button
Program up/down button
Volume up/down button
TV/AV switch button
Menu button
CH+
VOL-
VOL+
CH-
TV/AV
MENU
CH+
VOL-
VOL+
Power indicator
Remote sensor
Power indicator
Remote sensor
L26A8A-A1/L32A8A-A1/
L37A8A-A1/L42A8A-A1
L40A8A-A1
36810
7
2
1
POWER
9
HDMI
L-AUDIO-R
5 4
SCART1 SCART2
-
Power button
Program up/down button
Volume up/down button
TV/AV switch button
Menu button
CH-
TV/AV
MENU
CH+
VOL-
VOL+
L26A8A-A1/L32A8A-A1/L37A8A-A1/L42A8A-A1
L40A8A-A1
7
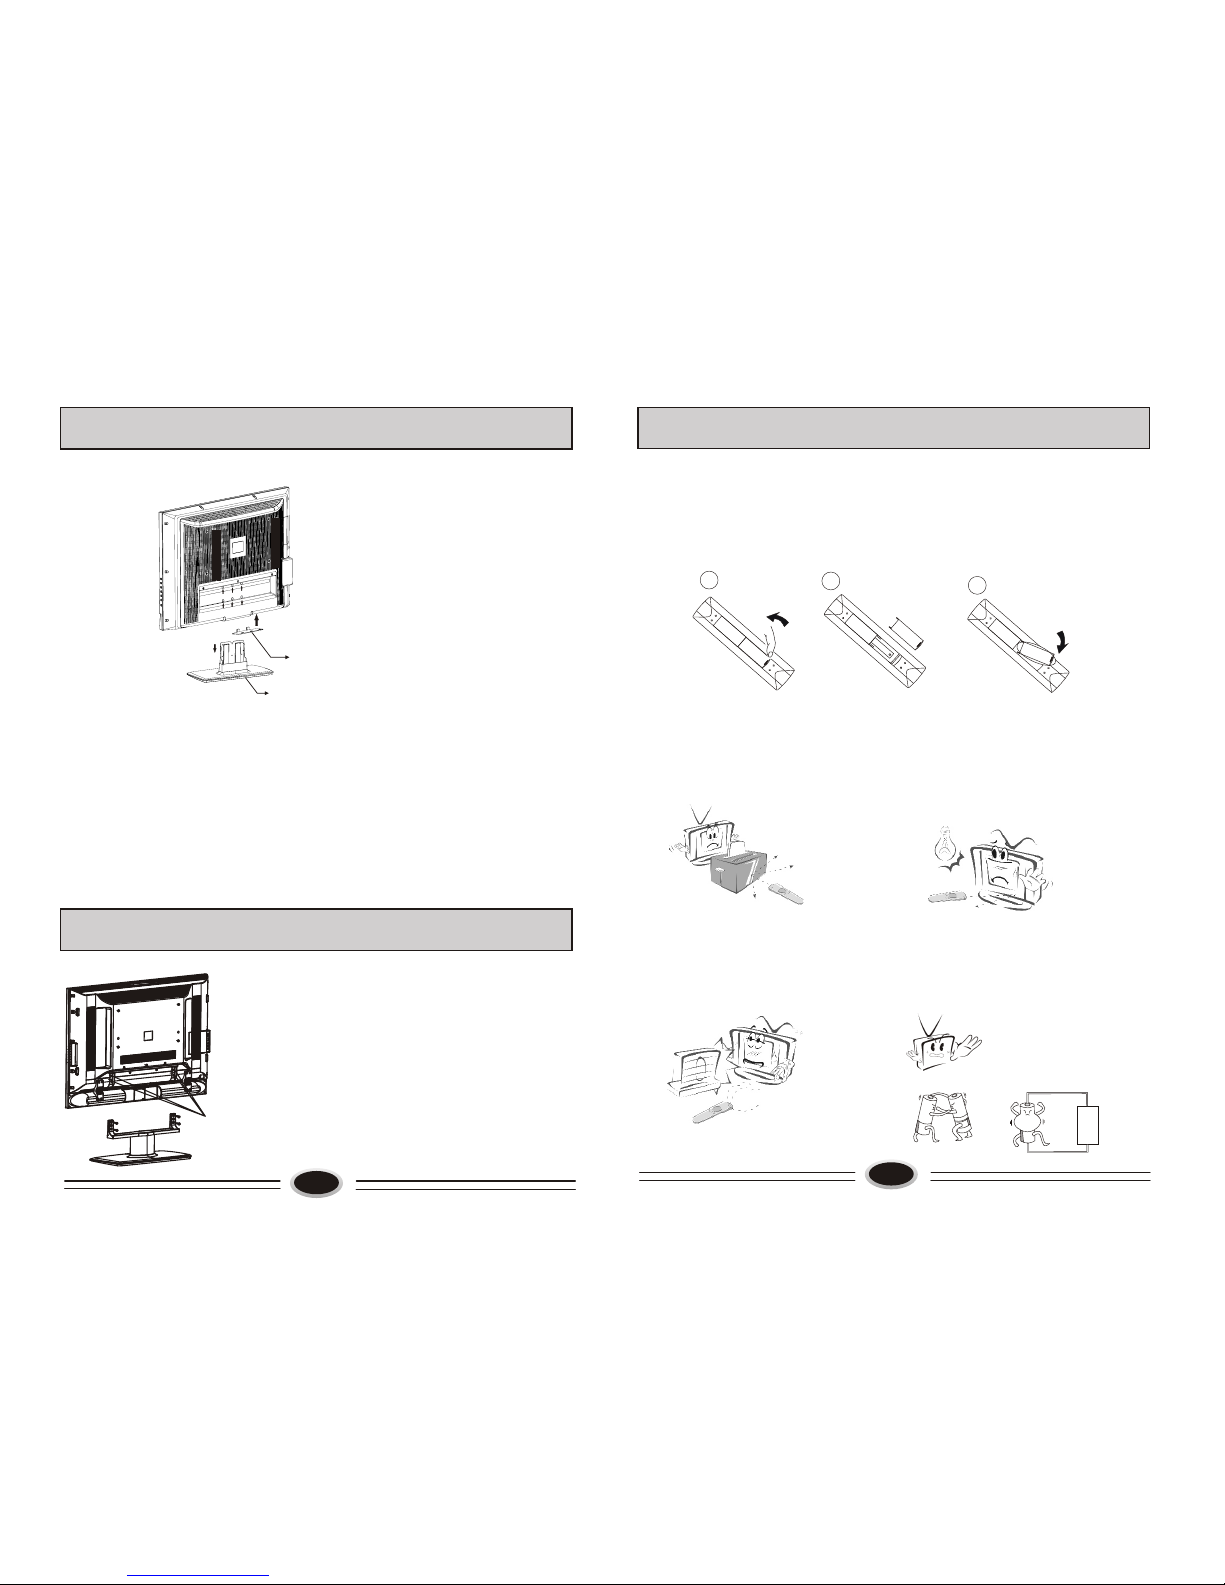
PREPARATION FOR REMOTE CONTROL
3
2
1
++
Remote control installation
1. According to the figure display below, place the remote control with face down,
then open the cover of battery apartment.
2. As in the figure display below, install two AA batteries. (The + and - symbol of
battery must match with the marks on the remote).
3.Close the cover of battery apartment.
Cautions for using remote control:
Confirm there is no object between the
remote control and the remote sensor
of TV set.
Sunshine or other strong light will
interfere the signal sent by the remote
control. In this situation turn the TV
set to avoid the direct light source.
Do not put the remote control in direct
heat or a damp place, or potential
damage to the remote may occur.
Please use two AA 1.5V batteries.
Do not mix battery types.
Install the batteries as the correct
polarities.
Do not use rechargeable batteries.
6
Base
Airproof board
(1)As figure, removing the four M4×20 screws, the base
will be disassembled.
(2)As figure, mounting the four M4×20 screws, the base
will be assembled.
Note:
The arrow indicates the position of screw.
The position to strike the screw.
BASE DISASSEMBLY/ASSEMBLY METHOD
WALL MOUNT BRACKET ASSEMBLY INSTRUCTIONS
(1) In order not to scratch the TV set, it is recommended putting the TV set with face
down on the soft and clean blanket.
(2)Disassemble the six screws from base and remove the base. (This item will be
cancelled if the product is without base.)
(3)Mount the airproof board.
(4)After completing the above operations, the complete set can be mounted on the wall
mount bracket.(Wall mount bracket operations refer to the assembly instructions of it.)
Note: 1. The arrow indicates the position of screw.
2. Wall mount bracket is additional purchase.
 Loading...