

Page 1

TFT-LCD COLOUR TELEVISION RECEIVER
OWNER'S MANUAL
This User's Manual is applicable for the following models:
L26A9A, L32A9A, L32A1A, L37A9A-AK
01
0090506952C
Please read this manual carefully
before operating the unit, and keep
it for future reference.
Page 2
CONTENTS
Warning and caution...........................................................................................2
Buttons and interface position............................................................................5
Front control panel.........................................................................................5
Back interface.................................................................................................6
Side
Preparation for remote control..........................................................................7
Remote control panel..........................................................................................8
Basic operation.................................................................................................9
Power on/off TV............................................................................................9
TV program selection and volume adjustment..............................................9
Recall............................................................................................................9
Mute function................................................................................................9
OSD language selection.................................................................................9
Screen display...................................................................................................10
TV program setting..........................................................................................11
Auto search...................................................................................................11
Manual search...............................................................................................11
Fine tune.......................................................................................................12
Skip...............................................................................................................12
Exchange.......................................................................................................13
Image control....................................................................................................13
Set your favourite picture mode....................................................................13
Noise reduce..................................................................................................13
Picture mode /sound mode selection.............................................................14
Sound control...................................................................................................14
Sound effect control......................................................................................14
System setting function....................................................................................14
OSD background setting...............................................................................14
Signal source setting......................................................................................15
Screen display picture zoom setting..............................................................15
Other setting function.......................................................................................15
Sleep timer setting.........................................................................................15
PIP setting......................................................................................................16
Sound source setting......................................................................................16
Color temperature..........................................................................................17
Digital filter setting........................................................................................17
AAA setting...................................................................................................17
H-POSITION/ V-POSITON/DURATION.........................................................18
Color and time on/of setting.........................................................................18
CHILD LOCK...............................................................................................19
Steram Media Broadcast System.................................................................20
External audio and video equipment connection..............................................28
Specifications...................................................................................................32
Trouble shooting guide.......................................................................................33
interface..................................................................................................6
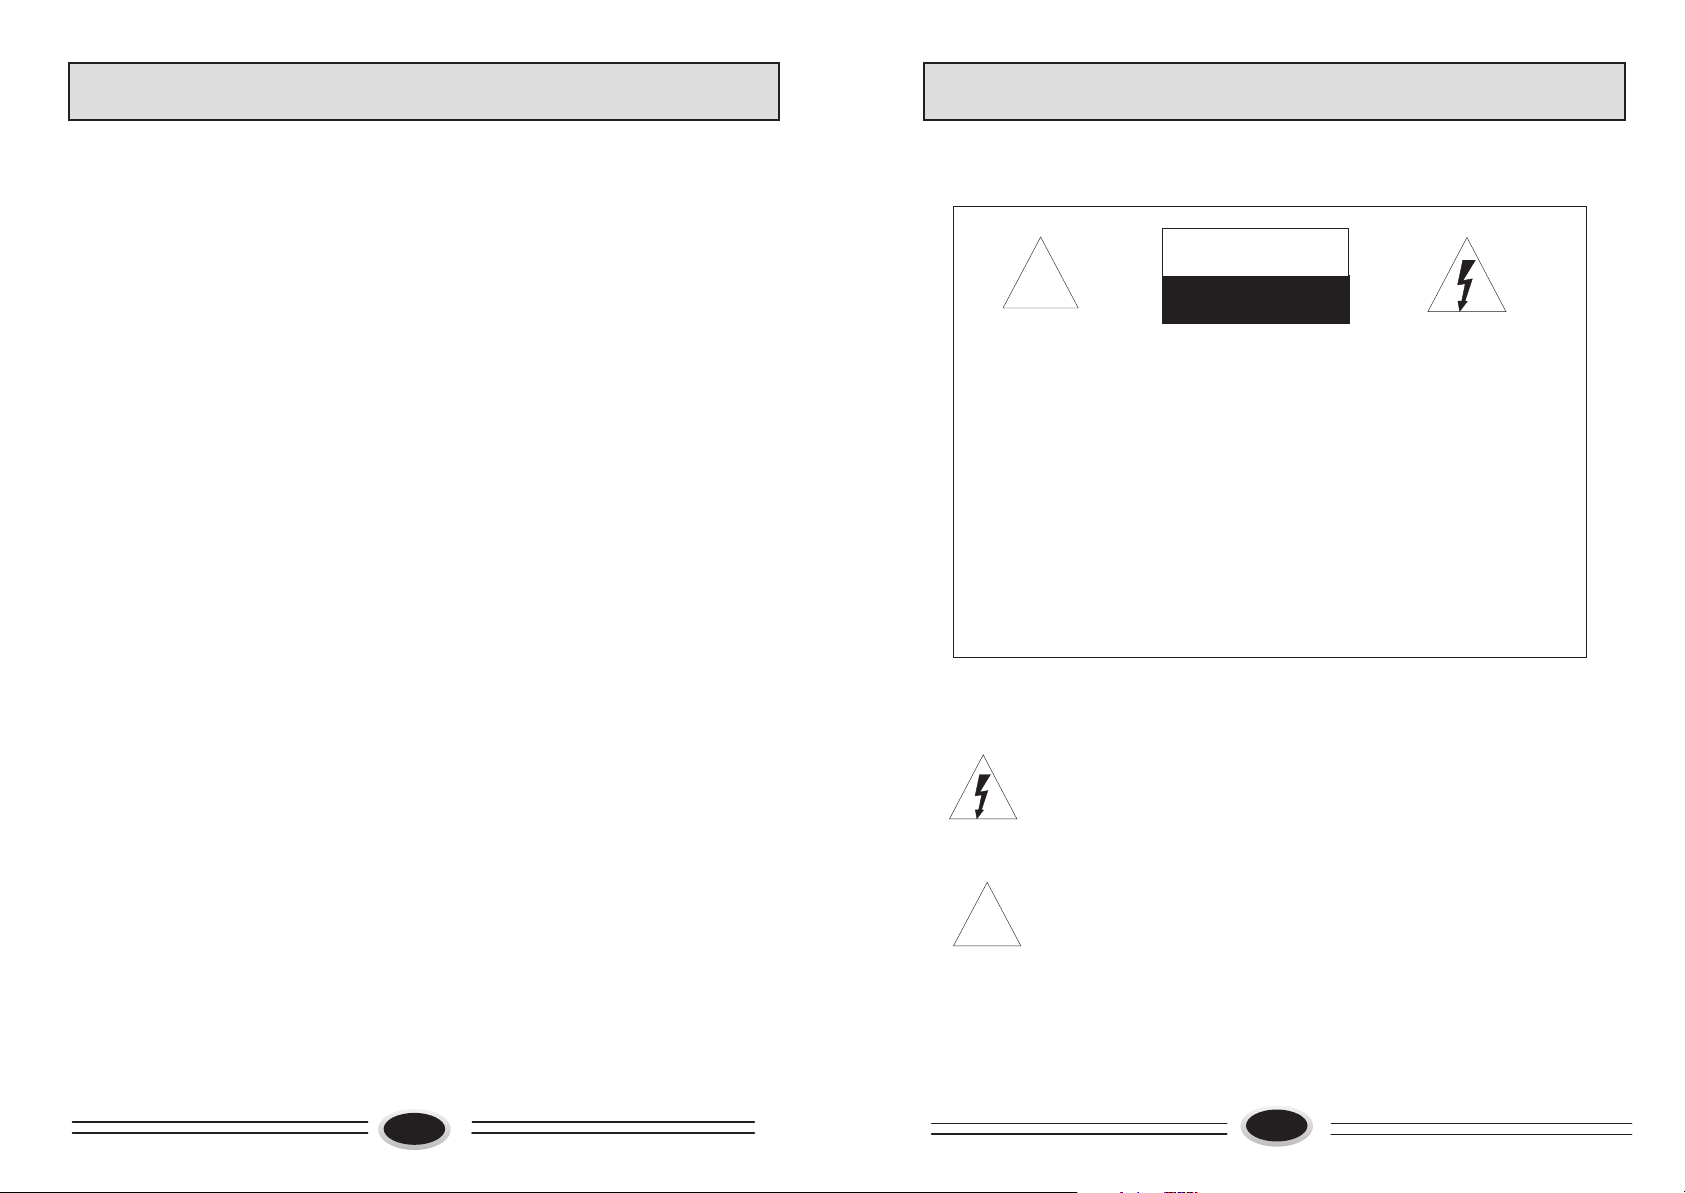
WARNING AND CAUTION
CAUTION
!!
CAUTION:
TO REDUCE THE RISK OF ELECTRIC SHOCK, DO NOT REMOVE
COVER (OR BACK). NO USER SERVICEABLE PARTS INSIDE.FOR
ANY PROBLEM, REFER SERVICING TO QUALIFIED SERVICE
PERSONNEL.
THERE IS A LIGHTNING ARROW SYMBOL IN THE TRIANGLE:
THIS SYMBOL INDICATES HIGH VOLTAGE IS PRESENT INSIDE.
IT IS DANGEROUS TO MAKE ANY KIND OF CONTACT WITH ANY
INSIDE PART OF THIS PRODUCT.
THERE IS A EXCALMATION MARK IN THE TRIANGLE: THIS
SYMBOL ALERTS YOU THAT IMPORTANT LITERATURE
CONCERNING. OPERATION AND MAINTENANCE HAS BEEN
INCLUDED WITH THIS PRODUCT.
CAUTION:
TO REDUCE THE RISK OF ELECTRIC SHOCK AND FIRE,
DO NOT PUT THE TV SET NEAR SOURCES OF HUMIDITY.
DO NOT USE ANY ABRASIVE CLEANSERS WHICH MAY
SCRATCH OR DAMAGE THE LCD SCREEN. AVOID CONTACT
WITH OBJECTS THAT MAY SCRATCH THE LCD SCREEN.
NOTE: SERVICING THE UNIT YOURSELF IS UNAUTHORIZED
!!
AND COULD LEAD TO INJURY OR PRODUCT DAMAGE.
RISK OF ELECTRIC SHOCK RISK OF ELECTRIC SHOCK
DO NOT OPENDO NOT OPEN
1
2
Page 3
WARNING AND CAUTION
WARNING AND CAUTION
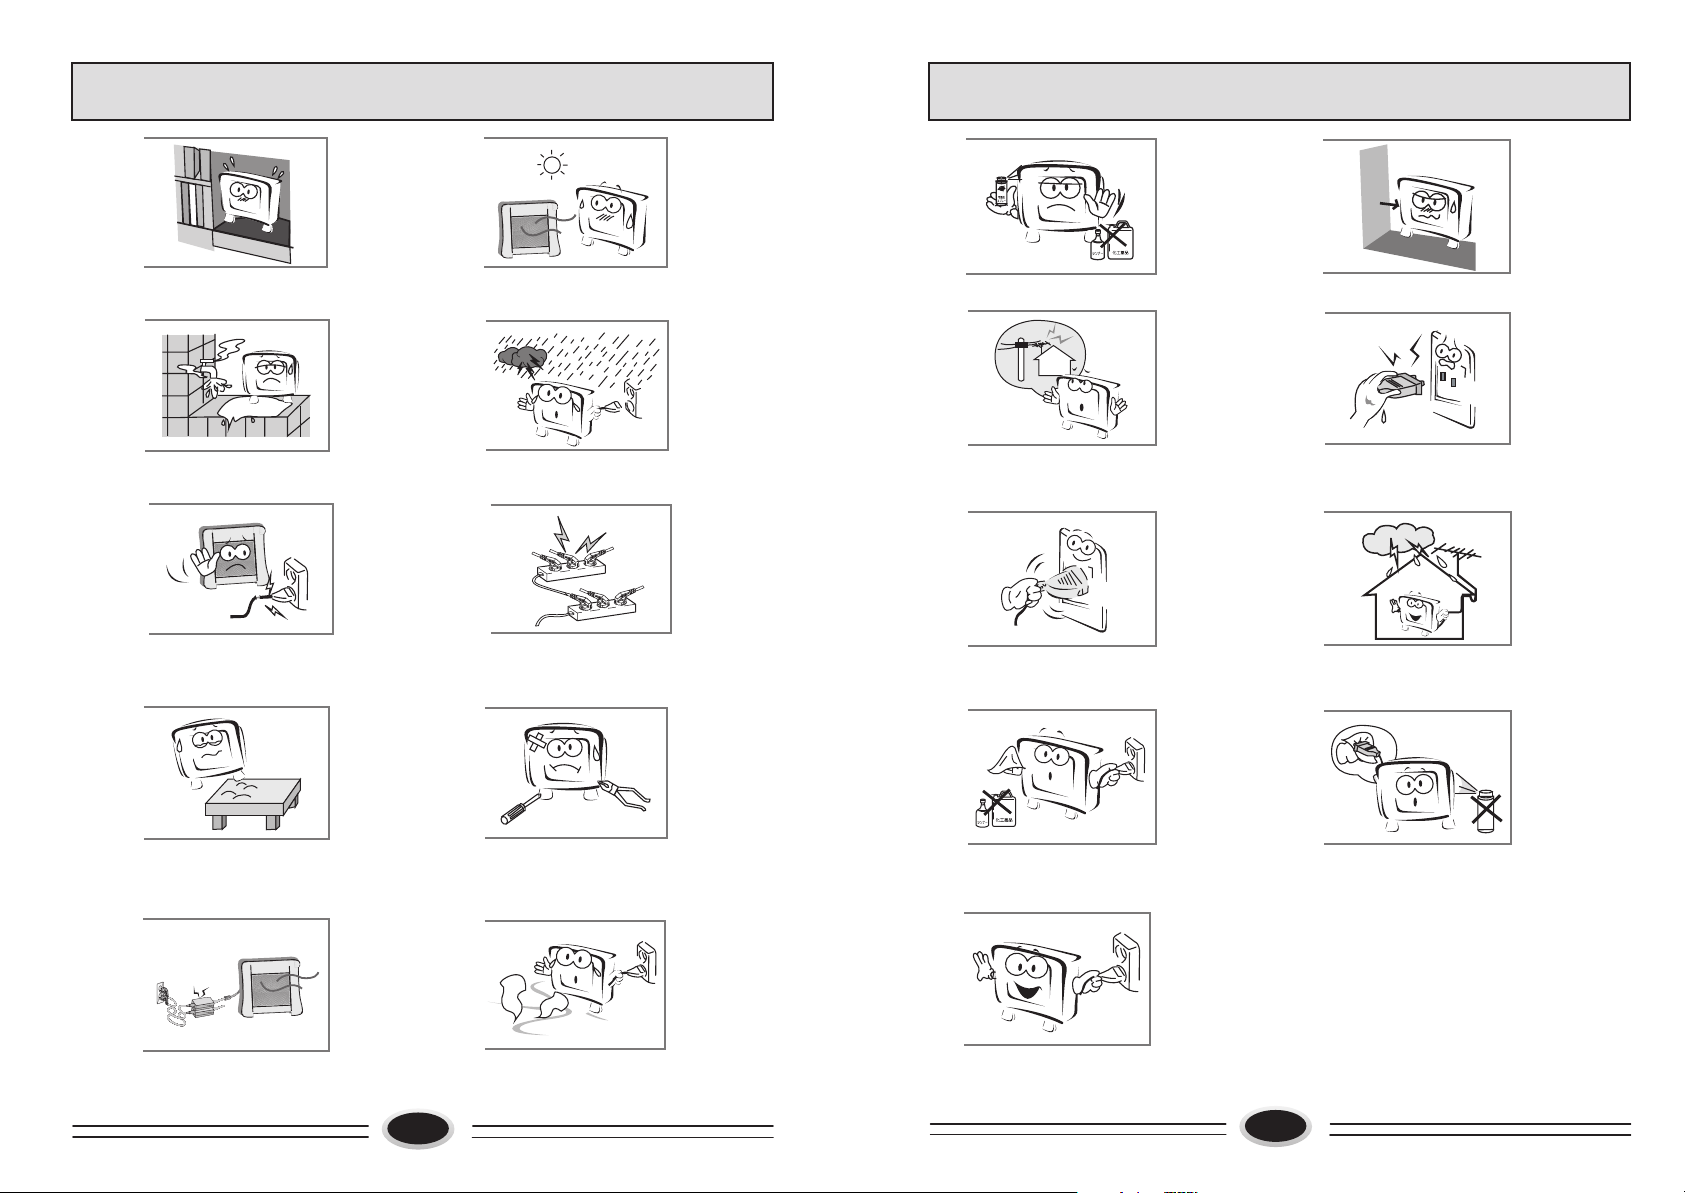
Please ensure that the set has adequate
ventilation.
Do not put the unit near water or oil as it
may cause a fire.
Do not use a damaged power plug or put
the power supply wire near a heat source
as it may cause electric shock or fire.
Place the set on a level surface to
prevent it from tipping and potential
damage.
Do not place the set near a heat source or
in direct sunlight.
During thunderstorms, unplug both the
antenna and power plug to prevent
damage.
To prevent potential fire, do not overload
an electrical outlet with too many plugs.
Do not remove the cover of the set
or try to service. This may result in
electric shock or fire. All service
work must be completed by an
authorized technician.
To prevent fire, do not use or store any
flammable materials near the unit.
To prevent electric shock, ensure that
any external antenna connected to the set
is clear of contact with any power lines.
Please ensure a solid connection with
the AC wall socket in order to avoid
shock and potential fire.
When cleaning, please unplug the unit.
Use a soft cotton cloth. Do not use any
abrasive cleansers, and prevent water
from entering the set.
To prevent fire, do not place the unit near
a damp wall.
Do not plug / unplug the unit while your
hands are wet. This may cause an electric
shock.
To prevent electric shock or fire, please
note to prevent rain from entering the set
along the wire connected to the outside
antenna.
If any plugs or input wires are dirty, unplug
the set and clean. This will prevent risk of
electric shock or fire.
Do not place the power adapter near
a heat source or it may cause a fire.
If there are any abnormal sounds or
smells from the unit, unplug
immediately and contact an authorized
service provider.
3
If the set is not going to be used for an
extended period, unplug the unit from
the AC wall outlet.
4
Page 4

BUTTONS AND INTERFACE POSITION
BUTTONS AND INTERFACE POSITION
Front control panel
MENU TV/AV
MENU
TV/AV
P-
P+
V-
V+
POWER
P- P+ V- V+
1
2
3
4
5
POWER
1 2 3 4 5 67
Back panel
L26A9A-A/L32A9A-A/L32A1A-A
YPb/CbPr/Cr L-IN R-IN
V-OUT L-OUT R-OUT
POWER
HDMI IN
VGA
VGA
AUDIO IN
Y Pb/Cb Pr/Cr
L37A9A-AK
YUV AUDIOIN
L
AUDIO IN
YUV
YUV IN
D-SUB IN
HDMI
L
V
AV OUT AUDIO OUT
R
R
S-VIDEO IN
1 VGA input
2 VGA audio input
3 Component video input
4 VIDEO/AUDIO output
5 Component/S-VIDEO audio input
6 S-VIDEO input
7 VIDEO/AUDIO input1
8 VIDEO/AUDEO input2
9 Antenna input
10 Power cord socket
11 Power switch Please according to the real set
12 HDMIVIDEO and AUDIO input
Side panel
AV2 AUDIO2 IN
L
V
L
V
AV1 AUDIO1 IN
AV2 L R
S-
AV1 L R
VIDEO
R
R
AC IN
ANT
ANT
Menu button
1.
TV/AV switch button
2.
Program down/up button/item down/up selected
3.
Volume down/up button/item left/right selected and enter
4.
Power button
5.
Power indicator
6.
Remote sensor
7.
5
USB1 jack
USB2 jack
USB1
USB2
6
Page 5
PREPARATION FOR REMOTE CONTROL
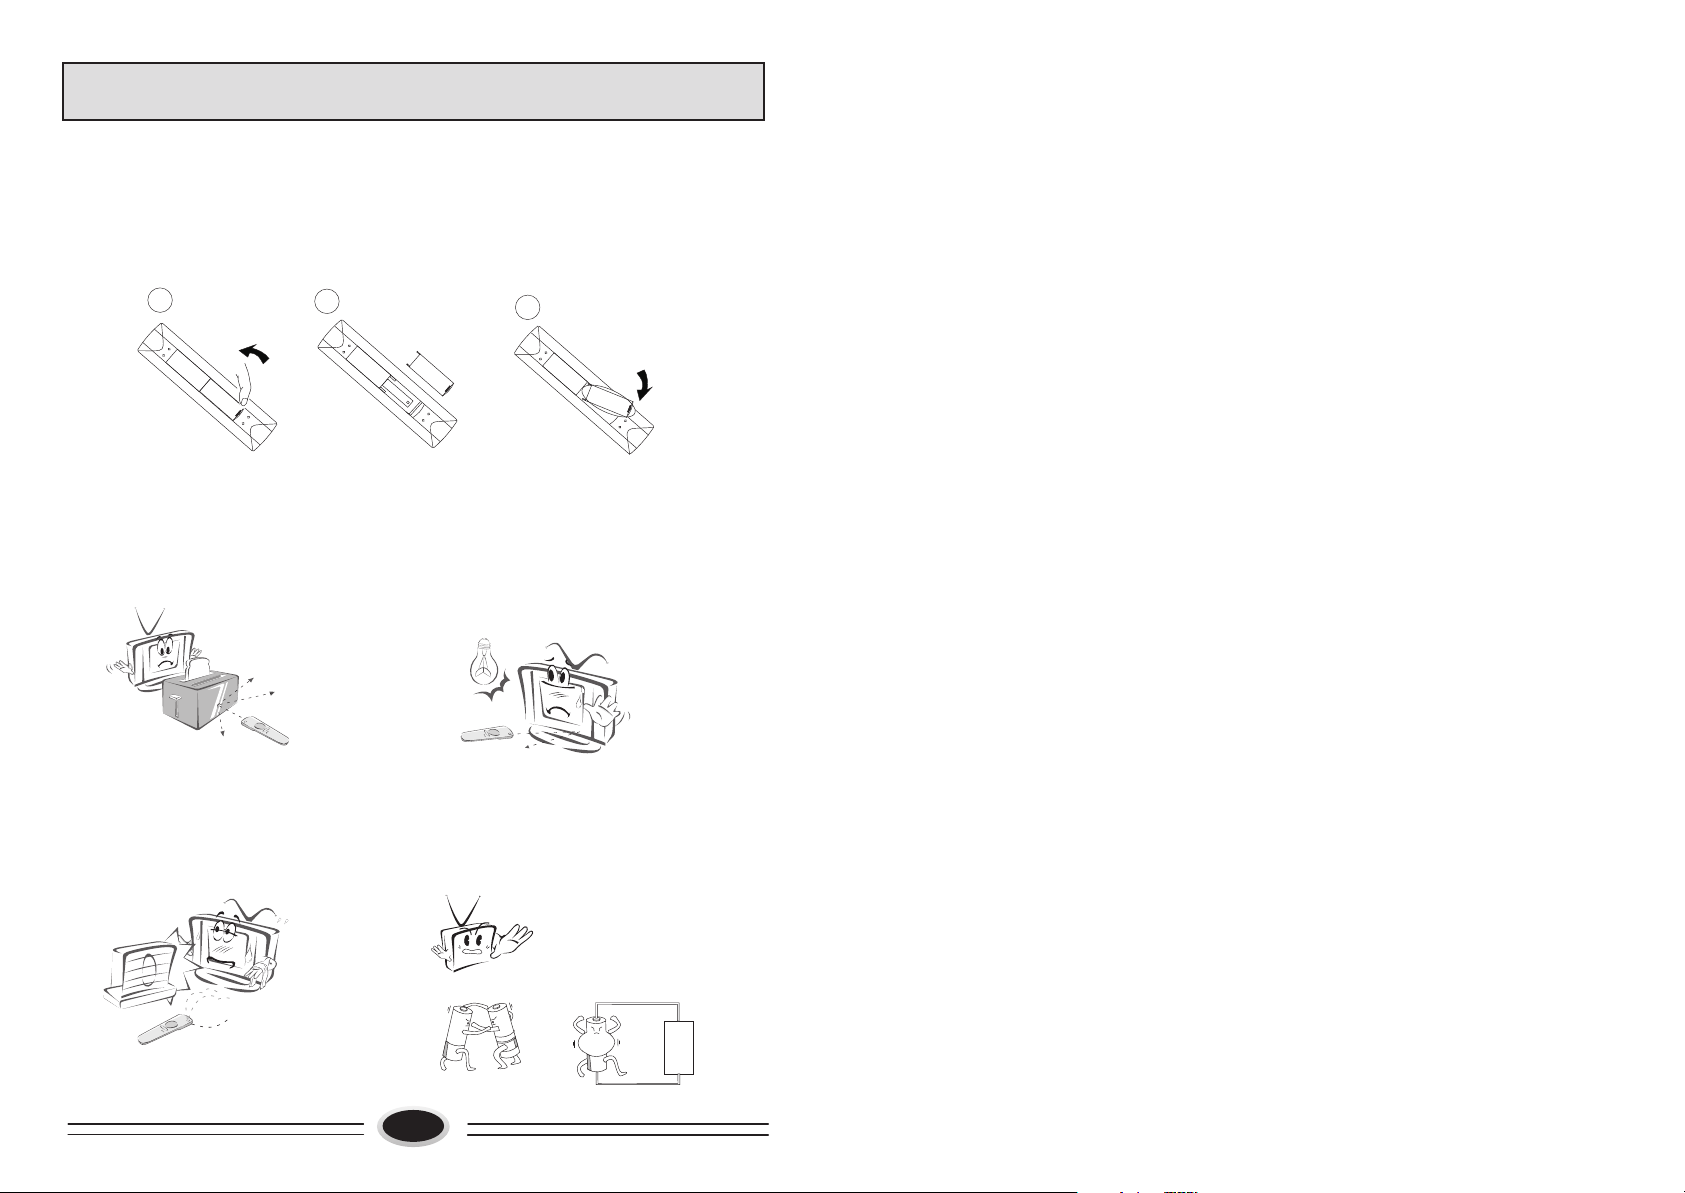
Remote control installation
1. According to the figure display below, place the remote control with face down,
then open the cover of battery apartment.
2. As in the figure display below, install two AA batteries. (The + and - symbol of
battery must match with the marks on the remote).
3.Close the cover of battery apartment.
1
2
++
3
Cautions for using remote control
Confirm there is no object between the
remote control and the remote sensor
of TV set.
Do not put the remote control in direct
heat or a damp place, or potential
damage to the remote may occur.
Sunshine or other strong light will
interfere the signal sent by the remote
control. In this situation turn the TV
set to avoid the direct light source.
Please use two AA 1.5V batteries.
Do not mix battery types.
Install the batteries as the correct
polarities.
Do not use the rechargeable batteries.
7
Page 6
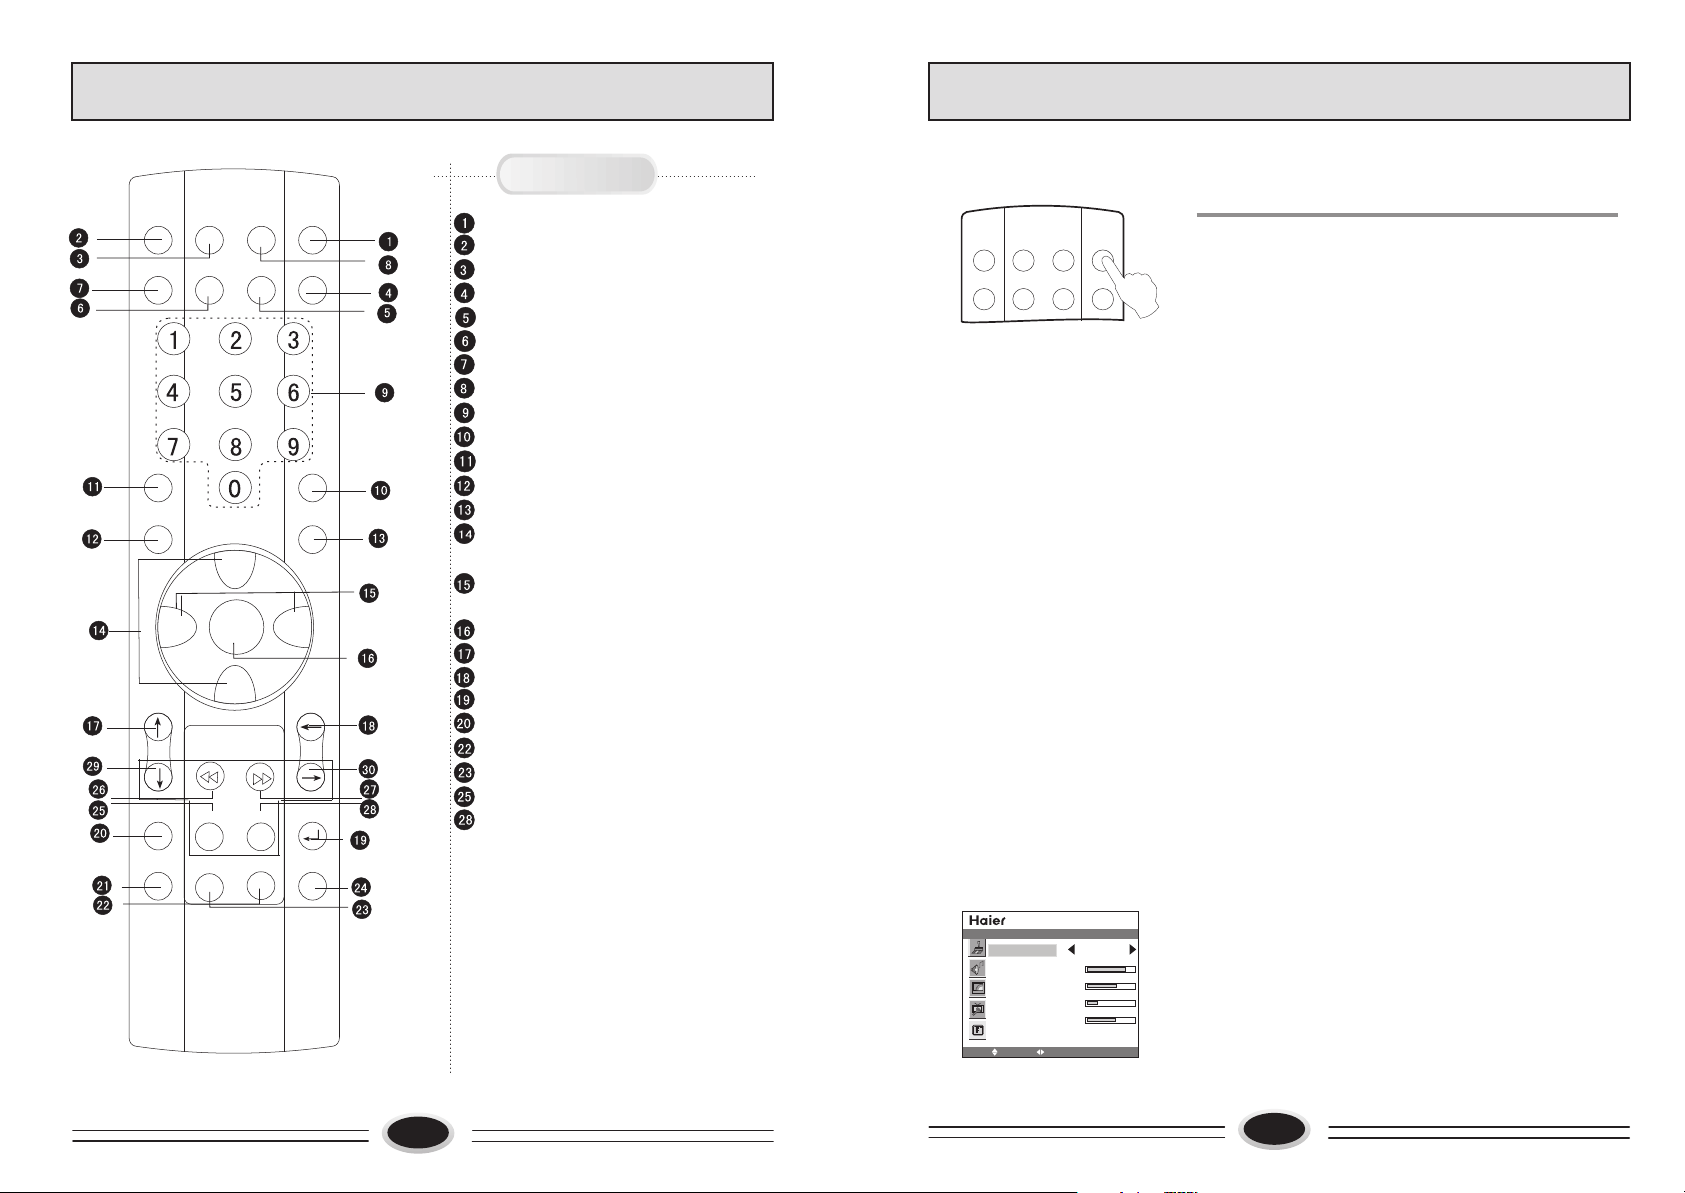
REMOTE CONTROL PANEL
Buttons and Descriptions
MUTE
MAIN/SUB
CHILDLOCK
P.STD
VOL-
C.SYS
STILL
=
TV/AV
PIP
CH+
MENU
CH-
SOUND
AAA
I-II
VOL+
POWER
DISPLAY
RECALL
S.STD
S.SYS
SCAN
Power button
Mute button
TV/AV switch button
Display button
Dynamic AAA HDTV on/off button
PIP function on/off button
PIP main/sub picture switch button
main/sub
PIP sound selection button
Digital selection button
Program recall button
Child lock button
Picture mode selection button
Sound mode selection button
Program up/down button, direction
selection button
Volume up/down button, direction
selection button
Menu call/exit button
Color system selection button
Sound system selection button
Program scan button
Picture still button
Picture size selection button
Sleep timer button
This function is not available
This function is not available
MUTE
MAIN/SUB
TV/AV
PIP
SOUND
AAA
BASIC OPERATION
POWER ON/OFF TV
Standby set: first connect the power supply wire,
then turn the power switch on the back of TV set on(if
there is a power switch button).
POWER
DISPLAY
1. If the TV set is in standby status, press power
switch on the remote control or TV set (or CH+/-/P+/ on the remote control)can cancel the standby status,
then enter the power on status.
2. Press power switch on the remote control or
the TV set again, the TV set will enter standby
status.
TV PROGRAM SELECTION AND VOLUME
ADJUSTMENT
You can use CH+/- button or direct-digit choosing
button to select the TV channel number.
Press VOL+/- button to adjust the volume.
RECALL
Pressing RECALL button can switch the channel to the
last channel you watched.
MUTE FUNCTION
1. Press MUTE button to shut off the TV sound, the
screen displays mute mark.
2. Press MUTE button again or VOL+ button to restore
the sound.
ZOOM
SLEEP
SIZE
BACK
17/18/19/20/21/24/26/27/29/30 buttons
are for the multi-media ,reference to
the instruction following.
The USB multi-media is only for the
model L37A9A-AK.
8
OSD
LANGUAGE ENGLISH
H-POSITION
V-POSITION
DURATION
TRANSPARENCY
MOVE SELECT MENU EXIT
OSD LANGUAGE SELECTION
Select the LANGUAGE item in the menu
1. Press MENU and CH+/- button to select OSD setting
menu.
2. Press VOL+/- to enter and CH+/- button to select
LANGUAGE item.
3. Press VOL+/- button to select the language you need.
9
Page 7

SCREEN DISPLAY
TV PROGRAM SETTING
For your convenient operation and in order to know the TV set, we offer the below
menus.
Picture setting menu
PICTURE
PICTURE MODE PERSONAL
CONTRAST
BRIGHTNESS
SATURATION
TINT
SHARPNESS
NOISE REDUCE
SIZE MODE
MOVE SELECT MENU EXIT
STRONG
FULL
Sound setting menu
SOUND SOURCE MAIN
SOUND MODE NEWS
BALANCE
EQUALIZER
SOUND
MOVE SELECT MENU EXIT
Source setting menu
SOURCE
PICTURE SOURCE TV
PIP MODE OFF
SUB PICTURE VGA
COLOR SYSTEM AUTO
SOUND SYSTEM
AUTO SEARCH
MANUAL SEARCH
MOVE SELECT MENU EXIT
BG
Menu setting menu
OSD
LANGUAGE ENGLISH
H-POSITION
V-POSITION
DURATION
TRANSPARENCY
MOVE SELECT MENU EXIT
Function setting menu
FUNCTION
CLOCK 00:12
TIME ON --:-TIME OFF --:-SLEEP TIMER OFF
COLOR TEMP USER
D FILTER
AAA ON
MOVE SELECT MENU EXIT
Operation instructions
The real display may be different from the above menus, if you need adjust, please do as
follows:
1.Press MENU button to open the menu, use CH+/- button to select every menu
separately, use VOL+/- button to enter.
2.Press CH+/- button to select the item needs adjust.
3.Press VOL+/- button to adjust the selected item, or enter the next menu.
4.Press MENU button to return the last menu or exit the screen menu display.
Note: Press MENU button to select the menu operation in the user manual, please
refer to these operation instructions.
SOURCE
PICTURE SOURCE TV
PIP MODE OFF
SUB PICTURE VGA
COLOR SYSTEM AUTO
SOUND SYSTEM
AUTO SEARCH
MANUAL SEARCH
MOVE SELECT MENU EXIT
SOURCE
CURRENT CHANNEL 10
SKIP OFF
TARGET CHANNEL 10
EXCHANGE
AFC OFF
FINE TUNE
SEARCH NEXT 471.2MHZ
MOVE SELECT MENU EXIT
BG
AUTO SEARCH
Using AUTO SEARCH can search all receiving
programs. We recommend using auto search to
search the program when you use this TV set for
the first time.
1.Press MENU and CH+/- button to select SOURCE
menu and VOL+/- to enter.
2.Press CH+/- button to select AUTO SEARCH.
3.Press VOL+/- button to start searching, press MENU
button to finish auto search.
Note: The order of the auto search is due to the
frequency of the program, generally speaking,
it is used only at the first time you search the
program, and once the order of the program has
been confirmed, you do nott have to use this
function, otherwise the order of the program
will be changed.
MANUAL SEARCH
Manual search can search and order the program freely.
1. Press MENU and CH+/- button to select the SOURCE
menu and VOL+/- to enter.
2. Press CH+/- button to select MANUAL SEARCH,
press VOL+/- button to enter the next menu.
3. Press CH+/- button to select SEARCH NEXT.
4. Press VOL+/- button to start searching, pressing
VOL+ button is used to search the higher frequency
channel, pressing VOL- button is used to search the
lower frequency channel, when you have searched
a program, the searching will stop automatically.
You can press VOL+/- button to go on searching or
press MENU button to exit.
Note: During searching, it may appear black screen
because of change of signal, it is normal, it will
recover after finishing searching.
10
11
Page 8

TV PROGRAM SETTING
TV PROGRAM SETTING
FINE TUNE
When you can not get a satisfactory picture effect,
you can fine tune to obtain.
1. Press MENU and CH+/- button to select SOURCE
menu and VOL+/- to enter.
2. Press CH+/- button to select MANUAL
SEARCH, press VOL+/- button to enter the next
menu.
3. Press CH+/- button to select FINE TUNE.
4. Press VOL+/- button to start fine tune until you
obtain the best picture and sound, then loose
the button, press MENU button to exit.
SKIP
1. Select the program number you need skip.
2. Press MENU and CH+/- button to select SOURCE
menu and VOL+/- to enter.
3. Press CH+/- button to select the MANUAL
SEARCH, press VOL+/- button to enter the
next menu.
4. Press CH+/- button to select SKIP, press
VOL+/- button to select ON.
5. Press MENU button to shut off the menu.
When you use CH+/- button to select channel,
this channel number will be skipped. But you
can still use one direct-digit choosing button to
select the skipped channel number.
Note: How to recover the skipped channel number
1. Press direct-digit choosing button to select the
channel number that needs recover.
2. Repeat the steps above.
3. Press CH+/- button to select SKIP, press VOL+/ button to select OFF.
SOURCE
CURRENT CHANNEL 10
SKIP OFF
TARGET CHANNEL 10
EXCHANGE
AFC OFF
FINE TUNE
SEARCH NEXT 471.2MHZ
MOVE SELECT MENU EXIT
SOURCE
CURRENT CHANNEL 10
SKIP OFF
TARGET CHANNEL 10
EXCHANGE
AFC OFF
FINE TUNE
SEARCH NEXT 471.2MHZ
MOVE SELECT MENU EXIT
SOURCE
CURRENT CHANNEL 10
SKIP OFF
TARGET CHANNEL 10
EXCHANGE
AFC OFF
FINE TUNE
SEARCH NEXT 471.2MHZ
MOVE SELECT MENU EXIT
SOURCE
CURRENT CHANNEL 15
SKIP OFF
TARGET CHANNEL 28
EXCHANGE
AFC OFF
FINE TUNE
SEARCH NEXT 471.2MHZ
MOVE SELECT MENU EXIT
PICTURE
PICTURE MODE PERSONAL
CONTRAST
BRIGHTNESS
SATURATION
TINT
SHARPNESS
NOISE REDUCE
SIZE MODE
MOVE SELECT MENU EXIT
PICTURE
PICTURE MODE PERSONAL
CONTRAST
BRIGHTNESS
SATURATION
TINT
SHARPNESS
NOISE REDUCE
SIZE MODE
MOVE SELECT MENU EXIT
STRONG
FULL
STRONG
FULL
EXCHANGE
1. Press MENU and CH+/- button to select SOURCE
menu and VOL+/- to enter.
2. Press CH+/- button to select MANUAL
SEARCH, press VOL+/- button to enter the next
menu.
3. Press CH+/- button to select TARGET CHANNEL,
press VOL+/- button to select the channel you need
exchange.
4. Press CH+/- button to select EXCHANGE, press
VOL+/- button to exchange, as figure, exchange
the current channel number 15 to channel number
28.
5. Press MENU button to save and exit.
IMAGE CONTROL
SET YOUR FAVOURITE PICTURE MODE
SET YOUR FAVOURITE PICTURE MODE
1. Press MENU and CH+/- button to select PICTURE
menu and VOL+/- to enter.
2. Press CH+/- button to select the item that needs
adjust.
3. Press VOL+/- button to adjust the selected item,
the detailed adjustment is as following table.
The table of picture item adjustment effect
Items
Contrast
Brightness
Saturation
Tint
*
Sharpness
VOL- VOL+
Weak
Dark
Light
Green
Strong
Bright
Thick
Red
Soft Sharp
Note: TINT is only valid in NTSC system.
NOISE REDUCE
Noise reduce can decrease the noise of picture
1. Press MENU and CH+/- button to select PICTURE
menu and VOL+/- to enter.
2. Press CH+/- button to select the NOISE REDUCE.
3. Press VOL+/- button to select OFF, WEAK or
STRONG as your require.
12
13
Page 9

IMAGE CONTROL
SYSTEM SETTING FUNCTION
PICTURE MODE/SOUND MODE SELECTION
Press P.STD button on the remote control
continually, the following four picture modes
can be selected in turn.
NATURAL
BRIGHT PERSONAL SOFT
NATURAL: common mode.
SOFT: the image effect is soft.
USER: set the image effect you like.
BRIGHT: suitable for sport image.
Press S.STD button on the remote control
continually, the following four sound modes
can be selected in turn.
NORMAL
MUSIC PERSONAL
NEWS
You can also enter picture and sound menu to adjust.
SOUND CONTROL
SOUND EFFECT CONTROL
You can select your favourite sound modes, and adjust
the BALANCE and EQUALIZER of sound.
1. Press MENU and CH+/- button to select SOUND menu.
2. Press VOL+/- to enter and CH+/- button to select the
sound item you need set.
3. Press VOL+/- button to adjust the selected item.
BALANCE: Press VOL+/- button to enter adjustment,
use VOL+/- button to adjust the balance of left and
right sound.
EQUALIZER: Press VOL+/- button to enter EQUALIZER
set menu, use VOL+/- button to select every different
frequency, use CH+/- button to adjust.
Note: Sound source only can be adjusted in PIP mode.
CHILD LOCK
P.STD
CHILD LOCK
P.STD
RECALL
0
S.STD
RECALL
0
S.STD
SOUND
SOUND SOURCE MAIN
SOUND MODE NEWS
BALANCE
EQUALIZER
MOVE SELECT MENU EXIT
SOUND
50
75 100 300 1K 3K 5K 10K 15K
SELECT MENU EXIT
MOVE
SOURCE
PICTURE SOURCE TV
PIP MODE OFF
SUB PICTURE VGA
COLOR SYSTEM AUTO
SOUND SYSTE
AUTO SEARCH
MANUAL SEARCH
MOVE SELECT MENU EXIT
Note:USB mode is only available
in model L37A9A-AK
PICTURE
PICTURE MODE PERSONAL
CONTRAST
BRIGHTNESS
SATURATION
TINT
SHARPNESS
NOISE REDUCE
SIZE MODE
MOVE SELECT MENU EXIT
SIGNAL SOURCE SETTING
There is different signal source mode in this TV set,
you can select according to your require: TV,
AV1, AV2, S-VIDEO, USB, YPBPR, VGA, HDMI.
BG
1. Press MENU and CH+/- button to select SOURCE
menu and VOL+/- to enter.
2. Press CH+/- button to select PICTURE SOURCE.
3. Press VOL+/- button to select the signal source
mode you need.
4. You can press TV/AV button on the remote
control to select directly.
SCREEN DISPLAY PICTURE ZOOM SETTING
There is different screen display picture zoom,
you can select according to your require: FULL,
ZOOM1, ZOOM2, NORMAL.
1.Press MENU and CH+/- button to select PICTURE
STRONG
FULL
menu and VOL+/- to enter.
2.Press CH+/- button to select SIZE MODE.
3.Press VOL+/- button to select the zoom you need.
4.You can press ZOOM button on the remote
control to switch.
OTHER SETTING FUNCTION
SLEEP TIMER SETTING
After you set the sleep timer, the TV set will count
from the setting time, when the count time is coming,
the TV set will turn off automatically.
SYSTEM SETTING FUNCTION
OSD BACKGROUND SETTING
The higher of the transparency set value is,
the higher of the OSD transparency is, whereas,
the transparency is lower.
1. Press MENU and CH+/- button to select OSD setting menu.
2. Press VOL+/- to enter and CH+/- button to select the
TRANSPARENCY item.
3. Press VOL+/- button to set the transparency value.
14
OSD
LANGUAGE ENGLISH
H-POSITION
V-POSITION
DURATION
TRANSPARENCY
MOVE SELECT MENU EXIT
TRANSPARENCY
SELECT MENU EXIT
MOVE
Press SLEEP button to enter off time set, you can
FUNCTION
CLOCK 00:12
TIME ON --:-TIME OFF --:-SLEEP TIMER OFF
COLOR TEMP USER
D FILTER
AAA ON
MOVE SELECT MENU EXIT
63
select the certain time: OFF, SLEEP 15(Min), SLEEP
30(Min), SLEEP 60(Min)...SLEEP 240(Min), after
setting, the TV set will start counting.
Note: if you want to see the off time you set, press
SLEEP button. If you want to cancel the sleep time
set, follow the above procedures, set the time OFF.
You could also set the sleep time in function menu.
15
Page 10

OTHER SETTING FUNCTION
OTHER SETTING FUNCTION
PIP SETTING
This TV set support PIP function, it can display
picture of two sources at the same time.
1.Press MENU and CH+/- button to select source menu.
2.Select PIP mode, use VOL+/- button to select
P1S1, P1S2, P2S1, P2S2, P3S1, P3S2, P4S1,
P4S2 or OFF mode, open PIP function.
3.Select PICTURE SOURCE, use VOL+/ button to change the input source of main picture,
such as TV, AV1, AV2 and so on.
4.Select SUB PICTURE source, use VOL+/- button to
change the input source of sub picture, such as
VGA, YPBPR and so on.
Note:
1. After switching the main picture source, it will
shut off the PIP function, if need, you can open
this function again.
2. The following two suit
can use PIP function,
the same suit source
SOURCE1
can not use PIP
function, source1
SOURCE2
and source2 can switch.
3.You can press PIP button on the remote control
to turn on or turn off the PIP function.
4.You can press MAIN/SUB button on the remote
control to switch the main picture and sub picture.
SOUND SOURCE SETTING
After the PIP function is open, this item is activated,
you can select the main picture sound or sub picture
sound of current broadcasting sound.
1.Press MENU and CH+/- button to select SOUND
menu and VOL+/- to enter.
2.Press CH+/- button to select SOUND SOURCE.
3.Press VOL+/- button to change the current sound to
main picture sound or sub picture sound.
Note:
1.You can also press SOUND button on the remote
control to switch the main picture sound or sub
picture sound.
2.After switching the sound to sub picture sound, you
can switch the source in sub picture.
SOURCE
PICTURE SOURCE TV
PIP MODE OFF
SUB PICTURE VGA
COLOR SYSTEM AUTO
SOUND SYSTEM
AUTO SEARCH
MANUAL SEARCH
MOVE SELECT MENU EXIT
Note: USB source is only
available in model L37A9A-AK
TV, AV1, AV2, S-VIDEO, USB
VGA, , HDMIYPBPR
SOUND SOURCE MAIN
SOUND MODE NEWS
BALANCE
EQUALIZER
SOUND
MOVE SELECT MENU EXIT
FUNCTION
CLOCK 00:12
TIME ON --:-TIME OFF --:-SLEEP TIMER OFF
COLOR TEMP USER
D FILTER
AAA ON
BG
MOVE SELECT MENU EXIT
1.Press MENU and CH+/- button to select FUNCTION
menu and VOL+/- to enter.
2.Press CH+/- button to select COLOR TEMP.
3.Press VOL+/- button to select DEFAULT 6500K
7300K 8500K 9300K USER
Note: PERSONAL is the color temperature of picture
you set through D FILTER.
DIGITAL FILTER SETTING
COLOR TEMPERATURE
FUNCTION
CLOCK 00:12
TIME ON --:-TIME OFF --:-SLEEP TIMER OFF
COLOR TEMP USER
D FILTER
AAA ON
MOVE SELECT MENU EXIT
Use D FILTER can adjust the color temperature
exactly.
1.Press MENU and CH+/- button to select FUNCTION
menu and VOL+/- to enter.
2.Press CH+/- button to select D FILTER.
3.Press VOL+/- button to select the COLOR TEMP,
use CH+/- button to adjust.
AAA SETTING
AAA function can improve the quality of picture and
FUNCTION
CLOCK 00:12
TIME ON --:-TIME OFF --:-SLEEP TIMER OFF
COLOR TEMP USER
D FILTER
AAA ON
MOVE SELECT MENU EXIT
make the picture best.
1.Press MENU and CH+/- button to select FUNCTION
menu and VOL+/- to enter.
2.Press CH+/- button to select AAA.
3.Press VOL+/- button to select ON, OFF, DEMO or
SPLIT.
4.Press AAA button on the remote control to start
and select AAA mode.
DEMO: Use one moved sub picture in the picture to
start AAA function.
SPLIT: Separate the picture from left and right, start
AAA function in left picture.
Note: .It can not use the AAA function with
no signal and in YPBPR/VGA/PIP mode
16
17
Page 11

OTHER SETTING FUNCTION
OTHER SETTING FUNCTION
OSD
LANGUAGE ENGLISH
H-POSITION
V-POSITION
DURATION
TRANSPARENCY
MOVE SELECT MENU EXIT
FUNCTION
CLOCK 00:12
TIME ON --:-TIME OFF --:-SLEEP TIMER OFF
COLOR TEMP USER
D FILTER
AAA ON
MOVE SELECT MENU EXIT
H-POSITION/V-POSITION/DURATION
1 Press MENU and CH+/- to select OSD and
VOL+/- to enter .
2 Press CH+/- to select H-POSITION(V-POSITION/
DURATION).
3 Press VOL+/- to adjust.
Note: H-POSITION and V-POSITION are used to adjust
horizontal and vertical position, DURATION is used to adjust
the time of the menu display.
Clock and time on/off setting
Clock setting
You should check if the display time fo the set is
the same with the standard time of your place, if not,
you could adjust it as following.
1 Press MENU and CH+/- to select FUNTION menu
and VOL+/- to enter.
2 Press CH+/- to select CLOCK and VOL+/- to enter
after pressing VOL+/- to select the position you want
to adjust, press VOL+/- to adjust.
Clock time is the standard of other time
3 After time setting, press MENU to exit
Time on/off function
Using on/off timer function , the TV set can automatically
turn on to a program or shut down at a preset time.
1 Press MENU and CH+/- to select FUNCTION menu
and VOL+/- to enter.
CHILD LOCK
Press CHILDLOCK button, password will appear
on the screen.Input 6666 (the initial password of the
television )to enter the menu .
1.Press CH+/- to select the first item and VOL+/-
to select the source and CHILDLOCK to turn on/off
the selected source.
2.Press CH+/- to select TV CHANNEL and CH+/-
to select position, then VOL+/- to change the
channel number(0-255), press CHILDLOCK to
turn on/off the selected channel.
3.Press CH+/- to select TV SEARCH and VOL+/-
or CHILDLOCK to turn on/off the function.
4.Press CH+/- to select VOLUME LOCK and
VOL+/- to set the max volume(10-100)
5.Press CH+/- to select PW.CHANNEL and
to set the channel number , then the TV can turn
on to the channel you have set.
6.Press CH+/- to select CLEAR ALL and VOL+/-
to unlock all the lock you have set.
7.
Press CH+/- to select CHANGE PASSWORD and
VOL+/- to enter the menu, input the new password
and confirm password to change the password.
8.Default of BUS is ON, can not be adjusted
VOL+/-
PLEASE INPUT PASSWORD
* * * *
AV1
TV CHANNEL 000
TV SEARCH
CLEAR ALL
CHANGE PASSWORD
VOLUME LOCK
BUS
PW.CHANNEL
PLEASE INPUT PASSWORD
* * * *
PLEASE INPUT PASSWORD
* * * *
CONFIRM * * * *
UNLOCK
UNLOCK
UNLOCK
100
ON
20
2 Press CH+/- to select TIME ON and VOL+/ to enter, after pressing VOL+/- to select
the position you want to adjust press CH+/ to set.
3 Repeat steps1and 2 to set TIME OFF.
18
19
Page 12

Steam Media Broadcast System Steam Media Broadcast System
Stream media play prepare
1. Supporting equipment
1.Equipment supporting Mass and
Storage agreements include USB,
mobile hard disk, card reader, some
MP3 and digital camera.
2.Equipment supporting PTP
agreement includes some digital
camera.
2. 1 Supporting media:
picture, music, MPEG4, MPEG2
and MPEG1;
Supporting file format
*.Avi, *.DIVX, *.MPEG,*.DAT, *.MP3,
*.WHA, *.JPG and *.JPEG. Due to
particularity of file code and file mode,
It is possible that some files cannot be
read.
2 If Pic & Music mode is activated,
relative media file format will include
JPEG and MP3 files. After Picture is
selected, MP3 files set for play will
open both music and picture files for
sync play performance. As some files
must be read while music is being
played, the speed of picture operation
response might be affected.
3.Before starting operation, verify
USB storage device is of FAT32 and
FAT file system format. At present, this
television does not support NTFS and
the file systems of other format.
4.Many movie files use suffix of AVI and
MPG. However, many kinds of format
are used for internal files. This
television can only play some AVI
and MPG files of this format. Those
files with suffix of dat are not movie
files, but data files used by
computers, and cannot be played for
movies.
5.External card reader supports
most digital cards available in the
market. Readable digital cards are
classified according to the property
of card readers and can be
connected to mobile hard disks
(working voltage 5.0V, working
current not over 500mA).
6. Some time the television operation
may be halted due to excessive rate
of information code errors. In such
case, restart the system. As there are
many nonstandard USB mobile
devices in the market. If this kind of
USB mobile devices are used in the
stream media play system, the
problem of identification failure
might occur. The same problem may
also happen with computers, not
televisions.
7.It is suggested that the external
devices with USB2.0 interface be
used to improve velocity of
information reading and continuity of
information play.
Removing USB device
1
Press up or down to select Remove USB1 or
Remove USB2, and press ENTER button to
ensure it.
2
press RETURN button to exit menu.
3 Remove the memory USB device.
USB data protection
- Do not remove the USB device when the content is being read or when
browsing. Such action may damage the USB device.
AAA Multimedia Player
USB1
USB2
File Copy
SETUP
Remove USB1
Press ENTER key to play this devices
Remove USB2
20
21
Page 13

Steam Media Broadcast System Steam Media Broadcast System
To start the media play
1. Press USB button to enter media play system.
2. Press up or down button
to select the desired option.
3. Press ENTER button to
enter desired option.
4. Press to return the
USB
RETURN
previous menu.
5. If to exit USB system, you need to return to the main
menu to protection card data.
ZOOM
HELPENTER
Note: If there are no operation one minute later, the
TV will enter the saver automatically, at the time, press
any button of USB system to exit the saver menu.
To operate the menu
1. Press up or down to select the item with up or down.
2 Press or to select the desired item of submenu
with left or right.
3 Press ENTER button to ensure the desired option to
enter the submenu to resume the speed of standard.
4. Press or button to operate play quickly or slowly.
RETURN
AAA Multimedia Player
USB1
USB2
File Copy
SETUP
Remove USB1
Press ENTER key to play this devices
Remove USB2
To select stream media broadcast system
1.Press up or down button
to select "USB1"or "USB2".
(The device be inserted
and identified).
2. Press ENTER button to
enter adjusted option.
USB
RETURN
ZOOM
HELPENTER
Note:
the play file menu are
different with your USB
devices.
To play picture
1. Press up or down
button to select Picture item.
2. Press ENTER button to
enter the menu of play.
3. Press again up or down
button to select desired
enjoy picture, and then
press ENTER button to enter
the play menu.
4. On screen display, Press
or to select the speed
of play.(Normal, Slow, Fast).
5. Press or button to
swap the picture of next and
previous. Press RETURN button
to return.
AAA Multimedia Player
USB1
USB2
File Copy
SETUP
Remove USB1
Press ENTER key to play this devices
JPEG
0016.JPG
Slideshow speed Slow
Remove USB2
AAA Multimedia Player
Picture
Movie
Music
Music and Pic
AAA Multimedia Player
F-007 .JPG
F-008 .JPG
F-009 .JPG
F-010 .JPG
F-011 .JPG
F-012 .JPG
Play
IMAGE
5.Press pause button to make the program stop and press
again to resume it.
6.Press ZOOM button to make zoom, and press or
or / button to enjoy the detail.
7 Press HELP button to call up or exit the OSD information.
And press HELP button to call up or exit the OSD during
operating file copy.
8 press RETURN button to return to previous menu and
stop play, press RETURN button repeatedly to return to main
menu.
22
Note:
1.The speed may be
slowerwhen the picture
of 1024x768 or more is
enjoyed.
2.After the menu
adjusted, the display
may not disappear
automatically, you could
press HELP button to exit
immediately.
To enjoy the picture detail
1. After selecting the picture to play, press ZOOM to
select desired zoom.
2. Press HELP button to exit the display, and then
press or or or
to move and enjoy the picture detail.
To make the picture overturn
Each press of button to make overturn 90 with right,
press ENTER button to resume the program playing.
0
23
Page 14

Steam Media Broadcast System Steam Media Broadcast System
To enjoy music
USB
RETURN
ZOOM
HELPENTER
USB
RETURN
ZOOM
HELPENTER
1. Press up or down button
to select "Music" option.
2. Press ENTER button to enter
play menu.
3. Press up or down button to
AAA Multimedia Player
Picture
Movie
Music
Music and Pic
select desired music, and
then press ENTER button to
play music.
Note: The play file menu are
AAA Multimedia Player
The day went away .MP3
different with your USB device.
4. When playing music,
press up or down to select
play mode, (play mode:
standard, program, Random;
Repeat mode: Disc Repeat,
Folder Repeat, File Repeat)
The day you went away.MP3
Play mode standard
and press ENTER button to
ensure the mode.
5. When playing music, press
or button to swap the
next and previous music
01 07 / 04 20
6. Press RETURN button to exit
the playing.
Note: 1. DISC Repeat mode: press up or down button,
the DISC Repeat will appear on
the screen, and then press
ENTER to ensure it.
The day went .MP3
Soft .MP3
Soft .MP3
The day went .MP3
2. Program mode:
press or button to select
the music in right list, and press
Done
ENTER button to program in turn,
and then press button to
select "Done", and then press ENTER button
to ensure it.
To play Movie
USB
RETURN
ZOOM
HELPENTER
USB
RETURN
ZOOM
HELPENTER
1. Press up or down button to
select "Movie" option.
2. Press ENTER to enter play
menu.
3. Press again up or down
button to select desired
music, and press again
ENTER button to play it.
4. On screen display, press
or button to select in
turn:
File -PlayBack Control-Audio
channel-Play Mode
5. Press or button
to set speed, press ENTER button
to resume to standard mode.
6. Press or button to
select the next movie or
previous.
7. Press RETURN button repeatedly
to return.
AAA Multimedia Player
Picture
Movie
Music
Music and Pic
AAA Multimedia Player
E08-8SOBTILES-1
24
25
Page 15

Steam Media Broadcast System Steam Media Broadcast System
To select the Music and PIC item
1. Press up or down button
to select "Music and Pic"
option, and press ENTER
button to enter menu.
2. Press up or down to select
desired file, and press
button to ensure it.
( to cancel). Repeat step
2 to select more file, and
press ENTER button to enter
play menu.
3. On screen display menu,
press up or down to select
the speed to play.( Normal,
Slow, Fast).
Note:The default of playing music is Normal.
4. Press or button
to swap the next and previous
picture, press or
button to select the music.
Note: press pause button to
stop playing the picture.
5. Press repeatedly RETURN button
to return.
Note: On the music and picture, the playing music
is only *.mp3 format.
ZOOM
ZOOM
USB
RETURN
HELPENTER
USB
RETURN
HELPENTER
AAA Multimedia Player
Picture
Movie
Music
Music and Pic
AAA Multimedia Player
F-007 .JPG
F-008 .JPG
F-009 .JPG
F-010 .JPG
F-011 .JPG
F-012 .JPG
JPEG
MP3
The day you went away .MP3
0016.JPG
Play mode standard
Play
00 01:43
IMAGE
Copy file function
USB
RETURN
ZOOM
HELPENTER
Note:
button to select the
all files;
button to cancel.
1. Press up or down to select
"File Copy" item.
2. Press ENTER button to enter
the copy menu.
3. Press ENTER button to
enter the file menu, and
press up or down button to
select "Card" or "USB"
4. Press ENTER button to enter
USB1 or USB2, and press up
or down button select the
files to copy, then press
HELP button to call up COPY
and PASTE, and then press
/ button to select
COPY, and press ENTER button
to confirm, press again
/ button to select
PASTE, then press
ENTER button to paste, in this
time, the "File already exits,
overwrite it "will appears
on the screen, and press
or button to select
YES/NO, and then press ENTER
button to confirm.
5. Press ENTER to cancel.
AAA Multimedia Player
USB1
USB2
File Copy
SETUP
Remove USB1
Press ENTER key to play this devices
Select source Port:
Root
Root
F-007 .JPG
F-008 .JPG
F-009 .JPG
F-010 .JPG
F-011 .JPG
F-012 .JPG
Remove USB2
USB1
USB2
F-007 .JPG
F-008 .JPG
F-009 .JPG
F-010 .JPG
F-011 .JPG
F-012 .JPG
COPY
PASTE
26
27
Page 16

EXTERNAL AUDIO AND VIDEO EQUIPMENT CONNECTIONEXTERNAL AUDIO AND VIDEO EQUIPMENT CONNECTION
Antenna Connection
BACK OF SET
300 Twin-lead cable
Antenna adapter
additional purchase
75 coaxial cable
Plug
additional purchase
ANT
Antenna input
75 standard coaxial type
Power cord of the TV
AC power socket
Outdoor antenna
additional purchase
PC connection
YUV AUDIOIN
L
AUDIO IN
YUV
YUV IN
D-SUB IN
HDMI
L
V
AV OUT AUDIO OUT
R
R
Note:
1. Use VGA cable
2. Avoid still picture and 4:3 picture displaying on the screen
for long time to save the screen.
3.All the equipment is not the accessories of this set.
S-VIDEO IN
AV2 AUDIO2 IN
Av1 AUDIO1 IN
RESOLUTION:
Mode
VGA
SVGA
XGA
Resolution
640*480
800*600
1024*768
Horizontal
Frequency
31.5KHz
37.9KHz
48.4KHz
Vertical
Frequency
60Hz
60Hz
60Hz
L
R
V
L
R
V
AC IN
ANT
Note:
It is recommended that you had better use 75 coaxial cable to remove the
disturbance caused by airwave.
Do not bind antenna cable and electric wire together.
The figure in the manual is just for an example, please see the real set.
28
Note: The above parameters are VESA standard.
Note:
1. If the temperature of the TV set is rather low, it is normal that there may be some
artifacts when the set is first turned on.
2. Nonconforming pixels may occur on the panel, but they have no influence on the
normal function of the display.
3. In the standard operation, It is normal if there is one bright dot or dark dot on the
screen.
29
Page 17

EXTERNAL AUDIO AND VIDEO EQUIPMENT CONNECTIONEXTERNAL AUDIO AND VIDEO EQUIPMENT CONNECTION
Video connection
HDMI
VCR
S-VIDEO OUTPUT
S-VIDEO VCR
VIDEO OUTPUT
DVD player
AUDIO OUTPUT
Component connection
HDMI
D-SUB IN
D-SUB IN
AUDIO IN
AUDIO IN
YUV
YUV IN
YUV
YUV IN
YUV AUDIOIN
L
L
V
AV OUT AUDIO OUT
YUV AUDIOIN
L
L
V
AV OUT AUDIO OUT
How to connect the output to other equipment
YUV AUDIOIN
L
AV2 AUDIO2 IN
R
R
S-VIDEO IN
L
V
L
V
AV1 AUDIO1 IN
R
R
AC IN
ANT
D-SUB IN
HDMI
AUDIO IN
YUV
YUV IN
L
V
AV OUT AUDIO OUT
R
R
VCR
TV
S-VIDEO IN
AV2 AUDIO2 IN
L
V
L
V
AV1 AUDIO1 IN
R
R
AC IN
ANT
VIDEO
output
AUDIO
output
HDMI connection
YUV AUDIOIN
L
AV2 AUDIO2 IN
R
R
S-VIDEO IN
L
V
L
V
AV1 AUDIO1 IN
R
R
AC IN
ANT
D-SUB IN
HDMI
AUDIO IN
YUV
YUV IN
L
V
AV OUT AUDIO OUT
R
R
HDMI
S-VIDEO IN
AV2 AUDIO2 IN
L
V
L
V
AV1 AUDIO1 IN
R
R
AC IN
ANT
Y Pb/Cb Pr/Cr
output
Audio output
Y
Pb/Cb
Pr/Cr
30
HDMI
Note: You had better not connect more than one signal so that can receive better effect .
External equipment connection just take L37A9A-AK for example, please see the real set.
31
Page 18

SPECIFICATIONS
The part specifications of this TV set provided here are for reference only.
Difference may occur as product technology is updated.
Screen
TV/VIDEO
Type
Viewable angle
Color system
Sound system
Video input
DTV Y/Pb/Pr
Power
Power consumption
Environment conditions
Accessory
A-si TFT active maxrix
PAL, NTSC (AV)
DK, I, BG,MN
CVBS, S-VHS, YPb/Pr, YCb/Cr, VGA,HDMI
Composite: 480i/p, 576i, 720p,1080i,1080p
See rating plate
See rating plate
Working temperature:
Working humidity:
Storage temperature:
Storage humidity:
User s manual
Warranty card
Remote control
Power cord
Battery
20%-80%
5%-90%
Warranty card is only for special countries and areas.
Model
L26A9A-A
Power consumption
Max.160W
Size WxHxD (base included
+5 +35
-15 +45
680mmX565mmX235mm
L32A9A-A
L32A1A-A
L37A9A-AK
Max.160W
Max.160W
Max.180W
810mmX621mmX246mm
807mmX643mmX236mm
946mmX708mmX310mm
The design and specifications are subject to change without notice.
32
Page 19

TROUBLE SHOOTING GUIDE
The following problems are not always caused by hardware failure, please use the
follow trouble shooting guide before you call for service:
BREAKDOWN PHENOMENON
PICTURE
Picture with Snow
Double or Triple Image
Disturb
SOUND
Noise
Normal
Noise
The direction and connection of the
antenna
Direction, station and connection
of the antenna
Interference from electric
appliance. Automobile Motor,
Vehicle Fluorescence lamp etc.
CHECK FOR
Normal
?
??
No Picture
No Color
Scramble
Note:1.If the problem can not be fixed after you check above items. DO NOT attempt
to remove the back cover by yourself.
2.A snapping sound from the cabinet of the TV set can be heard occasionally.
This is normal and is caused by temperature changes of the operating environment
and does not affect the operation of the set.
3.Do not let the TV set stay on a static images, as this can lead to permanent
residual images. If this situation occurs, the TV set may recover normal
automatically after 12 hours if you switch the TV set to dynamic programming.
No Sound
No Sound
Normal Volume
Normal or Weak Volume
Volume, Sound mute
The power plug isn't plugged in AC
outlet. The main power isn't turned
on. The setting up of contrast, brightness and volume.
Adjust color control
Adjust channel again
33
 Loading...