

Page 1

TFT-LCD COLOUR TELEVISION RECEIVER
OWNER'S MANUAL
This User's Manual is applicable for the following models:
L26A9-AK,L37A9-AK,L37A9-AKF
Please read this manual carefully
before operating the unit, and keep
it for future reference.
Page 2

*Please read this manual carefully before using your television and keep this
manual in a good place for future reference.
*To achieve the best performance of your television, read this User's Manual
carefully and properly store it for future reference.
*Information of screen displays and figures in the User's Manual may vary due
to technical innovations.
CAUTION
RISK OF ELECTRIC SHOCK
DO NOT OPEN
Warning
*To avoid electric hazards, it is strongly suggested that the back cover not be opened, as
there is no any accessory inside the casing.
*If necessary, please contact authorized after-sales services.
*A lighting flash mark in a triangle: A potentially hazardous situation, which, if not avoided,
could result in serious injury by high voltage.
*An exclamation mark in a triangle: Major part or accessory of which technical specifications
must be followed if it is to be replaced.
Warning:
To avoid fire or electric hazards, never place your television
receiver in an area with heavy moisture. Attention should be
paid to avoid accidental scratches or impacts onto the LCD
screen.
Caution:
Unauthorized disassembly of this product is prohibited.
Page 3

CONTENTS
Safety precautions
Preparation for the Remote Control
Keys and Ports
Front panel
Side panel
Back panel
Keys of remote control
OSD display
Power on / off
Viewing TV program
Program play
Quick view and program scan
...............................................................
Tuning
Automatic search
Manual search
...............................................................
MFT
...............................................................
Skip
Channel exchange and edit
Adjusting the picture
Multiple picture modes
Adjusting the sound
Multiple sound modes
Sound limit and mute
Setting the timer
Setting the Clock and time on/off
On Prog
...............................................................
Setting the function
Language and OSD position
Menu timeout and menu background option
...............................................................
PIP
...............................................................
Child lock
De-interlace
PC setup
...............................................................
Setting the other function
Picture still,sleep timer and program edit
Stream media broadcast system
Connecting additional equipments
Antenna connection
How to connect the signal with other equipments
How to connect the video input terminal
How to connect the component input terminal
How to connect the PC input terminal
External speaker installation
Woofer installation
Troubleshooting
Specification
...............................................................
...............................................................
...............................................................
...............................................................
...............................................................
...............................................................
...............................................................
...............................................................
...............................................................
...............................................................
...............................................................
...............................................................
...............................................................
...............................................................
...............................................................
...............................................................
...............................................................
...............................................................
...............................................................
...............................................................
...............................................................
...............................................................
...............................................................
...............................................................
...............................................................
...............................................................
...............................................................
...............................................................
...............................................................
...............................................................
...............................................................
...............................................................
...............................................................
...............................................................
...............................................................
...............................................................
...............................................................
...............................................................
...............................................................
1
3
4
4
4
5
6
7
8
9
9
10
11
11
12
13
14
15
16
16
17
17
18
19
19
20
21
21
22
23
23
24
25
26
26
27
36
36
37
38
38
39
40
40
41
42
Page 4

Safety Precautions
The product should be tightly fixed to
avoid drop damages and even fire.
Do not locate the product close to water
or oil, which may cause fire hazards.
Do not use damaged or worn electric
plugs, and keep electric cord away from
heat sources to avoid electric shocks or
fire hazards.
To avoid fire hazards, do not use this
product under direct sunlight or closely
to heat sources.
Unplug the power supply and antenna of
the product when there is a rainstorm,
especially thunderstorm.
Do not connect excessive sockets in
parallel or share the same socket by
multiple plugs to avoid fire hazards.
The product must be placed on a solid
and stable surface to avoid collapse.
Keep the product away from a transformer
or heat source to avoid fire hazards.
Unauthorized disassembly of the television
is prohibited to avoid electric shocks or fire
hazards. Contact authorized after-sales
service if technical service is needed.
Disconnect the product from power supply
and contact authorized after-sales service
if abnormal sound is heard in the product.
1
Page 5

Safety Precautions (continued)
Don't use or store inflammable
materials near the product to avoid
explosion or fire hazards.
The antenna of the product should
be away from electric cable to avoid
electric shocks.
Always make sure that the television
is well plugged as poor electric
connection might cause fire.
Unplug the television, use soft fabric,
never chemicals, if you are going to
make cleaning of the product. Make
sure that no water drops in the product.
Don't place the product in a humid area to avoid
fire hazards.
Never touch the plug when your hand is wet
as this might cause electric shocks.
When antenna is used, measures should be
taken to prevent water from flowing down along
the cable into the television.
The plug and electric cable must be kept
clean to avoid electric shocks or fire hazards.
Disconnect the television from power
supply and antenna when there is a
rainstorm or thunderstorm to avoid
electric shocks or fire hazards.
Disconnect the television from power
supply to avoid electric shocks or fire
hazards in a long vocation.
2
Page 6

Preparation for the Remote Control
Battery loading
1.Slide open the cover of the battery compartment on the back of
the remote controller.
2.Load two 7# alkaline batteries in the compartment. (plus and
minus poles to respective mark)
3.Replace the cover of the battery compartment.
1
2
+
3
Precautions
Make sure that there is no
obstacle between the remote
controller and television set.
Keep the remote controller
away from heat source or
humid area to ensure
effective performance of
the remote controller.
As strong light may interfere the
signals, change your position to
operate the remote controller if
the television cannot be turned
on or off as you expect.
Make sure that two 7# 1.5V alkaline
batteries are loaded. The batteries
must be of the same type. The batteries
must be located properly. The batteries
are not rechargeable.
3
Page 7

Keys and Ports
Front panel
1 2
3 4
6
5
- CH + - VOL +
POWER
7
1、CH-/+ :
2、 VOL-/+ :
3、 TV/AV: :TV-VIDEO-SIDE VIDEO-S VIDEO-YUV-
8
program minus and plus , menu options
volume decrease and increase , menu reset and entry
all input source select
TV/AV MENU
USB-VGA-DVI
4、 MENU:
Power on/off and indicator: in red when standby mode, in blue when display.
5、
Remote control signal receive window
6、
menu display
7、POWER : AC power on/off
8、 Multi-media input
Side panel
VIDEO
AUDIO
Video
L
Audio L
Audio R
R
VIDEO
AUDIO
-L
AUDIO
-R
Rear terminal
USB
4
Page 8

Keys and Ports (continued)
Back panel
PC/DVI
R-AUDIO-L
POWER WOOFER
OUT
D-SUB IN
S-VIDEO
IN
VIDEO
OUT
L - HD- R
IN
R-AUDIO-L
VIDEO
Y
Cb/Pb Cr/Pr
IN
DVI IN
OUT
L -V/S- R
IN
AUDIO IN
1 2 3 4 5 6 7 8 9 10 11 12 13 14
1、POWER:
2、R- :
、:
3 WOOFER External woofer output
、:
D-SUB IN Computer input,
4
AC power input
AUDIO-L OUT External audio output
For PC display purpose. Connects to the VGA analog
(Not available on L26A9-AK)
}
output connector of the PC display card.
、:
S-VIDEO IN S-VIDEO input
5
、:
6 VIDEO IN
、:
7 YCbCr,YPbPr
external video input
is an video input terminal connecting to the video output
terminal of the video output device(Y Cb Cr/ Y Pb Pr).
8、DVI IN
:
For high quality PC display purpose. Connects to the DVI digital output
connector of the PC display card.
ANT.
、:
9 R-AUDIO-L OUT
、
10 VIDEO OUT:
11、L-HD-R IN:
12、L-V/S-R IN:
、:
13 PC/DVI AUDIO IN
、
14 ANT.:
Connect antenna or CATV 75 Ω coaxial cable to receive TV/
audio output (to external speaker)
external video output
external YUV (YCbCr,YPbPr) audio input
external S-VIDEO/VIDEO audio input
external D-SUB/DVI audio input
CATV signal.
5
Page 9

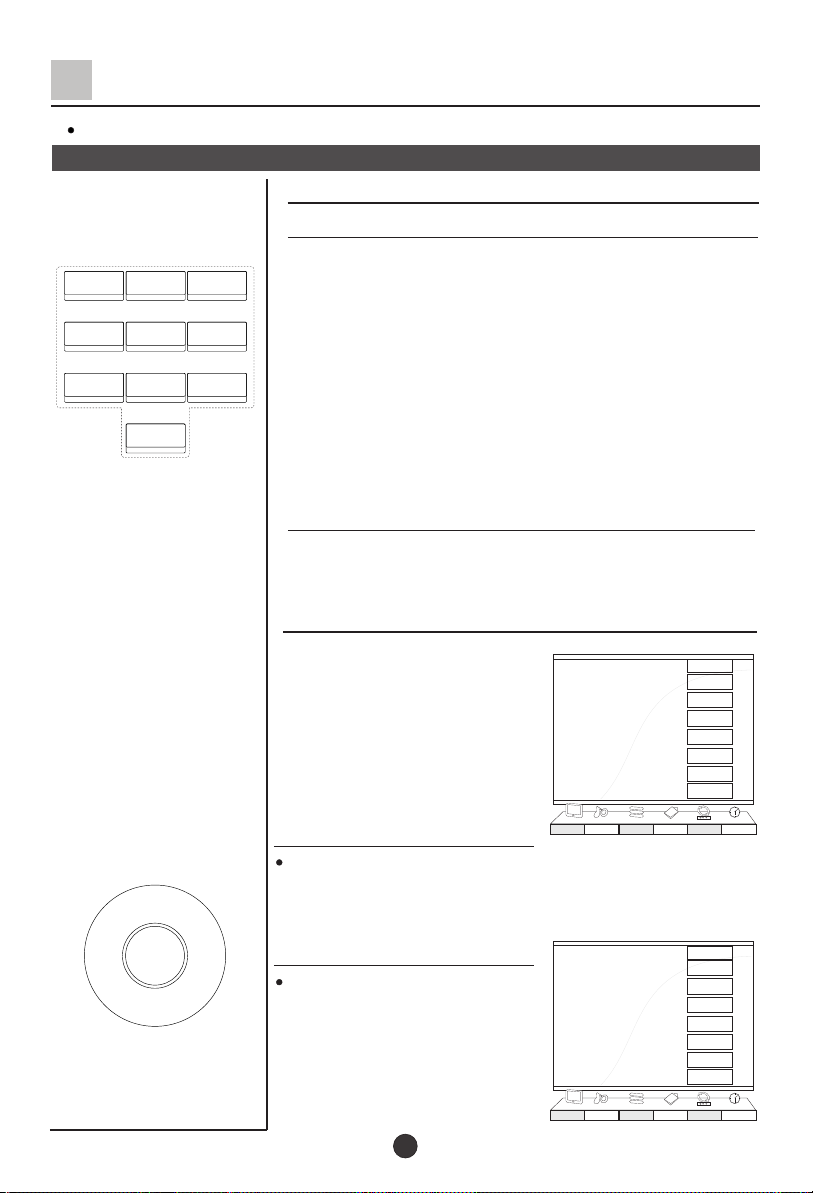
Keys of remote control
The remote controller cannot be operated unless the batteries are
properly loaded.
1
3
5
7
9
11
13
16
18
DISPLAY
MUTE
TV/AV
OK
PSM
STILL
S-VIDEO
VOL-
MENU
1 2
4
CH+
CH-
19
7 8 9
23
21
25
-/-- 0
PIP SWAP SCAN
SHUTTLE
SLEEP
27
29
DVD/DTV
5
H.LOCK
ZOOM
I/II
POWER
PIC.SIZE
PC/DVI
Q.VIEW
VOL+
S
SM
3
6
ZOOM/MOVE
CH.EDIT
TIME SKIP
USB
RETURN
HELPENTER
1.DISPLAY: Display the current info
2. POWER: Press to turn on the TV from standby
2
mode. Press again to switch off the TV to standby
mode.
4
3.STILL: Press it to freeze-frame the current screen
6
press again to continue playing(never see the still
picture for long time, it would burn-in the screen)
8
4. ¢ñ/¢ò: Nicam selection in the signal
10
5. MUTE: Press this button to mute the sound.
12
Press again to reactivate the sound. Sound also
reactivated if the power is turned off then on or
if press VOL+ button.
14
6. PIC.SIZE: Press to select the display the size of
the screen(never see the 4:3 picture for long time,
15
it would burn-in the screen)
7. S-VIDEO: Press it to select S terminal input.
8. DVD/DTV: Select YUV input
9. TV/AV : Press this key to select the sources
10. PC/DVI: Press it to select inputs as follows:
17
TV-VGA-DVI-TV
11. OK: Press to confirm
12. Q.VIEW: Back to the last channel
13. CH+/-: Select the option up and down in menu
or select channels when there is no OSD.
20
14. MENU: Press to display or exit the menu
15. VOL+/-: Left and right orientation in menu option
22
or adjust the volume when there is no OSD.
24
16. PSM: Press to select the picture mode
26
17. : Press to select the sound mode
28
SSM
18. Number key: Press to select the channel number
19£¬26£¬27£¬28 are not available in these set .
20. ZOOM/MOVE: PIP moving
21. PIP: PIP on or off
22. SCAN: Scan all preconcerted channel program
23.SWAP: Switch the input signal of the PIP and
the main picture
24. CH.EDIT: Press to display the stored channel
diagram
25. SLEEP: Can be used to set time to change
the TV into the standby status after a period of
preset time.
29. Only for the multi-media ,reference to
the instruction following.
The cover of the multi-media keys
Note:
The function just takes the remote control for example in this manual
P+/-(CH+/-),V+/-(VOL+/-),MENU,TV/AV and POWER on TV panel are corresponding
with the CH+/-,VOL+/-,MENU,TV/AV and POWER keys.
press down to the appropriate position
6
Page 10

OSD display
There are some OSD (on screen display)following for you to reference
Picture menu
Audio menu
Brightness 50
Contrast 50
Saturation 50
Hue 50
Sharpness 50
Color Temp. Std
A
B
Picture Audio Tuner Func PC Time
C
Tuner menu
Prog. 0
Color Sys. PAL
Sound Sys. DK
Skip Off
Prog.Name ----Search Set
Auto Search
Exchange
Picture Audio Tuner Func PC Time
A
B
C
>>>
>>>
>>>
PC menu
Auto
Clock 0
Phase 0
H_Position 0
V_Position 0
I/P Info. VGA
>>>
Bass 50
Treble 50
Balance 50
Surround Off
SubWoofer Switch Off
SubWoofer 50
AVL Off
A
B
Picture Audio Tuner Func PC Time
C
Function menu
OSD Position
OSD Timer 60S
OSD Language English
PIP
Transparency 0
De-interlace
Child Lock Off
A
B
Picture Audio Tuner Func PC Time
C
>>>
>>>
>>>
Time menu
Clock 0:00
Off Time Off
Off Time 0:00
On Time Off
On Time 0:00
On Prog. 0
A
B
Picture Audio Tuner Func PC Time
C
Picture Audio Tuner Func PC Time
A
B
C
Note:
There may be some difference between the above OSD and your realset,you could adjust
it according to what you want following the steps as follow:
1. Press MENU button to enter the main menu
2. Press VOL-/+ to select the main menu left and right orientation
3. Press OK or CH+/- to enter the submenu
4. Press MENU to back to the last menu
5. Press VOL+/- to adjust the item of the menu
6. There is no SubWoofer Switch and SubWoofer in sound menu in L26A9-AK
7
Page 11

Power on/off
Power on/off
POWER
Power ON/OFF
1.Switch on power supply (indicator in
red in standby)
2.If the television is on standby mode ,
you could press POWER button on
remote controlleror POWER£¨ £©
button on the TV to turn on the TV.
3.If you want to switch off the TV to
standby mode press POWER£¨ £©
button on TV or POWER button on
remote controller .
3
4.Disconnect the power supply or unplug
the television if it is intended to completely
cease the television performance.
8
Page 12
Viewing TV Program
There are 160 channels from 0 to 159.
观看电视节目
Program play
How to select program
Select desired program
1.Select buttons directly
1 2
3
If program number is selected, press digit
1~9 directly.
4
5
7 8 9
0
CH+
VOL- VOL+
MENU
CH-
6
2.Select buttons in sequence
Press CH+/- button for program option. (Note:
If Skip mode is activated, the program will not
appear by this way.)
Choose the proper volume you like
Press VOL+/- button to adjust sound volume.
If the color or sound of one channel is abnormal
It might be because the color or
sound system has been set
improperly, you may follow the
instruction below to adjust it :
press MENU and VOL+/- to
select Tuner menu ,you can see
the form , then press
CH+/- to enter
If the color of the picture is abnormal
Press CH+/- to "Color Sys ”, then press VOL+/- to
.
select the proper system.(AUTO、PAL,NTSC443 and
NTSC M will appear in sequence).
If the sound is abnormal
Enter the Tuner as above and
CH+/- to “Sound Sys.”item.
Then press VOL+/- to select the
system you want.
Prog. 0
Color Sys. PAL
Sound Sys. DK
Skip Off
Prog.Name ----Search Set
Auto Search
Exchange
Picture Audio Tuner Func PC Time
Prog. 0
Color Sys. PAL
Sound Sys. DK
Skip Off
Prog.Name ----Search Set
Auto Search
Exchange
Picture Audio Tuner Func PC Time
A
B
C
A
B
C
>>>
>>>
>>>
>>>
>>>
>>>
9
Page 13
Viewing TV Program(continued)
Quick view function can back to the channel you watched just now quickly
Program scanning function is to let the television automatically scan all preconcerted
channel program .
Quick view and program scan
Quick view
Q.VIEW
1.For example, if you have
viewed channel 8 just now
and you are watching channel
18 now (as right figure)
2.If you want to back to
channel 8,just press
Q.VIEW button
8
18
18
SCAN
CH+
VOL- VOL+
MENU
CH-
3.If you want to return to
channel 18,press Q.VIEW
button again .
Program scanning function
1、If you want to scan the programs and select your favorite
channel, just press the SCAN button then the television
will start scanning from the present channel with a rate
of three seconds per channel
and until all the preconcerted
programs have been
displayed once.
2.If you want to terminate
this function during the
scanning, press the SCAN or
MENU button again, and the
program will stay at the
present channel
0
1
0
10
Page 14

T uning
There are three ways of searching:automatic search,manual search and MFT
manual fine tune)
You may operate it either on the TV or on the remote control.Here is mainly
about the remote control
Automatic search
Automatic search
Prog. 0
Color Sys. PAL
Sound Sys. DK
Skip Off
Prog.Name ----Search Set
Auto Search
Exchange
Picture Audio Tuner Func PC Time
CH+
VOL- VOL+
MENU
CH-
1、Press MENU button and
VOL+/- to select Tuner menu,
Then press CH+/- to enter
>>>
>>>
A
B
C
>>>
CH+
VOL- VOL+
MENU
CH-
2、Press CH+/- button to
move to Auto Search item。
Prog. 0
Color Sys. PAL
Sound Sys. DK
Skip Off
Prog.Name ----Search Set
Auto Search
Exchange
Picture Audio Tuner Func PC Time
A
B
C
>>>
>>>
>>>
3、Press VOL+,then Auto Search
will work。The TV set will search
automatically all available
programs, after that, all available
Auto Search
Freq. 308MHz CH 9
program will be stored in turn
and the TV set will return to the
first channel
If you want to stop the search, just press MENU button
The order of the automatic search is due to the frequency of the
program, generally speaking, it is used only at the first time you
search the program, and once the order of the program has been
confirmed, you don't have to use this function, otherwise the
order of the program will be changed.
After searching
Press CH+/- button to check the channels.
If the color or sound is abnormal in a certain channel, it
may be the color or sound system has not been set properly,
so you should adjust it to the proper system (Reference to
page 9).
11
Page 15

Tuning(continued)
Manual search
Manual search
1. Press CH+/- button or the
Direct-digit choosing button to
select a channel directly(take
CH+
VOL- VOL+
MENU
CH-
channel 1 for example).
2 Press MENU and VOL+/-
to select Tuner menu then
press CH+ to enter
3、Press CH+/- to move to
Search Set,then press
VOL+ to enter
4、Press CH+/- to move to
Search
、
,
1
Prog. 0
Color Sys. PAL
Sound Sys. DK
Skip Off
Prog.Name ----Search Set
Auto Search
Exchange
Picture Audio Tuner Func PC Time
Fine 32
Search >>>
A
B
C
>>>
>>>
>>>
CH+
VOL- VOL+
MENU
CH-
5. Press VOL+/- button to start
searching.
VOL- button is used to search the
lower frequency channel.
VOL+ button is used to search the
higher frequency channel.
Repeat the steps until you find
the channel you need.
12
Freq. 112.28MHz
A
B
Picture Audio Tuner Func PC Time
C
Page 16

Tuning(continued)
MFT
MFT(manual fine tune)
When you can't get a satisfactory picture and audio effect,
you can fine tune to obtain.
CH+
VOL- VOL+
MENU
CH-
CH+
VOL- VOL+
MENU
CH-
1. Press CH+/- button or the
Direct-digit choosing button
to select a channel directly (take
1
channel 1 for example).
、
2 Press MENU and VOL+/-
to select Tuner then
,
press CH+/- to enter
3、Press CH+/- to move to
Search Set,then press
VOL+ to enter the menu
Prog. 0
Color Sys. PAL
Sound Sys. DK
Skip Off
Prog.Name -----
VOL-
Search Set
Auto Search
Exchange
Picture Audio Tuner Func PC Time
A
B
C
>>>
>>>
>>>
4、Press CH+/- to move to
Fine.
Fine 32
Search >>>
Freq. 112.28MHz
A
B
Picture Audio Tuner Func PC Time
C
5. Press VOL+/- button repeatedly to fine tune, until the
picture and the sound become satisfactory.
VOL- button is used to search the lower frequency channel.
VOL+ button is used to search the higher frequency channel.
13
Page 17

Tuning(continued)
Skip
Skip
After the programs are preset, you can skip some
programs so that to select your favorite channels only.
CH+
VOL- VOL+
MENU
CH-
CH+
VOL- VOL+
MENU
CH-
1. Press CH+/- button or
Direct-digit choosing button to
select a channel directly (take
channel 1 for example).
You could also select your
1
favorite channel number in
menu
¡¢
2 Press MENU and VOL+/-
to select the Tuner menu then
£¬
press CH+/- to enter.
3¡¢Press CH+/- to move to
Skip.
4. Press VOL+/- button to set it
On.
Prog. 0
Color Sys. PAL
Sound Sys. DK
Skip Off
Prog.Name ----Search Set
Auto Search
Exchange
Picture Audio Tuner Func PC Time
Prog. 0
Color Sys. PAL
Sound Sys. DK
Skip Off
Prog.Name ----Search Set
Auto Search
Exchange
Picture Audio Tuner Func PC Time
A
B
C
A
B
C
>>>
>>>
>>>
>>>
>>>
>>>
5. Press MENU button to close the menu. When you
select channels with CH+/- button, this channel will be
skipped. However, you can also use the Direct-digit Choosing
button on the remote control to select this channel directly.
And the channel number will be in red.
If you want to recover the skipped channel
1. Use Direct-digit choosing button to select the number of the
channel to be recovered.
2. Do the above steps again.
3. Press VOL+/- button to set Skip Off.
14
Page 18

Tuning(continued)
The function of channel exchange will enable you to exchange any two programs
and you can conveniently adjust the order of the programs due to your own need.
Channel exchange and edit
Channel Exchange
()
For example, to change between channel 6 and 9
Prog. 0
Color Sys. PAL
Sound Sys. DK
Skip Off
Prog.Name ----Search Set
Auto Search
Exchange
Picture Audio Tuner Func PC Time
Current Prog. 009
Exchange Prog. 006
Exchange >>>
Picture Audio Tuner Func PC Time
A
B
C
>>>
>>>
>>>
A
B
C
,
Prog. 0
Color Sys. PAL
Sound Sys. DK
Skip Off
Prog.Name ----Search Set
Auto Search
Exchange
Picture Audio Tuner Func PC Time
A
B
C
>>>
>>>
>>>
"-"
CH+
VOL- VOL+
MENU
CH-
OK
CH+
VOL- VOL+
MENU
CH-
1、Press MENU and VOL+/-
to select the Tuner menu,
then press CH+/- to enter。
2、Press CH+/- and move to
Exchange
3、Press VOL+ to enter
the submenu.
4、Press CH+/- to move to
Exchange Prog. then press
direct-digit to set the channel
you want to exchanged to 6.
And then press OK to confirm
5、Press CH+/- button, move to Exchange then
press VOL+ button to confirm.Then the programs of the two
channel will be exchanged.
Program edit function
This function can enable you to rename your favorite
channel
1、Press MENU and VOL+/- to
select the Tuner menu,then
press CH+/- to enter.
2、Press CH+/- to select
Prog.,Press VOL+/- to set
the channel number
3、Press CH+/- to select
Prog.Name,and press VOL+/-
to select the position you want to adjust ,
then press CH+/- to select among "A-Z","0-9" ,"、" ,
and blank .
4、After the operation, just press OK to confirm
15
Page 19

Adjusting the Picture
Multiple picture modes
How to select the picture mode
You may select the mode you want from the three preset
modes and one individual mode.
Press the PSM button to select a mode you
like. STANDARD, SOFTNESS,USER and BTIGHTNESS
PSM
totally four picture modes can be selected alternately.
CH+
VOL- VOL+
MENU
CH-
MODE
STANDARD
SOFTNESS
USER
BRIGHTNESS
PICTURE QUALITY
MEDIUM COLOR AND BRIGHTNESS
LOW COLOR AND BRIGHTNESS
SET BY YOURSELF
BRIGHT COLOR
Set the parameter of USER
You could set it just by your favorite
1、Press MENU and CH+/- to
enter Picture menu。
2. Press CH+/- button, move to
the option you want to adjust,
then press VOL+/- button to do
the adjustment . Then the
parameter will be automatically
stored in USER option.
OPTION
Brightness BRIGHT DARK
Contrast STRONG WEAK
Saturation
THICK LIGHT
Hue GREEN PURPLE
Sharpness SHARP SOFT
Color Temp. Std-Cool-Warm
VOL+
Brightness 50
Contrast 50
Saturation 50
Hue 50
Sharpness 50
Color Temp. Std
Picture
Audio Tuner Func PC Time
VOL-
A
B
C
Note:Hue only available in NTSC system.
16
Page 20

Adjusting the Sound
Multiple Sound Modes
How to select the sound mode
You may select the mode you want from the four preset
modes and one individual mode.
Press the .SSM button to select the sound quality that you
want.
S
SM
CH+
VOL- VOL+
MENU
CH-
Mode Sound quality
FILM
NEWS
MUSIC
STANDARD
USER
Theater sound
Clear
For Music
Standard sound
For your convenient to set
Setting the parameter of USER
You could set the parameter if you select USER mode.
1、Press MENU and VOL+/-
to select Audio menu,
then press CH+/- to enter
2. Press CH+/- button, move to
the option you want to adjust, then
press VOL+/- button to do the
adjustment.
Note:SubWoofer can only be adjusted when SubWoofer Switch is
set On, SubWoofer and SubWoofer Switch is not available in
L26A9-AK.
OPTION VOL- VOL+
Bass
Treble
Balance
Decrease Increase
Decrease Increase
Decrease right channel Decrease left channel
Bass 50
Treble 50
Balance 50
Surround Off
SubWoofer Switch Off
SubWoofer 50
AVL Off
Picture Audio Tuner Func PC Time
A
B
C
OPTION
Surround
SubWoofer Switch
17
Select On
Stereo sound
Enhance the effect
Page 21

Adjusting the Sound (continued)
Sound limit and mute
Sound limit
CH+
VOL- VOL+
MENU
CH-
MUTE
1、Press MENU to display
the menu.
2、Press VOL+/- to select
Audio menu。
Bass 50
Treble 50
Balance 50
Surround Off
SubWoofer Switch Off
SubWoofer 50
AVL Off
Picture Audio Tuner Func PC Time
A
B
C
3、Press CH+/- to enter it .
Bass 50
Treble 50
4、Press CH+/- to select
AVL .
5、 press VOL+/- button to adjust
the parameter you expect or set
Balance 50
Surround Off
SubWoofer Switch Off
SubWoofer 50
AVL Off
Picture Audio Tuner Func PC Time
A
B
C
On or Off.
How to use the MUTE function
When you want to pay attention to the environment or
answer a telephone, or to meet guests, using the mute
function is very convenient.
1、 Press MUTE button, a sign
will appear at the top right
corner of the screen, and the
sound of the TV set is cut off.
2.In order to recover the sound,
press MUTE button again or
press VOL+button.
X
Note: If you have pressed VOL- button in the condition of
the mute mode, the value of the volume would decrease, but
the sound of the TV is still in mute mode.
18
Page 22

Setting the Timer
This TV set provides you with three timer functions such as timer on, timer off and On Prog.
The basic unit of the time in the menu is minute.
The Clock will recover to 0 00 and the On Prog. will recover to 0 when switch the TV on
after off.
Setting the Clock and timer on/off
CH+
VOL- VOL+
MENU
CH-
OK
£º
Setting the Clock
You should check whether the Clock is the same with the standard
time of the area you are being in; if not, please adjust it as follows
1、Press MENU and VOL+/- to
select Time menu。
2.Press CH+/- to move to Clock
and press VOL+ to enter the
digital position you want to adjust,
then press CH+/- to adjust the
value
Clock 0:00
Off Time Off
Off Time 0:00
On Time Off
On Time 0:00
On Prog. 0
A
B
Picture Audio Tuner Func PC Time
C
3.After the setting, press OK to confirm
Timer on/off
When timer on function is used, the TV set can automatically turn the
power on at the preset time in the standby status and display the
preset program.Using timer off function can turn the TV set
automatically into standby status at the preconcerted time.
CH+
VOL- VOL+
MENU
CH-
1、Press MENU and VOL+/- to
select Time menu.
2、Press CH+/- to move to
On Time, Press VOL+ to enter
the digit position
, and then press
CH+/- to adjust the value
(eg.
18:00)。
Same as step 2 of Clock setting .
3.Press CH+/- to move to
Off Time,then press VOL+/- to
set on
4、Repeat steps 1 and 2 to
set Off Time(eg.23:00)。
19
Clock 0:00
Off Time Off
Off Time 0:00
On Time Off
On Time 0:00
On Prog. 0
A
B
Picture Audio Tuner Func PC Time
Clock 0:00
Off Time Off
Off Time 0:00
On Time Off
On Time 0:00
On Prog. 0
Picture Audio Tuner Func PC Time
C
A
B
C
Page 23

Setting the Timer (continued)
On Prog.
On Prog.
Using this function ,the TV set can display the preset program
automatically when the TV set is turned on.
CH+
VOL- VOL+
MENU
CH-
1、Press MENU to display
the menu.
2、Press VOL+/- to select
Time menu.
3、Press CH+/- to move to
On Prog.
4.Press VOL+/- button to set
the channel number you want
(eg. 18)
Clock 0:00
Off Time Off
Off Time 0:00
On Time Off
On Time 0:00
On Prog. 0
A
B
Picture Audio Tuner Func PC Time
Clock 0:00
Off Time Off
Off Time 0:00
On Time Off
On Time 0:00
On Prog. 0
Picture Audio Tuner Func PC Time
C
A
B
C
20
Page 24

Setting the Function
Language and the OSD position
How to select the language on the screen
CH+
VOL- VOL+
MENU
CH-
1.Press MENU and VOL+/-
to select the Func menu.
2.Press CH+/- button, move to
OSD Language.
OSD Position
OSD Timer 60S
OSD Language English
PIP
Transparency 0
De-interlace
Child Lock Off
Picture Audio Tuner Func PC Time
A
B
C
3.press VOL+/-button to
select the language and the menu on the screen will
be displayed with the language you select.
How to select the OSD position
Using this function,you could select the position of the OSD
on the screen you want.
1.Press MENU and VOL+/- to
select the Func menu .
2.Press CH+/-, move to
OSD Position .
OSD Position
OSD Timer 60S
OSD Language English
PIP
Transparency 0
De-interlace
Child Lock Off
Picture Audio Tuner Func PC Time
A
B
C
>>>
>>>
>>>
>>>
>>>
>>>
CH+
VOL- VOL+
MENU
CH-
3.Press VOL+/- to enter
submenu of the OSD Position .
OSD H-Position 50
OSD V-Position 50
4.Press CH+/- to select the item
you want to adjust, and then
Picture Audio Tuner Func PC Time
press VOL+/- to adjust. After all,
press MENU to back to the main menu.
21
A
B
C
Page 25

Setting the Function(continued)
Menu timeout and menu background option
基
本
操
作
CH+
VOL- VOL+
MENU
CH-
CH+
VOL- VOL+
MENU
CH-
Menu timeout option
If time you set in OSD menu expires after the latest press, the
menu will disappear automatically
1.Press MENU and VOL+/- to
select the Func menu .
2.Press CH+/- and move to
OSD Timer .
OSD Position
OSD Timer 60S
OSD Language English
PIP
Transparency 0
De-interlace
Child Lock Off
Picture Audio Tuner Func PC Time
A
B
C
3.Press VOL+/- to select the time
Note:
the basic unit of the OSD Timer is second。
Menu background option
OSD Position
1.Press MENU and VOL+/- to
select the Func menu .
2.Press CH+/- to move to
Transparency .
3.Press VOL+/- to adjust the
value you want. You could press
MENU to back to the main menu.
OSD Timer 60S
OSD Language English
PIP
Transparency 0
De-interlace
Child Lock Off
Picture Audio Tuner Func PC Time
OSD Position
OSD Timer 60S
OSD Language English
PIP
Transparency 0
De-interlace
Child Lock Off
Picture Audio Tuner Func PC Time
A
B
C
A
B
C
>>>
>>>
>>>
>>>
>>>
>>>
>>>
>>>
>>>
22
Page 26

Setting the Function(continued)
PIP
PIP
Using this function,you could adjust the H-POSITION ,
V-POSITION and the size of the PIP.
CH+
VOL- VOL+
MENU
CH-
CH+
VOL- VOL+
MENU
CH-
1.Press MENU and VOL+/- to
select the Func menu .
2.Press CH+/- and move to
PIP .
OSD Position
OSD Timer 60S
OSD Language English
PIP
Transparency 0
De-interlace
Child Lock Off
Picture Audio Tuner Func PC Time
>>>
>>>
>>>
A
B
C
3.Press VOL+/- to enter the
submenu of PIP .
4.Press CH+/- to select the item
you want to adjust ,then press
VOL+/- to adjust. After this ,you
could press MENU to back to
the main menu.
Note:Press source buttons(eg.TV/AV)to change the main input;
The signal of PIP can be changed in the submenu of PIP .
PIP Size Off
PIP Source VGA
PIP H-POS 100
PIP V-POS 100
A
B
Picture Audio Tuner Func PC Time
C
Child Lock
If Child Lock is set On,the keys on the TV will be locked
that means you could not operation the TV with these buttons.
1.Press MENU and VOL+/- to
select the Func menu .
2.Press CH+/- and move to
Child Lock .
OSD Position
OSD Timer 60S
OSD Language English
PIP
Transparency 0
De-interlace
Child Lock Off
Picture Audio Tuner Func PC Time
>>>
>>>
>>>
A
B
C
3.Press VOL+/- to set On or Off. You could press MENU to
back to the main menu.
23
Page 27

Setting the Function(continued)
De-interlace
De-interlace
Using this function,you could improve the effect of the
picture.
1.Press MENU and VOL+/- to
select the Func menu.
CH+
VOL- VOL+
MENU
CH-
2.Press CH+/- and move to
De-interlace .
3.Press VOL+/- to enter the
submenu
4.Press CH+/- to select the item
you want to adjust, then press
VOL+/- to adjust it .
OSD Position
OSD Timer 60S
OSD Language English
PIP
Transparency 0
De-interlace
Child Lock Off
Picture Audio Tuner Func PC Time
>>>
>>>
>>>
A
B
C
MOTION Medium
FILM MODE Off
LADI On
A
B
Picture Audio Tuner Func PC Time
C
MOTION To decrease the blur of the motorial image
FILM MODE To improve the image while filming
LADI To decrease the sawtooth
24
Page 28

PC Setup
PC setup
CH+
VOL- VOL+
MENU
CH-
PC setup
You could adjust the correlative item if you use this set as
a monitor
1.Press MENU and VOL+/- to
select the PC menu .
2.Press CH+/- and move to the
item you want to adjust
Auto
Clock 0
Phase 0
H_Position 0
V_Position 0
I/P Info. VGA
A
B
Picture Audio Tuner Func PC Time
C
3.Press VOL+/- to adjust the item
or enter its submenu(according
the item setting)
4.If enter the submenu ,press CH+/- and move to the item
you want to adjust , and then press VOL+/- to adjust. Then
you could press MENU to back to the main menu.
>>>
25
Page 29

Setting the other Function
Picture still,sleep timer and program edit
Picture still
STILL
SLEEP
CH.EDIT
CH+
VOL- VOL+
MENU
CH-
You could press STILL button
to “freeze-frame”the current
screen. And press the button
again to continue playing
Freeze
Sleep timer
Using this function, the TV set can be changed into the
standby status after a period of preset time from when
this function is activated.
Program edit
1.Press CH.EDIT button to display
the current program diagram
2.There are ten channels per page. You
could select the channel on this page
with CH+/-, also, you could press
VOL+/- to turn to the other page , you
could press CH+/- to select the channel
you want to watch, then press OK to
confirm. Press or MENU to
CH.EDIT
exit.
Prog. Prog.Name
0 Q
TV-1
1 CCTV1
2 CCTV2
3 CCTV3
4 CCTV4
5 CCTV5
6 CCTV6
7 CCTV7
8 CCTV8
9 CCTV9
3. You could see every channel¡¯s name by the
program edit function. It is very convenient for you
to watch the program you want.
Note:
The program name can not be more than five letters
26
Page 30

Stream Media Broadcast System
Stream media play prepare
1. Supporting equipment
1.Equipment supporting Mass and
Storage agreements include USB,
mobile hard disk, card reader, some
MP3 and digital camera.
2.Equipment supporting PTP
agreement includes some digital
camera.
2. 1 Supporting media:
picture, music, MPEG4, MPEG2
and MPEG1;
Supporting file format£º
*.Avi, *.DIVX, *.MPEG,*.DAT, *.MP3,
*.WHA, *.JPG and *.JPEG. Due to
particularity of file code and file mode,
It is possible that some files cannot be
read.
2 If Pic & Music mode is activated,
relative media file format will include
JPEG and MP3 files. After Picture is
selected, MP3 files set for play will
open both music and picture files for
sync play performance. As some files
must be read while music is being
played, the speed of picture operation
response might be affected.
3.Before starting operation, verify
USB storage device is of FAT32 and
FAT file system format. At present, this
television does not support NTFS and
the file systems of other format.
4.Many movie files use suffix of AVI and
MPG. However, many kinds of format
are used for internal files. This
television can only play some AVI
and MPG files of this format. Those
files with suffix of dat are not movie
files, but data files used by
computers, and cannot be played for
movies.
5.External card reader supports
most digital cards available in the
market. Readable digital cards are
classified according to the property
of card readers and can be
connected to mobile hard disks
(working voltage 5.0V, working
current not over 500mA).
6. Some time the television operation
may be halted due to excessive rate
of information code errors. In such
case, restart the system. As there are
many nonstandard USB mobile
devices in the market. If this kind of
USB mobile devices are used in the
stream media play system, the
problem of identification failure
might occur. The same problem may
also happen with computers, not
televisions.
7.It is suggested that the external
devices with USB2.0 interface be
used to improve velocity of
information reading and continuity of
information play.
27
Page 31

Stream Media Broadcast System
Stream media system setup
Note: Memory cards or USB devices are not
supplied with this TV.
USB setup
1 Insert USB in the card slots at the left side the TV.
2 Insert it to be clicked in.
3 Press USB button on the remote controller to enter
the stream media system.
CARD setup
This TV is compatible with the card of SD/MMC/CF/MS/SM
format.
Press ENTER key to play this devices
How to use
1、Jack of card :Instructions
Jack of SM card
Jacks of SD、MMC、MS card
Jack 1
}
Jack 2
}
Jack of CF card
2、Insert the card as right direction. As following Card in common use
1) CF card:
(jack)
COMPACT FLASH
DIGITAL MEMORY CARD
128
2)MMC card:
MB
( jack) (jack) (jack) (jack)
MULTIMEDIA
CARD
128
3) MS card:
128MB
MB
Note
1.Please note chooses uses
the digital memory card with
you corresponds the receptacle
2.Card reader in 1 cannot
simultaneously insert two kind
of cards in the graphical
representation position
4)SM card:
128MB
MEMORY STICK
ID
AAA Multimedia Player
Card
USB
File Copy
SETUP
Remove USB
5) SD card:
SD
128MB
Note:
1.the card insertion time, after the flows media system starts 2s , insert the card
to numerical code card reader , do not bring card to start flow media system.
2. After card insertion, indicator light will shines, and enters glitters condition,
after period of time , indicator light enters constant bright condition, indicates
already distinguishes finished, this time carries on play operation and so on .
3, In the market ,the digital card type are very many, please uses standard
product of the standard factory , meets reads takes difficult or reads speed
limits, please replaces the digital card.
28
Page 32

Stream Media Broadcast System
Removing USB device
Press up or down to select Remove USB,
1 ¡ü¡ý
¡ü¡ý
and press ENTER button to ensure it.
2
press RETURN button to exit menu.
3 Remove the memory card/USB device.
4 If to remove the card device, press RETURN
button to return to the main menu, and
remove the card.
Card data protection
- Do not remove the card/USB device when the content is being read or when
browsing. Such action may damage the memory card/USB device.
- Do not touch the terminals on the back of the card.
- Always insert a card in the correct direction. Failure to do so may result in
damage to the card and the unit.
- Do not subject the card to excessive pressure or strong impacts.
- Malfunctions of the unit or card may result in data loss or damage to the card.
- Haier shall not accept any liability for damage or loss of stored data.
Warning:
Memory cards can be swallowed
by young children. Do not allow
children to handle memory cards.
Please remove the memory card
immediately after use.
AAA Multimedia Player
Card
USB
File Copy
SETUP
Remove USB
Press ENTER key to remove USB devices
29
Page 33

Stream Media Broadcast System
To start the media play
1. Press USB button to enter media play system.
ZOOM
USB
RETURN
HELPENTER
2. Press up or down button
to select the desired option.
3. Press ENTER button to
enter desired option.
4. Press to return the
¡ü¡ý
AAA Multimedia Player
RETURN
Press ENTER key to play this devices
Card
USB
File Copy
SETUP
Remove USB
previous menu.
5. If to exit USB system, you need to return to the main
menu to protection card data.
Note: If there are no operation two minute later, the
TV will enter the saver automatically, at the time, press
any button of USB system to exit the saver menu.
To operate the menu
1. Press up or down to select the item with up or down.↑↓
2、Press or to select the desired item of submenu
with left or right.
3、Press ENTER button to ensure the desired option、to
enter the submenu、to resume the speed of standard.
4. Press or button to operate play quickly or slowly.
5.Press pause button to make the program stop,and press
again to resume it.
6.Press ZOOM button to make zoom, and press or
or / button to enjoy the detail.↑↓
7、Press HELP button to call up or exit the OSD information.
And press HELP button to call up or exit the OSD during
operating file copy.
8、press RETURN button to return to previous menu and
stop play, press RETURN button repeatedly to return to main
menu.
30
Page 34

Stream Media Broadcast System
To select stream media broadcast system
ZOOM
USB
RETURN
HELPENTER
1.Press up or down button
↑↓
to select "Card"or "USB".
(The device be inserted
and identified).
2. Press ENTER button to
enter adjusted option.
To play picture
1. Press up or down
button to select Picture item.
2. Press ENTER button to
enter the menu of play.
3. Press again up or down
button to select desired
enjoy picture, and then
press ENTER button to enter
the play menu.
4. On screen display, Press
↓
or to select the speed
of play.(Normal, Slow, Fast).
5. Press or button to
swap the picture of next and
previous. Press RETURN button
to return.
↑↓
↑↓
↑
AAA Multimedia Player
Card
USB
File Copy
SETUP
Remove USB
Press ENTER key to play this devices
AAA Multimedia Player
Picture
Movie
Music
Music and Pic
AAA Multimedia Player
F-007 .JPG
F-008 .JPG
F-009 .JPG
F-010 .JPG
F-011 .JPG
F-012 .JPG
JPEG
0016.JPG
Slideshow speed : Slow
Play
IMAGE
Note:
the play file menu are
different with your USB
devices.
To enjoy the picture detail
1. After selecting the picture to play, press ZOOM to
select desired zoom.
2. Press HELP button to exit the display, and then
press or or or
¡ü¡ý¡ü¡ý
to move and enjoy the picture detail.
To make the picture overturn
Each press of button to make overturn 90 with right,
press ENTER button to resume the program playing.
31
0
Page 35

Stream Media Broadcast System
To enjoy music
ZOOM
ZOOM
USB
RETURN
HELPENTER
USB
RETURN
HELPENTER
1. Press up or down button
to select "Music" option.
2. Press ENTER button to enter
play menu.
3. Press up or down button to
↑↓
↑↓
AAA Multimedia Player
Picture
Movie
Music
Music and Pic
select desired music, and
then press ENTER button to
play music.
Note: The play file menu are
AAA Multimedia Player
The day went away .MP3
different with your USB device.
4. When playing music,
press up or down to select
↑↓
play mode, (play mode:
standard, program, Random;
Repeat mode: Disc Repeat,
Folder Repeat, File Repeat)
The day you went away.MP3
Play mode: standard
and press ENTER button to
ensure the mode.
5. When playing music, press
or button to swap the
01£º07 / 04£º20
next and previous music
6. Press RETURN button to exit
the playing.
Note: 1. DISC Repeat mode: press up or down button,
↑↓
the DISC Repeat will appear on
the screen, and then press
ENTER to ensure it.
2. Program mode:
↑↓
press or button to select
the music in right list, and press
The day went .MP3
Soft .MP3
Soft .MP3
1:__
The day went .MP3
2:__
3:__
4:__
5:__
Done
ENTER button to program in turn,
and then press button to
select "Done", and then press ENTER button
to ensure it.
32
Page 36

Stream Media Broadcast System
To play Movie
ZOOM
ZOOM
USB
RETURN
HELPENTER
USB
RETURN
HELPENTER
1. Press up or down button to
↑↓
select "Movie" option.
2. Press ENTER to enter play
menu.
3. Press again up or down
↑↓
button to select desired
music, and press again
ENTER button to play it.
4. On screen display, press
or button to select in
turn:
File*-PlayBack Control-Audio
channel-Play Mode
5. Press or button
to set speed, press ENTER button
to resume to standard mode.
6. Press or button to
select the next movie or
previous.
7. Press RETURN button repeatedly
to return.
AAA Multimedia Player
Picture
Movie
Music
Music and Pic
AAA Multimedia Player
E08-8SOBTILES-1
33
Page 37

Stream Media Broadcast System
To select the Music and PIC item
ZOOM
ZOOM
USB
RETURN
HELPENTER
USB
RETURN
HELPENTER
1. Press up or down button
↑↓
to select "Music and Pic"
option, and press ENTER
button to enter menu.
2. Press up or down to select
↑↓
desired file, and press
button to ensure it.
( to cancel). Repeat step
2 to select more file, and
press ENTER button to enter
play menu.
3. On screen display menu,
press up or down to select
↑↓
the speed to play.( Normal,
Slow, Fast).
4. Press or button
to swap the next and previous
picture, press or
button to select the music.
Note: press pause button to
stop playing the picture.
AAA Multimedia Player
Picture
Movie
Music
Music and Pic
AAA Multimedia Player
F-007 .JPG
F-008 .JPG
F-009 .JPG
F-010 .JPG
F-011 .JPG
F-012 .JPG
JPEG
MP3
The day you went away .MP3
0016.JPG
Play mode: standard
Play
00:01:43
IMAGE
5. Press repeatedly RETURN button
to return.
Note: On the music and picture, the playing music
is *.mp3 format.
34
Page 38

Stream Media Broadcast System
Copy file function
ZOOM
USB
RETURN
HELPENTER
1. Press up or down to select
↑↓
"File Copy" item.
2. Press ENTER button to enter
the copy menu.
3. Press ENTER button to
enter the file menu, and
press up or down button to
↑↓
select "Card" or "USB"。
4. Press ENTER button to enter
Card or USB, and select the
files to copy, then press
HELP button to call up COPY
and PASTE, and then press
↑↓
/ button to select
COPY, and press ENTER button
to confirm, press again
↑↓
/ button to select
PASTE, then press
ENTER button to paste, in this
time, the "File already exits,
overwrite it?"will appears
on the screen, and press
or button to select
YES/NO, and then press ENTER
button to confirm.
AAA Multimedia Player
Card
USB
File Copy
SETUP
Remove USB
Press ENTER key to enter COPY menu
Select source Port:
Card
USB
Root
F-007 .JPG
F-008 .JPG
F-009 .JPG
F-010 .JPG
F-011 .JPG
F-012 .JPG
Root
F-007 .JPG
F-008 .JPG
F-009 .JPG
F-010 .JPG
F-011 .JPG
F-012 .JPG
COPY
PASTE
Note:
button to select the
all files;
button to cancel.
5. Press ENTER to cancel.
35
Page 39

Connecting Additional Equipments
Antenna connection
Generally speaking,to enjoy a clearer picture.We reconmmend that
you use a CATV system or an outdoor antenna.In different places,
the suitable antenna type and position are different.
VHF UHF
Antenna input
£¨75 standard
ANT.
coaxial type£©
Mixer
£¨additional
purchase£©
AC cable
300 twin-lead cable
+
+
Antenna adapter
£¨£©additional
purchase
75 coaxial cable
Plug
£¨£©additional
purchase
Note£º
It is recommended that you had better use 75 ¦¸coaxial to remove the
disturbance caused by airwave.
Do not lay the twin-lead cable under the TV set.
You need the suitable coaxial cable. and plug to receive the best picture
and sound.
AC power socket
36
Page 40

Connecting Additional Equipments
Some additional equipments could connect with this set. There is some
description about this following. You could check the input after the
connection.
TV/AV:All source inputs
S-VIDEO: S-VIDEO input
DVD/DTV: YUV input
PC/DVI: PC and DVI input
Note:
You could also use the TV/AV button on the front panel of the TV to change the inputs
How to connect the signal with other equipments
Output signal
R-AUDIO-L
POWER WOOFER
OUT
D-SUB IN
S-VIDEO
VIDEO
Y
Cb/Pb Cr/Pr
IN
IN
R-AUDIO-L
DVI IN
OUT
DISPLAY
MUTE
TV/AV
OK
VOL-
PSM
1 2
-/-- 0
PIP SWAP SCAN
SHUTTLE
L - HD- R
VIDEO
IN
OUT
I/II
STILL
S-VIDEO
DVD/DTV
CH+
MENU
CH-
5
4
7 8 9
H.LOCK
SLEEP
ZOOM
L -V/S- R
IN
VOL+
ZOOM/MOVE
PC/DVI
AUDIO IN
PIC.SIZE
CH.EDIT
TIME.SKIP
PC/DVI
Q.VIEW
S
SM
3
6
USB
RETURN
HELPENTER
ANT.
VCR
TV
37
R-AUDIO-L
OUT
VIDEO
OUT
Video output
Audio output
Page 41

Connecting Additional Equipments
How to connect the video input terminal
Output signal
R-AUDIO-L
POWER WOOFER
OUT
D-SUB IN
S-VIDEO
VIDEO
Y
IN
IN
VCR
S-VIDEO VCR
DVD Player
S-VIDEO output
Video output
Audio output
How to connect the component input terminal
Output signal
D-SUB IN
S-VIDEO
VIDEO
IN
IN
VCR
R-AUDIO-L
POWER WOOFER
OUT
Cb/Pb Cr/Pr
Y
Cb/Pb Cr/Pr
PC/DVI
ANT.
L - HD- R
IN
VIDEO
IN
AUDIO IN
L -V/S- R
IN
L -V/S- R
IN
PC/DVI
ANT.
AUDIO IN
L -V/S- R
IN
L - HD- R
IN
DVI IN
DVI IN
OUT
OUT
S-VIDEO
IN
R-AUDIO-L
OUT
Y Cb/Pb Cr/Pr
IN
VIDEO
OUT
L - HD- R
R-AUDIO-L
VIDEO
DVD digital box
(DTV-STB)
Y、 Pb,Pr
output
Video output
Y
Pb
Pr
38
Page 42

Connecting Additional Equipments
How to connect the PC input terminal
R-AUDIO-L
POWER WOOFER
OUT
D-SUB IN
D-SUB IN
S-VIDEO
VIDEO
IN
IN
PC/DVI
ANT.
Cb/Pb Cr/Pr
DVI IN
DVI IN
OUT
OUT
IN
PC/DVI
AUDIO IN
Y
L - HD- R
R-AUDIO-L
VIDEO
AUDIO IN
L -V/S- R
IN
Note:
The computer above is just an example
The other equipments and coaxial are not included in the TV set
PC input terminal is the DDC1/2B. If the computer is not provide
with DDC1/2B,you should adjust it when connecting.
Some models of PC can not be connected with this TV set
The D-sub 15P terminal of DOS/V need not adapter for the computer
The H/V scan frequence can not exceed the regulate range.
39
Page 43

Connecting Additional Equipments
External speaker installation
1. Face the LCD screen upside down on a clean blanket or a bracket and pay
attention not to indent the casing. Lay the two speaker aside of the LCD.
2. Lay a bracket on the speaker and hind
rind, Fix 4 screws to the speaker and
hind rind.
3. Connect the speaker cable to the speaker
terminal of LCD TV and the speaker terminal,
and insert the connecting cable into the terminal
slot, Release the speaker terminal, and ensure
that the white connecting cable is inserted in the
terminal slot marked red and black connecting
cable is inserted in the black terminal slot, and
that anode and cathode poles are correctly
connected.
Note:It is not suitable for L26A9-AK
Woofer installation
1. Take the woofer out, and place it the hind rind. (See picture)
2. Connect cable to the woofer terminal and
LCD TV terminal.
External speaker
Screw hole
Woofer
Note:It is not suitable for L26A9-AK
40
Page 44

Troubleshooting
Determine and try to solve the problems of your television by yourself before
applying for technical assistance by authorized after-sales service.
Do not leave the television with static picture in an extended period as it may
result in residual image on your television screen.
Troubleshooting
No picture, no sound
Blank screen
No sound
Poor sound
No picture in some
channel
No color for some channel
program (black and white)
Spots with some or
all pictures
Television out of control
Verify if the television is properly plugged.
Verify if the television is properly supplied power.
Verify if electricity is available.
Verify if correct signals are input.
Press TV/AV button to change signal input to TV input.
Restart the television of power supply is interrupted.
Press Mute button and verify if Mute mode is set.
Switch to other channel and verify if the same problem
happens.
Press VOL+ button to see if the problem can be solved.
Verify if sound system is correct. Refer to some chapter
for adjust.
Verify if correct channel is selected.
Adjust the antenna.
Make adjustments by Fine Tune and Manual Search.
Verify if the same problem exists in other channels.
Check out of picture and sound systems.
Refer to relative instructions in the Manual for color
adjust.
Verify if the antenna is correctly connected.
Verify if the antenna is in good condition.
Make fine adjustment of channel.
Disconnect the television from power supply and, 10
seconds later, connect the television to the power supply.
If the problem still exists, contact authorized after-sales
service for technical assistance.
Note£º
Design and specifications are subject to change without notice.
The dimension in this manual is a approximation.
41
Page 45

Specification
Following are some reference specifications, which may vary from
that of the television that you have just purchased due to technical
innovations.
Model
Power ~150V-240V£¬50/60Hz
Power
consumption
LCD screen
System
Condition
Connection
terminal
Dimensions
(WXDXH)
Accessory
1151mm mm mmX124 X664
User's Manual
Remote control
Electric cord
Warranty card
External speaker
Woofer
L37A9-AK/L37A9-AKF
Average£º180W
standby consumption£º<3W
size£º37.02 inch (94.03cm)
viewing angel£º>170¡ã
PAL £¬DK£¬I£¬BG
NTSC 3.58
NTSC 4.43
PAL 50£¬PAL 60
Working temperature
Working humidity
Store temperature
Store humidity
Video (RCA) 1.0Vp-p (75ohm)
S-video(Mini D2N4£© Y
Audio L-R(RCAX2 0.5Vrms
Y 1.0Vp-p
PbPr 0.35Vp-p
VGA Analog RGB 0.7Vp-p;75ohm,TTL
DVI DVI-D
USB 2.0
£©
TV
Video
}
20£¥ -80£¥
-25
5
1.0Vp-p (75ohm) C 0.286Vp-p(75ohm)
¡À
L26A9-AK
Average£º140W
standby consumption£º<3W
size£º26 inch (66.03cm)
viewing angel£º>170¡ã
5¡æ - 35¡æ
¡æ - 45¡æ
£¥ -90£¥
861mmX300mmX526mm
(stand including)
User's Manual
Remote control
Electric cord
Warranty card
Design and specifications contained in the manual might vary due to
technical innovations.
Warranty card is only for the special countries and areas.
42
Page 46

Input mode
Refurbish frequency(Hz)
Remark
640x480 60
800x600 60 , 75
1024x768 60 , 75
/
Resolution
Vertical(Hz) Horizontal(KHz) Clock(MHz)
60 31.5 25.2
640x480
75 37.5 31.5
60 37.9 40.0
800x600
75 46.9 49.5
60 48.4 65.0
1024x768
75 60.0 78.75
1600x1200 60 75.0 162.0
Specification(continued)
DVI supporting
PC supporting
43
Page 47

01
0090507703
 Loading...