

Page 1
Automatic Drum Washer-dryer
HW100-HB1297NZP
User Manual
Please read these instructions carefully before use.
Please save these instructions for future reference.
Page 2
Pr
oduct Features
DD inverter frequency
mo
tor te
chnologyFunction
(Stop just in time
upon
cleanness)
Hybrid bala
nce technology
Drawe
r-type
box
Inclined
drum Function
of Supporter Dry
La
rge capacity
Self-cleaning function
Optim
al door h
eight
des
ign
Air-wash function
La
rge-calib
er clothes-l
oading opening Techn
ology
of anti-ba
cter
ia
and m
ildew-proof wi
th
JIT func
tion (Stop just in time
upon
dr
yin
g)
window p
ad
Large
high-brightn
ess
LCD
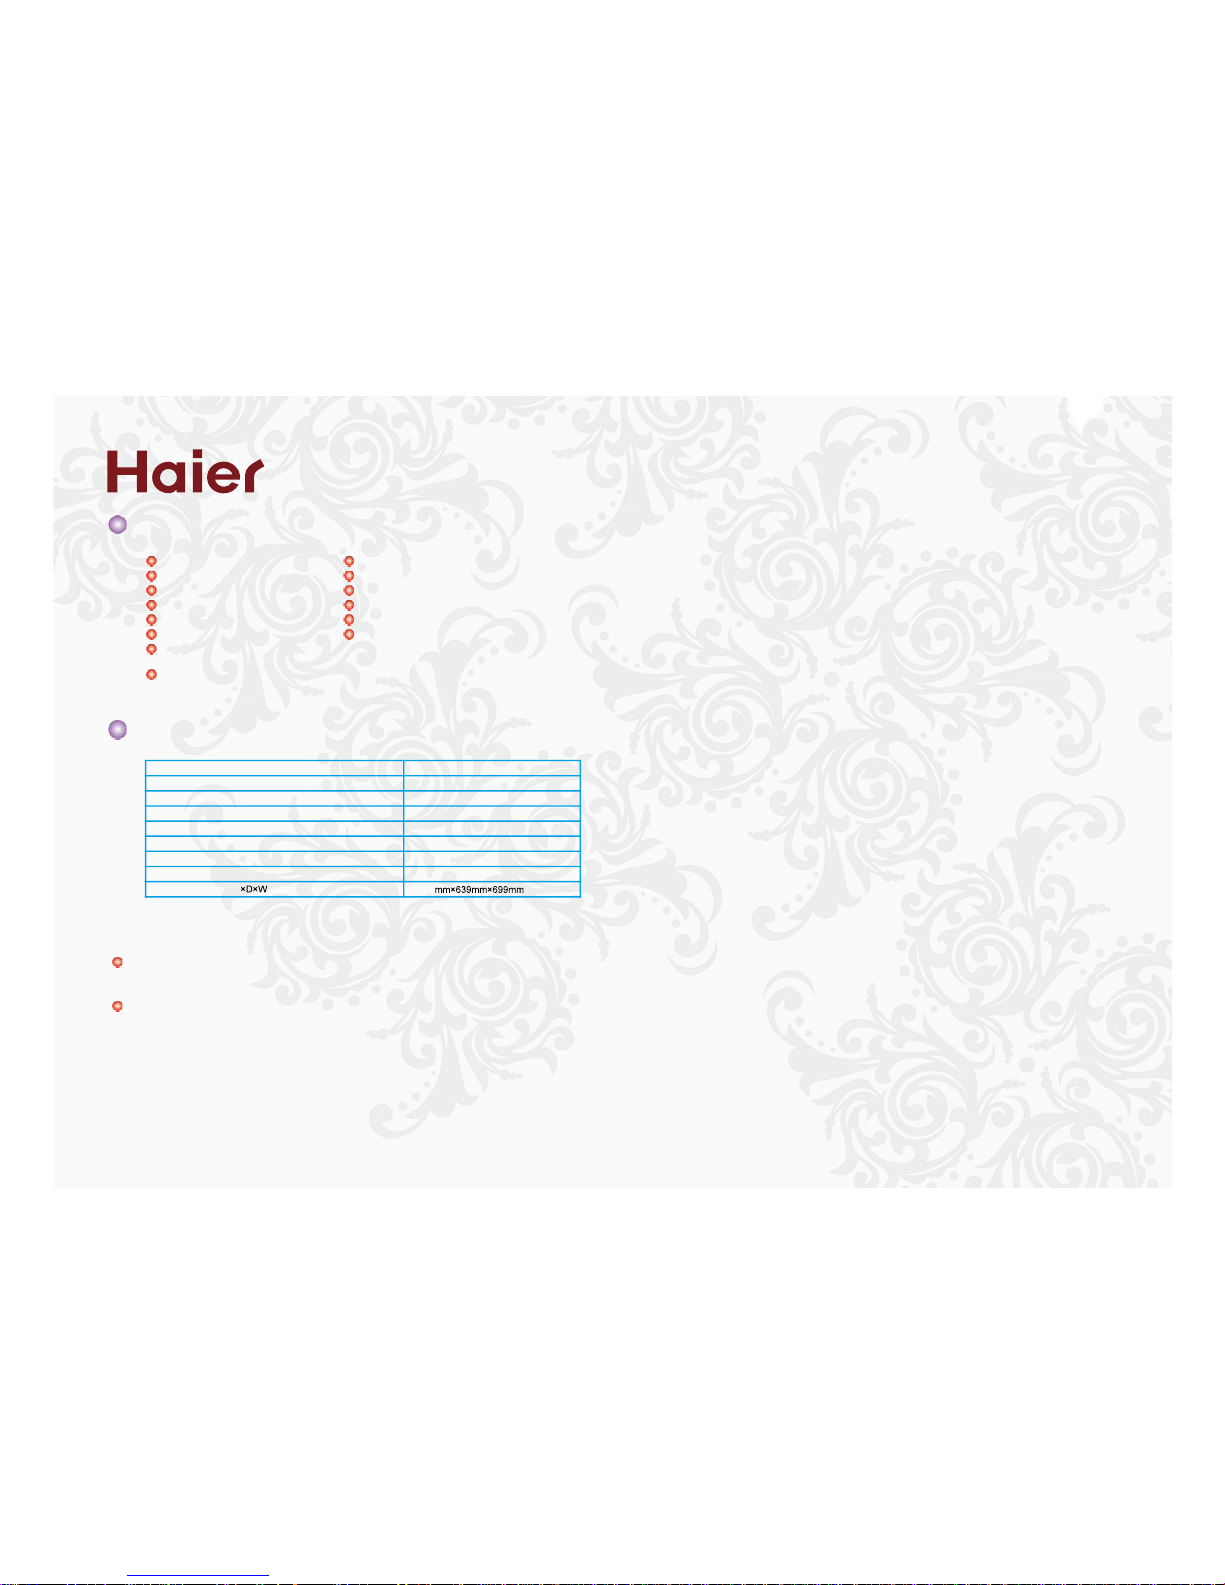
Specifications
W
ashi
ng noise
(sou
nd
pressure leve
l/sound power level
)
Spinni
ng no
ise (sound pressure level/soun
d po
wer l
eve
l)
The diagrams
in thi
s m
anual are for
illu
stra
tive purp
ose
only.
Due to
continu
ous product improvement,
please
see th
e actual
product fo
r ap
pear
ance, color and acc
essories
which may be inco
nsistent wi
th
those des
cri
bed in
this manua
l.
Here we a
pologiz
e for this
.
This
pro
duc
t is classif
ied
as C
las
s I
appliance.
Pl
ease pay
attention to elec
trical safety du
rin
g u
se.
* :
Please ensure that
Water inlet pressure
is higher than 0.03 MPa while drying.
Power supply
Water inlet pressure
Rated washing capacity
Rated spinning capacity
Rated drying capacity
Spinning speed
Overall dimensions(H
)
220-240V~/50Hz
(0.001-1.0)MPa *
10kg
10kg
8kg
1200rpm
36
dB(A)/49dB(A)
54
dB(A)/63dB(A)
1200
Page 3
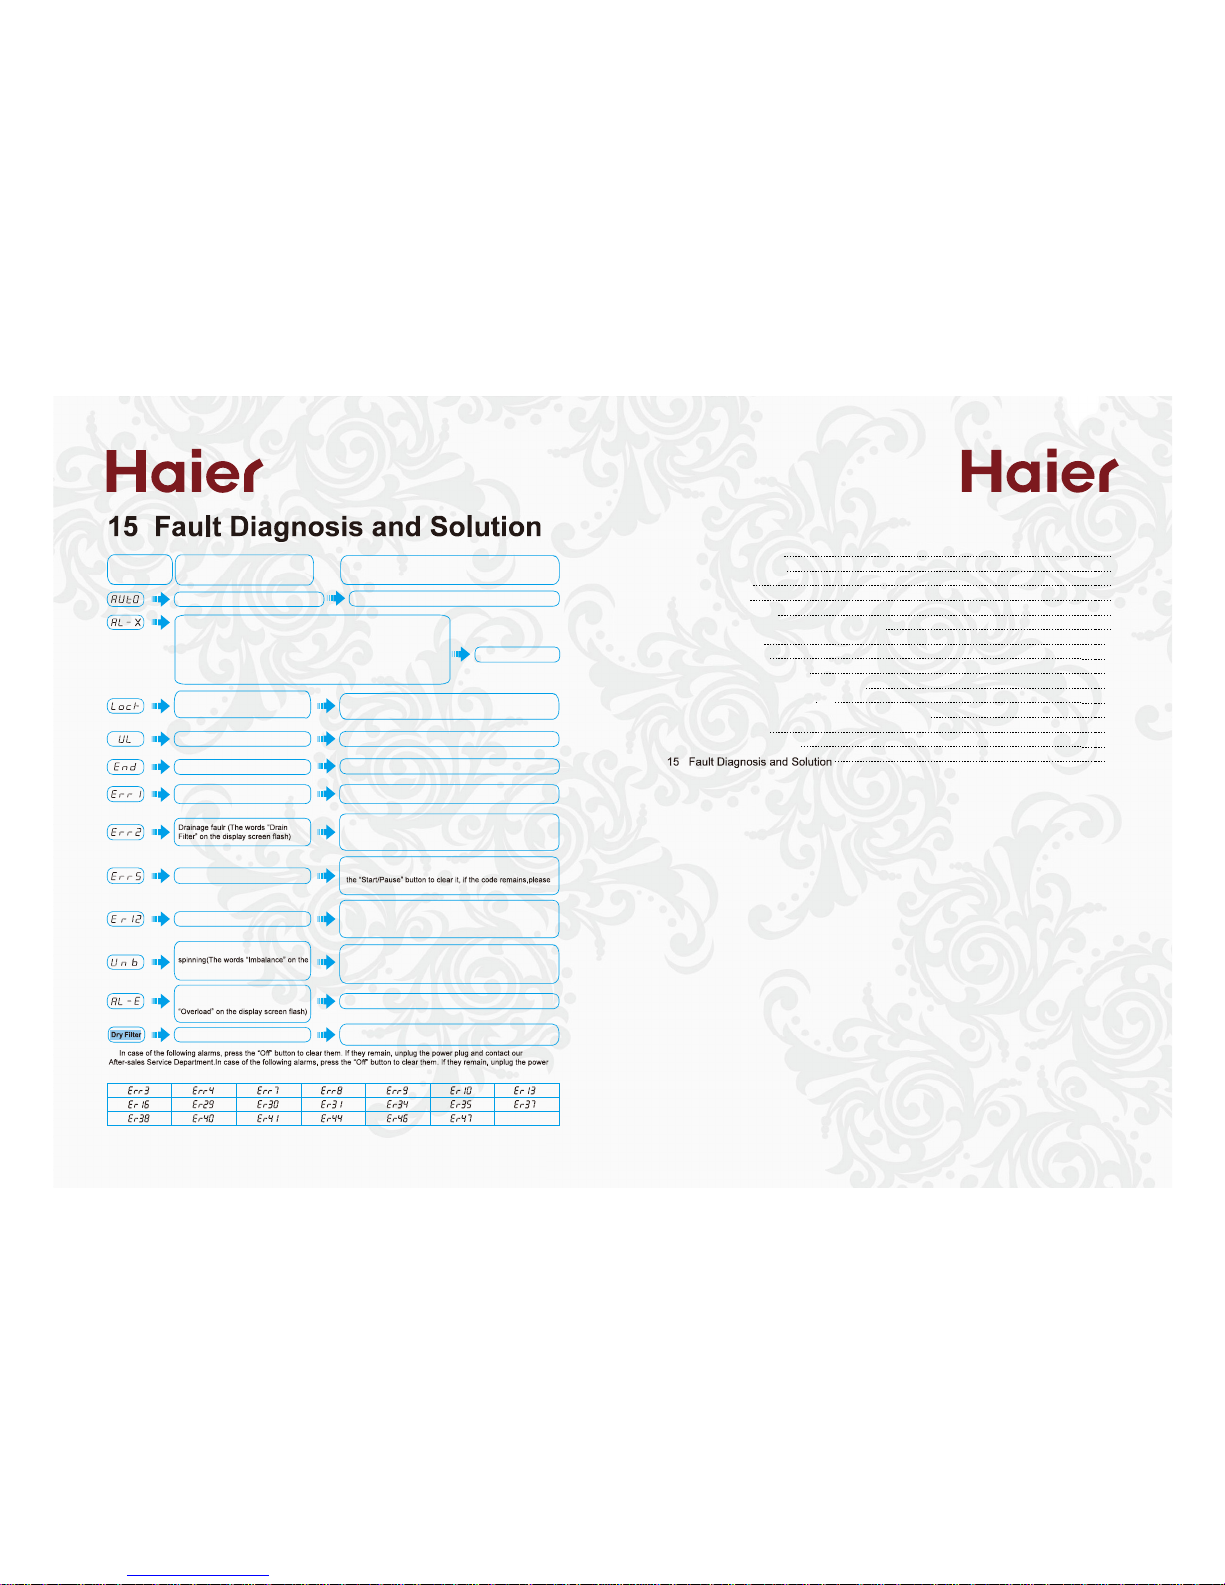
Displayed
code
Code meaning
Solution
The washer is in automatic weighing state
Normal prompt
Code for the clothes weight:
X=1(i.e. AL-1) displays when there are no clothes or less than 2kg clothes in the
washer-dryer;
X=2(i.e. AL-2) displays when there are about 2-4kg clothes in the washer-dryer;
X=3(i.e. AL-3) displays when there are about 4-6kg clothes in the washer-dryer;
X=4(i.e. AL-4) displays when there are about 6-8kg clothes in the washer-dryer;
X=5(i.e. AL-5) displays when there are about 8-10kg clothes in the washer-dryer.
Normal prompt
Being inconsistent with the conditions
for door opening,it is not allowed to
unlock the door
Normal prompt
Normal prompt
Normal prompt
Close the door ; if the code remains,please ask for repair
Check whether the outlet of drain pipe is 10cm above the floor;
Clean the drain filter and check whether the drain pipe is
clogged;if the code remains, please ask for repair
Check whether the water tap is turned on, whether the water
pressure istoo low ,whether power supply cut-off occurs.Press
ask for repair
Check whether the outlet of drain pipe is 10cm above the floor;
Clean the drain filter and check whether the drain pipe is
clogged;if the code remains, please ask for repair
Check the adjsuyable feet to confirm whether the washer-dryer
is level;
Take out and fluff out the clothes;if the code remains,please ask
for repair
Take out some clothes
Reinstall the drying filter; if the code remains,please ask for
repair
Abnormal drying filter
Child lock prompt
The whole program ends
Abnormal door locking or unclosed
door
Abnormal water feed
Abnormal drying water level
Unbalanced clothes distribution when
display screen flash)
The clothes weight is beyond the
acceptable range (The words
plug and contact our After-sales Service Department.
Contents
1
Safety Precautions
1
2
Precautions for Use
2
3 Com
ponents
4
4
Accessories
5
5
Notice before Use
5
6
Control Panel and Program Description
9
7
Display Screen
11
8
Programs Guide
13
9
Operatio
nal
Procedures
14
10 General Program Running Process
15
11
Preparations before
Wa
shing
16
12 Reference
We
ight for Different Types of Clothing
16
13 Other Functions
17
14 Cleaning/Maintenance
19
21
23
Page 4

1 Safety Precautions
The plug should be
acces
sible after
the washer
-dryer is instal
led in pla
ce. Do
no
t disconnect the plug from
the so
cket by pulling the po
wer co
rd. If
the
power co
rd
needs
to be repla
ced, ask a qualified
technician or cont
act our
After-sales Servi
ce
Depar
tment
for replacement. Prevent
the power
cord
from being pressed
by
an
y foot an
d from such pr
oblems
as break-off, flat
tening,
etc
.
Po
wer
supply must use an inde
pende
nt
soc
ket, the grounding terminal of which must be
properly grounded. The so
cket must be a qualified product.
Such overload protective
devices as
proper fuse
must be available at the user s home.
And,
the ammeter, wire and sock
et must be able to
withstand 10A current.
Ke
ep the
washer-dryer away fr
om
any he
at
source and direct sunlight to pre
vent the aging
of
pl
asti
c and rubber parts.
Do not use such
chem
ica
ls as flammable de
tergent and dry-cleaning solv
ent
to
wash the clothes. Do
not us
e any flamma
ble spr
ay
near
the wa
sher-drye
r. In
case
of flammable gas l
eak
age, do not plug or
unplug the wa
sher-dr
yers
power p
lug.
The washer
-dr
yers
door an
d tabletop panel
are
relati
vel
y hot during heating and drying.
For
th
e purpose of safety, keep the children away from the washer-dryer. In addition, when
drai
ning hot
wate
r, be
caref
ul to avoi
d s
cald.
After unpacking the wa
sher
-drye
r, do
not
al
low
the children to play
with the disassemble
d
packaging materials such as carton, plastic packaging bag and foam, etc.
Do
not install the washer-dryer outdoors and in excess
ivel
y humid envi
ronment, otherwise
mo
istur
e on
th
e elec
tric
al com
ponent
s may
eas
ily cause damage to the ignition
sy
stem or ot
her accidents. In case of
inadvertent water spray onto or into the
was
her
-dr
yer,
onl
y after the
was
her
-dr
yer is thoroughly
dri
ed
can you
use it
.
Neither should you pl
ace
the
was
her-d
ryer di
rect
ly onto an airproof carpet in or
der
not to block the
bottom vent, nor
place it
close up to
the wall or fu
rniture
to avoid accidents. Do not use the
washer-dryer on an
y platform
above the floo
r, ot
herwise it
may
fall off onto
th
e fl
oor and be damag
ed.
Electrical safety pro
mpt:
Please pay attention to electrical safety during use.
Wa
rning sign:
The contents with this sign involve
the
safety
of
both
the
product and
the
use
r.
Be sure
to
strictly
f
ollow these instructions, otherwise
the washer
-dryer
may be damaged or the user may be injured.
Prohibitory sign:
The contents with this sign indicate the behaviors to be absolutely
prohibited. Failure to follow these instructions
may
result in da
mage to the
washer
-dryer
or
personal injury.
1
Page 5

2 Pr
ecautions for Use
1.
Due
to the fluctuation of wa
ter pressure,
pl
ease
check all the joints of
water
inlet pi
pe,
wa
ter tap and dra
in
pi
pe for firm connection befo
re
washing
every time. In case of
loo
se water pipe connection or water leakage,
pl
ease turn
off the
water
tap
and take proper measures or contact our After-sales Service Department for
reconnection. Only after
such faults are cleared c
an you
use it agai
n.
2.
When the washer-dryer is
not in use, plea
se keep the door
sli
ghtly open and
tow
el off both the
window
pad and do
or glass
to avoid unpleasa
nt smell. Do not
cov
er the washer-dryer with
a plastic bag to avoid
mo
isture s
taying in it.
3.Do not place any heavy object, he
at-p
roducing appliance and item
liab
le to water/liquid leakage on the
table top
to
avoid
de
form
ation of
the tabletop panel and plas
tic pa
rts.
4.Do
not wa
sh
such waterproof articles as rain
coat, bicy
cle
cover and
down
products as
well as carp
et to
avoid abnorm
al v
ibration
or
dama
ge
to such
articles.
5.
Pleas
e add a pr
ope
r am
ount of was
hing po
wde
r, detergent
(or
bleach) and softener in
corres
ponding
cham
bers of th
e di
stri
butor box
befor
e st
arti
ng the selected pr
ogra
m. Do not open the
distr
ibutor box
dur
ing the
prog
ram running to avoid som
e dete
rgent
(or
ble
ach) left in its chambe
r.
6.If a
brassiere with
steel wire is
wash
ed in the
washer-dr
yer, the steel
wire
may bounce out. Ther
efore,
do not
wash any brassiere wi
th steel
wire
in
order to prote
ct the
washer-drye
r.
7.
The
washe
r-dryers
door is eq
uipped
wit
h a
self-lo
ck sa
fety device.
Pr
ess the
S
tartbutton to
m
ake the
washer-dryer in pause (if the washer-dryer is operating). Only wh
en the
was
her
-dryer is
in the
safe
state (the
water level
is below the lo
wer
edge of sight gl
ass, the temperature inside of th
e drum is below
50 and the in
ner drum is
not rotati
ng)
and
the door lock icon is not illuminated can you open the door by
press
ing the door
-opening
butt
on. Never for
cibly open
the d
oor before
th
e wa
sher
-dryer enters the safe st
ate
8.Turn
off
the water supply an
d po
wer supply af
ter fini
shing
was
hing
every time.
Meanwhile, cl
ean th
e sight
glass
window pad inter
lining to pr
event
contaminan
ts from taint
ing the cloth
es a
gain.
9.
The
was
her
-dryer describ
ed in this m
anual is equi
pped wi
th dow
nward drainage sy
ste
m. Pl
ease
install the
washer-dryer in
a
loca
tion with floor drainer.
10
.Using the
washer-dryer
at or below 0 may damage the
wat
er inlet valve and
drai
nage sy
ste
m.
If the washer-dryer is stor
ed at or below 0 , be
sur
e to m
ove an
d leave it in the en
vir
onment at room
temperature
for
2-4
ho
urs
before use.
11.Do not put the clothes tainted with chemicals into the was
her-dryer.
12.It is p
rohibited to
dr
y the cloth
es wi
th oil
stain
s to avoid
fire hazar
d.
13.When an
y pr
ogram other
than
Supporter Dry
is
sele
cted, it is prohibited to put the drying rack into
the
washer-dryer to avo
id dama
ge
to the
was
her
-dr
yer.
14.When using
th
e washer-dr
yers
drawer:
Do
not put any
flammable,
expl
osi
ve and co
rrosi
ve s
ubstan
ce in the
drawe
r. Do not pour detergent and
w
ashing powder
into the d
rawe
r to prevent the dr
awer fr
om being contaminated. The m
axi
mum
weight
of
all the items in
the
drawer
must not
exce
ed
5kg. Pl
ease close the
drawe
r imme
diat
ely
after
you use it.
Neither should yo
u put
wet cl
othes on
the drawe
r,
nor al
low
the
chil
dren
to play w
ith
and step on the drawer
to
avoid
de
form
ation or
dam
age of
the drawer.
to avoid dam
age to
the d
oor or scald.
Page 6

15. When wa
shing small
articl
es
(e.g. ha
ndke
rchiefs,
gloves,
sock
s, et
c.) and
th
ose
clot
hes
liable to
inter-twist and
wea
r, pl
ease
put them in net
bags
for
washing,
rinsing
and
spinning to prevent them from
falling
into be
twe
en the inner
drum and
win
dow pa
d and
further
avoid inadequate wa
shi
ng and drying. The
weight of
articles
in each net bag must not
exc
eed 300g and the net bags should be put in the
was
her
-dryer
together with
th
ose clothe
s not in a net bag, oth
erwise
the
washer-dryer will not b
e bal
anc
ed an
d re
sult in
ab
normal vibra
tion.
Reference weights for small articles: handke
rchiefs
about 30g/pi
ece
; gloves
about
60g/pair; cotton
soc
ks about 30
g/pair;
silk
socks
about 20g/pair.
16. When
spinning at high spe
ed,
the clothes
will
stick on the
washer-dr
yers
inner drum wall
due to
c
ent
ripetal
force. If
the
clothes ar
e to be
dri
ed, it is recommended to take them
out
and
flu
ff them
out, then put them in the
washer-dryer again for drying to
achieve optim
al drying effe
ct.
17. During he
ating or drying, high temp
erat
ure
inside
the w
asher-dryer
may
cause
temp
erature
rise of the
tablet
op panel
and door
, et
c. Th
erefore,
do not touch the tabletop panel and door
during
heating
or dr
ying.
18. During drying
, it is recommended not to load the in
ner drum with clothes
over the height of drying stic
ker
on the electro
plated
rin
g; oth
erwise in
adequate dryi
ng
may
occu
r.
To
clean the drying filter box
Note: Pleas
e clean the drying
filter
box
after using
th
e d
ryi
ng f
unction
every time.
(1) Pull out
the dryi
ng filter box
as shown
in Fig. 1.
(2) Gentl
y open the dryi
ng filter
bo
x c
over
as
shown in Fig. 2.
(3) Remove
the flocking in the dryi
ng f
ilt
er box with a soft bristle brush
as
shown
in Fig. 3.
(4) Clos
e the dryi
ng filter
box and
ins
tall it in pla
ce.
Fig. 1 Fig. 2 Fig. 3
Note
: Th
e flocki
ng mu
st not be piled
up around the
was
her
-dryer to avoid its entry into the washer-dryer
an
d poor
drying
ef
fect.
To
clean the water inlet filter screen
Warm
tips:
To im
prove t
he
washing e
ffect, do not
throw awa
y the
water inlet filter screen. In case of
unsmooth water feed
, pl
eas
e clean th
e water inle
t
fi
lter
sc
reen in tim
e as follows
:
(1) Screw
off
the water inlet pipe as shown in Fig.1,
and then take out th
e filter sc
reen
with a
pa
ir
of
nipper
pliers as
sh
own
in Fig. 2.
(2)
Wash
the filter screen with
a soft bris
tle br
ush.
(3) Install the filter screen in pla
ce and connect
the
water
inlet pipe.
Fig. 1 Fig. 2
3
20
Page 7

14 Cleaning/Maintenance
Please
unplug
the power
plug
from the socket before
cleaning and m
aint
ena
nce.
After finis
hin
g washing, please turn
of
f the water ta
p an
d remove the water
inlet pipe.
Unplug the power plug and put back the dr
ain
pi
pe.
If the wa
sher
-dryer is
not to be
used for a
long tim
e, pleas
e keep
th
e door sl
ightly open and dry the
window pad to
avoid unpleasant smell.
Do n
ot
use
organic solvent
or corro
sive liquid
to wipe
th
e was
her-dryers
exterior and r
ubb
er parts.
Frequentl
y clean both the
water
inlet pipe joint an
d water inlet va
lve fi
lter screen
to
prev
ent them
fr
om
being
clogge
d by dir
t.
To
clean the drain filter (once every 30 days)
After draining the water in
the
washer-drye
r,
press the filter co
ver
with a
han
d to open it as shown in
Fig. 1.
Press the pu
sh swit
ch to the end to prevent the
hand from
being wounded when turnin
g the filt
er knob,
then anticlockwise scr
ew
out the drai
n f
ilter
with a
ha
nd.
Not
e: A
little water
may
flow out when screwing
out the
filter
knob
(if Err2 alarm appears, rela
tively
mu
ch wate
r may
flow out when scre
wing out th
e fi
lter kn
ob)
. Th
erefore, prepa
re a
container
(e.g.
basin)
before screwing out
the filter
knob and m
ake the water flow in
the contain
er b
ut not onto the groun
d or
floor.
Rem
ove
the thrums
and impurities
on the
filter
an
d rinse the filter wi
th
clean wa
ter.
Insert the filter along
th
e g
roo
ve
and tighten
it by
tur
nin
g c
loc
kwise
; ot
herwise w
ate
r le
akage may occur.
Be
careful no
t to di
stort the filte
r.
Note
: Th
e drain filter must be t
ightened to avoi
d water leakage.
(5)
Press the push switch a
gain
with
a hand to m
ake
it
bounce out,
then cl
ose the filter cove
r.
To
clean the distributor box
(1) Full
y pull out
the distri
buto
r box.
(2) Slightl
y lift up and pull out the
distr
ibu
tor
box.
(3) Rins
e the
dist
ribu
tor
box and siphon ca
p with
cle
an wate
r.
distributor
box.
No
te: Pleas
e b
uck
le th
e siph
on cap in the co
rrect posit
ion
of distributor
box; ot
herwise t
he detergen
t
and softener in the
distr
ibu
tor
bo
x c
annot be siphoned into th
e washer-dr
yers
dr
um.
Fig
. 1
Fig.
2
Fig.
3
(4) Buckle the siphon cap, then insert, push in and close the
Push
switc
Dra
in
filter
knob
Dra
in
filter
cover
Loos
en
Groov
e
Drain
filte
r
19
4
(1)
(2)
(3)
(4)
Page 8

4 Accessories
Inlet pipe assy (1)
Drain pipe assy (1)
Drain
pipe clam
p (1) Drying rack (1)
Pack
aging bolt
cover
(4)
User manual (1
)
5
Notice before Use
Please
install and adju
st the
washer
ac
cording
to the
inst
ructions in this ma
nual
so that y
ou
can use it in a safe ma
nne
r.
To
connect the water inlet pipe
Please
use the new wa
ter inlet
pipe delive
red with the
washer-drye
r.
(1) Select
a
proper water tap
In case of unsmooth end face of the
water t
ap outl
et,
please file
it sm
ooth t
o avoid
water leakage
.
(2) Remove
the water inlet pipe joint
Press
the lo
wer
end of locking le
ver;
Hold the w
ater
inlet pipe,
press down
th
e slider
and
rem
ove the water inlet
pipe joint;
Before using, please take out the foam piece between equilibrium wreath and window.
This only is used for transport, so please must take it out with other packing pieces at
the same time.
The lengh of front end must be more than 10mm.
W
ater
inlet pi
pe
joint
Locking lever
Slid
er
W
ater
inlet
pipe
Warranty Card (1)
Anti Rat Cover (1
)
Screw
(8)
5
Buzzer mute function
Selec
t th
e self-clean program, s
imu
ltaneously press
and hold the Delay nd Tem
butt
ons for 3s
to
mu
te t
he buz
zer for all the programs (ex
cluding the
alarm sound), and t
he
dis
play
screen will display bE
EP
imultaneo
usly press a
nd hold
th
e D
ela
y a
nd
Tem butt
ons for 3s
to
resume the beep for all
th
e
programs, and th
e display
screen will display
P
Memory program
When selecting the
Memory m
, all the was
hing
parameters set by the user will be
memo
rized
af
ter
the
program ends. If the user
wa
nts
to wash with the same setti
ngs, just select
the Memory ogram
after turning
on the
washer-drye
r.
(This program does not
memo
rize the dela
y unction
set
by th
e u
ser.)
pr
ogram
Air Wash function
This f
unction
is avai
lable in
the
Drymode. Th
e i
nner drum rotates duri
ng air-
wash and removes the moisture
and unple
asant smell from the clothes
via hot air
. Please tu
rn on the
water tap before star
ting
air-wash
.
Tub Clean function
This f
unction
is avai
lable in
the Was
h and W
ash & Drym
odes a
nd
used
to
wash away the dirt from inner
and ou
ter drums. Note that
clot
hes must
not be put in th
e wa
sher
-dryer when
using th
is f
uncti
on.
The function of drying with rack
This f
unction
is us
ed to dry
those ar
ticl
es
liable to
deformation
such
as hat, c
loth do
ll
and cloth s
hoes, etc.
Make sure th
at the artic
les
in the washer
-dryer are
su
itab
le
for dr
ying
with washing mach
ine.
When using
th
e funct
ion
of drying w
ith ra
ck,
put the
dr
ying
rack in the drum as shown in Fig. 1.
In
sert the
protuberance
at the fr
ont en
d of dr
ying ra
ck
into the hol
e of
inn
er drum cove
r, place
th
e back end
of dr
ying
rack on the
gimb
als an
d keep
the dr
ying
rack l
eve
l as show
n in Fig. 2
.
Fi
g. 1
Fi
g. 2
spinning speed.
Gim
bals
18
 Loading...