

Page 1
Compact Refrigerator
Réfrigérateur compact
Refrigerador compacto
Installation and User Manual
Manuel d’installation et d’utilisation
Manual de instalación y del usuario
HRC2731AC
Part # 0570000773 REV A
Page 2

Page 3

TABLE OF CONTENTS
REFRIGERATOR SAFETY ..................................................................................... 2
PARTS AND FEATURES ....................................................................................... 5
INSTALLATION REQUIREMENTS .........................................................................6
Location Requirements .................................................................................................6
Electrical Requirements ................................................................................................7
REFRIGERATOR INSTALLATION .......................................................................... 8
Step 1 - Unpack Refrigerator ........................................................................................8
Step 2 - Door Reversing ................................................................................................ 9
Step 3 - Align Door ......................................................................................................10
Step 4 - Level Refrigerator .......................................................................................... 11
Step 5 - Complete the Installation .............................................................................11
REFRIGERATOR USE .......................................................................................... 12
Control .........................................................................................................................12
Refrigerator Compartment ......................................................................................... 13
Freezer Compartment.................................................................................................13
REFRIGERATOR CARE ....................................................................................... 14
Cleaning .......................................................................................................................14
Defrosting and Draining ..............................................................................................15
Vacation and Moving ................................................................................................... 16
Reinstalling/Using Refrigerator Again ........................................................................17
TROUBLESHOOTING ........................................................................................ 18
LIMITED WARRANTY ........................................................................................20
RECORD KEEPING
Thank you for purchasing this Haier
product. This user manual will help you
get the best performance from your
new refrigerator.
For future reference, record the model
number, serial number, and the date
of purchase. The model/serial number
plate is located on a label inside the
refrigerator.
Staple your proof of purchase to this
manual to aid in obtaining warranty
service if needed.
___________________________________
Model number
___________________________________
Serial number
___________________________________
Date of purchase
1
Page 4
REFRIGERATOR SAFETY
Your safety and the safety of others are very important.
We have provided many important safety messages in this manual and
on your appliance. Always read and obey all safety messages.
This is the safety alert symbol.
This symbol alerts you to potential hazards that can
kill or hurt you and others. All safety messages will
follow the safety alert symbol and either the word
“DANGER,” “WARNING” or “CAUTION.”
These words mean:
An imminently hazardous situation. You
DANGER
WARNING
CAUTION
All safety messages will tell you what the potential hazard is, tell you
how to reduce the chance of injury, and tell you what can happen if the
instructions are not followed.
could be killed or seriously injured if you
don’t immediately follow instructions.
A potentially hazardous situation
which, if not avoided, could result in
death or serious bodily injury.
A potentially hazardous situation
which, if not avoided, may result in
moderate or minor injury.
2
Page 5

IMPORTANT SAFETY
INSTRUCTIONS
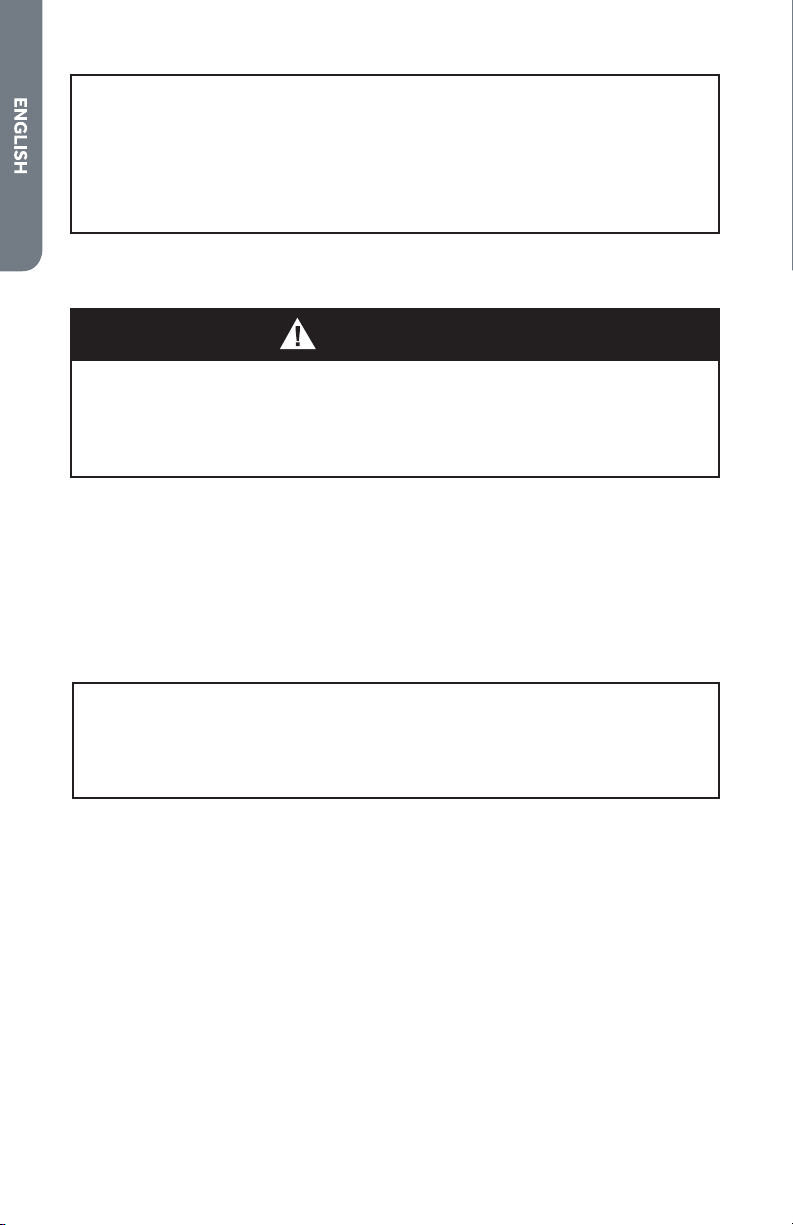
WARNING: To reduce the risk of re, electrical shock, injury to persons,
or damage when using the refrigerator, follow basic precautions,
including the following:
Use this appliance only for
•
its intended purpose as
described in this user manual.
This refrigerator must
•
be properly installed
in accordance with the
installation instructions
before it is used. See
grounding instructions in the
installation section.
Flammable refrigerant used.
•
Do not use mechanical
devices to defrost freezer.
Do not puncture refrigerant
tubing.
Flammable refrigerant used.
•
To be repaired only by trained
service personnel. Do not
puncture refrigerant tubing.
Flammable refrigerant
•
used. Dispose of properly in
accordance with federal or
local regulations.
Flammable refrigerant used.
•
Follow handling instructions
carefully. Risk of re or
explosion due to puncture of
refrigerant tubing.
Plug into a grounded 3 prong
•
outlet.
Do not remove ground prong.
•
Do not use an adapter.
•
Do not use an extension cord.
•
Do not repair or replace any
•
part of the appliance unless
specically recommended in
the manual. All other servicing
should be referred to a
qualied technician.
Disconnect power before
•
servicing.
Replace all parts and panels
•
before operating.
Use nonammable cleaner.
•
Keep ammable materials and
•
vapors, such as gasoline, away
from refrigerator.
Cabinet edges along stamp/
•
cutout areas may be sharp.
Avoid placing hands, ngers
or other appendages near
these areas.
This refrigerator should
•
not be recessed or built-in
an enclosed cabinet. It is
designed for freestanding
installation only.
Before discarding or removing
•
from service, remove the
door. This will reduce the
possibility of danger to
children.
READ AND SAVE THESE
INSTRUCTIONS
3
Page 6
State of California Proposition 65 Warnings:
WARNING
WARNING: This product contains one or more chemicals known to the
State of California to cause cancer.
WARNING: This product contains one or more chemicals known to the
State of California to cause birth defects or other reproductive harm.
PROPER DISPOSAL OF YOUR OLD REFRIGERATED APPLIANCE
Suffocation Hazard
Remove doors or lid from your old freezer or refrigerator.
Failure to do so can result in death or brain damage.
IMPORTANT: Child entrapment and suocation are not problems of the past. A
junked or abandoned freezers or refrigerators are still dangerous – even if it will sit
for “just a few days.” If you are getting rid of your old refrigerator or freezer, please
follow these instructions to help prevent accidents.
Before You Throw Away Your Old Freezer or Refrigerator:
Remove the doors or lid.
•
Leave any shelves in place so that children may not easily climb inside.
•
Important information to know about disposal of refrigerants:
Dispose of freezer in accordance with Federal and Local regulations.
Refrigerants must be evacuated by a licensed, EPA certied refrigerant
technician in accordance with established procedures.
4
Page 7
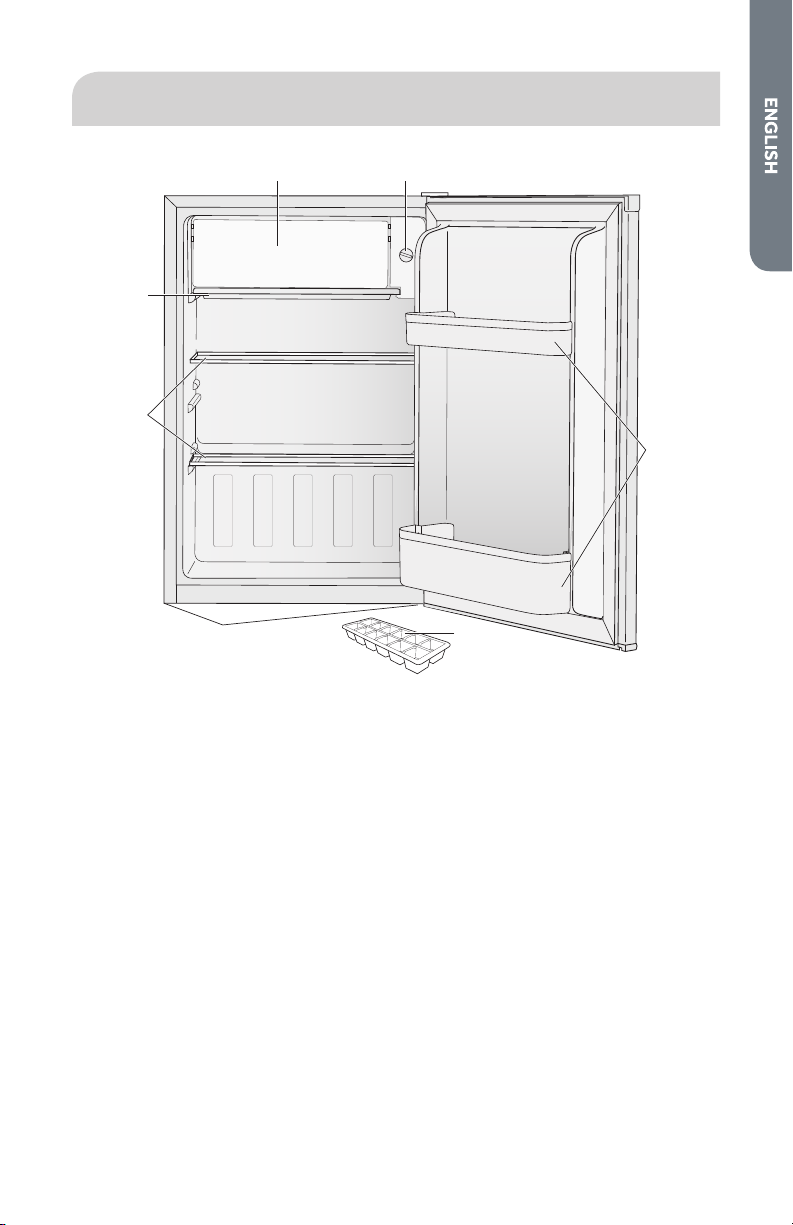
PARTS AND FEATURES
e
c
b
a
g
a Full-width Glass Shelves (2)
b Drip Tray
c Freezer Compartment
d Adjustable Temperature Control
d
f
e Full-width Door Storage Bins (2)
f Ice Cube Tray
g Leveling Legs (2)
5
Page 8

INSTALLATION REQUIREMENTS
WARNING
LOCATION REQUIREMENTS
Explosion and Fire Hazard
Keep flammable materials and vapors, such as gasoline, away from
appliance.
Failure to do so can result in death, explosion or fire.
IMPORTANT: This appliance is designed for freestanding installation only. It should
not be recessed or built-in an enclosed cabinet. To ensure your refrigerator works
at optimum eciency, you should install it in a location where there is proper air
circulation, and electrical connections.
Recommended Clearances:
4"
(10.2 cm)
4"
(10.2 cm)
Your refrigerator is designed for use in a location where the temperature ranges
•
from a minimum of 55°F (13°C) to a maximum of 110°F (43°C).
It is recommended that you do not install the refrigerator in direct sunlight or
•
near a heat source e.g. radiators, baseboard heaters, cooking appliances etc.
Place the refrigerator on a oor strong enough to support it fully loaded.
•
6
4"
(10.2 cm)
Page 9

ELECTRICAL REQUIREMENTS
WARNING
Electrical Shock Hazard
Plug into a grounded 3 prong outlet.
Do not remove the ground prong from the power cord plug.
Do not use an adapter.
Do not use an extension cord.
Failure to do so can result in death, fire or electrical shock.
Before you move your refrigerator to a location, it is important to make sure you
have the proper electrical connection.
Recommended Grounding Method
A 115 Volt, 60 Hz., AC only, 15-amp fused, grounded electrical supply is required. It
is recommended that a separate circuit serving only your refrigerator be provided.
Use an outlet that cannot be turned o by a switch. Do not use an extension cord.
7
Page 10

REFRIGERATOR INSTALLATION
WARNING
STEP 1 - UNPACK REFRIGERATOR
Fire or Explosion Hazard
Do not puncture refrigerant tubing.
Follow handling instructions carefully.
Flammable refrigerant used.
Failure to do so can result in death, explosion or fire.
IMPORTANT: Handle with care when moving to avoid either damaging the
refrigerant tubing or increasing the risk of a leak.
IMPORTANT: When moving, never tilt the refrigerator more than a 45° angle. This
could damage the compressor and the sealed system. If the refrigerator has been
placed in a horizontal position for any period of time, wait 24 hours before plugging
in the refrigerator to allow the refrigerant to settle.
1. Remove and dispose of/recycle all packing materials. This includes the foam
base and all adhesive tape. Remove all protective packaging covering the
product.
2. Clean the exterior surface with a soft cloth.
3. Remove user manual and other printed material before turning on the
refrigerator.
4. Clean the inside of your refrigerator before using it. See the cleaning instructions
in “Refrigerator Care.”
Important information to know about glass shelves and covers:
Do not clean glass shelves or covers with warm water when they are cold.
Shelves and covers may break if exposed to sudden temperature changes or
impact, such as bumping. Tempered glass is designed to shatter into many
small, pebble-size pieces. This is normal. Glass shelves and covers are heavy.
Use both hands when removing them to avoid dropping.
8
Page 11

STEP 2 - DOOR REVERSING
f
(OPTIONAL)
If you want the refrigerator door to open from the opposite side, you can reverse the
door swing.
a
b
c
d
e
a Hole Plugs
b Cover
c Top Hinge Screws
1. Remove any loose items in the refrigerator, and then gently lay the refrigerator
on its back.
2. Using a at-blade screwdriver, gently insert the blade under the top hinge cover
and pry up to remove.
3. Using a Phillips-head screwdriver, remove the three screws from the top hinge.
d Top Hinge
e Bottom Hinge
f Bottom Hinge Screws
a
a Top Hinge Screws
b Top Hinge
b
4. Remove top hinge, and then lift the door o of the bottom hinge.
5. Remove the hole plugs from the cabinet top, move them to the opposite side,
and then insert the plugs into holes created by removing the hinge screws.
6. Remove the two front leveling legs.
7. Remove the two screws, and the hinge pin that are attaching the hinge bracket
to the bottom of the refrigerator cabinet.
9
Page 12

b
a Bottom Hinge Screws
b Bottom Hinge
a
8. Remove the bottom hinge bracket, turn the bracket upside down, and insert the
hinge pin through the top of the bracket.
b
a Bottom Hinge Screws
a
9. Align the bottom hinge bracket with the hinge holes on the opposite side of the
cabinet bottom, and fasten with the screws removed in Step 7.
10. Align the hole in the bottom edge of the door with the pin in the bottom hinge,
and then lower the door onto the pin. Push down gently until the door is rmly
seated on the bottom hinge.
11. Re-install both leveling legs.
12. Align the top hinge bracket with the hinge holes, insert screws and partially
tighten. Make sure that door and cabinet are properly aligned and then tighten
the top hinge screws completely.
13. Replace the top hinge cover by aligning the back of the cover with the back of
the hinge. Press down rmly on the front of the cover until it snaps in place.
b Bottom Hinge
STEP 3 - ALIGN DOOR
(IF NECESSARY)
1. Using a at-blade screwdriver, gently insert the blade under the top hinge cover
and pry up to remove.
2. Using a Phillips-head screwdriver, loosen the three top hinge screws.
10
Page 13

3. Adjust the door or put a spacer between the hinge and cabinet, and then tighten
the screws.
4. Replace the top hinge cover by aligning the back of the cover with the back of the
hinge. Press down rmly on the front of the hinge cover until it snaps in place.
STEP 4 - LEVEL REFRIGERATOR
Your refrigerator has two leveling legs located in the front, bottom corners. After
placing the refrigerator in its nal position, level the refrigerator.
Adjust the Leveling Legs:
To Raise – Turn the leveling legs to the left.
To Lower – Turn the leveling legs to the right.
NOTE: The refrigerator door will close easier when leveling legs are extended.
STEP 5 - COMPLETE THE INSTALLATION
WARNING
Electrical Shock Hazard
Plug into a grounded 3 prong outlet.
Do not remove the ground prong from the power cord plug.
Do not use an adapter.
Do not use an extension cord.
Failure to do so can result in death, fire or electrical shock.
1. Plug into a grounded 3 prong outlet.
11
Page 14

REFRIGERATOR USE
1
4
2
3
1
4
2
3
CONTROL
The control, located at the top right of the interior cabinet, is an adjustable dial with
settings ranging from Least Cold (1) to Coldest (5), and “0”.
NOTE: Turning the control knob to O does not disconnect the refrigerator from the
power supply.
0
5
1. Turn the temperature control dial to the recommended setting (3).
0
5
2. Allow the refrigerator to cool for several hours before adding food.
ADJUSTING THE TEMPERATURE
The recommended setting (3) is designed to maintain the temperature under
normal operating conditions.
If you need to adjust the temperature, adjust the control dial to one of the adjacent
settings (2 or 4).
NOTE: Except when starting the refrigerator, do not adjust the control more than
one setting at a time. Wait 24 hours between adjustments for the temperature to
stabilize.
12
Page 15

REFRIGERATOR COMPARTMENT
Important information to know about glass shelves and covers:
Do not clean glass shelves or covers with warm water when they are cold.
Shelves and covers may break if exposed to sudden temperature changes or
impact, such as bumping. Tempered glass is designed to shatter into many
small, pebble-size pieces. This is normal. Glass shelves and covers are heavy.
Use both hands when removing them to avoid dropping.
SHELVES
To Remove or Replace a Shelf:
To Remove - Tilt the front of the shelf upward, and then slowly slide it forward.
•
To Replace - Align the shelf with the supports and gently slide the shelf toward
•
the rear.
FREEZER COMPARTMENT
The feezer compartment is designed for making ice cubes and for short-term food
storage (a few days at most).
IMPORTANT: This compartment is not cold enough to store frozen foods safely for
more than 5 days.
ICE CUBE TRAY
If ice cube tray freezes to the bottom of the compartment, pour a little warm
•
water around it to loosen it.
NOTE: Do not use boiling water, which can damage plastic parts, or sharp metal
objects such as a knife or screwdriver, which can damage the cooling system
tubing.
Wash the ice cube tray in lukewarm water only. Do not wash in the dishwasher.
•
13
Page 16

REFRIGERATOR CARE
WARNING
CLEANING
WARNING
Explosion Hazard
Use nonflammable cleaner.
Failure to do so can result in death, explosion or fire.
IMPORTANT: Do not use harsh chemicals, ammonia, chlorine bleach, concentrated
detergent, solvents, abrasives or metal scouring pads to clean your refrigerator
inside or out. They can damage and/or discolor the refrigerator nish.
Electrical Shock Hazard
Unplug your appliance or disconnect power before cleaning.
Failure to do so can result in death, electric shock or personal injury.
1. Unplug refrigerator or disconnect power.
2. Before using cleaning products, always read and follow manufacturer’s
instructions and warnings to avoid personal injury or product damage.
3. Wash interior surfaces, accessories, and outer frame with cold water and a little
baking soda.
4. Dry thoroughly with a soft cloth.
5. Plug in or reconnect power.
14
Page 17

DOOR GASKETS
DANGER
Gaskets must be kept clean and pliable to assure a proper seal.
Clean door gaskets every 3 months with solution of baking soda and warm
•
water.
Petroleum jelly applied lightly on the hinge side of gaskets will keep the gasket
•
pliable and assure a good seal.
DEFROSTING AND DRAINING
Fire or Explosion Hazard
Flammable refrigerant used.
Do not use mechanical devices to defrost freezer.
Do not puncture refrigerant tubing.
Failure to do so can result in death, explosion or fire.
For most ecient operation and minimum energy consumption, defrost whenever
the frost becomes ” (3.2 mm) thick.
IMPORTANT:
Do not use mechanical devices to defrost freezer.
•
Do not use boiling water as it may damage the freezer.
•
1. Remove food and ice cube tray from the freezer, and place the drip tray under
the compartment.
2. Turn the temperature control to “0” and unplug the unit.
NOTE: Defrosting usually takes a few hours. To defrost faster keep the door
open and place a bowl of warm water in the refrigerator.
3. When defrosting is complete, empty water from the drip tray, and then wash the
drip tray in warm water and dry it thoroughly.
4. Wipe the interior of the freezer compartment with a soft cloth.
15
Page 18

WARNING
Electrical Shock Hazard
WARNING
Plug into a grounded 3 prong outlet.
Do not remove the ground prong from the power cord plug.
Do not use an adapter.
Do not use an extension cord.
Failure to do so can result in death, fire or electrical shock.
5. Plug into a grounded 3 prong outlet.
6. Reset the temperature control to your preferred setting.
7. Return the food into the refrigerator.
VACATION AND MOVING
Fire or Explosion Hazard
Do not puncture refrigerant tubing.
Follow handling instructions carefully.
Flammable refrigerant used.
Failure to do so can result in death, explosion or fire.
IMPORTANT:
Handle with care when moving to avoid either damaging the refrigerant tubing
•
or increasing the risk of a leak.
When moving, never tilt the refrigerator more than a 45° angle. This could
•
damage the compressor and the sealed system.
16
Page 19

For long vacations or absences:
WARNING
Remove food from refrigerator.
•
Turn the temperature control to “0”.
•
Clean the door gaskets. See “Cleaning.”
•
Prop open the doors to allow air to circulate inside.
•
REINSTALLING/USING REFRIGERATOR AGAIN
If the refrigerator has been placed in a horizontal or tilted position for any period of
time wait 24 hours before plugging it in to allow the refrigerant to settle.
1. Clean refrigerator. See “Cleaning.“
2. Place refrigerator in desired location and level. See “Installation Instructions.”
Electrical Shock Hazard
Plug into a grounded 3 prong outlet.
Do not remove the ground prong from the power cord plug.
Do not use an adapter.
Do not use an extension cord.
Failure to do so can result in death, fire or electrical shock.
3. Plug into grounded 3 prong outlet.
17
Page 20

TROUBLESHOOTING
First try the solutions suggested here to possibly avoid the cost of a service call.
PROBLEM POSSIBLE CAUSE(S) SOLUTION
Refrigerator does
not run
Compressor runs
too frequently
Door does not
close
Food temperature
is too warm
The refrigerator is
unplugged.
The circuit breaker is
tripped or turned o /
Fuse is blown.
The temperature control
is in the “0” position.
The compressor has
cycled o.
The temperature is hot
and/or humid.
The door is ajar. Completely close the door.
The door gasket is not
sealing properly.
Frequent or prolonged
door openings.
The door is blocked
open.
Refrigerator is not level
or door is not aligned.
The door is blocked
open.
The door is opened
frequently.
A large load of food was
recently added.
The door is not sealing
properly.
The control is not
set to a cold enough
temperature.
Plug refrigerator into a grounded
3prong outlet.
Reset / Turn on circuit breaker or
replace fuse
Turn the temperature control to
a setting between 1 and 5.
Wait 30 to 40 minutes to see
whether the compressor will
start.
This may be normal to maintain
constant temperature during
high temperature and humid
days.
Clean the door gasket. See
“Cleaning.”
Limit door openings to maintain
the internal temperature.
Rearrange or remove items
that are blocking the door from
closing completely.
Level refrigerator or align the
door.
Rearrange or remove items
that are blocking the door from
closing completely.
Limit door openings.
Allow time for recently added
warm food to cool.
Clean door gasket. See
“Cleaning.”
Adjust the temperature control
to a colder setting.
18
Page 21

PROBLEM POSSIBLE CAUSE(S) SOLUTION
Food temperature
is too cold.
Refrigerator has
an odor
Gurgling sound
Clicking
Popping or
Cracking sound
when compressor
comes on
The control is set to a
too cold setting.
The refrigerator needs
cleaning.
Food is improperly
wrapped or sealed and is
giving o odor.
Refrigerant circulating
through the cooling coils.
The temperature control
cycling on and o.
The refrigerator is not
level.
The refrigerator is
touching a wall.
Adjust the temperature control
to a less cold setting.
Clean the refrigerator. See
“Cleaning.”
Wrap and seal food tightly before
storing in the refrigerator.
This sound is normal.
This sound is normal.
Level the refrigerator. See
“Leveling.” If the oor is uneven,
you may need to place metal or
wood shims under part of the
refrigerator.
Move the refrigerator away
from the wall and re-level, if
necessary.
FOR MORE HELP, VISIT HAIERAMERICA.COM OR CALL THE
CONSUMER HELP LINE AT 1-877-337-3639.
19
Page 22

LIMITED WARRANTY
CARRY-IN SERVICE
FULL ONE YEAR WARRANTY
12 Months on Parts and Labor
(Carry-In only)
5 Years on Sealed System
(Carry-In only)
For 12 months from the date of original
retail purchase, Haier will repair or replace
any part free of charge including labor
that fails due to a defect in materials or
workmanship.
Haier may replace or repair at their sole
discretion any part, sub system including
the entire product.
LIMITED WARRANTY
NOTE: This warranty commences on
the date the item was purchased, and
the original purchase receipt must be
presented to the authorized service
representative before warranty repairs are
rendered.
Exceptions: Commercial Use Warranty
90 days labor from date of original purchase
90 days parts from date of original
purchase
No other warranty applies.
FOR CARRY-IN WARRANTY
SERVICE
All service must be performed by a Haier
authorized service center. For the name
and telephone number of the nearest
authorized service center, please call
1-877-337-3639.
Before calling please have available the
following information:
Model number and serial number of your
appliance. The name and address of the
dealer you purchased the unit from and
the date of purchase.
A clear description of the problem.
A proof of purchase (sales receipt).
This warranty covers carry-in appliance
services within the contiguous United
States and Canada and where available in
Alaska, Hawaii and Puerto Rico.
20
What is not covered by this warranty:
Replacement or repair of household fuses,
circuit breakers, wiring or plumbing.
A product whose original serial number
has been removed or altered.
Any service charges not specically
identied as normal such as normal service
area or hours.
Damage incurred in shipping.
Damage caused by improper installation
or maintenance.
Damage from misuse, abuse accident, re,
ood, or acts of nature.
Damage from service other than an
authorized Haier dealer or service center.
Damage from incorrect electrical current,
voltage or supply.
Damage resulting from any product
modication, alteration or adjustment not
authorized by Haier.
Adjustment of consumer operated
controls as identied in the owner’s
manual.
All attachments, accessories and
disposable parts.
Labor, service transportation, and shipping
charges for the removal and replacement
of defective parts beyond the initial
12-month period.
Damage from other than normal
household use.
Any transportation and shipping charges.
THIS LIMITED WARRANTY IS GIVEN
IN LIEU OF ALL OTHER WARRANTIES,
EXPRESS ED OR IMPLIED, INCLUDING BUT
NOT LIMITED TO, THE WARRANTIES OF
MERCHANTABILITY AND FITNESS FOR A
PARTICULAR PURPOSE
The remedy provided in this warranty is
exclusive and is granted in lieu of all other
remedies.
This warranty does not cover incidental
or consequential damages, so the above
limitations may not apply to you. Some
states do not allow limitations on how long
an implied warranty lasts, so the above
limitations may not apply to you.
This warranty gives you specic legal
rights, and you may have other rights,
which vary from state to state.
Haier America
Wayne, NJ 07470
 Loading...