

Page 1
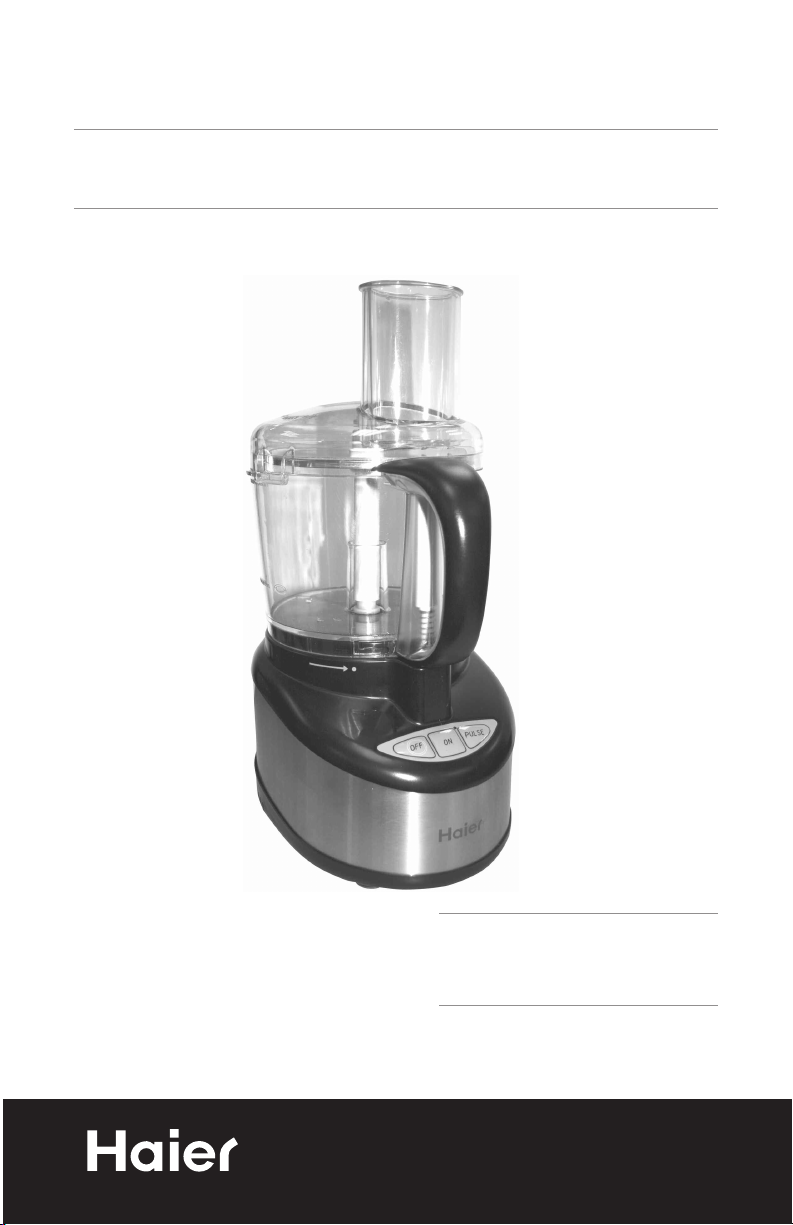
Food Processor
Procesador de Alimentos
Robot de Cuisine
User Manual
HFP400SS
Guide de l’Utilisateur
HFP400SS
Manual del Usuario Modelo
HFP400SS
Quality •Innovation •Style
Page 2

English
IMPORTANT SAFEGUARDS
When using electrical appliances, basic safety precautions
should always be followed, including the following:
1. Read all instructions carefully.
2. To protect against risk of electric shock, do not immerse cord, plug
or any parts of the food processor in water or other liquids.
3. Close supervision is necessary when using this appliance near
children. This appliance is not suitable for use by children.
4. Never leave an appliance unattended while in use.
5. Do not place an appliance on or near a hot gas flame, electric
element, or on a heated oven. Do not place on top of any other
appliance.
6. Do not let the power cord of an appliance hang over the edge of a
table or countertop or touch any hot surface.
7. Do not operate any electrical appliance with a damaged cord or
after the appliance has been dropped or damaged in any manner.
If damage is suspected, return the appliance to the nearest authorized service center for examination, repair or electrical or mechanical adjustment.
8. Unplug from power outlet when not in use. Before putting on or
taking off attachments, and before cleaning.
9. The use of accessory attachments no recommended by the appliance
manufacturer may cause fire, electric shock or injury.
10. Keep hands and utensils away from moving blades or discs while
processing food to reduce risk of severe injury to person or damaged
to food processor. A scraper may be used but must be used
only when the food processor is not running.
11. Blades are sharp. Handle carefully.
12. To reduce risk of injury, never place cutting blade or discs on base
without first putting bowl properly in place.
1
Page 3

English
13. Always operate food processor with cover in place. Be certain cover
is securely locked in place before operating food processor. Do not
attempt to defeat cover interlock mechanism.
14. Avoid contacting moving parts at all times.
15. Never feed food by hand. Always use the food pusher.
16. Do not use outdoors.
17. Do not use appliance for other than its intended use.
SAVE THESE INSTRUCTIONS
HOUSEHOLD USE ONLY
Staple your receipt to your manual.
You will need it to obtain warranty service.
2
Page 4

English
POLARIZED PLUG
This appliance has a polarized plug- one blade is wider than the other. As a
safety feature, this plug will fit into a polarized outlet only one way. If the plug
does not fit fully into the outlet, reverse it and try again. If it still does not fit,
contact an electrician Do not attempt to defeat this safety feature.
POWER SUPPLY CORD
A short power-supply cored is provided to reduce the hazards resulting from
entanglement or tripping on a longer cord. An extension cord may be used with
care; however, be sure the marked electrical rating is at least as great as the
electrical rating of this appliance. The extension cord should be positioned such
that it does not drape over the counter or table top where it can be pulled on by
children or tripped over. The electrical rating of this appliance is listed on the
bottom panel of the unit.
BOTTOM COVER
To reduce the risk of fire or electric shock, do not attempt to remove the bottom
cover. There are no user serviceable parts inside. Repair should be done only by
authorized service personnel.
NOTE: If the power supply cord is damaged, it must be replaced by the manu-
facturer or its service agent or a similarly qualified person in order to
avoid a hazard.
BEFORE FIRST USE
• When unpacking the product and removing packing material, handle the
Chopping Blade and Slice/Shred Disc carefully; they are very sharp.
• Wash all parts except the Base in hot, soapy water. Rinse and dry them. These
parts can also be placed in the dishwasher. Be sure to read this Use & Care
Book, paying special attention to the sections on “Using Your Food Processor”
and “Care and Cleaning” to learn the correct methods for taking the unit
apart and cleaning.
3
Page 5

Table Of Contents
PAGE
Important Safeguards ....................................................................1
English
Before First Use
Parts and Features
Using Your Food Processor
Note About Usage ..............................................................................6
Operating the Food Processor ............................................................6
How to Slice or Shred ..........................................................................6
How to Chop ......................................................................................7
How to Use Dough Blade ....................................................................8
Bread Making Tips for the Dough Blade ..............................................8
Food Processing Tips: Liquids ..............................................................8
Clean and Care................................................................................9
Chopping Guide ............................................................................10
Shredding Guide ..........................................................................12
Slicing Guide..................................................................................12
Limited Warranty ..........................................................................14
..............................................................................3
..........................................................................5
............................................................6
4
Page 6

English
Parts And Features
6
1
7
5
8
9
2
3
4
10
1. Slicing Disc
Shredding Disc
2.
Stainless Steel Multi-Purpose
3.
Blade
Dough Blade
4.
5. Disc Stem
5
6. Food Pusher
orking Bowl Cover and F
W
7.
Chute
8. 11 Cup (2400 ml) Working Bowl
Heavy Duty P
9.
10. Spatula
ower Base
ood
Page 7

English
Using Your Food Processor
NOTE ABOUT USAGE: Do not attempt to chop ice in this food
processor; it will damage the Bowl and dull the Chopping Blade. This unit will
not whip cream, beat egg whites to a desirable volume, grind coffee beams or
spices with a high oil content, or slice or shred hard-cooked eggs, marshmallows, or soft cheeses.
IMPORTANT: For your protection, this unit has an Interlock System so the
processor will not operate unless the Bowl is locked onto the Base and the Cover
is correctly locked onto the Bowl. Be sure the Bowl Handle is turned fully onto the
Base so that the Handle lines up over the Signal Light. Do not attempt to operate
the unit without the Cover correctly in place. Be sure the is on a flat, dry, clean
surface before you begin processing.
Operating the Food Processor
How to Slice or shred
1. Place the Bowl over the Center Post in the base
with the Handle on the left. Turn the bowl right
until it drops down into place. Snap the bowl in
so that the Handle lines up straight over the
Signal Light; be sure it locks into place (A).
2. Slide the Disc Stem onto the Center Post in the
Bowl, then carefully grasp the Slice/Shred Disc
(use caution as disc is sharp) with the desired
side (Slice or Shred) up and push it down onto
the disc Stem.
3. Place the Cover onto the Bowl so that the food
Chute is to the right of the bowl handle. Twist the
Food Chute/Cover toward LOCK until you hear it
click into place (B).
4. Plug the cord into an electrical outlet. Use the
food Guide to help you prepare food for
slice/shred processing. Fill the Food Chute with
food and position the Pusher over the food.
5. Press down lightly but firmly on the Food Pusher while pressing Pulse
(or press ON for continuous processing).
NOTE: Let the Processor do the work. Heavy pressure will not speed
operation. Do not use the P
than 3 minutes at a time.
rocessor continuously for more
A.
.
B
6
Page 8

English
6. After processing food, release the Pulse, or if you were using continuous ON, press Pulse/OFF. Allow the Disc to stop rotating. Twist the
Food Chute/Cover toward UNLOCK to remove the Cover. Remove
the plug from the wall outlet.
7. Grasp the Disc and lift out, Carefully pull out the Disc Stem, unlock
the Bowl by turning the Handle to the left and remove bowl.
How to Chop
The Chopping Blade speeds up many everyday tasks and is designed to
chop, crumb, grind, mince and mix quickly.
1. Place the Bowl over the Center Post in the
Base with the Handle on the left. Turn the Bowl
right until it drops down into place. Snap the
Bowl in so that the Handle lines up straight
over the Signal Light; be sure it locks into
place (A).
2. Grasp the Chopping Blade by its center shaft
and slide it down onto the Center Post. (B)
3. Place the Cover onto the Bowl so that the
Food Chute is to the right of the Bowl Handle.
Twist the Food Chute/Cover toward LOCK until
you hear it click into place (C).
4. Plug the cord into an electrical outlet. Use the
Food Guide to help you prepare food for chopping/mincing/mixing and crumbing.
5. Press Pulse (or ON for continuous operation).
When pulsing, hold the Pulse position for about
2-3 seconds: check results; repeat for desired
consistency. It is better to use several short
pulses rather than a single long one unless
mixing ingredients that require longer processing times.
6. After processing food, release the Pulse, or if
you were using continuous ON, press
Pulse/OFF. Allow the Disc to stop rotating.
Twist the Food Chute/Cover toward UNLOCK
to remove the Cover. Remove the plug from
the wall outlet.
Grasp the Chopping Blade by its shaft and
7.
remove. Unlock the Bowl by turning the han
dle to the left, and lift the bowl off. Empty the
processed food.
A.
B.
C.
7
Page 9

How to Use Dough Blade
IMPORTANT: Follow the instructions under “How to Chop” to install
and remove the Dough Blade.
1. The Dough Blade can be used to make yeast breads, pizza dough,
or yeast rolls. Use the 2 dough recipes in this manual as a guide
when making bread or pizza dough. Be sure to add liquid ingredients slowly as the dough will not form properly if liquid is added too
fast.
2. You may have to stop the unit at times to scrape down the side of the
processing Bowl.
3. Do NOT use the Dough Blade to make piecrust. Use the Chopping
Blade for pie dough (see recipes).
Bread Making Tips for the Dough Blade
1. For best results, use ingredients at room temperature and be sure the
butter is soft.
2. Check the date on the yeast package to be sure it hasn’t expired.
Measure flour accurately by spooning it into a measuring cup
designed for dry ingredients. Level it off with the straight side of a
knife of metal spatula. Do not pack flour by tapping the cup when
measuring.
English
3. Use the amount of liquid and flour in the bread recipe provided as a
guide. You can experiment with other favorite yeast bread recipes.
4. You may use bread flour, if you’d prefer. Breads will be taller.
Food Processing Tips: Liquids
• Hot liquids (not boiling) and hot foods can be processed in the Bowl.
• Be sure to process small amounts of liquids-2 cups or less at a time.
Larger amounts may leak from the Bowl.
8
Page 10

English
Clean and Care
NOTE: Do not attempt to sharpen the cutting edges of the Chopping
Blade or the Reversible Disc. They are permanently sharpened at the
factory and will be ruined by attempted sharpening.
1. Before cleaning, be sure the unit is off and the cord is unplugged.
2. Whenever possible, rinse parts immediately after processing for easy
cleanup.
3. Wipe the Base, Control area, and feet with a damp cloth and dry
thoroughly. Stubborn spots can be removed by rubbing with a damp
cloth and a mild, non-abrasive cleaner. Do not immerse the Base in
liquid.
4. All removable parts can be washed by hand or in a dishwasher, top
rack.
• If washing by hand, wash in hot, soapy water, rinse, and dry
thoroughly. If necessary, use a small nylon bristle brush to thor
oughly clean the Bowl and Food Chute/Cover. This type of brush
will also help prevent cutting yourself on the Chopping Blade and
Slice/Shred Disc.
• If washing in a dishwasher, place removable parts on the top rack
only-not in or near the utensil basket.
5. Do not use abrasive scouring pads or cleansers on any plastic or
metal parts.
6. Do not fill the Bowl with boiling water or place any of the parts in
boiling water. Some foods, such as carrots, may temporarily stain the
Bowl. To remove stains, make a paste of 1 tablespoon baking soda
and two tablespoons warm water. Apply the paste to the stains and
rub with a cloth. Rinse in soapy water and dry.
9
Page 11

Chopping Guide
FOOD AMOUNT COMMENTS
English
BABY FOOD Up to 4 cups Add up to 4 cups cooked vegetables and
BREAD CRUMBS Up to 10 slices Break either fresh or dry bread slices into
COOKIE/CRACKER
CRUMBS
CRANBERRIES MINCED 3 cups Pulse to chop to desired fineness. Can also
EGGS, CHOPPED Up to 12 Peel, dry and halve hardcooked eggs. Add to
GARLIC, MINCED Up to 5 Drop clove(s) down food chute while unit is
Up to 10 cups Use for crumbling graham crackers, choco
meat to Bowl, along with 1/2 cup cooking
lliquid/broth. Process to reach desired
fineness.
quarters. Add to Bowl and process until finely
crumbled.
late or vanilla wafers. Break larger crackers
into quarters. Add to Bowl and process until
fine.
add sugar to make cranberry relish.
Bowl. Pulse to chop, check fineness after 4-5
pulses.
running.
MEAT, CHOPPED
(RAW OR COOKED)
MUSHROOMS
CHOPPED
NUTS, CHOPPED 10 cups Add to Bowl and process to chop.
Up to 2 cups Cut meat into 1”(2.54cm) cubes. Add to
Bowl and pulse to chop.
Up to 20 medium Halve large mushrooms and add to Bowl.
Chop to desired fineness.
10
Page 12

English
FOOD AMOUNT COMMENTS
ONIONS, CHOPPED Up to 3 large Quarter, add to Bowl. Pulse 2 times to
PARMESAN OR
ROMANO CHEESE,
GRATED
PARSLEY, CHOPPED Up to 2 cups Add to Bowl and Pulse to chop to desired
PEPPER, GREEN
CHOPPED
PIE DOUGH Up to 2 9” pie crusts Follow food processor recipe for 1 or 2 stan
SOUPS, PUREED
OR CREAMED
Up to 1-1/2 cups Allow cheese to reach room temperature.
Up to 1 pepper Cut into 1”(2.54cm) pieces. Add to Bowl and
2 cups Add up to 2 cups hot (not boiling) vegetable
coarsely chop. For green onions, cut into
1”(2.51cm) pieces and add up to 3 cups.
Cut into 1”(2.54cm) cubes. Add to Bowl
and process to desired fineness.
fineness, about 10-15 seconds. Process other
herbs in same manner (basil, cilantro, mint).
pulse to chop.
dard size pie crusts. See One-Crust Standard
pie Crust recipe.
soup for pureeing and creaming. Process to
desired smoothness.
SQUASH (BUTTERNUT)
MASHED
STRAWBERRIES,
PUREED
TOMATOES, CHOPPED 4 medium Quarter tomatoes. Add up to 4 and pulse to
Up to 8 cups,
1”(2.54cm) cubes
2 cups Hull and halve large berries. Add to Bowl
Add up to 8 cups cooked, drained squash to
Bowl. Process to puree. Works for pumpkin
and sweet potatoes, also.
and process to chop.
desired fineness.
11
Page 13

Shredding Guide
FOOD COMMENTS
English
CABBAGE Use shredding disc for very fine cabbage or slaw. Cut into
CARROTS Position in chute and shred.
CHEESE, CHEDDAR Cut to fit chute. Cheese must be well chilled.
CHEESE, MOZZARELLA Cut to fit chute. Cheese must be chilled in freezer for 30
POTATOES Position in chute. Cut large potatoes in half or quarters.
ZUCCHINI Cut to fit chute, either lengthwise or horizontally.
pieces to fit into chute. Shred using light pressure. Empty
bowl as cabbage reaches disc.
minutes prior to shredding. Use light pressure.
Slicing Guide
FOOD COMMENTS
APPLE Quarter and stack horizontally in chute. Use firm pressure..
CABBAGE For coarsely shredded results, use slicing side of disc. Cut
into pieces to fit into chute. Empty Bowl as cabbage reaches
disc.
CARROTS Cut into 4”(10.2cm) lengths and pack in chute, alternating
thick and thin ends.
CELERY Remove string. Cut stalks into thirds. Pack chute for best
results.
CUCUMBER Cut to fit chute if necessary.
MUSHROOMS Stack chute with mushrooms on their sides for lengthwise
slices.
12
Page 14

English
FOOD COMMENTS
NUTS For coarsely chopped results, fill chute with nuts and slice.
ONIONS Quarter and fill chute, positioning onions upright for
PEACHES/PEARS Halve or quarter and core. Position upright in chute and
PEPPERS, GREEN Halve and seed. Fit pepper against bottom of chute,
PEPPERONI Cut into 3” (8cm) lengths. Remove inedible casing. Slice 2
POTATOES
STRAWBERRIES Hull. Arrange berries on their sides for lengthwise slices.
coarsely chopped results.
slice using light pressure.
squeezing slightly to fit if necessary. Cut large ones into
quarters or strips, depending on desired results. Slice using
moderate pressure.
pieces at a time using firm pressure.
Peel if desired. Position in chute, cutting large potatoes in
halves or thirds.
13
TOMATOES Use small tomatoes for whole slices, halve if necessary. Use
gentle, but firm pressure.
TURNIPS Peel. Cut turnips to fit chute.
ZUCCHINI Slice off ends. Use small squash for whole slices; halve
larger ones to fit chute.
Page 15

Limited Warranty
Full One Year
This warranty covers all defects in
workmanship or materials for a period
of 12 months from the date of purchase, provided you are able to present a valid proof-of-purchase (the
original receipt)
Exceptions: Commercial or Rental Use
Warranty is 90 days from date of original purchase.
This warranty covers appliances within
the Continental United States, Puerto
Rico and Canada.
What is not covered by this
warranty:
Damage from other than normal use
or improper installation.
Damage from misuse, abuse, accident,
alteration, lack of proper care and
maintenance.
Failure caused by build-up of food
matter or water deposits.
Product, whose rating label has been
removed or altered.
Product serviced by other than authorized service center.
Replacement or repair of household
fuses, circuit breakers or wiring.
Labor, shipping charges and replacement of defective parts beyond the initial 12-month period.
Do not return this product to the store.
If you need assistance with this product, please contact "Haier Customer
Satisfaction Service at 1-877-337-3639
between 9:00 AM and 5:00 PM (EST)
.
Monday to F
riday
English
of purchase. A clear description of the
problem.
Haier will repair or replace any part
free of charge including labor that fails
due to a defect in materials or workmanship, or replace with a comparable model.
THIS LIMITED WARRANTY IS
GIVEN IN LIEU OF ALL OTHER
WARRANTIES, EXPRESSED OR,
INCLUDING THE WARRANTIES OF
MERCHANTABILITY AND FITNESS
FOR A PARTICULAR PURPOSE.
The remedy provided in this warranty is
exclusive and is granted in lieu of all
other remedies.
This warranty does not cover incidental
or consequential damages, so the
abovelimitations may not apply to you.
Some states do not allow limitations on
how long an implied warranty lasts, so
the above limitations may not apply to
you.
This warranty gives you specific legal
rights, and you may have other rights,
which vary, from state to state.
Haier America
New York, NY 10018
Before calling, please have the
following information available:
Model number of your appliance. The
name and address of the store you
purchased the unit from and the date
14
Page 16

IMPORTANT
Do Not Return This Product To The Store
If you have a problem with this product, please contact the "Haier Customer Satisfaction
Center" at 1-877-337-3639.
DATED PROOF OF PURCHASE REQUIRED FOR WARRANTY SERVICE
IMPORTANT
Ne pas Réexpédier ce Produit au Magasin
our tout problème concernant ce produit, veuillez contacter le service des
P
consommateurs ‘Haier Customer Satisfaction Center’
UNE PREUVE D’ACHAT DATEE EST REQUISE POUR BENEFICIER DE LA GARANTIE.
au 1-877-337-3639.
IMPORTANTE
No regrese este producto a la tienda
Si tiene algún problema con este producto, por favor contacte el "Centro de Servicio al
NECESITA UNA PRUEBA DE COMPRA FECHADA PARA EL SERVICIO DE LA GARANTIA
Consumidor de Haier" al 1-877-337-3639 (Válido solo en E.U.A).
HFP00SS
Issued: December-05
115V, 60 Hz
Made in China
Fabriqué en Chine
Hecho en China
Haier America
New York, NY 10018
Printed in China
 Loading...