

Page 1

User Manual
HD80-26A-F
Heat Pump Dryer
HD80-26A-DF
HD80-26A
Page 2

2 | English
TABLE OF CONTENTS
Dear customer ................................................................................................ 3
Scope of delivery ............................................................................................ 3
Intended use ................................................................................................... 3
Safety instructions .........................................................................................4
Unpacking .......................................................................................................6
Installation ......................................................................................................6
Using the dryer rack .......................................................................................7
Front view .......................................................................................................8
Rear view .........................................................................................................9
Control panel ................................................................................................10
Program modes ............................................................................................13
Preparing the dryer ...................................................................................... 14
Preparing the laundry .................................................................................. 14
Loading the dryer .........................................................................................15
Care chart ...................................................................................................... 15
Load reference ..............................................................................................16
Set program & start ...................................................................................... 16
End of dry cycle ............................................................................................ 17
Empty the water tank ................................................................................... 17
........................................................................................ 18
............................................................................18
Heat pump technology ................................................................................. 19
Consumption table ....................................................................................... 19
Cleaning & care ............................................................................................ 20
Error codes ...................................................................................................20
Troubleshooting ...........................................................................................21
Electric circuit diagram ................................................................................ 22
Customer service ......................................................................................... 24
Product fiche
23................................................................................................
Page 3
English | 3
DEAR CUSTOMER
Thank you for your purchase of a Haier
product. Please read the manual and
safety instructions carefully and keep
them for future reference and pass
them on to any future owner.
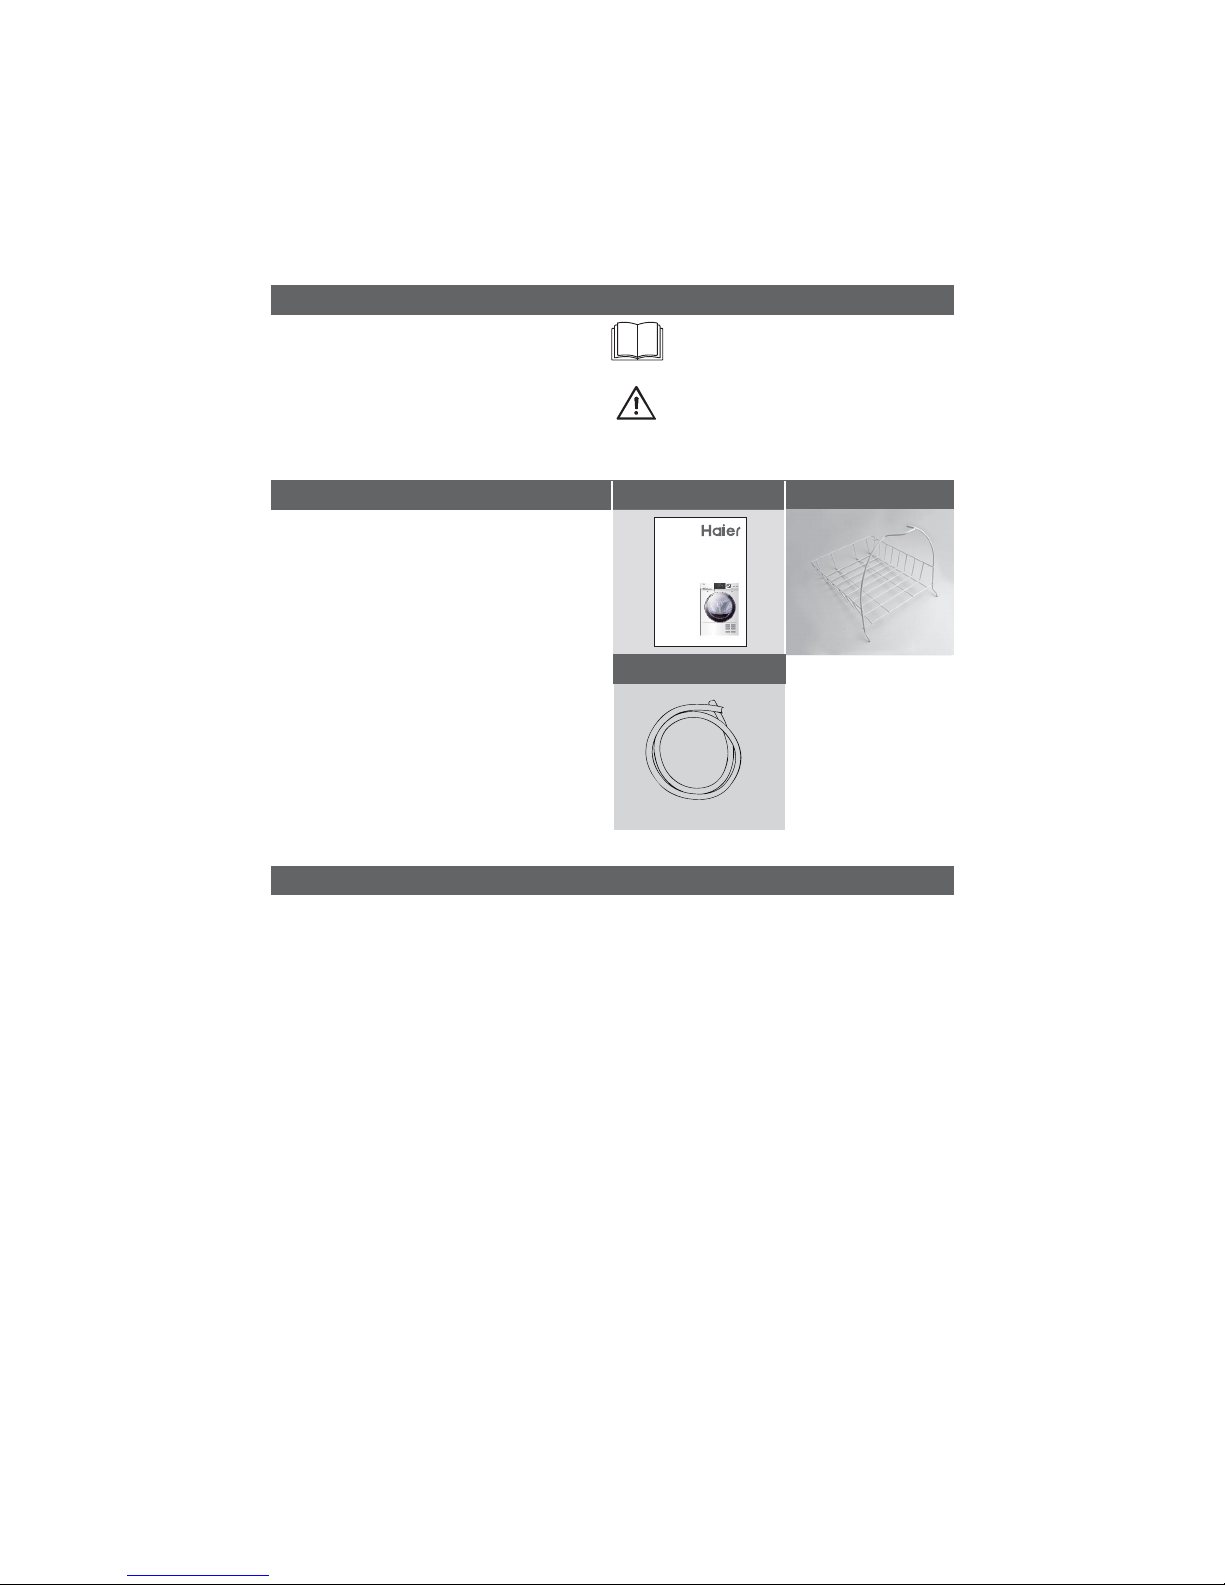
SCOPE OF DELIVERY 1 2
Please check, if the accessories and
literature is in accordance with this list.
1 User manual
2 Rack
INTENDED USE
This heat pump tumble dryer is
designed for household use only. It
should be used to dry items which
have been washed in a water solution
and are marked on the manufacturer's
care label as being suitable for tumble
drying.
It is not intended for commercial or
outdoor use.
Haier cannot be held liable for
damage resulting from incorrect or
improper use or operation.
This tumble dryer conforms to current
safety requirements.
User Manual
HD80-26A-F
Heat Pump Dryer
HD80-26A-DF
HD80-26A
3
3 Drainpipe
Instructions showing this icon
need special attention for safe
handling.
Read the instructions.
Page 4
4 | English
SAFETY INSTRUCTIONS
Children under 3 years of age must be kept away from the tumble dryer unless
they are constantly supervised.
The tumble dryer is not a toy! To prevent the risk of injury, do not allow children
to play with it or near it, or to play with the controls.
Before setting up the tumble dryer, check it for any externally visible damage.
Do not install or use a damaged tumble dryer.
Before connecting the tumble dryer, ensure that the connection data match the
mains electricity supply
The electrical safety of this tumble dryer can only be guaranteed when
correctly earthed.
Do not connect the tumble dryer to the mains electricity supply by an extension
lead.
If the supply cord is damaged, it must be replaced by the manufacturer, its
Faulty components must be replaced by original spare parts.
The tumble dryer must be isolated from the mains supply in the event of a fault
and during cleaning and maintenance.
Do not install the tumble dryer in a room where there is a risk of frost occurring.
The ambient temperature should be between 5 °C and 35 °C.
Do not install the tumble dryer behind a lockable door, a sliding door or a door
with hinges on the opposite side of the tumble dryer door as this limits the full
opening of the tumble dryer door.
Always keep the area around the tumble dryer free of dust and lint. Also make
sure that the area is dry and well ventilated.
The tumble dryer must not be used in a non-stationary location (e.g. a ship).
Do not make any alterations to the tumble dryer, unless authorised to do so by
Haier.
In areas which may be subject to infestation by cockroaches or other vermin,
pay particular attention to keeping the tumble dryer and its surroundings in a
clean condition at all times.
Do not dry unwashed items in the tumble dryer.
Do not load more than Nominal load.
acetone, alcohol, benzine, petrol, kerosene, spot removers, turpentine, waxes,
wax removers or other chemicals should not be dried in the tumble dryer.
If it is unavoidable to dry items that contain vegetable oil, cooking oil, hair care
or cosmetical products, they should be washed using additional detergent and
select a high temperature. If in doubt, wash the items several times.
This appliance can be used by children aged from 8 years and above and
persons with reduced physical, sensory or mental capabilities or lack of
experience and knowledge if they have been given supervision or instruction
concerning use of the appliance in a safe way and understand the hazards
involved. Children shall not play with the appliance. Cleaning and user
maintenance shall not be made by children without supervision.
Page 5

English | 5
Items which contain a large proportion of rubber, foam rubber (latex foam)
or rubber like materials such as shower caps, waterproof textiles, rubberised
articles and items of clothing and pillow
dried in the tumble dryer.
Items which have been cleaned using chemicals such as professional
drycleaning agents, should not be dried in the tumble dryer.
Do not dry damaged items which conta
.
Remove all items such as lighters and matches from pockets.
The end of a dryer cycle runs without heat (cool down cycle) to ensure that the
items do not get damaged and are at a handleable temperature.
Warning: Do not switch the tumble dryer of
Afterwards, the laundry must be hung up or spread out to cool it down.
manufacturer's packaging.
y.
Close the door once the laundry is removed to prevent children, animals and
objects getting into the drum.
Do not sit or lean on the door, as this can cause the tumble dryer to tilt.
Condensed water is not drinking water. It can cause health problems in both
people and animals.
Notice
This appliance contains the fluorinated greenhouse gas HFC-134a
(GWP:1430). This gas is hermetically sealed.
Page 6

6 | English
UNPACKING 1 2
Remove all packaging material including
the polystyrene base. All packaging
material should be recycled.
1 Cut the strips.
2 Lift the cover upwards.
3 Remove the protective parts.
4 Remove the base.
Ensure that any plastic wrappings,
bags, etc are kept out of the reach of
babies and young children. Danger of
suffocation.
3 4
INSTALLATION 1 2
1
Check the dryer does not rock or
wobble.Adjust the four feet to level the
dryer before operation.
2 Make sure the socket meets the
requirements and connect it to an earthed socket outlet.
Do not install in a room which is susceptible to frost. Water may cause damage
once it starts to freeze.
Transport the dryer in a vertical upright position.
There may be residual water in the dryer.
This can leak out if the dryer is at an angle.
TECHNICAL DATA
Power 220 - 240 V~ / 50 Hz
Nominal load (kg)
8
Max. power (W) 800
Fuse (A) min. 10
Ambient temperature (°C) 5 - 35
Dimensions (H x D x W mm) 845 x 650 x 595
Net weight (kg) approx. 50,5
Water protection level IPX4
Warning: Following transportation and
installation, you MUST leave the dryer to
stand for two hours before use.
Fluorinated greenhouse gas
HFC-134a
Volume
0.63kg
GWP
Tonne(s) of equivalent
1430
0.9
Page 7
English | 7
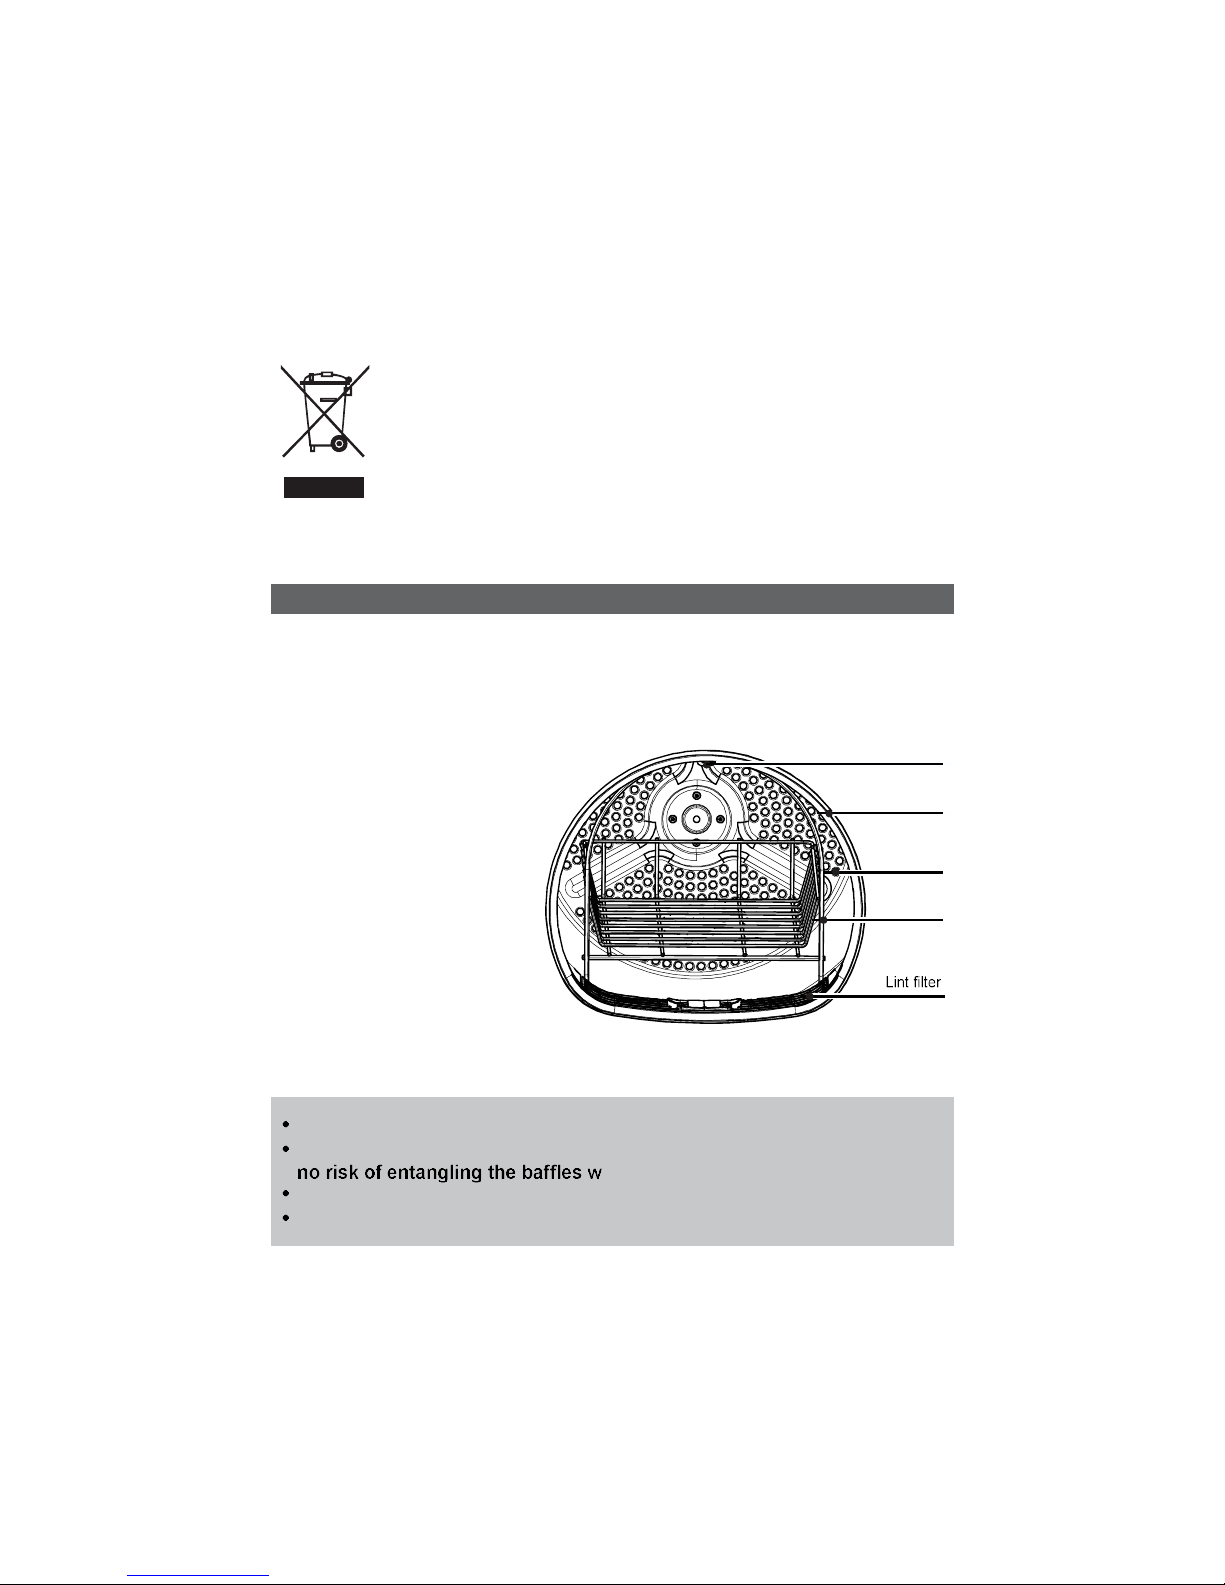
USING THE DRYER RACK
DRYER RACK
The dryer rack is designed for use with items which are not recommended for
tumble drying such as trainers, sneakers, sweaters or delicate lingerie.
TO USE THE DRYER RACK
1. Open the dryer door.
2. Check that the drum is empty.
3. Put the dryer rack into the
drum.
4. Make sure the catches are
inserted in the hole of the
lint filter and locked in the
hook of basket.
PLEASE NOTE
Do not use this dryer rack when there are other clothes in the dryer.
During drying, please make sure the items are placed on the rack with
hile the drum is rotating.
The dryer rack must be used with the “Wool” or “shoe”cycle.
Maximum weight of wet items: 1.5 kg.
Hook of basket
Drum openings
Drum
Dryer rack
Do not dispose of electrical appliances as unsorted municipal
waste, use separate collection facilities.Contact your local
government for information regarding the collection systems
available. If electrical appliances are disposed of in landfills or
dumps, hazardous substances can leak into the groundwater
and get into the food chain, damaging your health and
well-being. When replacing old appliances with new ones, the
retailer is legally obligated to take back your old appliance for
disposals at least free of charge.
The heat exchanger of the dryer contains the greenhouse gas
HFC-134a. This must be disposed of properly.
For further technical information, please check the type plate on the appliance.
Page 8

Timer
+
ECO
emoTimerModeDry LevelSelectionFunc tion
Extra Dry
Wool
Shoe
rebiforciMtropS
Baby
Garment
Towel
Mix
Duvet
Ready to
Store
Iron
Synthetic
Extra Dry
Cotton
Ready to
Iron
Ready to
Store
Ultra Care
Underwear
Ready to
8 | English
FRONT VIEW
The pictures may differ from the appliance you have purchased due to technical
improvements.
1 Water tank
2 Tumble dryer door
3 Service door
4 Control panel
3
1 4
2
Page 9

English | 9
REAR VIEW
5 Power supply cord
6 Back plate
7 Drainage outlet
8 Adjustable feet
Page 10

Extra Dry
Wool
Shoe
Sport Microfiber
Baby
Garment
Towel
Mix
Duvet
Ready to
Store
Ready to
Iron
Synthetic
Extra Dry
Cotton
Ready to
Iron
Ready to
Store
Ultra Care
Underwear
Timer ModeDry LevelSelectionFunction
ECO
emo
| English
CONTROL PANEL
or
when the dryer is powered on, press the
function
for 3 sec. again.
supply i
interrupted, the function will not be
2
4
10
12
13
14
Clean filter
indicators
Water tank must be emptied.
Empty the water tank section
of the manual.
Memory mode is set or you have activated the
memory cycle.
4
The display shows the remaining time, the delay
time and other related information.
The remaining time.
The delay time.
The drying process(drying, cooling
and the end of cycle).
indicator
11
Page 11

English | 11
6 Program knob Select one of the 16 programs using the knob.
The indictor of the respective program lights up.
See
Program Modes
section of the manual for
further information.
7
Start/Pause
button
Press Start/Pause to Start a drying cycle. Press
button again to pause the drying cycle – indicator
8
Power button
Press Power button to switch on/off the tumble
dryer.
9/10
Function and
Selection button
There are 4 kind of functions to select
Note: Not all the funcions can be selected for
different program.
Delay function for delay start, turn the knob to the
right to set time (in 1 intervals up to 19 hours).
The appliance shoule be finished in, afterwards
press to start the delayed operation.
Delicate function for delicate fabrics. It lowers the
temperature and lengthens the drying cycle time
to take better care of the laundry.
Note: This function should be set after you
have finished program selection, otherwise
when you turn the knob, the function will be
delected automatically.
Signal function, you can choose it as you need.
Note: The remaining time is a default value,
this time will be re-calculated depending on
additional program settings and the moisture
content of the laundry.
Function and Selection are a couple of buttons.
They should be selected together. Press the
Function button to select one function you
need-corresponding indicator icon is flashing,
then press Selection button-corresponding icon
lights up. You have finished the function setting.
Use the same method continue to select other
function as you need.
.
Page 12

13 Timer button
Set timer program, the default time is 20 min,
turning the knob to the right to add the time and
left to subtract it. The shortest time is 10 min and
the longest time is 150min.
11 Dry level button
Press the button to set the final moisture content
of the laundry at the end of cycle.
Ready to iron.
12 Mode button
Press the button to set the drying mode after you
have selected one program.
14
M
emo
Press the button for 2 sec to memory the cycle
you want, at the same time the indicator will
light up. The next time, when you want to use the
stored cycle you just only touch the emo button.
The indicator
lights up and the stored cycle is
Note: The laundry can be removed at any time
during the anti-crease phase.
12 | English
Anti-Crease function to lengthen the automatic
anticrease phase at the end of each program by
60 minutes.
activated.
Note: The “ Delay function ” can not be
memoried.
Extra dry.
Ready to wear.
To save enery during a prolonged drying time.
A balance of drying time and enery
consumpution between “ ” and
Cool air.
M
ECO
For drying in a shorter time at a higher level of
energy consumpution.
ECO
“ ”.
Page 13

PROGRAM MODES
PROGRAM
DRYING
DEGREE
RECOMMENDED
LAUNDRY
MAX. LOAD
Extra Dry
Extra dry Heavy cotton 8 kg
Ready to
Store *)
Ready to wear Cotton, coats 8 kg
Ready to Iron
Damp Ordinary cotton 8 kg
Extra Dry
Extra dry Heavy synthetic 4 kg
Ready to Store
Ready to wear Ordinary synthetic 4 kg
Ready to Iron
Damp Ordinary synthetic 4 kg
Sport
Sportswear 2 kg
Towels,sheets
1 kg
Towel ***)
Woollen clothing
4 kg
Baby Garment
Baby clothing 4 kg
Mix
Heavy fabrics, need
further drying
4 kg
*) EN 61121 test program setting.
**) Special program for careful treating of woollen fabrics with warm air, after they
have been worn or stored for long per
becomes soft and cosy.
***)
This program has reversing function specially for big load.
Shoe
Shoes
Duvet
Microfiber
Underwear
Ultra Care
English | 13
Wool **)
Fluff but not dry
1 pair
Optional
Optional
Duvet
Underwear
1 kg
1 kg
2 kg
2 kg
Microfiber fabrics
Chiffon dress
Ready to wear
Optional
Ready to wear
Ready to wear
Page 14

PREPARING THE DRYER 1 2
1 Connect the tumble dryer to a power
socket.
2 Make sure the water tank is empty
and properly installed.
3
and properly installed.
4
clean and properly installed.
3 4
PREPARING THE LAUNDRY 1 2
1 Sort clothes according to fabric (cotton,
synthetics, wool etc.). Only dry lanuary
that has been spun.
2 Empty pockets of all sharp or
lighters and matches. Remove harder
Follow the instructions on the laundry
label and dry only machine-dryable
garments.
– Close zippers and hooks, make sure
the buttons are sewn on tightly and
place small items such as socks, bras
etc. in a wash bag.
– Unfold large pieces of fabric such as
bed sheets, table cloth etc.
14 | English
Page 15

LOADING THE DRYER 1 2
1 Place the laundry evenly in the drum
making sure not to overload the dryer.
2 Switch on the tumble dryer by
pressing the Power button.
Fabric softeners or similar products
should be used as specified in the
manufacturer’s instructions.
CARE CHART
Resistant material Bleachable in cold
water
Do not dry clean
Delicate fabric Do not bleach
Washable
at 95 °C
Iron at 200 °C Hang to dry
Washable
at 60 °C
Iron at 150 °C Dry on clothes
hanger
Washable
at 40 °C
Iron at 100 °C Tumble dry
(normal heat)
Washable
at 30 °C
Do not iron Tumble dry
(reduced heat)
Hand wash Dry cleaning
(any solvent)
Do not tumble dry
Dry clean only Dry cleaning
(pericloride)
Wool seal Dry cleaning
(aviation fuel)
English | 15
Page 16

LOAD REFERENCE
Bed sheet (single) Cotton Approx. 800 g
Blended fabric clothes / Approx. 800 g
Jackets Cotton Approx. 800 g
Jeans / Approx. 800 g
Overalls Cotton Approx. 950 g
Pyjamas / Approx. 200 g
Shirts / Approx. 300 g
Socks Blended fabrics Approx. 50 g
T-Shirts Cotton Approx. 300 g
Underwear Blended fabrics Approx. 70 g
SET PROGRAM & START 1 2
1 Turn the program knob to select the
desired program.
2 Set functions such as Signal, Delay,
Delicate, Anti-Crease, Dry level,
Mode. Afterwards press the
Start/Pause button to start the dry
cycle.
ENVIRONMENTAL TIPS
– Spin the laundry as dry as possible before putting it into the tumble dryer.
– Avoid overloading the tumble dryer.
– Shake the laundry loose before putting it into the tumble dryer.
– Choose a proper drying program. Make sure the laundry is not dried longer
than needed.
16 | English
Page 17

END OF DRY CYCLE 1 2
The tumble dryer stops operation
automatically when a dry cycle is
complete. The display shows END. Open
the tumble dryer door and remove the
laundry. If the laundry is not removed the
anti-crease program starts automatically.
1 Switch off the tumble dryer by pressing
the Power button.
2 Unplug the tumble dryer from the
power socket.
3 Empty the water tank after each dry
cycle.
4
cycle.
5 Clean the condenser filter after each
dry cycle
3 4
5
EMPTY THE WATER TANK 1 2
During operation, steam condenses to
water which is collected in the water
tank. Empty the water tank after each
drying cycle.
1 Pull out the water tank from its
housing.
2 Empty the water tank.
3 Reinstall the water tank to the tumble
dryer.
Note: Do not use the water for any
kind of drinking or food processing.
English | 17
3
Page 18

LINT FILTER CLEANING 1 2
1
2
3
4
can be cleaned under running water.
Let it dry thoroughly before use.
3 4
CONDENSER FILTER CLEANING 1 2
1
2
3
4
5
6
T
use.
3 4
5 6
Clean the condenser filter after each
dry cycle.
18
Note: if the condenser filter is very
dirty, it can be cleaned under running
water. Let it dry thoroughly before
Note: if the lint filter is very dirty, it
Clean the lint filter after each dry
cycle.
Page 19

HEAT PUMP TECHNOLOGY
The condensation dryer with heat exchanger is outstanding in terms of
efficient energy consumption.
These are guide values determined under standard conditions.
The values may differ from those given, depending on overvoltage and
undervoltage, the type of fabric, composition of the laundry to be dried, the
residual moisture in the fabric and the size of the load.
CONSUMPTION TABLE
Program Spin Speed in rpm Energy DRYING TIME
Extra Dry
1000
(approx. 60 %)
1.53 kwh 3:30 h
Ready to Store
1000
(approx. 60 %)
Ready to Iron
1000
(approx. 60 %)
English | 19
1.33 kwh 3:18 h
1.09 kwh 2:36 h
(Residual Moisture)
Page 20

CLEANING & CARE
TUMBLE DRYER
Wipe the outside of the tumble dryer and the control panel with a damp cloth. Do
not use any organic solvent or corrosive agent to avoid damage to the device.
DRUM
After some operation time, fabric care agents or calcium contained in the water
some detergent to remove it. Do not use any organic solvent or corrosive agent
to avoid damage to the device.
EVAPORATOR
a vacuum cleaner. Make sure not to damage the evaporator while cleaning it.
ERROR CODES
CODE CAUSE SOLUTION
F2 Drain pump error. Contact the customer service.
F32,
F33
The condenser thermal
sensor is open-circuited or
short-circuited.
Contact the customer service.
F4 Temperature of the laundry
in the drum does not
change.
Contact the customer service.
E6
E7 Under voltage or over
voltage fault.
Check the voltage of power suply.
Or contact the customer service.
E8
reduce the load,Repower the dryer.
Over load warning.
Lo
Use the dryer when air temperature
is higher than 2
.
Temperature is too low.
The filters is clogged.
Clean both filters.
20 | English
Or contact the customer service.
Check the voltage of power suply or
If the evaporator behind the condenser filter is dirty, it can be cleaned by use of
Page 21

TROUBLESHOOTING
Before contacting the customer service, please check the following
circumstances:
PROBLEM CAUSES SOLUTION
Tumble dryer
fails to operate.
– Poor connection to the
power supply.
– Power failure.
– No drying program is set.
– Device has not been
switched on.
– The water tank is full.
– The door is not closed
properly.
Check connection to the power
supply.
Check the power supply.
Set a drying program.
Switch the device on.
Empty the water tank.
Close the door properly.
Tumble dryer
fails to operate
and the display
shows END.
– The laundry has reached
by
the program.
– There is no laundry in the
drum.
Check if the program setting is
appropriate.
Check if there is laundry in the
drum.
Drying time is
too long and
the results are
not satisfactory.
– The program setting is not
correct.
–
– The evaporator is blocked.
– The tumble dryer is
overloaded.
– The laundry is too wet.
– The vent duct is blocked.
Make sure the program is set
correctly.
Clean the evaporator.
Reduce the amount of laundry.
Spin the laundry properly
before drying.
Check the vent duct and
unblock it.
Remaining time
on the display
stops or skips.
The remaining time will be
adjusted continuously based
upon the following factors:
– Type of laundy.
– Loaded amount.
– Moisture degree of the
laundry.
– Ambient temperature.
The automatic adjustment is a
normal operation.
English | 21
Page 22

ELECTRIC CIRCUIT DIAGRAM
22 | English
K1 Door switch
HP
Heat pump
K2
Water level switch
DP
Drainage pump
H
Humidity sensor
L
Lamp
F
Fan motor
NTC2
M
Motor
NTC3
Temperature sensor
K1 H K2 NTC2 NTC3
HP
DP L F
N
L
G
PCB
M
C2
C1
C2
Capacitor 17uf
Capacitor 10ufC1
Page 23

PRODUCT FICHE
English | 23
HD80-26A/HD80-26A-F
HD80-26A-DF
8
A+++
2) In case there is a power management system.
Freestanding
Haier
Energy efficiency class
(kWh annum)
1)
Power in off-mode (W)
Mode No.
Power in left-on mode (W)
(min)
2)
3
Programme time (full load)(min)
Programme time (partial load)(min)
4
Sound power lever (dB)
Built-in or freestanding
Condensing
Automatic
Product fiche (according EU 392/2012)
Cotton/ Ready to store
http://www.haier.com/uk
1) Based on 160 drying cycles of the standard cotton programme at full and partial load,
and the consumption of the low-power modes.Actual energy consumption per cycle will
depend on how the appliance is used.
3) Standard cotton programme used at full and partial load is the standard programme to
which the information in the label and the fiche relates, that this programme is suitable for
drying normal wet cotton laundry and that is the most efficient programme in terms of
energy consumption for cotton.
4) Class G is the least efficient and Class A is the most efficient.
Trade mark
Rated capacity (kg)
Type
Energy consumption per year
Automatic or non-automatic
Energy consumption (full load)( kWh/cycle)
Energy consumption (partial load)( kWh/cycle)
Duration of the “left-on mode”
Standard cotton programme
Weighted programme time (full and partial load)(min)
Condensation efficiency class
Weighted condensation efficiency (%)
Condensation efficiency (full load)(%)
Condensation efficiency (partial load)(%)
160
1.33
0.74
0.2
0.2
40
153
198
119
B
84
84
84
67
Page 24

CUSTOMER SERVICE
If you have a problem with your appliance Troubleshooting
.
available.
MODEL
SERIAL NUMBER
Warranty Card y.
COUNTRY PHONE NUMBER COSTS
Haier Italy (IT) 199-100 912
Haier Spain (ES & PT) 902 509 123
Haier Germany (DE) 0180 5 39 39 99*
max. 42 Ct/Min Mobile
Haier Austria (AT) 0820 001 205*
Haier United Kingdom (UK) 0845 025 30 25
Haier France (FR) 0980 406 409
www.haier.com.
24
|
Page 25

Mode d'emploi
Sèche-linge avec
pompe à chaleur
HD80-26A-F
HD80-26A-DF
HD80-26A
Page 26

2 | Français
TABLE DES MATIÈRES
Cher client .......................................................................................................3
Contenu de la livraison ..................................................................................3
Utilisation prévue ........................................................................................... 3
Consignes de sécurité ...................................................................................4
Déballage ........................................................................................................6
Installation ......................................................................................................6
Utilisation de l'étagère de séchage ...............................................................7
Vue avant .........................................................................................................8
Vue arrière .......................................................................................................9
Panneau de commande ...............................................................................10
Modes de programmes ................................................................................13
Préparation du sèche-linge .........................................................................14
Préparation du linge .....................................................................................14
Chargement du sèche-linge ........................................................................15
Symboles de soin du linge ..........................................................................15
Indications de charge ..................................................................................16
Déterminer programme et début .................................................................16
Fin du cycle de séchage ..............................................................................17
Vidange du bac d'eau ...................................................................................17
....................................................................18
.............................................................18
Technologie de pompe à chaleur ................................................................19
Tableau de consommation ..........................................................................19
Nettoyage et entretien ..................................................................................20
Codes d'erreur ..............................................................................................20
Dépannage ....................................................................................................21
Diagramme du circuit électrique .................................................................22
Fiche de produit
23
Service client ................................................................................................24
............................................................................................
Page 27

Français | 3
CHER CLIENT
Nous vous remercions d'avoir choisi
un produit Haier. Lisez attentivement
ce mode d'emploi et les consignes de
sécurité. Conservez-les pour vous y
reporter ultérieurement et remettez-les
à d'éventuels futurs propriétaires.
CONTENU DE LA LIVRAISON 1 2
Veuillez contrôler si les accessoires et
les documents correspondent à cette
liste.
1 Mode d'emploi
2 Panier
UTILISATION PRÉVUE
Ce sèche-linge avec pompe à chaleur
est conçu pour un usage domestique
uniquement. Il doit être utilisé pour
sécher des articles qui ont été lavés
dans une solution aqueuse et qui
selon l'étiquette placée par le fabricant
conviennent à un séchage dans le
sèche-linge.
Il n'est pas prévu pour un usage
commercial ou à l'extérieur.
Haier ne peut être tenu responsable
de dommages résultant d'un
fonctionnement incorrect ou
impropre.
Ce sèche-linge est conforme aux
exigences de sécurité actuelles.
User Manual
HD80-26A-F
Heat Pump Dryer
HD80-26A-DF
HD80-26A
3 Tuyau d'évacuation
3
Les consignes accompagnées
de ce symbole sont
à respecter pour une
manipulation en toute
sécurité.
Lisez les instructions.
Page 28

4 | Français
CONSIGNES DE SÉCURITÉ
Les enfants de moins de 3 ans doivent se tenir à distance du sèche-linge s'ils
ne sont pas sous la surveillance permanente d'un adulte.
Le sèche-linge n'est pas un jouet ! Pour éviter tout risque de blessure, ne pas
laisser les enfants jouer avec ou à proximité du sèche-linge ni jouer avec les
éléments de commande.
Avant de mettre le sèche-linge en marche, veuillez contrôler la présence
d'éventuels dommages extérieurs visibles.
Ne pas installer ou utiliser un sèche-linge endommagé.
Avant de brancher le sèche-linge, veuillez-vous assurer que l'alimentation
électrique correspond aux données techniques. En cas de doute, veuillez
La sécurité électrique de ce sèche-linge est uniquement garantie s'il est
correctement mis en terre.
Ne pas relier le sèche-linge à l'alimentation électrique en utilisant une rallonge.
Les composants défectueux doivent être remplacés par des pièces détachées
originales.
Le sèche-linge doit être débranché en cas de problème et pendant le
nettoyage et l'entretien.
Ne pas installer le sèche-linge dans une pièce présentant un risque de gel. La
température ambiante doit se situer entre 5 °C et 35 °C.
La zone autour du sèche-linge doit toujours être exempté de poussières et de
Le sèche-linge doit être utilisé sur un endroit stable (par exemple un bateau).
Ne procéder à des modifications sur le sèche-linge, qu'après autorisations
de Haier.
Dans des zones susceptibles d'être infestées par des cafards ou
d'autres animaux nuisibles, veillez à la propreté du sèche-linge et de son
environnement à tout moment.
Si le câble d’alimentation est endommagé, il doit être remplacé par le fabricant,
son service après-vente ou des personnes de qualification similaire afin d’éviter
un danger.
L’appareil ne doit pas être installé derrière une porte à verrouillage, une porte
coulissante ou une porte avec une charnière du côté opposé à celle du
sèche-linge.
Cet appareil n'est pas prévu pour être utilisé par des personnes (y compris les
enfants) dont les capacités physiques, sensorielles ou mentales sont réduites,
ou des personnes dénuées d'expérience ou de connaissance, sauf si elles ont
pu bénéficier, par l'intermédiaire d'une personne responsable de leur sécurité,
d'une surveillance ou d'instructions préalables concernant l'utilisation de
l'appareil.
Page 29

t
sèche-linge.
vvztt vt
f
fectuer un cycle de rinçage supplémentaire en utilisant
vêtements ou coussins avec rembourr
ge en caoutchouc mousse.
s qui contiennent un matelassage
o
A
vertissement
pour éviter que des enfants, animaux
Mise en garde
Cet appareil contient le gaz à effet de serre fluoré HFC-134a (GWP: 1430).
Ce gaz est fermé hermétiquement.
Page 30

6 | Français
DÉBALLAGE 1 2
Retirez tous les éléments d'emballage, y
compris la base en polystyrène. Tout le
matériel d'emballage est à recycler.
1 Découpez les lanières.
2 Soulevez l'emballage.
3 Retirez les éléments protecteurs.
4 Retirez la base.
Ne pas laisser les emballages
plastiques, les sachets, etc. à la portée
des bébés et des jeunes enfants. Risque
d'asphyxie.
3 4
INSTALLATION 1 2
1 Réglez les quatre pieds de
l'appareil pour le stabiliser avant le
fonctionnement.
2
Ne pas installer l'appareil dans une pièce susceptible de geler. L'eau peut
causer des dommages en cas de gel.
Transportez le sèche-linge dans une position verticale.
Après transport, laissez le sèche-linge en position verticale pendant deux heures.
Le sèche-linge peut contenir de l'eau résiduelle.
Elle peut s'écouler si le sèche-linge est incliné.
INFORMATIONS TECHNIQUES
Alimentation 220 - 240 V~ / 50 Hz
Charge nominale (kg)
8
Max. alimentation (W) 800
Fusible (A) min. 10
Température ambiante (°C) 5 - 35
Dimensions (H x P x L mm) 845 x 650 x 595
Poids net (kg) environ 50,5
Indice de protection contre l'eau IPX4
Assurez-vous que la prise électrique
soit conforme aux exigences et
branchez la sur une prise de terre.
Gaz à effet de serre fluorés HFC-134a
Volume
0,63 kg
1430
0,9
2
GWP
Tonne (s) d'équivalent CO
Page 31

Français | 7
UTILISATION DU PANIER DE SÉCHAGE
Le panier de séchage permet de sécher des éléments qui ne conviennent pas
au séchage dans le sèche-linge à même le tambour, tels que les baskets, les
sweat-shirt ou la lingerie.
UTILISATION DU PANIER DE SECHAGE
1. Ouvrez la porte du sèche-linge.
2. Contrôlez que le tambour soit
vide.
3. Placez le panier de séchage
dans le tambour.
et verrouillées dans le
crochet du panier.
REMARQUES
Ne pas utiliser ce panier de séchage lorsque d'autres textiles se
trouvent dans le sèche-linge.
Pendant le séchage, assurez-vous que les articles soient bien placés
dans le panier
de la rotation du tambour.
Poids maximum articles mouillés: 1,5 kg.
Crochet du panier
Ouverture
du tambour
Tambour
Filtre
Ne pas éliminer les appareils électriques avec les déchets ménagers
non triés, utiliser des centres de collecte séparés. Contacter votre
commune pour en savoir plus sur les systèmes de collecte disponibles.
Si les appareils électriques sont éliminés dans des décharges ou
dépotoirs, des substances dangereuses peuvent s'échapper dans la
nappe phréatique et s'introduire dans la chaîne alimentaire, portant
ainsi atteinte à votre santé et bien-être. Lors du remplacement d'anciens
appareils par des appareils neufs, le revendeur est légalement tenu de
reprendre votre ancien appareil en vue de sa mise au rebut, et ceci
gratuitement.
L’échangeur de chaleur du sèche-linge contient le gaz à effet de serre
HFC-134a. Celui-ci doit être éliminé correctement.
Le panier de séchage doit être utilisé uniquement avec les programmes
"Laine" ou "Chaussures".
PANIER DE SECHAGE
Panier de
séchage
Pour plus d'informations techniques, veuillez consulter la plaquette signalétique
figurant sur l'appareil.
Page 32

TimerTimerTemp.Dry LevelSelectionFunction +
émoFonction Sélection Mode MinuteurSéchage
Synthétique
Extra sec
Prêt à ranger
Laine
Serviette
Sport
Chaussures
Bébé coton
Extra sec
Coton
Mixte
Couette
Microfibres
Sous
Délicat
vêtements
ECO
Prêt à
ranger
ressaperressaper
à têrP à têrP
8 | Français
VUE AVANT
L'image peut être différente de l'appareil que vous avez acheté en raison des
1 Bac d'eau
2 Porte du sèche-linge
3 Porte de service
4 Panneau de commande
3
1 4
2
Page 33

Français | 9
VUE ARRIÈRE
5 Cordon électrique
6 Plaque arrière
7
8 Pieds réglables
Page 34

TimerTimer Temp.Dry LevelSelectionFunction
+
émoFonction Sélection
Mode
MinuteurSéchage
Synthétique
Extra sec
Prêt à ranger
Laine
Serviette
Sport
Chaussures
Bébé coton
Extra sec
Coton
Mixte
Couette
Microfibres
Sous
Délicat
vêtements
ECO
Prêt à
ranger
repasser
Prêt à
repasser
Prêt à
| Français
PANNEAU DE COMMANDE
Voyant Sécurité
enfants
2
Voyants de
filtre
V
ou
Note: lorsque le cycle se termine ou que le
courant est coupé, la fonction ne sera pas
automatiquement annulée.
2
4
10 12 13 14
11
Pour activer la sécurité enfants, pressez
simultanément les boutons "Fonction" et
"Sélection" pendant 3 secondes, jusqu'à ce que
l'indicateur s'allume. Pour la désactiver, refaites la
même manipulation jusqu'à ce que l'indicateur
s'éteigne.
Voyant vidange
section du mode
V
4
Le mode "Memo" est activé ou bien vous avez
activé le cycle "Memo".
indicateur
le temps restant.
Remarque: lorsque ces voyants s'allument, la
lumière du tambour s'allume aussi.
le temps restant,
Page 35

Français | 11
6
7
8
Bouton programme
Sélectionnez l'un des 16 programmes en utilisant
ce bouton.
Le voyant lumineux du programme correspondant
s'allume. Voir la section Modes de programmes
du mode d'emploi pour davantage d'informations.
Touche
Départ/Pause
Appuyez sur la touche Départ/Pause pour
démarrer un cycle de séchage. Appuyez à
nouveau sur la touche pour interrompre le
cycle de séchage - le voyant lumineux clignote.
Appuyez à nouveau sur le bouton pour continuer.
Touche Power
(marche)
Appuyez sur la touche Power pour mettre le
sèche-linge en marche ou l'éteindre.
9/10 Fonctions et
bouton de sélection
4 sortes de fonctions peuvent être sélectionnées
Note: toutes les fonctions ne peuvent pas être
sélectionnées selon les programmes.
Remarque
d'interruption de l'alimentation électrique, la
fonction est annulée automatiquement.
Vous pouvez activer ou désactiver l'alarme de fin
de cycle en fonction de vos besoins.
Fonction et Selection sont deux boutons séparés.
Pour sélectionner une fonction, appuyez sur le
bouton "Fonction" puis "Selection" pour afficher le
petit indicateur correspondant. Vous avez terminé
la fonction de réglage. En utilisant la même
méthode pour continuer à sélectionner d'autres
fonctions selon vos besoins.
le départ différé.
le déroulement du cycle de séchage
(séchage, rafraîchissement, fin du cycle).
Note: cette fonction doit être réglée après que
la sélection du programme soit faite, sinon les
paramètres sélectionnés seront effacés lors
de la rotation du bouton des programmes.
Pour régler le départ différé, tournez le bouton
jusqu'à sélection du temps souhaité (de 1h à 19h).
Pressez ensuite le bouton "Start" pour lancer le
cycle en départ différé.
Page 36

12
| Français
Utilisez cette fonction pour prolonger de
60 minutes la phase Anti-froissage automatique
Remarque: : lors de la phase Anti-froissage,
il est possible de retirer le linge à tout
moment.
11 Bouton Séchage
Pressez ce bouton pour choisir le niveau de
séchage de votre linge à la fin du cycle.
Prêt à ranger.
Prêt à repasser.
Extra sec.
12 Bouton Mode
Pour certains programmes vous pouvez régler le
mode de séchage après avoir sélectionné le
programme qui vous intéresse.
ECO
Pour économiser de l'énergie durant une
durée prolongée de séchage.
Pour sécher le linge dans un temps plus court
avec un niveau de consommation plus élevé.
Moyenne entre temps de séchage et
consommation d'énergie (programme
intermédiaire comparé aux deux précédents)
Air froid.
Utilisez cette fonction pour les textiles délicats.
La température est réduite et le cycle de séchage
est prolongé pour mieux prendre soin du linge.
14
13
M emo
Pressez le bouton pendant 2 secondes pour
mémoriser le cycle de séchage désiré.
L'indicateur va s'allumer. A la prochaine
utilisation, il vous suffira d'appuyer sur emo et
le programme désiré se paramétrera
automatiquement.
Réglez le minuteur du programme. Le temps par
défaut est 20 minutes. Pressez le bouton Timer
et tournez le sélecteur de programmes vers la
droite pour ajouter du temps et vers la gauche
pour en enlever. Le temps minimum est 10
minutes, le temps maximum est 150 minutes.
Note: la fonction " Départ différé " ne peut
pas être mémorisée.
M
Bouton Minuteur
Page 37

MODES DE PROGRAMMES
PROGRAMME
NIVEAU
SECHAGE
LINGE
RECOMMANDE
MAX. CHARGE
Très sec
Extra sec Coton lourd
Prêt à
ranger *)
Prêt à porter Coton, manteaux
Prêt à repasser
Vapeur Coton ordinaire
Très sec
Extra sec Matières synthétiques
lourdes
Prêt à ranger
Prêt à porter Matières synthétiques
ordinaires
Prêt à repasser
Matières synthétiques
ordinaires
Sport
Vêtements de sport
Serviette ***)
Serviettes,draps
Laine **) Souple mais
pas sec
Vêtements en laine
Bébé coton
Vêtements de bébé
Mixte
Prêt à porter
Textiles lourds,
nécessitent
un séchage
supplémentaire
**) Programme spécial pour le traitement soigneux des textiles avec air chaud,
après qu'ils aient été portés ou rangés pendant de longues périodes. Les
***)
Ce programme possède la double rotation du tambour, en particulier pour les
charges importantes de linge.
Chaussures
Chaussures
/
Couette
Microfibres
Sous
vêtements
Délicat
Couette
Microfibres
Sous vêtements
/
/
Optionnel
Optionnel
8 kg
8 kg
8 kg
4 kg
4 kg
4 kg
1 kg
4 kg
2 kg
4 kg
4 kg
2 kg
1 kg
2 kg
1 kg
Français | 13
Robe de mousseline
de soie
1 paire
Optionnel
Prêt à porter
Prêt à porter
Vapeur
*) EN 61121 réglage programme test.
Page 38

PRÉPARATION DU SÈCHE-LINGE 1 2
1 Branchez le sèche-linge à une prise
électrique.
2 Le bac d'eau doit être vide et
correctement installé.
3
soit propre et correctement installé.
4
3 4
PRÉPARATION DU LINGE 1 2
1 Triez les vêtements en fonction
de leur matière (coton, matières
synthétiques, laine etc.). Séchez
uniquement le linge essoré.
2 Videz les poches pour retirer tous
tels que les clés, les briquets et les
allumettes. Retirez tous les objets
décoratifs rigides, tels que les broches.
l'étiquette du textile et séchez
uniquement les vêtements
susceptibles d'être séchés en
machine.
– Fermez les fermetures et les crochets,
assurez-vous que les boutons soient
cousus fermement et placez de petits
articles, tels que les socquettes, les
soutiens-gorge dans un sac de lavage.
– Dépliez les grandes pièces de linge,
telles que les draps, les nappes, etc.
14 | Français
condenseur soit propre et correctement
installé.
Page 39

CHARGEMENT DU SÈCHE-LINGE 1 2
1 Placez le linge uniformément dans le
tambour en évitant de le surcharger.
2 Mettez le sèche-linge en marche en
appuyant sur la touche Power (marche).
Les assouplissants ou produits
identiques sont à utiliser
conformément aux consignes du
fabricant.
SYMBOLES DE SOIN DU LINGE
Matériel résistant Peut être blanchi
dans de l'eau
froide
Ne pas sécher
dans le sèche-linge
Textiles délicats Ne pas blanchir Sécher à plat
Lavable
à 95 °C
Repasser à
200 °C
Accrocher pour
sécher
Lavable
à 60 °C
Repasser à
150 °C
Faire sécher les
vêtements sur un
porte-manteau
Lavable
à 40 °C
Repasser à
100 °C
Séchage au
sèche-linge
(chaleur réduite)
Lavable
à 30 °C
Ne pas repasser Séchage au
sèche-linge
(chaleur réduite)
Lavage à la main Nettoyage à sec
(tout solvant)
Ne pas sécher au
sèche-linge
Nettoyage à sec
uniquement
Nettoyage à sec
(perchloréthylène)
Symbole laine Nettoyage à sec
(détergent à base
d'hydrocarbure)
Français | 15
Page 40

INDICATIONS DES CHARGES
Drap (simple) Coton Env. 800 g
Vêtements de textiles
mélangés
/ Env. 800 g
Vestes Coton Env. 800 g
Jeans / Env. 800 g
Combinaisons de travail Coton Env. 950 g
Pyjamas / Env. 200 g
T-shirts / Env. 300 g
Socquettes Tissus mélangés Env. 50 g
T-Shirts Coton Env. 300 g
Sous-vêtements Tissus mélangés Env. 70 g
DÉTERMINER PROGRAMME ET
DÉBUT
1 2
1 Tournez le bouton du programme pour
sélectionner le programme désiré.
touches Minuterie et Température.
2
Ensuite, appuyez sur la touche Marche/
Arrêt pour démarrer le cycle de
séchage.
CONSEILS POUR L'ENVIRONNEMENT
– Essorez le linge autant que possible avant de le mettre dans le tambour.
– Evitez de surcharger le tambour du sèche-linge.
– Secouez le linge avant de le mettre dans le sèche-linge.
– Sélectionnez le programme de séchage adapté. Assurez-vous de ne pas
sécher le linge plus longtemps que nécessaire dans le sèche-linge.
16 | Français
Régler les fonctions telles que Signal,
Départ Différé, Délicat, Anti-froissage,
Niveau de séchage, Mode.
Page 41

FIN DU CYCLE DE SÉCHAGE 1 2
Le sèche-linge s'arrête de fonctionner
automatiquement lorsqu'un cycle de
FIN. Ouvrez la porte du sèche-linge et
retirez le linge. Si le linge n'est pas retiré,
le programme Anti-froissage démarre
automatiquement.
1 Eteignez le sèche-linge en appuyant
sur la touche Power.
2 Débranchez le sèche-linge de la prise
électrique.
3 Videz le bac d'eau après chaque cycle
de séchage.
4
de séchage.
5
3 4
5
VIDANGE DU BAC D'EAU 1 2
Pendant le fonctionnement, la vapeur
se condense en eau qui est collectée
dans le bac d'eau. Videz le bac d'eau
après chaque cycle de séchage.
1 Retirez le bac d'eau de son logement.
2 Videz le bac d'eau.
3 Replacez le bac d'eau dans le sèche-
linge.
Remarque : ne pas utiliser l'eau
comme boisson ou pour préparer de
la nourriture.
3
Veillez à nettoyer le filtre du
condenseur après chaque cycle de
séchage
Français | 17
Page 42

NETTOYAGE DU FILTRE À
PELUCHES
1 2
de séchage.
1 Retirez le ltre à peluches du tambour.
2
3
résidu.
4
Remarque
il peut être nettoyé sous le robinet.
Laissez-le sécher soigneusement
avant utilisation.
3 4
NETTOYAGE DU FILTRE DU
CONDENSEUR
1 2
1 Ouvrez la porte de service.
2
r.
3
4
5
6
r.
r,
veuillez suivre les étapes
Remarque
est très sale, il peut être nettoyé
sous le robinet. Laissez-le sécher
soigneusement avant utilisation.
3 4
5 6
Veillez à nettoyer le filtre du
condenseur après chaque cycle de
séchage.
18
Page 43

TECHNOLOGIE DE POMPE À CHALEUR
Le sèche-linge par condensation avec échangeur de chaleur présente
d'excellentes performances en termes de consommation énergétique.
Ces valeurs de référence sont déterminées dans des conditions standard.
Ces valeurs sont différentes de celles transmises; elles varient en fonction de la
surtension et de la sous-tension, du type de tissu, de la composition du linge à
sécher, du taux d'humidité restant dans le linge et de la taille du chargement.
TABLEAU DE CONSOMMATION
Programme Vitesse
d'essorage en tpm
(Humidité
résiduelle)
Consommation
énergétique
TEMPS DE
SECHAGE
Très sec
1 000
(env.60 %)
3h30
Prêt à ranger 3h18
Prêt à repasser 2h36
1 000
(env.60 %)
1 000
(env.60 %)
1.53 kwh
1.33 kwh
1.09 kwh
Français | 19
Page 44

NETTOYAGE ET ENTRETIEN
SECHE-LINGE
Essuyez l'extérieur du sèche-linge et le panneau de commande avec un chiffon
mouillé. Ne pas utiliser de solvants organiques ou d'agents corrosifs pour éviter
tout dommage à l'appareil.
TAMBOUR
A vec le temps, les lessives ou le calcaire contenu dans l'eau peuvent former
un film quasiment invisible sur l'intérieur du tambour. Utilisez un chiffon mouillé
et des détergents pour l'éliminer. Ne pas utiliser de solvants organiques ou
d'agents corrosifs pour éviter tout dommage de l'appareil.
EVAPORATEUR
en utilisant un aspirateur. Veillez à ne pas endommager l'évaporateur lors du
nettoyage.
CODES D'ERREUR
CODE CAUSE SOLUTION
F2 Erreur pompe de vidange. Contactez le service client.
F32,
F33
Le capteur thermique du
condenseur est à circuit
ouvert ou à circuit fermé.
Contactez le service client.
F4
La température du linge
dans le tambour ne change
pas.
Contactez le service client.
E6
E7
Sous tension ou plus
perturbation de la tension.
Vérifiez la tension de la suply.
Ou contactez le service à la clientèle.
E8
Au cours d'avertissement
de charge.
Lo
Sous tension, plus ous la
tension de perturbation de
la.
Utilisez le sèche-linge lorsque la
température de l'air est supérieur
à 2 .
20 | Français
Vérifiez le voltage de l'alimentation
électrique ou bien réduisez la charge.
Rallumez le sèche-linge. Sinon,
contactez le service client.
Page 45

DÉPANNAGE
Avant de contacter le service client, veuillez contrôler les points suivants :
PROBLEME CAUSES SOLUTION
Le sèche-linge
ne fonctionne
pas.
– Mauvais branchement
électrique.
– Pas d'électricité.
– Aucun programme de
séchage n'est sélectionné.
– L'appareil n'est pas mis en
marche.
– Le bac d'eau est plein.
– La porte n'est pas
Correctement fermée.
électrique.
électrique.
Sélectionnez un programme de
séchage.
Mettez l'appareil en marche.
Videz le bac d'eau
Fermez correctement la porte.
Le sèche-linge
ne fonctionne
pas et l'écran
– Le linge a atteint le statut
– Il n'y a pas de linge dans
le tambour.
Contrôlez si les réglages du
programme sont corrects.
tambour.
Le temps de
séchage est
trop long et
les résultats
ne sont pas
satisfaisants.
– Le réglage du programme
n'est pas correct.
– L'évaporateur est bloqué.
– Le sèche-linge est
surchargé.
– Le linge est trop mouillé.
– La buse d'aération est
bloquée.
Assurez-vous du réglage
correct du programme.
Contrôlez l'évaporateur.
Réduisez la quantité de linge.
Essorez le linge correctement
avant de le sécher.
Contrôlez la buse d'aération et
débloquez-la.
La durée
restante sur
l'écran reste
bloquée ou
s'immobilise de
temps à autre.
La durée restante sera
adaptée en continu sur la
base des facteurs suivants :
– Type de linge.
– Charge de linge.
– Taux d'humidité du linge.
– Température ambiante.
Le réglage automatique est un
fonctionnement normal.
Français | 21
Page 46

DIAGRAMME DU CIRCUIT ÉLECTRIQUE
K1
Interrupteur de la porte
HP Pompe à chaleur
K2 Interrupteur du niveau d'eau
DP Pompe de vidange
H Capteur d'humidité
L Lampe
F Moteur de ventilation
NTC2 Capteur de température
M Moteur
NTC3 Capteur de température
22 | Français
K1 H K2 NTC2 NTC3
HP
DP L F
N
L
G
PCB
M
C2
C1
C2
C1
Capacité 17uf
Capacité 10uf
Page 47

23
HD80-26A/HD80-26A-F
HD80-26A-DF
8
A+++
Haier
2)
3)
Sèche-linge domestique à tambour automatique ou non
automatique
1)
Classe de taux de condensation
4)
Intégrable ou autoportant
1) Sur la base de 160 cycles de séchage pour le programme coton standard à pleine
charge et à demi-charge. La consommation réelle d’énergie par cycle dépend des
conditions d’utilisation de l’appareil.
Condenseur
Automatique
Coton/ Prêt à ranger
Autoportant
la marque commerciale
la référence du modèle
la capacité nominale en (kg)
Type
la classe d’efficacité énergétique
la consommation d’énergie annuelle pondérée (kWh/annum)
la consommation d’énergie à demi-charge(kWh/cycle)
la consommation d’énergie à plein charge(kWh/cycle)
la consommation d’électricité en mode arrêt (W)
la consommation d’électricité en mode laissé sur
marche (W)
la durée en mode laissé sur marche (min)
le programme coton standard
la durée pondérée du programme à plein charge et à
demi-charge (min
la durée du programme à plein charge (min
la durée du programme à demi-charge (min
les taux de condensation moyens (%)
les taux de condensation moyens à plein charge (%)
les taux de condensation moyens à demi-charge (%)
le niveau de puissance acoustique (dB)
2) si le sèche-linge domestique à tambour est équipé d’un système de gestion de la
consommation d’électricité.
http://www.haier.com/fr
Français |
3) le Programme "Coton " standard à pleine charge et à demi-charge sont les
programmes de lavage standards auxquels se rapportent les informations qui figurent sur
l'étiquette sur la fiche, que ces programmes conviennent pour nettoyer du linge en coton
normalement sale et qu’il s’agit des programmes les plus efficaces en termes de
consommation combinée d’eau et d’énergie.
Fiche de produit (selon EU 392/2012)
Fiche de produit
160
1.33
0.74
0.2
0.2
40
153
198
119
B
84
84
84
67
4) La classe G est la moins efficace. La classe A est la plus efficace.
Page 48

24 | Français
SERVICE CLIENT
Si vous avez un problème avec votre appareil, veuillez d'abord consulter la
section Dépannage du mode d'emploi. Si vous ne trouvez pas de solution dans
cette section, contactez votre revendeur local ou essayez d'appeler l'un des
numéros suivants.
Avant de contacter le service client, assurez-vous que vous avez toutes
les données à portée de main. Les informations se trouvent sur la plaque
signalétique :
MODELE
NUMERO DE SERIE
Consultez également, le cas échéant, la fournie avec le
produit.
PAYS NUMERO DE
TELEPHONE
FRAIS
Haier Italie (IT) 199-100 912
Haier Espagne (ES et PT) 902 509 123
Haier Allemagne (DE) 0180 5 39 39 99*
: 14 c/min
max. mobile : 42 c/min max.
Haier Autriche (AT) 0820 001 205* : 14,53 c/min
max. autres : 20 c/min max
Haier Royaume-Uni (UK) 0845 025 30 25
Haier France (FR) 0980 406 409
Pour les autres pays, reportez-vous à la zone de service et d'entretien de :
www.haier.com.
HAIER Benelux (NL) 070 891 25 67
HAIER Benelux (VL) 02 808 41 31
HAIER Benelux (FR)
02 808 41 32
HAIER Benelux (LUX)
0220 880 325
 Loading...