

Haier AD212BMBAA User Manual
Auto, Cooling, Dehumidifying,
Heating operation
AD212BMBAA
Haier Network Air Conditioner
Two by One Room Air Conditioner
CONTENTS
Before Use
To User
Name of Parts
Safety Precautions
Operation Instruction
Fan Operation
Timer On/Off Function
Sleep Function
Timer On-Off Function
Maintenance
Maintenance
Usersí Attention
Installation of Indoor Unit
Installation Instruction
Installation Procedure
Operation Points
Troubleshooting
No:
0010571573
Please read this manual carefully before using
Please keep this manual for future use
1
2-3
4-5
6
7
8
9
10
11
12-13
14-16
19-29
17-18
Characteristics of Products
Far distance monitoring
There is a pre-set far distance control communication interface on the
control panel of indoor unit. After installing the peripheral equipment
according to the manual attached with the Haier made far distance control
detector, the computer management or other place monitoring can be
achieved to the air conditioner.
Characteristics of Products
1.Free combination multi-split.
2.Prompt temperature adjustment.
3.Inner hidden type installation, space saving.
4.Large screen LCD display, easy and convenient operation.
5.Super quiet design.
6.Powerful circular air volume.
7.This air conditioner has POWER FAILURE RESUME FUNCTION.
During the operation of the unit, if there is a sudden power failure,
when the power resumes, the unit will resume the previous operation
mode.
8.This unit has the function of far distance monitoring. Through the
telephone network, it can be effectively controlled in any other far distance place.(Only after equipped with the ìfar distance detectorî
made by our company can this function be fulfilled.)
1
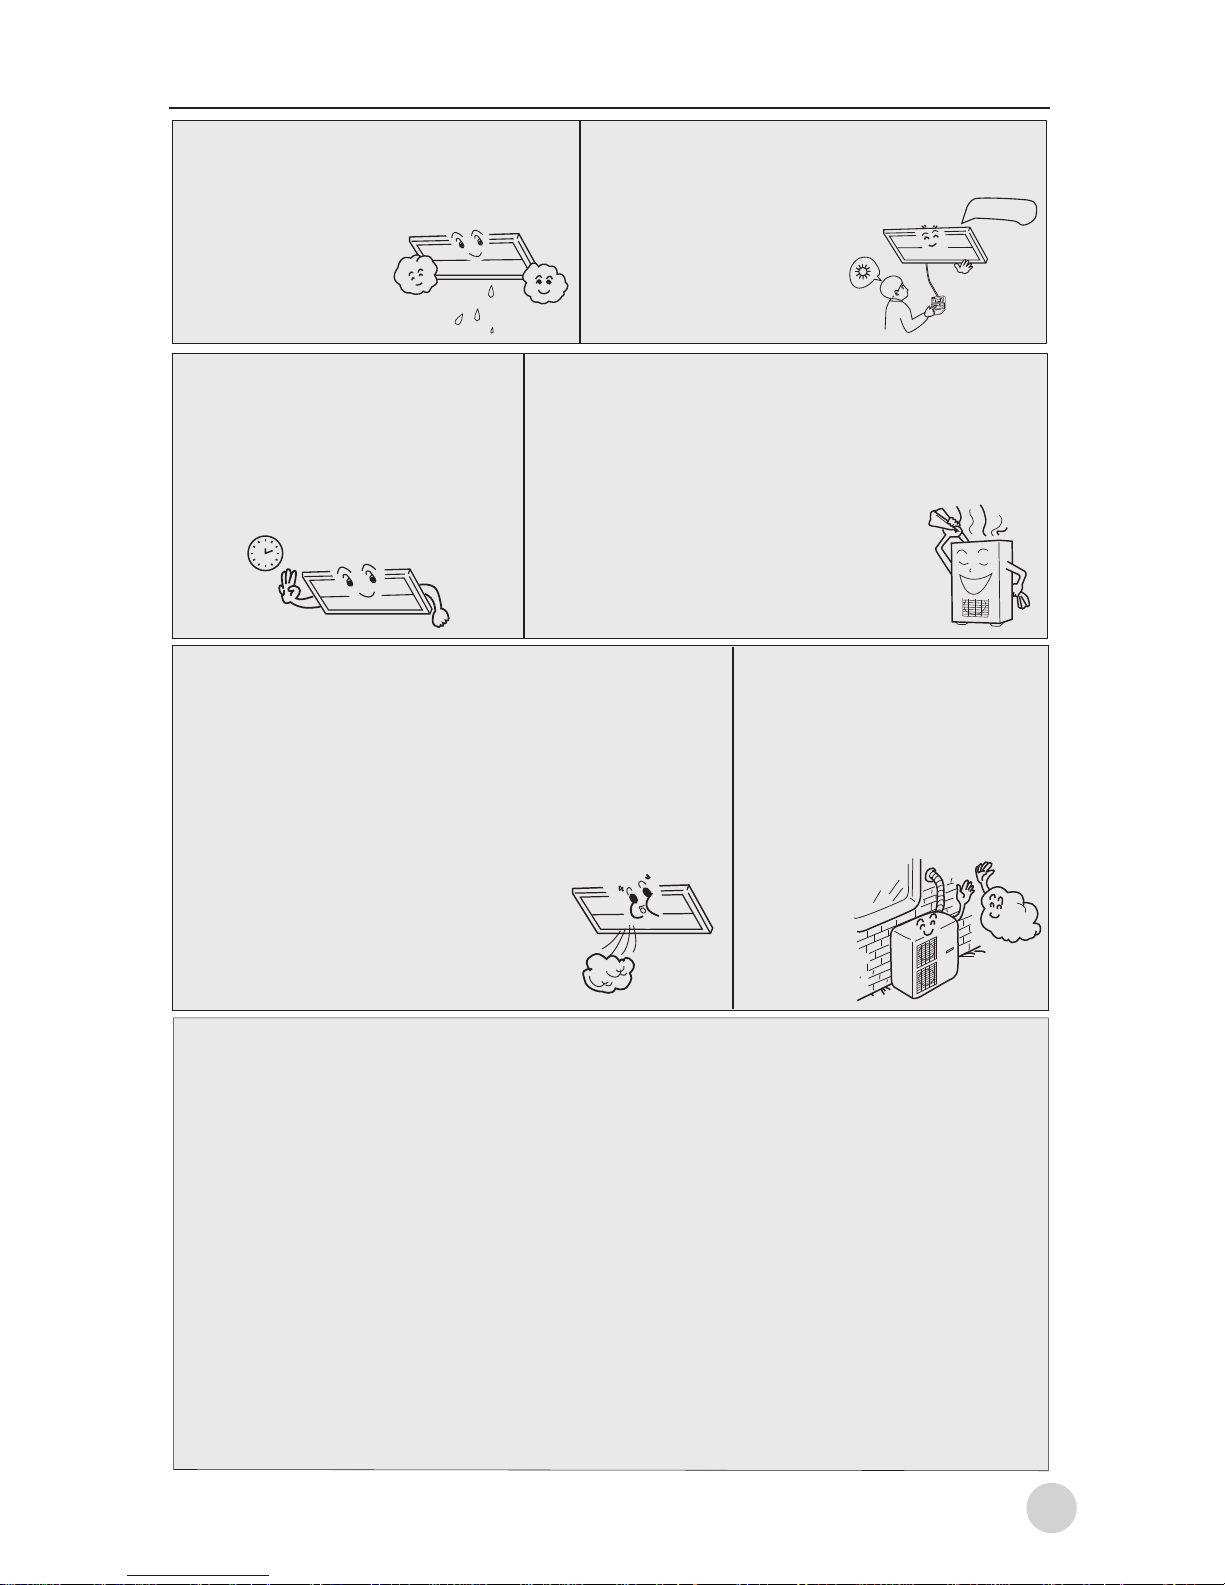
Change of fan speed
In COOLING mode, the air sending is set at AUTO,
when the indoor temperature is near the set
temperature, the fan speed will lower automatically .
In HEATING mode, when room temperature reaches
the set temperature, the compressor will
stop running, and the fan will
change to LOW FAN or stop.
In DEHUMIDIFYING mode, the fan
speed will change automatically.
3-minute protection function
If start the unit immediately only
after it is turned off, the compressor
will start after 3 minutes have
elapsed to protect the compressor.
Operation of air conditioner
When the ambient humidity is too high,
in COOLING or DEHUMIDIFYING
mode, there may be
water dropped in
the air outlet.
Anti-cold air blowing out
During Heating operation, after starting the
unit, the indoor fan motor
will not rotate
immediately to prevent
cold air from blowing out.
Defrosting function
During Heating operation, when frost formed on the
heat exchanger of outdoor unit, the air conditioner
will defrost automatically for several minutes. During
defrosting, both the fan of indoor
and outdoor unit do not run. After
finishing defrosting, the air conditioner
will automatically resume operation.
Hint
When the air conditioner is in
Heating mode, it absorbs heat
from outside and release to
indoors. So the outdoor
temperature may affect the
Heating effect.
Power failure resume function (please set and use this function according to actual
condition)
After setting power failure resume function, if there is a sudden power failure during
unit operation, when power on for again, the unit will resume the previous state.
Setting method: when the wire controller is in ON state (except for TIMER and FAN
mode), press the SLEEP button for 10 times in 5 seconds, after the buzzer sounds 4
times, the unit will change to POWER FAILURE RESUME function.
Cancellation method: press the SLEEP button 10 times in 5 seconds, after the buzzer
2 times, the POWER FAILURE RESUME function is cancelled.
Note: After the unit is set POWER FAILURE RESUME function, if there is a sudden power failure
in using, during this period of time if there is no need to use the unit for a long time, please cut off
power to prevent the air conditioner from automatically resuming to the previous setting if powerfailure
resumes, or press the ON/OFF button to turn off the unit after power failure resumes.
Operation points
Please wait
?
2
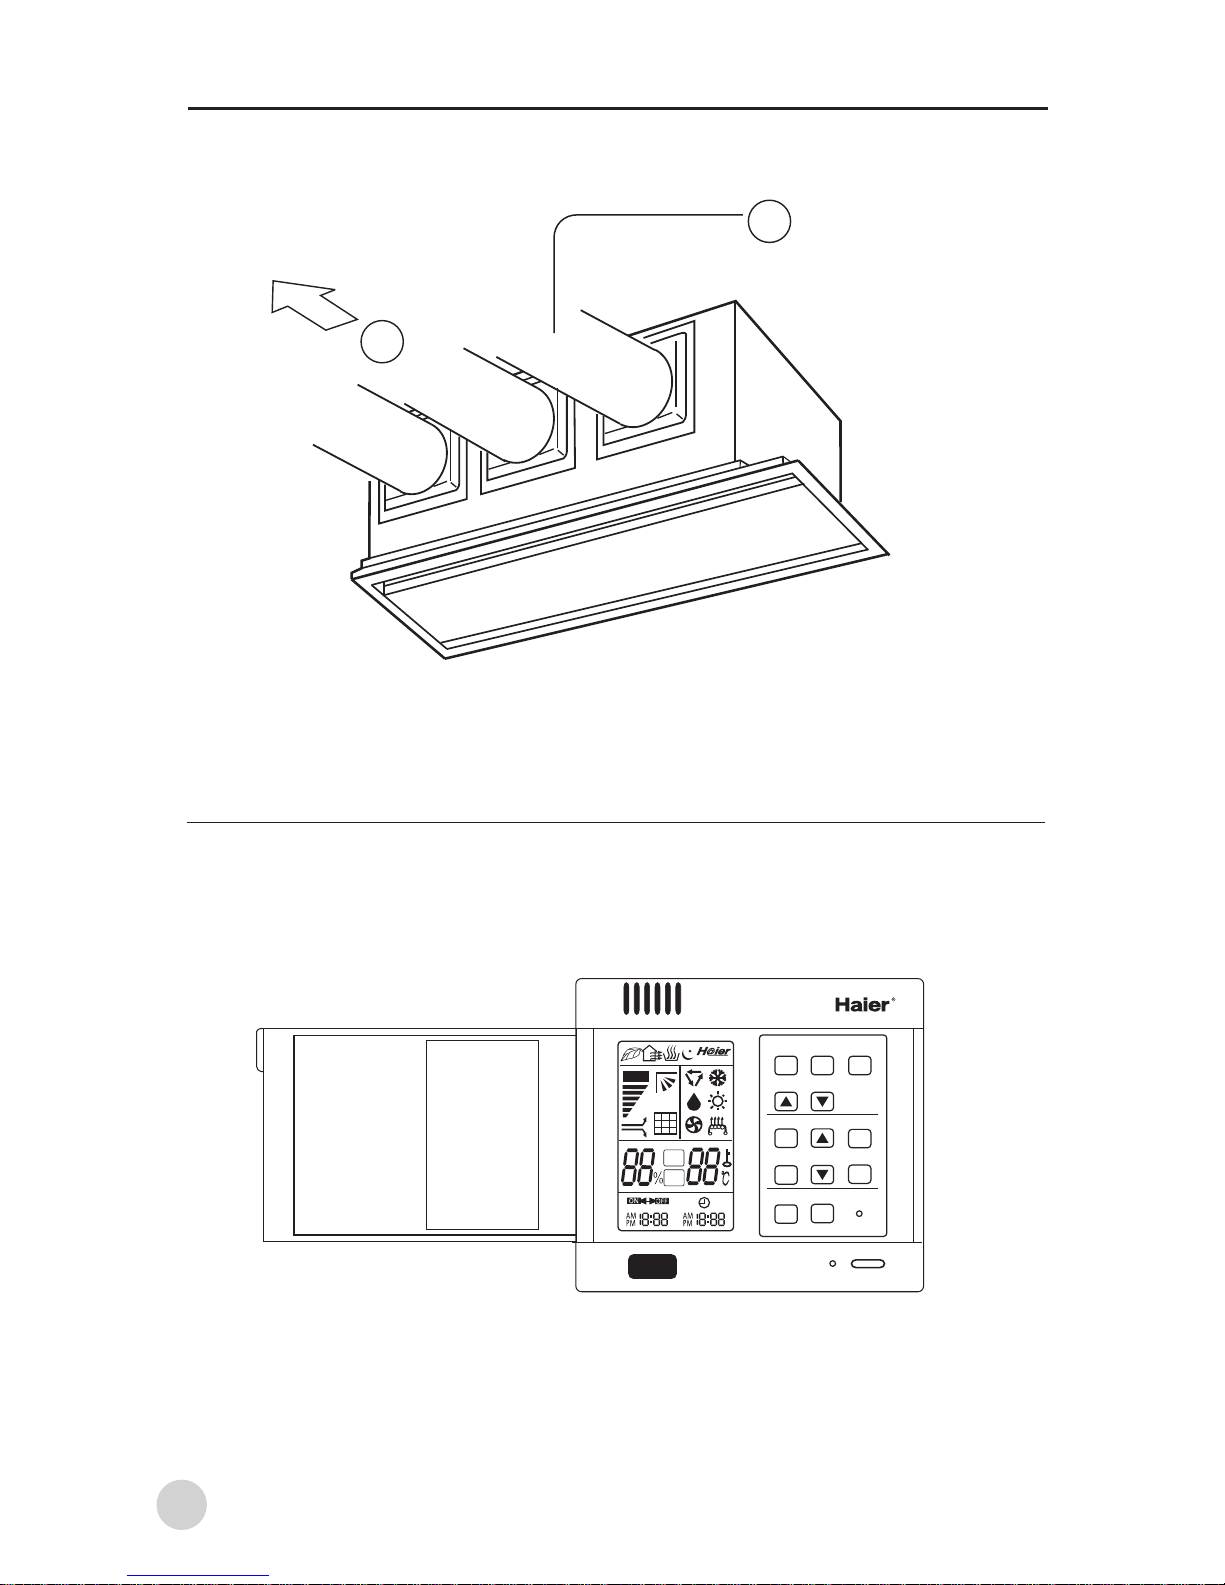
Wire Controller
HEAT
AUTO
SET
ROOM
MODE FAN SWING
TEMP
CLOCK SET
TIMER SLEEP
RESET
FILTER RESET
ON/OFF
Indoor Unit
1
2
* Air outlet * Ventilation hole
Name of Parts
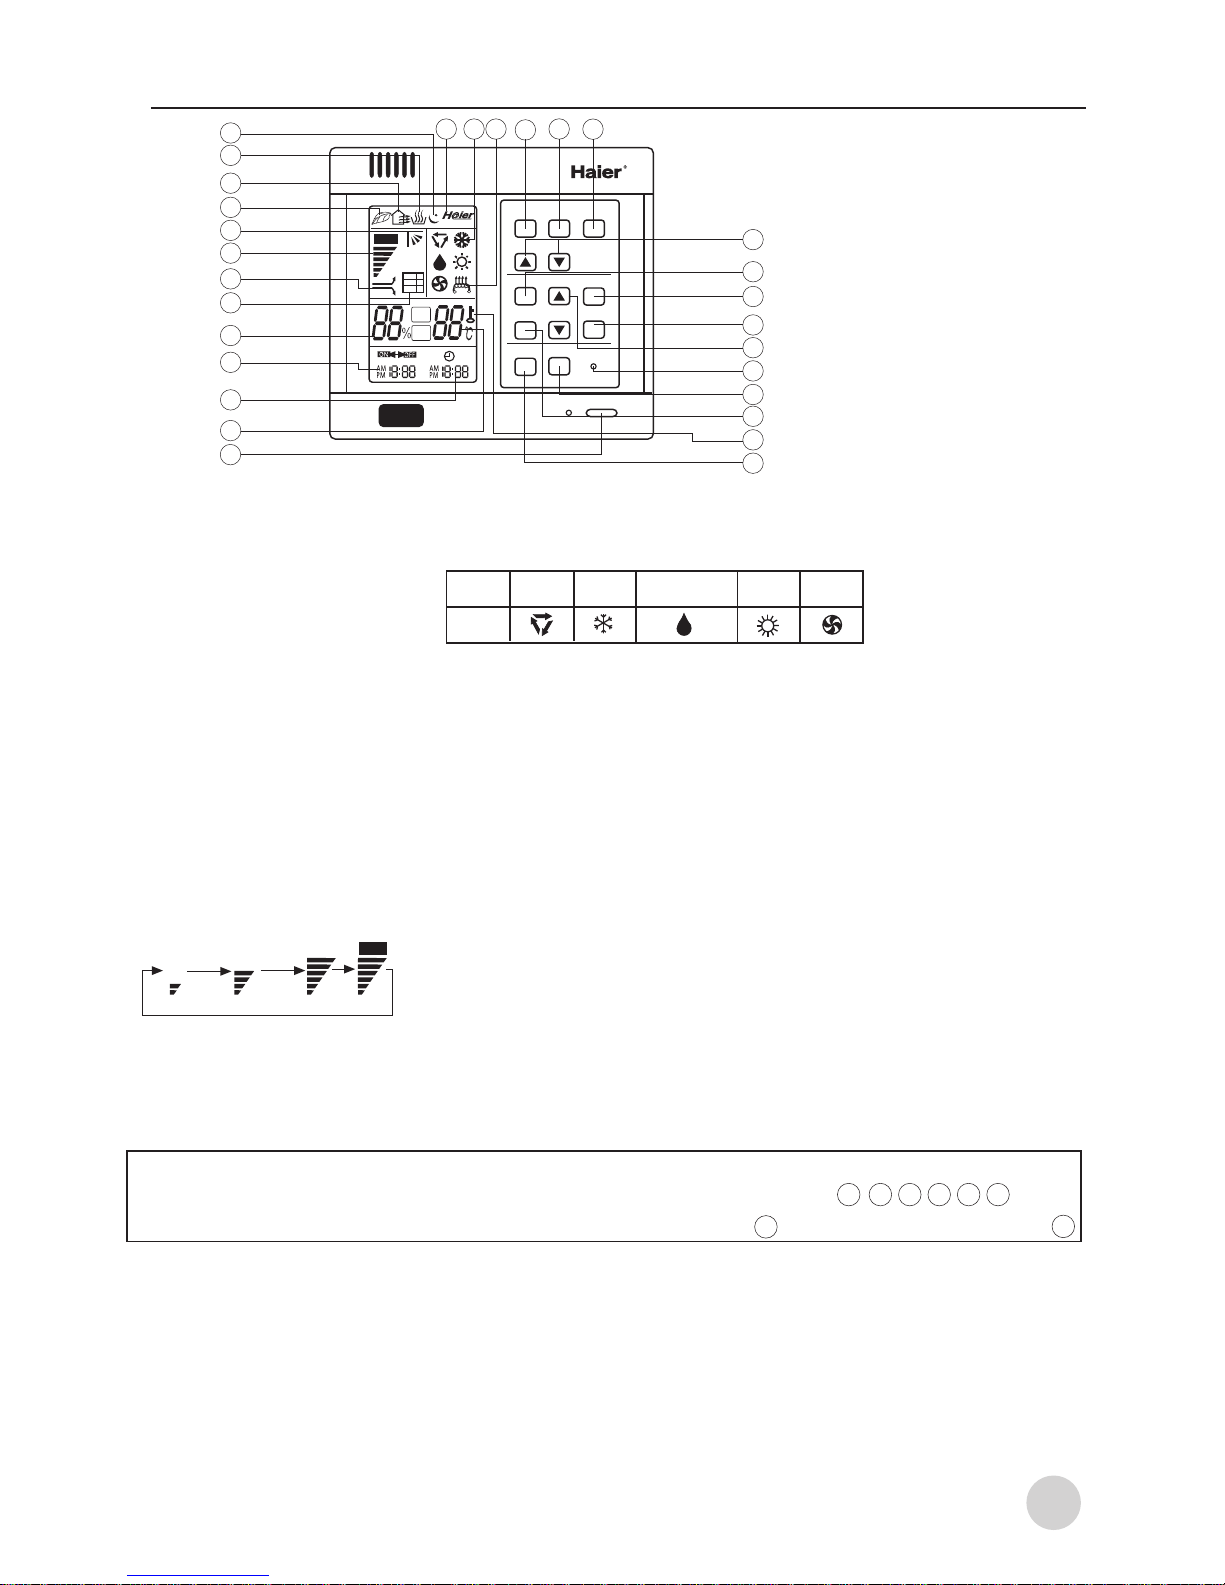
Name of Parts
Wire Controller
14.Network control display
Used to adjust the
time of timer and
clock
When the wire
controller appears
abnormal condition,
use a sharp-pointed
article to press this
button to make the
wire controller
resume norma
After cleaning the air
inlet, press this
button, the unit can
start to operate
12.Humidifying state display
Used to turn on/off unit
1.ON/OFF button
6.Air filter cleaning display
*
7.Super/Soft operation display
13.Sleep state display
2.Temperature display
24.Time Adjusting
button
23.Sleep button
Used to set Sleep
state or Power
Failure Resume
Function
When there is too much dust
collected on the air inlet, the
wire controller will show this
display to remind the user to
clean the air inlet. After
cleaning and installation, just
press the air filter reset button.
8.Fan speed display
9.Auto Swing display
11.Fresh air state display
25.Reset button
26.Air Filter Reset
button
27.Timer button
Used to set the mode
of timer
28.Lock state display
29.Electric heating
button
4.Timer ON/OFF display
3.Clock display
17.Operation mode button
5.Humidity display
22.Setting button
Used to confirm the
time of timer and
clock
15.Working mode display
21.Clock button
Used to calibrate the time of
timer and clock
16.Electric heating display
Used to set working mode:Auto,
Cooling, Dehumidifying,
Heating, Fan
18.Fan speed button
Used to set fan speed: Low Fan,
Med Fan, High Fan, Auto
20.Temperature Setting button
10.Health state display
Used to set temperature,
temperature range: 16*~30*
19.Swing button
Used to set Auto Swing or Fixed
air sending direction
3
Calibration of clock
When turning on the unit for the first time, the clock should be calibrated. The method of
calibration is:
1.Press ìClockî button, the Clock display ìAMî ìPMî will flash.
2.Press * or * to adjust time. For each press, the time will increase or*decrease 1
minute. If depressing the button, the time will increase or decrease*rapidly.
3.After confirming the time, press ìSetî button, ìAMî or ìPMî will stop flashing, the
clock will begin to work.
Note:
1.This model does not have the following related display and function
2.Non-electric heating type, there is no electric heating button and electric heating display
* * 10 11 12 28
16
29
Auto
Low Fan Med Fan High Fan Auto
Working
mode
Auto
operation
Cooling
operation
Dehumidifying
operation
Heating
operation
Fan
operation
Wire
controller
29
MODE FAN SWING
TEMP
CLOCK
TIMER
SET
SLEEP
HEAT FILTER RESET
SET
ROOM
RESET
ON/OFF
1
2
3
4
5
6
7
8
9
11
12
13
14
15
16
17
18
20
21
22
23
24
25
26
27
28
AUTO
10
19

4
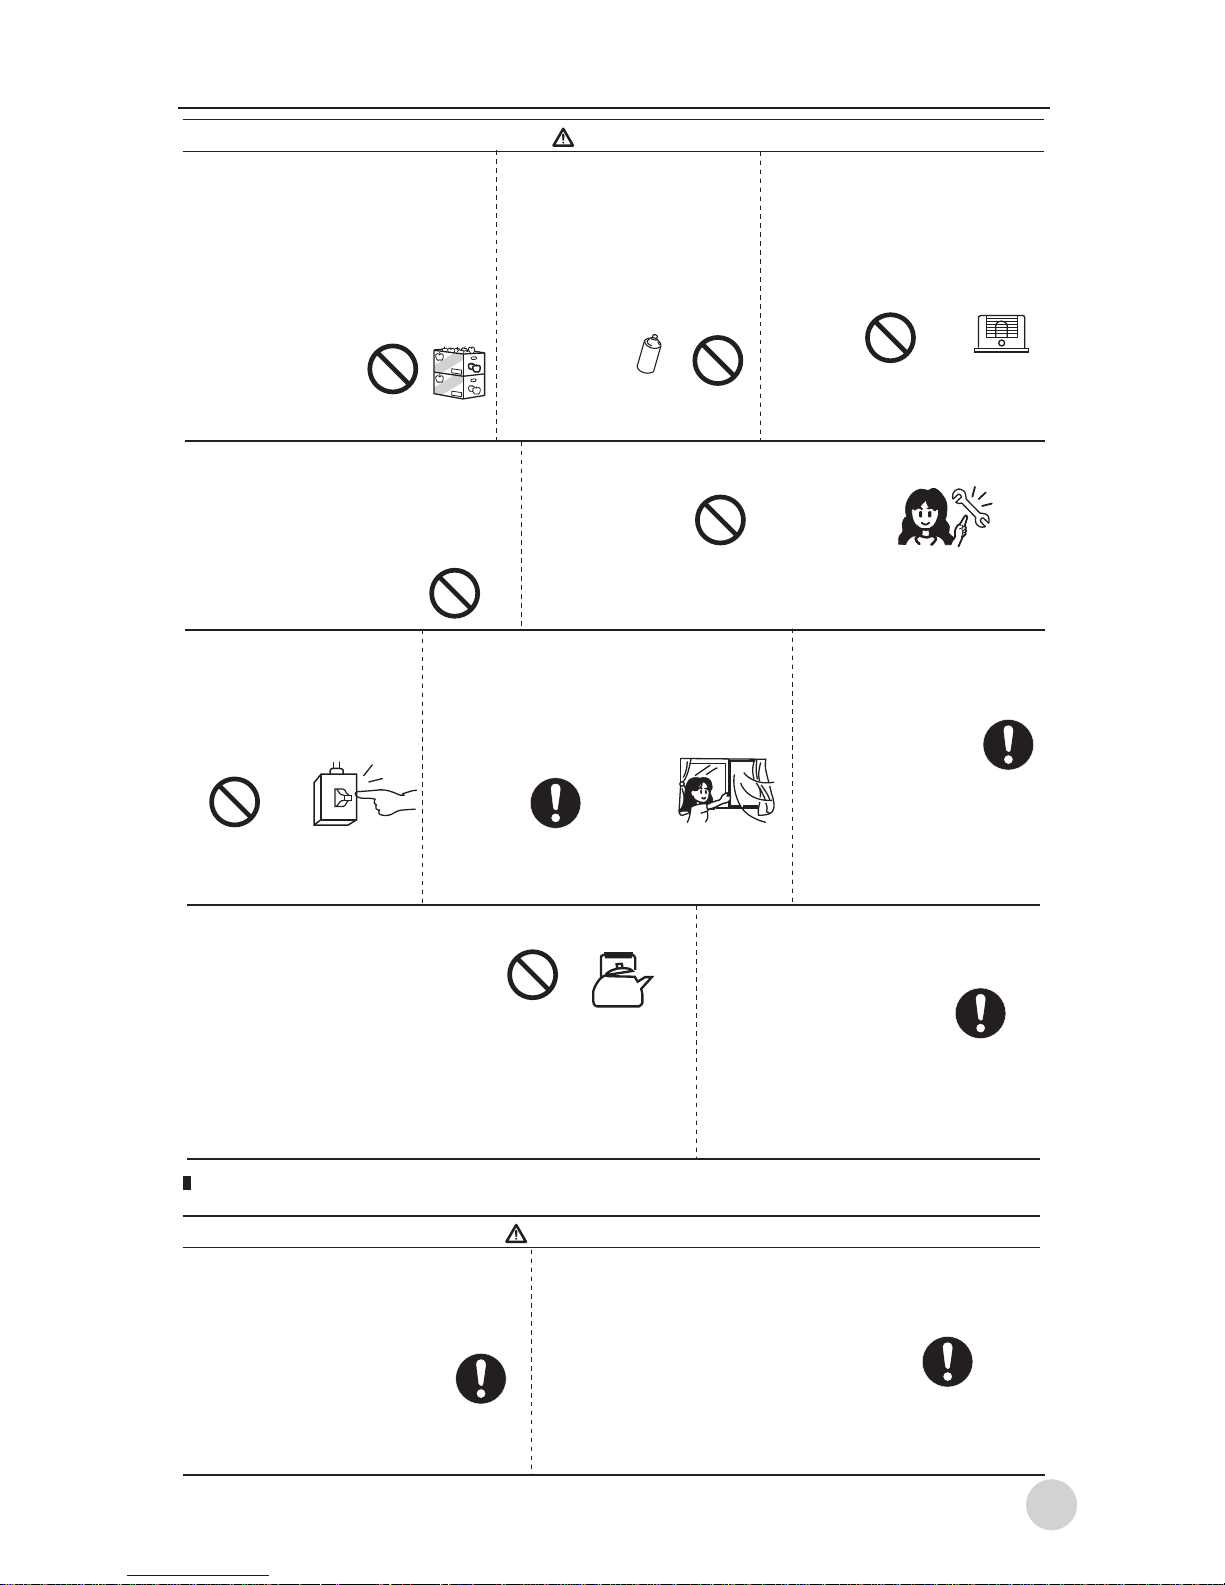
Safety Precautions
Before starting the unit, please read the following ìSafety Precautionsî carefully
to guarantee the normal operation of the system.
The following lists two kinds of safety precautions ì Warningî and ì Noticeî.
For the items that the improper use may cause death or serious injury are listed
in ì Warningî volume. However, sometimes the items listed in ì Noticeî
volume may also cause serious accidents. So, these two volumes are the important
contents related to safety, they must be observed.
Installation Safety Precautions
Warning
The system should be applied to places as
office, restaurant, residence
and the like.
The system should be installed by your
dealer or a professional installer.
Application to inferior environment such
as workshop, it may cause equipment
malfunction and serious injury or death.
Installation by yourself is not encouraged.
Because improper installation could cause water
leakage, electric shock and fire accident.
Notice
Operation safety precautions
Do not let the cold wind blow to human
body for a long time.
When any abnormal condition (scorching smell
or others) is found, stop operation immediately
and turn off the power switch.
Then consult your dealer.
Warning
It may affect the physical condition or
cause some health problems.
If continuing the operation without removing the
cause, it may cause trouble, electric shock or fire.
After carefully reading this manual, please keep in hand for reference. If the air
conditioner is given to a new user, this manual should be attached with unit to
the new user.
Grounding wire should
never be connected to gas pipe,
city water pipe, lightning conductor
rod or the telephone line. If the
grounding wire is not set properly,
it may cause electric shock.
ON
OFF
A creepage breaker
must be installed at
the installation place
Drain pipe should be arranged
properly to provide a smooth
drainage.
Unless the circuit
breaker is installed,
it may cause
electric shock.
If the pipe is
arranged improperly,
furniture or the like may be
damaged by the leaked water.
Make sure the system is grounded.
Notice
Do not handle switches with a wet hand.
It may cause electric shock.
Do not use water to clean
the air conditioner.
It may cause electric shock.
Do not do like this Do follow the instruction Do equip with grounding wire
Safety Precautions
5
Notice
The system should never be
used for any other purposes
than intended such as for
preservation of food, flora
and fauna, precision devices
or work of art.
Do not put the fire devices
in the places, which the
air from the air
conditioner can directly
blow.
It may cause
deterioration of the articles.
It may
cause the fire devices
cannot burn completely.
Do not install the system where
the air outlet may directly
reach the flora and fauna.
Only use the proper specified fuse.
It will not be good
for their health.
If use metal wire or copper wire to replace the
fuse, it may cause trouble and fire accident.
Do not put or use any
spray near the air
conditioner, and do not
directly spray to the air
conditioner.
Otherwise
it may cause fire.
Safety precautions when moving, reinstalling and repairing the air conditioner
Warning
Do not use the power
switch to turn of or
off the air
conditioner.
Do not use such equipment as a water heater,etc.,
around the indoor unit
or the wire controller.
It may cause fire or
Creepage.
If the system is operated at the vicinity of such
equipment that generates steam, condensed
water may drip during cooling operation or it
may cause Creepage or short-circuit.
When operating the system
simultaneously with a combustion
apparatus, indoor air must be
ventilated frequently.
Insufficient ventilation may cause
the danger of lack of oxygen.
When cleaning, please
stop the unit and cut off
the power first.
Do not put the water containers,
such as vase, on the unit.
Do not
perform cleaning, when
the indoor fan motor is
rotating in high speed.
If the water enters
into the unit and damages the
electric insulation material, it
may cause electric shock.
Do not refit the air conditioner.
When repair is needed, please
contact your dealer.
When moving the air conditioner to another
installation place, please contact the dealer or
the professional installer.
Improper repair may
cause water leakage,
electric shock and fire accident.
Improper moving and reinstallation may cause
water leakage, electric shock and fire accident.
ON
OFF
Operation instruction
3
2
MODE
FAN SWING
TEMP
CLOCK
SET
TIMER
SLEEP
RESET
FILTER RESET
ON/OFF
HEAT
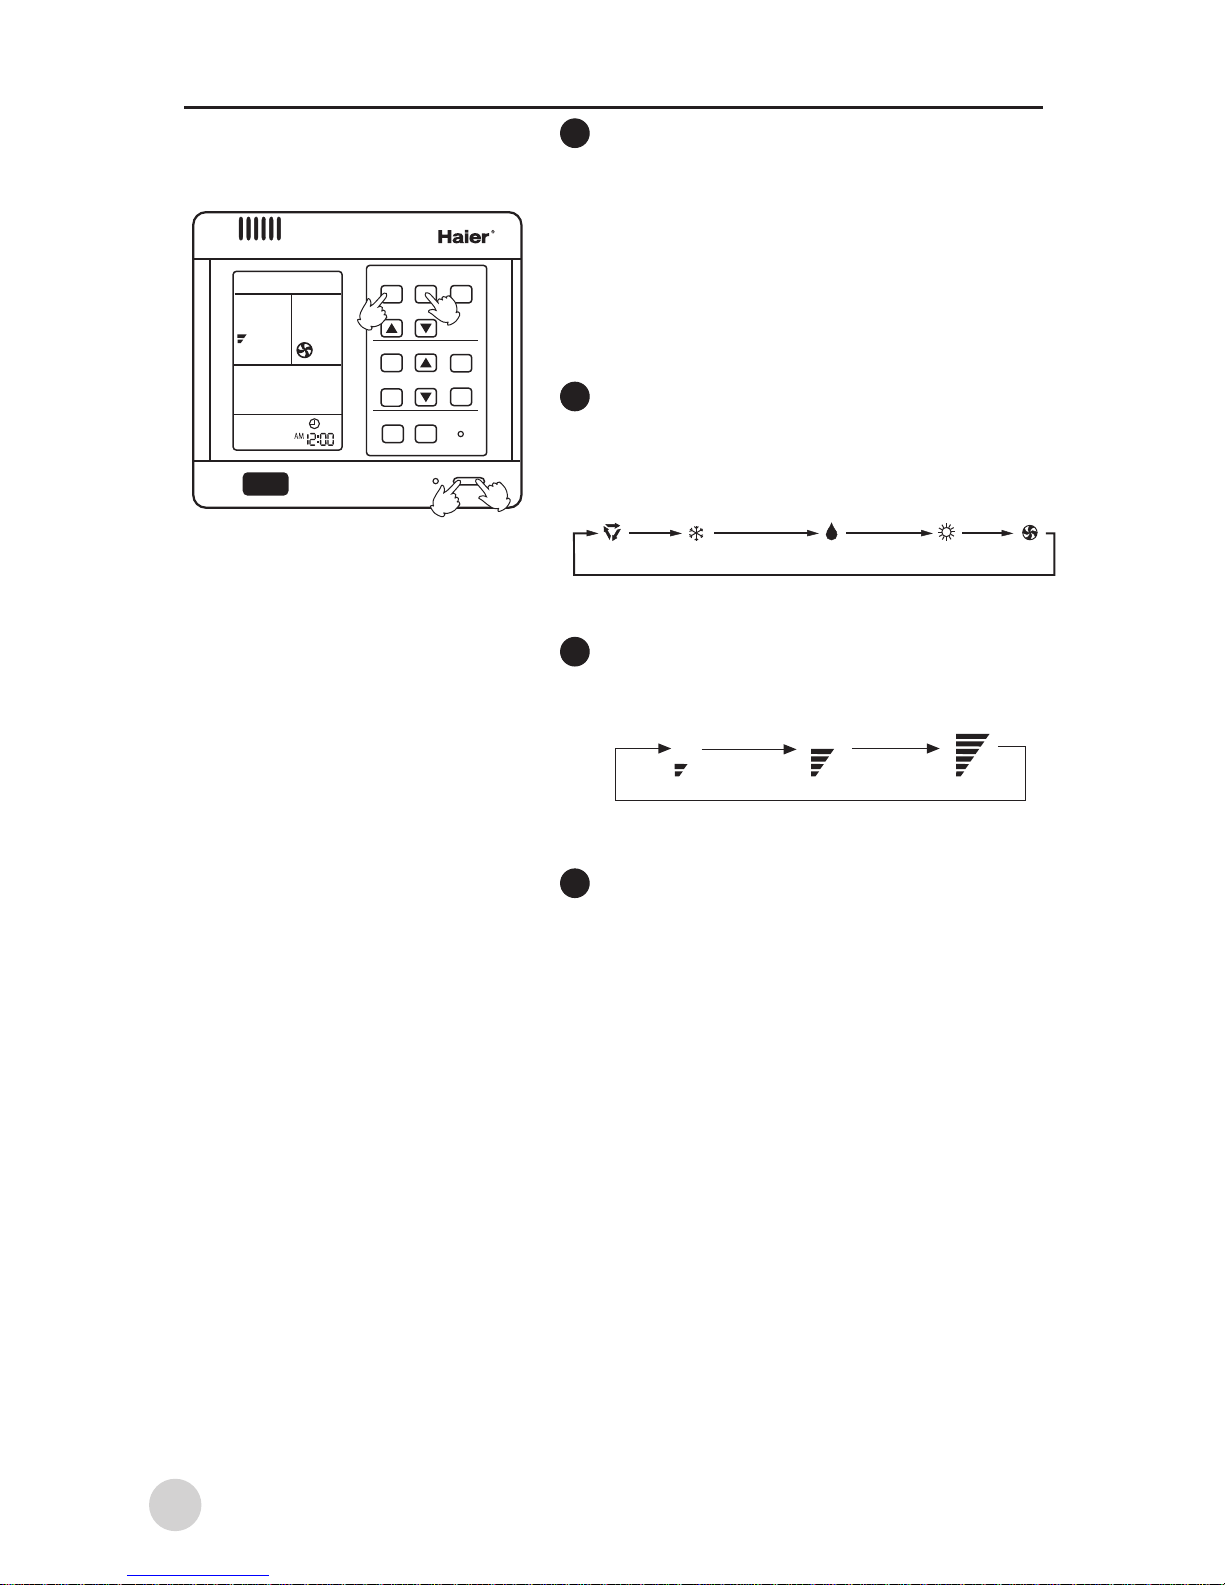
Fan operation
About FAN operation:
FAN operation refers the air conditioner does not perform COOLING and
HEATING operation, but FAN operation. In this mode, the air conditioner
cannot perform AUOT F AN operation, and does show the temperature value
on the wire controller.
Turn on the unit
Press the ON/OFF button to turn on the
unit The LCD display of the wire controller
will show the previous working state
(except for Timer, Sleep, Swing mode),
the operation indicator light on the wire
controller will light up.
Choose of working mode
Press MODE button, each press the working
mode will change as the following
sequence:
choose FAN operation
Adjusting FAN SPEED
Press the FAN SPEED button to change
fan speed:
Turn off the unit
Press the ON/OFF button to turn off the
unit.
The wire controller only shows the clock
and room temperature.
Choose the desired fan speed
6
1
4
1
2
COOLING
DEHUMIDIFYING
AUTO HEATING FAN
3
LOW FAN MED FAN HIGH FAN
4
2
7
Operation instruction
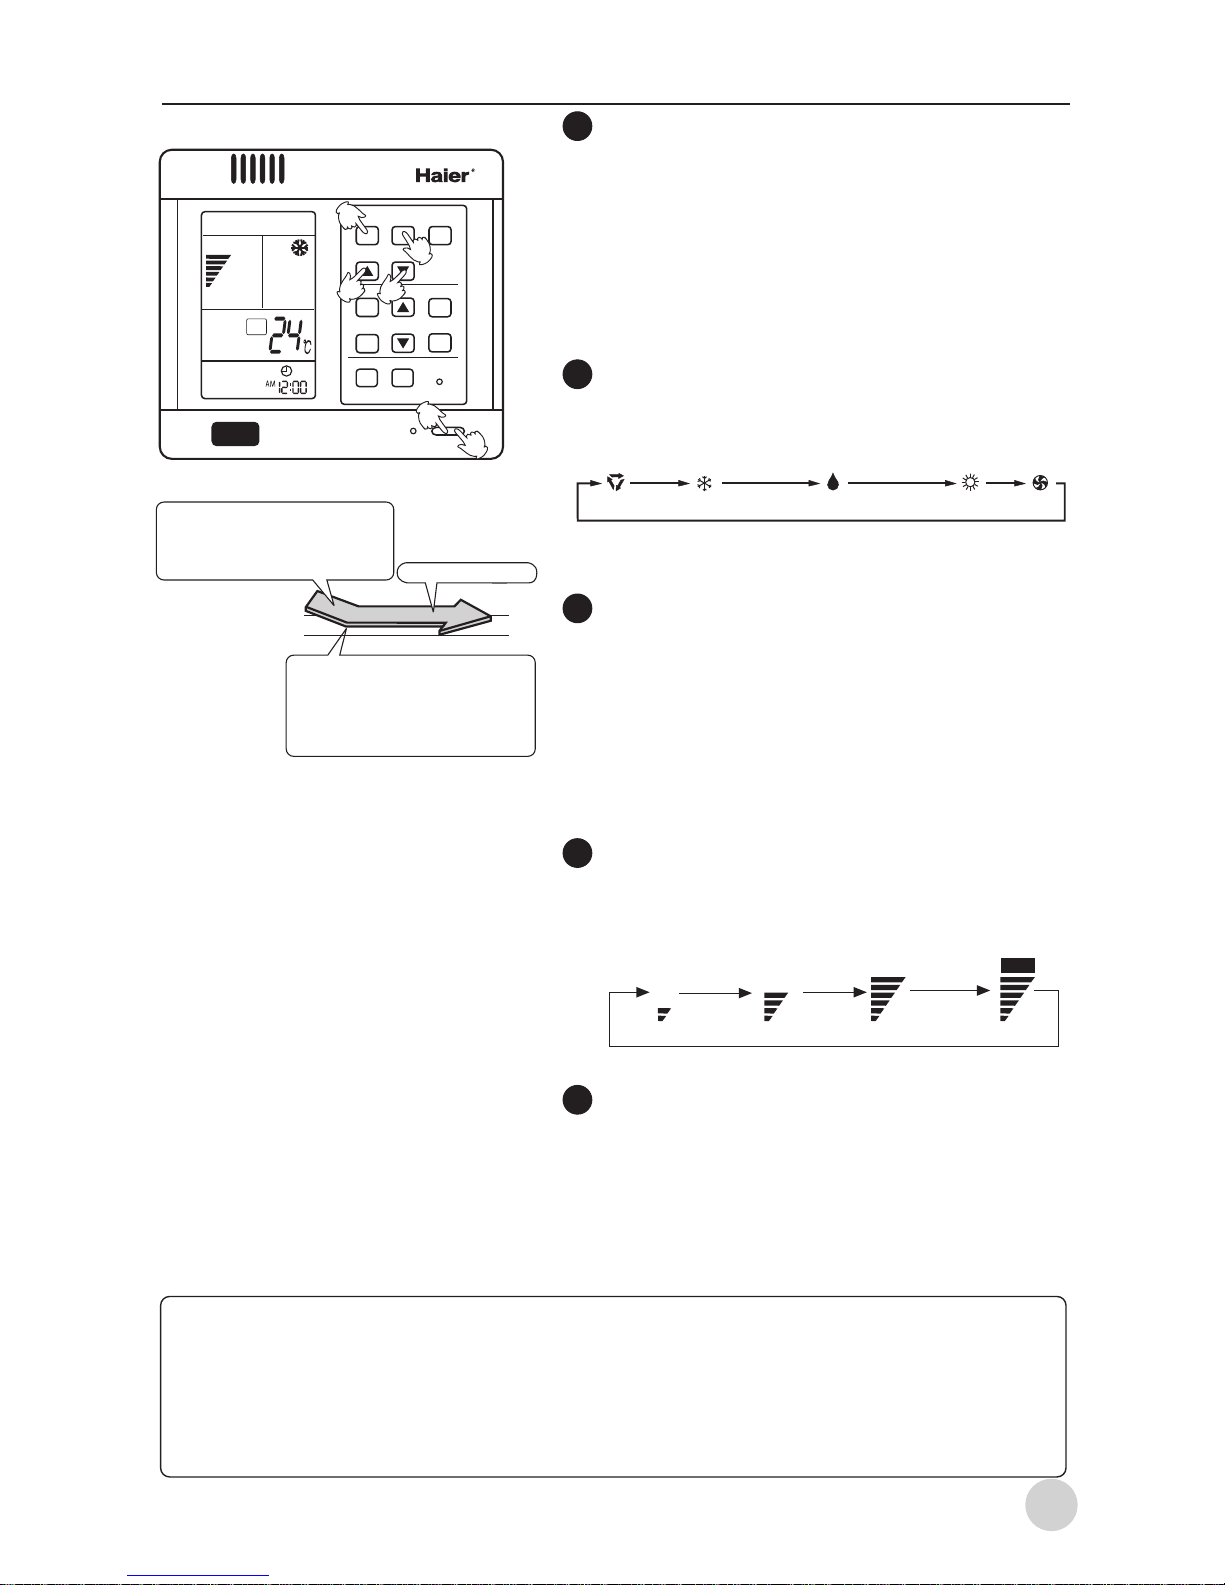
Auto/Cooling/Dehumidifying/Heating operation
Hints:
The wire controller can memorize the working condition of each time. When start
the unit for the second time, just need to press ON/OFF button, the air conditioner
will work according to the previous working mode. (except for Timer, Sleep and
Swing)
Turn on the unit
Press the ON/OFF button to turn on the unit
The LCD display of the wire controller will
show the previous working state (except for
TIMER, SWING, SLEEP mode). The
operation indicator light on the wire
controller will light up.
Choose of working mode
Press MODE button, each press the working
mode will change as the following sequence:
then choose AUTO, COOLING,
DEHUMIDIFYING, HEATING operation.
Set temperature
*Each press , the set temperature will
increase 1 degree.
*Each press, the set temperature will
decrease 1 degree.
Set the desired temperature.
Press the TEMP. SET button
Adjusting FAN SPEED
Press the F AN SPEED button, for each press,
the fan speed will change as the following
sequence:
Choose the desired fan speed.
In Heating operation, after start the unit,
the air conditioner will sending warm
air a moment later to prevent the cold
air blowing out. In Dehumidifying,
when the room temperature drops 2*
higher than the set temperature,
regardless the set fan speed, the air
conditioner will intermittently operate
in low fan speed.
Turn off the unit
Press the ON/OFF button to turn off the unit.
The wire controller only shows the clock
and room temperature.
About AUTO operation:
In AUTO operation, the air conditioner will operate and automatically choose COOLING,
HEATING or FAN operation according to room temperature.
AUTO COOLING DEHUMIDIFYING HEATING FAN
3
4
SET
ON/OFF
MODE
FAN SWING
TEMP
CLOCK
SET
TIMER
SLEEP
RESET
FILTER RESETHEAT
5
1
4
3
2
3
5
1
Set temperature + 2*
Set temperature
When room temperature reaches
set temperature + 2*, the unit will
operate in mild dehumidifying
operation.
Ultra-low air flow
When room temperature is higher
than set temperature, unit in
COOLING operation.
AUTO
LOW FAN MED FAN HIGH FAN AUTO
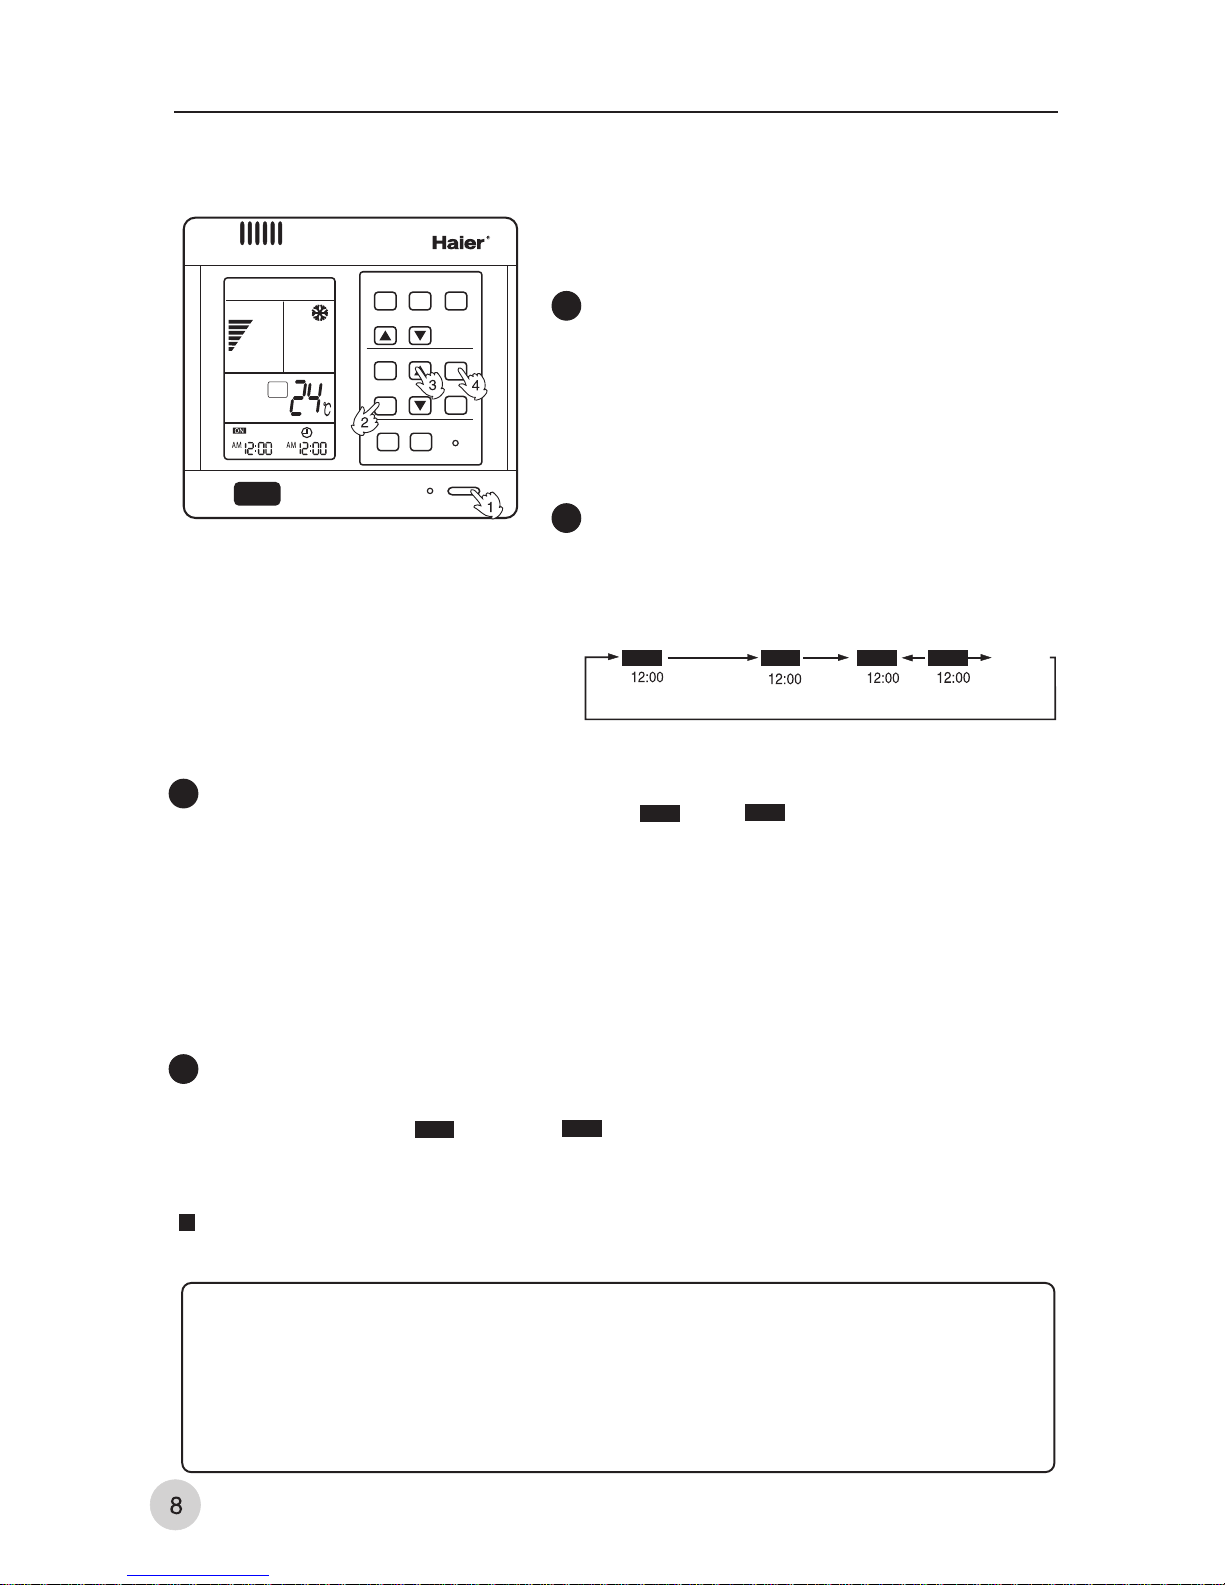
Timer On/Off function
Operation instruction
SET
ON/OFF
MODE
FAN SWING
TEMP
CLOCK
SET
TIMER
SLEEP
RESET
FILTER RESETHEAT
2
Before using TIMER function, calibrate the clock
first (referring to page 3). When you wake up in the
morning, before going back to home after work or
after going to bed, you can let your air conditioner
automatically turn on or turn off.
Set of TIMER mode
Press the TIMER button to change the
TIMER mode, each press the TIMER mode
will change as the following sequence:
Turn on the unit
Cancel TIMER
Press the TIMER button several times until the TIMER mode display disappears.
After turning on the unit, set the desired
working mode.
The LCD of the wire controller will show
working mode. (except for Timer, Sleep,
Swing)
* Each press, the set time increases 10 minutes. If depress the button, the
time will increase rapidly.
*Each press, the set time decreases 10 minutes. If depress the button, the
time will decrease rapidly.
Set time
Press the time adjusting button
This LCD will show the time set, the time can be adjusted within 24h.
(AM stands for morning, PM stands for afternoon).
Confirm the time
After calibration of the clock, press SET button to confirm time.
The time displayed is: at x oíclock x minutes the unit will be turned on (TIMER
ON) or turned off (TIMER OFF).
Hints:
After power failure, the clock should be calibrated again.
The wire controller has memory function, when you use this function for the
second time, if the time set is the same as the previous one, you just need to
choose the TIMER mode then press the SET button to confirm.
3
1
TIMER ON TIMER OFF TIMER ON-OFF
Blank
OFFON OFFON
AM
PM
AM
PM
Then choose the timer mode as you need
(TIMER ON or TIMER OFF.)At this time
the or will flash.
ON
OFF
* * * *
At this time, the* *or* *will not flash.
ON
OFF
4
 Loading...