

Page 1
User Manual
PHC725
Safety information
DOC022.52.80432
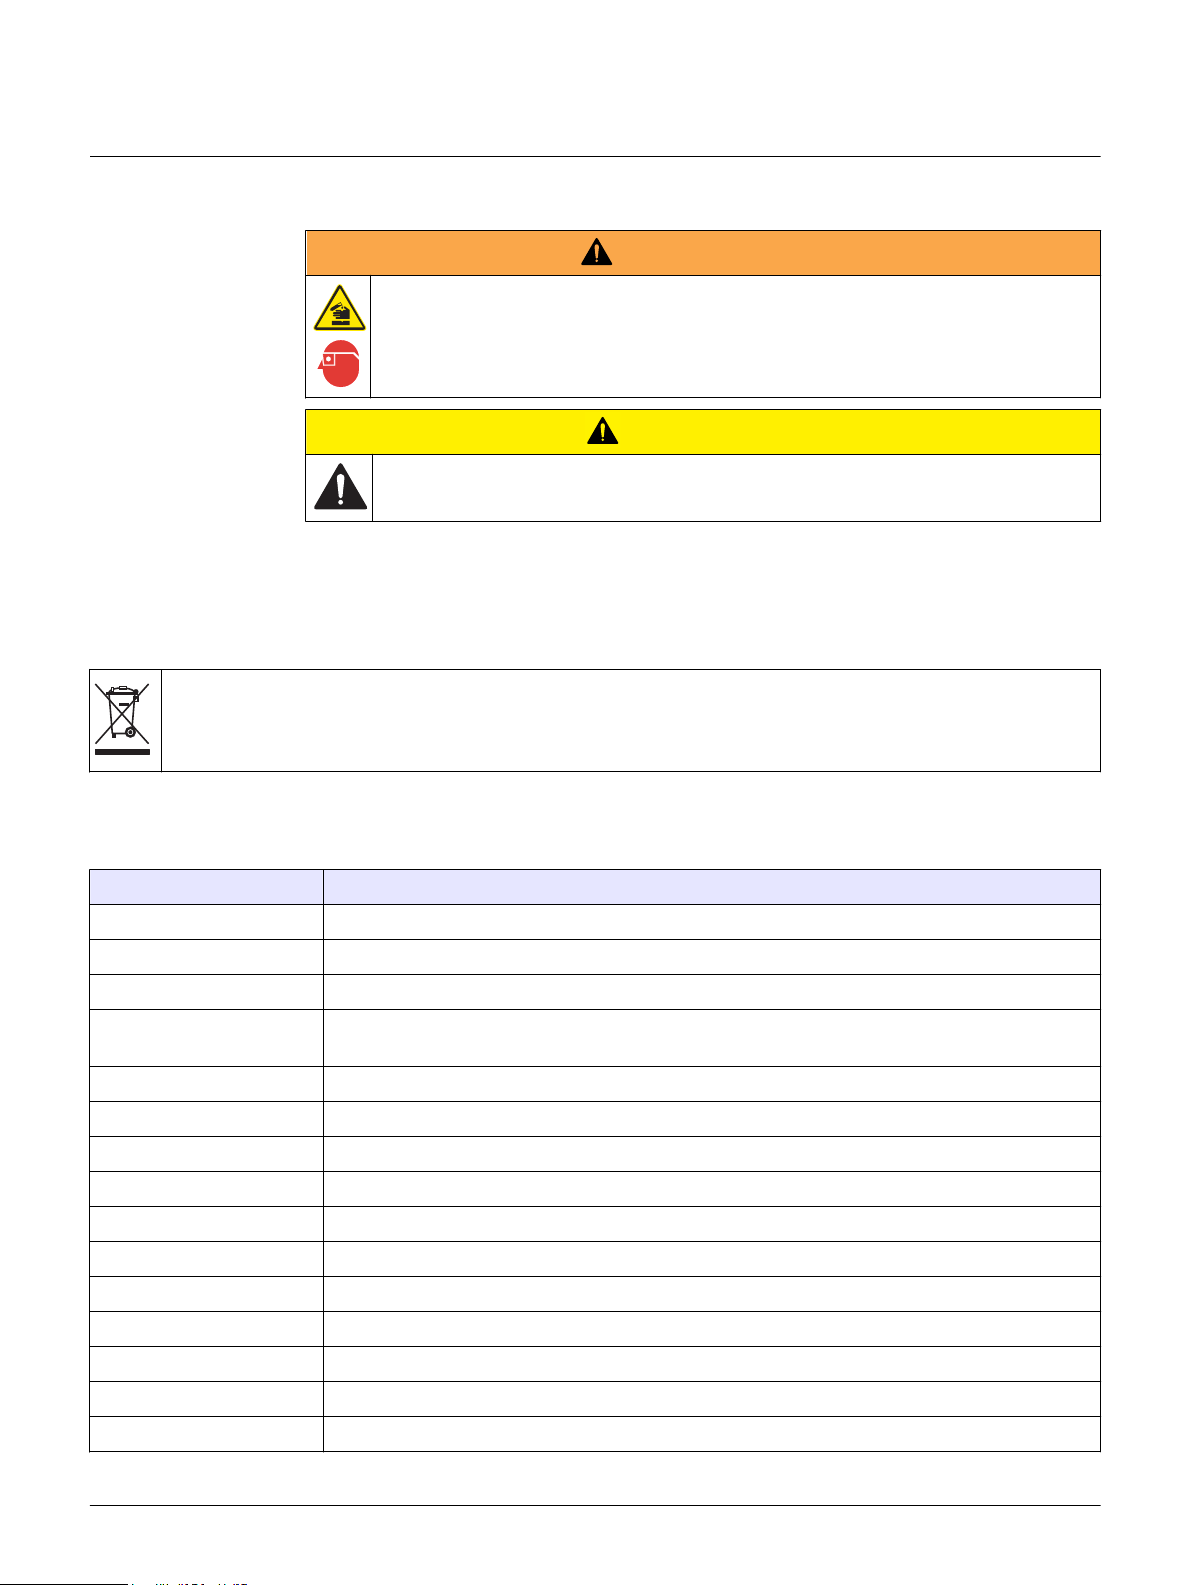
Precautionary labels
Read all labels and tags attached to the instrument. Personal injury or damage to the
instrument could occur if not observed. A symbol on the instrument is referenced in the
manual with a precautionary statement.
Electrical equipment marked with this symbol may not be disposed of in European domestic or public disposal
systems. Return old or end-of-life equipment to the manufacturer for disposal at no charge to the user.
Specifications
W A R N I N G
Chemical exposure hazard. Obey laboratory safety procedures and wear all of the
personal protective equipment appropriate to the chemicals that are handled. Refer to the
current safety data sheets (MSDS/SDS) for safety protocols.
C A U T I O N
Personal injury hazard. Glass components can break. Handle with care to prevent cuts.
Specifications are subject to change without notice.
Specifications Details
Probe type Digital combination glass pH probe with refillable electrolyte and built-in temperature sensor
Body material Glass
pH range pH 0 to 14
pH resolution User-selectable stabilization time and resolution—Fast: 0.1, Fast: 0.01, Medium: 0.01, Slow:
0.01 or Slow: 0.001
pH accuracy ±0.01 pH
Sodium (alkalinity) error <0.3 pH at pH 13 in 0.1 M NaOH
Slope –59 mV/pH (85 to 115% at 25 °C (77 °F) per Nernstian theoretical value)
Isopotential point pH 6.00
Temperature compensation 30 kΩ NTC thermistor
Temperature accuracy ±0.3 °C (±0.54 ° F)
Operating temperature –10 to 100 °C (14 to 212 °F)
Storage temperature 5 to 40 °C (41 to 104 °F)
Junction type Annular porous ring
Reference type Red Rod
1
Electrolyte Refillable, saturated KCl
1
Page 2
Specifications Details
Storage solution Saturated KCl
Minimum sample depth 14 mm (0.55 in.)
Dimensions Body diameter: 12 mm (0.47 in.)
Body length: 103 mm (4.1 in.)
Total length: 200 mm (7.87 in.)
Cable length: 1 m (3.28 ft)
Cable connection M12 digital output and connector compatible with HQd meters
1
Radiometer Analytical’s Red Rod technology: Encapsulation of reference elements with a red protection tube.
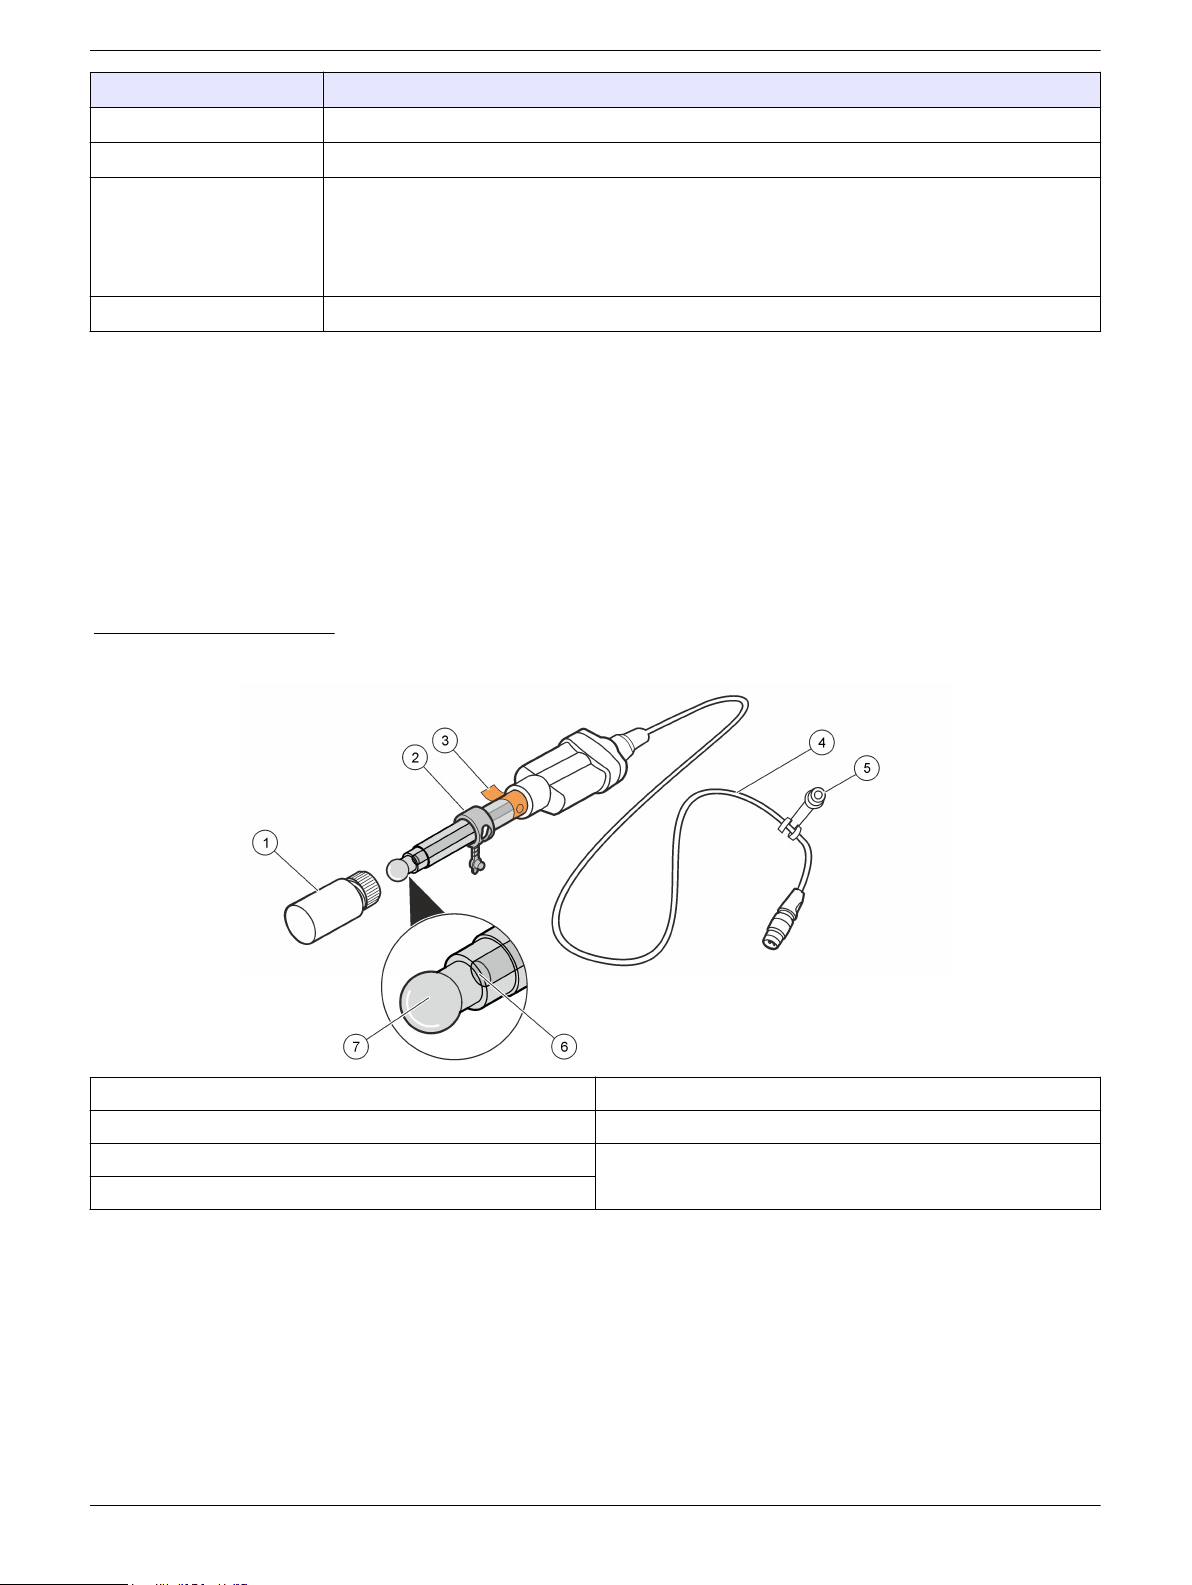
Product overview
The probe is a digital pH combination electrode with refillable electrolyte, a glass body
and an integrated temperature sensor. The probe is for laboratory use and measures pH
in general aqueous samples.
Note: Do not use the probe with organic solvents, emulsions, samples with high solids content or
high alkaline sample types.
A 59-mL bottle of reference electrolyte filling solution (saturated KCl solution) is included
with the probe. Refer to Figure 1.
Figure 1 Probe overview
1 Probe soaker bottle 5 Probe soaker bottle holder
2 Filling-hole cap 6 Reference junction
3 Protective tape and filling-hole 7 Glass bulb and temperature sensor
4 Cable, 1 meter (3.28 ft)
Preparation for use
Prepare the probe before a calibration or a sample measurement.
1. Turn the probe soaker bottle cap counter-clockwise to loosen the cap.
2. Remove the soaker bottle from the probe.
3. Fully rinse the reference junction and the glass bulb with deionized water to remove
all of the storage solution or possible salt particles. Dry with a no-lint cloth.
4. Remove the protective tape from the filling hole before initial use (refer to Product
overview on page 2). Discard the protective tape.
2
Page 3
5. Add the filling solution to the probe as necessary (refer to Fill the probe
on page 11). The filling solution must be above the standard solution or the sample
level during measurement or calibration (Figure 2).
6. For Red Rod probes, make sure that there is approximately 0.5 cm (0.2 in.) of KCl
crystals in the filling solution in the probe. Refer to Table 1. For measurements at
temperatures higher than 60 °C (140 °F), add KCl crystals through the filling hole.
Refer to Table 1 to calculate the quantity of KCl crystals to add. The quantity of
necessary KCl crystal increases linearly from 60 to 100 °C.
7. For Red Rod probes, make sure that the KCl crystals move freely through the liquid
when the probe is inverted. If necessary, shake the probe to loosen the crystals.
8. Make sure that the filling hole is open during measurement for the correct flow of the
filling solution.
Note: For the best stabilization time, condition the probe for 2 hours in pH buffer 4.01 before use, if
the probe was not used for 3 weeks or more. In low ionic strength (LIS) samples, condition the
probe for a maximum of 5 minutes in the sample before use. In all other cases a condition before
use is not necessary.
Figure 2 Filling solution level
1 KCl crystals
2 Filling solution level 4 Standard solution or sample level
1
Red Rod probes only
1
3 Filling solution
Table 1 KCl crystal level for Red Rod pH probes
Temperature Amount of KCl crystals Add Temperature Amount of KCl crystals Add
60 °C (158 °F) 0.5 g (0.5 cm) 0 g 90 °C (194 °F) 0.875 g 0.375 g
70 °C (158 °F) 0.625 g 0.125 g 100 °C (212 °F) 1.0 g (1.0 cm) 0.5 g
80 °C (176 °F) 0.750 g 0.25 g
Calibration
Before calibration:
The probe must have the correct service-life time stamp. Set the date and the time in the meter before the probe is attached.
It is not necessary to calibrate again if a calibrated probe is moved from one HQd meter to another. Make sure that the
additional meter is configured to use the same calibration options.
3
Page 4
Before calibration:
To view the calibration data, push , then select View Probe Data>View Current Calibration.
If two probes are connected, push the UP or DOWN arrow to change to the single display mode to show the Calibrate option
(available only on HQ40d and HQ440d meters).
Prepare the probe for use (refer to Preparation for use on page 2).
Calibration notes:
• Use buffers that are two pH units apart.
• Select additional standard sets with the minimum number of calibration points in the
Calibration Options. For a two-point calibration, select: one buffer with a pH above
and one buffer with a pH below the sample pH. For a one-point calibration, select the
buffer nearest to the sample pH.
• The calibration is recorded in the probe and the data log. Send the calibration to a
PC, a printer or a flash memory stick if connected.
• Air bubbles under the sensor tip can cause a slow response or an error in the
measurement. If there are bubbles under the sensor tip, carefully shake the probe to
remove the bubbles.
• Make sure that the filling hole is open and above the sample solution level.
• Use a laboratory stirrer or shake the probe from side to side in the solution to refresh
the reference junction.
• The meter display shows "Stabilizing" and a progress bar as the probe stabilizes in
the standard. The display shows the buffer and the temperature corrected pH value
when the measurement is stable.
• The calibration and sample measurement conditions must be as similar as possible
(e.g., the temperature of the solution, the stir procedure, the stir rate and the position
of the probe).
• If a calibration error occurs, refer to Troubleshooting on page 12.
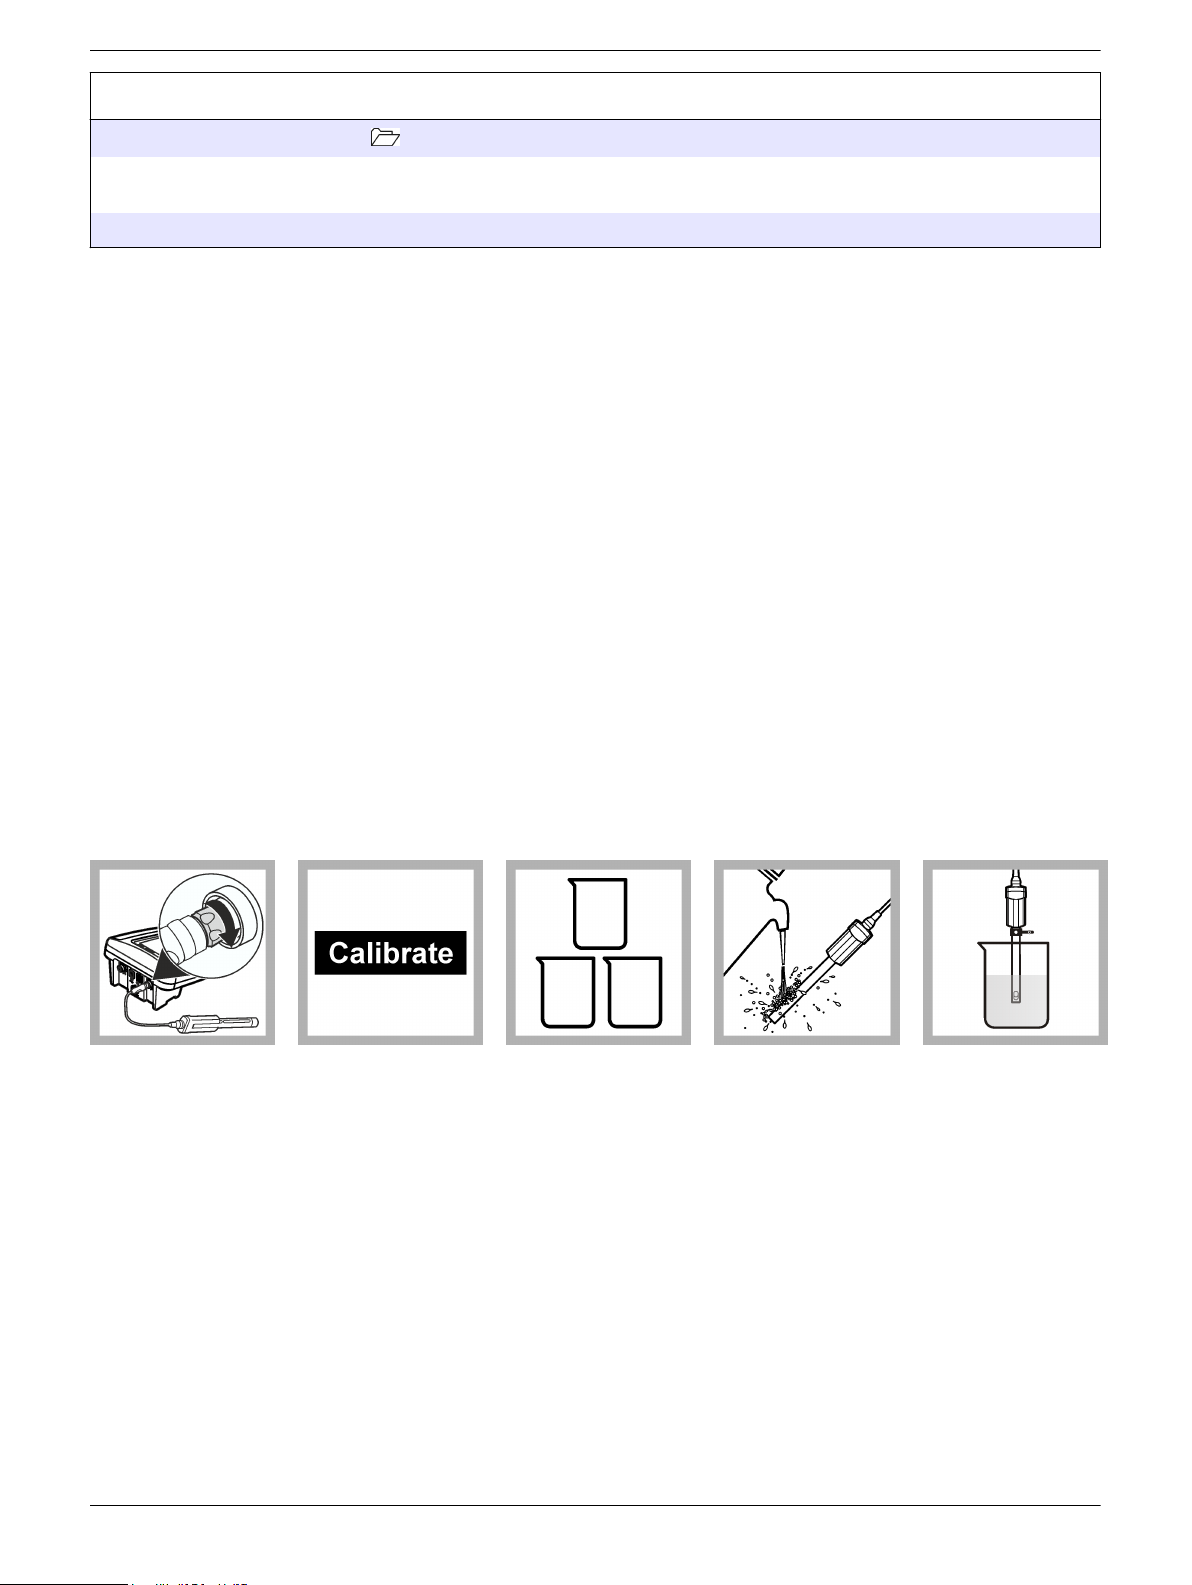
1. Connect the probe
to the meter. Make
sure that the cable
locking nut is correctly
connected to the
meter. Set the meter
to on.
Calibration procedure:
2. Push Calibrate.
The display shows the
buffers that are
necessary for
calibration.
3. Prepare the fresh
buffers in separate
beakers or applicable
containers.
4. Rinse the probe
with deionized water.
Dry with a no-lint
cloth.
5. Put the probe in
the pH buffer solution
and stir lightly. Make
sure to fully put the
reference junction into
the standard.
4
Page 5
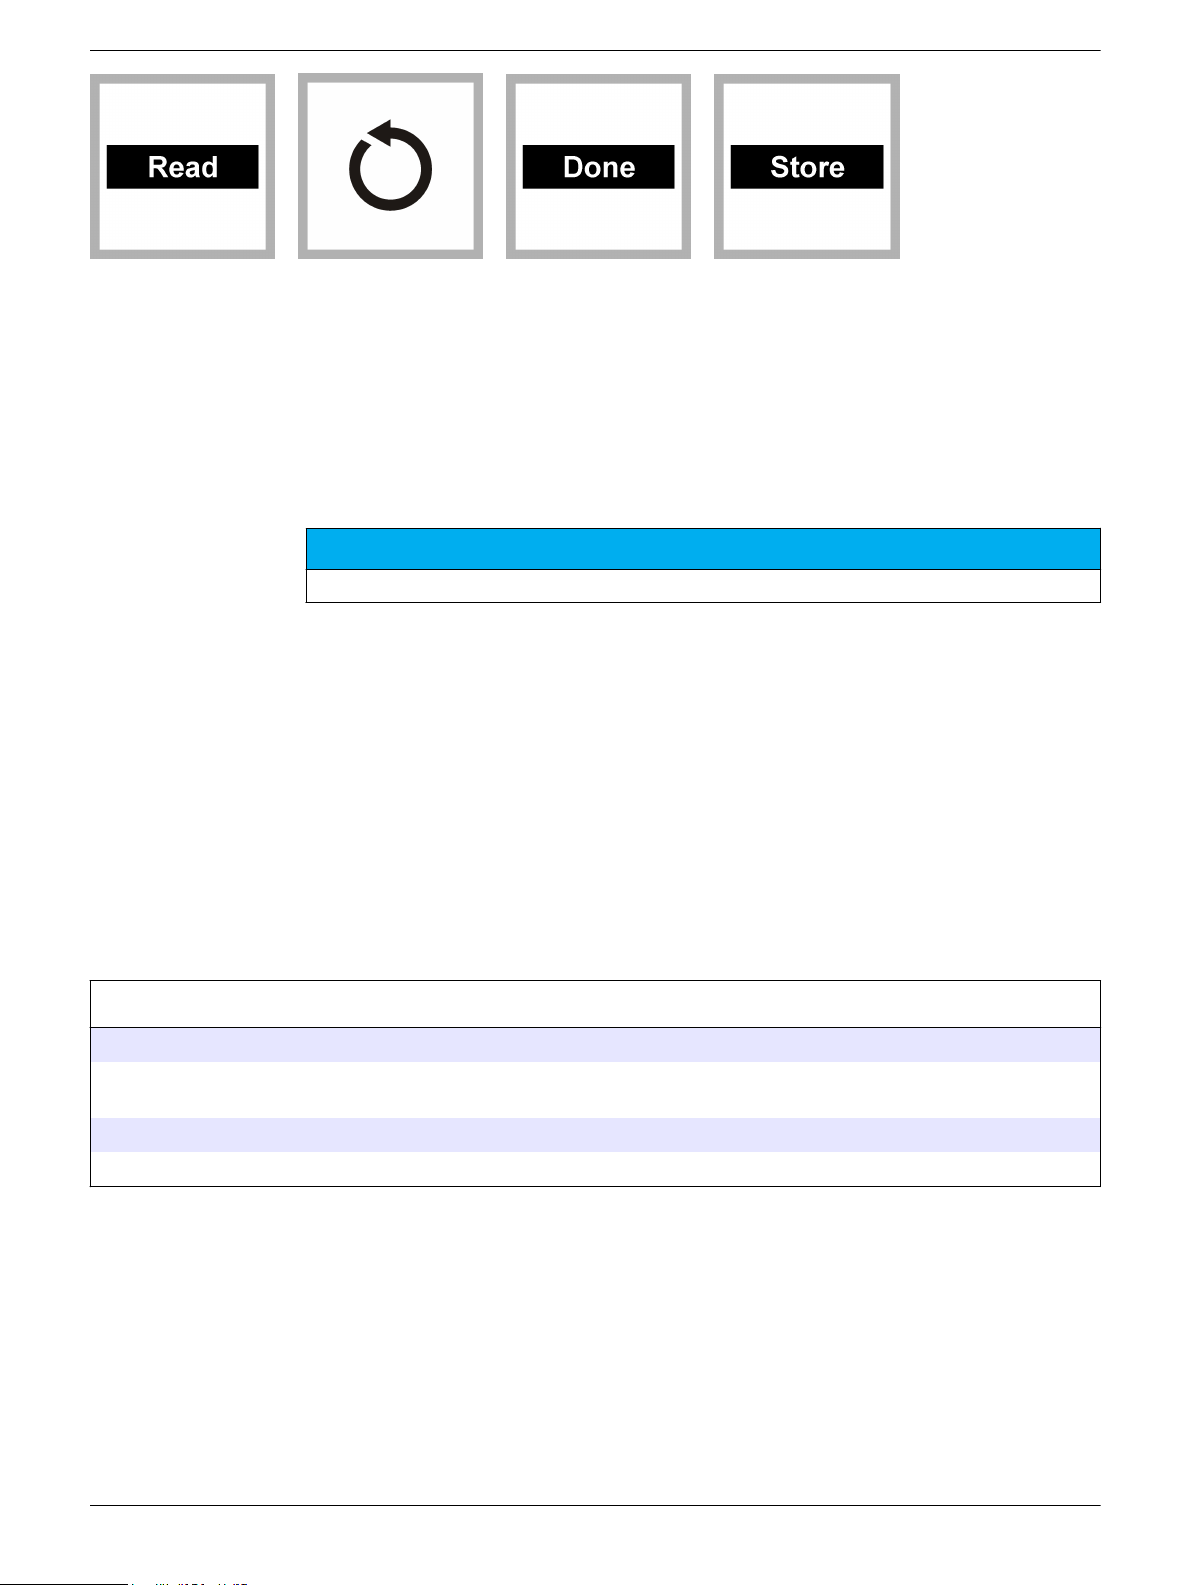
6. Push Read. Wait
until the reading
stabilizes.
7. Do steps 4–6
again to collect the
minimum number of
calibration points
specified in the
calibration options.
Sample requirements
8. Push Done to view
the calibration
summary.
Note: The display will
not show "Done" until
the minimum number
of calibration points is
collected.
9. Push Store to
accept the calibration
and go back to the
measurement mode.
N O T I C E
Some probes are not compatible with specific sample types. Probe damage can occur.
• Samples must be aqueous. The probe can also make measurements in partially
aqueous or some water-miscible solvents. Read the results with caution because the
full pH scale changes when the solvent system changes.
• Probes with a Red-Rod reference system are compatible with solutions that contain
silver complexing or binding agents (e.g., TRIS, proteins and sulfides), as they have
an encapsulated reference system.
• Proteins can collect on the sensing element. Make sure that the probe stays clean
when these types of samples are measured.
• Do not use the probe in solutions that are out of the temperature range of the probe.
Refer to Specifications on page 1.
• For low ionic strength (LIS) or high purity samples, use an LIS chamber or a flow cell
to prevent sample contamination.
Measurement
Before measurement:
The probe must have the correct service-life time stamp. Set the date and the time in the meter before the probe is attached.
If the complete traceability is necessary, enter a sample ID and an operator ID before the measurement. Refer to the HQd
meter manual for more information.
A regular calibration is necessary for the best measurement accuracy (refer to Calibration on page 3).
Prepare the probe for use (refer to Preparation for use on page 2).
Measurement notes:
• Data is automatically stored in the data log when Press to Read or Interval is
selected in the Measurement Mode. When Continuous is selected, data is only
stored when Store is pushed.
• Air bubbles under the sensor tip can cause a slow response or an error in the
measurement. If there are bubbles under the sensor tip, carefully shake the probe to
remove the bubbles.
• For the best stabilization time, condition the probe for several minutes in the sample
or in a solution comparable to the sample in terms of pH and ionic strength before the
initial sample measurement.
5
Page 6

• Do not put the probe on the bottom or sides of the container.
• Make sure that the filling hole is open and above the sample solution level.
• Use a laboratory stirrer or shake the probe from side to side in the solution to refresh
the reference junction.
• The meter display shows "Stabilizing" and a progress bar as the probe stabilizes in
the sample. The display shows the lock icon when the measurement is stable.
• If a measurement error occurs, refer to Troubleshooting on page 12.
Measurement procedure:
1. Connect the probe
to the meter. Make
sure that the cable
locking nut is correctly
connected to the
meter. Set the meter
to on.
6. Do steps 3–5
again to make more
measurements.
2. Condition the
probe in the sample.
7. When
measurements are
done, put the probe in
storage (refer to
Storage
on page 11).
Run Check Standard
3. Rinse the probe
with deionized water
and then with the
sample. Dry with a
no-lint cloth.
4. Put the probe in
the sample and stir
lightly. Make sure to
fully put the reference
junction into the
sample.
5. Push Read. Wait
until the reading
stabilizes.
The Run Check Standard feature validates the instrument performance between sample
measurements. Use the Run Check Standard feature for a periodic or a user-defined
interval measurements of a traceable standard solution. Set the criteria for check
standards from the PHC725 Settings menu.
Note: Access control must be set to off or a valid password must be used to change the Run Check
Standard options.
1. Push . The Full Access Options menu shows.
2. Select Run Check Standard.
Note: Select the correct probe if two probes are connected to the meter.
3. Use the standard solution shown on the display.
4. Rinse the probe with deionized water. Dry the probe with a no-lint cloth.
5. Put the probe in the standard solution. Make sure that the reference junction is fully in
the standard. Move the probe up or down or lightly shake the probe to remove air
bubbles.
6
Page 7

6. Push Read. The display shows "Stabilizing" and a progress bar as the reading
stabilizes. The display shows the value of the check standard and Check Standard
Passed or Check Standard Failed.
7. If the display shows Check Standard Passed, the check standard measurement is in
the accepted limits. Select Done to continue the sample measurement.
8. If the display shows Check Standard Failed, the measurement is out of the accepted
limits. A calibration is recommended. Make sure that the limits are set correctly at the
PHC725 Settings menu. If the acceptance criteria is set to "Cal Expires on Failure:
Yes", the display shows the calibration icon and a question mark until the probe is
calibrated again. To correct the probe calibration and status indicator, calibrate the
probe (refer to Calibration on page 3).
Advanced operation
This section gives instructions about menu navigation and available options. Change
parameter-specific settings through the Full Access Options menu.
The settings that can be changed are shown in Table 2.
Setting Options
Table 2 Parameter-specific settings
Measurement Options
Calibration Options
Check Standard Options
Units
• Resolution
• Upper and lower range limits
• Buffer set
• Buffer set values (if Custom Buffer Set selected)
• Reminder
• Minimum Cal points
• Slope limit
• Standard (temperature compensated buffer or custom at 25 °C (77 °F))
• Reminder
• Acceptance criteria
• Standard value at 25 °C (77 °F) (if custom standard selected)
• pH
• mV
Change measurement options
Methods are groups of default or user-defined settings related to specific applications. If
the meter is set to the default method, a prompt for a new name method shows. The
settings are saved with this name to identify them from the default method settings, which
cannot be changed. Use a saved method as an alternative of many adjustments to the
individual settings. Changes made to a user-defined method are automatically saved with
the existing name. Save different methods for the same probe on each meter.
1. Make sure that a probe is connected to the meter.
2. Push and select PHC725 Settings.
3. Select Modify Current Settings.
4. Select Units. Select pH (default) or mV.
Note: Use the mV option to find the probe offset in a pH 7 buffer or to measure the slope. Both
units show when the Detail Display mode is selected.
7
Page 8

5. Select Measurement Options and update the settings:
Option Description
Resolution Set the resolution:
• 0.1 pH—Fast
• 0.01 pH—Fast (default)
• 0.01 pH—Medium
• 0.01 pH—Slow, or
• 0.001 pH—Slow
The resolution has an effect on the number of decimal digits and the
stabilization time. More stabilization time is necessary for higher resolution
measurements. Slower stabilization times give higher accuracy
measurements.
Measurement
Limits
Set the measurement limits—Lower limit (default: 0.00 pH) or Upper limit
(default: 14.00 pH).
Set the measurement limits to agree with the permitted values for the
sample. When the measurement is above the upper limit setting or below
the lower limit setting, the meter shows an "Out of limits" message. This
message is an alert to a possible problem with the process conditions.
6. If prompted, enter a name for the new method settings. Other changes made to the
settings of an existing method are automatically saved with the same method name.
7. Push EXIT until the meter goes back to the measurement mode.
Change calibration options
1. Make sure that a probe is connected to the meter.
2. Push and select PHC725 Settings.
3. Select Modify Current Settings.
4. Select Calibration Options and update the settings:
Option Description
Buffer Set Sets the temperature compensated buffer set for calibration:
Buffer Set
Values
Minimum Cal
Points
Slope Limit Sets the slope limit—1% to 20% (acceptable slope criteria, default = 15%).
• Color Coded—4.01, 7.00, 10.01 (default)
• IUPAC—4.01, 7.00, 10.01, 12.45
• DIN—4.65, 9.23
• IUPAC—4.01, 6.86, 10.01, 12.45
• IUPAC—4.01, 6.86, 9.18, 12.45
• IUPAC—4.01, 7.00, 9.18, 12.45
• Custom Buffer Set (refer to Table 3)
Custom buffer sets are characterized at 25 °C (77 °F).
Buffer set values show on the Calibration Options screen.
Note: Measure only the minimum calibration points specified in Minimum
Cal Points to complete a calibration.
Sets the buffer values if Custom Buffer Set is selected (refer to Table 3).
Sets the minimum number of calibration points that are necessary to
complete a calibration—1 (default), 2 or 3.
Set the slope between the set limits for a correct calibration.
8
Page 9

5. Select the Calibration Reminder and update the settings:
Option Description
Reminder
Repeat
Expires Calibration expires after the selected time—Immediately, Reminder +
The meter makes a sound when a calibration is necessary and at the
selected interval—Off (default), 2 h, 4 h, 8 h, 2 d, 5 d or 7 d.
30 min, Reminder + 1 h, Reminder + 2 h or Continue Reading.
Note: The meter cannot read samples after calibration has expired unless
Continue Reading is selected.
6. If prompted, enter a name for the new method settings. Other changes made to the
settings of an existing method are automatically saved with the same method name.
7. Push EXIT until the meter goes back to the measurement mode.
Table 3 Custom buffer sets
Buffer set
values
Std1 to
Std5
Option Description
1.09 pH—25 °C Pre-set temperature compensated buffer values.
1.68 pH—25 °C
4.01 pH—25 °C
4.65 pH—25 °C
6.86 pH—25 °C
7.00 pH—25 °C
9.18 pH—25 °C
9.23 pH—25 °C
10.01 pH—
25 °C
12.45 pH—
25 °C
Custom Buffer Custom buffer value.
No Buffer Select this option for undefined standards.
Note: It is necessary for selected standards to be different by a minimum of 2 pH units. For example, if
1.09 pH is selected for the first standard, the second standard must be different by at least 2 pH.
Standards that do not meet this minimum will show gray on the screen and will not be selectable.
Range = 2.000 pH to 14.000 pH.
Custom buffer values are not temperature compensated. Custom buffers must be read at
25 °C (77 °C).
Change check standard options
1. Make sure that a probe is connected to the meter.
2. Push
3. Select Modify Current Settings.
and select PHC725 Settings.
9
Page 10

4. Select Check Standards Options and update the settings:
Option Description
Standard Sets the temperature compensated buffer value for check standard—
• 4.01 pH—25 °C
• 4.65 pH—25 °C
• 6.86 pH—25 °C
• 7.00 pH—25 °C
• 9.18 pH—25 °C
• 9.23 pH—25 °C
• 10.01 pH—25 °C
• 12.45 pH—25 °C
• Custom
The standard value shows on the Check Standard Options screen.
No temperature compensation for custom buffers.
Standard
Value
When the Standard is set to Custom, enter the standard value with the
up/down arrow keys.
5. Select Check Standard Reminder and update the settings:
Option Description
Reminder Repeat Sets the time interval for the check standard reminder—Off, 30 minutes,
2 h, 4 h, 8 h, 12 h or 24 h.
Allow Defer Lets the postponement of check standard reminders—Yes or No.
Maintenance
Clean the probe
6. Select Acceptance Criteria and update the settings:
Option Description
Acceptance Limits Sets the tolerance limits for check standard—0.005 pH (default) to
1.000 pH.
Cal Expires on Failure Recalibration is necessary if check standard fails—Yes or No.
7. If prompted, enter a name for the new method settings. Other changes made to the
settings of an existing method are automatically saved with the same method name.
8. Push EXIT until the meter goes back to the measurement mode.
Clean the probe when there is contamination on the sensor. Symptoms of contamination
are:
• Readings are not accurate or consistent.
• The stabilization time is slow.
• A calibration error occurs.
• Contamination is visible on the probe (e.g., dirt).
1. Rinse the probe with deionized water. Blot dry with a no-lint cloth.
2. Soak the glass bulb of the probe in the applicable cleaning agent. Refer to Table 4.
Note: Remove KCl salt build-up from the probe with warm deionized water.
3. Rinse or soak the probe for 1 minute in deionized water.
4. Soak the probe in pH 4 buffer for 20 minutes.
5. Rinse the probe with deionized water.
6. Blot dry with a no-lint cloth.
10
Page 11

Table 4 Cleaning agent
Contaminant Cleaning agent Soak time
General contaminants Electrode cleaning solution 12–16 hours
Mineral deposits 0.1 N HCl solution 10–15 minutes
Fats, grease and oils Warm, mild detergent solution 2 hours (maximum)
Protein deposits Pepsin cleaning solution 3 hours (maximum)
Inorganic buildup EDTA solution 3 hours (maximum)
Replace the filling solution
Replace the filling solution and KCl crystals (if applicable) when either occurs:
• The filling solution becomes contaminated.
• The KCl crystals in a Red Rod probe no longer move freely through the liquid when
the probe is inverted.
1. Use a syringe or small pipette to remove as much filling solution from the probe as
possible.
2. For Red Rod probes, if KCl crystals are still in the probe:
a. Fill the probe half full with the filling solution.
b. With a finger over the filling hole, shake the probe until the crystals become
loose.
c. If the crystals will not loosen, fill the probe with filling solution. Put the probe into a
warm water bath for approximately 10 minutes (up to 60 °C (140 °F)).
d. Do step 1 again.
3. For Red Rod probes, add approximately 0.5 cm (0.2 in.) of KCl crystals to the probe
through the filling hole. For measurements at temperatures more than 60 °C (140 °F),
more crystals are necessary. Refer to Preparation for use on page 2.
4. Fill the probe. Refer to Fill the probe on page 11.
Fill the probe
Storage
Add filling solution to the probe when the filling solution level is low (refer to Preparation
for use on page 2) or is replaced (refer to Replace the filling solution on page 11). Refer
to Specifications on page 1 for the applicable filling solution.
1. If the filling hole is closed, remove the filling-hole cap from the filling hole (refer to
Product overview on page 2).
2. Remove the cap from the tip of the filling solution bottle.
3. Hold the bottle so that the tip is down. Put the tip of the bottle in the filling hole.
4. Slowly squeeze the bottle and fully fill the probe.
Note: Fully fill the probe for the best performance.
5. Put the probe into storage if not used immediately (refer to Storage on page 11).
6. Keep the filling solution bottle and cap for later use.
Note: If the dispensing tip becomes clogged, remove the dispensing tip and soak the tip in
warm water. Fully dry and assemble the tip.
Short-term and long-term storage
For the best probe performance, do not let the reference junction become dry.
Note: Keep the probe in a sample for a maximum of 2 hours if the sample pH is not too high.
11
Page 12

1. Put the filling-hole cap in the filling hole (refer to Product overview on page 2).
2. Rinse the probe with deionized water. Dry the probe with a no-lint cloth.
3. Fill the probe soaker bottle half full with the applicable Storage Solution (refer to
Specifications on page 1) .
4. Loosen the soaker bottle cap and put the soaker bottle on the probe.
5. Turn the soaker bottle cap clockwise to tighten the soaker bottle cap.
6. Make sure that the solution in the soaker bottle fully covers the glass bulb and the
reference junction.
Rehydration
If the glass bulb becomes dry:
1. Soak the probe tip in the 4.01 and 7.00 buffers each for 5 minutes.
2. Rinse the probe with deionized water. Blot dry with a no-lint cloth.
3. Calibrate the probe.
Troubleshooting
Message or symptom Possible cause Action
Probe not supported Software not updated To download the most current version of the software,
refer to the applicable product page on the
manufacturer's website.
Refer to the HQd Series meter documentation for more
information.
HQd meter does not sense the
IntelliCAL® probe
Connect a probe or probe
requires service
pH reading and/or mV reading
is same for all solutions
Standard not recognized error Soaker bottle not removed Remove the soaker bottle.
Probe not connected correctly Disconnect, then connect the probe. Tighten the locking
Software not updated To download the most current version of the software,
Large number of methods stored
on probe
Damaged probe Make sure that there is connectivity with another probe or
Soaker bottle not removed Remove the soaker bottle.
Electrical issue Contact technical support.
Incorrect buffer or contamination
in the buffer solution
Contamination in the filling
solution
Contact technical support.
nut.
refer to the applicable product page on the
manufacturer's website.
Refer to the HQd Series meter documentation for more
information.
If the probe has a large number of stored methods, more
time is necessary for connection. Do not disconnect the
probe, continue to let the probe connect.
meter to confirm isolated issue with probe. Contact
technical support.
Use fresh buffer solution as specified in the method.
Drain and replace the filling solution with fresh solution.
12
Page 13

Message or symptom Possible cause Action
Slow stabilization time Tape not removed from the
filling-hole
Contamination in the glass
sensor
Contamination in the filling
solution
Filling hole closed Make sure that the filling hole is open and above the
Poor contact between reference
junction and solution
LIS sample Soak the probe in the sample for 10 to 15 minutes before
Low sample temperature or
temperature difference between
samples
Air bubbles around inner
reference electrode
Dehydrated glass bulb Rehydrate the probe. Refer to Storage on page 11.
Not sufficient electrolyte flow
Remove the tape.
Clean the probe. Refer to Clean the probe on page 10.
Drain and replace the filling solution with fresh solution.
solution level.
Shake the probe in the solution from side to side to
refresh the reference junction.
the initial measurement or use a LIS chamber or flowthrough cell.
Examine the sample temperature. The lower the
temperature or the higher difference of temperatures
between samples, the longer the stabilization time will
be.
Carefully tap the probe with hand or shake the probe
downward to remove any air bubbles.
1
Open the sleeve junction.
pH probe too old (membrane
Replace the probe.
degradation)
Calibration errors Calibration not done correctly Calibrate again with fresh pH buffers.
Contaminated glass sensor Clean the probe. Refer to Clean the probe on page 10.
Slope exceeds the criteria for %
of theoretical (as defined in the
method slope limit)
1. Adjust the slope limits by changing the PHC725
calibration settings and method.
2. Calibrate again the probe.
3. Make a check standard to examine the performance
of the probe.
13
Page 14

Message or symptom Possible cause Action
Drifting/Inaccurate readings Contaminated glass bulb Clean the probe. Refer to Clean the probe on page 10.
CO2 absorption (for low ionic
strength or high purity sample)
Clogged reference Make sure that the filling hole is not covered. Rinse the
Improper storage conditions/
Dehydrated glass bulb
Colloidal and/or particulates in
the filling solution
Air bubbles around inner
reference electrode
Not sufficient electrolyte flow
Not sufficient stirring Stir the standards and samples at a slow and steady rate
Out of range Measurement value is out of
range
Out of limits Check Standard value is out of
limits in the current method
1
Use the LIS chamber for LIS/high purity samples to
prevent sample contamination.
reference junction holes with deionized water. Carefully
tap the probe with hand or shake the probe to remove air
bubbles. If there are salt crystals around the junction,
soak the electrode tip in a 60 ºC (140 ºF) water bath for
10 minutes.
Clean or condition the probe and calibrate again. The
probe can not operate correctly if the probe was left dry
for a long time. Rehydrate the probe. Refer to Storage
on page 11.
Replace the filling solution, calibrate and test again.
Carefully tap the probe with hand or shake the probe to
remove air bubbles.
Open the sleeve junction.
to prevent the formation of a vortex.
Make sure that the sample is in the range of the probe.
Make sure that the standard is in the limits of the current
method.
Do another method that expands the acceptable limits.
Measurement value is out of
measurement limits in the current
method
Temperature out of range Temperature value is out of
range
Measured temperature is out the
range of the probe
Check standard temperature
value is out of range
1
Only applicable for probes with sleeve junction.
Make sure that the sample is in the limits of the current
method.
Make a new method with an expanded range.
Make sure that the sample temperature is in the range of
the probe.
Make sure that the temperature sensor works correctly.
Make sure that the standard temperature is in the range
of the probe.
Make sure that the temperature sensor works correctly.
Make sure that the check standard temperature is in the
range of the probe.
Consumables and accessories
Description Quantity Item Number
Electrode filling solution, saturated KCl 59 mL 25118059
Electrode filling solution, saturated KCl 500 mL 25118049
KCl crystals (Radiometer Analytical) 15 g S21M001
Hach Electrode Cleaning Solution 500 mL 2965249
EDTA standard solution, 0.20N 500 mL 102149
Soaker bottle 1 5192900
14
Page 15

Consumables and accessories (continued)
Description Quantity Item Number
LIS chamber assembly 1 5189900
Color-coded pH standards (buffers)
pH 4.01 ±0.02 at 25 °C (77 °F), 500 mL 1 2283449
pH 7.00 ±0.02 at 25 °C (77 °F), 500 mL 1 2283549
pH 10.01 ±0.02 at 25 °C (77 °F), 500 mL 1 2283649
pH 4.01 ±0.02 at 25 °C (77 °F), 4 L 1 2283456
pH 7.00 ±0.02 at 25 °C (77 °F), 4 L 1 2283556
pH 10.01 ±0.02 at 25 °C (77 °F), 4 L 1 2283656
pH 4.01 ±0.02 at 25 °C (77 °F), 20 L 1 2283461
pH 7.00 ±0.02 at 25 °C (77 °F), 20 L 1 2283561
pH 10.01 ±0.02 at 25 °C (77 °F), 20 L 1 2283661
IUPAC series certified pH standards (buffers)
pH 4.005 ±0.010 at 25 °C (77 °F), 500 mL 1 S11M002
pH 6.865 ± 0.010 at 25 °C (77 °F), 500 mL 1 S11M003
pH 7.000 (Radiometer Analytical) ±0.010 at 25 °C (77 °F), 500 mL 1 S11M004
pH 9.180 ± 0.010 at 25 °C (77 °F), 500 mL 1 S11M006
pH 10.012 ± 0.010 at 25 °C (77 °F), 500 mL 1 S11M007
pH 12.45 ± 0.05 at 25 °C (77 °F), 500 mL 1 S11M008
Technical grade pH standards (buffers)
pH 4.65 at 25 °C (77 °F), 500 mL 1 S11M010
pH 9.23 at 25 °C (77 °F), 500 mL 1 S11M011
1
Certified standards ship with certificates for traceability to Standard Reference Materials
1
15
Page 16

HACH COMPANY World Headquarters
P.O. Box 389, Loveland, CO 80539-0389 U.S.A.
Tel. (970) 669-3050
(800) 227-4224 (U.S.A. only)
Fax (970) 669-2932
orders@hach.com
www.hach.com
©
Hach Company/Hach Lange GmbH, 2014. All rights reserved. Printed in Germany. 01/2014, Edition 1
HACH LANGE GMBH
Willstätterstraße 11
D-40549 Düsseldorf, Germany
Tel. +49 (0) 2 11 52 88-320
Fax +49 (0) 2 11 52 88-210
info@hach-lange.de
www.hach-lange.de
HACH LANGE Sàrl
6, route de Compois
1222 Vésenaz
SWITZERLAND
Tel. +41 22 594 6400
Fax +41 22 594 6499
 Loading...