

Page 1

DOC024.52.93009
ORBISPHERE Model 6110 Package Analyzer
User Manual
08/2013, Edition 5
Page 2

Page 3

Table of Contents
Section 1 General Information.........................................................................................................5
1.1 About this manual ........................................................................................................................ 5
1.2 Contact information...................................................................................................................... 5
1.3 Safety information ........................................................................................................................ 5
1.3.1 Use of hazard information................................................................................................... 5
1.3.2 Disclaimer ........................................................................................................................... 6
1.3.3 Safety precautions .............................................................................................................. 6
1.3.4 Service and repairs .............................................................................................................6
1.3.5 Class 1 LASER ...................................................................................................................6
1.3.6 Use of antifoam................................................................................................................... 7
1.3.7 CFL backlight ......................................................................................................................7
1.3.8 Precautionary labels............................................................................................................7
1.4 Product recycling information.......................................................................................................8
1.5 Product disposal ........................................................................................................................ 10
1.6 Restriction of hazardous substances (RoHS) ............................................................................11
Section 2 Specifications.................................................................................................................. 13
2.1 Technical specifications .............................................................................................................13
2.2 Instrument dimensions............................................................................................................... 14
2.3 Main instrument components..................................................................................................... 15
2.3.1 Front view.......................................................................................................................... 15
2.3.2 Left side view .................................................................................................................... 16
2.3.3 Right side view.................................................................................................................. 17
2.4 Instrument switches and buttons ............................................................................................... 18
2.5 Operation overview ....................................................................................................................18
Section 3 Installation........................................................................................................................19
3.1 Unpacking .................................................................................................................................. 19
3.2 Main components.......................................................................................................................19
3.3 Positioning ................................................................................................................................. 20
3.4 Installation.................................................................................................................................. 20
3.4.1 Pre-installation .................................................................................................................. 20
3.4.2 Physical installation........................................................................................................... 21
3.4.3 Post-installation procedures..............................................................................................21
3.5 Additional installation information .............................................................................................. 22
3.5.1 Microsoft ActiveSync® configuration.................................................................................22
3.5.2 Power supply..................................................................................................................... 23
3.5.3 Emergency STOP button .................................................................................................. 23
3.5.4 Antifoam cartridge preparation.......................................................................................... 23
Section 4 User Interface and Startup...........................................................................................27
4.1 User interface.............................................................................................................................27
4.1.1 Turning the instrument ON and OFF.................................................................................27
4.1.2 Touch screen .................................................................................................................... 27
4.1.3 Data entry.......................................................................................................................... 27
4.1.4 Rolling lists........................................................................................................................28
4.1.5 Instrument options............................................................................................................. 28
4.1.6 Information and warning windows..................................................................................... 29
4.1.7 Instrument status indicator................................................................................................29
4.2 Instrument startup ...................................................................................................................... 30
4.2.1 Instrument auto check....................................................................................................... 30
4.2.2 User identification and access level.................................................................................. 31
4.3 Menu structure overview............................................................................................................32
Section 5 Configuration...................................................................................................................33
5.1 Configuration menu overview .................................................................................................... 33
5.2 Units and resolutions ................................................................................................................. 34
5.3 Package parameters..................................................................................................................35
1
Page 4

Table of Contents
5.3.1 Package management ......................................................................................................35
5.3.2 Formula management .......................................................................................................36
5.4 Instrument parameters ...............................................................................................................37
5.4.1 Measurement output .........................................................................................................37
5.4.2 Time and date ...................................................................................................................37
5.4.3 System information............................................................................................................38
5.5 Security and user management .................................................................................................38
5.5.1 Security management .......................................................................................................38
5.5.2 User management............................................................................................................. 38
5.5.3 Audit trail ...........................................................................................................................39
5.6 Communication ..........................................................................................................................39
5.6.1 Data download configuration.............................................................................................39
5.6.2 Ethernet configuration .......................................................................................................40
5.7 Scheduled operations.................................................................................................................43
5.7.1 Manual calibration ............................................................................................................. 43
5.7.2 Verification.........................................................................................................................43
5.7.3 Routine maintenance ........................................................................................................43
5.7.4 Service ..............................................................................................................................43
Section 6 Calibration........................................................................................................................45
6.1 Calibration menu overview.........................................................................................................45
6.2 Standards requirements.............................................................................................................45
6.3 Calibration schedule...................................................................................................................45
6.4 Barometric pressure sensor .......................................................................................................46
6.5 Pressure sensor .........................................................................................................................46
6.6 Temperature sensor...................................................................................................................47
6.7 Carbon dioxide sensor ...............................................................................................................47
6.8 Flow sensor................................................................................................................................48
6.9 Oxygen sensor ...........................................................................................................................48
Section 7 Measurement ...................................................................................................................49
7.1 Main screen................................................................................................................................50
7.1.1 User...................................................................................................................................50
7.1.2 Package ID........................................................................................................................50
7.1.3 Start analysis.....................................................................................................................50
7.2 Diagnostic measurement and results views...............................................................................53
7.2.1 Measurement view ............................................................................................................53
7.2.2 Results view ......................................................................................................................53
Section 8 Analysis ............................................................................................................................55
8.1 Analysis menu overview.............................................................................................................55
8.1.1 Open data..........................................................................................................................55
8.1.2 Table settings ....................................................................................................................55
Section 9 Maintenan ce.....................................................................................................................57
9.1 Schedule ....................................................................................................................................57
9.2 Purge gas cylinder......................................................................................................................57
9.3 Maintenance menu overview......................................................................................................58
9.3.1 Wizards .............................................................................................................................58
9.3.2 Digital input verification .....................................................................................................59
9.3.3 Actuator verification........................................................................................................... 60
9.3.4 Analog value monitoring....................................................................................................61
9.3.5 Global system view ...........................................................................................................62
9.3.6 System initialization........................................................................................................... 62
9.3.7 End application.................................................................................................................. 62
9.3.8 Service validation ..............................................................................................................62
9.3.9 Measurement head initialization........................................................................................62
2
Page 5

Table of Contents
Section 10 Troubleshooting ........................................................................................................... 63
10.1 Error and warning messages ...................................................................................................63
10.1.1 Error messages............................................................................................................... 63
10.1.2 Warning messages ......................................................................................................... 64
10.1.3 Red LED’s on startup screen .......................................................................................... 65
10.1.4 Measurement problems .................................................................................................. 66
Section 11 Spare Parts and Accessories .................................................................................... 67
Section 12 Material Safety Data Sheet s (MSDS)........................................................................ 69
12.1 Silicon antifoam (part number 33156)...................................................................................... 69
3
Page 6

Table of Contents
4
Page 7
Section 1 General Information
1.1 About this manual
The information in this manual has been carefully checked and is believed to be accurate.
However, Hach Lange assumes no responsibility for any inaccuracies that may be contained in
this manual. In no event will Hach Lange be liable for direct, indirect, special, incidental, or
consequential damages resulting from any defect or omission in this manual, even if advised of
the possibility of such damages. In the interest of continued product development, Hach Lange
reserves the right to make improvements in this manual and the products it describes at any
time, without notice or obligation.
Copyright © 2013 by Hach Lange. All rights reserved. No part of the contents of this manual
may be reproduced or transmitted in any form or by any means without the written permission of
Hach Lange.
1.2 Contact information
Manufacturing site:
HACH LANGE Sàrl
6, route de Compois
1222 Vésenaz
SWITZERLAND
Tel. +41 22 594 6400
Fax +41 22 594 6499
1.3 Safety information
Please read the entire manual before unpacking, setting up, or operating this instrument.
Pay particular attention to all warning and caution statements. Failure to do so could result in
serious injury to the operator or damage to the equipment.
To ensure the protection provided by this equipment is not impaired, do not use or install this
equipment in any manner other than that which is specified in this manual.
1.3.1 Use of hazard information
Indicates a potentially or imminently hazardous situation which, if not avoided, will result in
death or serious injury.
European HQ:
HACH LANGE GmbH
Willstätterstraße 11
40549 Düsseldorf
GERMANY
Tel. +49 211 52 880
Fax +49 211 52 88143
DANGER
WARNING
Indicates a potentially or imminently hazardous situation which, if not avoided, could result in
death or serious injury.
CAUTION
Indicates a potentially or imminently hazardous situation that may result in minor or moderate
injury.
NOTICE
Indicates a situation which, if not avoided, may cause damage to the instrument. Information
that requires special emphasis.
5
Page 8
General Information
1.3.2 Disclaimer
The manufacturer is not responsible for damages resulting from misapplication or misuse of
this product and rejects the regulation of such damages, including direct, indirect and
consequential damages, and in full accordance with applicable law. The user is solely
responsible for the identification of critical applications and risks and taking appropriate
measures to protect processes during a possible equipment malfunction.
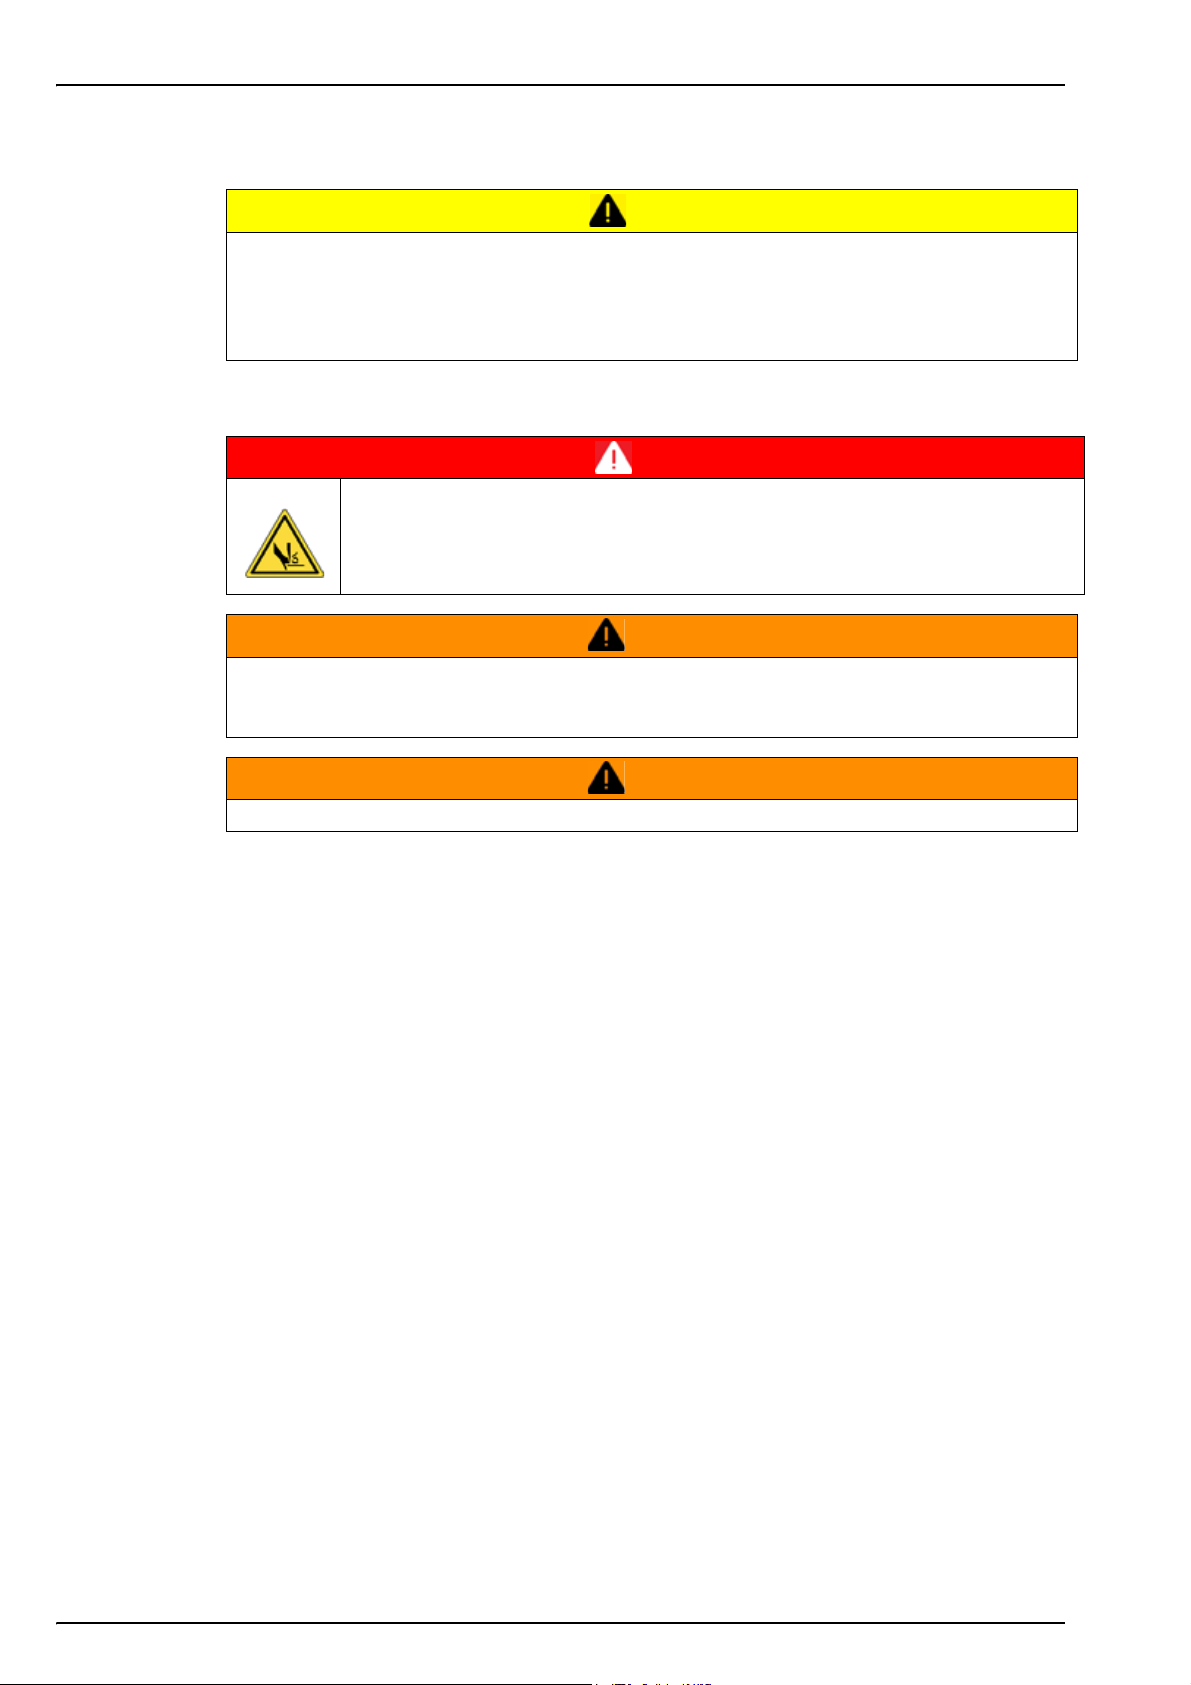
1.3.3 Safety precautions
CAUTION
DANGER
Risk of finger trapping.
A silicon insert is located on the transparent front door to assist in lifting and
lowering the door when adding or removing packages for analysis. Under no
circumstances must this silicon insert be removed.
WARNING
Electrical danger and fire hazard. Only use the supplied power cable. Only qualified experts
may perform the tasks detailed in the installation section of this manual, while adhering to all
locally valid safety regulations.
Removable power cables must not be replaced with inadequately dimensioned power cables.
1.3.4 Service and repairs
None of the instrument’s components can be serviced by the user. Only personnel from Hach
Lange or its approved representative(s) is (are) authorized to attempt repairs to the system and
only components formally approved by the manufacturer should be used. Any attempt at
repairing the instrument in contravention of these principles could cause damage to the
instrument and corporal injury to the person carrying out the repair. It renders the warranty null
and void and could compromise the correct working of the instrument and the electrical integrity
or the CE compliance of the instrument.
If you have any problems with installation, starting, or using the instrument please contact the
company that sold it to you. If this is not possible, or if the results of this approach are not
satisfactory, please contact the manufacturer’s Customer Service.
1.3.5 Class 1 LASER
A Class 1 LASER is installed in this instrument. Class 1 LASERS are products where the
radiant power of the LASER beam accessible (the accessible emission) is always below the
Maximum Permissible Exposure value. Therefore, for Class 1 LASERS the output power is
below the level at which it is believed eye damage will occur. Exposure to the beam of a Class 1
LASER will not result in eye injury. Class 1 LASERS may therefore be considered safe.
However, Class 1 LASER products may contain LASER systems of a higher Class but there are
adequate engineering control measures to ensure that access to the beam is not reasonably
likely.
WARNING
This Class 1 Laser product complies with 21 CFR Chapter 1, sub-chapter J. It is evaluated and
tested in accordance with EN 61010-1, Safety Requirements for Electrical Equipment for
Measurement and Control and Laboratory Use and IEC/EN 60825-1, Safety of Laser Products.
6
Page 9
1.3.6 Use of antifoam
Antifoam is injected into the sample as part of the measurement process. Once a sample has
completed the measurement process it will therefore contain a small amount of antifoam. After
measurement, ensure the sample is disposed of in a sink (or similar) to avoid any risk of
ingestion. Refer also to the material safety data sheet (MSDS) Silicon antifoam (part number
33156) on page 69 for additional antifoam safety information.
1.3.7 CFL backlight
The CFL (compact florescent light) used for backlighting the screen display contains a small
amount of mercury. Please dispose of any used CFL’s in accordance with local, state or federal
laws concerning the disposal of products containing mercury.
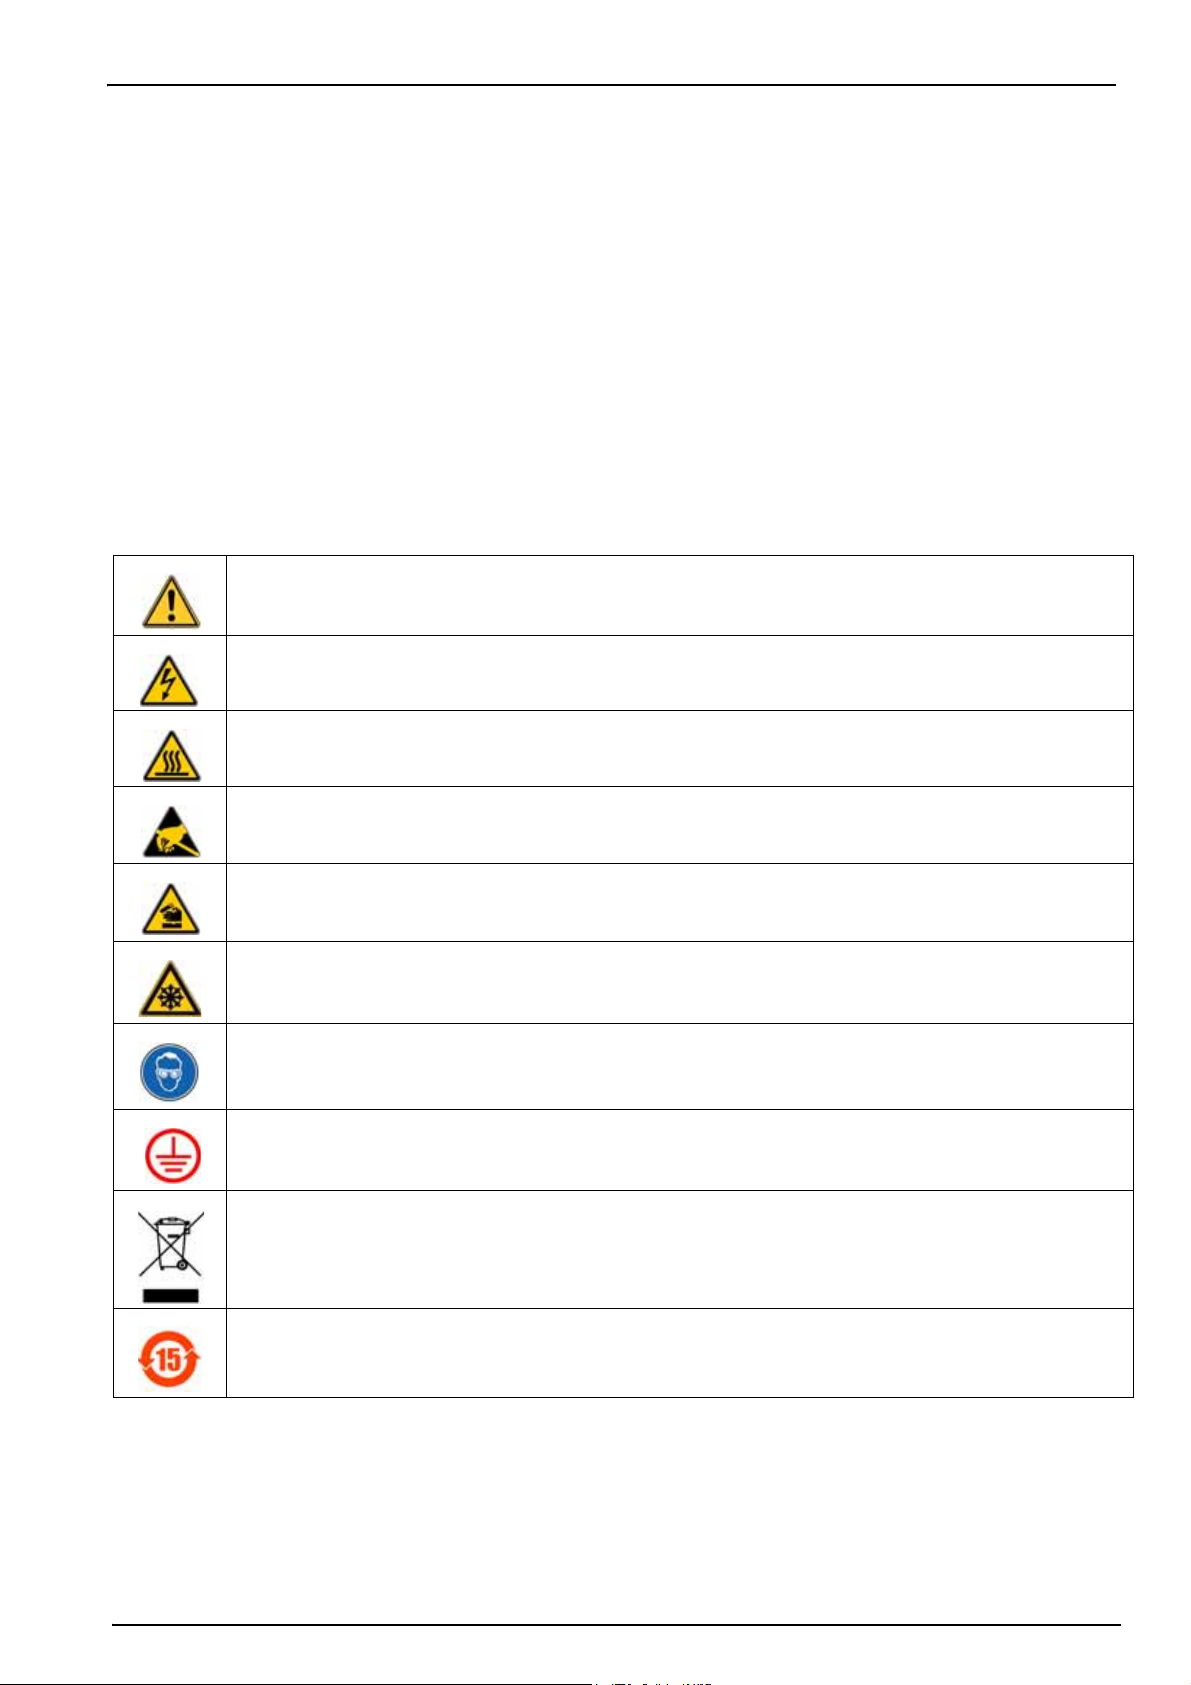
1.3.8 Precautionary labels
Read all labels and tags attached to the instrument. Personal injury or damage to the instrument
could occur if not observed.
This symbol, when noted on a product, indicates a potential hazard which could cause serious personal injury
and/or death. The user should reference this instruction manual for operation and/or safety information.
General Information
This symbol, when noted on a product enclosure or barrier, indicates that a risk of electrical shock and/or
electrocution exists and indicates that only individuals qualified to work with hazardous voltages should open
the enclosure or remove the barrier.
This symbol, when noted on the product, indicates that the marked item can be hot and should not be touched
without care.
This symbol, when noted on the product, indicates the presence of devices sensitive to electrostatic discharge
and indicates that care must be taken to prevent damage to them.
This symbol, when noted on the product, identifies a risk of chemical harm and indicates that only individuals
qualified and trained to work with chemicals should handle chemicals or perform maintenance on chemical
delivery systems associated with the equipment.
This symbol, when noted on the product, indicates a laser device is used in the equipment.
This symbol, if noted on the product, indicates the need for protective eye wear.
This symbol, when noted on the product, identifies the location of the connection for protective earth (ground).
Electrical equipment marked with this symbol may not be disposed of in European public disposal systems. In
conformity with European local and national regulations, European electrical equipment users must now return
old or end-of-life equipment to the manufacturer for disposal at no charge to the user.
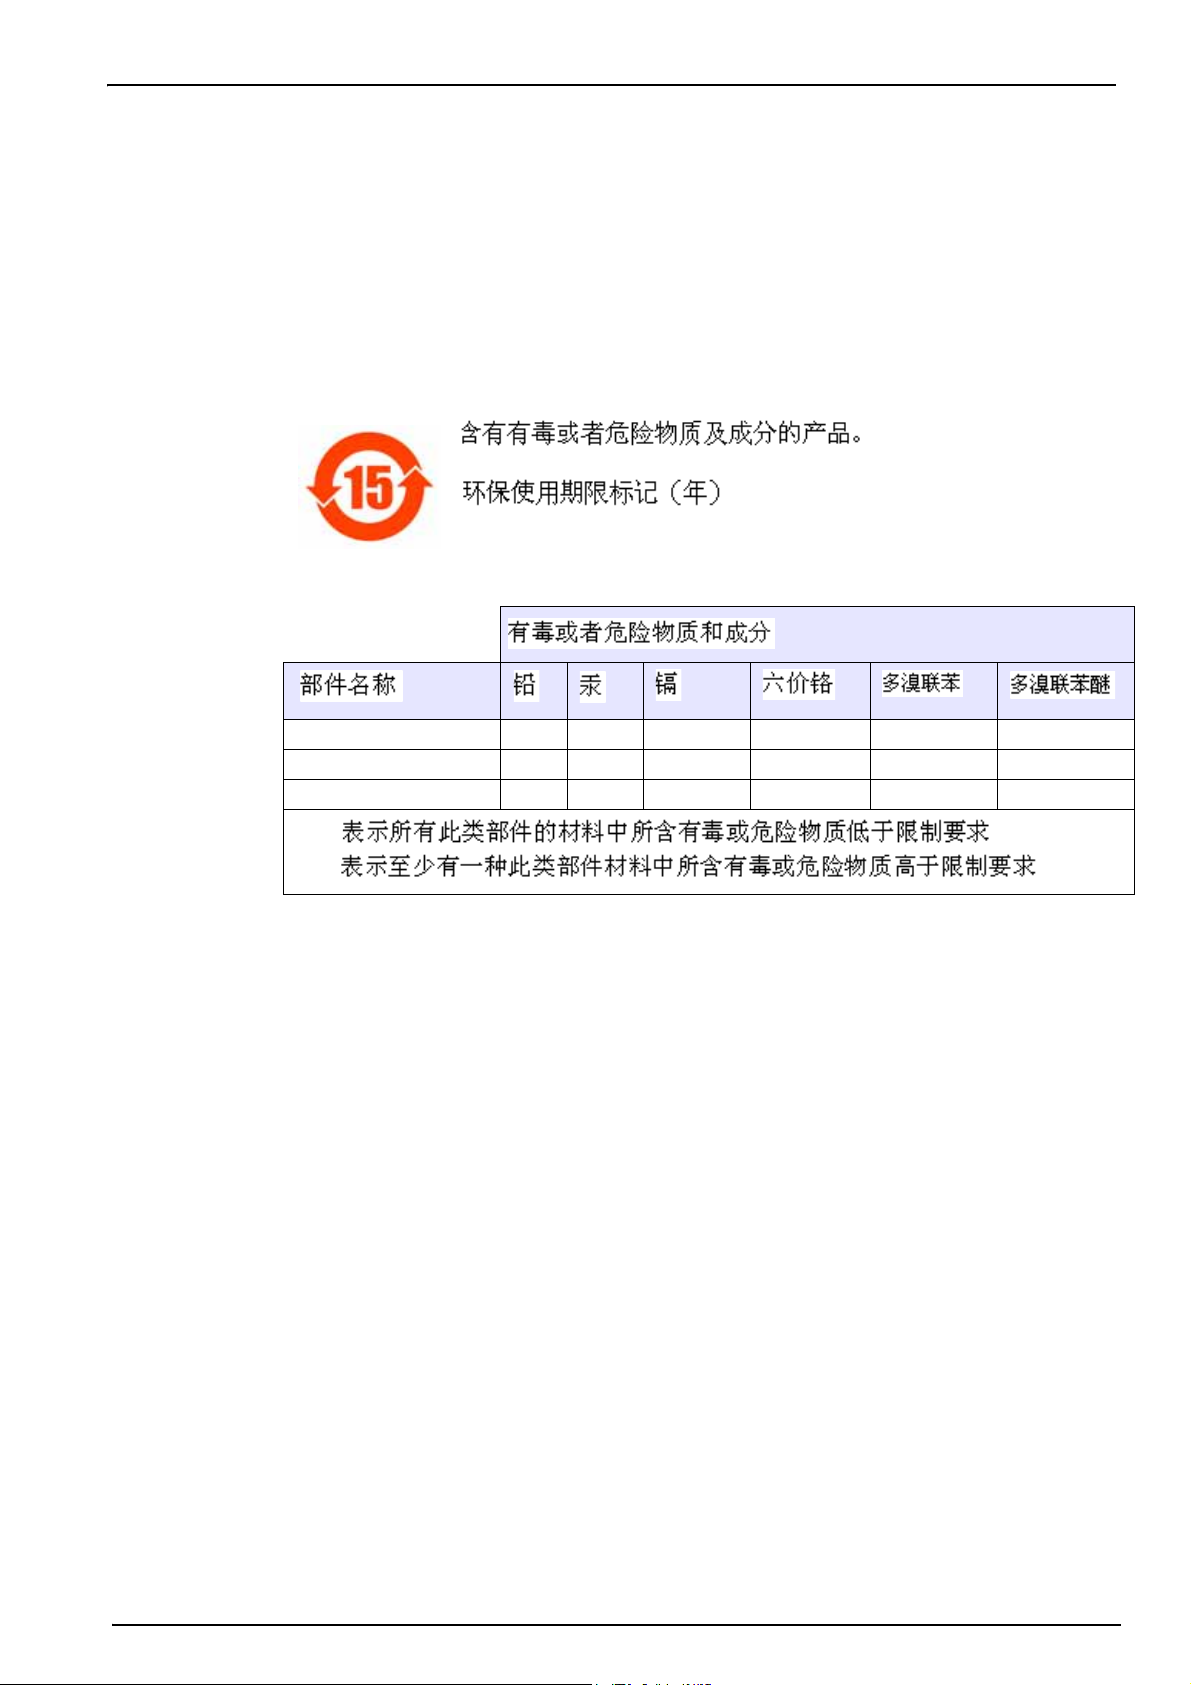
Products marked with this symbol indicates that the product contains toxic or hazardous substances or
elements. The number inside the symbol indicates the environmental protection use period in years.
7
Page 10
General Information
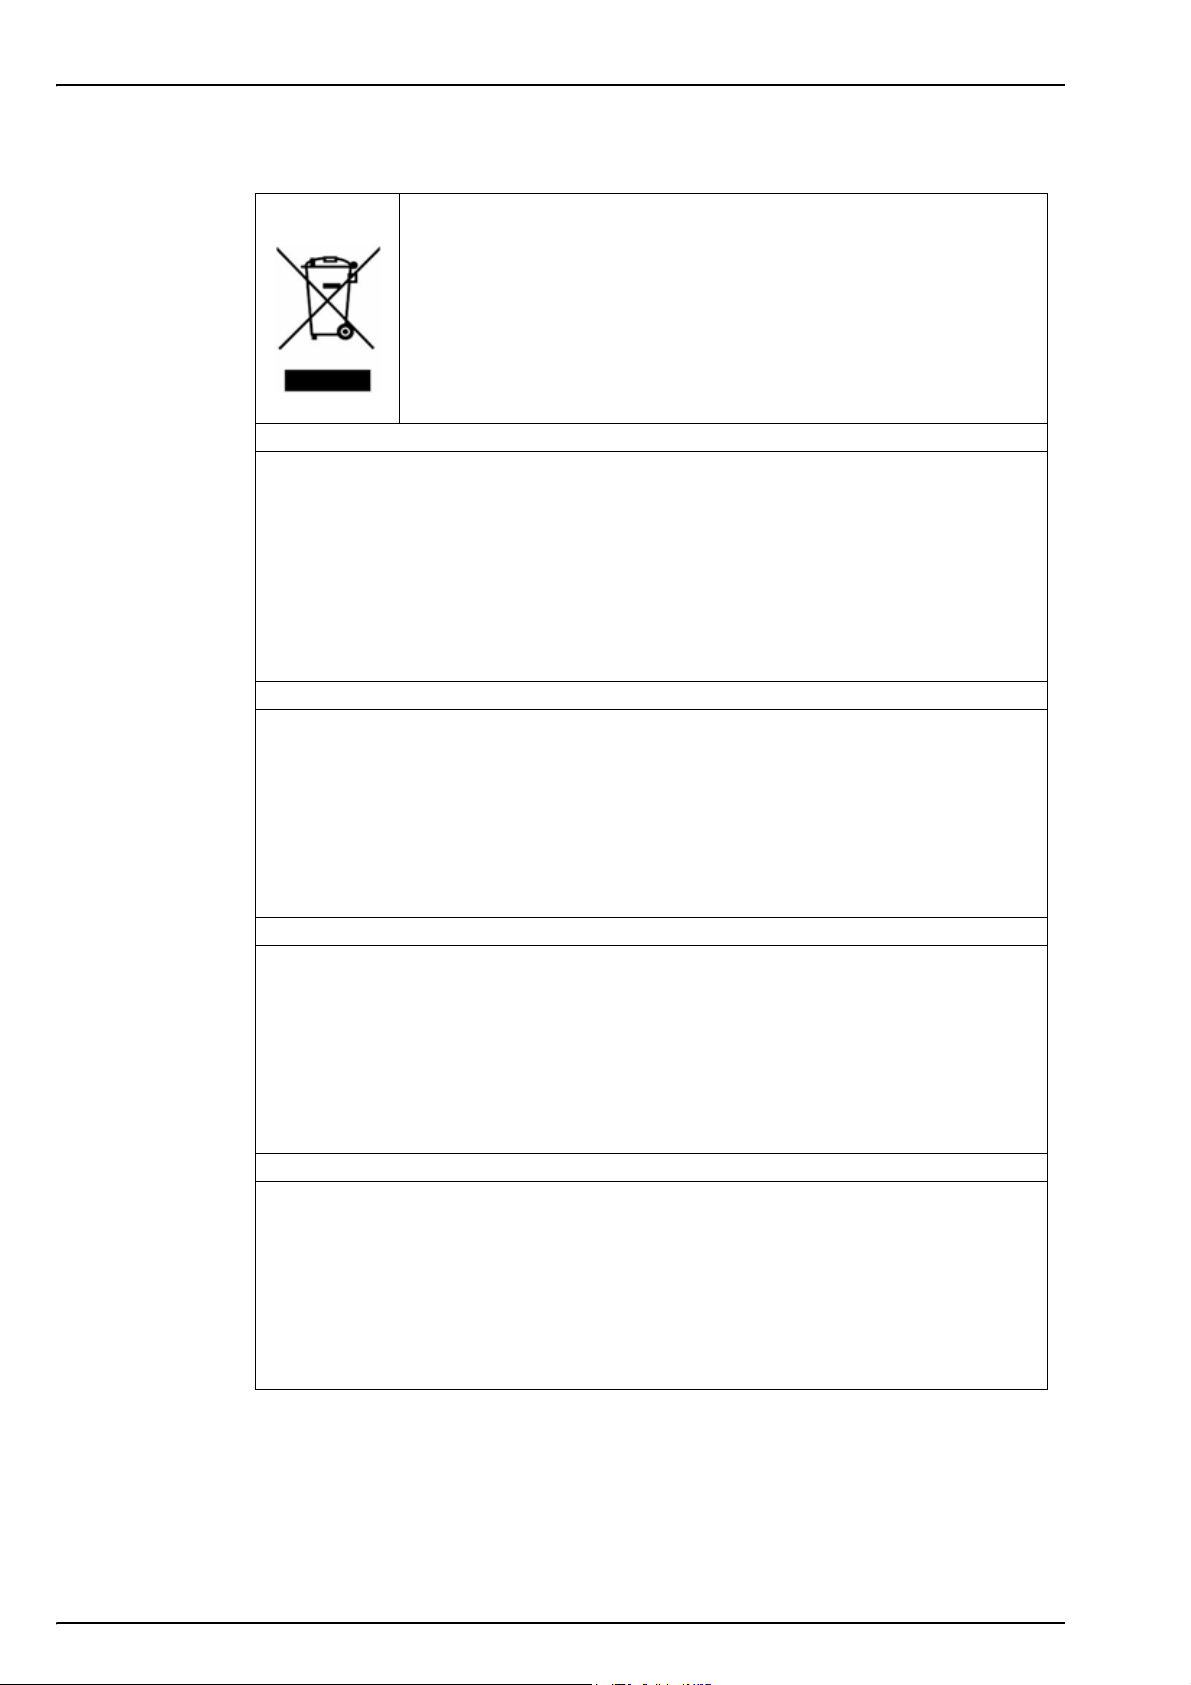
1.4 Product recycling information
ENGLISH
Electrical equipment marked with this symbol may not be disposed of in
European public disposal systems after 12 August 2005. In conformity with
European local and national regulations (EU Directive 2002/96/EC), European
electrical equipment users must now return old or end-of-life equipment to the
manufacturer for disposal at no charge to the user.
Note: For return for recycling, please contact the equipment manufacturer or
supplier for instructions on how to return end-of-life equipment for proper
disposal.
DEUTSCH
Elektrogeräte, die mit diesem Symbol gekennzeichnet sind, dürfen in Europa nach dem 12.
August 2005 nicht mehr über die öffentliche Abfallentsorgung entsorgt werden. In
Übereinstimmung mit lokalen und nationalen europäischen Bestimmungen (EU-Richtlinie
2002/96/EC), müssen Benutzer von Elektrogeräten in Europa ab diesem Zeitpunkt alte bzw. zu
verschrottende Geräte zur Entsorgung kostenfrei an den Hersteller zurückgeben.
Hinweis: Bitte wenden Sie sich an den Hersteller bzw. an den Händler, von dem Sie das Gerät
bezogen haben, um Informationen zur Rückgabe des Altgeräts zur ordnungsgemäßen
Entsorgung zu erhalten.
FRANCAIS
A partir du 12 août 2005, il est interdit de mettre au rebut le matériel électrique marqué de ce
symbole par les voies habituelles de déchetterie publique. Conformément à la réglementation
européenne (directive UE 2002/96/EC), les utilisateurs de matériel électrique en Europe doivent
désormais retourner le matériel usé ou périmé au fabricant pour élimination, sans frais pour
l'utilisateur.
Remarque: Veuillez vous adresser au fabricant ou au fournisseur du matériel pour les
instructions de retour du matériel usé ou périmé aux fins d'élimination conforme.
ITALIANO
Le apparecchiature elettriche con apposto questo simbolo non possono essere smaltite nelle
discariche pubbliche europee successivamente al 12 agosto 2005. In conformità alle normative
europee locali e nazionali (Direttiva UE 2002/96/EC), gli utilizzatori europei di apparecchiature
elettriche devono restituire al produttore le apparecchiature vecchie o a fine vita per lo
smaltimento senza alcun costo a carico dell’utilizzatore.
Nota: Per conoscere le modalità di restituzione delle apparecchiature a fine vita da riciclare,
contattare il produttore o il fornitore dell’apparecchiatura per un corretto smaltimento.
DANSK
Elektriske apparater, der er mærket med dette symbol, må ikke bortskaffes i europæiske offentlige
affaldssystemer efter den 12. august 2005. I henhold til europæiske lokale og nationale regler
(EU-direktiv 2002/96/EF) skal europæiske brugere af elektriske apparater nu returnere gamle eller
udtjente apparater til producenten med henblik på bortskaffelse uden omkostninger for brugeren.
Bemærk: I forbindelse med returnering til genbrug skal du kontakte producenten eller
leverandøren af apparatet for at få instruktioner om, hvordan udtjente apparater bortskaffes
korrekt.
8
Page 11

General Information
SVENSKA
Elektronikutrustning som är märkt med denna symbol kanske inte kan lämnas in på europeiska
offentliga sopstationer efter 2005-08-12. Enligt europeiska lokala och nationella föreskrifter
(EU-direktiv 2002/96/EC) måste användare av elektronikutrustning i Europa nu återlämna gammal
eller utrangerad utrustning till tillverkaren för kassering utan kostnad för användaren.
Obs! Om du ska återlämna utrustning för återvinning ska du kontakta tillverkaren av utrustningen
eller återförsäljaren för att få anvisningar om hur du återlämnar kasserad utrustning för att den ska
bortskaffas på rätt sätt.
ESPANOL
A partir del 12 de agosto de 2005, los equipos eléctricos que lleven este símbolo no deberán ser
desechados en los puntos limpios europeos. De conformidad con las normativas europeas
locales y nacionales (Directiva de la UE 2002/96/EC), a partir de esa fecha, los usuarios
europeos de equipos eléctricos deberán devolver los equipos usados u obsoletos al fabricante de
los mismos para su reciclado, sin coste alguno para el usuario.
Nota: Sírvase ponerse en contacto con el fabricante o proveedor de los equipos para solicitar
instrucciones sobre cómo devolver los equipos obsoletos para su correcto reciclado.
NEDERLANDS
Elektrische apparatuur die is voorzien van dit symbool mag na 12 augustus 2005 niet meer
worden afgevoerd naar Europese openbare afvalsystemen. Conform Europese lokale en
nationale wetgegeving (EU-richtlijn 2002/96/EC) dienen gebruikers van elektrische apparaten
voortaan hun oude of afgedankte apparatuur kosteloos voor recycling of vernietiging naar de
producent terug te brengen.
Nota: Als u apparatuur voor recycling terugbrengt, moet u contact opnemen met de producent of
leverancier voor instructies voor het terugbrengen van de afgedankte apparatuur voor een juiste
verwerking.
POLSKI
Sprzęt elektryczny oznaczony takim symbolem nie może być likwidowany w europejskich
systemach utylizacji po dniu 12 sierpnia 2005. Zgodnie z europejskimi, lokalnymi i państwowymi
przepisami prawa (Dyrektywa Unii Europejskiej 2002/96/EC), użytkownicy sprzętu elektrycznego
w Europie muszą obecie przekazywać Producentowi stary sprzęt lub sprzęt po okresie
użytkowania do bezpłatnej utylizacji.
Uwaga: Aby przekazać sprzęt do recyklingu, należy zwrócić się do producenta lub dostawcy
sprzętu w celu uzyskania instrukcji dotyczących procedur przekazywania do utylizacji sprzętu po
okresie użytkownia.
PORTUGUES
Qualquer equipamento eléctrico que ostente este símbolo não poderá ser eliminado através dos
sistemas públicos europeus de tratamento de resíduos sólidos a partir de 12 de Agosto de 2005.
De acordo com as normas locais e europeias (Directiva Europeia 2002/96/EC), os utilizadores
europeus de equipamentos eléctricos deverão agora devolver os seus equipamentos velhos ou
em fim de vida ao produtor para o respectivo tratamento sem quaisquer custos para o utilizador.
Nota: No que toca à devolução para reciclagem, por favor, contacte o produtor ou fornecedor do
equipamento para instruções de devolução de equipamento em fim de vida para a sua correcta
eliminação.
9
Page 12
General Information
1.5 Product disposal
Note: The following only applies to European customers.
Hach Lange is committed to ensuring that the risk of any environmental damage or pollution
caused by any of its products is minimized as far as possible. The European Waste Electrical
and Electronic Equipment (WEEE) Directive (2002/96/EC) that came into force on August 13
2005 aims to reduce the waste arising from electrical and electronic equipment; and improve the
environmental performance of all those involved in the life cycle of electrical and electronic
equipment.
In conformity with European local and national regulations (EU Directive 2002/96/EC stated
above), electrical equipment marked with the above symbol may not be disposed of in
European public disposal systems after 12 August 2005.
Hach Lange will offer to take back (free of charge to the customer) any old, unserviceable or
redundant instruments and systems which carry the above symbol, and which were originally
supplied by Hach Lange. Hach Lange will then be responsible for the disposal of this
equipment.
In addition, Hach Lange will offer to take back (at cost to the customer) any old, unserviceable
or redundant instruments and systems which do not carry the above symbol, but which were
originally supplied by Hach Lange. Hach Lange will then be responsible for the disposal of this
equipment.
Should you wish to arrange for the disposal of any piece of equipment originally supplied by
Hach Lange, please contact your supplier or our After Sales Service department in Geneva for
instructions on how to return this equipment for proper disposal.
10
Page 13
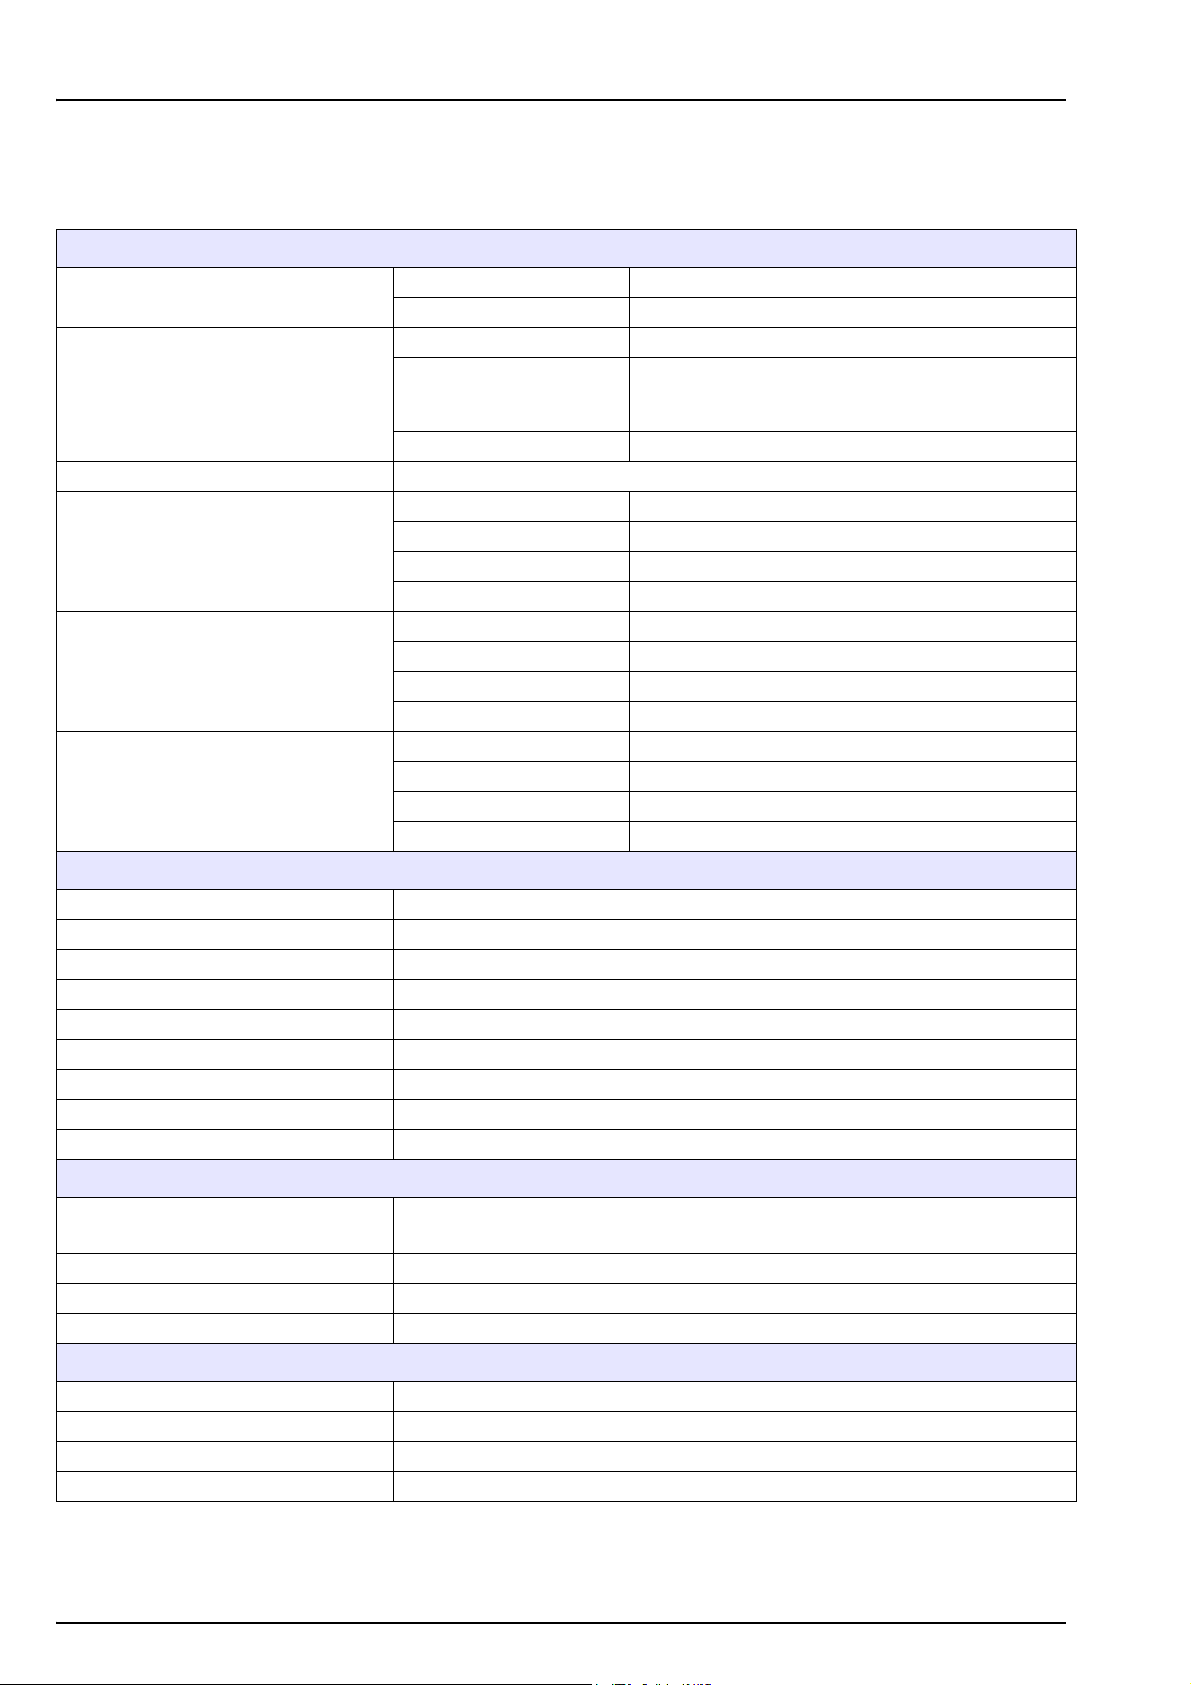
1.6 Restriction of hazardous substances (RoHS)
The European Union RoHS Directive and subsequent regulations introduced in member states
and other countries limits the use of six hazardous substances used in the manufacturing of
electrical and electronic equipment.
Currently, monitoring and control instruments do not fall within the scope of the RoHS Directive,
however Hach Lange has taken the decision to adopt the recommendations in the Directive as
the target for all future product design and component purchasing.
Note: The following only applies to exports of this product into the People’s Republic of China.
General Information
Backlit display O
Ultrasound head O
Brass spacers O
O:
X:
11
Page 14

General Information
12
Page 15
Section 2 Specifications
2.1 Technical specifications
Specifications are subject to change without notice.
Analysis
Measurement range
O
CO
2
2
1 ppb - 12 ppm
0.75 - 5 V/V or 1.5 - 10 g/kg
Total Package Oxygen ± 5 µg/L ± 10% whichever is the greater
on equilibrated
CO
Repeatability r
95
2
packages at T = 10 to 25°C
± 0.05 V/V or 0.10 g/kg ± 2% whichever is the greater
(50 to 77°F)
O
2
± 2 ppb ± 10% whichever is the greater
Typical analysis time About 4 minutes
concentration ppb or ppm
O
2
concentration V/V, g/kg, g/L or %W
CO
Display units
2
Pressure bar, mbar, psia
Temperature °C, °F or K
Package temperature -2 to 30°C (28 to 86°F)
Operating limits
Package pressure 1.4 to 6.8 bar absolute (20 - 99 psia)
Ambient temperature 0 to 40°C (32 to 104°F)
Relative humidity Up to 80%
Maximum package height 340 mm (13.39 ins)
Package setup
Minimum package height 90 mm (3.54 ins)
Minimum volume 150 ml
Material Glass, PET or aluminum
Enclosure
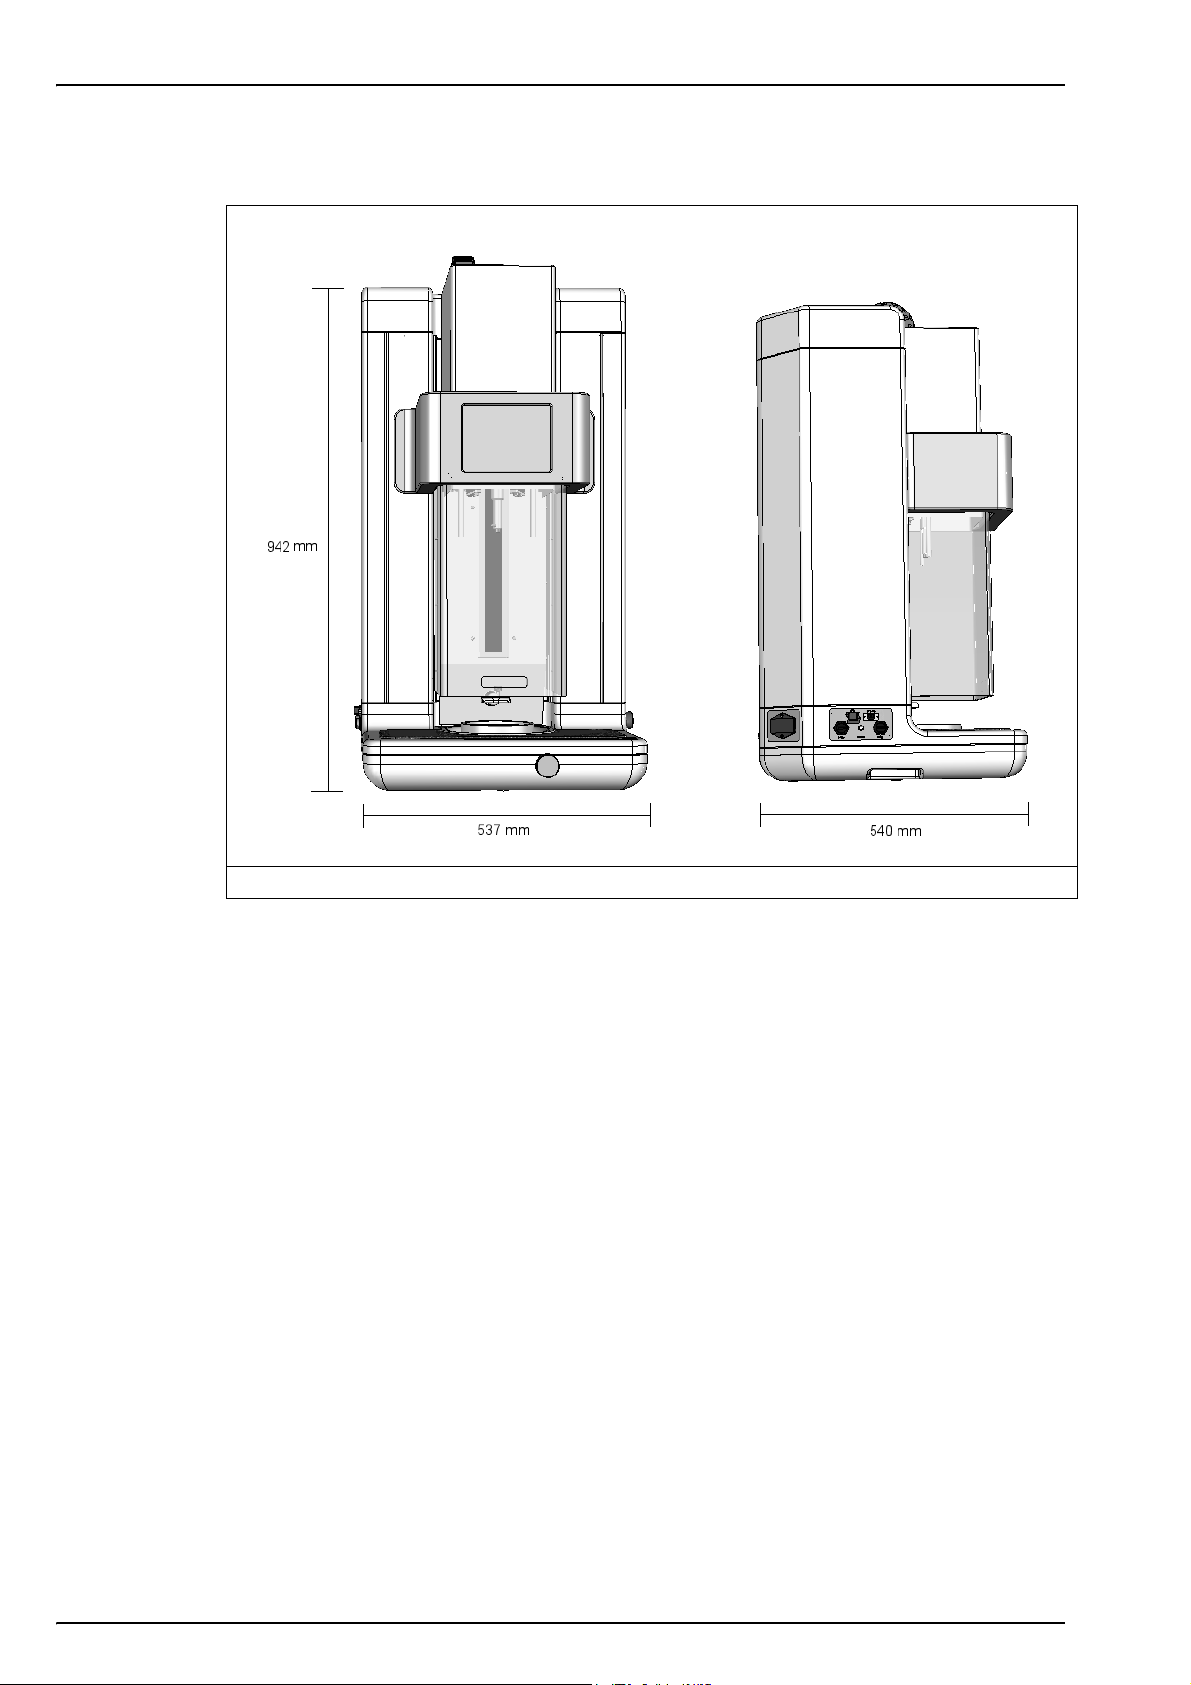
Dimensions (L x W x H) 537 x 540 x 942 mm (21.1 x 21.3 x 37.1 ins)
Weight 55 kg (121 lbs)
Enclosure protection IP20
Power requirements 100-240 VAC ±10% @ 50-60 Hz
Power consumption Max. 250 VA
Purge gas CO
with purity > 99.9% at 6 to 7 bar absolute (87 to 102 psia)
2
Purge gas consumption 0.4 mL/second (1.5 L/hour)
Forcing gas Air or N
at 5.5 to 6 bar absolute (80 to 87 psia)
2
Forcing gas consumption 0.25 mL/minute in standby mode
Compliance
European directives
Low voltage 2006/95/EC
EMC 2004/108/EC
Electromagnetic compatibility standards EN 61326: 2006
Safety standard IEC/UL/CSA 61010-1
Laser product safety IEC/UL/CSA 60825-1
Interface
Digital display TFT VGA (640 x 480) color display touch screen with backlight
Operating system Windows CE 4.2
Languages English, German, Spanish, Chinese, Japanese
Digital connections 1 x USB client, 1 x USB host, 1 x Ethernet
13
Page 16
Specifications
2.2 Instrument dimensions
Figure 1 Instrument dimensions
14
Page 17
2.3 Main instrument components
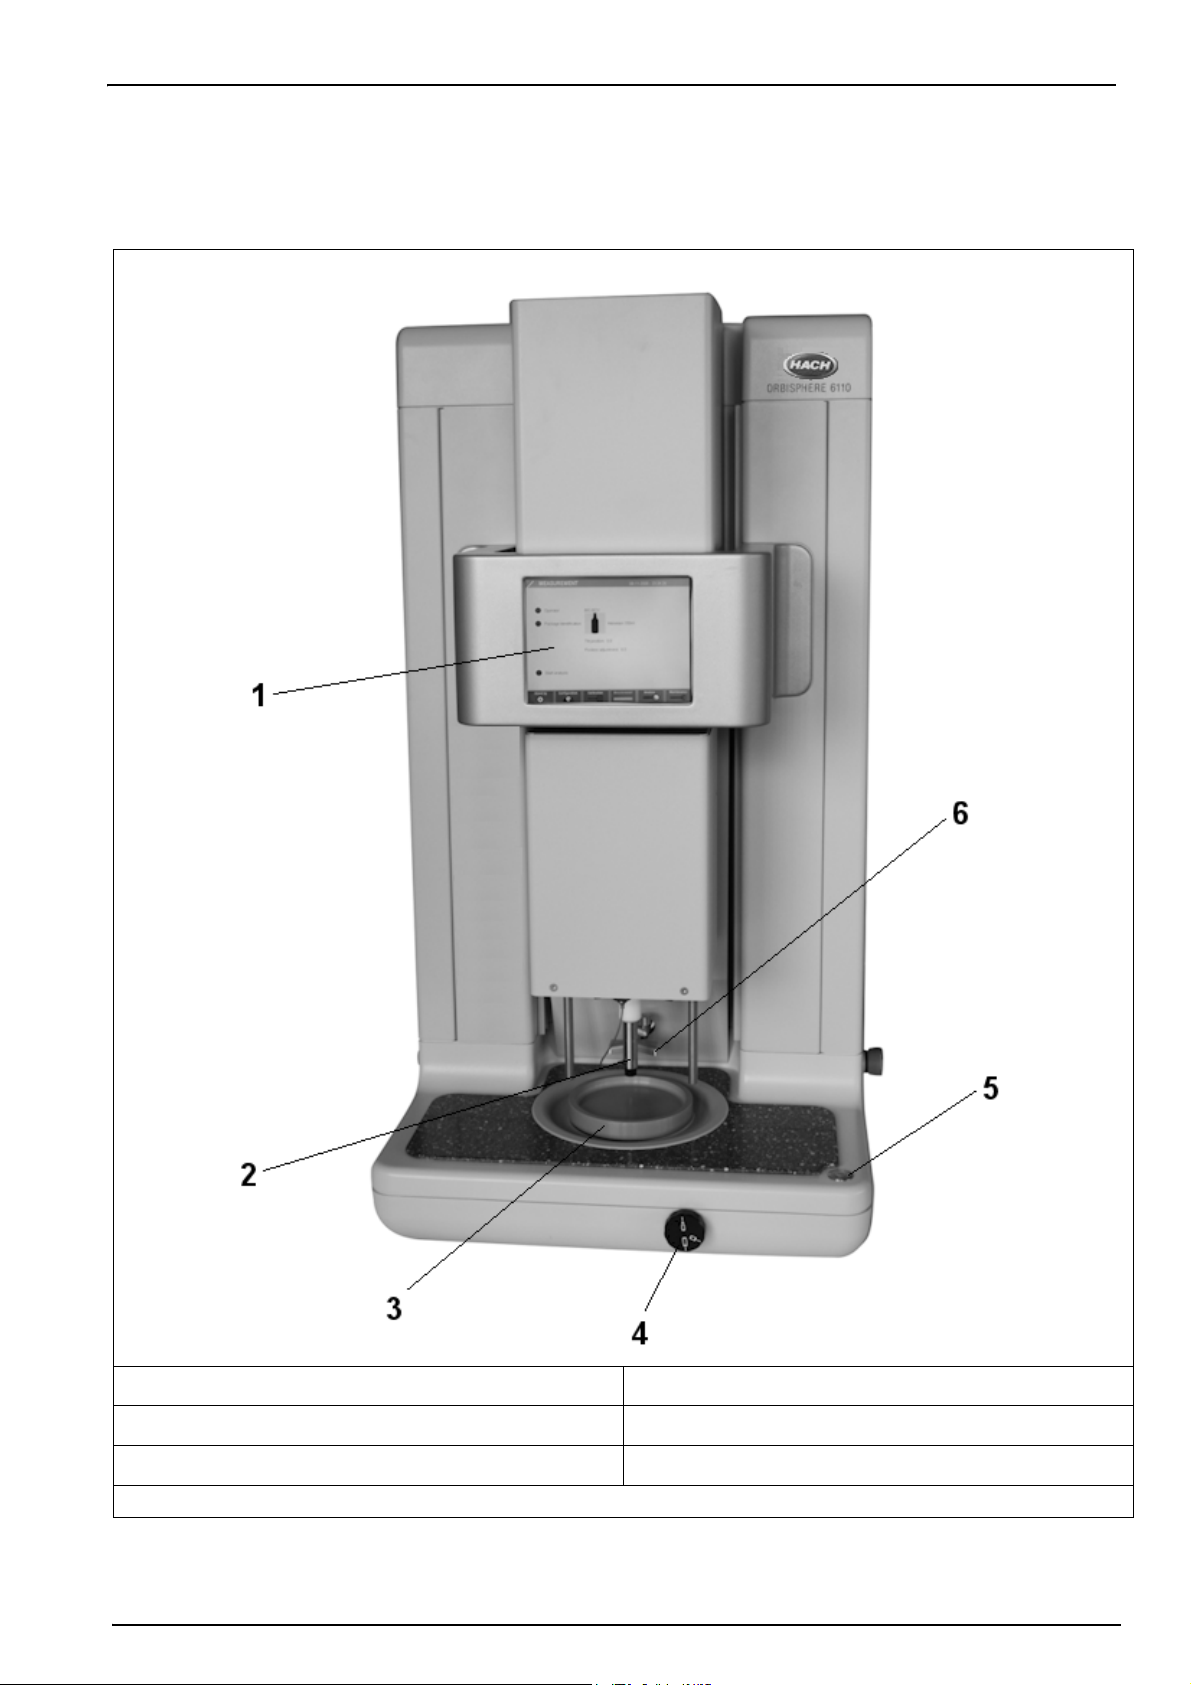
2.3.1 Front view
Specifications
1. Display panel 4. Knob to tilt package
2. Package piercing device 5. Measurement start button with LED
3. Package holder 6. Package backstop
Figure 2 Instrument components - front view
15
Page 18
Specifications
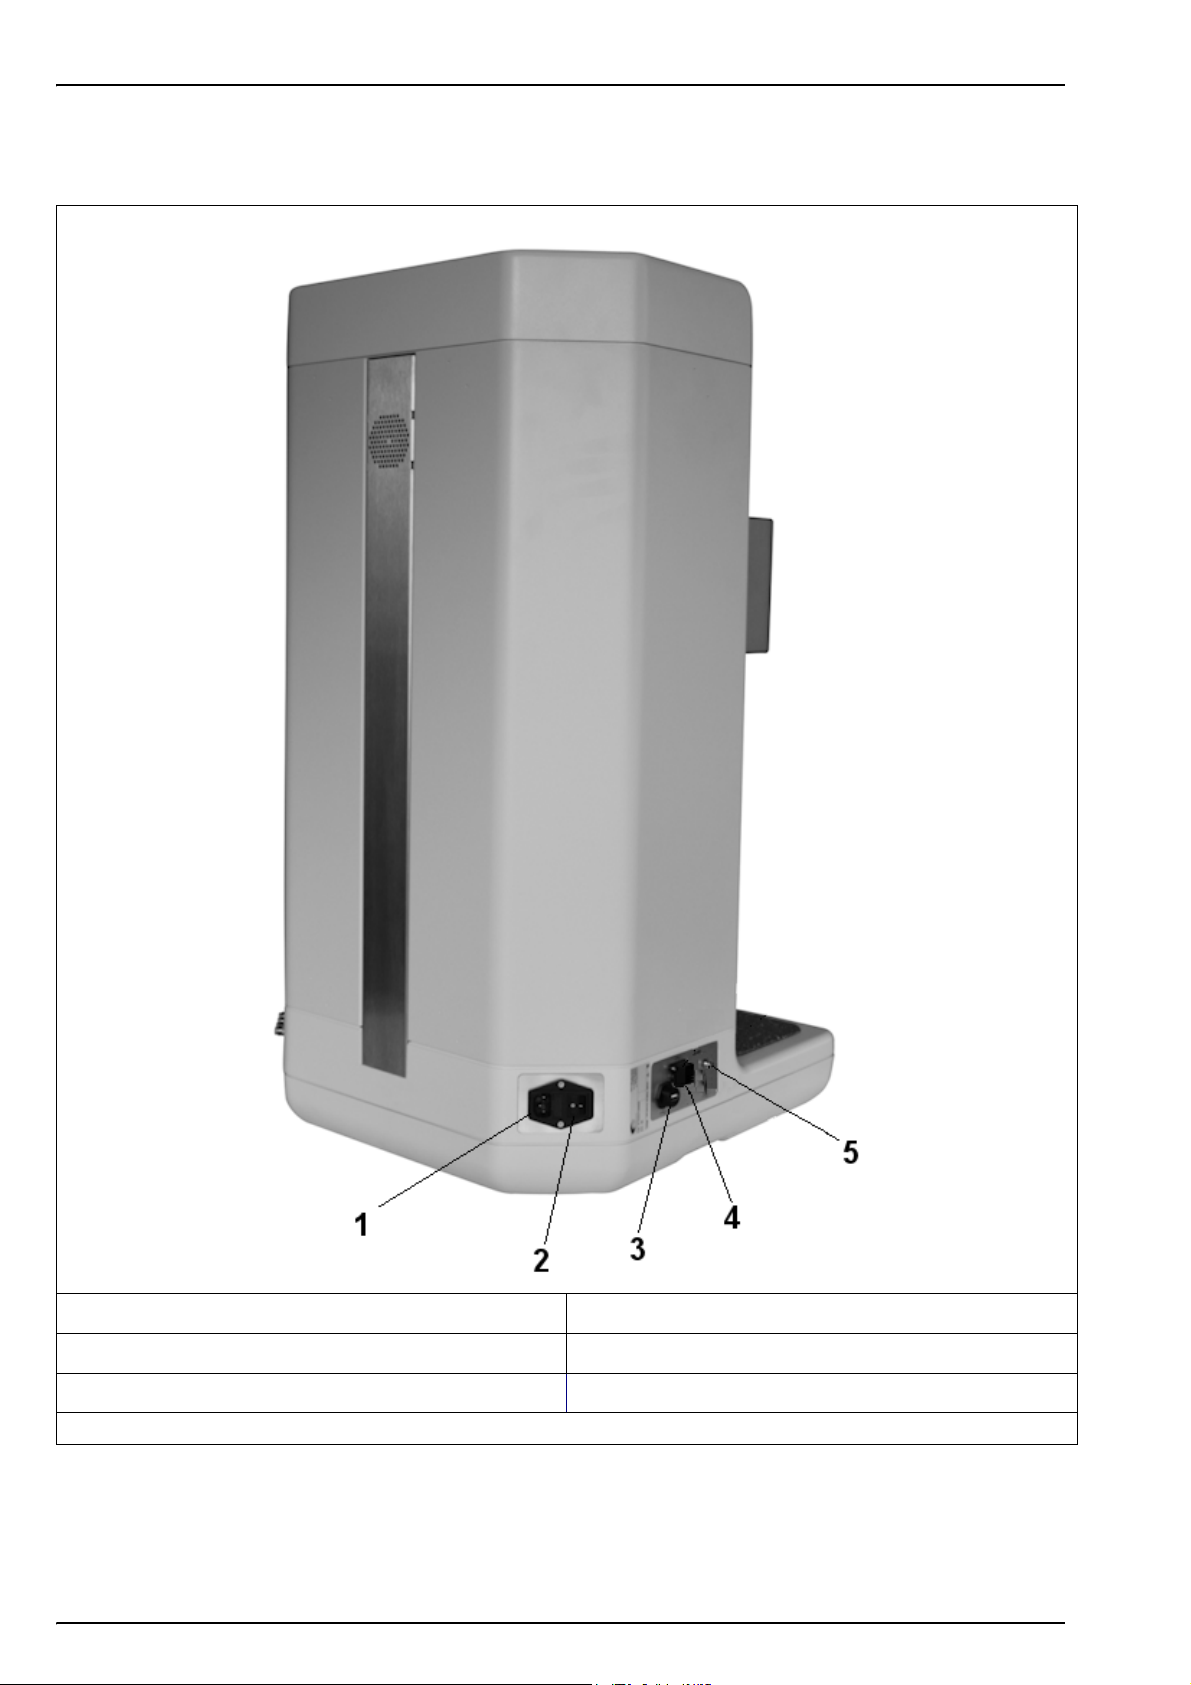
2.3.2 Left side view
1. Power socket 4. Ethernet connection
2. Power ON/OFF rocker switch 5. USB-B client 4-pin connector
3. USB-A connector for mass storage device
Figure 3 Instrument components - left side view
16
Page 19
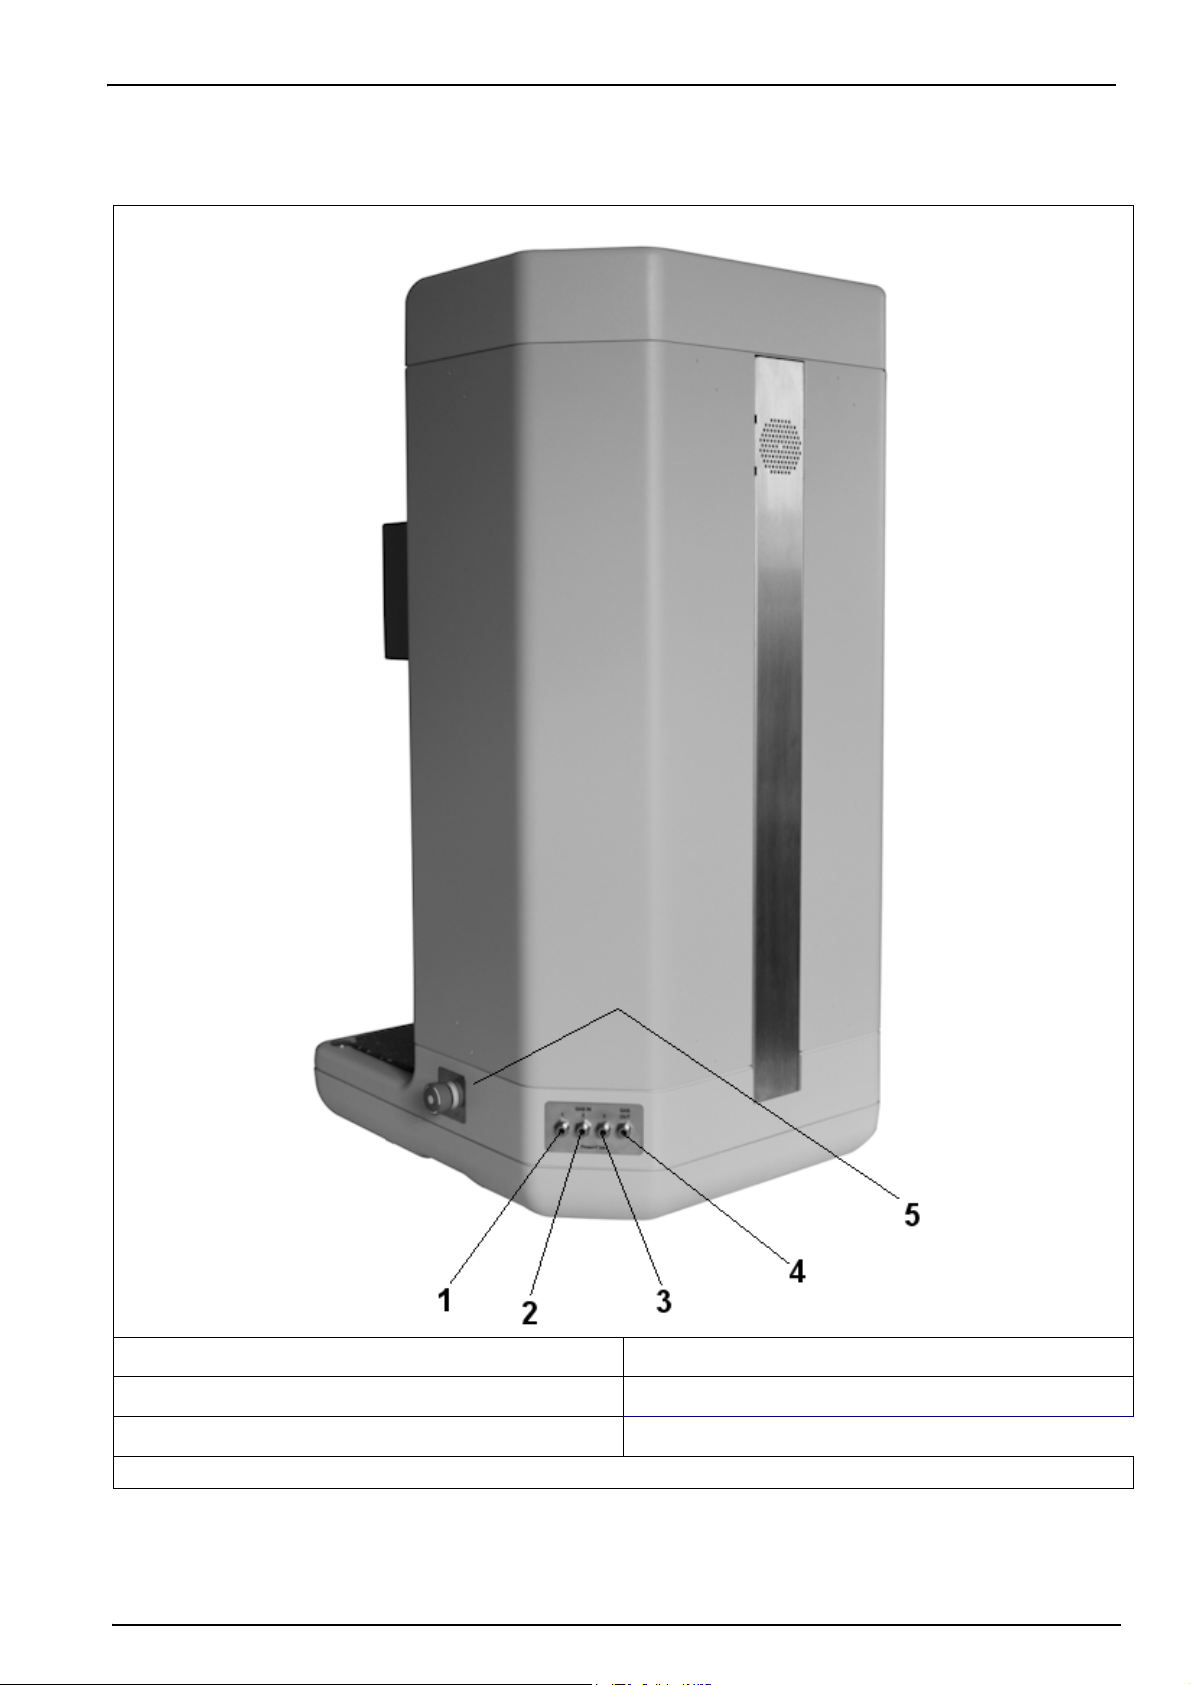
2.3.3 Right side view
Specifications
1. Gas connection No. 1 (IN) - Forcing gas (Air or N2) 4. Gas connection No. 4 (OUT) - Pressure sensor calibration
2. Gas connection No. 2 (IN) - Purge gas (CO
3. Gas connection No. 3 (IN) - Reference gas (CO
99.9% purity) 5. Emergency STOP button
2
only)
2
Figure 4 Instrument components - right side view
17
Page 20
Specifications
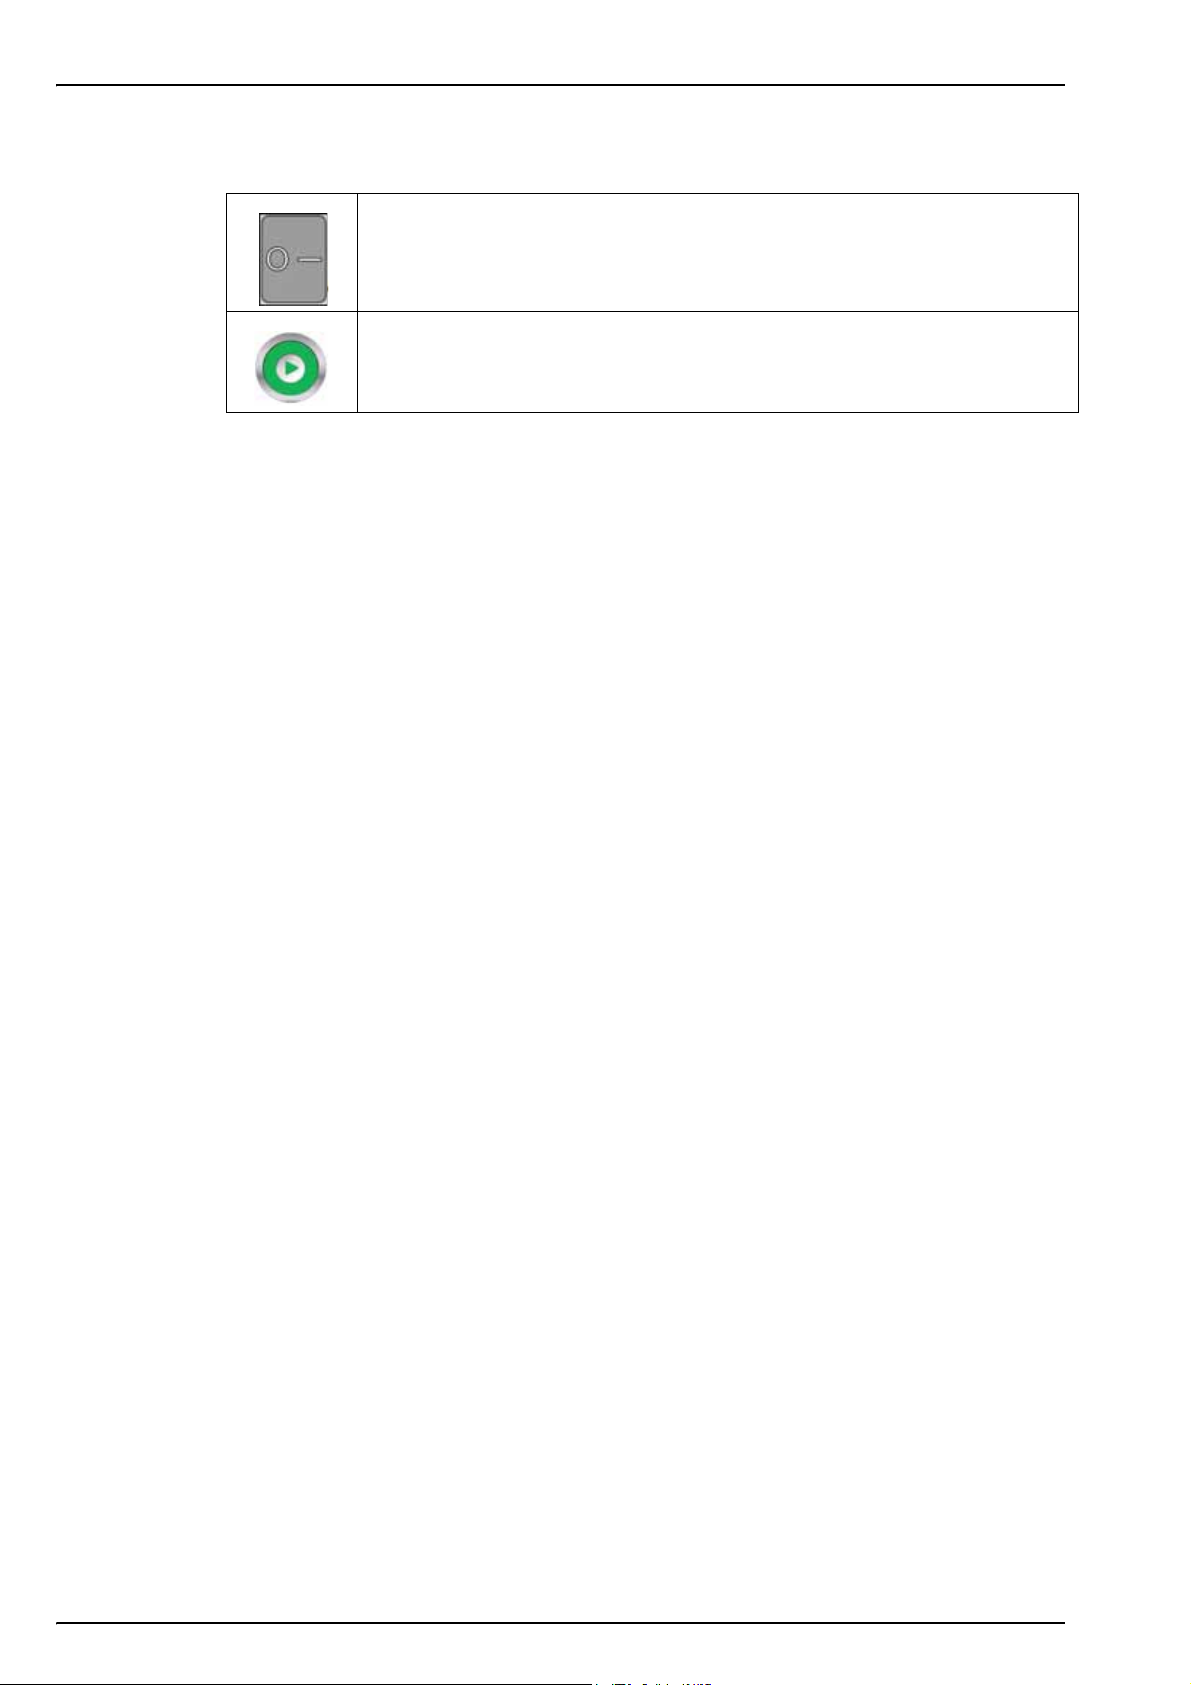
2.4 Instrument switches and buttons
The mains power switch is located at the rear left of the instrument (No. 2 in Figure 3 on
page 16). To switch the instrument on and off, press the rocker switch to the
required position: “O” for Off and “I” for On.
The measurement button is located at the front right of the instrument (No. 5 in Figure 2
on page 15). Press this button to start a package measurement.
2.5 Operation overview
1. Piercing
The reference volume is filled with the purge gas and the whole of the gas sampling path is fully
purged. The purge stops when the rubber seal of the piercing device contacts the top of the
package. Once the package is pierced, a pump injects an antifoam solution into the headspace.
2. Oxygen in headspace and CO
2
The pressure is measured, then the regulating valve is opened and the gas contained in the
headspace flows over the O
headspace is obtained by integrating the volumes of O
The temperature is measured and combined with the pressure to calculate the CO
3. Liquid analysis (O
and the CO2 sensors at a given rate. The quantity of O2 in the
2
)
2
leaving the package per unit of time.
2
P/T value.
2
The gas flow is stopped and the ultrasonic sonotrode is activated. The regulating valve is then
opened and the gas escaping the liquid mixes with the gas of the headspace. The O
an exponential function to which coefficients can be included and the total O
contained in the
2
signal is
2
bottle is calculated by integrating this function.
Note: For faster measurements, the liquid analysis step can be skipped and the O
the headspace by setting specific parameters for the package (see Package parameters on page 35 for
additional details).
value calculated from
2
4. Headspace volume
At the end of the run, the gas flow is stopped and the valve is opened. The gas of the reference
volume expands in the headspace and the pressure reaches a new value. The headspace
volume is calculated with the ideal gas law principle.
5. End of measureme n t
The piercing head assembly is lifted out of the package. A short burst of gas purges the gas
sampling path to flush out any residual liquid or foam. The system returns to the standby mode
where the sensors are kept under a slight purge gas flow.
18
Page 21
Section 3 Installation
This section provides necessary information to install and connect the analyzer. The
installation of the analyzer should be performed in accordance with relevant local regulations,
and only by personnel trained and experienced in the installation of the 6110 analyzer.
Disconnect the power supply of the analyzer before carrying out any work inside the analyzer.
Any work inside the analyzer should be performed exclusively by personnel specialized and
authorized to work on electrical installations. In addition, and in accordance with safety
standards, it must be possible to disconnect the power supply of the analyzer in its immediate
vicinity.
Electrical danger and fire hazard. Only use the supplied power cable. Only qualified experts
may perform the tasks detailed in the installation section of this manual, while adhering to all
locally valid safety regulations.
Proper ESD (electrostatic discharge) protocols must be followed to prevent damage to the
product when working with the electronic boards.
WARNING
WARNING
CAUTION
3.1 Unpacking
The instrument is heavy (55 kg) so extreme care must be taken with handling to avoid
damaging the instrument or inflicting personal injury. It is highly recommended to use a
pulley system (or similar) attached to the lifting ring located on the top of the instrument when
unpacking. The instrument should always be moved and stored in a vertical position.
To avoid personal injuryIt is recommended to use a pulley system to rem.
Carefully remove the instrument and its accessories from the box and packing material,
referring to the packing list included to confirm that everything has been delivered. Please
visually inspect the instrument for shipping damage. If anything is missing or damaged, contact
the manufacturer or your dealer immediately.
You may want to retain the box and other packing material in case you later need to ship the
instrument. Please dispose safely and ecologically of the box and packing material (if not stored
for future use).
Please read through this manual thoroughly before carrying out the installation.
3.2 Main components
Factory supplied
CAUTION
NOTICE
Your 6110 Total Package Analyzer is shipped with the following components:
Equipment included Part No.
Instrument
6110 instrument including all sensors pre-installed
Installation kit
2.5 mm Allen key
Power supply cable
Protection film for screen
Protection for rim detector x4
Seal to package (6 items) 33117
19
Page 22
Installation
Solenoid valve 2/2 NC with O-ring 33122
Filter with Goretex membrane (52 items) 33124
Piercing tip x1 (for PET) DG33308
Piercing tip x2 (for metal) 33127
Piercing tip mounting tool 33159
Pneumatic tubing kit 33154
Antifoam recharge bottle 1L 33156
Antifoam cartridge (empty) 33157
Antifoam priming beaker 33161
Syringe for antifoam cartridge 33162
Sensor recharge kit 2956A-A
Outlet sample tube assembly DG33267
USB key 60930
USB client cable including connectors, length = 3m 32533.03
Sensor support (part of A1100-S00T) 32205
PPS sensor storage and calibration cap (part of A1100-S00T) 28129
Locally supplied
The following must be provided locally by the user:
Purge gas for O
Forcing gas for piercing device (Air or N
Reference gas for CO
Loctite® 222 sealant (or similar) For locking and sealing piercing tips
Precision certified barometer For calibrating the barometric pressure sensor
Precision certified pressure gauge (0-7 bar) For calibrating the pressure sensor
3.3 Positioning
The instrument is heavy (55 kg) so extreme care must be taken when handling, to avoid
damaging the instrument or inflicting personal injury. It is highly recommended to use a
pulley system (or similar) attached to the lifting ring located on the top of the instrument when
moving it.
Hach Lange recommends installing the instrument on a sturdy laboratory table that can more
than support the 55kg weight. Place it on a clean flat surface, and convenient to the power
source. The display screen should be at head-height for easy viewing and operation.
3.4 Installation
3.4.1 Pre-installation
and CO2 sensor (CO2) 6 to 7 bar (87 to 102 psia), purity > 99.9%
2
) 5.5 to 6 bar (80 to 87 psia)
2
sensor (optional) 5.5 to 6 bar (80 to 87 psia)
2
CAUTION
20
You will need the antifoam cartridge filled with the antifoam liquid as part of the installation
process. Prepare this before starting the installation using the instructions in Antifoam cartridge
preparation on page 23.
In addition make sure you have suitable standards available before performing any calibration,
see Standards requirements on page 45 for calibrating the instrument sensors.
Your A1100 electrochemical sensor has been thoroughly cleaned and tested at the factory
before shipment and installed in the instrument. It has been shipped with a cartridge containing
a membrane and electrolyte pre-installed to protect the sensor head. The sensor must be
removed from the instrument and the cartridge removed and replaced with a new one prior to
first use to make it fully operational. These steps are described in the A1100 cleaning
procedure for 6110 TPA document supplied with the instrument. The new cartridge is included
in the sensor recharge kit, also supplied with the instrument.
Page 23

3.4.2 Physical installation
An installation wizard will start automatically once power is connected to the instrument for the
first time.
1. Connect the instrument to a power source - see Power supply on page 23.
2. Turn the instrument ON. An instrument auto check routine will start automatically. As this is
the first time the instrument will have been powered up, the O2 sensor residual and the
Antifoam level LEDs will always be red. This is normal as the system has not yet been fully
commissioned and these can be ignored at this stage.
3. The wizard will start automatically. Press the Installation button to proceed.
4. At the end of the process select the auto-check option. See Instrument startup on page 30
for a more detailed explanation of the auto-check process and results.
3.4.3 Post-installation procedures
1. The instrument has been delivered with English as the default language. However, a USB
memory stick
Japanese). If you wish to keep English as the preferred language please proceed to the
next step (Step 2 below), otherwise follow these instructions for installing a new language:
a. Make sure that ActiveSync® is installed on your PC. If you do not have it installed on
your PC, please refer to Microsoft ActiveSync® configuration on page 22 for installation
details.
is supplied with other available languages (German, Spanish, Chinese, and
Installation
b. Connect your PC to the instrument via the USB client connector (No. 5 in Figure 3 on
page 16). ActiveSync® will start automatically. By default ActiveSync® proposes to set
up a partnership with the instrument. This is not required, so select NO before
continuing.
c. Insert the supplied
USB memory stick into your PC.
d. Inside the “Setup” folder, double click on the “setup.exe” executable file. Follow the
on-screen instructions on your PC and then on the instrument to install the preferred
language software.
2. Set the security levels, user ID’s and passwords as described in Security and user
management on page 38.
3. Configure the instrument parameters as described in Configuration on page 33.
4. Perform a barometric sensor calibration as described in Barometric pressure sensor on
page 46.
5. Perform an O
sensor calibration as described in Oxygen sensor on page 48. Wait until the
2
residual value of the sensor is low enough (controlled automatically by the instrument). This
operation may take around 1-2 hours depending on storage conditions.
Note: The pressure, flow, temperature and CO
prior to use.
sensors are more stable and will not require calibration
2
The instrument should now be ready for use.
If a problem should arise with the instrument, please refer initially to Troubleshooting on
page 63. If the problem cannot be overcome, please contact your Hach Lange representative
who will be happy to assist you.
21
Page 24

Installation
3.5 Additional installation information
3.5.1 Microsoft ActiveSync® configuration
This software must be installed on your PC when connecting to the instrument via the USB
client connector (No. 5 in Figure 3 on page 16). The latest version of ActiveSync® is available
as a free download from www.microsoft.com
Once successfully installed, ActiveSync® will
start automatically each time the instrument is
connected to the PC.
Note: By default ActiveSync® proposes to set up a
partnership with the instrument. This is not
required, so make sure this is set to NO (as
illustrated left) before continuing.
The ActiveSync® screen is then displayed
and an icon will appear in the taskbar at the
bottom of your screen.
When active the icon in the taskbar is colored green (as illustrated top left)
and when inactive, the icon is still visible but greyed out (as illustrated
bottom left).
22
Page 25

3.5.2 Power supply
Electrical danger and fire hazard. Only use the supplied power cable.
Removable power cables must not be replaced with inadequately dimensioned power cables.
Check voltage requirement sticker on the rear panel of the instrument before connecting
(100-240 VAC).
Installation
WARNING
WARNING
CAUTION
Connect the power cable supplied with the instrument to the socket
at the rear of the instrument (left in diagram) for AC power
connection.
To switch the instrument on and off, press the rocker switch (right in
the diagram) - “I” for On and “O” for Off.
Important Note: In order to get optimum performance from the instrument always keep the gas
and power supplies switched on.
3.5.3 Emergency STOP button
This is located on the right side of the instrument (No. 5 in Figure 4 on page 17). Should the
need arise to stop the machine at any time during operation, press this button. An audible click
can be heard as the button locks in position.
The instrument should then be disconnected from the power supply.
Once disconnected, unlock the button by turning it clockwise. The instrument can then be
reconnected to the power supply and restarted.
3.5.4 Antifoam cartridge preparation
An empty 280mL volume antifoam cartridge is delivered as part of the installation kit. A recharge
bottle of antifoam is part of the package along with the necessary tools to transfer the liquid to
the cartridge (100mL volume syringe, tubing and connectors).
Note: One antifoam recharge bottle should be enough to fill the cartridge at least 3 times and a cartridge
completely filled with antifoam is sufficient for approximately 3,000 measurements.
Important Note: To optimize the performance and reliability of the instrument, it is strongly
recommended to only use the silicon antifoam supplied by Hach Lange (part number 33156).
To fill the cartridge, proceed as follows (numbers in the boxes correspond to the steps):
23
Page 26

Installation
1. Connect the syringe to the tubing with the quick connector.
2. Unscrew the cap from the antifoam recharge bottle and put the tubing in, making sure it
goes as near to the bottom of the liquid as possible.
3. Pull on the syringe to extract the liquid until the syringe is full.
4. Remove the syringe and tubing from the recharge bottle.
5. Attach the end of the tubing from the syringe to the other piece of tubing using the quick fit
connector.
6. Remove any trapped air in the system by applying a small amount of pressure to the end of
the connector with a small screwdriver (or similar) to open the valve. Push slightly on the
end of the syringe until antifoam can be seen dripping out of the end of the connector.
Remove the screwdriver.
24
Page 27

Installation
7. Attach the end of the second piece of tubing to the antifoam cartridge by pressing until the
connector clicks into place on the inlet valve. Then, push on the end of the syringe to empty
the contents into the cartridge. The syringe has a volume of 100mL and the cartridge a
volume of 280mL, so repeat the process until the antifoam cartridge is full.
8. On completion, rinse out the syringe and all tubing with water. Screw the cap back onto the
antifoam container and store the tools and container in a cool dry place.
Important Note: After installation of the antifoam cartridge in the analyzer, it is critical that any
air bubbles be cleared from the antifoam circuit before taking any measurements. To do this,
select the Antifoam system option from the Actuator verification option in the Maintenance
menu and follow the instructions as described in Antifoam system on page 61. Select 50
injections and stop the process when the system constantly spits a small stream of antifoam at
each stroke denoting the antifoam circuit is free of air bubbles.
25
Page 28

Installation
26
Page 29

Section 4 User Interface and Startup
4.1 User interface
4.1.1 Turning the instrument ON and OFF
The instrument has a power switch located at the rear of the left side of the base (No. 2 in
Figure 3 on page 16). The LED on the instrument measurement start button (No. 5 in Figure 2
on page 15) is illuminated when the instrument is powered on.
Important Note: It is recommended to keep the instrument powered ON at all times, unless the
instrument is to be moved to another location, if it will not be used for a long period of time, or if
maintenance procedures need to be carried out inside the instrument.
4.1.2 Touch screen
The instrument front panel is comprised of a TFT VGA (640x480) color display touch screen
acting as display, touch pad and keyboard.
4.1.3 Data entry
When a text box (alphanumeric field) is selected for data entry, a virtual keyboard appears on
screen as illustrated below. This is used in a similar way to a standard PC keyboard.
Once values have been entered, press the (Enter) key on the right of the keyboard to
confirm input and exit the virtual keyboard.
Note: Use the Cap key at the bottom left of the keyboard to switch between upper and lower case
characters. This is important for case-sensitive information such as passwords.
27
Page 30

User Interface and Startup
4.1.4 Rolling lists
For convenience, selection through a possible large list of items has been designed with a
rolling list as in the example below. Use the up and down arrows at the side to navigate through
the list, or select one item directly. Press Ok to confirm.
4.1.5 Instrument options
A banner will be displayed at the foot of each screen showing the options available:
• Standby - Press this button to leave the instrument in operational mode if there is a long
time delay between measurements. The screen will go blank, but can be reactivated by
tapping it. Once reactivated, you will need to enter a valid user ID and password combination
if this has been set up (see User identification and access level on page 31).
• Configuration - Refer to Configuration on page 33
•Calibration - Refer to Calibration on page 45
• Measurement - Refer to Measurement on page 49
•Analysis - Refer to Analysis on page 55
• Maintenance - Refer to Maintenance on page 57
If any of the options are not available for any reason (e.g. access level not high enough), they
will be greyed out.
28
Page 31

4.1.6 Information and warning windows
At various stages, an information or warning message may be displayed to request confirmation
from the operator that his last action(s) must be applied, or that there is a problem that did not
enable the requested action to be performed.
Note: Warning messages can be suppressed by unchecking the warning messages parameter (see
Instrument parameters on page 37).
For a full list of all possible warning and error messages, and the recommended action to take,
please refer to the section entitled Troubleshooting on page 63.
User Interface and Startup
4.1.7 Instrument status indicator
A colored LED indicator on the top right of the screen will indicate the current status of the
system:
• A green indicator means that no problems have been found
• A yellow indicator means that a problem has been found, but is not serious enough to stop
measurements being taken
• A red indicator means that there is a serious problem with the system which must be
corrected before any measurements can be performed
If multiple problems have been detected, the color of the LED will reflect the most severe error
(red in the example below). If the LED indicator is not green, pressing it on any screen will
display a list of errors and warnings:
It is advisable to correct all of the errors listed before continuing, to ensure the instrument is
working correctly.
On completion of all startup checks you may be required to enter a valid identification number
and password (as described in User identification and access level on page 31) to continue.
Provided all startup checks were successful, the measurement screen will be displayed.
29
Page 32

User Interface and Startup
4.2 Instrument startup
Important Note: The following assumes that the instrument is already fully operational and has
been used for taking measurements. For first time startup of the instrument refer to Installation
on page 20 to ensure additional procedures have been completed successfully for the instrument
to start up without errors occurring during the auto check procedures.
4.2.1 Instrument auto check
When the instrument is powered ON it goes through a number of startup procedures to check all
components are installed and functioning correctly. A number of instrument parameters are also
displayed down the left side of the screen indicating the current software and board versions
installed:
Note: It is possible (but not recommended) to skip individual checks by pressing the Skip button when the
component has the yellow indicator against it to indicate the component check is in progress.
The right side of the screen lists each of the instrument components that are being checked,
and a colored indicator to the left of each component shows the current status:
• A green indicator means that the component is installed and working correctly
• A red indicator means that there is a problem with that particular component
• A yellow indicator means that the component is in the process of being checked
• A blue indicator means that the component has not yet been checked
If there are errors encountered on startup that mean the instrument cannot function correctly, a
warning screen will be displayed indicating the next course of action.
Important Note: Once the instrument is switched on you will need to wait until the oxygen
sensor residual value reaches the threshold of 0.1 mbar. This operation can take as much as two
hours depending on the instrument and sensor conditions prior to startup.
30
Page 33

4.2.2 User identification and access level
If access rights have been enabled, it will be necessary to log on as an authorized user to get
access to the instrument functionalities and settings (see Security and user management on
page 38 to set these up).
By default, three levels of user have been defined for the instrument, and will be required on first
access to the instrument:
Name First name ID Password Level
Administrator Administrator 000 123 Administrator
Manager Manager 001 123 Manager
Operator Operator 002 123 Operator
After setting up your own user list, these three default entries should be removed.
First press Login at the bottom of the screen to access the full login screen:
User Interface and Startup
Enter your identification and password in the boxes provided, and press Ok to continue. Your
details will be displayed at the top left corner of the screen. Then press the Ok button at the
bottom left of the screen to gain access to the main menu.
There are three user access levels:
Level Available options
Administrator Configuration, Calibration, Measurement, Analysis and Maintenance
Manager Configuration, Measurement, Analysis and Maintenance
Operator Measurement and Analysis
For security purposes, when the session inactivity delay period has expired (adjustable using
the option Security and user management on page 38), the user is logged off automatically.
31
Page 34

User Interface and Startup
4.3 Menu structure overview
32
Page 35

Section 5 Configuration
5.1 Configuration menu overview
33
Page 36

Configuration
This section describes the sequence of actions required to configure the instrument. The
following configuration options are available from the main screen:
• Units and resolutions
• Package parameters
• Instrument parameters
• Security and user management
• Communication
• Scheduled operations
5.2 Units and resolutions
Units
Define the units for all values displayed by the instrument:
• O2 concentration
• CO2 concentration
• Length
• Temperature
• Volume
• Pressure
• Quantities
For each parameter select the required unit from the drop-down list and press Ok to continue.
When all units have been assigned, press Ok on the main screen to save these values and continue.
Resolutions
Define the display resolution for all values displayed by the instrument. These are the same as listed for
units with the addition of Formula.
For each parameter select the required display resolution from a drop-down list. A maximum of 4 digits
and a decimal point can be displayed (i.e. 1234, 123.4, 12.34, or 1.234). This does not affect the actual
resolution of data measured and stored, only the data displayed on screen. Select the required resolution
from the list and press Ok to continue.
When all display resolutions have been defined, press Ok on the main screen to save these values and
continue.
Note: The instrument performance and specifically the sensitivity and accuracy of each measured
parameter is not affected by the choice of resolution. This is purely for screen display purposes. Refer to
Technical specifications on page 13 to view the accuracy of each measured parameter.
34
Page 37

5.3 Package parameters
5.3.1 Package management
Package management
Add new package definitions (up to a maximum of 100), and edit or delete existing definitions. To edit or
delete a package, first select the package from the list displayed by touching the package name on the
screen, and then press either Edit or Delete as appropriate.
New Create a new package. The new package will be created using the default package
parameters. You will then need to select the new package and edit these default parameters
to define the new package parameters.
Delete Confirm the deletion to delete the package from the list
Edit A new screen is displayed to allow you to change the definition of the package. Select each
tab in turn (detailed below) to define the package definitions.
Product tab
Solubility Enter the type of beverage in the package.
Headspace Check this box for a fast measurement sequence that provides data from the
Equilibrated This is only available if Headspace (previous box) is checked. Check this box if
Slow
Decompress
Formula Define up to five different formulae for computing a new parameter. The formula
Configuration
headspace only.
you require the additional total O
the headspace.
If checked, then after the measurement process has completed, a slow release of
any remaining pressure will take place so the package can be handled safely.
definitions must already have been entered into the system (see Formula
management on page 36 for details).
and dissolved O2 measurements taken from
2
Package tab
Comment Enter a free-format alphanumeric text. This text will appear against the package
description in the main package management screen.
Brimful volume Enter the volume of the package when full to overflowing.
Height Enter the overall height of the package. This information is used if you activate
the Package size check option in Instrument parameters on page 37.
Tilt position Enter the tilt position of the package holder (optional). This should be 1, 2, or 3
and corresponds to the number on the tilt knob on the front of the instrument (
4 in
Figure 2 on page 15).
Pck backstop Position of the package backstop (optional). The backstop is calibrated on a scale
of zero to seven.
Package type Select the correct image for the type of package being measured (bottle, can,
etc.). The setups for each icon are different, so it is important to select the correct
one.
Note: The above reference values are also displayed at the start of the measurement process for that
package, so the operator can adjust the instrument accordingly (tilt position, etc.).
Alarms tab
Alarm
parameters
Factors tab
Factors Small adjustments can be made to the measurements listed by entering a factor.
Select the parameter to define the alarm settings, and enter the minimum and
maximum values allowable for each parameter listed. When the measurement
value falls below the minimum level or exceeds the maximum level for any
parameter listed, an alarm will be triggered.
This defaults to 1.000 for all measurements to indicate no adjustment. If this is
changed then the measurement calculated by the instrument will be multiplied by
this factor to give an adjusted measurement value.
No.
35
Page 38

Configuration
5.3.2 Formula management
Formula management
This option allows you to add new formula definitions (up to a maximum of 40), and edit or delete existing
definitions. You can use up to 16 variables pre-defined by the instrument and 2 user defined numerical
variables that are set up manually at the end of each measurement.
When the option is selected a screen will be displayed listing all existing formulae.
New Press the New button to create a new formula. The formula editor screen is displayed (see
Figure 5 below) and used to define the formula. The measurement values that can be used
are listed down the left side of the screen and are defined as listed in Table 1 on page 37.
The operators and operands are listed down the top right. In the bottom right of the screen
are a number of screen navigation options to assist in editing.
The colored indicator in the top right corner shows the validity of the formula as it is being
created. It is initially colored yellow but will turn red if the formula is invalid and green when
valid. When the indicator is red, the Ok button will be unavailable.
Use the Select button to select an existing formula to include in the new formula. The list of
existing formulae is displayed as a rolling list.
When a valid formula has been entered, press the Ok button to continue. You are then
requested to assign a name to the new formula, after which an information box is displayed
showing the name of the user who created the formula and the date and time it was created.
If required, add any free format alphanumeric text to identify the formula and press Ok to
continue.
Edit or
Delete
Info This button can be used to display information about the selected formula, such as the
To edit or delete a formula, first select the formula from the list displayed and then press
either Edit or Delete as appropriate. If Delete was selected, you will be asked to confirm
deletion before the formula is deleted from the list. If Edit was selected the formula editor
screen is displayed to allow you to change the definition of the formula.
operator who created it, the date and time of creation (or the last edit), and any comments
associated with it.
36
Figure 5 Formula editor screen
Page 39

Table 1 Formula terms and definitions
Term Definition
O2 HS O
O2 liquid O
O2 total O
CO2 HS CO
CO2 liquid CO
CO2 total CO
CO2 PT Concentration of dissolved CO
CO2 True Concentration of the real dissolved CO
%CO2 HS CO
Vol HS (Pr) Volume of headspace
Vol package Volume of headspace + volume of liquid
Vol liquid Volume of liquid
Barometric Pr Barometric pressure
Pressure HS Headspace pressure after piercing
Temperature liquid Temperature of package liquid
Temperature EC Temperature of the O
User numval1
User numval2
in headspace
2
in liquid
2
in headspace + O2 in liquid
2
in headspace
2
dioxide in liquid
2
in headspace + CO2 in liquid
2
using headspace pressure obtained by a
2
pressure/temperature (PT) method after package shaking
purity during headspace analysis
2
sensor in the instrument
2
The values are defined in the Num 1 and Num 2 fields of the comments section on
the measurement results screen (see example measurement screen on page 52).
Configuration
(corrected with CO2 purity in the package)
2
5.4 Instrument parameters
5.4.1 Measurement output
Measurement output
Define the parameters shown on the screen after and during the measurement process.
Diagnostic
measurement
view
Display
diagnostic
results
Package size
check
Warning
messages
Normalization If checked, enter the temperature value for CO2 normalization. CO2 calculations will
Column
selection
When all details have been entered, select Ok to confirm.
Use this option to troubleshoot measurement problems. If this box is checked, then
instead of the standard measurement progress screens being displayed during the
measurement process, the measurement values are displayed instead (see example in
Measurement view on page 53).
Use this option to troubleshoot measurement problems. If this box is checked, then
instead of the standard measurement results screen being displayed at the end of the
measurement process, more detailed measurement values are displayed instead (see
example in Results view on page 53).
If checked, the instrument will verify that the package size is the same as that defined
in the height parameter for the package being measured. If different a warning
message will be displayed. The height detection resolution is 1 mm.
If checked, any warning messages will be displayed during the package measurement
process. If left unchecked, all warnings will be suppressed. For a full listing of possible
warnings, refer to Warning messages on page 64.
then be made based on the temperature entered rather than the sample temperature.
From the drop down list, define the three measurements to display on the right side of
the measurement results screen after the measurement process has completed (see
example in Figure 7 on page 52).
5.4.2 Time and date
Time / Date
Set the system date and time parameters and the display format. Select Ok to confirm.
37
Page 40

Configuration
5.4.3 System information
System information
Display the system information about the currently configured boards. Select Exit to exit the screen.
5.5 Security and user management
5.5.1 Security management
Note: When the instrument is started for the first time, security is disabled by default. To avoid any
unauthorized access, it is highly recommended that each user be entered into the system and given
appropriate access rights as soon as possible. Details are provided in this section.
Security management
Configure parameters related to confidentiality. On completion, select Ok to confirm.
Access rights
enabled
Auto logoff When checked, the user is logged out automatically when the set delay for inactivity
Audit trail When checked, every action from a user is recorded in an audit file for traceability.
Logout timer Enter a maximum time of inactivity (in minutes) for all users. Users are logged out
Clear audit trail
file
Clear result file This option deletes the package measurement data.
When checked (recommended), it is required to log on as a registered user to access
the menus. When disabled (default), all menus are access free and there will be no
name recorded against any actions in the log file. To set up valid users, refer to User
management below.
(Logout timer) is reached and the instrument goes on standby.
These actions cover the configuration, calibration, and maintenance options. Each
record holds the date and time of the action, the action ID and description, and the
operator name and ID. The audit file is a rolling buffer recording the last 1000 actions.
automatically when the period of inactivity exceeds this value and the Auto logoff
feature is enabled.
This option deletes the audit file.
5.5.2 User management
User management
When selected, the list of registered users (up to a maximum of 99) for this instrument are displayed.
Note: To have the Delete and Edit options available, select one of the existing users first.
New To add a new user, all of the following fields must be entered, then select Ok to add
Edit or Delete To remove or modify an existing user, select the user in the user management screen
Level Available options
Operator Measurement and Analysis
Supervisor Calibration, Measurement, Analysis and Maintenance
Manager Configuration, Calibration, Measurement, Analysis and Maintenance
Administrator Configuration, Calibration, Measurement, Analysis and Maintenance
the new user.
Name Enter the user surname (3-15 characters).
First Name Enter the user first name (3-15 characters)
ID Enter an alphanumeric ID (1-10 characters).
Password Enter an alphanumeric password (3-15 characters).
Security level Select the security level from the drop-down list. For a list of options
available at each level refer to Table 2 below.
and select Edit or Delete as appropriate. To save all changes, press Ok (you will be
required to confirm the changes) or press the Exit button to exit the screen without
making any changes.
Tabl e 2 Secu rit y lev e l table
38
Page 41

5.5.3 Audit trail
Audit trail
View the list of user actions performed on the instrument. The actions are listed chronologically with the
latest action always at the top of the list. When the maximum of 1,000 recorded actions is reached, the
oldest is deleted and replaced with the newest.
Scroll through the audit trail screens using the First, Previous, Next and Last buttons, or select the Exit
button to leave this option.
Note: To clear the audit trail file, use the option available in Security management.
5.6 Communication
This option sets the parameters required for exporting instrument data files to your PC or USB
storage device.
Select from:
• Data download configuration (see below)
• Ethernet configuration (see Ethernet configuration on page 40)
5.6.1 Data download configuration
Configuration
Scroll through the list of available data files using the up/down arrow keys on the right, and
select if the file to be exported is in data or text format. By default, the text format is set to YES
and the data format to NO. Set both formats to NO if you do not require the file downloaded.
Use the Invert Selection button under each column to toggle between YES and NO.
Note: It is recommended to set the files to text format for easy loading into standard software applications
on the PC such as Microsoft Excel or similar. The data format is only required for Hach Lange service and
support personnel.
When the data formats have been configured, select Ok to confirm.
The following files can be transferred:
• Audit trail: Audit trail.txt
• Calibration files: Calib Barometer.txt, Calib CO2.txt, Calib Flow.txt, Calib O2.txt,
Calib Pressure.txt and Calib Temperature.txt
• Liquid: Liquid.txt
• Package: Package.txt
• Result: Result.txt
• Configuration: Configuration.txt
• Formula: Formula.txt
• Raw data: Raw data.txt
To transfer the data files, plug an external mass storage device (such as a USB memory stick)
into the USB-A port at the rear left of the instrument (No. 3 in Figure 3 on page 16). The
instrument should automatically recognize the presence of the device.
It may be that some USB memory sticks are not compatible with the instrument and will not be
recognized. In this case, the only solution is to try another brand of memory stick, or to access
the instrument using an Ethernet connection (see Ethernet configuration on page 40).
Note: It is recommended to use an empty USB storage device, as the more files it contains the longer the
instrument will take to scan the device for files already downloaded.
The files are automatically copied and on completion a pop-up window will inform you the
process completed successfully and you can remove the device.
Remove the device and press YES in the pop-up window to continue, followed by EXIT in the
main window to complete the process.
Next, insert the device into an available USB port on your computer and download the data to
an appropriate folder using standard computer software.
39
Page 42

Configuration
The text files (with a .txt file extension) are in a readable format on a PC and most document
editors (MS Word, Notepad, etc.) can be used to open these files as well as spreadsheet and
other reporting tools (e.g. MS Excel).
The following is an example of the instrument configuration report (Configuration.txt) as
viewed using the Notepad utility.
5.6.2 Ethernet configuration
This option allows you to set up an Ethernet connection to download data from the instrument to
a PC. This can be to a web page (see Web browser below) using an HTTP connection, or to an
OPC client (see OPC client on page 42) using a DCOM connection.
These options allow you to perform several operations directly from your PC. To be able to use
these options, the instrument must be connected to the network.
At the bottom of the ethernet connection screen, check the data access box required.
5.6.2.1 Web browser
Access the information by launching an internet browser on your PC and typing “http://” followed
by the device name assigned to the instrument. The home page will then be displayed:
40
Page 43

Configuration
You will be required to enter a valid username and password combination (defined in Security
and user management on page 38).
The initial screen will then be displayed. You can then click on Expand All to see all the
available options. Then click on the report you wish to view (as in Audit trail below).
Depending on the option selected, you will have the possibility to browse through all pages of
the reports, by clicking on the First, Previous, Next and Last buttons at the bottom. Click on
Exit to select another report or click directly on the list of reports on the left.
To download the data for your selected option, right click on Import (top right of the screen) and
select Save Target As.
Then selected a location on your PC to store the file. The files and filenames are the text files
that are listed in Data download configuration on page 39.
41
Page 44

Configuration
5.6.2.2 OPC client
OPC (Open Process Control) is a software interface standard that allows Windows PC
programs to communicate with industrial hardware devices. The OPC client software is installed
on a PC and communicates directly with the OPC server embedded in the 6110 instrument.
To activate the link, check the OPC option on the ethernet configuration screen.
Figure 6 Ethernet configuration screen
The first time this option is selected, a registration key is required. This can be found on the
case of the supplied CD-ROM. Enter the registration key.
Once validated, press the information button next to the OPC checkbox to display the CLSID
number. Enter the instrument ID (shown in the device name box in the configuration screen) and
the CLSID into the OPC client software on the PC to establish the two-way network link to the
instrument.
The OPC protocol identifies the data passed between server and client with a three level
hierarchy called an item. The item may contain data, error messages or warning messages.
To ensure total synchronization between PC and instrument, all modifications that are made to
data elements on the instrument are automatically sent to the client PC as a message item.
Three data items are sent in read-only format from the instrument to the OPC client:
• Package - Containing data about the currently selected package
• Measure - Containing data about the last measurement made by the instrument
• Calibration - Containing data about the current calibration parameters being used
Message items can be sent from the instrument to the OPC client and from the OPC client to
the instrument.
42
Page 45

5.7 Scheduled operations
This option defines the sensor service and calibration schedule for all the sensors installed on
the instrument.
5.7.1 Manual calibration
Manual calibration
Select a sensor and check the activation flag as required.
Calibration
frequency
Frequency
selection
When set, the system will set a yellow status indicator message to inform you when a
sensor calibration is required (see also Instrument status indicator on page 29).
Press the button to set the desired frequency:
• Choose between Daily, Weekly, Monthly or Yearly by pressing the appropriate
• With the Weekly option, define the day of the week when the operation will take
• With the Monthly option, define:
• With the Yearly option, define:
Configuration
radio button
place
• The date and monthly interval (e.g. every 15th day of every 3 months), or
• The day and monthly interval (e.g. every 1st Sunday of every 2 months)
• The date and month (e.g. every 1st February), or
• The day and month (e.g. every 2nd Saturday of every July)
5.7.2 Verification
The process is the same as for Manual calibration but defines a verification frequency for
selected sensors.
5.7.3 Routine maintenance
The process is the same as for Manual calibration but defines a service frequency for selected
instrument maintenance options.
5.7.4 Service
The process is the same as for Manual calibration but defines a service frequency for selected
instrument service options.
43
Page 46

Configuration
44
Page 47

Section 6 Calibration
6.1 Calibration menu overview
This section describes the sequence of actions required to calibrate the sensors and flow meter
on the instrument:
1. Barometric pressure sensor
2. Pressure sensor
3. Temperature sensor
4. CO2 sensor
5. Flow sensor
6. O2 sensor
Note: The above is the actual sequence of events that must be followed for any calibration (i.e. if you
calibrate the CO2 sensor, then the barometric sensor, pressure sensor and temperature sensor must be
calibrated first and in that order).
6.2 Standards requirements
It is recommended that calibrations should be made with external certified standards at least
once a year.
The instrument will provide accurate results provided accurate reference standards are used.
The following table shows the maximum ranges for the standards. These ranges should not be
exceeded.
Standard Range
Pressure ± 0.02 bar
Barometric pressure ± 2 mbar
Temperature ± 0.2°C
CO
sensor CO2 at 99.9% purity at ± 0.1% which is the purge gas for the normal operation
2
6.3 Calibration schedule
This following table shows the recommended sensor calibration intervals (using the instrument’s
automatic calibration feature) based on an average of 500 package analyses per week. This
proposed schedule can be modified according to operating conditions.
Sensor Interval Sensor Interval
Barometric pressure sensor 6 months O
Flow meter 6 months CO
Temperature sensor 6 months Pressure sensor 6 months
sensor 2 months
2
sensor 6 months
2
45
Page 48

Calibration
6.4 Barometric pressure sensor
After selecting this option, the details of the last barometric pressure sensor calibration are
displayed. This shows the values recorded, and information about who performed the last
calibration and when. The due date of the next calibration is also shown (determined by the
parameters entered in Scheduled operations on page 43).
Barometric pressure sensor
New calibration 1. A calibration screen is displayed showing the current values measured by the
instrument.
2. Using a precision certified barometer, measure the barometric pressure in the
location where the instrument is used and compare with the current barometric
pressure value displayed. If the values are the same press Cancel, otherwise
enter the new barometric value in the New barometric value box and press
Validation to store the new setting.
3. On completion a calibration report is created.
Calibration
reports
View the last 10 barometric pressure sensor calibration reports.
6.5 Pressure sensor
After selecting this option, the details of the last pressure sensor calibration are displayed. This
shows the values recorded, and information about who performed the last calibration and when.
The due date of the next calibration is also shown (determined by the parameters entered in
Scheduled operations on page 43).
Important Note: This procedure uses information from the barometric pressure sensor. Be sure
that this parameter is reliable (i.e. a recent barometric pressure sensor calibration has been
performed - see Barometric pressure sensor above).
Pressure sensor
New calibration 1. A calibration screen is displayed showing the current values measured by the
instrument.
2. Using a precision certified barometer, measure the barometric pressure in the
location where the instrument is being used. Provided a barometric pressure
sensor calibration has recently been performed (as described in the Important
Note above) this measurement should be the same as the value displayed in the
Reference pressure box. If this is the case, press Enter and go to the next step.
Otherwise, enter the measured barometric pressure value in the Reference
pressure box and press Enter.
3. Connect a precision certified pressure gauge (0-7 bar) to the gas out connection
on the rear of the instrument (No. 4 in Figure 4 on page 17) and measure the
reference pressure. Enter this value in the Reference pressure box and press
Enter.
4. Finally press the Validation button at the bottom left of the screen to accept the
new calibration and complete the process.
5. On completion a calibration report is created.
Calibration
reports
View the last 10 pressure sensor calibration reports.
46
Page 49

6.6 Temperature sensor
After selecting this option, the details of the last temperature sensor calibration are displayed.
This shows the values recorded, and information about who performed the last calibration and
when. The due date of the next calibration is also shown (determined by the parameters entered
in Scheduled operations on page 43).
The temperature calibration is made using an accurate internal resistor.
Temperature sensor
New calibration 1. A calibration screen is displayed and the instrument measures two temperature
2. On completion a calibration report is created.
Calibration
reports
View the last 10 temperature sensor calibration reports.
6.7 Carbon dioxide sensor
After selecting this option, the details of the last carbon dioxide sensor calibration are displayed.
This shows the values recorded, and information about who performed the last calibration and
when. The due date of the next calibration is also shown (determined by the parameters entered
in Scheduled operations on page 43).
Calibration
values and checks the stability of the measurements. Provided the
measurements are stable, you can choose to accept or reject the new values.
Press Validation to store the new setting.
The CO
using pure CO
sensor needs to be calibrated approximately once every 6 months and is calibrated
2
and air. CO2 is supplied by the purge gas and air is provided by an internal
2
pump that takes air directly from the atmosphere.
Carbon dioxide sensor
New calibration 1. A calibration screen is displayed showing the gas purity data of the main gas. If
the value is incorrect, enter the correct value in the Gas purity box.
2. When the measurement stabilizes press the Va lidation First Point button. A
new measurement is then initialized and the internal air pump automatically
activated.
3. When the measurement stabilizes press the Va lidation Second Point button.
4. You now have the opportunity to accept the calibration, store the new values, and
write the details to the calibration report file. If the calibration cannot be
performed, an error message will be displayed giving the reason.
Verification 1. The process is similar to a new calibration, but once verification is complete press
the Ok button to complete the process. No report is produced.
Calibration
reports
View the last 10 flow sensor calibration reports.
47
Page 50

Calibration
6.8 Flow sensor
After selecting this option, the details of the last flow sensor calibration are displayed. This
shows the values recorded, and information about who performed the last calibration and when.
The due date of the next calibration is also shown (determined by the parameters entered in
Scheduled operations on page 43).
Important Note: This procedure uses information from the pressure sensor. Be sure that this
parameter is reliable (i.e. a recent pressure sensor calibration has been performed - see
Pressure sensor on page 46).
Flow sensor
New calibration 1. A calibration screen is displayed and the instrument will then compute the
Verification 1. The process is exactly the same as for a new calibration, but once the details
Calibration
reports
measured flow in four steps (at 0.200 ml/s, 0.400 ml/s, 0.800 ml/s and at 0.000
ml/s). The results are displayed on screen.
2. After a few minutes, when the process is complete, the Validation button is
highlighted. Press this button to accept the calibration (you will need to confirm
acceptance).
3. On completion a calibration report is created.
have been displayed on screen press the Cancel button to complete the process.
No report is produced.
View the last 10 flow sensor calibration reports.
6.9 Oxygen sensor
After selecting this option, the details of the last oxygen sensor calibration are displayed. This
shows the values recorded, and information about who performed the last calibration and when.
The due date of the next calibration is also shown (determined by the parameters entered in
Scheduled operations on page 43).
Important Note: This procedure uses information from the barometric pressure sensor. Be sure
that this parameter is reliable (i.e. a recent barometric pressure sensor calibration has been
performed - see Barometric pressure sensor on page 46).
The O
parameter has been passed. After a sensor service, wait at least 30 minutes after mounting a
new membrane before calibrating.
Note: For full details on sensor servicing, please refer to the A1100 Sensor Installation and Maintenance
Manual that was delivered with the instrument.
The O2 sensor is calibrated in-situ with an air pump providing a continuous flow of fresh air in
front of the sensor head.
sensor should be calibrated after each sensor service or when the calibration due date
2
Oxygen sensor
New calibration 1. A calibration screen is displayed.
Verification 1. The process is similar to a new calibration, but once verification is complete press
Calibration
reports
2. The value Ratio ideal membrane is a percentage of the current against the ideal
current for the membrane being used.
3. The value Variation shows the percentage of this measurement against the last
sensor calibration measurement.
4. The Calibration Status box at the bottom of the screen shows the current
calibration process with a bar graph below it to indicate the progress.
5. On completion, only if the calibration is valid will the Validation button be
displayed. Press this button to accept the calibration, store the new values, and
write the details to the calibration report file. If the calibration cannot be
performed, an error message will be displayed giving the reason.
the Exit button to complete the process. No report is produced.
View the last 10 flow sensor calibration reports.
48
Page 51

Section 7 Measurement
The following flow chart shows an overview of the measurement process. The actions listed on
the left are performed by the user, and those on the right by the instrument.
49
Page 52

Measurement
7.1 Main screen
The initial screen displays standard information about the package to measure:
You have the option to change the details displayed or to start the measurement process:
• User
• Package ID
• Start analysis
7.1.1 User
User
Enter a valid User ID and Password. The new user name will be displayed.
7.1.2 Package ID
Package ID
Define the package to be measured. The package details must have already been entered into the
system (see Package parameters on page 35 for details).
Select the package from the list provided and press Ok. If necessary, you can change the package
details using the Edit button. For details on editing a package, refer to Package parameters on page 35).
7.1.3 Start analysis
Important Note: Once a sample has completed the measurement process it will contain a small
amount of antifoam. Therefore, after measurement, ensure the sample is disposed of in a sink
(or similar) to avoid any risk of ingestion.
50
Note: If the Diagnostic measurement view and the Display diagnostics results boxes have been checked
during configuration (see Instrument parameters on page 37), then the screens will differ (see examples in
Diagnostic measurement and results views on page 53) but the process is the same.
For optimal operation, the base of the package holder should always have a layer of water for
improved transfer of the ultrasound energy to the liquid in the package. For the correct amount
of water, tilt the package holder forward by turning the tilt knob (No. 4 in Figure 2 on page 15) to
position 3 (small can icon). Next, fill the holder with water until the water level reaches the top
without spilling over. Finally, put the holder back to the correct tilt position for the package to be
measured in readiness for the measurement process.
Page 53

Measurement
Select the Start Analysis option to start the measurement process. The instrument will display
information regarding the measurement step being taken, instructions on any user involvement
required, and the measurement progress throughout the duration of the measurement process.
The first screen gives details of the package being analyzed and gives the user information on
what action to take. As instructed, raise the transparent front door in order to place the package
in the measuring chamber. As soon as the door is raised, the initialization screen is displayed
with the next set of instructions.
Place the package to be analyzed on the circular platform, and set the tilt position as defined for
this package by turning the black knob on the front. Two red laser beams are activated as the
front door is raised. Where the two red beams intersect is where the package will be pierced.
For bottles, position the package so that the two red beams
intersect in the centre of the bottle top (as illustrated right).
For cans, position the package so that the two red beams
intersect at position 1 (as illustrated right). This is the
recommended piercing position.
Alternatively, position the package so that the two red beams
intersect at position 2.
Note: If piercing at position 2, turn the ring pull 90° left or right, in order to
clear the piercing position. Do not pierce the can with the ring pull in the
position illustrated.
Make sure that the package is also hard up against the backstop. This may require realigning
the backstop by turning the locking wheel counter clockwise and adjusting its position to that
defined for this package. Lock it in place by turning the locking wheel clockwise finger tight.
Once the package is secure against the backstop and the piercing position aligned with the two
red laser beams, close the front door.
Start the measurement process by pressing the START button on the right side of the
instrument base (No. 5 in Figure 2 on page 15).
A progress bar is displayed at the bottom of the screen showing the elapsed time to date, and
the estimated time for measurement completion. This bar is updated on an on-going basis.
No intervention or action from the user is required until the measurement process has
completed. However, you do have the option to Abort the process at any point.
The measurement goes through four main stages during which time a number of measurements
are taken and calculated:
• The piercing arm is lowered and the package is pierced
51
Page 54

Measurement
• The head space is analyzed
• The liquid is analyzed
Note: This step will not be executed if the Headspace measurement
has been defined for this package (see Package parameters on
page 35).
• The measurement completes and the piercing arm is raised to its home position
Once complete, the measurement results are displayed. The three columns of data displayed
are those that have been defined in Instrument parameters on page 37:
Figure 7 Measurement results screen
The three measurements are displayed graphically and are color coded. Those in green show
that the measurements are within the defined limits for this package. Those in red signify that
the measurements are outside the defined limits. These limits have been defined in the alarms
section of Package parameters on page 35.
It is possible to add 2 numerical values and 5 comments to these results by entering them in the
text boxes displayed down the left. The numerical values will be required if they have been
defined as part of a formula (see Formula management on page 36).
Press the Continue button to return to the main measurement screen, or press the Info button
to display more detailed results (again color coded) in a tabular format.
For additional information on viewing the full set of measurement results, see the section
entitled Open data on page 55.
52
Page 55

7.2 Diagnostic measurement and results views
These views are essentially used for troubleshooting purposes by Hach Lange service
technicians, therefore no detailed explanation of the data displayed is given in this manual.
7.2.1 Measurement view
As the measurement process executes, the measurement details are displayed down the left
side of the screen. The first line of the display shows the current stage in the process. The right
side of the screen gives additional textual information.
Measurement
7.2.2 Results view
The following screen is displayed on completion of the measurement process:
Note: If the Stored measured sensor values box at the bottom of the screen is checked, the values are
recorded in the results file (and as raw data) but with pre-defined units. These units cannot be changed by
the user.
53
Page 56

Measurement
54
Page 57

Section 8 Analysis
8.1 Analysis menu overview
8.1.1 Open data
Open data
This option allows you to view the measurement data from the last 1000 measurements.
The data elements displayed are those defined in Table settings below.
Use the Previous and Next buttons to scroll through the data.
Select one of the lines of data and the Info button will be made available. Press the Info button to see
more details of the measurement in a new screen.
Use the Exit button to return to the main analysis menu.
8.1.2 Table settings
Table settings
This options allows you to define up to 10 data elements that the instrument will display for each
measurement. More data is recorded, but only 10 values can be displayed on screen.
Define for each of the 10 columns the data to view from the drop-down list of available data elements.
Select Validation to accept and save the selected data elements.
55
Page 58

Analysis
56
Page 59

Section 9 Maintenance
9.1 Schedule
The following table shows the recommended maintenance schedule for an average of 500
package analyses per week. This proposed schedule should be modified according to operating
conditions.
Action Interval
Clean instrument exterior Daily
Refill sonotrode base with water Daily
Check piercing tip is tight Daily
Check the purge gas pressure and purity Daily
Run a reference sample (old beer) through the system to verify the
CO
sensor and the O2 response/residual (< 20 ppb)
2
Goretex filter replacement (see Wizards on page 58)Weekly
Remove and clean instrument front door inside and out Weekly
Clean optical barrier windows Weekly
Clean the sonotrode surface of the package holder Weekly
Clean laser optics used to position the package Weekly
Refill the antifoam cartridge (see Antifoam cartridge preparation on
page 23)
Daily
Approximately every 6 weeks
O2 sensor cartridge replacement and calibration (see Wizards on
page 58)
Piercing gasket replacement (see Wizards on page 58) Every 3 months
Piercing tip replacement (see Wizards on page 58) Every 6 months
Clean antifoam cartridge Every 6 months
Purge and clean antifoam system Every 6 months
Replace the display protection film Every 6 months
Replace the rim detector protection Every 6 months
Replace flow chamber O-ring Every 6 months
Replace the blue sample tubing Every 6 months
Sensor calibrations Twice a year
Replace needle valve Yearly
Replace antifoam cartridge internal membrane Yearly
Antifoam pump maintenance Yearly
Piercing module maintenance Yearly
9.2 Purge gas cylinder
Check the purge gas cylinder (CO2 99.9% purity) daily to ensure there is an adequate supply of
gas.
Every 2-3 months
The following are performed by a Hach Lange service technician
CAUTION
On no account should the cylinder become empty while the instrument is switched on, as this
can cause damage to the carbon dioxide sensor.
57
Page 60

Maintenance
9.3 Maintenance menu overview
9.3.1 Wizards
This option gives an on-screen visual guide through a number of standard maintenance
procedures to perform on the instrument.
Installation
The installation wizard will be invoked automatically the first time the instrument is switched on to help
you complete the installation of the instrument.
Once the instrument has been successfully installed, the Skip installation wizard on device startup
checkbox should be checked to ensure a normal startup from there onwards.
Maintenance
It is recommended to use the maintenance wizards for maintenance of the instrument. Simply follow the
on-screen instructions available for each of the options.
Antifoam
cartridge
replacement
EC sensor
maintenance
Goretex filter
replacement
A replacement cartridge can be used or the existing cartridge refilled with antifoam. If
refilling the existing cartridge, follow the instructions given in Antifoam cartridge
preparation on page 23.
To ensure the performance and reliability of the instrument, it is strongly
recommended to only use the silicon antifoam supplied by Hach Lange (part number
33156).
Chemical reactions within the gas sensor requires that the oxygen sensor be serviced
regularly to restore its original sensitivity. A clear sign that a sensor maintenance is
required is when measurements are noticeably less stable than usual.
For EC sensor maintenance, please also refer to the instruction sheet entitled A1100
cleaning procedure for 6110 TPA which is supplied with the instrument.
It is recommended to replace this filter every week.
58
Page 61

Maintenance
Piercing tip
replacement
Antifoam pump
maintenance
It is recommended to replace these about every six months.
Note: When replacing the tip, use the mounting tool supplied with the installation kit
and apply some Loctite
mounting.
Refill or replace the antifoam cartridge as required.
9.3.2 Digital input verification
Digital input verification
This allows you to check all devices that provide digital inputs to the instrument microprocessor. A black
dot in the circle to the right of the option signifies that the specific sensor has been activated.
Emergency stop pushed Activated when the emergency stop button is pushed. The ultra
Axis reference position activated The black dot indicates that the piercing device is positioned in
End of travel upper bound activated The upper bound limit is located higher than the reference
End of travel lower bound activated Activated when the piercing device is in its lowest position.
Front door closed Activated when the front door is closed.
Protection cover opened Activated when the top protection cover is not in place.
Ultra sound error Activated when the sonotrode is not working correctly.
Low level of antifoam Activated when the antifoam cartridge is nearly empty.
Foam detection activated Activated when foam or liquid has ingressed into the gas
Bottle rim detection activated Activated when a package is detected by the optical barrier. For
®
222 sealant (or similar) on the screw thread of the tip before
sound option will also have a black dot as the power supply of
the sonotrode is deactivated at the same time.
the reference (home) location.
position. If this button is activated it means that the system is in
an abnormal state of operation and you should call your local
Hach Lange representative.
sampling tube.
control purposes, this can be activated by passing the hand
between both optical detectors.
59
Page 62

Maintenance
9.3.3 Actuator verification
Manual displacement
Move to the home
position (top)
Move up
Stop (only applicable
when moving to the
home position)
Move down
Ultrasound ON/OFF
Switch between having the ultrasound system on or off.
Important Note: Before turning ON, remove any pierced packages from the package holder to avoid any
liquid spillage.
With some water in the base of the package holder, test the system is working by moving your finger
across the base of the package holder and toggling the switch between ON and OFF. You should sense
a noticeable difference.
Press on the icons displayed left to perform the required operation on
the piercing assembly.
The current position is displayed on the left side of the screen as the
assembly moves either up or down.
It is advisable to check the displacement process using the two
different speed settings by pressing on these two buttons (tortoise for
slow and hare for fast).
Press on the icon with the down arrow to lower the needle without
moving the piercing assembly.
Press on the icon with the up arrow to raise the needle back into the
home position.
Lasers ON/OFF
Switch between having the lasers on or off.
Test the system is working by toggling the switch to ON and you should see the two red laser beams
intersecting on the package holder. Toggle the switch back to OFF and the laser beams should
disappear.
60
Page 63

Maintenance
Antifoam system
Use this option to check the level of antifoam remaining, and to test that the antifoam injector system is
working. This option is useful to purge the system before an extended stand-by (several weeks) or when
performing start up procedures.
Injection number Enter the number of injections.
Follow this procedure:
1. An antifoam priming beaker is available from the spares kit delivered with the instrument. Place this
on the ultrasonic base of the instrument, using the lasers to center it and lower the plastic front door.
2. Activate the motor to lower the instrument head, allowing the needle to penetrate approximately to
the center of the beaker (illustrated below). Refer to Manual displacement above for details on
lowering the instrument head.
3. Press the Start injection button and you should hear the injector working. You should hear as
many clicks as you have defined for the injection number. In addition, the liquid should be seen
exiting from the tip of the needle.
4. On completion of the test press the Stop injection button and raise the instrument head to its home
position. Remove the beaker and rinse well with water. Store with the syringe and antifoam
container for next usage.
9.3.4 Analog value monitoring
This screen shows all the main analog signals related to the main components of the
instrument. Select this option to view the analog and actual values for:
• Temperature
• Pressure
• CO
• Flow
• EC sensor current
• EC sensor temperature
concentration
2
61
Page 64

Maintenance
9.3.5 Global system view
This option allows you check various components of the instrument:
• O2 calibration valve
• Gas calibration valve
• Reference volume valve
• Main purge valve
• Needle purge valve
• On-off valves function
• Regulating valves function
• Ultrasound
• Flow regulation
• Manual displacement
• Proportional valve
Check a component by pressing on the button/schematic (which will turn to green) and observe
the values being displayed.
Note: If the gas flow rate is manually changed, be aware that the automatic purge procedure (every 5
minutes) will reset the gas flow rate back to 0.25 mL/s, which will have an impact on the values being
observed.
9.3.6 System initialization
Selecting this option initiates the standard system startup process, without having to power the
instrument off and on. See Instrument startup on page 30 for more information on system
startup.
9.3.7 End application
Select this option to perform an orderly shut down of the instrument. On completion, the
instrument can be powered OFF.
9.3.8 Service validation
This option lists the service due date for a number of options. These are user-defined (see
option Service on page 43). As each service due date is passed, the Service done button will
be made available. Press this button after the service has been performed to reset the service
due date based on how the service has been configured.
9.3.9 Measurement head initialization
Use this option to return the measurement head to the home position by pressing the Initialize
motor button.
62
Page 65

Section 10 Troubleshooting
10.1 Error and warning messages
Note: If any error or warning persists, please contact your Hach Lange representative for assistance.
10.1.1 Error messages
Error
code
HEX001 E1: Emergency STOP. Emergency STOP button pushed.
HEX002 E2: Motor error.
HEX004
HEX008 N/A
HEX010
HEX020
HEX040
HEX080
HEX100 E100: Ultrasound error.
HEX200 E200: Motor error - High limit.
HEX400
HEX800 N/A
HEX1000 N/A HS pressure unstable.
HEX2000 N/A Measurement aborted by user. N/A
Displayed message Probable cause Solution
Release emergency STOP button
by turning it clockwise.
If necessary, initialize the motor.
The measuring head has missed an
E4: The front door has been
opened. The measurement
process has been stopped.
E10: Foam has been detected in
the gas path. The measurement
process is canceled.
E20: Not enough pressure in the
system. The measurement
process is canceled.
E40: Check gas supply, current
pressure: xxxxx.
E80: Rim detector is dirty. Please
clean it and restart the
instrument.
E400: Problem to initialize the
motor displacement. The
measurement is aborted. Please
restart the instrument.
obstacle.
Emergency STOP button pushed if the
motor is moving.
The front door has been opened before
the end of the measurement process.
The front door is not closed properly. Control the front door mechanism.
The protection cover has been
removed.
There is a problem with the antifoam
injection.
Incorrect tilt of the sonotrode. Check the tilt of the sonotrode.
There is no more antifoam.
The pressure in the package is greater
than the purge gas pressure.
Problem of flow regulation during the
measurement.
The gas path is partially or totally
blocked.
Before filling the reference volume, the
pressure is lower than 1.5 bar.
The detector has become clogged with
old sample and dirt.
The ultrasound power supply is OFF. Check the ultrasound power supply.
The emergency STOP button is not
released.
There is too much water in the
ultrasound generator.
The motor is above the reference
position.
An upper or lower limit is ON.
N/A Turn the instrument off and restart it.
Needle pressure is too low probably
caused by air leaking from the piercing
position.
Initialize the motor.
Close the front door.
Replace the protection cover.
Try another measurement.
Check the antifoam level and refill if
necessary.
Prime the antifoam pump.
Increase the purge gas pressure.
Check the purge gas pressure.
Change the Goretex filter.
Control the antifoam injection.
Check the purge gas pressure.
Clean the two metal rods either side
of the piercing device with a damp
cloth. Turn the instrument off and
restart it.
Release emergency STOP button
by turning it clockwise.
Remove any excess water.
Go to the maintenance menu, move
the motor down and initialize it.
Pierce the package in a different
position.
Change the Goretex filter if clogged.
Check correct piercing tip is being
used for the package (PET/metal).
Check for package leaks.
63
Page 66

Troubleshooting
10.1.2 Warning messages
Warning
code
HEX001
HEX002 W2: Unmatched package size.
HEX004
HEX010 N/A
HEX020
HEX040 W40: Spontaneous degassing...
HEX080
HEX100 N/A
HEX200 N/A
HEX400 N/A
Displayed message Probable cause Solution
W1: Unstable reference
pressure.
W4: Measurement timeout.
Accuracy of dissolved O2 not
guaranteed.
W20: Measurement process
incomplete. Insufficient initial
package pressure.
W80: Measurement process
incomplete. Insufficient package
pressure during ultrasound
stage.
The variation of reference
pressure is too high.
The measured package height is
different from the value defined in
the package definition.
The measurement pressure is
lower than 3.5 bar.
Gas path not airtight.
A spontaneous and/or too fast
degassing has occurred.
The package (especially in the
case of cans) is losing pressure
due to a leak.
The sensor has become
unstable.
The pressure in the package is
too low to continue with a
measurement.
A spontaneous degassing is
detected at the end of the first
expansion.
The measured pressure is too
low to compute the second phase
of the measurement.
Possible problem with instrument
configuration
Possible problem with instrument
configuration
True CO2 may not be reliable
due to CO2 purge gas purity out
of specification.
Check the pressure stability of
the input reference gas.
Check the package size
definition.
Check the black seal on the
piercing unit.
Check the purge gas pressure.
Check the forcing gas pressure.
Check the Goretex filter.
Check the airtightness of the gas
path between the piercing unit
and the measurement chamber.
Restart the measurement with
another package.
Verify the package is leak free i.e.
watertight and airtight
Perform an oxygen sensor
maintenance procedure
Restart the measurement with
another package.
Restart the measurement with
another package.
Check foam intrusion in the gas
path.
Check Goretex filter.
Contact your Hach Lange
representative to analyze the
problem.
Contact your Hach Lange
representative to analyze the
problem.
Check gas cylinder purity, tubing
and connections to 6110 and
recalibrate CO2 sensor
Code in
results
file
1
2
4
10
20
40
80
100
200
400
64
Important Note: The value in the right hand column of the above table is a direct correlation to
the value in the warning flag column in the measurement file Result.txt. If a value in the warning
flag column does not exist in the above table it is because it is a composite code meaning more
than one warning is relevant (e.g. a value of 6 in the warning flag column equates to warning
messages 4 and 2 from the table above). Be aware that this is a hexadecimal code meaning that
if warning codes 8 and 2 from the above table are relevant, it will be displayed as an A in the
warning flag column of the measurement file. If you have any difficulties relating the
measurement file warning flags to the codes in the above table, please contact your Hach Lange
representative for assistance.
Page 67

10.1.3 Red LED’s on startup screen
Item Possible cause Corrective action
Bad communication between boards. This
Boards
sensor
O
2
sensor residual
O
2
too high
TC sensor
Temperature
sensor
Flow sensor
Pressure sensor
Foam detector
Electrovalves
Motor Bad initialization or communication.
Ultrasound Sonotrode failure
Protection cover
Emergency STOP
may happen when switching the instrument
on.
No communication between sensor and
board.
O2 concentration is not below residual
threshold (0.1 mbar)
No communication between sensor and
board. Sensor damaged.
No communication between sensor and
board. Sensor damaged.
No communication between sensor and
board. Sensor damaged.
No communication between sensor and
board. Sensor damaged.
Ingress of foam or liquid in the sampling
tube.
Cover is not on the instrument or is badly
positioned.
Cover detection sensor failure.
The emergency STOP button is in the
activated position (pushed in).
Switch instrument off, wait 10 seconds and switch back
on. If the LED is still red call Hach Lange service support.
Check connection of the oxygen sensor. If problem
persists, call Hach Lange service support.
Wait until a residual < 0.1 mbar is reached.
Check gas purity and gas connections.
Perform an O2 sensor verification.
Check sensor protection cap positioning.
If required, perform an O
for the initial start up).
Note: A high residual value will also affect the TC sensor
readings and may cause them to go out of bounds. The
problem with the TC sensor readings should self-correct as
the residual value returns to normal.
Switch instrument off, wait 10 seconds and switch back
on. If the problem persists call Hach Lange service
support.
Switch instrument off, wait 10 seconds and switch back
on. If the problem persists call Hach Lange service
support.
Switch instrument off, wait 10 seconds and switch back
on. If the problem persists call Hach Lange service
support.
Switch instrument off, wait 10 seconds and switch back
on. If the problem persists call Hach Lange service
support.
Activate the needle and the purge valves in the Global
System View screen (see Global system view on
page 62).
Switch instrument off, wait 10 seconds and switch back
on. If the problem persists call Hach Lange service
support.
Initialize motor position in the Actuator Verification screen
(see Actuator verification on page 60).
Activate the emergency STOP button and call Hach Lange
service support.
Check that the cover is correctly in place and fixed with
screws.
Check that the position detector is in place (in the back of
the instrument).
This can happen during transportation. Release the button
by turning it clockwise.
T roubleshooting
sensor maintenance (necessary
2
65
Page 68

Troubleshooting
10.1.4 Measurement problems
Observation Explanation
Negative TPO results CO
The instrument never reaches the threshold value CO2 purge gas is not of the required purity of > 99.9%
The bottle goes up with the piercing head
No antifoam being injected
purge gas is not of the required purity of > 99.9%
2
Stop the analysis by pressing the emergency STOP button.
Disconnect instrument from the power supply and remove the bottle.
Check that the piercing spike is in place and not unscrewed. Release
emergency STOP button by turning it clockwise and restart the
instrument.
Open the front door to stop the process. Remove the bottle and check
that the piercing spike is in place and is not unscrewed. Close the front
door and press the Abort button on the screen.
Go to the antifoam section of the maintenance wizard (see the
Antifoam system section of Actuator verification on page 60) and
prime the pumps until antifoam can be seen being regularly injected
into the antifoam priming beaker.
Note: At startup, approximately 300 injections will be required in order
to prepare the system correctly.
66
Page 69

Section 11 Spare Parts and Accessories
Part N° Description
2956A-A A1100 cartridge
32912 O2 flow chamber O-ring kit
33001 Power Cord - EU Plug
33002 Power Cord - US Plug
33003 Power Cord - Swiss Plug
33004 Power Cord - UK Plug
33117 Package seal
33122 Solenoid valve for manifold
33123 Internal membrane for antifoam cartridge
33124 Filter, Goretex membrane
33127 Metal piercing tip
33142 Sonotrode seal
33143 Staron bottom plate
33144 Protection shield
33156 Antifoam recharge bottle
33157 Antifoam cartridge (empty)
33160 Cover detector with cable
33162 Syringe for antifoam cartridge
6110-AD2 Total O2/CO2 package analyzer version 2
A1100-S00T Oxygen sensor for the 6110
DG33308 PET piercing tip
DG33365 One year of consumables for the 6110
DG6110-MAN/D 6110 Manual in German
DG6110-MAN/E 6110 Manual in English
DG6110-MAN/F 6110 Manual in French
DG6110-MAN/J 6110 Manual in Japanese
DGA1100-MAN/D A1100 Manual in German
DGA1100-MAN/E A1100 Manual in English
DGA1100-MAN/F A1100 Manual in French
DGA1100-MAN/J A1100 Manual in Japanese
67
Page 70

Spare Parts and Accessories
68
Page 71

Section 12 Material Safety Data Sheets (MSDS)
12.1 Silicon antifoam (part number 33156)
PRODUCT AND COMPANY IDENTIFICATION
PRODUCT NAME Silicon antifoam, emulsion, 30% in water
COMPANY Hach Lange SA
6 Route de Compois
Case Postale 212
CH-1222 Vésenaz, Switzerland
PHONE NO. 0041 22 594 64 00
COMPOSITION / INFORMATION ABOUT THE COMPONENTS
INGREDIENT CAS NO PERCENT HAZARDOUS
Silicone antifoam emulsion
Water
OVERVIEW
INHALATION
INGESTION
SKIN CONTACT
EYE CONTACT
FIRE EXTINGUISHING MEDIA Suitable: Water spray. Carbon dioxide, dry chemical powder,
SPECIAL INFORMATION Wear self-contained breathing apparatus and protective
Wash spill site with soap solution. Flush spill area with copious amounts of water. Absorb on sand or vermiculite and place in
closed containers for disposal.
Directions for Safe Handling: Avoid inhalation. Avoid contact with eyes, skin, and clothing. Avoid prolonged or repeated
exposure. Conditions of Storage: Keep tightly closed.
ENGINEERING CONTROLS Safety shower and eye bath. Mechanical exhaust required.
GENERAL HYGIENE MEASURES Wash thoroughly after handling.
PERSONAL PROTECTIVE EQUIPMENT Eye Protection: Chemical safety goggles.
N/A
7732-18-5
IDENTIFICATION OF HAZARDS
SPECIAL INDICATION OF HAZARDS TO HUMANS AND THE ENVIRONMENT
Not hazardous according to Directive 67/548/EEC.
FIRE FIGHTING MEASURES
MEASURES IN CASE OF SPILLAGE
HANDLING AND STORAGE
EXPOSURE CONTROLS / INDIVIDUAL PROTECTION
70%
30%
FIRST AID
If inhaled, remove to fresh air. If breathing becomes difficult,
call a physician.
If swallowed, wash out mouth with water provided person is
conscious. Call a physician.
In case of contact, immediately wash skin with soap and
copious amounts of water.
In case of contact with eyes, flush with copious amounts of
water for at least 15 minutes. Assure adequate flushing by
separating the eyelids with fingers. Call a physician.
or appropriate foam.
clothing to prevent contact with skin and eyes.
No
No
69
Page 72

Material Safety Data Sheets (MSDS)
PHYSICAL AND CHEMICAL PROPERTIES
APPEARANCE Color: White. Form: Turbid viscous liquid
Property Value At temperature or pressure
pH
BP/BP range
MP/MP range
Flash point
Flammability
Autoignition temp
Oxidizing properties
Explosive properties
Explosion limits
Vapor pressure
SG/density
Partition coefficient
Viscosity
Vapor density
Saturated vapor conc.
Evaporation rate
Bulk density
Decomposition temp.
Solvent content
Water content
Surface tension
Conductivity
Miscellaneous data
Solubility
ST ABILITY AND REACTIVITY
STABILITY Stable
HAZARDOUS EXOTHERMIC REACTIONS Will not occur
HAZARDOUS POLYMERIZATION Will not occur.
MATERIALS TO AVOID Strong oxidizing agents.
TOXICOLOGICAL INFORMATION
ACUTE TOXICITY
6.5 - 7.5
100 °C
- 1.0 °C
N/A
N/A
N/A
N/A
N/A
N/A
N/A
0.999 g/cm
N/A
N/A
N/A
N/A
N/A
N/A
N/A
N/A
N/A
N/A
N/A
N/A
N/A
LD50
Oral
Rat
> 5,000 mg/kg
3
760 mmHg
LD50
Skin
Rat
> 2,000 mg/kg
SENSITIZATION Sensitization: Will not occur
To the best of our knowledge, the chemical, physical, and
SIGNS AND SYMPTOMS OF EXPOSURE
ROUTE OF EXPOSURE Skin Contact May cause skin irritation.
Skin Absorption May be harmful if absorbed through the skin.
Eye Contact May cause eye irritation.
Inhalation Material may be irritating to mucous membranes and upper
Ingestion May be harmful if swallowed.
toxicological properties have not been thoroughly
investigated.
respiratory tract. May be harmful if inhaled.
70
Page 73

Material Safety Data Sheets (MSDS)
ECOLOGICAL INFORMATION
Test Type: LC0 Fish
Test Type: LC50 Fish
Test Type: LC100 Fish
Incinerate in a furnace providing environmental regulations permit. Observe all federal, state, and local environmental
regulations.
RID/ADR Non-hazardous for road transport.
IMDG Non-hazardous for sea transport.
IATA Non-hazardous for air transport.
Not hazardous according to Directive 67/548/EEC. Caution: Substance not yet fully tested (EU).
COUNTRY SPECIFIC INFORMATION Germany WGK: 1
WARRANTY The above information is believed to be correct but does not purport to be all inclusive and
PRODUCT USE For laboratory use only. Not for drug, household or other uses.
The information in this sheet is believed to be correct at the time of printing. The details should be reviewed periodically and
should be checked for special uses.
Species: Brachydanio rerio
Species: Brachydanio rerio
Species: Brachydanio rerio
DISPOSAL CONSIDERATIONS
TRANSPORT INFORMATION
REGULATORY INFORMATION
OTHER INFORMATION
shall be used only as a guide. The information in this document is based on the present state
of our knowledge and is applicable to the product with regard to appropriate safety
precautions. It does not represent any guarantee of the properties of the product.
Time: 96 h
Time: 96 h
Time: 96 h
Value: 180 mg/l
Value: 250 mg/l
Value: 350 mg/l
Self-Classification
71
Page 74

Material Safety Data Sheets (MSDS)
72
Page 75

73
Page 76

HACH COMPANY World Headquarters
P.O. Box 389, Loveland, CO 80539-0389 U.S.A.
Tel. (970) 669-3050
(800) 227-4224 (U.S.A. only)
Fax (970) 669-2932
orders@hach.com
www.hach.com
©
Hach Lange, 2013. All rights reserved. Printed in Europe.
HACH LANGE GMBH
Willstätterstraße 11
D-40549 Düsseldorf, Germany
Tel. +49 (0) 2 11 52 88-320
Fax +49 (0) 2 11 52 88-210
info@hach-lange.de
www.hach-lange.de
HACH LANGE Sàrl
6, route de Compois
1222 Vésenaz
SWITZERLAND
Tel. +41 22 594 6400
Fax +41 22 594 6499
 Loading...