

Page 1
FR
3-5 / 22-24
EN
DE
ES
NL
IT
PT
RU
6-7 / 22-24
8-10 / 22-24
11-12 / 22-24
13-14 / 22-24
15-17 / 22-24
18-19 / 22-24
20-21 / 22-24
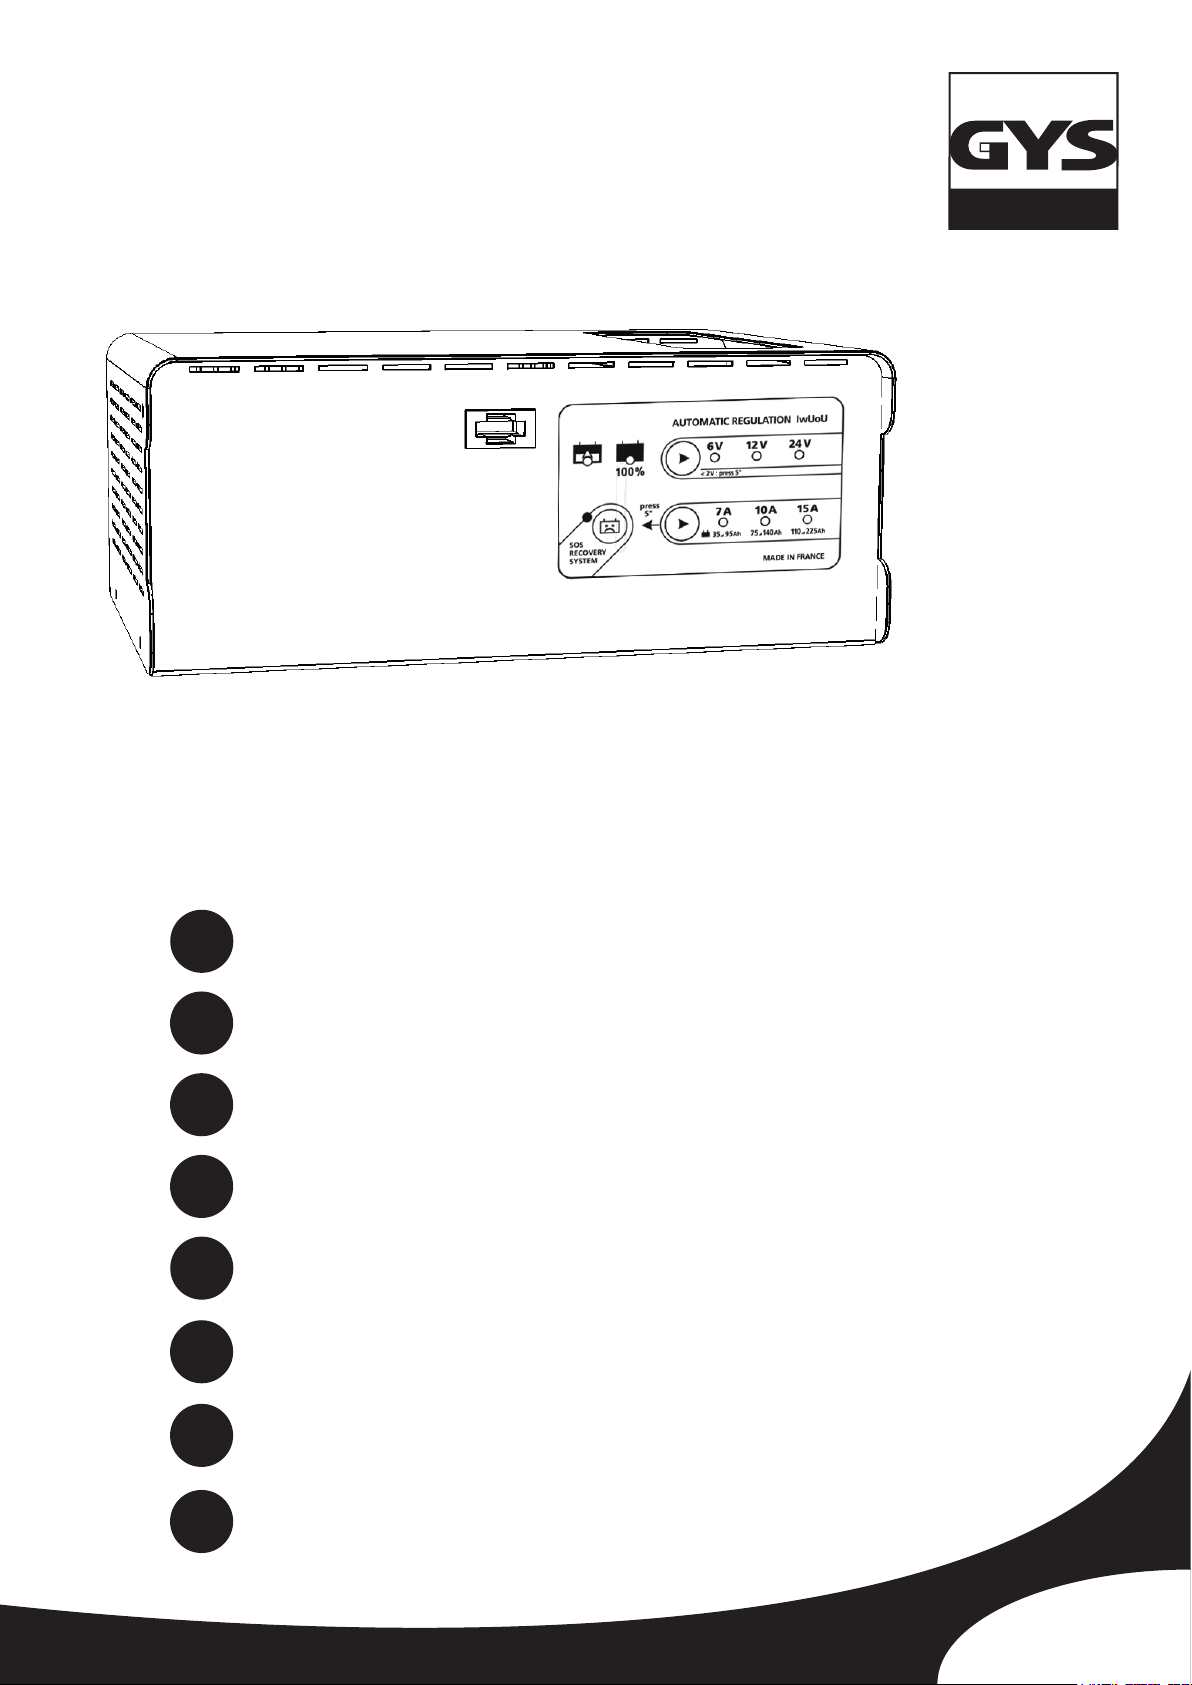
BATIUM
Electronic Battery Charger
7/12 • 15/12 • 7/24 • 15/ 24
73522-V8-17/03/2015
www.gys.fr
Page 2

BATIUM 7/12 • 7/24 • 15/12 • 15/24
1
2
3
4
5
6
2
4
6
1
3
5
(A)
(B)
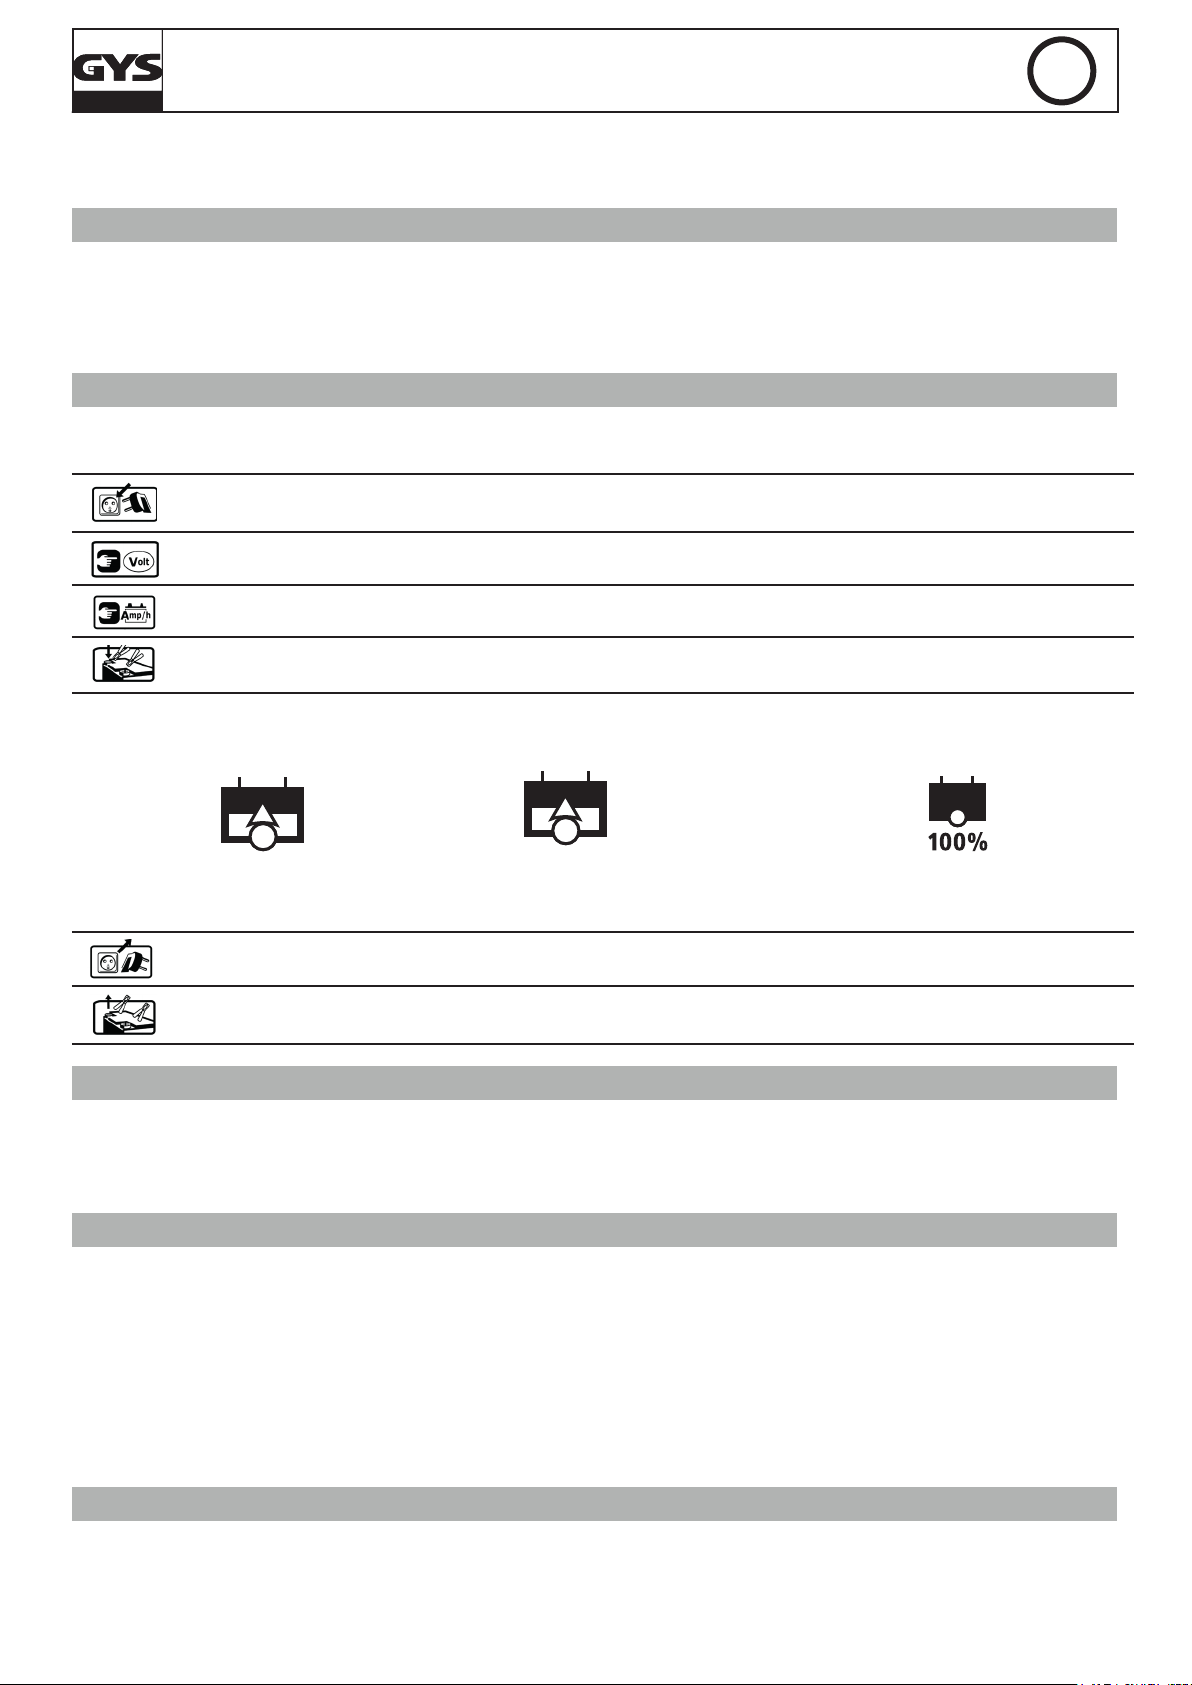
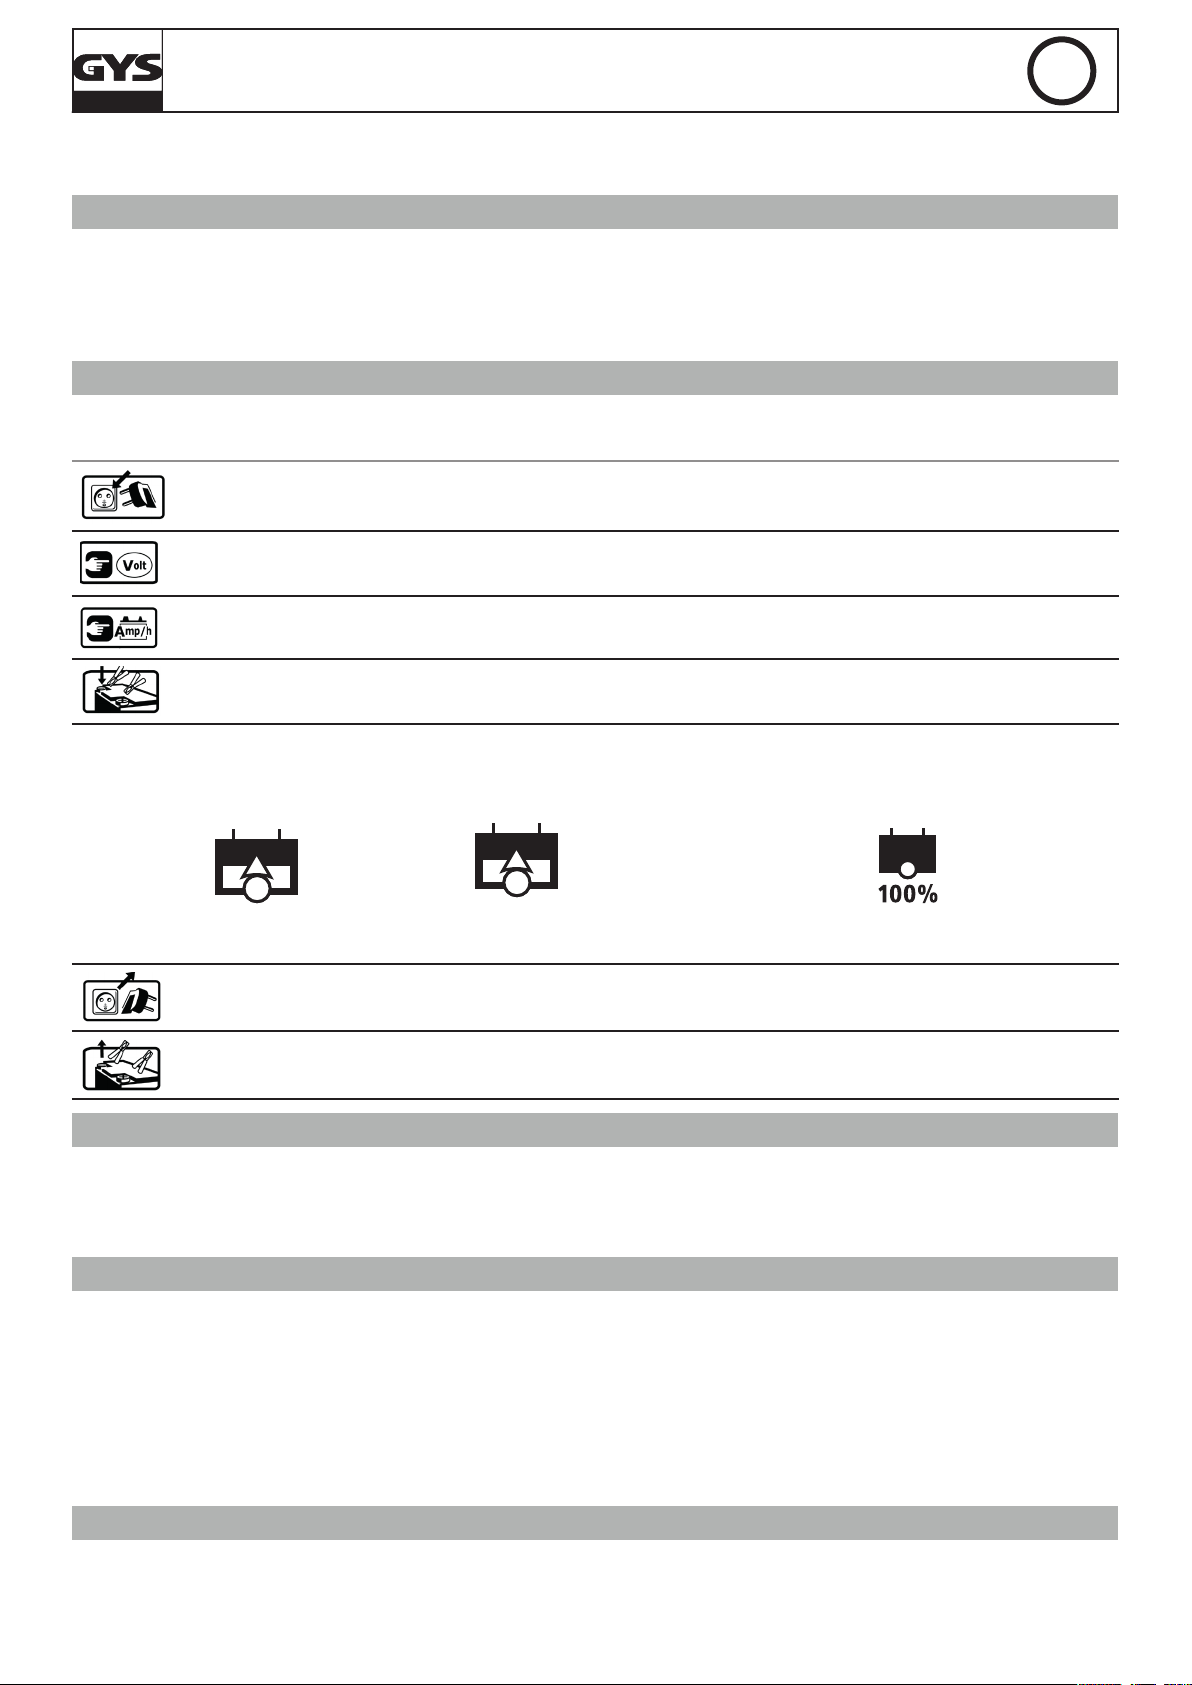
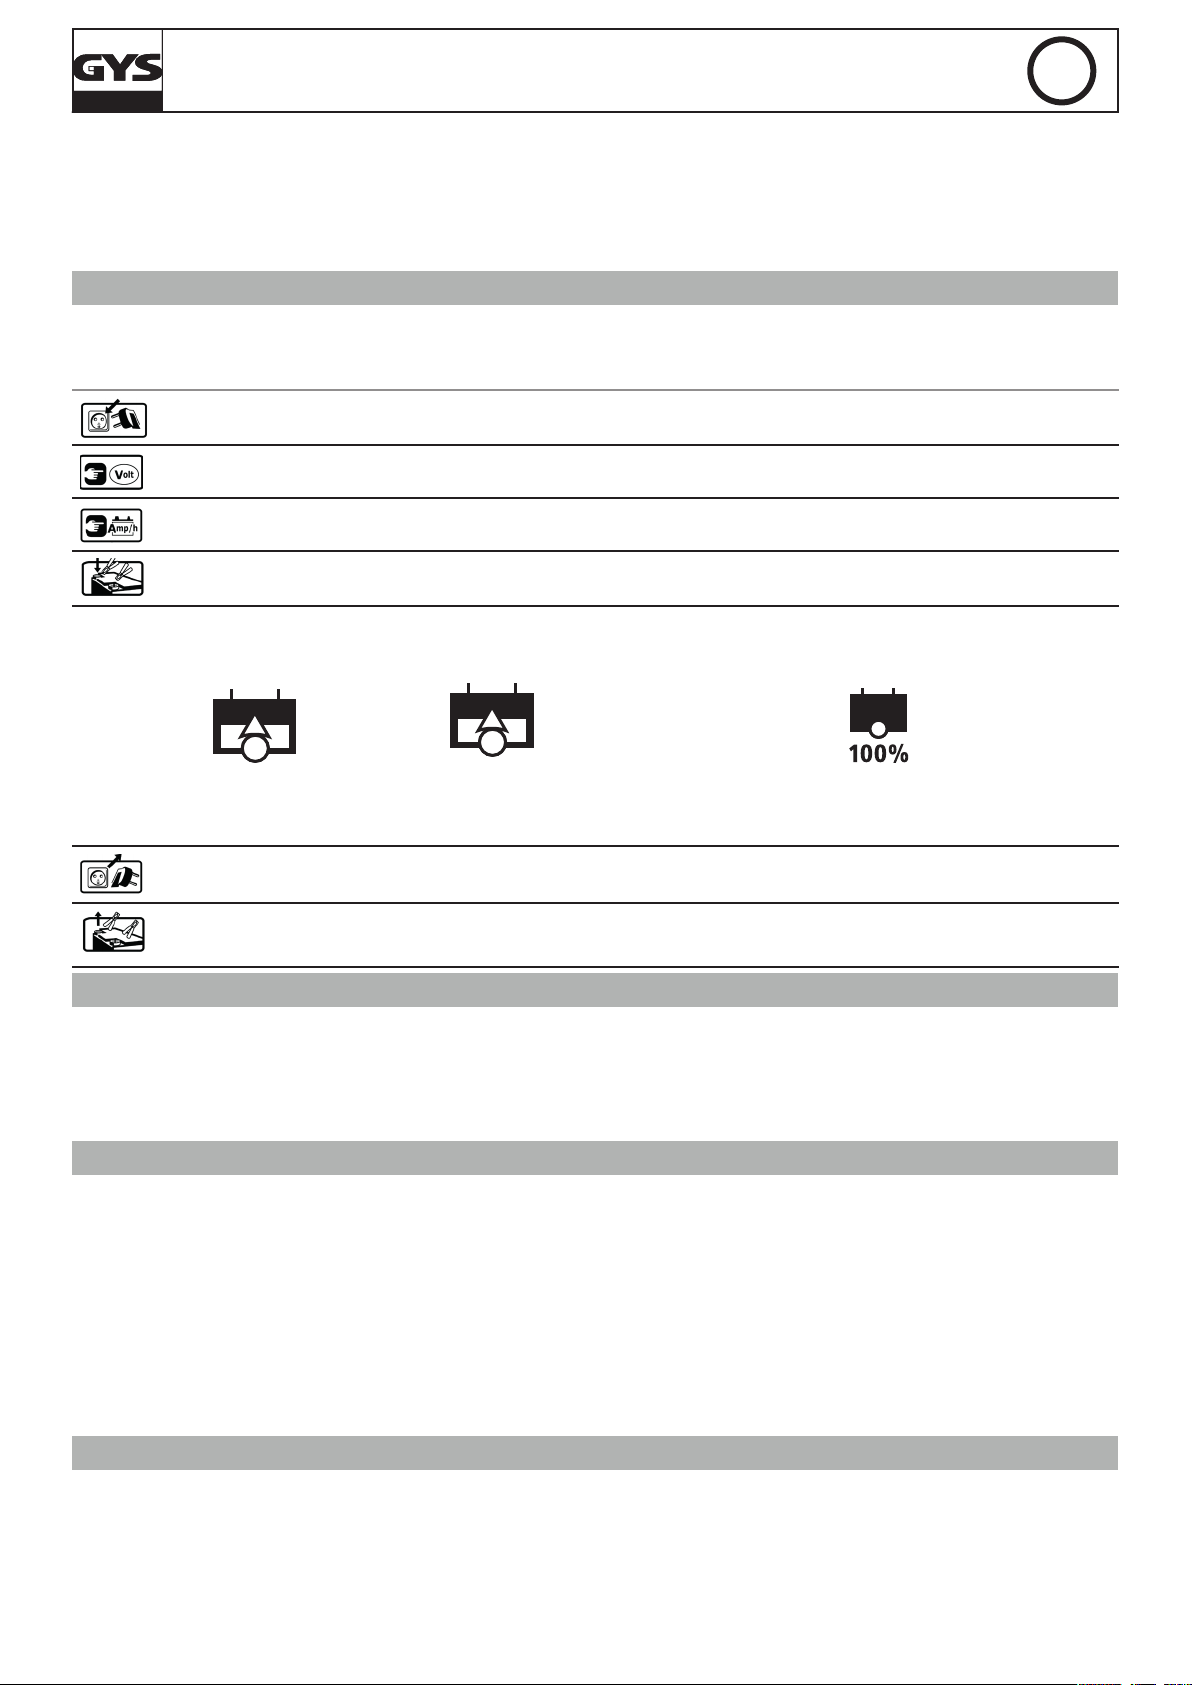
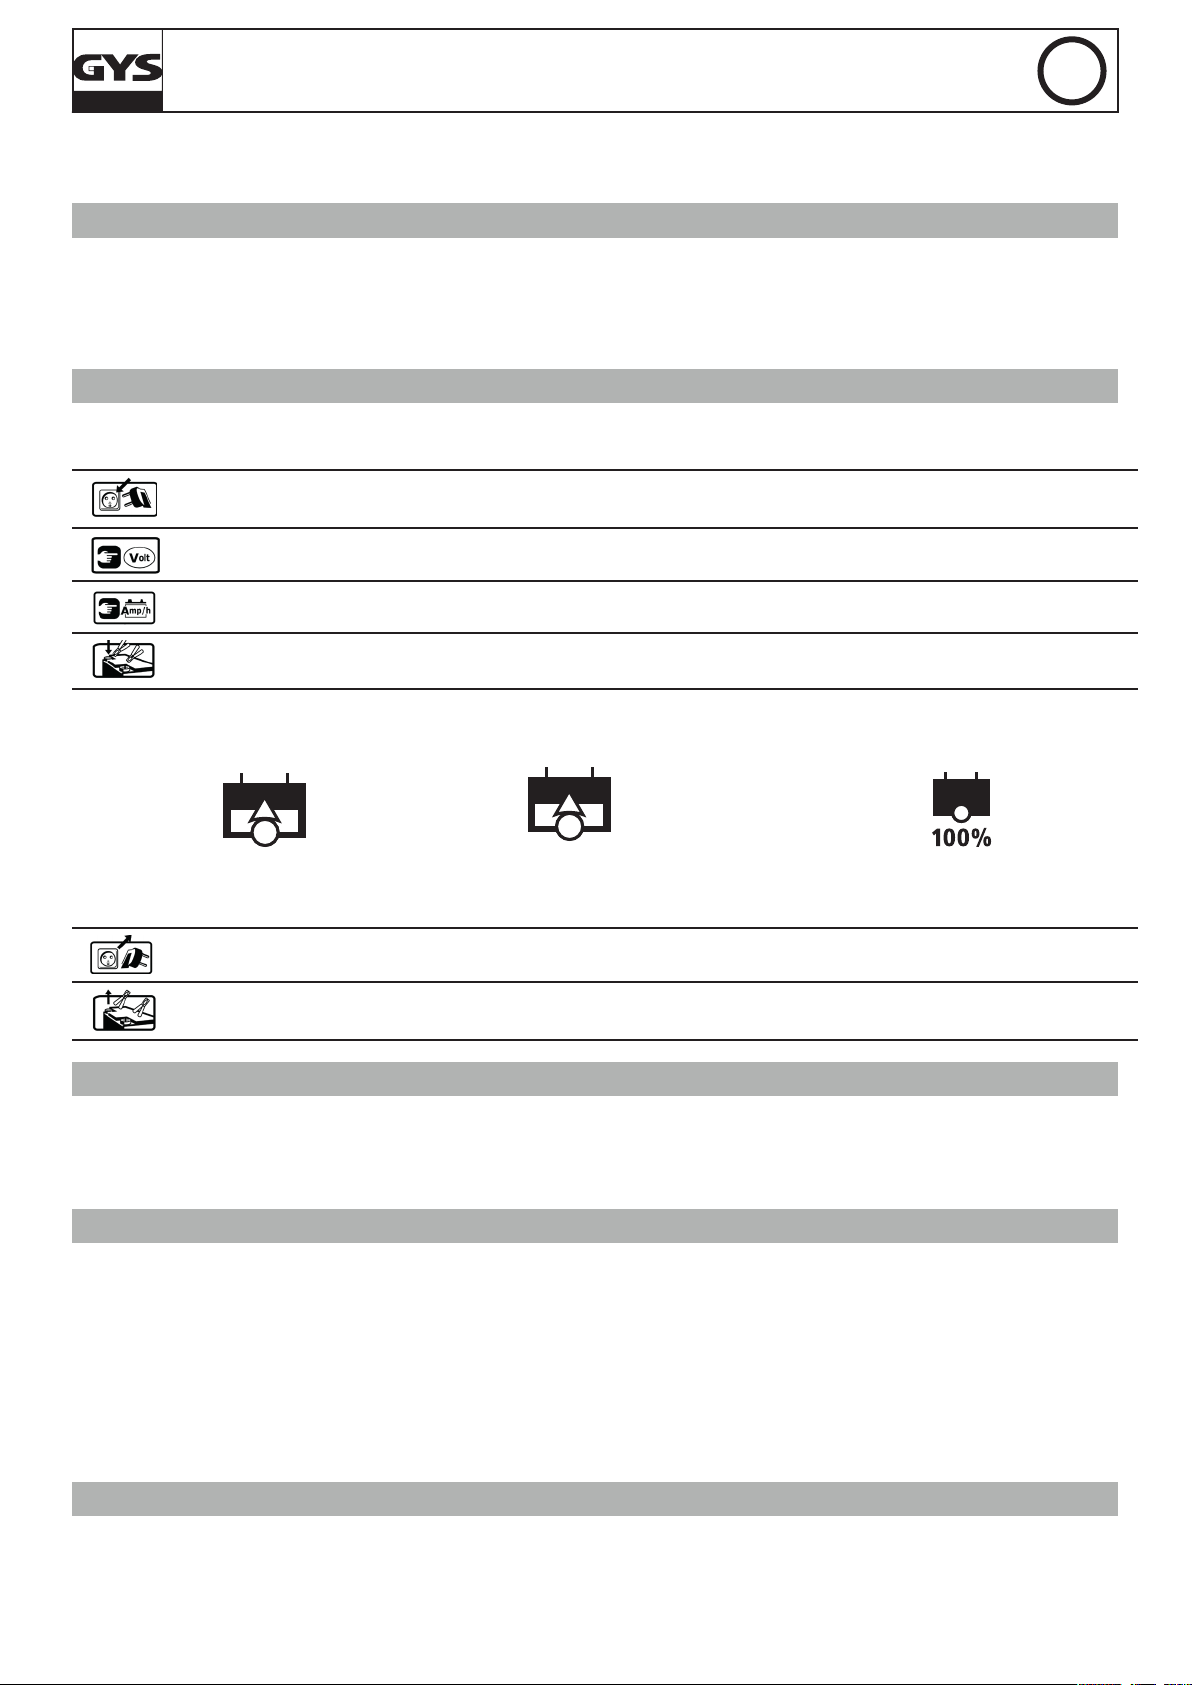
Voyant de charge : s’allume ou clignote selon l’état de charge / Charge indicator : lights up and ashes according
to charging state / Ladeleuchte : leuchtet oder blinkt je nach Batteriezustand / Indicador óptico naranja de carga
: se encende jo o por intermitencias según el nivel de carga. / LED voor laden : aan of knippert afhankelijk van
de lading van de accu according to de laad state / Spia luminosa di ricarica: Si accende o lampeggia a senda dello
l’avanzamento della carica / LED voor laden : aan of knippert afhankelijk van de lading van de accu according to
de laad state / Индикатор зарядки: горит или в зависимости от этапа зарядки.
Voyant de n de charge : s’allume quand la batterie est chargée / End of charge indicator : lights up when the
battery is fully charged / grünes Licht bei Ladungsende : leuchtet wenn die Batterie aufgeladen ist / Indicador
verde de n de carga : se encende cuando la batería estaargada. / Groene LED voor einde laden : aan als de accu
geladen is / Spia luminosa di ne carica: si accende quando la batteria è carica / Groene LED voor einde laden
: aan als de accu geladen is / Зеленый индикатор конца зарядки – зажигается, когда батарея заряжена.
Sélecteur de tension batterie + démarrage forcé (5 sec.) / Battery voltage selection key + forced start (5 sec) /
Auswahl der Batteriespannung + Start für Erzwungene Ladung“(5 Sek. drücken) /Selector de tensión batería
+ arranque forzado (5 seg.) / Accu spanning selectie + gedwongen laden (5 sec) / Selettore di tensione batteria + avvio forzato (5 sec.) / Accu spanning selectie + gedwongen laden (5 sec) / Выбор напряжения батареи
+ принудительный старт (5 сек.) / Seletor de tensão bateria + arranqe forçado (5 seg.)
Sélecteur de capacité batterie / Battery capacity selection key / Auswahl der Batteriekapazität / Selector de
capacidad batería / Выбор емкости батареи Accu capaciteit selectie / Επιλογέας χωρητικότητας / Selettore di
capacità della batteria / Accu capaciteit selectie / Выбор емкости батареи. / Seletor de capacidade bateria
Position 24V uniquement sur le BATIUM 7/24 et 15/24. / 24V position only for BATIUM 7/24 - 15/24 / Stellung
24V nur für den BATIUM 7/24 - 15/24 / Posición 24V solo en el BATIUM 7/24 - 15/24 / Positie 24V alleen op
BATIUM 7/24 - 15/24 / Posizione 24V disponibile soltanto sul BATIUM 7/24 e 15/24. / Positie 24V alleen op
BATIUM 7/24 - 15/24. / Позиция 24В только для BATIUM 7/24 - 15/24. / Posição 24V disponível somente no
BATIUM 7/24 e 15/24.
SOS Recovery : voyant batterie à régénérer uniquement sur le BATIUM 15/12 et 15/24. / SOS Recovery : indicating the battery requires recovering (available for batium 15-12 & 15/24 / SOS Recovery : Batterielicht zum
Regenieren von Batterien (Verfügbar bei batium 15/12 und 15/24) / SOS Recovery : indicador de batería que
necesita una regeneración (disponible sobre batium 15/12 y 15/24) / SOS recovery: indicator accu regeneratie /
SOS Recovery: spia luminosa batteria da regenerare soltanto sul BATIUM 15/12 e 15/24. / SOS recovery: indicator accu regeneratie / SOS Recovery : индикатор необходимости перезарядки. / SOS Recovery: sinal luminoso
a regenerar somente no BATIUM 15/12 e 15/24.
2
Page 3
BATIUM 7/12 • 7/24 • 15/12 • 15/24BATIUM 7/12 • 7/24 • 15/12 • 15/24
FR
Ce manuel d’utilisation comprend des indications sur le fonctionnement de votre appareil et les précautions à suivre pour votre
sécurité. Merci de le lire attentivement avant première utilisation et de le conserver soigneusement pour toute relecture future.
DESCRIPTION GENERALE
Batium a été conçu pour la recharge des batteries de démarrage au plomb à électrolyte liquide ou gel:
- de 15 Ah à 130 Ah en 6V ou 12V pour le modèle 7/12 (3 ou 6 éléments de 2V), en 6V, 12V ou 24V pour le modèle 7/24 (3, 6 ou
12 éléments de 2V).
- de 35 Ah à 225 Ah en 6V et 12V pour le modèle 15/12 (3 ou 6 éléments de 2V), et en 6V, 12V ou 24V pour le modèle 15/24 (3, 6
ou 12 éléments de 2V).
BRANCHEMENT ET FONCTIONNEMENT GÉNÉRAL
Respecter l’ordre de mise en route.
Précaution : Vérier le niveau de l’électrolyte pour les batteries ouvertes. Compléter les niveaux si nécessaire avant la charge.
1. Brancher le chargeur sur la prise secteur 230 V. Un voyant en A et en B s’allume correspondant aux dernières données
mémorisées (voir anomalie 6).
2. Choisir la tension de votre batterie (6V, 12V, 24V) selon les indications inscrites sur votre batterie ou en fonction de l’éventuel
couplage réalisé (série ou parallèle cf P23).
3. Choisir la capacité de votre batterie, puis Batium dénit, de lui même, le courant de charge.
4. Brancher les pinces : pince rouge sur le + de la batterie et pince noir sur le –.
5. Batium démarre automatiquement la charge. Il vous indique l’état de charge de votre batterie. (voyants 1 et 2 )
Phase 1 :
montée en tension
Permanent
Lors d’une coupure de courant, BATIUM mémorise l’état de charge (excepté en mode « SOS Recovery »), pour que la charge
reprenne à son point d’interruption de la phase 1.
6. Quand la batterie est chargée, débrancher le câble d’alimentation
7. Débrancher les pinces ou le connecteur de la batterie.
régulation de tension (pendant 2 heures)
Phase 2 :
Clignotant
Phase 3 :
n de charge (Floating)
Vert
FONCTION CHARGE FORCEE
Si la batterie est fortement déchargée (tension très basse <2V), la charge ne démarre pas automatiquement. Le voyant de charge 1
ne s’allume pas. Les voyants tension batterie (A), et capacité (B) sont allumés. Dans ce cas, sélectionner la tension et le courant de
charge puis presser 5 secondes sur la touche tension batterie 3 pour lancer une « charge forcée ». Le voyant 1 s’allumera en relâchant
cette pression. Si aucun voyant ne s’allume, votre batterie est irrécupérable (<0.8 V).
FONCTION « SOS RECOVERY » (DISPONIBLE SUR BATIUM 15-12 ET 15/24)
Lors du branchement de la batterie, le voyant SOS Recovery (6) clignote pour indiquer que votre batterie a subi une décharge profonde et de longue durée débutant un processus de sulfatation.
La fonction « SOS Recovery » grâce à une courbe de charge spécique enclenche un cycle de 24 à 48 h de régénération.
Pour activer cette fonction, respecter les étapes suivantes :
1. Déconnecter impérativement la batterie du véhicule. (DANGER DE SURTENSION)
2. Raccorder Batium au secteur.
3. Sélectionner la tension de charge.
4. Activer « Sos Recovery » en appuyant pendant 5 secondes sur la touche 4 jusqu’à ce que le voyant 6 s’allume (les voyants (B) sont éteints).
5. Connecter les pinces de Batium sur la batterie.
6. Le voyant vert 2 signale la n de charge.
PROTECTIONS
Batium est protégé contre les courts-circuits, inversions de polarité, les démarrages. Il dispose d’un système anti-étincelle qui évite
toutes étincelles lors du branchement du chargeur sur la batterie. Sans batterie aux pinces, Batium ne délivre pas de courant par
sécurité.
3
Page 4
BATIUM 7/12 • 7/24 • 15/12 • 15/24BATIUM 7/12 • 7/24 • 15/12 • 15/24
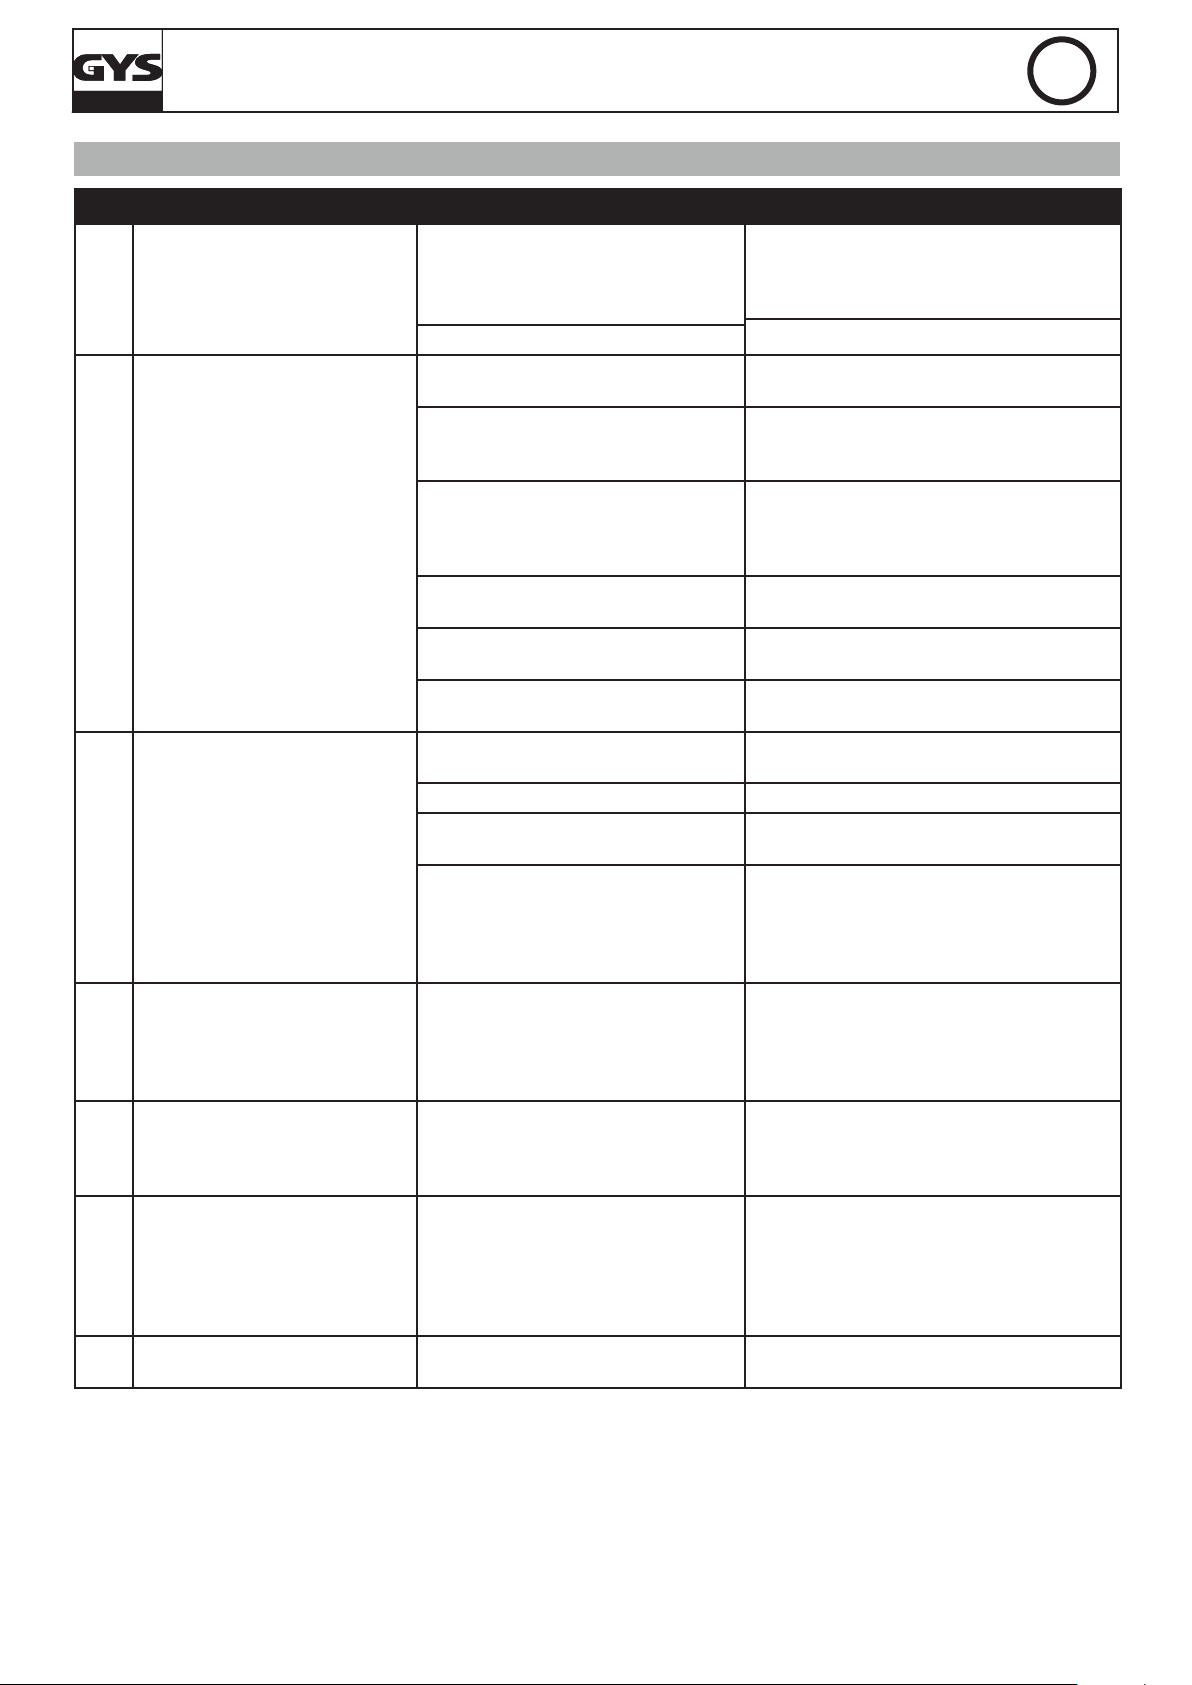
ANOMALIES, CAUSES, REMEDES
ANOMALIES CAUSES REMEDES
Le voyant de charge 1
est éteinte
1
Les voyants de tension batterie
(A) clignotent à tour de rôle au
bout d’une minute de charge.
Les voyants de capacité batterie
2
(B) clignotent à tour de rôle.
La batterie est branchée.
Le voyant de charge 1 ne
s’allume pas
Les voyants tension batterie (A)
3
et capacité batterie (B)
sont allumés.
Le voyant «SOS Recovery»
(6) clignote (Batium 15/12 et
4
15/24) au bout d’une minute de
charge.
Fonction SOS RECOVERY (Batium
15/12 – 15/24) : au bout de 24
5
heures les voyants charge 1 et
n de charge 2 sont éteints.
Fonction charge forcée :
Après avoir appuyé 5 sec sur la
touche tension batterie 3 pour
6
lancer la fonction charge forcée,
le voyant de charge ne s’allume
pas
Lors du branchement au secteur
7
aucun voyant ne s’allume
FR
- Débrancher BATIUM de la batterie tout en
Vous n’avez pas sélectionné la bonne
tension de batterie.
La batterie est irrécupérable.
Votre batterie est en court-circuit ou
endommagée
Un consommateur est resté connecté
involontairement
(ex : phares)
Le chargeur est utilisé en tant qu’ali-
mentation pour compenser des
gros consommateurs branchés sur la
batterie.
La batterie a une capacité (Ah) supérieure à celle du chargeur
La batterie a une capacité (Ah) supérieure à celle du chargeur
La tension de la batterie ne monte pas,
la batterie est endommagée.
Les polarités + et – sont inversées
Le contact des pinces est mauvais Nettoyer les bornes et rebrancher les pinces.
La batterie est fortement déchargée
Le fusible est fondu
La batterie a subi une décharge profonde de longue durée débutant un
processus de sulfatation. La charge
continue mais il est conseillé d’utiliser
la fonction « SOS recovery ».
Batterie non récupérable Batterie à remplacer
Tension batterie <0,5V Batterie à remplacer
Lors du branchement au secteur aucun
voyant ne s’allume
le maintenant raccordé au secteur
- Sélectionner la bonne tension
- Puis rebrancher BATIUM à la batterie.
Batterie à remplacer.
Batterie à remplacer.
Couper le consommateur et continuer /
relancer la charge
Comportement normal du chargeur dans
cette utilisation. Le voyant indiquant la n de
charge ne peut pas s’allumer.
Le temps de charge sera anormalement long.
Utiliser si possible un chargeur plus puissant
Choisir la capacité indiquée sur votre batte-
rie.
Batterie à remplacer.
Mettre la pince rouge au + la pince noire
au -
Utiliser la fonction « charge forcée » (voir
procédure page précédente)
Débrancher l’appareil du secteur. Retirer les
pinces de la batterie. Remplacer le fusible
en respectant son calibre (15A pour Batium
7-12 7-24 ou 30A pour Batium 15-12 et 15-
24).
Débrancher l’appareil du secteur puis les
pinces.
Enclencher la fonction « SOS Recovery » voir
procédure page précédente.
Débrancher Batium du secteur pendant 10
sec., puis rebrancher.
4
Page 5
BATIUM 7/12 • 7/24 • 15/12 • 15/24BATIUM 7/12 • 7/24 • 15/12 • 15/24
AVERTISSEMENTS
• Gaz explosif, éviter les ammes et les étincelles. Pendant la charge, la batterie doit être placée dans un emplacement bien aéré.
• Protéger contre la pluie et l’humidité.
• Votre chargeur doit être raccordé à un socle de prise de courant relié à la terre.
• Si le câble d’alimentation est endommagé, il doit être remplacé par le fabricant, son service après vente ou une personne de
qualication similaire, an d’éviter un danger.
• A n’utiliser en aucun cas pour charger des piles ou des batteries non-rechargeables.
• La borne de la batterie non reliée au châssis doit être connectée la première. L’autre connexion doit être effectuée sur le châssis
loin de la batterie et de la canalisation de combustible.
• Après l’opération de charge, débrancher le chargeur du réseau, puis retirer la connexion du châssis et la connexion de la batterie,
dans l’ordre indiqué.
• L’appareil doit être placé de façon telle que la che de prise de courant soit accessible.
• L’appareil ne doit pas être utilisé comme un jouet par de jeunes enfants, ou être utilisé par de jeunes enfants ou personnes han
dicapés sans surveillance.
• Produit faisant l’objet d’une collecte sélective. Ne pas jeter dans une poubelle domestique.
• Ne pas mettre en court circuit les pinces pendant la charge.
CONDITIONS DE GARANTIE
• La garantie couvre tout défaut ou vice de fabrication pendant 1 an, à compter de la date d’achat (pièces et main d’œuvre).
• La garantie ne couvre pas les erreurs de tension, incidents dus à un mauvais usage, chute, démontage ou toute autre avarie due
au transport.
• La garantie ne couvre pas l’usure normale des pièces (Ex. : câbles, pinces, etc.).
FR
En cas de panne, retournez l’appareil au point S.A.V GYS, en y joignant :
• Un justicatif d’achat daté (ticket de sortie de caisse, facture….)
• Une note explicative de la panne.
Attention : notre SAV n’accepte pas les retours en port dû.
Après la garantie, notre SAV assure les réparations après acceptation d’un devis.
Contact SAV : Société Gys-134 Bd des Loges
BP 4159-53941 Saint-Berthevin Cedex (Fax: +33 (0)2 43 01 23 75)
5
Page 6
BATIUM 7/12 • 7/24 • 15/12 • 15/24BATIUM 7/12 • 7/24 • 15/12 • 15/24
EN
This manual contains safety and operating instructions. Read it carefully before using the charger for the rst time and keep it in a
safe place for future reference.
GENERAL DESCRIPTION
Batium is designed for charging lead acid, GEL and AGM battery :
- from 15 Ah to 130 Ah in 6V or 12V for the 7/12 model (3 or 6 2V elements), in 6V, 12V or 24V for the 7/24 model (3, 6 or 12 2V
elements).
- from 35 Ah to 225 Ah in 6V and 12V for the 15/12 model (3 or 6 2V elements), and in 6V, 12V or 24V for the 15/24 model (3, 6
or 12 2V elements).
CONNECTION AND OPERATION
Follow the connection instruction as below:
Precaution: Check electrolyte level if possible and ll if necessary before charging.
1. Plug the charger into the mains (230V). Indicators (A) and (B) which correspond to the last setting used switch on (see
Troubleshooting- Symptom 6)
2. Select your battery voltage (6V, 12V, 24V) according to the indications written on your battery or to the coupling done. (in series
or parallel see P23).
3. Select the capacity of the battery. The Batium will select the charging current automatically.
4. Connect the clamps: Red clamp on the battery “+” and black clamp on the “–“.
5. Batium starts charging automatically and will indicate after 30 seconds the de-sulphation process only if the battery is deeply discharged.
The indicators 1 and 2 indicate the charge state of your battery.
Phase 1 :
Voltage rise
Permanent
During a power cut, Batium stores the charge state (except in « SOS Recovery » mode), so the charge can continue (phase 1).
6. When the battery is charged, disconnect the power cable.
7. Disconnect the clamps or the battery connector.
Voltage regulation (during 2 hours)
Phase 2 :
Flashing Light
Phase 3 :
Charge end (Floating)
Green
FUNCTION « FORCED CHARGE »
If the battery is deeply discharged (very low voltage <2V), the charge will not start automatically. The charge indicator 1 does not
switch on. The battery voltage indicators, (A) and capacity (B) switch on. In this case, select the voltage and the charging current
then press the battery voltage key (3) for 5 seconds to start a « forced charge ». The indicator 1 will switch on when the key is
released. If no indicators switch on, your battery is unrecoverable (<0.8 V).
« SOS RECOVERY » FUNCTION (AVAILABLE FOR BATIUM 15-12 & 15/24
If the SOS Recovery indicator (6) ashes when a deeply discharged battery is connected and a de-sulphation process has started.
The « SOS Recovery » function delivers a specic charging curve between 24 to 48 hours to recover the battery. To activate this
function follow the steps below:
1. The vehicle battery MUST BE DISCONNECTED. (OVERVOLTAGE DANGER)
2. Connect Batium to the mains
3. Select charging voltage
4. Activate « SOS Recovery » by pressing the key 4 for 5 seconds until the indicator 6 switches on (the indicators (B) are off).
5. Connect the Batium clamps to the battery.
6. The green indicator 2 will light up to notify the end of the charge.
PROTECTION
The Batium is protected against short-circuits, polarity inversions and engine starts. It has an anti-spark feature which prevents
sparks whilst the battery is connected to the Batium. The Batium will not deliver current if there is no battery detected (no voltage
in the clamps)
6
Page 7
BATIUM 7/12 • 7/24 • 15/12 • 15/24BATIUM 7/12 • 7/24 • 15/12 • 15/24
TROUBLESHOOTING
SYMPTOM REASONS REMEDIES
The charge indicator 1 does not switch on.
The battery voltage indicators (A) ash one
1
by one after one minute of charge
The battery capacity indicators (B) ash
2
one by one.
When the battery is connected:
The indicator for charge 1 does not switch
on.
The battery voltage indicator (A) and (B)
3
capacity indicator switch on.
The «SOS Recovery» indicator ashes 6
4
after one minute of charge
“SOS recovery” function (Batium 15/12 –
15/24) :
After 24 hours of use, the charge indicator
5
1 and end of charge indicator 2 are off.
EN
- Disconnect BATIUM from the battery but keep the
Incorrect battery voltage selected.
The battery is unrecoverable
Battery in short-circuit or damaged Replace the battery
A consumer is left on (eg : Headlights)
The charger is being used as a power
supply to compensate high consumers
connected to the battery.
The battery has a higher capacity (Ah) than
the charger’s capability.
You have selected a battery capacity (Ah)
lower than the one indicated on your
battery
The battery voltage does not rise. The
battery is damaged
Polarities + and – have been reversed Put the red clamps on + and black clamps on -
Weak clamp connection
The battery is deeply discharged
The fuse has blown
You battery is deeply discharged – and has
started to sulphate.
The charge continues but it is recommended to use the “SOS recovery” function
The battery is unrecoverable Replace the battery
BATIUM connected to the mains.
- Select the correct voltage
- Re-connect the BATIUM to the battery
Replace the battery
Turn off the consumer then continue or re-start the
charge
Normal behaviour of the charger in this use. The
indicator which indicates the charge end cannot
switch on.
The charging time will be abnormally long. If possible use a more powerful charger
Select the correct capacity as indicated on your
battery.
Replace the battery
Clean the battery terminals and re-connect the
clamps.
Use the « forced charge » function (see procedure
on previous page)
Disconnect the Batium from the power supply.
Disconnect the clamps from the battery. Replace
the fuse: 15A for Batium 7-12 and 7-24, and 30A
for Batium 15-12 and 15-25.
Disconnect the device from the mains and then
disconnect the clamps.
Engage the « SOS Recovery » function (see procedure on previous page).
Forced charging function: After pressing for
5 seconds the battery voltage selection key
6
3 to start the forced charging function, the
indicator does not switch on.
When you connect the BATIUM to the
7
mains, no indicators switch on
Battery voltage <0.5V Replace the battery
The charger has detected a problem with
the main voltage
Disconnect the Batium for 10 sec., then connect
again.
WARNING
• WARNING! Explosive gas, avoid ames and sparks. During charging, the battery should be placed in a ventilated area.
• Protect the unit from rain and moisture
• If the power cable is damaged it must be replaced by the manufacturer, its after sales department or a similarly qualied person
to avoid hazard.
• The external fuse can be replaced and the circuit breaker can be engaged by the user.
• Under no circumstances should this appliance should be used to charge accumulators or non rechargeable batteries.
• Respect the connection sequence indicated.
• Product subject to separate collection, do not dispose in domestic waste.
• This appliance is not intended for use by persons (including children) with reduced physical, sensory or mental capabilities, or
lack of experience or knowledge, unless they are supported by a person responsible for their safety, supervision or instruction
concerning use of the appliance.
• Do not open the device. Modications not performed by the manufacturer’s technician will void the warranty.
• Check that the available input voltage corresponds to the one indicated on the nameplate of the charger.
• Do not short-circuit the clamps during charging.
7
Page 8
BATIUM 7/12 • 7/24 • 15/12 • 15/24BATIUM 7/12 • 7/24 • 15/12 • 15/24
DE
Wir freuen uns, dass Sie sich für ein Markengerät der Firma GYS entschieden haben und danken Ihnen für das entgegengebrachte
Vertrauen. Um das Gerät optimal nutzen zu können, lesen Sie bitte die Betriebsanleitung sorgfältig durch.
Die Batium Batterieladegeräte wurden konzipiert, um Bleibatterien mit üssigem oder Gel- Elektrolyt aufzuladen:
- von 15Ah bis 130Ah bei 6V oder 12V für Batium 7/12 (3 oder 6 x 2V Elemente) und 6V, 12V oder 24V für Batium 7/24
- von 35Ah bis 225Ah bei 6V oder 12V für Batium 15/12 (3 oder 6 x 2 Elemente) und 6V, 12V und 24V für Batium 15/24
NETZANSCHLUSS - INBETRIEBNAHME
Bitte beachten Sie die folgenden Punkte:
Hinweis: Überprüfen Sie bei Säurebatterien den Elektrolytstand und füllen Sie ihn wenn nötig nach (nur bei Verschlussdeckelbatterien
notwendig).
1. Schließen Sie das Batterieladegerät an eine 230 V Netzspannung an. Die (A)+(B) Anzeigen sind eingeschaltet und entsprechen
den zuletzt gespeicherten Daten (cf. Fehler 6).
2. Wählen Sie die Batteriespannung (6 V, 12 V, 24 V) je nach Batterietyp (oder nach Batteriekombination: Reihenschaltung, Parallel-,… s. Seite 23) aus.
3. Wählen Sie die Kapazität der Batterie aus. Das Batium bestimmt nun selbsttätig den Ladestrom.
4. Schließen Sie die Ladegerät-Klemmen wie folgt an: Rote Klemme an „+“ Pol, schwarze Klemme an „–“ Pol der Batterie.
5. Das Batium startet automatisch den Ladevorgang. Es erkennt nach ca. 30 Sekunden, ob die Batterie sulfatiert ist (Anzeige 1 und 2).
Phase 1:
Spannungsanstieg
Phase 2:
blinkend
Phase 3:
Ladeende (Floating)
konstant
Während eines Stromausfalls speichert BATIUM automatisch den Ladezustand, um später wieder dort aufzuladen, wo gestoppt
wurde (Phase 1). (Ausnahme: „SOS Recovery“ Funktion)
6. Wenn die Batterie aufgeladen ist, klemmen Sie die Netzspannung ab.
7. Entfernen Sie die Ladegerät-Klemmen.
blinkend
Grün
FUNKTION „ERZWUNGENE LADUNG“
Ist eine Batterie stark entladen (sehr niedrige Spannung) beginnt der Ladevorgang nicht automatisch! Die Ladeanzeige 1 leuchtet
nicht auf, die Batteriespannungs- (A) und Kapazitätsanzeigen (B) sind jedoch eingeschaltet. Wählen Sie in diesem Fall Ladespannung
und Ladestrom aus und drücken Sie 5 Sekunden die Batteriespannungstaste 3, um eine „erzwungene Ladung“ zu starten: Der Ladevorgang wird ausgelöst und die Ladeanzeige 1 leuchtet. Leuchtet die Ladeanzeige nicht auf, ist die Batterie sulfatiert oder tiefentladen
(<0.8 V).
FUNKTION „SOS RECOVERY“ (VERFÜGBAR BEI BATIUM 15/12 UND 15/24)
Blinkt das „SOS Recovery“ Anzeige bei Anschluß des Gerätes an eine Batterie, bedeutet dies, dass die Batterie stark entladen ist und
der Sulfatierungsprozess bereits begonnen hat.
Die Funktion „SOS Recovery“ mit einer spezischen Ladekurve beginnt eine Regenerierungsladung, welche 24 bis 48 Stunden dauert.
Um diese Funktion zu starten, gehen Sie wie folgt vor:
1. Bauen Sie die Batterie aus dem Fahrzeug aus (VORSICHT ÜBERSPANNUNGSGEFAHR!)
2. Schließen Sie das Batium ans Netz an.
3. Wählen Sie die Ladespannung aus.
4. Aktivieren Sie „SOS Recovery“ durch 5 sekündiges Drücken der «SOS Recovery» Taste 4 bis die Anzeige angeht (die (B) Anzeigen
sind aus).
5. Schließen Sie das Gerät an Plus- und Minuspol der Batterie an.
6. Aueuchten der grünen Anzeige 2: Zeigt das Ende des Ladeprozesses an.
SCHUTZ
Die Batiumgeräte sind gegen Verpolung und Überspannung geschützt. Der Eingangskreis ist zusätzlich gesichert. Die Batium-Batterieklemmen sind spannungslos, wenn sie nicht an der Batterie angeschlossen sind.
8
Page 9

BATIUM 7/12 • 7/24 • 15/12 • 15/24BATIUM 7/12 • 7/24 • 15/12 • 15/24
FEHLER, GRÜNDE, LÖSUNGEN
FEHLER GRÜNDE LÖSUNGEN
DE
Die Ladeanzeige 1 leuchtet nicht.
Die Batteriespannungsanzeigen
(A) blinken nach einer Minute Ladezeit
1
der Reihe nach.
Die Batteriekapazitätsanzeigen (B)
2
blinken der Reihe nach.
Die Batterie ist angeschlossen.
Die Ladeanzeige 1 leuchtet nicht.
3
Die Batteriespannungs- (A) und Kapazitätsanzeigen (B) sind eingeschaltet.
Die Anzeige „SOS Recovery“
blinkt (Batium 15/12 und 15/24) nach
4
einer Minute Ladezeit.
SOS Recovery Funktion (Batium
15/12 – 15/24): Nach 24 Stunden sind
5
Ladeanzeige 1 und Ladeende Anzeige
2 ausgeschaltet.
Sie haben die Funktion “erzwungene
Ladung“ gestartet, indem Sie bei
abgetrennter Batterie für 5 Sek. die
Batteriespannungstaste 3 drückten.
6
Die Ladeanzeige leuchtete auf und Sie
schlossen die Batterie an: Die Ladean-
zeige erlosch.
7 Keine Anzeige. Versorgungsspannung defekt.
Sie haben nicht die richtige Spannung ausgewählt.
Batterie ist sulfatiert.
Ihre Batterie hat einen Kurzschluss
oder ist beschädigt.
Ein Verbraucher im Auto ist eingeschaltet (z.B. Licht, Radio, ...).
Das Ladegerät wurde als Netzstromquelle verwendet.
Die Batteriekapazität (Ah) ist höher
als die des Ladegerätes.
Die ausgewählte Batteriekapazität (Ah) ist niedriger als die des
Ladegerätes.
Die Batterie ist beschädigt und
kann nicht aufgeladen werden.
„+“ und „–“Pol der Batterie sind
vertauscht.
Schlechter Kontakt mit den
Zangen.
Die Batterie ist stark entladen.
Die Sicherung ist geschmolzen.
Die Batterie ist stark entladen
und der Sulfatierungsprozess hat
begonnen. Der Ladeprozess wird
fortgesetzt. Es wird jedoch empfohlen die „SOS Recovery“-Funk-
tion anzuwenden.
Batterie ist defekt. Wechseln Sie die Batterie.
Batteriespannung <0.5V Wechseln Sie die Batterie.
1. Klemmen Sie das Batium von der
Batterie ab. Lassen Sie das Gerät an der
Netzspannung angeschlossen.
2 Wählen Sie die richtige Spannung.
3. Schließen Sie das Batium wieder an die
Batterie an.
Wechseln Sie die Batterie.
Wechseln Sie die Batterie.
Schalten Sie die Verbraucher aus und starten Sie erneut den Ladevorgang.
Normale Reaktion des Ladegerätes bei
dieser Verwendung. Die Ladeanzeige wird
nicht eingeschaltet.
Die Ladezeit ist ungewöhnlich lang.
Verwenden Sie ein stärkeres Ladegerät.
Wählen Sie die auf der Batterie aufgedruckte Kapazität.
Wechseln Sie die Batterie.
Klemmen Sie die rote Zange an den „+“
und die schwarze Zange an den „-“ Pol.
Reinigen Sie die Batteriepole und schließen
Sie die Zangen wieder an.
Verwenden Sie die Funktion „erzwungene
Ladung“ (s. Punkt 2).
Gehen Sie wie folgt vor:
Netzstecker ziehen. Kabel von der Batterie
abklemmen. Sicherung austauschen: 15 A
für Batium 7-12 7-24 oder 30 A für Batium
15-12 und 15-24.
Klemmen Sie Batterie von der Fahrzeugelektronik ab und drücken Sie auf die Taste
„SOS Recovery“ (s. Punkt 3).
Ziehen Sie den Netzstecker. Schließen Sie
das Gerät nach 10 Sek. wieder an.
9
Page 10

BATIUM 7/12 • 7/24 • 15/12 • 15/24BATIUM 7/12 • 7/24 • 15/12 • 15/24
HINWEISE UND WARNUNGEN
• Versuchen Sie niemals defekte oder nicht auadbare Batterien zu laden.
• Brandgefahr: Vermeiden Sie stets Feuer und Funkenug und sorgen Sie während der Auadung für gute Belüftung.
• Schützen Sie das Gerät vor Regen und Feuchtigkeit.
• Beachten Sie die Anschlussreihenfolge.
• Achten Sie während der Ladung auf einen sicheren Stand des Gerätes und einen frei zugänglichen Netzanschluss.
• Überprüfen Sie das Gerät regelmäßig auf Schäden, insbesondere das Netzkabel, den Stecker und das Gehäuse. Ist das Ladegerät
beschädigt, darf es vor der Reparatur nicht mehr benutzt werden.
• Ist das Ladegerät und/ oder Kabelleitungen defekt/ beschädigt, geben Sie das Ladegerät zur Reparatur zum Hersteller bzw. zur
Serviceleistung an einen Fachbetrieb.
• Schließen Sie das Batterieladegerät zuerst an den Pluspol (+) an und die schwarze Klemme an einer blanken Stelle der Karrosserie
und achten Sie darauf, dass weder das Ladegerät, noch das Kabel mit der Kraftstofeitung des Fahrzeuges in Berührung kommt.
• Ziehen Sie nach Auadung der Batterie den Netzstecker und entfernen Sie die Klemmen vom Minus- (Schwarz) und Pluspol (Rot)
der Batterie.
• Öffnen Sie nicht das Gerät. Achtung: Änderungen und Eingriffe am Gerät von nicht autorisierten Personen setzen die Garantie und
Konformitätserklärung der Firma GYS außer Kraft.
• Ihr Gerät ist ein Produkt für selektives Einsammeln. Werfen Sie es daher nicht in die häusliche Mülltonne.
• Dieses Gerät ist kein Spielzeug! Schützen Sie es vor unbefugtem Gebrauch.
GARANTIEBEDINGUNGEN
Die Garantieleistung des Herstellers erfolgt ausschließlich bei Fabrikations- oder Materialfehlern, die binnen 12 Monate nach Kauf
angezeigt werden. (Nachweis Kaufbeleg) Nach Anerkenntnis des Garantieanspruchs durch den Hersteller bzw. seines Beauftragten
erfolgen eine für den Käufer kostenlose Reparatur und ein kostenloser Ersatz von Ersatzteilen. Der Garantiezeitraum bleibt aufgrund
erfolgter Garantieleistungen unverändert.
DE
Ausschluss: Die Garantieleistung erfolgt nicht bei Defekten, die durch unsachgemäßen Gebrauch, Sturz oder harte Stöße sowie
durch nicht autorisierte Reparaturen oder durch Transportschäden, die in Folge des Einsendens zur Reparatur, hervorgerufen worden
sind. Keine Garantie wird für Verschleißteile (z.B.: Kabel, Klemmen, etc.) übernommen.
Das betreffende Gerät bitte immer mit Kaufbeleg und kurzer Fehlerbeschreibung ausschließlich über den Fachhandel einschicken. Die
Reparatur erfolgt erst nach Erhalt einer schriftlichen Akzeptanz (Unterschrift) des zuvor vorgelegten Kostenvoranschlags durch den
10
Page 11

BATIUM 7/12 • 7/24 • 15/12 • 15/24BATIUM 7/12 • 7/24 • 15/12 • 15/24
ES
Besteller. Im Fall einer Garantieleistung trägt GYS ausschließlich die Kosten für den Rückversand an den Fachhändler.
Este manual contiene instrucciones para el funcionamiento de su aparato y las precauciones que atender para su seguridad. Gracias
por leerlo atentamente antes del primer uso y conservarlo con precaución para poder leerlo de nuevo si es necesario.
DESCRIPCION GENERAL
El Batium fue concebido para la recarga de baterías de arranque al plomo, al electrolito liquido o al gel :
. de 15 Ah hasta 130 Ah en 6V o 12V para el modelo 7/12 (3 o 6 elementos de 2V), en 6V, 12V o 24V para el modelo 7/24 (3, 6 o
12 elementos de 2V).
. de 35 Ah hasta 225 Ah en 6V y 12V para el modelo 15/12 (3 o 6 elementos de 2V), y en 6V, 12V o 24V para el modelo 15/24 (3,
6 o 12 elementos de 2V).
PUESTA EN MARCHA Y FUNCIONAMIENTO GENEREAL
Respetar el orden de puesta en marcha. Atención : comprobar el nivel del electrolito para las baterías abiertas. Completar los niveles si
necesario antes de la carga.
1. Conectar el cargador sobre la red eléctrica 230 V. Un indicador en A y otro en B se encienden y corresponden a las últimas informaciones memorizadas (ver anomalía 6).
2. Elegir la tensión de su batería (6V, 12V, 24V) según las indicaciones escritas sobre su batería o según el posible montaje realizado
(en serie o en paralelo – ver P23).
3. Elegir la capacidad de su batería, después Batium dene, de el mismo, el corriente de carga.
4. Conectar las pinzas : pinza roja sobre el + de la batería y pinza negra sobre el –o
5. Batium arranca automáticamente la carga. Le indica el nivel de carga de su batería. (indicadores 1 y 2)
Phase 1 :
Spannungsanstieg
jo
En caso de corte de corriente, BATIUM memoriza el estado de carga (salvo en modo SOS RECOVERY), para que la carga vuelva a
empezar de nuevo a su punto de interrupción (fase 1).
6. Cuando la batería está cargada, Desconectar el cable de alimentación.
7. Desconectar las pinzas / o el conectador de la batería.
regulación de tensión (durante 2 horas)
Phase 2 :
por intermitencia
Phase 3 :
fín de carga (Floating)
Verde
FUNCIÓN CARGA FORZADA
Si la batería esta fuertemente descargada (tensión muy baja), la carga no empieza automáticamente. El indicador de carga 1 no se
enciende. Los indicadores de tensión de batería A y de capacidad B están encendidos. En este caso, elegir la tensión y la corriente
de carga, luego empujar 5 segundos el botón de tensión de batería 3 para empezar una « carga forzada ». El indicador naranja 1 se
encenderá al relajar esta presión. Si ningún indicador se enciende, su batería es irrecuperable (<0.8 V).
FUNCIÓN « SOS RECOVERY » (DISPONIBLE SOBRE BATIUM 15/12 Y 15/24)
Al conectar la batería, el indicador SOS Recovery (6) se encenderá para indicar que la batería ha sufrido una descarga profunda y de
larga duración empezando un proceso de sulfatado.
La función « SOS Recovery » empieza un periodo de carga entre 24 y 48h de regeneración gracias a una curva de carga especíca.
Para activar esta función, respetar las etapas siguientes :
1. Desconectar imperativamente la batería del vehículo (PELIGRO DE SOBRETENSIÓN)
2. Juntar Batium a la red eléctrica
3. Elegir la tensión de carga
4. Activar « Sos Recovery » empujando durante 5 segundos el botón 4 hasta que el indicador 6 se encienda (los incadores B están apagados)
5. Conectar las pinzas del Batium sobre la batería.
6. El indicador verde 2 indica el n de carga.
PROTECCIONES
El Batium está protegido contra los cortocircuitos, inversiones de polaridades, arranques. Dispone de un sistema anti-chispa que
evita cualquiera chispa durante la conexión del cargador con la batería. Sin batería en las pinzas, el Batium no libera corriente por
seguridad.
11
Page 12

BATIUM 7/12 • 7/24 • 15/12 • 15/24
ANOMALIA, CAUSAS, REMEDIOS
ANOMALIA CAUSAS REMEDIOS
El indicador de carga 1 está apagado.
Los indicadores de tensión de batería
1
(A) se encienden cada uno su turno
al cabo de un minuto de carga.
Los indicadores de capacidad B de
batería se encienden cada uno su
2
turno.
La batería está conectada
El indicador de carga 1 no se
enciende.
Los indicadores de tensión de batería
3
A y de capacidad de batería B están
encendidos.
El indicador «SOS Recovery» se
enciende por intermitencias 6
(Batium 15/12 y 15/24) al cabo d un
4
minuto de carga
Función « SOS Recovery » (Batium
15/12 – 15/24) : al cabo de 24 horas,
5
los indicadores de carga 1 y de n de
carga 2 están apagados
Función carga forzada : después de
apretar 5 segundos la tecla tensión
batería 3 para lanzar la función car-
6
gada forzada, el indicador naranja de
carga no se enciende
Al conectar a la red eléctrica ningún
7
indicador se enciende
- Desconectar BATIUM de la batería sin desconec-
No ha seleccionado Usted la buena tensión
de batería
La batería es irrecuperable
Su batería esta en cortocircuito o esta
dañado
Un consumidor quedó conectado involuntariamente (ex : faros)
El cargador esta utilizado como fuente de
alimentación para compensar los grandes
consumidores conectados sobre la batería.
La batería tiene un a capacidad (Ah) supe-
rior a la capacidad del cargador.
Ha elegido una capacidad de batería (Ah)
inferior a la capacidad indicada sobre su
batería
La tensión de la batería no sube, la batería
está dañada
Las polaridades + y – están invertidas Conectar la pinza roja al + y la pinza negra al -
El contacto de las pinzas esta malo
La batería esta fuertemente descargada
El fusible está fundido
La batería sufrió una profunda descarga de
larga duración, lo que provocó el proceso
de sulfatación. La carga sigue haciéndose
pero es aconsejado utilizar la función « SOS
Recovery »
Batería irrecuperable Batería irrecuperable
Tensión batería <0,5V Cambiar la batería
El cargador detecta una anomalía de la
tensión de la red eléctrica
tarlo de la red eléctrica
- Elegir la buena tensión
- Luego conectar BATIUM de nuevo a la batería.
Cambiar la batería
Cambiar la batería.
Cortar el consumidor y seguir / reactivar la carga
Comportamiento normal del cargador en este uso.
El indicador de n de carga no puede encenderse.
El tiempo de carga durará anormalmente. Utilizar si
posible un cargador más fuerte
Elegir la capacidad indicada sobre su batería.
Cambiar la batería
Limpiar los terminales y conectar las pinzas de
nuevo.
Utilizar la función « carga forzada » (ver proceso
pagina precedente)
Desenchufar el aparato de la red eléctrica. Quitar
las pinzas de la batería. Remplazar el fusible respectando el calibrado (15A para Batium 7-12 7-24
o 30A para Batium 15-12 y 15-24)
Desconectar el aparato de la corriente, luego las
pinzas.
Activar la función « SOS Recovery » ver proceso
pagina precedente.
Desconectar el Batium de la red electrica durante 10
segundos, luego conectar de nuevo
ES
AVISOS
▪ Gas explosivo, evitar las llamas y las chispas. Durante la carga, es imprescindible que la batería esté situada en un lugar bien
ventilado.
▪ Proteger contra la lluvia y la humedad.
▪ Su cargador debe ser conectado a una toma de tierra.
▪ Si el cable de alimentación está dañado, tiene que ser remplazado por el fabricante, su departamento post venta o una persona
con compe
tencia similar, para evitar cualquier peligro.
▪ En ningún caso se puede utilizar para cargar pilas o baterías no-recargables.
▪ El terminal de la batería que no está conectado al chasis tiene que ser conectado el primero.
La otra conexión tiene que efectuarse sobre el chasis, a lo lejos de la batería y de la canalización de combustible.
▪ Después de la carga, desconectar el cargador de la red eléctrica, luego quitar la conexión del chasis y la conexión de la batería,
en el orden indicado.
▪ El aparato tiene que ser colocado de tal manera que la toma de tierra este accesible.
▪ No se puede utilizar el aparato como juego para niños o no puede ser utilizado por jóvenes o personas minusválidas sin vigilancia.
▪ Este aparato es objeto de una recogida selectiva. No echar en un contenedor domestico.
12
Page 13

BATIUM 7/12 • 7/24 • 15/12 • 15/24
NL
Gefeliciteerd met de aanschaf van deze lader, welke ontworpen is met de grootst mogelijke zorg. Leest u a.u.b. deze gebruiksaanwijzing aandachtig door, om er het beste uit te kunnen halen.
OMSCHRIJVING
Deze lader is ontwikkeld om vloeibaar- en gel electroliet lood-zuur accu’s te laden:
- van 15 Ah tot 130 Ah in 6V of 12V voor de 7/12 modellen (3 of 6 2V elementen), in 6V, 12V of 24V voor de 7/24 modellen (3, 6 of 12 2V
elementen).
- van 35 Ah tot 225 Ah in 6V en 12V voor de 15/12 modellen (3 of 6 2V elementen), en in 6V, 12V of 24V voor de 15/24 modellen (3, 6 of
12 2V elementen).
PUESTA EN MARCHA Y FUNCIONAMIENTO GENEREAL
Let op de juiste aansluitvolgorde.
Waarschuwing: Controleer het niveau van het zuur indien mogelijk.
1. Sluit de lader aan op een 230 V stopcontact. De LEDs A en B gaan branden. (zie storing 6 als dit niet gebeurt)
2. Kies het voltage van uw accu (6V, 12V,24V) volgens de aanduiding op de accu of de eventuele schakeling van meerdere accu’s
(serie of parallel – P23).
3. Kies de capaciteit van uw accu. De Batium kiest nu zelf de laadstroom.
4. Sluit de klemmen aan op uw accu : rode klem op de + van de accu, zwarte klem op de – van de accu
5. Het laden wordt nu automatisch gestart en zal na 30 seconden aangeven of de accu geregenereerd moet worden. De LEDs geven
de staat van de accu aan. ( indicators 1 en 2)
fase 1 :
Stijg tijd
Permanent
Als de spanning wegvalt, wordt de staat van het laden bewaard (behalve in SOS recovery mode), om verder te gaan als de spanning
terug komt (fase 1).
6. Als de accu geladen is neemt u eerst de stekker uit het stopcontact.
7. en verwijdert vervolgens de accuklemmen.
fase 2 :
Knippert
fase 3 :
Groen
FUNCTIE GEDWONGEN LADEN
Als de accu diep ontladen is (zeer laag voltage <2V), zal het laden niet automatisch starten. De laad indicator 1 zal niet oplichten. De
indicators accu spanning A en capaciteit B gaan aan. In dit geval selecteert u de spanning en laadstroom, druk vervolgens 5 seconden
op de accuspanning toets l om een « gedwongen lading » te starten. De indicator 1 zal aangaan op het moment dat u de toets los
laat. Als er geen lampjes aan gaan, is uw accu niet te recoveren (<0.8 V).
« SOS RECOVERY » FUNCTIE(BESCHIKBAAR OP BATIUM 15-12 & 15/24 )
Als na aansluiten van de accu de indicator SOS Recovery (6) begint te knipperen, betekent dit dat de accu diep ontladen is geweest,
en is gesulfateerd.
De « SOS Recovery » functie heeft een speciale laadcurve en regenereert in 24-48 uur de accu. Dit werkt alleen bij accu’s die licht
gesulfateerd zijn. Om de functie te activeren, volgt u de volgende stappen:
1.Neem de accupoolklemmen van de auto los. (GEVAAR VOOR SPANNINGSPIEKEN)
2. Sluit de lader aan op het stopcontact
3. Selecteer laadspanning
4. Activeer « Sos Recovery » door gedurende 5 seconden op toets 4 te drukken, indicator 6 gaat aan
5. Sluit de lader aan op de accu
6. De groene indicator 2 geeft het einde van het laden aan.
VEILIGHEID
Batium is beschermd tegen kortsluiting, poolomwisseling en starten. Het bevat een anti-vonk systeem welke ervoor zorgt dat er
geen vonk ontstaat bij het aansluiten op de accu. Zonder voltage op de klemmen wordt er uit veiligheid geen stroom geleverd.
13
Page 14

BATIUM 7/12 • 7/24 • 15/12 • 15/24
STORINGEN, OORZAKEN, OPLOSSINGEN
STORINGEN OORZAKEN OPLOSSINGEN
De laad indicator 1 gaat niet aan
De accuspanning indicators (A)
knipperen om en om na één minuut
1
laden.
De indicators voor accu capaciteit
2
(B) knipperen om en om
De accu is aangesloten.
De laadindicator 1 gaat niet aan.
De indicators accu spanning A en
3
accu capaciteit B gaan aan
De «SOS Recovery» indicator knip-
4
pert na één minuut laden
“SOS recovery” functie (Batium 15/12
– 15/24). : Na 24 uur gebruik zijn
5
de laadindicator j en de einde laden
indicator k uit.
Geforceerd laden functie: Na 5 seconden op accuspanning toets 3 drukken
om de geforceerd laden functie te
6
starten, gaat het oranje lampje niet
aan
Als u 230 Volt aansluit, gaat niets
7
branden
U heeft de verkeerde accu spanning geselecteerd
De accu is niet te regenereren
De accu heeft kortsluiting Vervang de accu
Een verbruiker is per ongeluk ingeschakeld Schakel de verbruiker uit en start het laden opnieuw
De lader wordt gebruikt als voeding voor
te veel verbruikers die aangesloten zijn op
de accu.
De accu heeft een hogere capaciteit (Ah)
dan de lader aan kan
U heeft een lagere capaciteit (Ah) geselecteerd dan aangegeven op de accu
De accuspanning stijgt niet. De accu is
beschadigd
Polen + en – verwisseld Verwissel de klemmen
Klemmen maken slecht contact Reinig de polen en sluit opnieuw aan
De accu is diep ontladen
De zekering is doorgebrand
De accu is diep ontladen geweest, en is
gesulfateerd. Het laden gaat verder maar
het is aan te raden de “SOS recovery” func-
tie te gebruiken
Accu te ver gesulfateerd Vervang accu
Accuspanning <0.5V Vervang accu
De lader heeft een abnormale voedingss-
panning gedetecteerd
NL
- Neem een poolklem los van de accu Houdt de 230
V voeding aangesloten
- Selecteer het juiste voltage
- Sluit de opnieuw aan op de accu
Vervang de accu
(klemmen losnemen en opnieuw aansluiten).
Normaal gedrag van de lader bij dit ge-bruik. De
indicator die het einde laden aangeeft, kan niet
inschakelen
De laad tijd zal abnormaal lang zijn. Gebruik indien
mogelijk een sterkere lader
Kies de capaciteit die wordt aangegeven op de accu
Vervang de accu
Gebruik de functie « gedwongen laden » (zie procedure op vorige pagina)
Verwijder de voeding van de Batium. Verwijder de
klemmen van de accu. Vervang de zekering door de
juiste: 15A voor Batium 7-12 en 7-24, en 30A voor
Batium 15-12 en 15-24
Neem de stekker uit het stopcontact en vervolgens
de klemmen losnemen. Schakel de functie SOS
recovery in (zie procedure op de vorige bladzijde)
Verwijder de stekker 10 seconden en sluit opnieuw
aan
OPMERKINGEN
• Explosief gas, voorkom vonken, niet roken. Plaats de accu tijdens het laden in een goed geventileerde ruimte.
• Bescherm tegen regen of vocht.
• Alleen gebruiken op een stopcontact met randaarde.
• Als de voedingskabel beschadigd is, dient deze vervangen te worden door de fabrikant, zijn service afdeling of een gekwali
ceerde service afdeling van de importeur.
• Deze lader is niet geschikt voor enkele cel- of niet herlaadbare accu’s.
• De accu klem die niet aan massa ligt dient als eerste te worden aangesloten.
• De lader moet zodanig worden aangesloten dat het mogelijk is deze indien nodig meteen uit te kunnen schakelen .
• Afzonderlijke inzameling vereist – gooi het niet in de vuilnisbak.
• De Batium mag niet worden gebruikt door kinderen !!
• Vermijd kortsluiting van de klemmen tijdens het laden.
14
Page 15

BATIUM 7/12 • 7/24 • 15/12 • 15/24
IT
Questo manuale descrive il funzionamento del carica-batterie e le precauzioni da seguire per la sicurezza. Leggere attentamente
prima dell’uso e conservare con cura per poterlo consultarlo in futuro.
COLLEGAMENTO E FUNZIONAMENTO GENERALE
Rispettare l’ordine d’avviamento.
Attenzione: Vericare il livello dell’elettrolito e prima della carica, se necessario, riempire no a livello.
1. Connettere il carica batterie sulla presa 230 V. Una spia luminosa (A) e una (B) si accendono, ed indicano gli ultimi dati memorizzati (vedere punto 6).
2. Scegliere la tensione della vostra batteria (6V, 12V, 24V) secondo le indicazioni poste sulla batteria stessa o in funzione
dell’eventuale collegamento realizzato (in serie o parallelo, vd. pag. 23).
3. Scegliere la capacità della vostra batteria, e BATIUM imposterà da solo la tensione di carica.
4. Connettere le pinze: pinza rossa sul + e pinza nera sul -.
5. BATIUM inizia automaticamente la carica. Indica lo stato di carica della batteria. (spie luminose 1 e 2)
Fase 1:
salita in tensione
regolazine di tensione (durante 2 ore)
Fase 2:
ne della carica (Floating)
Fase 3:
Permanente
Durante un’interruzione di corrente, BATIUM memorizza lo stato di carica (tranne in modo « SOS Recovery »), in modo che la
ricarica ricominci dal punto in cui è stata interrotta alla fase 1.
6. Quando la batteria è carica, disconnettere il cavo d’alimentazione.
7. Scollegare le pinze o il connettore dalla batteria.
Lampeggiante
Verde
FUNZIONE CARICA FORZATA
Se la batteria è fortemente scarica (tensione molto bassa, <2V), la carica non inizia automaticamente. La spia luminosa di carica 1
non si accende. Le spie luminose che indicano il voltaggio (A), e la capacità (B) sono accese. In questo caso, selezionare la tensione
e la corrente di carica poi premere il tasto tensione batteria per 5 secondi per iniziare una «ricarica forzata». La spia luminosa 1 si
accenderà non appena verrà rilasciato questo pulsante. Se nessuna spia si accende, la batteria è irrecuperabile (<0.8 V).
FONCTION « SOS RECOVERY » (DISPONIBLE SUR BATIUM 15-12 ET 15/24)
Se la spia SOS Recovery (6) lampeggia quando una batteria è collegata, ciò signica che la batteria è profondamente scarica et è
iniziata la solfatazione.
La funzione «SOS Recovery» grazie ad una curva di cara specica, inizia un ciclo di 24 a 48 ore di rigenerazione.
Per attivare questa funzione, seguire la procedra sotto:
1. DISCONNETTERE la batteria dal veicolo. (PERICOLO DI SOVRATENSIONE)
2. Collegare BATIUM alla presa di alimentazione.
3. Selezionare la tensione di carica.
4. Attivare «Sos Recovery» premendo il tasto per 5 secondi 4 no a quando la spia luminosa 6 si accende (la spia (B) è spenta).
5. Collegare le pinze di BATIUM sulla batteria.
6. La spia verde 2 indica che la carica è terminata.
PROTEZIONI
BATIUM è protetto dai corti-circuiti, inversioni di polarità ed avviamento del motore. Ha un sistema anti-scintilla che evita la formazione di scintille quando vi è connessa una batteria. Se le pinze del BATIUM non sono connesse alla batteria, non ci sarà voltaggio
nelle pinze.
15
Page 16

ANOMALIE, CAUSE, RIMEDI
ANOMALIE CAUSE RIMEDI
La spia di carica 1 è spenta
1
La spia che indica la tesione della
batteria (A) lampeggia dopo un
minuto di carica.
La spia che indica la capacità
2
della batteria (B) lampeggia.
La batteria è connessa.
La spia di carica 1 non si accende
Le spie che indicano la tensione
3
(A) e la capacità (B) sono accese.
La spia luminosa «SOS Recovery» lampeggia 6 (BATIUM
4
15/12 e 15/24) dopo un minuo
di carica.
BATIUM 7/12 • 7/24 • 15/12 • 15/24
- Scollegare BATIUM dalla batteria mante-
Non è stata selezionata la corretta
tensione della batteria.
La batteria è irrecuperabile.
La batteria è in corto-circuito o dan-
neggiata.
Qualche dispositivo che consuma batteria è rimasto acceso
(es: fari)
Il carica-batterie è utilizzato come alimentazione per alimentare i dispositivi
connessi alla batteria.
La batteria ha una capacità (Ah) superiore a quella del carica-batterie
È stata selezionata una capacità della
batteria Ah inferiore a quella indicata
sulla batteria stessa.
La tensione della batteria non sale, la
batteria è danneggiata.
La polarità + e - sono invertite
Il contatto delle pinze non è buono Pulire i terminali e ricollegare le pinze.
La batteria è fortemente scarica.
Il fusibile è bruciato.
La batteria è profondamente scarica ed
è iniziato il processo di solfatazione. La
carica continua ma si consiglia di utiliz-
zare la funzione «SOS recovery».
nendolo collegato alla rete elettrica
- Selezionare la tensione corretta
- Poi ricollegare BATIUM alla batteria.
Batteria da sostituire.
Batteria da sostituire.
Spegnere ciò che è rimasto acceso e consumava batteria, staccare e ricollegare le pinze,
avviare la carica.
Se usato così, non c’è nessuna anomalia. La
spia luminosa che indica la ne della carica
non si accende.
Il tempo di carica è più lungo del normale.
Utilizzare se possibile un carica-batterie più
potente.
Scegliere la capacità indicata sulla vostra
batteria.
Batteria da sostituire.
Mettere la pinza rossa sul + e la pinza nera
sul -
Utilizzare la funzione «carica forzata»
(vedere procedura pagina precedente).
Scollegare l’apparecchio dalla presa elettrica.
staccare le pinze dalla batteria. Sostituire
il fusibile rispettando suo calibro (15A per
BATIUM 7-12 7-24 o 30A per BATIUM 15-12
e 15-24).
Scollegare l’apparecchio dalla presa elettrica,
poi staccare le pinze.
Avviare la funzione «SOS Recovery» vedere
la procedura pagina recedente.
IT
16
Funzione SOS RECOVERY
(BATIUM 15/12 – 15/24) : dopo
5
24 ore le spie luminose di carica
1 e ne di carica 2 sono spente.
Funzione carica forzata.
Dopo aver premuto per 5 secondi
6
sul tasto tensione batteria 3 per
avviare la funzione carica forzata,
la spia luminosa non si accende.
Quando BATIUM viene connesso
7
alla presa non si accende nessuna spia.
Batteria irrecuperabile Batteria da sostituire.
Tensione batteria <0,5V Batteria da sostituire.
Il carica-batterie ha trovato un’anoma-
lia sulla rete elettrica
Scollegare BATIUM della presa per 10
secondi , poi ricollegare.
Page 17

BATIUM 7/12 • 7/24 • 15/12 • 15/24
AVVERTIMENTI
▪ Gas esplosivo, evitare le amme e le scintille. Durante la carica, la batteria deve essere messa in un posto ben aerato.
▪ Proteggere dalla pioggia e dall’umidità.
▪ Il carica-batterie deve essere collegato a una presa elettrica con messa a terra.
▪ Se il cavo di alimentazione è danneggiato, esso deve essere sostituito dal fabbricante, suo servizio post-vendita o da persona
qualicat, per evitare pericoli.
▪ Non utilizzare in nessuna circostanza per ricaricare le pile o batterie non ricaricabili.
▪ Il terminale della batteria che non è connesso alla massa, è il primo che deve essere collegato. L’altra connessione al telaio deve
essere fatta lontano dalla batteria e dal serbatoio del carburante.
▪ Una volta terminata la carica, scollegare il caricabatterie dalla presa, poi staccare le pinze dal telaio e dalla batteria, nell’ordine
indicato.
▪ Il carica-batterie deve essere posizionato in modo che la spina di alimentazione sia sempre accessibile.
▪ Il carica-batterie non deve essere utilizzato come giocattolo oppure essere utilizzato da bambini e persone diversamente abili se
non sorvegliate.
▪ Prodotto soggetto a raccolta differenziata. Non smaltire con i riuti domestici.
▪ Non fare andare le pinze in corto circuito durante la carica.
IT
17
Page 18
BATIUM 7/12 • 7/24 • 15/12 • 15/24
PT
Este manual do usuário possui indicações sobre o funcionamento do aparelho e precauções a seguir para sua segurança. Favor ler
atentamente antes do primeiro uso e conservar este manual cuidadosamente para ulterior consultação.
DESCRIÇÃO GERAL
Batium foi concebido para recarga de baterias de arranque de chumbo ao aletrólito líquido ou gel:
- de 15 Ah a 130 Ah em 6V ou 12V para o modelo 7/12 (3 ou 6 elementos de 2V), em 6V, 12V ou 24V para o modelo 7/24 (3, 6 ou
12 elementos de 2V).
- de 35 Ah a 225 Ah em 6V e 12V para o modelo 15/12 (3 ou 6 elementos 2V), e em 6V, 12V ou 24V para o modelo 15/24 (3, 6 ou
12 elementos de 2V).
CONEXÃO E FUNCIONAMENTO GERAL
Respeitar a ordem para ligar.
Precaução: Vericar o nível do eletrólito para as baterias abertas. Completar os níveis se nenessário antes da recarga.
1. Conectar o carregador na tomada 230 V. Um sinal luminoso em A e um em B
se ligam, correspondendo aos últimos dados memorizados (ver anomalia 6).
2. Escolher a tensão da bateria (6V, 12V, 24V) segundo indicações inscritas sobre a mesma ou em função de uma eventual conexão
em série a ser realizada (seja essa em série ou paraléla cf P23).
3. Escolher a capacidade da bateria, e Batium denirá ele mesmo a corrente de carga.
4. Conectar os alicates: alicate vermelho no + da bateria, e alicate preto no –.
5. Batium inicia automaticamente a carga. Ele indica o estado da carga da bateria (sinais 1 e 2).
Fase 1 :
aumento da tensão
Permanentemente
Durante uma queda de energia, BATIUM memorisa o estado de carga (exceto em modo «SOS Recovery»), para que a recarga
recomece do ponto onde foi interrompida na fase 1.
6. Quando a bateria estiver carregada, desconectar o cabo de alimentação
7. Desconectar os alicates ou o conector da bateria.
regulação de tensão (durante 2 horas)
Fase 2 :
Intermitente
m de carga (Floating)
Fase 3 :
Verde
FUNÃO RECARGA FORÇADA
Se a bateria estiver fortemente descarregada (tensão baixa <2V), a carga não começará automaticamente. O sinal luminoso de
recarga (1) não se acende. Os sinais luminosos (A) tensão bateria (B), e capacidade são ligados. Neste caso, selecionar a tensão e
a corrente de carga, pressionar a tecla tensão bateria por 5 segundos (3) para lançar a «carga forçada». O sinal (1) vai se acender
assim que a pressão do botão for aliviada. Se nenhum sinal se acende, a bateria é irrecuperável (<0.8 V).
FUNÇÃO «SOS RECOVERY» (DISPONIVEL NO BATIUM 15-12 E 15/24)
Durante a conexão da bateria, o sinal SOS Recovery (6) pisca para indicar que a bateria foi profundamente descarregada durante
longo tempo, o que deu início a um processo de sulfatação.
A função « SOS Recovery », graças à curva de carga especíca, libera um ciclo de 24 a 48 h de regeneração.
Para ativar esta função, favor respeitar as etapas seguites :
1. Desconectar imperativamente a bateria do veículo. (PERIGO DE SOBRETENSÃO)
2. Conectar Batium à tomada
3. Selecionar a tensão de carga.
4. Ativar «SOS Recovery » pressionando durante 5 segundos a tecla (4) até que o sinal luminoso (6) se acenda (os sinais (B) são desligados).
5. Conectar os alicates do Batium à bateria.
6. O sina verde (2) anuncia o término da recarga.
PROTEÇÕES
Batium é protegido contra curto-circuitos, inversões de polaridade, partidas. Ele dispõe de um sistema anti-faísca que evita faíscas
durante a conexão do carregador à bateria. Sem bateria nos alicates, Batium não libera nenhuma corrente por medida de segurança.
18
Page 19

BATIUM 7/12 • 7/24 • 15/12 • 15/24
ANOMALIAS, CAUSAS, REMEDIOS
ANOMALIAS CAUSAS REMÉDIOS
O sinal de carga 1
está apagado.
1
Os sinais de tensão da bateria (A)
piscam alternadamente após um minuto
de recarga.
- Desconectar BATIUM da bateria deixando -o conec-
A tensão de recarga da bateria não foi escol-
hida corretamente.
A bateria é irrecuperável.
A bateria está em curto-circuito ou danicada Bateria a ser substituída.
tado à tomada
- Selecionar a tensão correta
- Reconectar BATIUM à bateria.
Bateria a ser substituída.
PT
Os sinais de capacidade bateria (B)
2
piscam alternadamente.
A bateria está conectada.
O sinal de carga (1) não se acende.
3
Os sinais de tensão bateria (A)
e capacidade bateria (B) estão ligados.
O sinal «SOS Recovery»
pisca (6) (Batium 15/12 et 15/24) após
4
um minuto de recarga.
O consumidor restou conectado involuntariamente
(ex: faróis)
O carregador é usado como alimentação para
compensar grandes consumidores conectados
à bateria.
A bateria tem capacidade (Ah) superior à
capacidade do carregador.
Capacidade de bateria Ah inferior à capacidade
indicada na bateria a ser carregada.
A tensão da bateria não aumenta, a bateria
está danicada.
As polaridades + e – estão invertidas Colocar o alicate vermelho no + e o alicate preto no -.
O contato das pinças não é bom Limpar os terminais e reconectar os alicates.
A bateria está fortemente descarregada
O fusível derreteu
A bateria foi profundamente descarregada
durante longo tempo, o que deu início ao processo de sulfatação. A carga continua mas se
aconselha o uso da função «SOS recovery».
Desligar o que estiver consumindo a bateria e continuar/relançar a carga.
Comportamento normal do carregador neste tipo de
uso. O sinal indicando m de carga não se acende.
O tempo de carga sera anormalmente longo. Usar um
carregador mais potente se possível
Escolher a capacidade indicada na bateria a ser
carregada.
Bateria a ser substituída.
Usar a função «recarga forçada» (ver a procedura na
página anterior)
Desconectar o aparelho da tomadaDébrancher l’appareil du secteur. Retirar os alicates da bateria. Substituir o fusível respeitando o calibre (15A para Batium
7-12 7-24 ou 30A para Batium 15-12 e 15-24).
Desconectar o aparelho do setor e depois desconectar
os alicates.
Ativar a função «SOS Recovery» - ver o procedimento
na página anterior.
Função SOS RECOVERY (Batium 15/12
– 15/24): após 24 heures os sinais
5
de carga (1) e m de carga (2) estão
desligados.
Função recarga forçada:
Após pressionar durante 5 segundos a
6
tecla tensão bateria (3) para lançar a
função recarga forçada, o sinal de carga
não se acende.
Durante a conexão à tomada nenhum
7
sinal se acende.
Bateria irrecuperável Bateria a ser substiduída
Tensão bateria <0,5V Bateria a ser substiduída
O carregador detectou uma anomalia da
tensão na tomada.
Desconectar Batium da tomada durante 10 segundo. ,
depoi reconectar.
ADVERTÊNCIAS
▪ Gás explosivo, evitar chamas e faíscas. Durante a carga, a bateria deve ser posicionada em um lugar bem aerado.
▪ Proteger contra chuva e humidade.
▪ O carregador deve ser conectado à uma tomada com conexão terra.
▪ Se o cabo de alimentação estiver danicado deve ser substituído pelo fabricante, seu serviço após venda ou uma pessoa de qualicação similar, para evitar todo perigo.
▪ Não deve ser usado em nenhum caso para carregar pilhas ou baterias não recarregáveis.
▪ O terminal da bateria não conectado ao chassis deve ser conectado em primeiro lugar. A outra conexão deve ser feita no chassis
longe da bateria e da canalização do combustível.
▪ Após a operação de carga, desconectar o carregador da tomada, retirar a conexão do chassis e a conexão da bateria, seguido
esta ordem.
▪ O aparelho deve ser colocado de forma tal que a saída da tomada seja acessível.
▪ O aparelho não pode ser usado como um brinquedo pelas crianças, e não deve ser usado pelas crianças ou pessoas com handicap sem vigilância.
▪ Produto objeto de coleta seletiva. Não jogar no lixo doméstico.
▪ Não colocar os alicates em curto-circuito durante a carga.
Este manual do usuário possui indicações sobre o funciona
19
Page 20

BATIUM 7/12 • 7/24 • 15/12 • 15/24
RU
Настоящая инструкция по эксплуатации включает указания о функционировании Вашего аппарата и о мерах предосторожности
для Вашей безопасности. Внимательно прочтите ее перед первым использованием и сохраните, чтобы перечитать при
надобности.
ОПИСАНИЕ
Batium был создан для зарядки аккумуляторов запуска на жидком электролите или геле:
- от 15 Aч до 130 Aч при 6В или 12В для модели 7/12 (3 или 6 элементов по 2В), и при 6В, 12В или 24В для модели 7/24 (3,
6 или 12 элементов по 2В).
- от 35 Aч до 225 Aч при 6В или 12В для модели 15/12 (3 или 6 элементов по 2В), и при 6В, 12В или 24В для модели 15/24
(3, 6 или 12 элементов по 2В).
ПОДКЛЮЧЕНИЕ И ПРИНЦИПЫ ФУНКЦИОНИРОВАНИЯ
Соблюдайте порядок подключения. Меры предосторожности : Проверьте уровень электролитного раствора открытых
аккумуляторов. При надобности дополните уровень до начала зарядки.
1. Включите зарядное устройство в сеть 230 В. Загораются индикаторы в зонах A и B, в соответствии с последними
сохраненными настройками (см. также аномалию 6).
2. Выберите напряжение аккумулятора (6В, 12В, 24В), пользуясь указаниями на аккумуляторе или в зависимости от
соединения аккумуляторов (последовательное или параллельное см. P23).
3. Выберите емкость вашей батареи. Затем Batium сам выберет оптимальный зарядочный ток.
4. Подключите зажимы : красный на + аккумулятора и черный на –.
5. Batium автоматически начинает зарядку. Он укажет вам состояние зарядки вашей батареи с помощью индикаторов 1 и
2.
Фаза 1 :
Напряжение
возрастает
Горит индикатор
Durante uma queda de energia, BATIUM memorisa o estado de carga (exceto em modo «SOS Recovery»), para que a recarga
recomece do ponto onde foi interrompida na fase 1.
6. В случае сбоев в электросети Batium запоминает состояние зарядки (за исключением режима «SOS Recovery»). Таким
образом, зарядка возобновляется с точки прерывания (Фаза 1).
7. Отсоедините зажимы /или коннектор аккумулятора.
регулировка напряжения
Фаза 2 :
(в течении 2 часов)
Моргает индикатор
окончание зарядки (Floating)
Зеленый индикатор горит
Фаза 3 :
ФУНКЦИЯ ПРИНУДИТЕЛЬНОЙ ЗАРЯДКИ
Если батарея сильно разряжена (напряжение очень низкое), зарядка не начнется автоматически.
Индикатор зарядки (1) не загорается. Индикаторы напряжения (A) и емкости (B) батареи включены. В этом случае выберите
напряжение и ток заряда, затем нажмите в течение 5 секунд на кнопку выбора напряжения аккумулятора (3), чтобы
включить режим «принудительной зарядки». Когда вы отпустите кнопку, загорится индикатор (1). Если никакой индиктор не
загорается, это значит, что ваш аккумулятор невосстановим (<0.8 B).
РЕЖИМ « SOS RECOVERY » (ДЛЯ BATIUM 15-12 ET 15-24)
При подключении батареи индикатор SOS Recovery (6) мигает, указывая, что ваша батарея подверглась длительной и
значительной разрядке и начинает процесс сульфатации.
Функция « SOS Recovery » благодаря специальной кривой заряда запускает цикл регенерации длящийся от 24 до 48 часов.
Для активации этого режима соблюдайте следующие этапы:
1. обязательно отсоедините батарею от автомобиля. (опасность перенапряжения)
2. подключите Batium к электрической сети
3. выбрерите напряжение заряда
4. активируйте режим « Sos Recovery » нажимая на кнопку (4) в течении 5 секунд до того момента как индикатор (6) загорится
(индикаторы (B) не включены).
5. подключите зажимы Batiumа к аккумулятору.
6. зеленый индикатор (2) сигнализирует о завершении зарядки.
ЗАЩИТА
Batium защищен от короткого замыкания, инверсии полярности и запусков. Он оснащен системой против искр, которая
помогает устранить появление искр при подключении зарядного устройства к аккумулятору. Для безопасности Batium не
20
подает ток без зажимов не подключенных к аккумулятору.
Page 21

BATIUM 7/12 • 7/24 • 15/12 • 15/24
АНОМАЛИИ, ПРИЧИНЫ, СПОСОБЫ УСТРАНЕНИЯ
AНОМАЛИЯ ВОЗМОЖНЫЕ ПРИЧИНЫ РЕШЕНИЕ
Индикатор зарядки (1) не горит.
1
Индикаторы напряжения батареи (A)
моргают по очереди через минуту
после начала зарядка
Индикаторы емкости батареи (B)
2
моргают по очереди.
Аккумулятор подключен.
индикатор зарядки (1) не загорается.
3
Индикаторы напряжения батареи (A)
и емкости (B) горят.
Индикатор «SOS Recovery»
(5) (Batium 15/12 и 15/24) через
4
минуту с начала заряда.
Функция SOS RECOVERY (Batium
15/12 – 15/24) : через 24 часв
5
индикаторы заряда (1) et окончания
заряда не горят.
Функция принудительной зарядки:
После нажатия в течении 5 сек на
кнопку напряжения аккумулятора
6
(3) с целью запуска функции
принудительного заряда, индикатор
заряда не загорается.
при режиме «SOS Recovery» не
7
загорается после 48ч зарядки (Batium
15/12 – 15/24).
Вы выбрали некорректное напряжение
акккумулятора.
Аккумулятор вышел из строя.
Короткое замыкание или повреждение
аккумулятора.
Вы забыли выключить один из
потребителей энергии (например, фары)
Зарядное устройство используется
как дополнительно питание, чтобы
компенсировать нехватку тока батареи в
случае подключения энергоемких устройств
Батарея имеет емкость (А/ч),
превосходящую емкость зарядного
устройства
Вы выбрали емкость батареи (А/ч) ниже
емкости, указанной на вашей батарее.
Напряжение аккумулятора не
увеличивается, аккумулятор поврежден.
Перепутаны полярности «+» и «-»
Плохой контакт зажимов Почистите контакты батареи и повторите попытку
Батарея сильно разряжена
Расплавился предохранитель
Батарея подверглась длительной и
значительной разрядке и начинает процесс
сульфатации. Заряд продолжится, но
рекомендуется использовать функцию «SOS
Recovery».
Аккумулятор вышел из строя. Замена аккумулятора
Напряжение аккумулятора <0,5V Замена аккумулятора
Зарядное устройство определило аномалию
электрической сети.
RU
- Отсоедините BATIUM от батареи, не выключая
его из сети
- Выберите правильное напряжение
- Подключите повторно BATIUM к батарее.
Замена аккумулятора
Bateria a ser substituída.
Desligar o que estiver consumindo a bateria e continuar/relançar a carga.
Comportamento normal do carregador neste tipo de
uso. O sinal indicando m de carga não se acende.
O tempo de carga sera anormalmente longo. Usar um
carregador mais potente se possível
Escolher a capacidade indicada na bateria a ser
carregada.
Bateria a ser substituída.
Установите красный зажим на «+» и черный
зажим на «-».
Используйте функцию «принудительная зарядка»
(см. процедуру на пред. странице)
Отключите аппарат от сети. Снимите клеммы
с аккумулятора. Замените предохранитель,
соблюдая номинал (15A для Batium 7-12 и 7-24 или
30A для Batium 15-12 и 15-24).
Отключите аппарат от сети, затем отсоедините
зажимы. Включите функцию «SOS Recovery»
согласно указаниям на предыдущей странице.
Отключить Batium от сети в течении 10 сек., затем
снова подключить.
ПРЕДУПРЕЖДЕНИЯ
▪ Взрывчатый газ – избегайте пламени и искр. В течении заряда аккумулятор должен находиться в проветриваемом помещении.
▪ Защищайте от дождя и влажности.
▪ Ваше зарядное устройство должно быть подключено к розетке с заземлением.
▪ Если кабель питания поврежден, он должен быть заменен производителем, его сервисной службой или квалифицированным персоналом в целях безопасности.
▪ Не использовать ни в коем случае для батареек или неперезаряжаемых аккумуляторов.
▪ Клемма аккумулятора не подключенная к кузову должна быть подключена первой. Второе подключение должно быть сделано к кузову далеко от аккумулятора
и от трубопровода топлива.
▪ После заряда отключите зарядное устройство от сети, затем отсоедините подключение к кузову и подключение к аккумулятору в указанном порядке.
▪ Аппарат должен быть расположен так чтобы розетка была доступна.
▪ Аппарат не должен быть использован как игрушка для маленьких детей или использован маленькими детьми и инвалидами без присмотра.
▪ Товар подлежит специальной переработке – не выбрасывать в общий мусоросборник.
▪ Не замыкать зажимы во время процесса зарядки.
21
Page 22

BATIUM 7/12 • 7/24 • 15/12 • 15/24
ATTESTATION DE CONFORMITE
La société GYS atteste que le chargeur décrit dans ce manuel : Batium 7/12- 7/24- 15/12- 15/24
Est fabriqué conformément aux exigences des directives européennes suivantes :
. Directive Basse Tension : 2006/95/CE du 12/12/06. / Directive CEM : 2004/108/CE du 15/12/2004- 03/05/1989.
ils sont pour cela conformes aux normes harmonisées :
. EN 60335-2-29 (2004) / EN 55014-1-1 (2006) / EN 55014-1-2 (1997) + A1 (2001)
Date de marquage CE/GS : mai 2014.
DECLARATION OF COMPLIANCE
The GYS Company testies that the charger described in this manual: Batium 7/12 - 7/24 – 15/12 -15/24
Is manufactured in compliance with the requirements of the following European directives:
. Low Voltage Directive : 2006/95/CE - 12/12/2006 / EMC Directive : 2004/108/CE - 15/12/2004- 03/05/1989.
It therefore complies with the following harmonized standards :
. EN 60335-2-29 (2004) / EN 55014-1-1 (2006) / EN 55014-1-2 (1997) + A1 (2001)
Marking dates CE/GS : May 2014.
KONFORMITÄTSERKLÄRUNG
GYS erklärt, dass das die Batterieladegeräte: Batium 7/12 - 7/24 – 15/12 -15/24
richtlinienkonform mit folgenden europäischen Bestimmungen
. Niederspannungs-Richtlinie 2006/95/CE von 12/12/06 / CEM Richtlinien : 2004/108/CE von 15/12/2004 – 03/05/1989
hergestellt wurden.
Diese Geräte stimmen daher mit den erweiterten Normen
. EN 60335-2-29 (2004) / EN 55014-1-1 (2006) / EN 55014-1-2 (1997) + A1 (2001)
CE/GS Kennzeichnung: Mai 2014
DECLARACION DE CONFORMIDAD
La empresa GYS atesta que el cargador descrito en este manual : Batium 7/12 - 7/24 - 15/12 - 15/24
está fabricado en conformidad con las exigencias de las directivas europeas siguientes :
. Directiva Baja Tensión : 2006/95/CE del 12/12/06 / Directiva CEM : 2004/108/CE del 15/12/2004- 03/05/1989.
Para estas razones, es en conformidad con las normas harmonizadas :
. EN 60335-2-29 (2004) / EN 55014-1-1 (2006) / EN 55014-1-2 (1997) + A1 (2001)
Fecha de marcado CE/GS : mayo 2014.
VERKLARING VAN OVEREENSTEMMING
Het bedrijf GYS verklaart dat de lader die in de machine wordt gebruikt: Batium 7/12 – 15/12 – 7/24 - 15/24
wordt vervaardigd overeenkomstig de vereisten van de volgende Europese richtlijnen:
. De Richtlijn van het lage Voltage: 2006/95/CE - 12/12/2006 / EMC Richtlijn: 892004/108/CE - 15/12/2004-03/05/189,
Hij is daarom naleeft de volgende geharmoniseerde normen:
. EN 60335-2-29 (2004) / EN 55014-1-1 (2006) / EN 55014-1-2 (1997) + A1 (2001)
Het toestel wordt CE/GS gemarkt: may 2014
ATTESTAZIONE DI CONFORMITA
L’azienda GYS attesta che il carica-batterie descritto in questo manuale: BATIUM 7/12- 7/24- 15/12- 15/24
È fabricato in conformità alle seguenti direttive europee:
. Direttiva Bassa Tensione: 2006/95/CE del 12/12/06 / Direttiva CEM : 2004/108/CE del 15/12/2004- 03/05/1989.
ed è pertanto conforme alle normative armonizzate:
. EN 60335-2-29 (2004) / EN 55014-1-1 (2006) / EN 55014-1-2 (1997) + A1 (2001)
Data di marcatura CE/GS : maggio 2014.
ATESTADO DE CONFORMIDADE
A empresa GYS atesta que o carregador descrito neste manual: Batium 7/12- 7/24- 15/12- 15/24
É fabricado conformemente às exigências das diretivas européias seguintes:
. Diretiva baixa tensão: 2006/95/CE do 12/12/06 / Diretiva CEM: 2004/108/CE do 15/12/2004- 03/05/1989.
são consequentemente conformes às normas harmonisadas:
. EN 60335-2-29 (2004) / EN 55014-1-1 (2006) / EN 55014-1-2 (1997) + A1 (2001)
Data de marcação CE/GS : maio 2008.
СЕРТИФИКАТ СООТВЕТСТВИЯ
Компания GYS подтверждает что зарядное устройство, описанное в данной инструкции: Batium 7/12 – 15/12 – 7/24 - 15/24 произведено в
соответствии с требованиями следующих европейских директив :
. Директива Низкого Напряжения: 2006/95/CE от 12/12/06. / Директива CEM : 2004/108/CE от 15/12/2004- 03/05/1989.
И также в следствии этого он соответстуют нормам :
. EN 60335-2-29 (2004) / EN 55014-1-1 (2006) / EN 55014-1-2 (1997) + A1 (2001)
Маркировка CE/GS : Май 20.
17/03/2015
Société GYS
Nicolas BOUYGUES
Président Directeur Général
134 BD des Loges
53941 Saint-Berthevin
France
22
Page 23

BATIUM 7/12 • 7/24 • 15/12 • 15/24
COMBINAISON BATTERIES / BATTERIES COMBINATION / BATTERIEKOMBINATION
COMBINACION BATERIAS / COMBINAZIONE BATTERIE
PICTOGRAMMES / SYMBOLS / ZEICHENERKLÄRUNG / ICONOS / COMBINAÇÃO BATERIAS
Appareil conforme aux directives européennes / The device complies with European Directive / Gerät entspricht
europäischen Richtlinien / El aparato está conforme a las normas europeas De apparaat is conform de Europeese
richtlijnen / Apparecchio in conformità con le direttive europee. / Aparelho conforme às diretivas européias.
Marque de conformité CCC (Certication obligatoire pour la Chine) / Conformity mark CCC (China Compulsory
Certication) / Marca de conformidad CCC (Certicado obligatorio para China) / Маркировка соответствия EAC
(Евразийское экономическое сообщество)
Marque de conformité EAC (Communauté économique Eurasienne) / Conformity mark EAC (Eurasian Economic
Commission) /In Übereinstimmung mit der Norm EAC / Marca de conformidad EAC (Comunidad económica euroasiática) / Маркировка соответствия EAC (Евразийское экономическое сообщество) / EAC (Euraziatische Economische Gemeenschap) merkteken van overeenstemming / In conformità con le norme EAC (Russie)
Attention ! Lire le manuel d’instruction avant utilisation / Caution ! Read the user manual/Achtung! Lesen Sie die
Betriebsanleitung / Cuidado, leer las instrucciones de utilización. / Pas op ! Lees de gebruiksaanwijzing voor het
gebruik. / Attenzione! Leggere il manuale d’istruzioni prima dell’utilizzo / Atenção! Ler o manual de instruções antes
de usar
Produit faisant l’objet d’une collecte sélective- Ne pas jeter dans une poubelle domestique. / Separate collection
required – Do not throw in a domestic dustbin. / Produkt für selektives Einsammeln. Werfen Sie dieses Gerät nicht
in die häusliche Mülltonne. / Este aparato es objeto de una recolección selectiva. No debe ser tirado en en cubo
doméstico. / Niet te spruiten in een huiselijke afvalbak. / Questo prodotto è soggetto alla raccolta differenziata Non buttare nei riuti domestici. / Produto objeto de coleta seletiva - Não jogar no lixo doméstico.
Pour usage intérieur, ne pas exposer à la pluie / For interior use, do not expose to the rain / Nur für den Gebrauch
in geschlosssnen Räumen geeignet. Gegen Nässe schützen / para uso interior, no exponer a la lluvia / Voor binnenlands gebruik, stel niet aan de regen bloot / Da utilizzare al coperto, non esporre alla pioggia / Para uso em lugar
coberto, não expor à chuva
Attention gaz explosifs, éviter la formation de ammes et d’étincelles. / Warning contains explosive gas, keep away
from ames or source of sparks. / Nicht in der Nähe von Flammen oder Funkenquellen arbeiten! / Cuidado : gases
explosivos, evitar la formación de llamas y chispas. / Opgelet : bevat explosief gas, blijft van vlammen of bron van
vonken weg ! / Attenzione gas esplosivi, evitare la formazione de amme e scintille. / Atenção - gás explosivo, evitar a formação de chamas e faíscas..
Choisir un local abrité et sufsamment aéré ou spécialement aménagé. / Choose a sheltered room with appropriate
airing. / Nur in geschützten und gut belüfteten Räumen benutzen/Elegir un lugar cubierto, sucientemente ventilado
o especialmente acondicionado / Kies een beschutte ruimte met het aangewezen luchten. / Scegliere un posto al
riparo e sufcientemente ventilato o specialmente allestito. / Escolher um local protegido e sucientemente aerado
ou especialmente equipado.
Protégé contre l’accès aux parties dangereuses avec un doigt, et contre les chutes verticales de gouttes d’eau/Protected against rain and against ngers access to dangerous parts / Gegen Berührung mit gefährlichen Teilen und
gegen Sprühwasser geschützt. / protegido contra el acceso a las partes pelígrosas con los dedos, y contra las caidas
verticales de gotas de agua. / bescherming tegen het binnendringen van vinger en tegen water druppels vallen /
Aree pericolose protette per impedire il contatto con l’usuario. Protetto contro cadute verticali di gocce d’acqua /
Acesso às partes perigosas protegido, e contra quetas verticais de gotas de água
23
Page 24

24
 Loading...