

Page 1

Quick Start Guide
Rev. A
Page 2
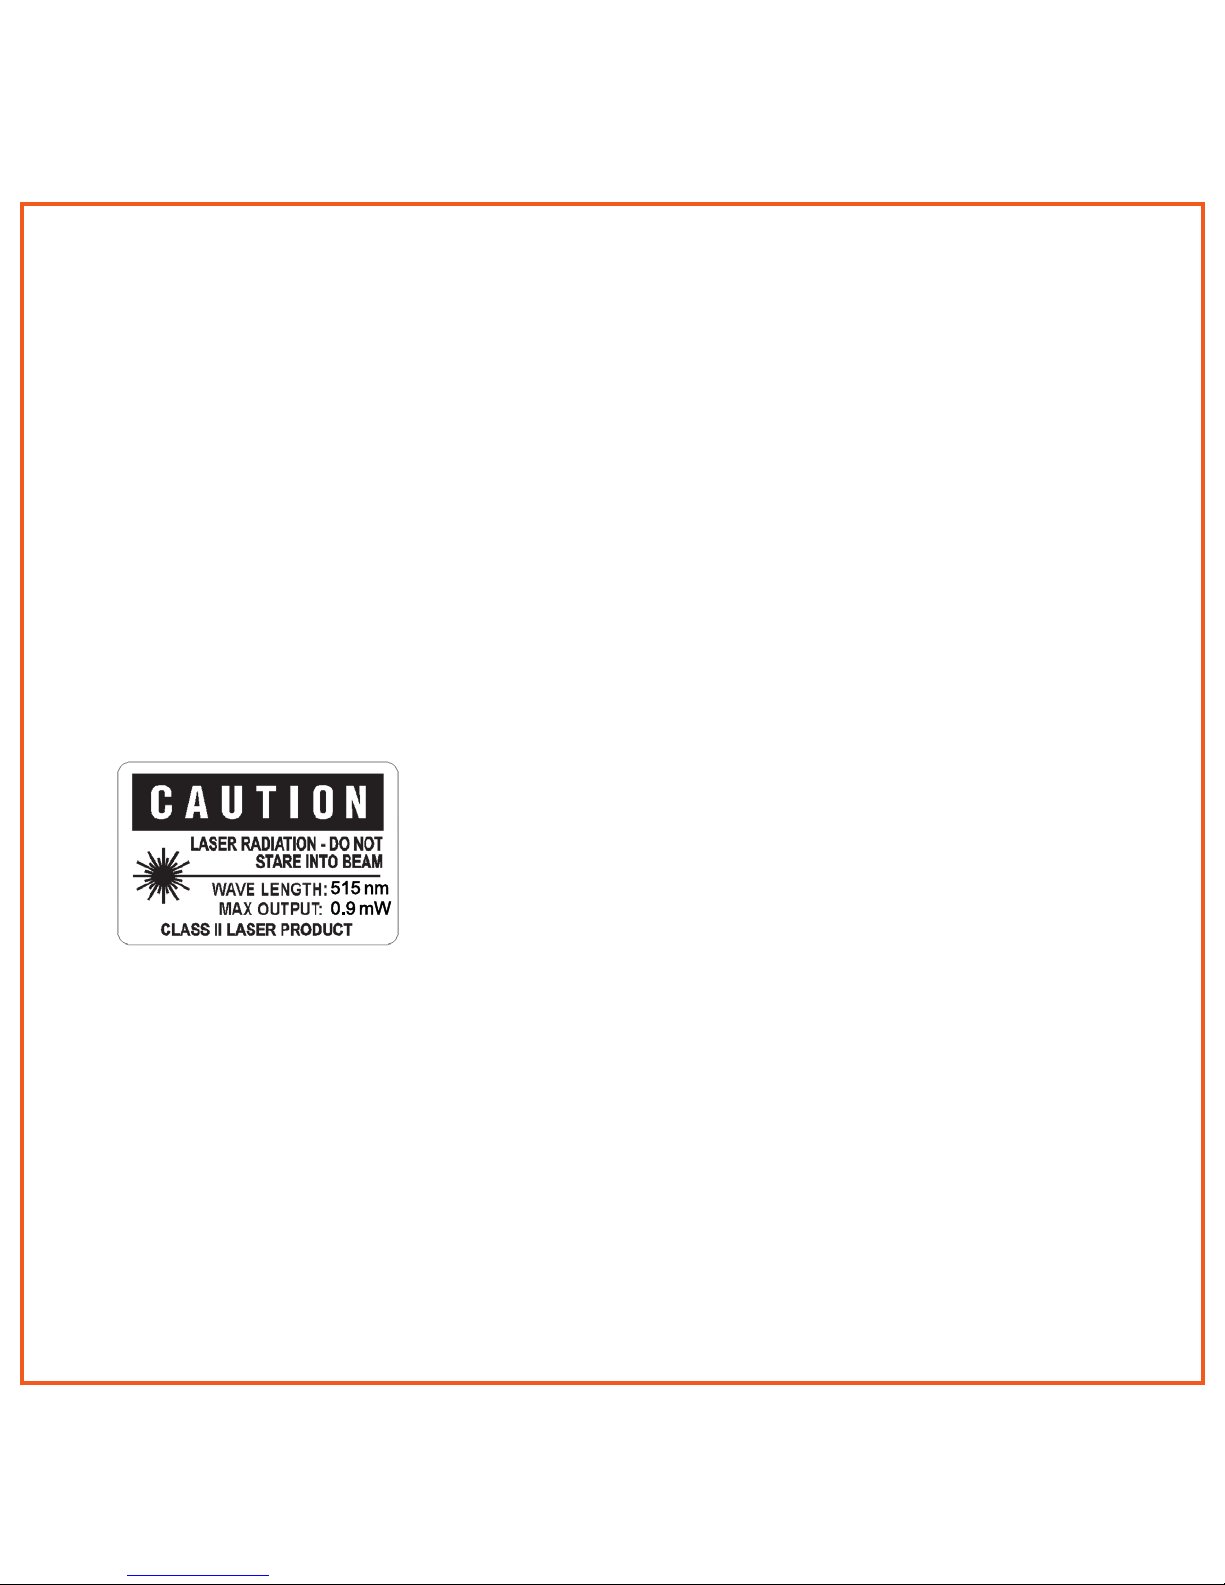
Laser Safety Warning
CAUTION: Use of controls or adjustments or performance of procedures other than those
specied herein may result in hazardous radiation exposure.The laser is activated by pressing the laser button identied in the user guide.
Do not stare into the laser beam, or shine the laser at others.
Do not allow minors to use the laser unsupervised.
Avoid pointing the laser pointer at any reective surface.
Do not disassemble the device, it has no serviceable parts.
Do not immerse in any liquid or expose to heat or moisture.
Use only within the designed operating temperature range of 0-40 degrees C.
Specications
The laser used in the GYM4400, with a maximum output power of <1mW and an emitted
wavelength of 532nm, complies as Class 2 laser product with: IEC/EN 60825-1: 2007, and
CFR Title 21 1040.10 and 1040.11, except for deviations pursuant to Laser Notice No. 50,
dated June 24, 2007. A complete Declaration of Conformity can be found at www.gyration.
com.
2.
Page 3
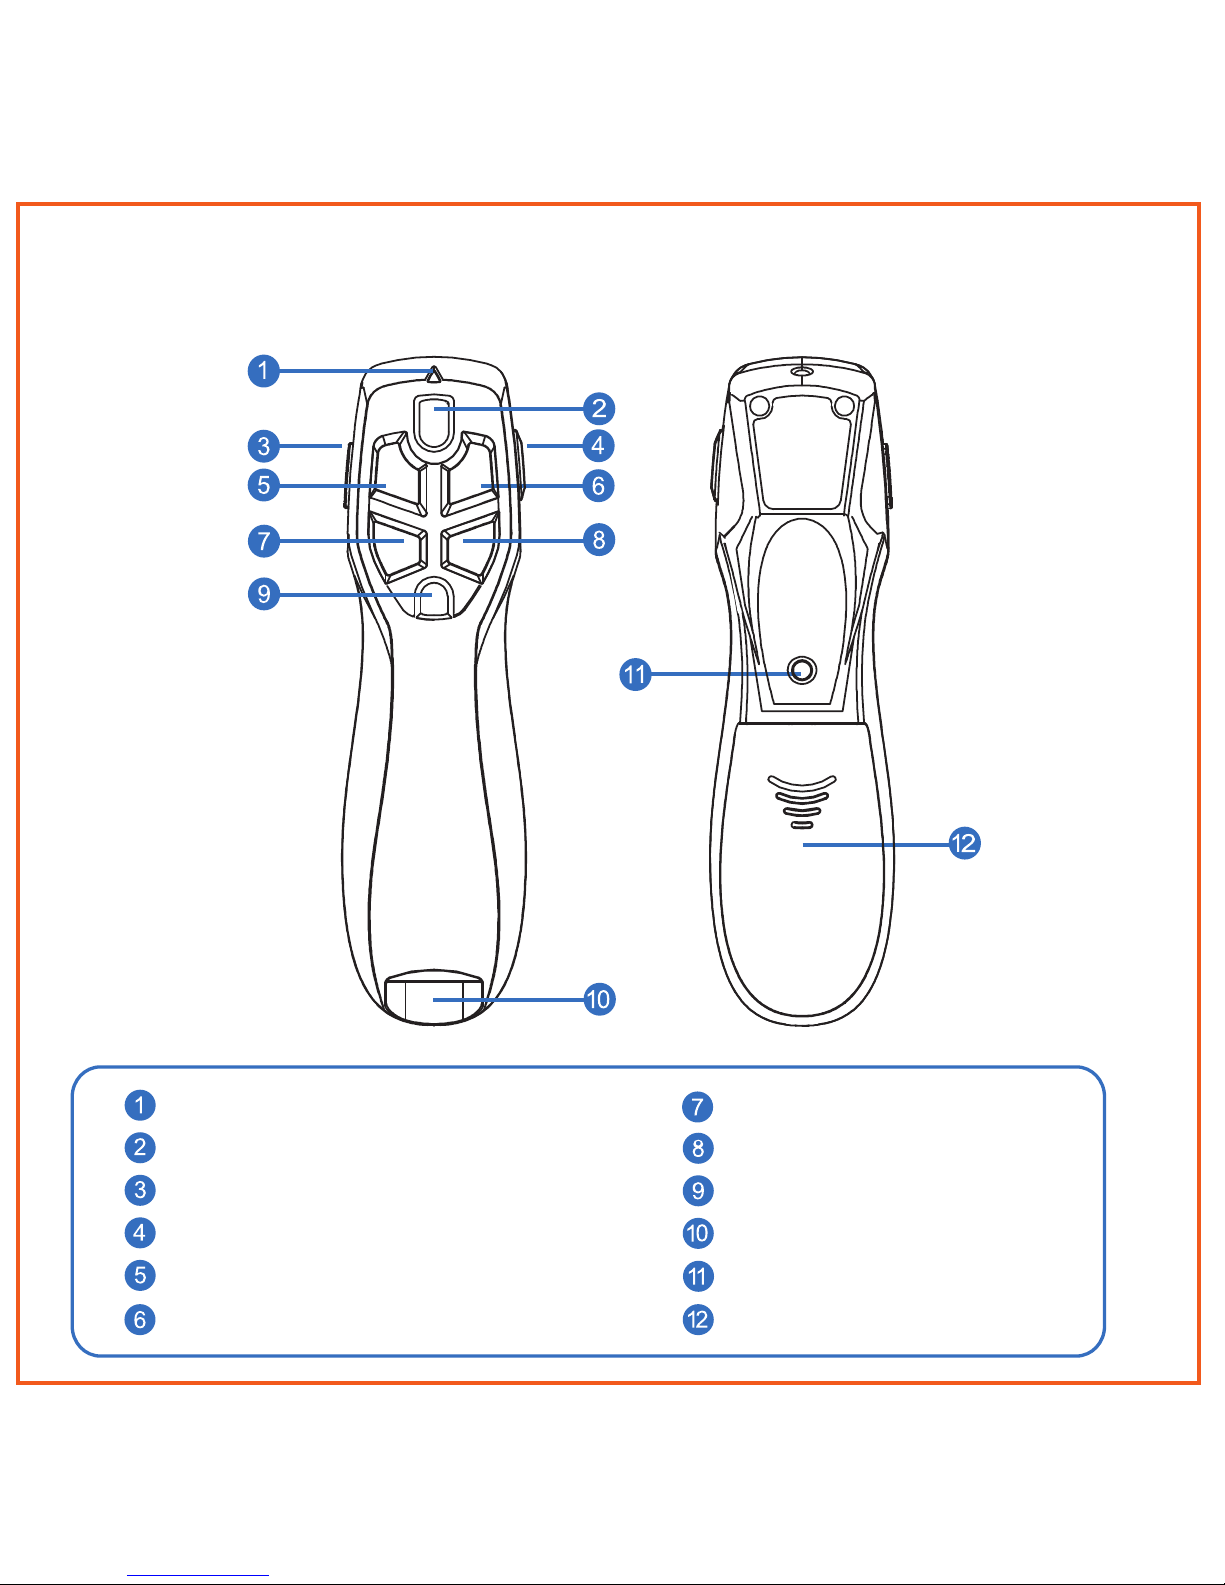
Air Mouse® Presenter Overview
LED Indicator
Laser Activation Key
On/Off Switch
Screen Blank
Previous Slide
Next Slide
Mouse Click (Left)
Mouse Click (Right)
Gyroscopic Mouse Button
Dongle Storage Bay
Wireless Connect Button
Battery Bay Door
3.
Page 4
1 Conrming Compatibility
Air Mouse® Presenter is designed for
Windows
®
or OS X® computers that support
USB capability. Confirm that your system
offers an accessible USB port.
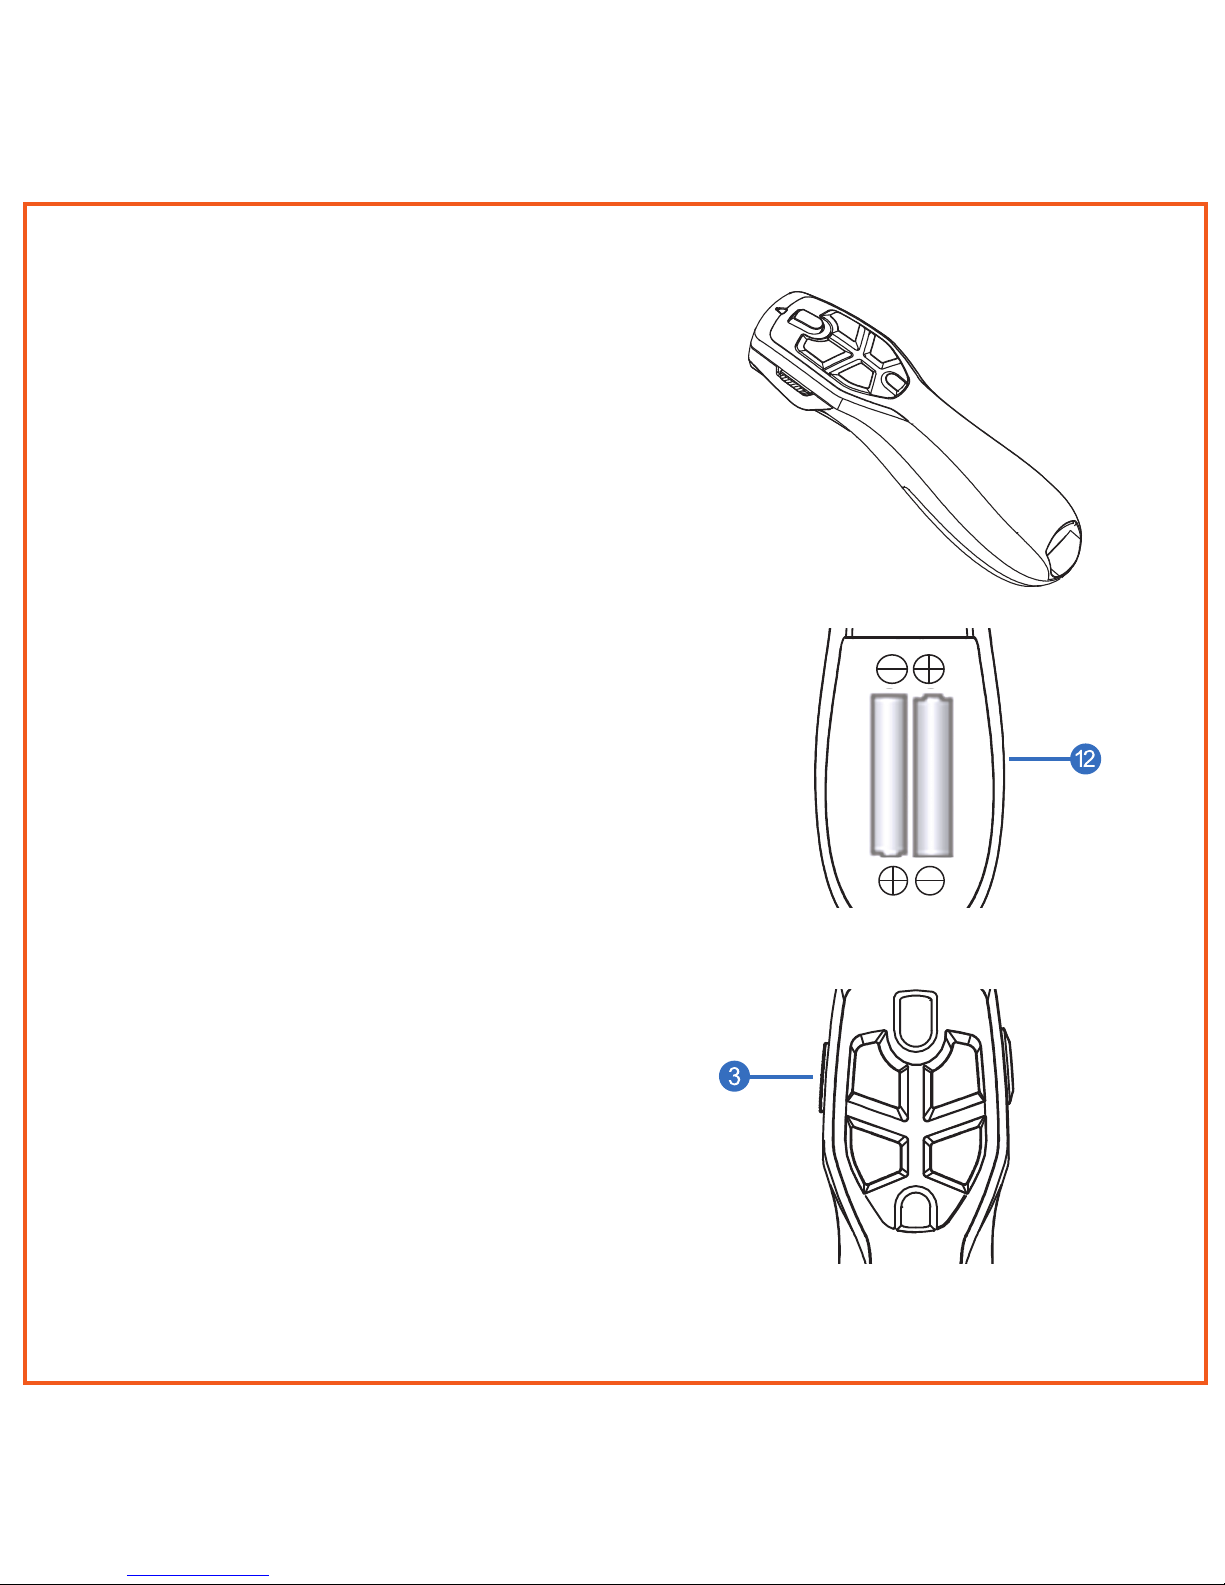
2 Inserting the Batteries
Removing the mouse battery door (12),
insert the AAA batteries (supplied), aligning
them with the positive and negative legends
in the battery bay
3 Installation & Basic Operation
Your Air Mouse® Presenter is designed
for use with today’s leading presentation
software including PowerPoint
®
and Keynote®
for both Windows
®
or OS X® computers.
To install, just plug the Receiver Dongle into
an available USB port and turn the remote
ON using the On/Off switch (3). Use Next
Slide, Previous Slide, and Blank Screen
buttons to control your presentation slides.
Getting Started
4.
Page 5

Using Presenter In the Air
1 The Gyroscopic Mouse Button
Picking up your Air Mouse® Presenter,
press and hold the Gyroscopic Mouse
Button (9). Depressing the button
activates the gyroscope and Gyroscopic
Mouse Mode. As you move your wrist,
the cursor will mimic your movement.
The faster your move your wrist, the
faster the cursor will move. Don’t use
your whole arm as movement will be
very, very slow.
If you wish to activate continuous
Gyroscopic Mouse Mode, simply
double-click the trigger. This will keep
the gyroscope active but may make it
difficult to target smaller icons.To exit
continuous Gyrscopic Mouse Mode,
double click the button again.
2 Gyroscopic Mouse Mode
While your Air Mouse® Presenter is in
Gyroscopic Mouse Mode, Laser Pointer,
Left Click, Right Click and Blank Screen
controls all remain functional.
5.
Page 6

Pairing the USB Receiver
Pairing the remote to the dongle
Connect
Button
LED
Indicator
(device
status)
The Air Mouse Presenter is pre-paired
at the factory with its USB Receiver
Dongle prior to shipping. Should
re-pairing be necessary, follow these
simple steps:
1 With the USB Receiver dongle
plugged into your computer, bring
the remote control within 3 feet of
the dongle.
2 Press the ‘Connect’ button on the
underside of the remote.
3 The LED on the top of the remote
will flash Green (indicating that
pairing is in progress), and go dark
when pairing is established.
4 If pairing is unsuccessful, the LED
will flash from Green to Red for
approximately one mintue, and then
go dark.
6.
Page 7

Warranty
SMK-Link Electronics Corporation (SMK-Link) warrants to the original end-user
purchaser of the Product (“you”) that the Product, excluding batteries, will be free
from defects in materials and workmanship under normal use and service for
two-years from date of purchase. If the Product becomes defective in materials or
workmanship during the warranty period, SMK-Link will, at its option, either repair
or replace it. The replacement unit may be a more current or upgraded model if
the originally purchased model is not available. Any Product repaired or replaced
under the terms of the warranty is covered for the remainder of the original
warranty period or ninety (90) days from the date of return shipment, whichever
is longer.
This warranty does not cover Products which have been subjected to misuse,
accident, physical damage, improper installation, abnormal operation or handling,
neglect, inundation or re or when Product regulatory label has been removed,
altered or rendered illegible; nor does it cover accessory or consumable items.
SMK-Link shall not be liable for any indirect special, incidental, or consequential
damages. SMK-Link’s total liability for damages for any cause related to, or
arising out of, the use or inability to use the Product shall not exceed the original
price paid for the Product even if SMK-Link has been informed of such possibility.
If your Product requires service under warranty, you must rst contact SMK-Link
product support to receive an RMA number. Shipping of defective units back to
SMK-Link is at your expense. The contact information can be found on the SMKLink website: www.smklink.com.
The warranty does not affect your statutory rights and you may have other rights
which vary from state to state and country to country. This warranty is understood
to be the complete and exclusive agreement between the parties, superseding
all prior agreements, oral or written, and all other communications between the
parties relating to the matter of this warranty.
The above warranty does not apply to Products sold in Australia. Products sold
in Australia by an authorized reseller will contain an Australia specic warranty
statement.
7.
Page 8

FCC Statement
This device complies with Part 15 of the FCC Rules. Operation is subject to the
following two conditions:
(1) This device may not cause harmful interference and
(2) this device must accept any interference received, including interference that
may cause undesired operation.
This equipment has been tested and found to comply with the limits for a class B
digital device, pursuant to part 15 of the FCC Rules. These limits are designed to
provide reasonable protection against harmful interference in a residential installation. This equipment generates, uses and can radiate radio frequency energy and
if not installed and used in accordance with the instructions, may cause harmful
interference to radio communications.
However, there is no guarantee that interference will not occur in a particular
installation. If this equipment does cause harmful interference to radio or television
reception, which can be determined by turning the equipment off and on, the user
is encouraged to try to correct the interference by one or more of the following
measures:
* Reorient or relocate the receiving antenna.
* Increase the separation between the equipment and receiver.
* Connect the equipment into an outlet on a circuit different from that to which the
receiver is connected.
* Consult the dealer or an experienced radio/TV technician for help.
In order to maintain compliance with FCC regulations, shielded cables must be used
with this equipment. Operation with non-approved equipment or unshielded cables is
likely to result in interference to radio and TV reception.
The user is cautioned that changes and modications made to the equipment
without the approval of manufacturer could void the user’s authority to operate this
equipment.
8.
Page 9

CE Declaration of Conformity
This equipment has been tested and found to comply with the limits of the European Council
Directive 2014/53/EU. A complete Declaration of Conformity can be found at www.SMK-Link.
com.
9.
Page 10

Thank You
Congratulations on your purchase of the Air Mouse Voice. We thank you for
choosing Gyration to meet your wireless needs and look forward to serving you in
the future. To learn about new Gyration products as they become available, and to
ensure the best possible customer support, please register your product at www.
Gyration.com.
Product Support
SMK-Link Electronics Corporation
3601-B Calle Tecate, Camarillo, CA 93012
TEL: (888) 696-3500 | (805) 987-6662 | FAX: (805) 987-6665
Email: gsupport@smkusa.com
www.gyration.com
©2016 SMK-Link Electronics Inc. SMK-Link, the SMK-Link logo, Gyration, the Gyration logo
and Air Mouse and the are registered trademarks of SMK-Link Electronics, Inc. Windows,
and PowerPoint are registered trademarks of Microsoft Corporation in the United States and
other countries. Apple, OS X and Keynote are registered trademarks of Apple Inc. All other
registrations and trademarks are properties of their respective owners.
10.
Page 11

11.
Page 12

www.gyration.com
 Loading...