

Page 1
GUILD
SACK BARROW 90kg
Instruction Manual
Important - Please read these instructions fully before operating or maintaining your Guild sack barraw
After Sales Support
GZS90A
UK/Ireland 0345 640 0800
Note the safe operational requirements, warnings & cautions. Use the product correctly and
with care for the purpose for which it is intended. Failure to do so may cause damage and/or
personal injury and will invalidate the warranty. Please keep instructions safe for future use.
If you need help or have damaged or missing parts, call the Customer Helpline on 0345 640 0800
Page 2
2
Contents
Safety instructions.........................................................................................................3
Specifications.................................................................................................................3
Assembly & use..............................................................................................................3
Adjustments ..................................................................................................................4
Customer Helpline 0345 640 0800
Page 3

Safety instructions
Specifications
Assembly & use
Always load evenly with the centre of gravity of the load as near the centre of the truck as
possible.
Obtain addional support for large or wide loads to prevent tipping.
DO NOT overload the truck - see Specifications.
DO NOT leave unattended, especially when loaded, unless the wheels are chocked or the
truck is otherwise secured.
DO NOT use truck on uneven ground and do not run over curbs or steps - use a ramp.
DO NOT allow others to ride on the truck.
DO NOT use the truck if any part is significantly damaged - pay particular attention to the
wheels.
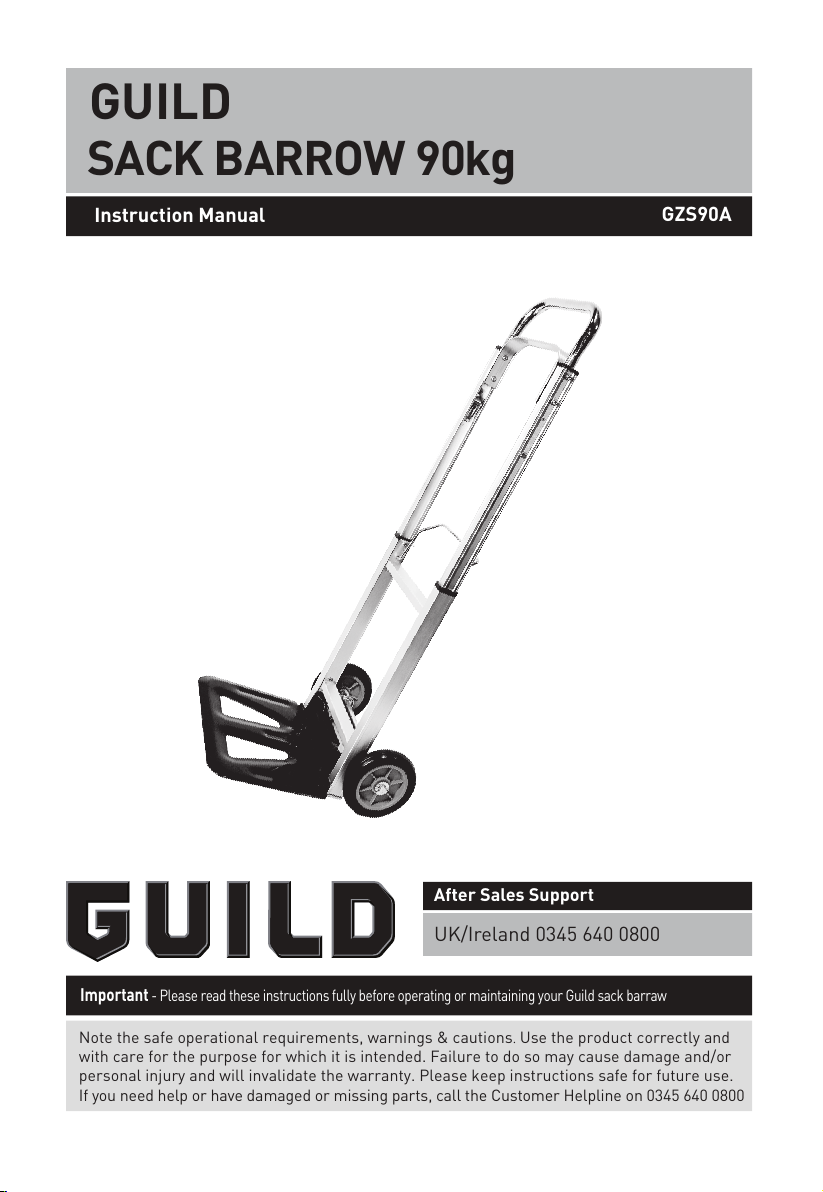
Lightweight aluminium frame, weighs only 4.3kg yet has a carrying capacity of 90kg. Folding steel
foot plate and telescopic handle with spring release means that trolley can be packed away in
seconds. Large back support makes light work of oversized loads. Fitted with Ø150mm wheels
for easy rolling over rough ground. Ideal for business and home use.
Max. Load:
Wheel Diameter:
Height Folded:
Height Extended:
Width:
Foatplate Width:
Footplate Depth:
90kg
150mm
710mm
1080mm
400mm
355mm
240mm
Make sure the axle is clean from dust and dirt to allow free movement of the wheel.
Place the sleeve (fig.1.2) onto the axle (fig.1.1), as far as it wil go.
Slide the wheel (fig.1.3) onto the axle, and complete by pushing the pin (fig.1.4) through the
hole in the end of the axle.
Repeat the operation for the other side.
•
•
•
•
Customer Helpline 0345 640 0800
3
The wheels of the product have been installed. If you want to remove them, please follow the
following steps.
Page 4

Adjustments
•
•
•
•
Firstly fold down the foot plate ready to accept a load (fig.2)
To extend the handle push the spring loaded locking bar forward (fig.2A) and lift the handle
upwards until it latches in its fully extended position.
To lower the handle, push the spring loaded locking bar forward and push the handle
downwards until it latches in the closed position.
After use close the handle, fold up the foot plate and store in a safe dry place. Only use truck
with handle fully closed or fully extended.
Customer Helpline 0345 640 0800
4
fig.2
Locking
Bar
A
Extending
Handle
Folding
Foot Plate
fig.1
1
2
4
3
 Loading...