


GWD16
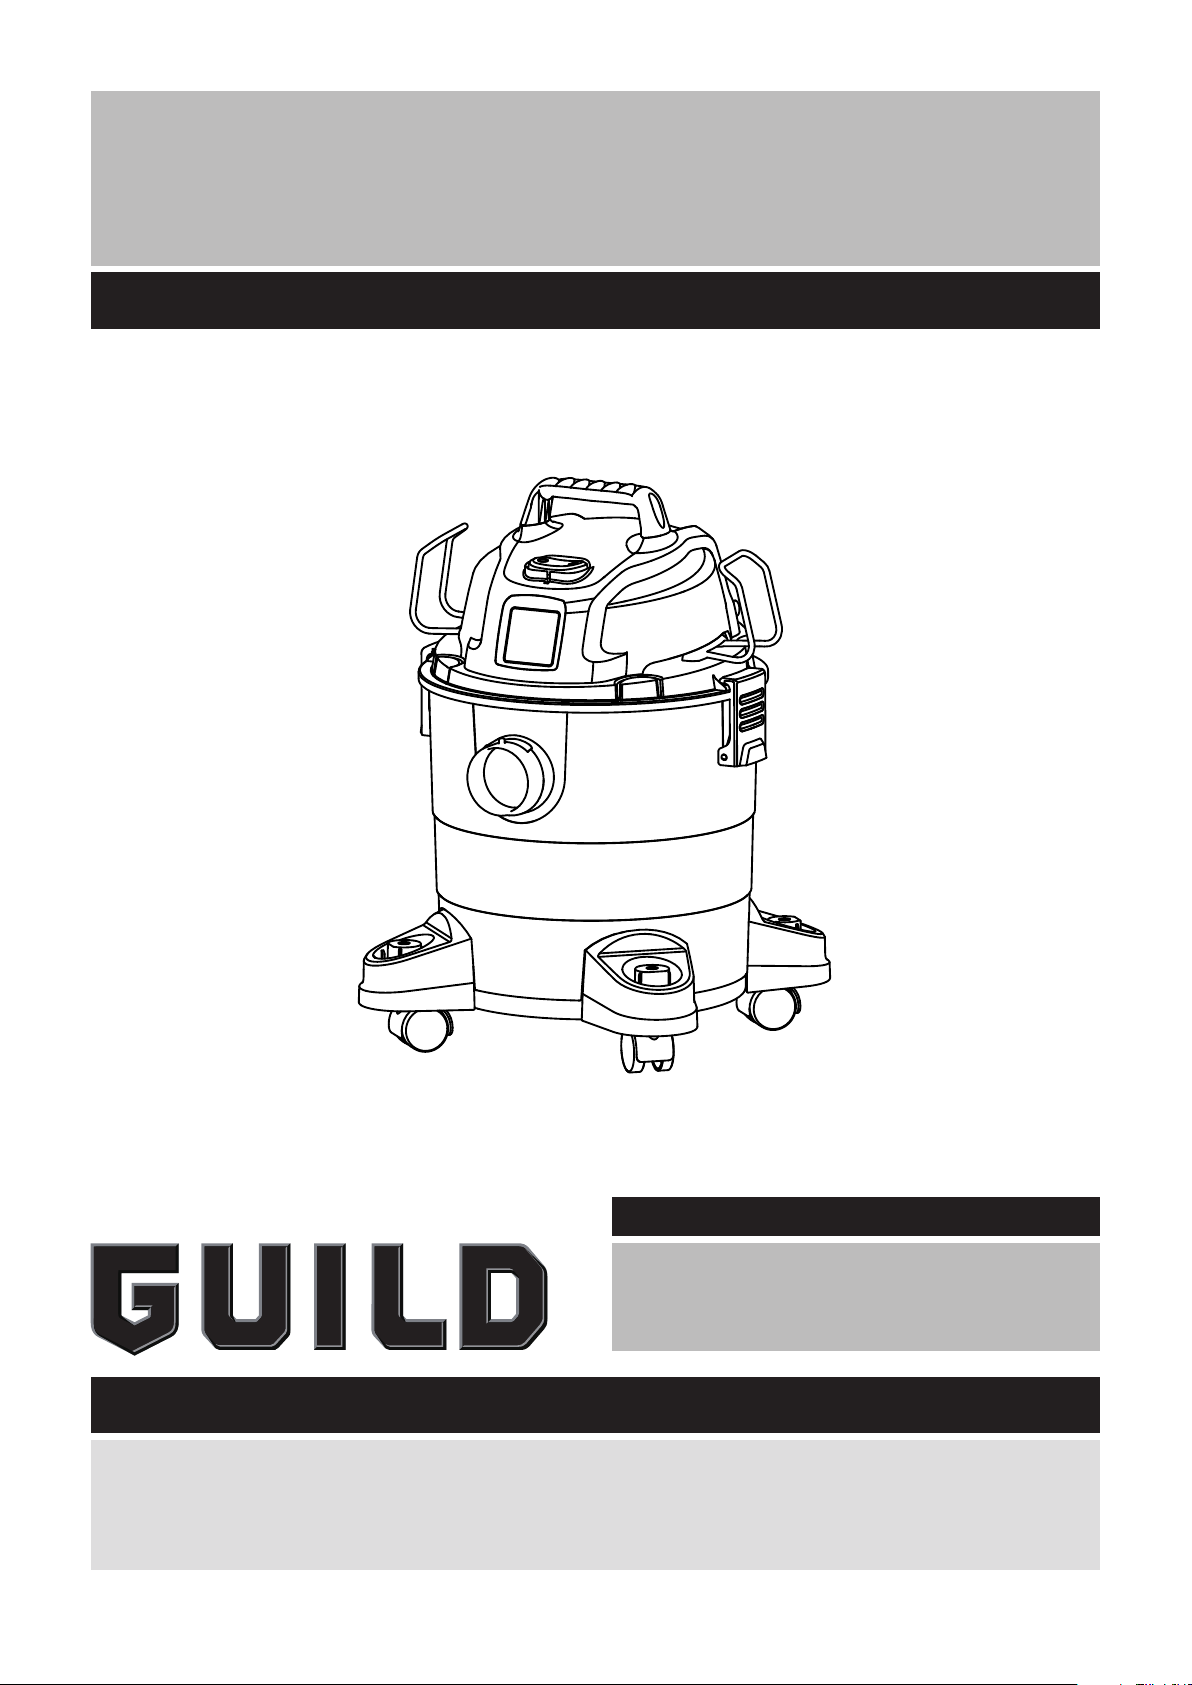
Instruction Manual GWD16
GUILD
16L WET AND DRY VAC
After Sales Support
Important- Please read these instructions fully before operating or maintaining your Guild wet/dry vacuum.
These instructions contain important information that will help you get the best from your Guild
wet/dry vacuum cleaner, ensuring it remains safe to operate.
If you require any assistance or have damaged or missing parts, please call the After Sales Helpline
on 03303 800 661
UK/Ireland 03303 800 661

Table Of Contents
2
After Sales Helpline 03303 800 661
Thank you for purchasing this Guild
®
wet and dry vacuum cleaner. With Guild
®
you are obtaining a
high-quality product that is engineered for optimal performance. This vacuum cleaner is suitable
for use with both liquids and dry materials.
FOR YOUR SAFETY: CAREFULLY READ AND UNDERSTAND ALL INSTRUCTIONS.
Safety Instructions And Warnings ................................................................................................ 3
Unpacking & Checking Carton Contents ........................................................................................ 6
General Assembly .......................................................................................................................... 7
General Operation ........................................................................................................................ 12
Dry & Wet Vacuum Operation ................................................................................................................................. 12
Blower Operation ................................................................................................................................................... 17
Maintenance ................................................................................................................................. 18
Cleaning Reusable Cloth Filter ............................................................................................................................. 19
Cleaning Foam Filter ..............................................................................................................................................20
Troubleshooting ........................................................................................................................... 21
Technical Data .............................................................................................................................. 22
Replacement Parts List ............................................................................................................... 23
Guarantee ..................................................................................................................................... 23
Recycling And Disposal ................................................................................................................ 24
3
After Sales Helpline 03303 800 661
Important- Please read these instructions fully before starting assembly
READ AND UNDERSTAND ALL INSTRUCTIONS BEFORE
USING THIS VACUUM CLEANER.
Read and understand this instruction manual and all
labels on the Wet/Dry Vacuum cleaner before operating.
Safety is a combination of common sense, staying alert
and knowing how your vacuum cleaner works. Use this
Wet/Dry Vacuum only as described in this manual. To
reduce the risk of personal injury or damage to your
Wet/Dry Vacuum, use only recommended accessories.
SAVE THIS MANUAL FOR FUTURE REFERENCE.
When using an electrical appliance, basic precautions
should always be undertaken including the following:
WARNING: TO REDUCE THE RISK OF FIRE, ELECTRIC
SHOCK, OR INJURY:
• Never leave the appliance switched on unattended, if
you leave the work area, switch the appliance off or
unplug it from the power supply.
• Do not vacuum or use this Wet and Dry Vacuum cleaner
near flammable liquids, gases or explosive vapours
like gasoline or other fuels, lighter fluids, cleaners,
oil-based paints, natural gas, hydrogen, or explosive
dusts like coal dust, magnesium dust, grain dust or gun
power. Sparks inside the motor can ignite flammable
vapours or dust.
• This vacuum cleaner is not suitable for the vacuuming
of asbestos or asbestos dust.
• Do not vacuum anything that is burning or smoking,
such as cigarettes, matches, or hot ashes.
• Keep hands and body parts away from the suction ports
on the vacuum cleaner. High powered suction can cause
personal injuries.
• Ensure the hose and connections are always pointed
Safety Instructions And Warnings

4
After Sales Helpline 03303 800 661
Important- Please read these instructions fully before starting assembly
Safety Instructions And Warnings
Warning Symbols
away from the users face, hair, ears and eyes during
operation and never direct the nozzle towards persons
or animals.
• Clear the working area of any items or precessions that
you do not wish to be vacuumed before operation.
• Keep cord away from heated surfaces.
• Do not expose to rain. Store indoors.
• Do not unplug by pulling on the cord. To unplug, grasp
the plug, not the cord.
• Do not use with damaged cord, plug or other parts.
• Do not pull or carry by cord, use cord as handle, close
a door on cord, or pull cord around sharp edges or
corners.
• Do not run vacuum cleaner over cord.
• Do not handle the plug or vacuum cleaner with wet
hands.
• To reduce the risk of health hazards from vapours or
dusts, do not vacuum toxic materials.
• Frequently check that the float valve positioned
underneath the motor is able to move freely.
• Do not use or store near hazardous materials.
• Do not use this vacuum cleaner with a torn filter or
without the filter installed.
• Do not allow to be used as a toy. Close attention is
necessary when used by or near children.
• To reduce the risk of injury from accidental starting,
unplug power cord before changing or cleaning filter.
• Do not leave vacuum cleaner unattended when plugged
in. Unplug from power supply when not in use and
before carrying out maintenance.
• Turn off Wet and Dry Vacuum cleaner before
unplugging.
• Do not cover the ventilation openings. Do not vacuum
with any ventilation openings blocked; keep free of dust,
lint, hair or anything that may reduce air flow.
• To reduce the risk of falls, use extra care when cleaning

5
After Sales Helpline 03303 800 661
Important- Please read these instructions fully before starting assembly
Safety Instructions And Warnings
Warning Symbols
on stairs.
• Keep hair, loose clothing, fingers, all parts of body away
from openings and moving parts.
• If the supply cord is damaged, it must be replaced by
the manufacturer, a qualified service agent or similarly
qualified persons in order to avoid a hazard.
• This appliance is not intended for use by persons
(including children) with reduced physical, sensory
or mental capabilities, or lack of experience and
knowledge, unless they have been given supervision or
instruction concerning use of the appliance by a person
responsible for their safety.
• Children should be supervised to ensure that they do
not play with the appliance.
• For additional protection: It is recommended that
this vacuum cleaner can be used in conjunction with
residual current device (RCD) with a rated residual
current of 30mA or less.
• Always unplug the appliance after use and before
cleaning or changing the filters or accessories.
When using as blower:
• Direct air discharge only at work area.
• Do not use Wet/Dry Vacuum as a sprayer.
• Do not direct air at bystanders.
• Keep children away when blowing.
• Wear safety goggles.
6
After Sales Helpline 03303 800 661
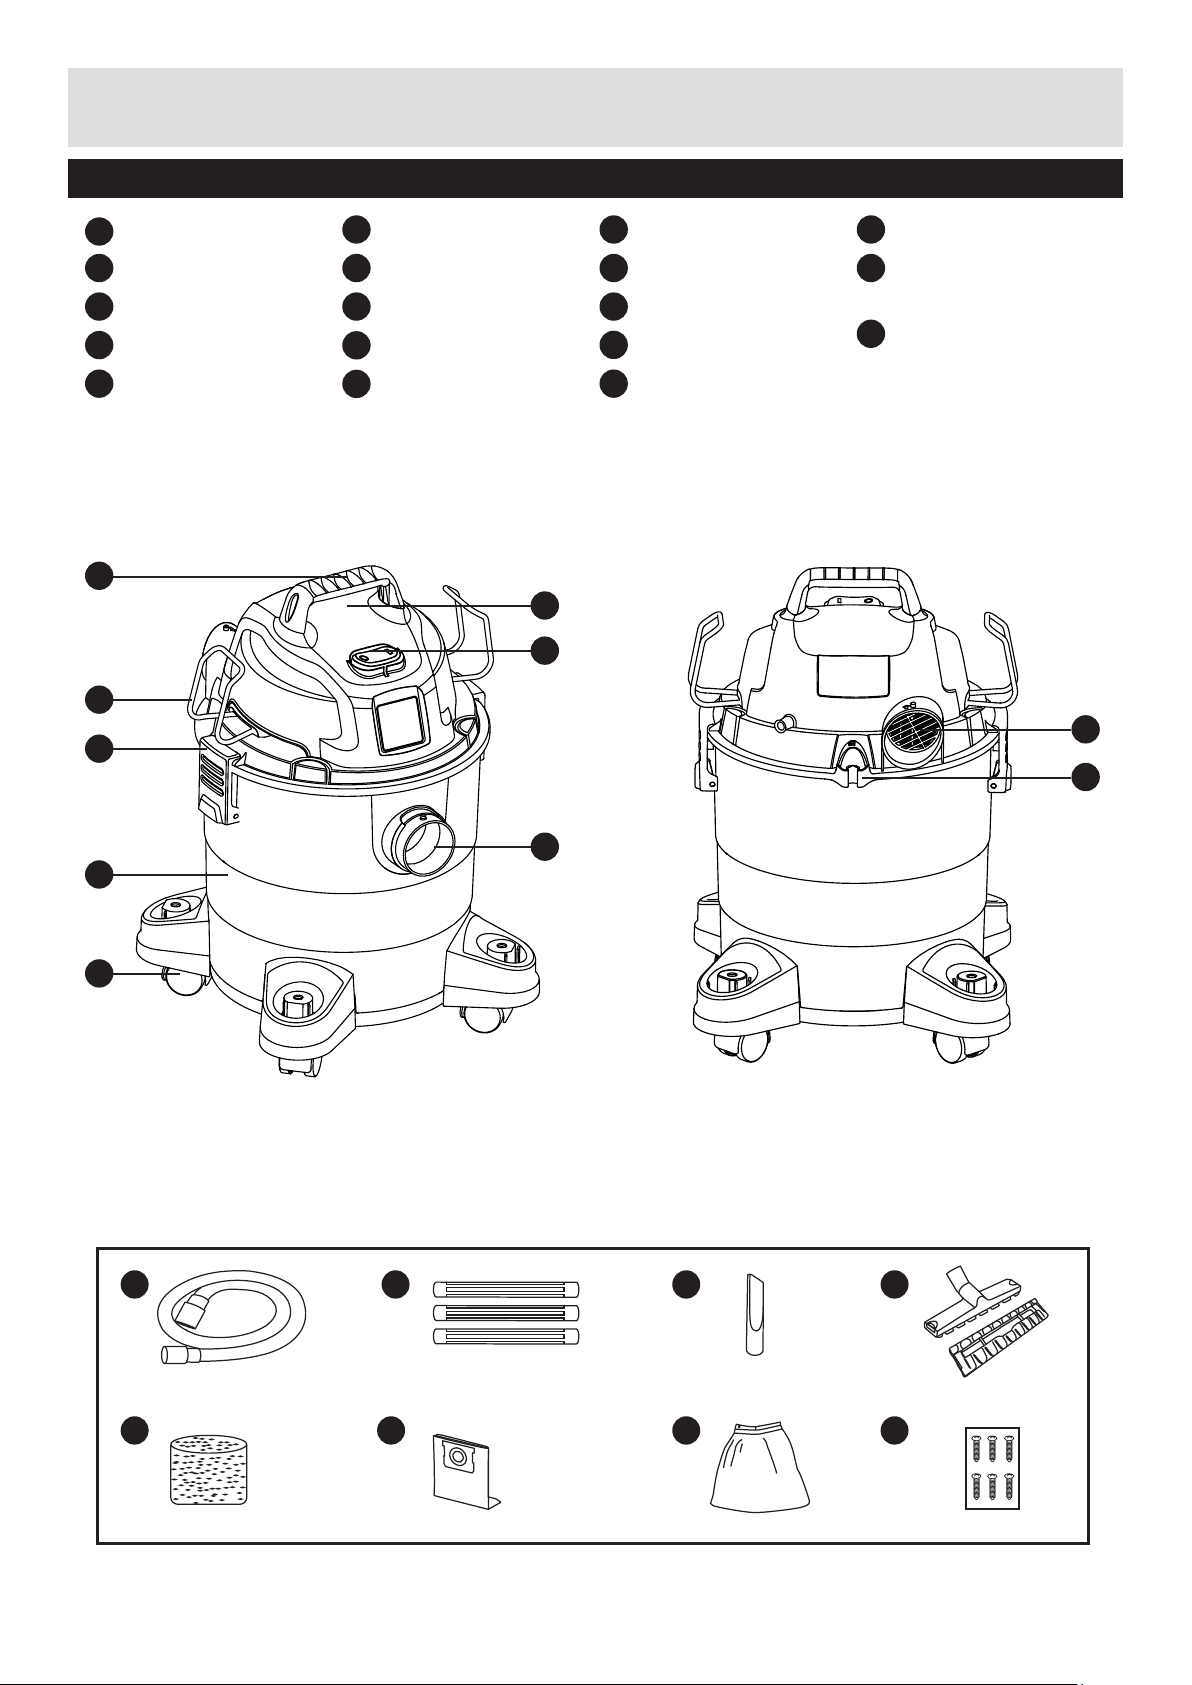
Parts
Unpacking & Checking Carton Contents
1
9
10
3
5
4
6
7
8
2
11
13 14
15 16 17 18
12
1
Handle
2
Power Head
3
On/Off Switch
4
Hose Storage Rack
5
Latch
6
Vacuum Port
7
Container
8
Caster
9
Blowing Port
10
Power Cable
Storage Hook
11
Hose
12
Extension Wands
13
Crevice Tool
14
Floor Nozzle
15
Foam Filter
16
Dust Bag X5
17
Reusable Cloth
Filter (pre-installed)
18
Screws
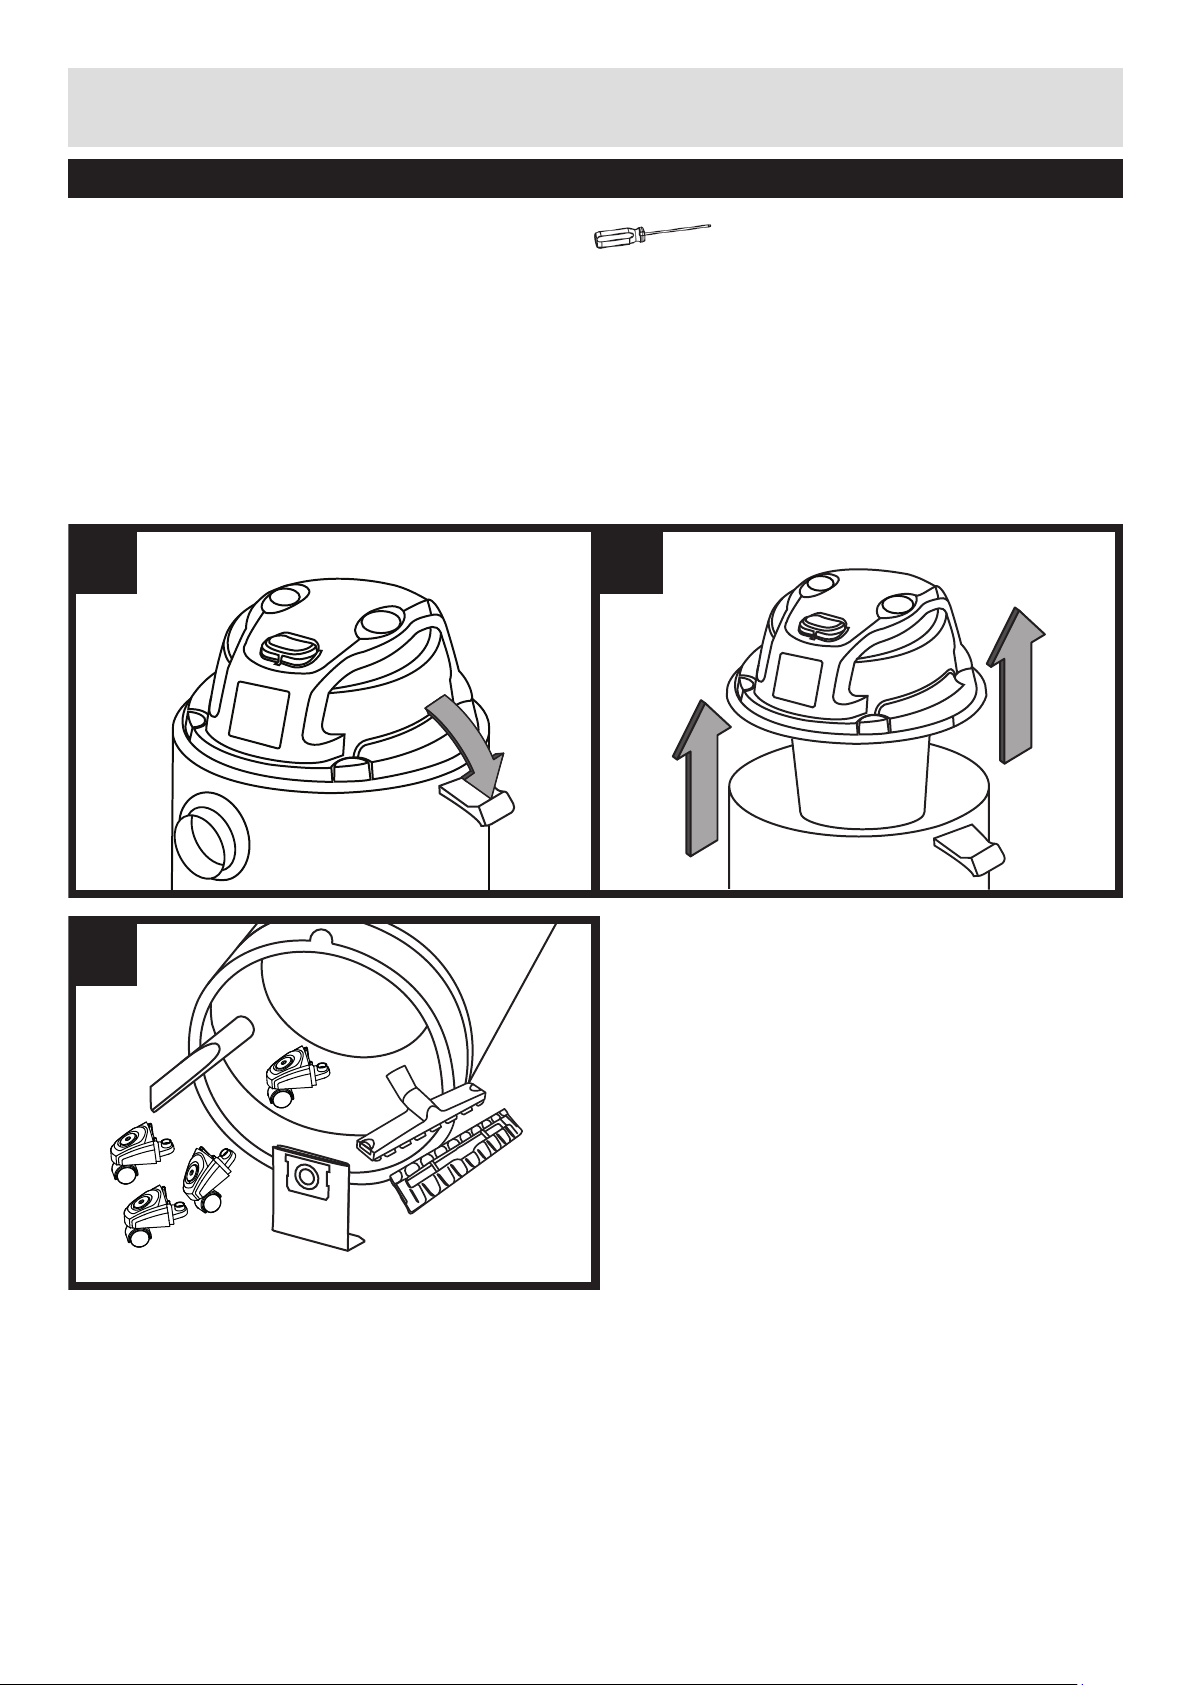
7
After Sales Helpline 03303 800 661
1 2
3
A Phillips head screwdriver is required.
1. Un-clip the latches (Fig. 1).
2. Lift the power head from the container (Fig. 2). Remove the contents from inside the
container (Fig. 3).
3. Make sure you have all the contents that are listed on page 6 .
General Assembly
8
After Sales Helpline 03303 800 661
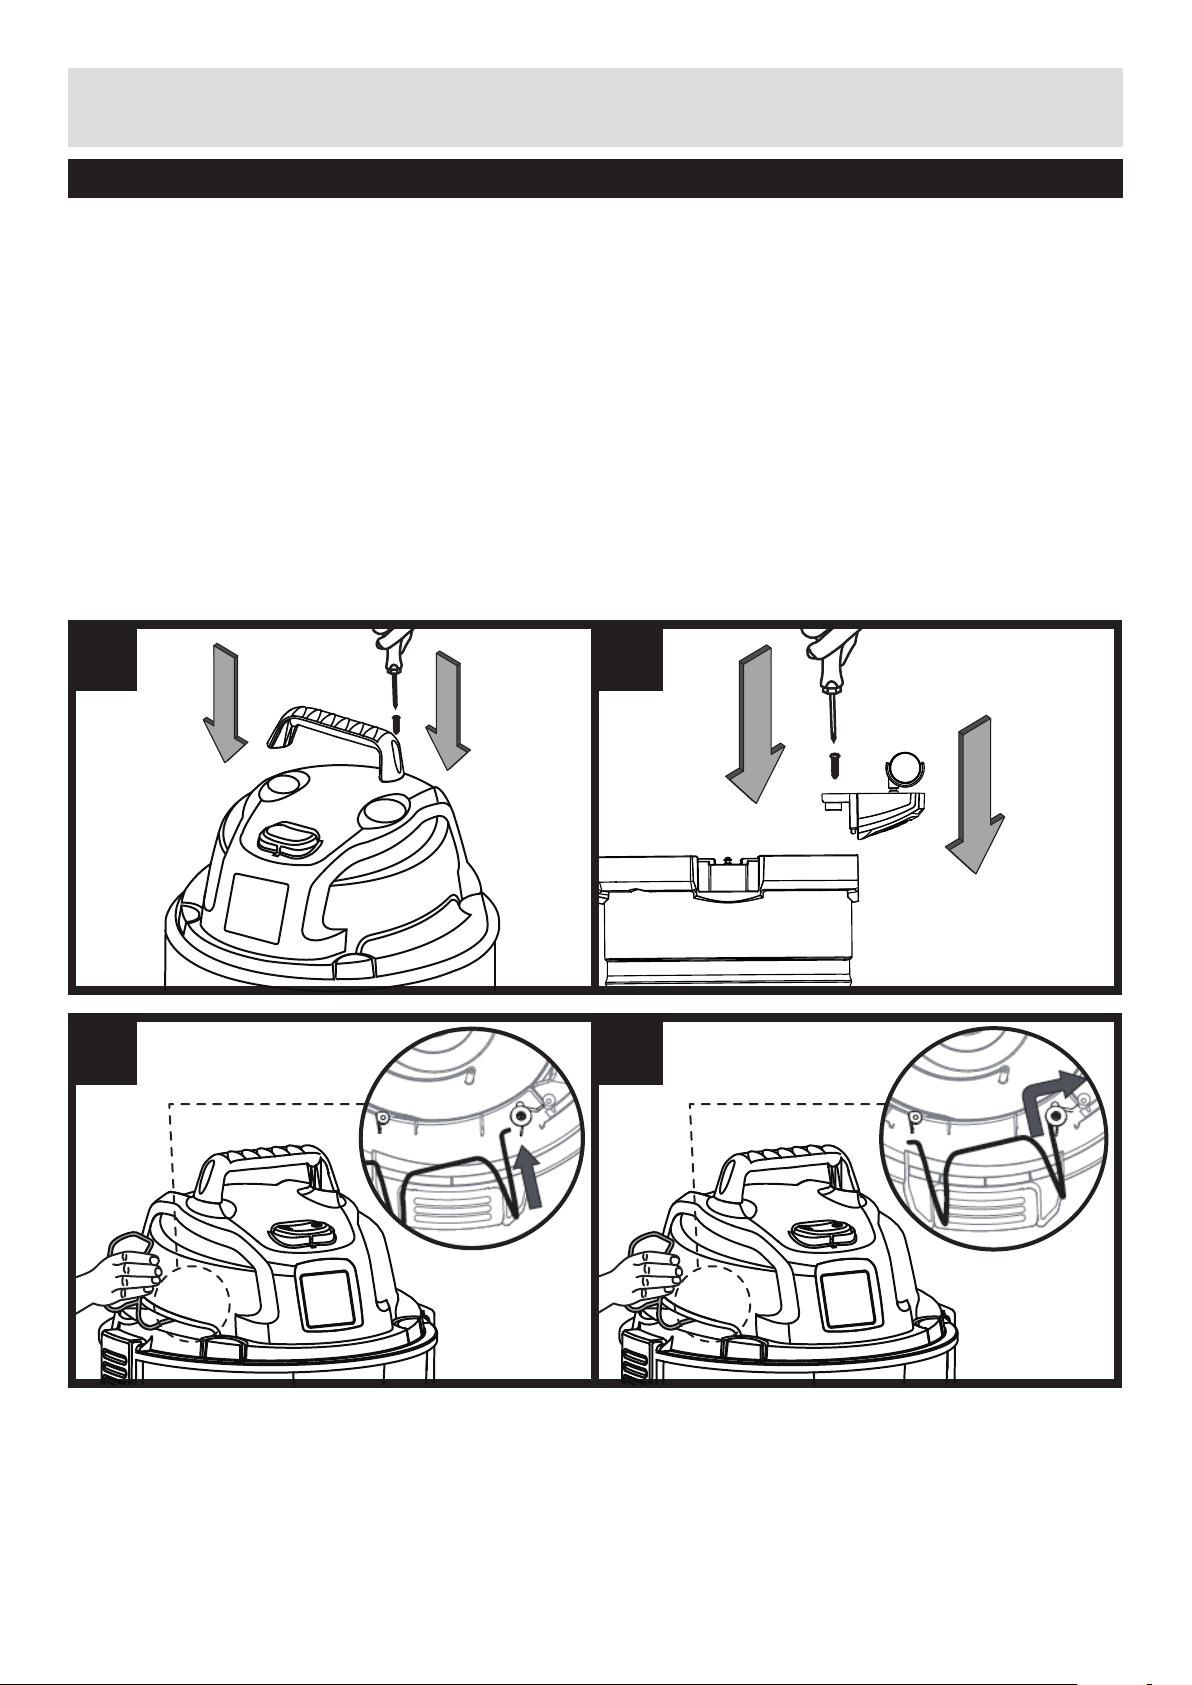
4
6 7
5
4. Insert the carry handle into the slots located on the top of the power head, and secure
with the screws provided. Do not over-tighten the screws (Fig. 4).
5. With the power head removed, turn the container upside down. Insert the feet with
casters into the slots and apply pressure until they click into place, and secure them
with supplied screw. Do not over-tighten the screws (Fig. 5).
6. Position the hose storage rack as illustrated. Insert one side of the rack into the support
hole on the side of the powerhead, making sure it is secured in place. Squeeze in
the other end and insert it into the corresponding channel, making sure it is secured
(Fig. 6 & 7). Duplicate this process for both hose storage racks on either side of the
powerhead.
General Assembly
 Loading...