

Page 1
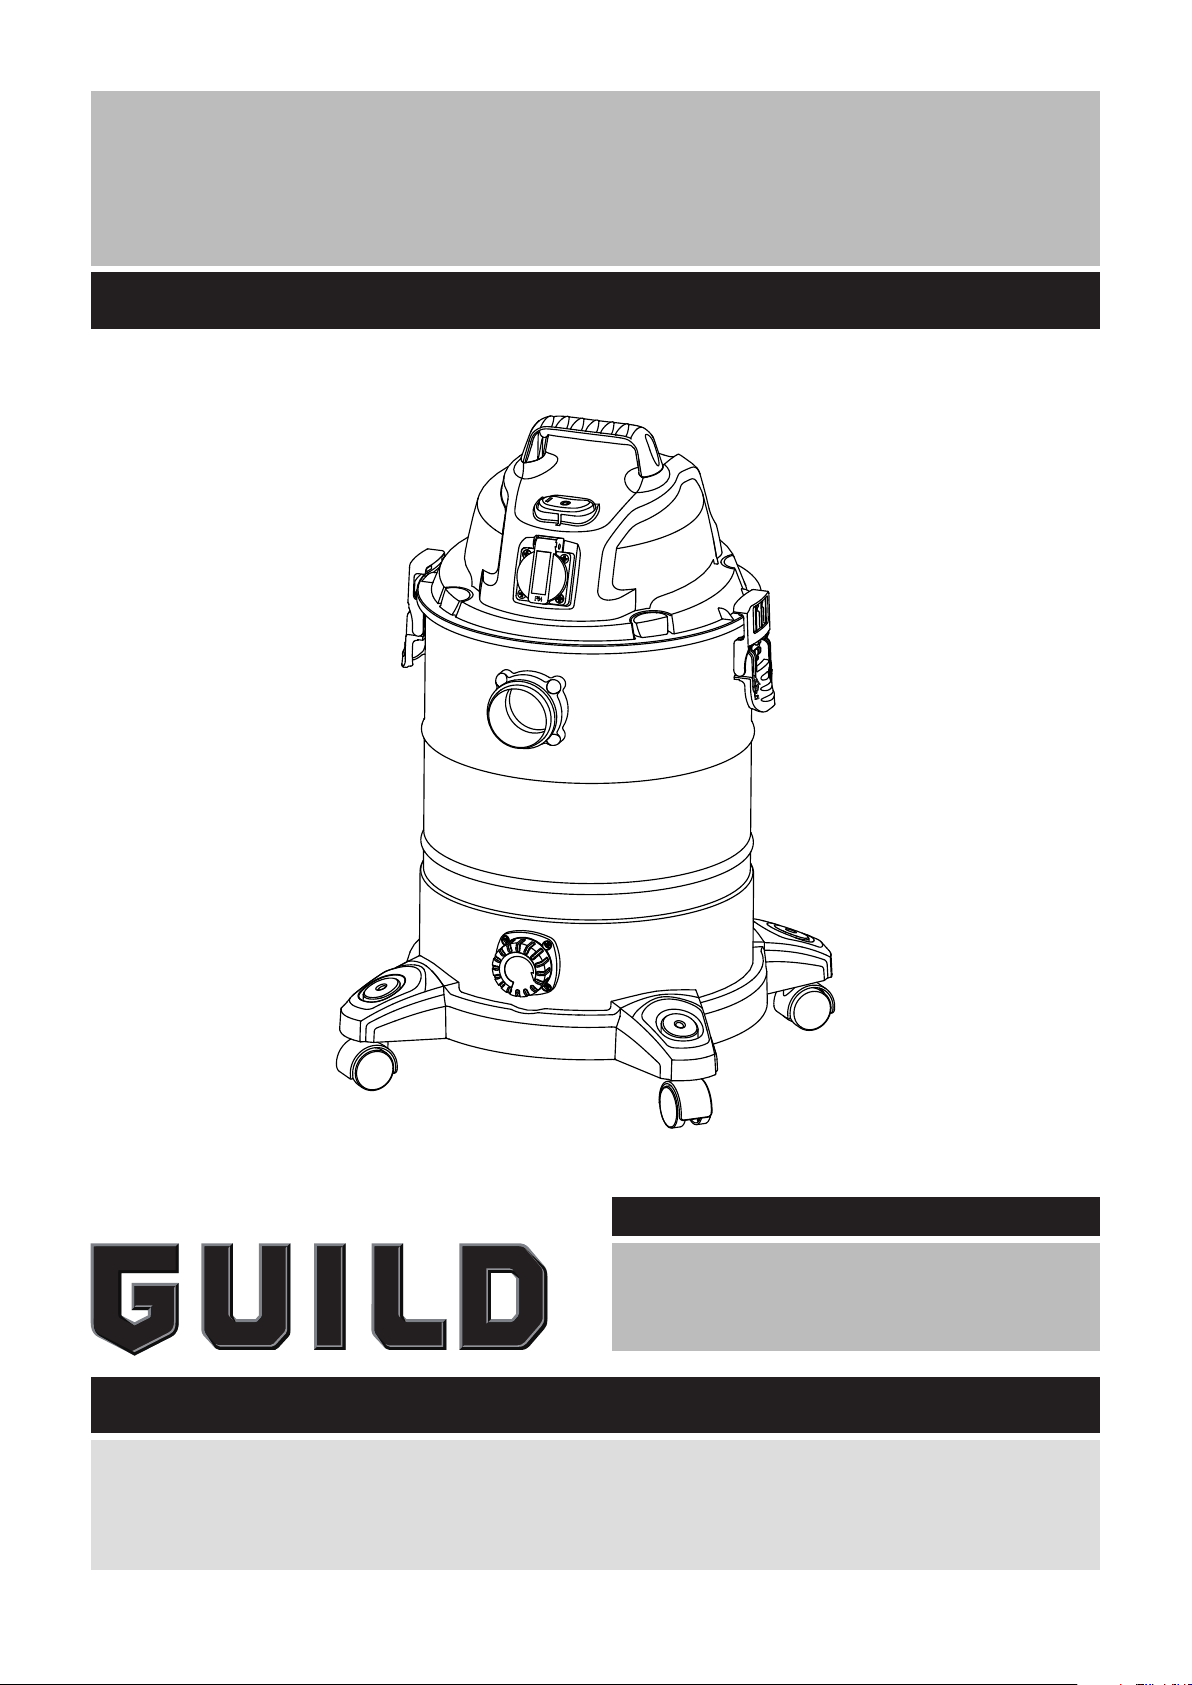
GUILD
30L POWER TAKE OFF WET & DRY VAC
Instruction Manual GWD30P
After Sales Support
UK/Ireland 03303 800 661
Important- Please read these instructions fully before operating or maintaining your Guild wet/dry vacuum.
These instructions contain important information that will help you get the best from your Guild
wet/dry vacuum cleaner, ensuring it remains safe to operate.
If you require any assistance or have damaged or missing parts, please call the After Sales Helpline
on 03303 800 661
Page 2

Table Of Contents
Safety Instructions And Warnings ................................................................................................ 3
Unpacking & Checking Carton Contents ........................................................................................ 6
General Assembly .......................................................................................................................... 7
General Operation ........................................................................................................................ 10
Switching ON/OFF .................................................................................................................................................. 10
Power Tool Take-Off Operation .............................................................................................................................. 10
Dry & Wet Vacuum Operation ................................................................................................................................. 11
Blower Operation ................................................................................................................................................... 15
Maintenance ................................................................................................................................. 16
Cleaning Cartridge Filter ....................................................................................................................................... 16
Cleaning Foam Filter ..............................................................................................................................................17
Troubleshooting ........................................................................................................................... 18
Technical Data .............................................................................................................................. 20
Replacement Parts List ............................................................................................................... 20
Guarantee ..................................................................................................................................... 21
Recycling And Disposal ................................................................................................................ 21
Thank you for purchasing this Guild® wet and dry vacuum cleaner. With Guild® you are obtaining a
high-quality product that is engineered for optimal performance. This vacuum cleaner is suitable
for use with both liquids and dry materials.
FOR YOUR SAFETY: CAREFULLY READ AND UNDERSTAND ALL INSTRUCTIONS.
2
After Sales Helpline 03303 800 661
Page 3
Safety Instructions And Warnings
Important- Please read these instructions fully before starting assembly
READ AND UNDERSTAND ALL INSTRUCTIONS BEFORE
USING THIS VACUUM CLEANER.
Read and understand this instruction manual and all
labels on the Wet/Dry Vacuum cleaner before operating.
Safety is a combination of common sense, staying alert
and knowing how your vacuum cleaner works. Use this
Wet/Dry Vacuum only as described in this manual. To
reduce the risk of personal injury or damage to your Wet/
Dry Vacuum, use only recommended accessories.
SAVE THIS MANUAL FOR FUTURE REFERENCE.
When using an electrical appliance, basic precautions
should always be undertaken including the following:
WARNING: TO REDUCE THE RISK OF FIRE, ELECTRIC
SHOCK, OR INJURY:
• Never leave the appliance switched on unattended, if
you leave the work area, switch the appliance off or
unplug it from the power supply.
• Do not vacuum or use this Wet and Dry Vacuum cleaner
near flammable liquids, gases or explosive vapours
like gasoline or other fuels, lighter fluids, cleaners,
oil-based paints, natural gas, hydrogen, or explosive
dusts like coal dust, magnesium dust, grain dust or gun
power. Sparks inside the motor can ignite flammable
vapours or dust.
• This vacuum cleaner is not suitable for the vacuuming
of asbestos or asbestos dust.
• Do not vacuum anything that is burning or smoking,
such as cigarettes, matches, or hot ashes.
• Keep hands and body parts away from the suction ports
on the vacuum cleaner. High powered suction can cause
personal injuries.
After Sales Helpline 03303 800 661
3
Page 4

Safety Instructions And Warnings
Important- Please read these instructions fully before starting assembly
• Ensure the hose and connections are always pointed
away from the users face, hair, ears and eyes during
operation and never direct the nozzle towards persons
or animals.
• Clear the working area of any items or precessions that
you do not wish to be vacuumed before operation.
• Keep cord away from heated surfaces.
• Do not expose to rain. Store indoors.
• Do not unplug by pulling on the cord. To unplug, grasp
the plug, not the cord.
• Do not use with damaged cord, plug or other parts.
• Do not pull or carry by cord, use cord as handle, close
a door on cord, or pull cord around sharp edges or
corners.
• Do not run vacuum cleaner over cord.
• Do not handle the plug or vacuum cleaner with wet
hands.
• To reduce the risk of health hazards from vapours or
dusts, do not vacuum toxic materials.
• Frequently check that the float valve positioned
underneath the motor is able to move freely.
• Do not use or store near hazardous materials.
• Do not use this vacuum cleaner with a torn filter or
without the filter installed.
• Do not allow to be used as a toy. Close attention is
necessary when used by or near children.
• To reduce the risk of injury from accidental starting,
unplug power cord before changing or cleaning filter.
• Do not leave vacuum cleaner unattended when plugged
in. Unplug from power supply when not in use and
before carrying out maintenance.
• Turn off Wet and Dry Vacuum cleaner before
unplugging.
• Do not cover the ventilation openings. Do not vacuum
with any ventilation openings blocked; keep free of dust,
4
After Sales Helpline 03303 800 661
Page 5

Safety Instructions And Warnings
Important- Please read these instructions fully before starting assembly
lint, hair or anything that may reduce air flow.
• To reduce the risk of falls, use extra care when cleaning
on stairs.
• Keep hair, loose clothing, fingers, all parts of body away
from openings and moving parts.
• If the supply cord is damaged, it must be replaced by
the manufacturer, a qualified service agent or similarly
qualified persons in order to avoid a hazard.
• This appliance is not intended for use by persons
(including children) with reduced physical, sensory
or mental capabilities, or lack of experience and
knowledge, unless they have been given supervision or
instruction concerning use of the appliance by a person
responsible for their safety.
• Children should be supervised to ensure that they do
not play with the appliance.
• For additional protection: It is recommended that
this vacuum cleaner can be used in conjunction with
residual current device (RCD) with a rated residual
current of 30mA or less.
• Always unplug the appliance after use and before
cleaning or changing the filters or accessories.
When using as blower:
• Direct air discharge only at work area.
• Do not use Wet/Dry Vacuum as a sprayer.
• Do not direct air at bystanders.
• Keep children away when blowing.
• Wear safety goggles.
After Sales Helpline 03303 800 661
5
Page 6
Unpacking & Checking Carton Contents
Parts
1
Handle
2
On/Off Switch
3
Power Take-Off
Socket
4
Power Head
5
Accessory Storage
6
Latch
7
Vacuum Port
1
2
3
8
Container
9
Drainage Port
10
Accessory
Storage
11
Caster
12
Blowing Port
13
Power Cord
Storage Hooks
14
Anti-static Chain
15
Hose
16
Extension Wands
17
Crevice Tool
18
Handle with Air
Flow Regulation
19
Floor Nozzle
20
Power Tool Hose
21
Round Dust Brush
22
Cartridge Filter
(pre-installed)
23
Filter Retainer
(pre-installed)
24
Dust Bag x5
25
Foam Filter
26
Screws
Adaptor
4
5
12
6
7
8
10
9
11
15 17 18 19
16
13
14
20 21 22 23 24 25 26
6
After Sales Helpline 03303 800 661
Page 7
General Assembly
A Phillips head screwdriver is required.
1. Un-clip the latches (Fig. 1).
2. Lift the power head from the container (Fig. 2). Remove the contents from inside the
container.
3. Make sure you have all the contents that are listed on page 6 (Fig. 3).
1 2
3
After Sales Helpline 03303 800 661
7
Page 8

General Assembly
4. Insert the carry handle into the slots located on the top of the power head, and secure
with the screws provided. Do not over-tighten the screws (Fig. 4).
5. With the power head removed, turn the container upside down. Insert the feet with
casters into the slots and apply pressure until they click into place, and secure them
with supplied screw. Do not over-tighten the screws (Fig. 5).
6. Your vacuum cleaner comes ready for dry vacuum cleaning with the cartridge filter
pre-installed. If the cartridge filter is not installed, refer to page 13 for filter installation
instructions.
7. Optionally, for improved dust filtration, fully fit the dust bag flange onto the inlet stub,
taking care not to damage the bag (Fig. 6).
4
6
5
Inlet Stub
Vacuum Port
8
After Sales Helpline 03303 800 661
Page 9

General Assembly
8. For wet vacuuming, replace the cartridge filter with the foam filter supplied. Do not use
a dust bag when wet vacuuming. If foam filter is not installed, refer to page 14 for filter
installation instructions.
9. Place the power head back on the container, and secure into place using the 2 side
latches (Fig. 7 & 8). Insert the locking end of the hose into the vacuum port of the
container. Rotate clockwise to securely lock into place (Fig. 9).
10. Choose the desired accessories and/or extension wands and push fit onto the hose
nozzle (Fig. 10).
7 8
109
After Sales Helpline 03303 800 661
9
Page 10

General Operation
SWITCHING ON/OFF
Connect the mains plug to a suitable a power outlet.
Position I switches the vacuum cleaner on for normal operation.
Position II switches the vacuum cleaner onto standby mode for automatic synchronized
start-up when used with an attached power tool (not supplied).
Position O switches off the vacuum cleaner (middle position).
Position Status
I on
O off
II automatic synchronized start-up
POWER TOOL TAKE-OFF OPERATION
WARNING: Always check the maximum wattage compatibility of the power tool take
off socket on the vacuum cleaner against the desired power tool before connecting.
This may render the machine unusable if the maximum wattage is overloaded.
1. Connect the power cable of your power tool to the power take-off socket on the vacuum.
2. If applicable, connect the vacuum suction hose to the dust extractor connector on your
tool with the supplied adaptor. Check that the connections are secure and air-tight.
3. Set the switch on the wet and dry vacuum cleaner to position II, as described in
Switching ON/OFF. The moment you switch on the power tool, the vacuum cleaner will
also switch on.
Once the electrical appliance has been switched off, the vacuum cleaner switches off
following a time lapse (around 5 seconds) to allow the suction tube to be emptied.
MAX POWER: 1400W
10
After Sales Helpline 03303 800 661
Page 11

General Operation
DRY & WET VACUUM OPERATION
WARNING: ENSURE YOU READ, UNDERSTAND AND APPLY SECTION ENTITLED
‘SAFETY INSTRUCTIONS & WARNINGS’.
WARNING: DO NOT VACUUM IN AREAS WITH FLAMMABLE GASES, VAPOURS,
OR EXPLOSIVE DUSTS IN THE AIR. DO NOT VACUUM HAZARDOUS SUBSTANCES.
FLAMMABLE GASES OR VAPOURS INCLUDE BUT ARE NOT LIMITED TO; LIGHTER
FLUID, SOLVENT TYPE CLEANERS, OIL-BASE PAINTS, GASOLINE, ALCOHOL
OR AEROSOL SPRAYS. EXPLOSIVE DUSTS INCLUDE BUT ARE NOT LIMITED TO;
COAL, MAGNESIUM, GRAIN OR GUN POWDER. TO REDUCE THE RISK OF HEALTH
HAZARDS FROM VAPOURS OR DUST, DO NOT VACUUM TOXIC MATERIALS.
1. Verify that the power cord is disconnected from the power socket (Fig. 1).
2. Choose the desired filter for dry or wet vacuuming following the instructions listed below.
3. After installing the filter, place the power head back on the container securing the
latches on either side of the container.
4. Insert the locking end of the hose into the vacuum port and lock in place (Fig. 2).
5. Choose the desired accessories and extension wands and push the attachment(s) onto
the hose nozzle (Fig. 3). The air flow regulation allows you to change vacuum cleaner
suction. For best cleaning results, fully close the air flow regulation (Fig. 4).
1
2
3 4
Decrease Suction
Air Flow Regulation
After Sales Helpline 03303 800 661
Increase Suction
11
Page 12

General Operation
6. Plug the power cord into the power socket (Fig. 5)
7. Turn on the motor by assigning the switch to the “I” ON position (Fig. 6).
8. Once you have completed vacuuming, switch to the “O” OFF position and unplug the
power cord from the power.
5 6
12
After Sales Helpline 03303 800 661
Page 13

General Operation
FOR DRY VACUUMING:
WARNING: BEFORE INSTALLING, REMOVING OR CLEANING THE VACUUM
CLEANER FILTER, ENSURE THAT THE POWER CORD IS REMOVED FROM THE
POWER OUTLET AND THE APPLIANCE IS SWITCHED OFF.
1. In order to prepare your vacuum cleaner for dry vacuuming, verify that the cartridge
filter is securely mounted. If the cartridge filter is not installed, follow the instructions
listed below.
2. Optionally, for improved dust filtration, fully fit the dust bag flange onto the inlet stub,
taking care not to damage the bag. The Vacuum cleaner can we be used with or without
dust bags.
3. Remove the power head and place in an upside down position.
4. Install the cartridge filter over the filter cage with the flat end of the filter towards the
vacuum power head. Carefully push filter until it sits flush against the power head
forming a tight seal (Fig. 7 & 8).
5. Place the filter retainer cap on top of cartridge filter over the raised lip and tighten by
turning the retainer lock clockwise to secure against the internal filter cage (Fig. 9 & 10).
IMPORTANT: Check the filter regularly for optimal performance. An old or blocked filter
will reduce suction performance.
7 8
9 10
Note: Make sure
the raised lip
on the cartridge
filter is
positioned away
from the power
head.
After Sales Helpline 03303 800 661
13
Page 14

General Operation
FOR WET VACUUMING:
WARNING: BEFORE INSTALLING, REMOVING OR CLEANING THE VACUUM
CLEANER FILTER, ENSURE THAT THE POWER CORD IS REMOVED FROM THE
POWER OUTLET AND THE APPLIANCE IS SWITCHED OFF.
1. In order to prepare your vacuum cleaner for wet vacuuming, remove the power head
from the container and place in the upside down position (Fig. 11).
2. Remove the retainer cover and the dry use cartridge filter.
3. Carefully install the supplied foam filter over the internal filter cage, making sure the
whole cage is covered (Fig. 12).
WARNING:
DO NOT USE THE CARTRIDGE FILTER FOR WET VACUUMING
DO NOT USE A DUST COLLECTION BAG FOR WET VACUUMING
IMPORTANT! When vacuuming large quantities of liquids, do not immerse the nozzle
completely in the liquid; leave a gap at the tip of the nozzle opening to allow air inflow. The
machine is fitted with a float valve that stops the suction action when the container reaches
its maximum capacity. You will notice an increase in motor noise. When this happens,
turn off the machine, disconnect from power supply, and drain the liquid into a suitable
receptacle or drain. To continue vacuuming, replace the drainage cap. After wet vacuuming,
turn off the machine and remove the plug from the power supply. Empty the container,
clean and dry inside and outside before storage.
REMEMBER! The foam filter must be removed after wet vacuuming and the reusable
cartridge filter must be reinstalled before dry vacuuming again.
11 12
14
After Sales Helpline 03303 800 661
Page 15

General Operation
BLOWER OPERATION
This wet and dry vacuum cleaner has blow capabilities.
To use the blower feature follow the instructions listed.
WARNING: KEEP BYSTANDERS CLEAR FROM BLOWING DEBRIS.
WARNING: WEAR A DUST MASK IF BLOWING CREATES DUST THAT MIGHT BE
INHALED.
1. Verify that the power cord is disconnected from the power socket.
2. Make sure the container and any collected waste is emptied before using as a blower.
This also includes removal of the dust bag.
3. Remove hose from the vacuum port.
4. Insert the locking end of the hose into the blowing port on the rear side of the power
head and lock into position (Fig. 13).
5. Fit the desired extension wand or nozzle to the vacuum cleaner hose (Fig. 14).
6. Ensure the power switch is turned off and plug into the power supply.
7. Before turning on the wet and dry vacuum cleaner, firmly hold the loose end of the
hose. Turn on the motor on by turning the switch to the ‘I’ ON position.
13 14
After Sales Helpline 03303 800 661
15
Page 16

Maintenance
WARNING: REMOVE THE POWERCORD FROM THE POWER SUPPLY BEFORE
CARRYING OUT ANY MAINTENANCE.
1. Verify that the power cord is disconnected from the power socket (Fig. 1).
2. Disconnect the hose from the vacuum cleaner, turning counter clockwise in direction (Fig. 2).
3. Un-clip the latches and remove the power head from the container.
4. Clear all dirt and debris from the container and hose (Fig. 3).
5. Check the hose, attachments, and power cord to verify that they have not been damaged
or any debris is trapped and blocking airflow.
CLEANING CARTRIDGE FILTER
1. Unlock and remove the filter retainer cap by tuning the retainer handle counter clockwise.
2. Carefully hold and pull the cartridge filter up to remove (Fig. 4).
3. Clean the cartridge filter by gently tapping or brushing off dirt. Cleaning should not be
done indoors or in living areas. For optimal performance it is recommended to replace
the old filter with a new filter regularly.
4. Wet filters should be removed and allowed to dry before reinstalling onto the filter cage.
Replacement filters and dust bags can be purchased from the after sales helpline.
1 2
3 4
16
After Sales Helpline 03303 800 661
Page 17

Maintenance
CLEANING FOAM FILTER
1. With the removed power head in an upside down position, carefully remove the foam
filter by pulling up and over the internal filter cage (Fig. 5).
2. Use a mild soap and water solution to wash foam the filter and rinse with clean water
(Fig. 6).
3. Allow filter to air dry before installing and using again.
4. Install cleaned or new filter into place as instructed above on page 14.
Replacement filters and dust bags can be purchased from the after sales helpline.
5 6
After Sales Helpline 03303 800 661
17
Page 18

Troubleshooting
WARNING: ONLY PERFORM THE STEPS DESCRIBED WITHIN THESE
INSTRUCTIONS! ALL FURTHER INSPECTION, MAINTENANCE AND REPAIR WORK
MUST BE PERFORMED BY A QUALIFIED SPECIALIST.
WARNING: TO REDUCE THE RISK OF ELECTRIC SHOCK-UNPLUG BEFORE
TROUBLESHOOTING.
CLEANING PERFORMANCE
All vacuum cleaners are very simple and reliable machines, a motor with a fan attached to
move air through the machine.
Guild vacuum cleaners are robust and tested for endurance. If your motor is operating,
then the most likely cause for a loss in suction is a blockage or an opening somewhere in
the appliance.
For a vacuum cleaner to do its job correctly, it needs a working filter (in good condition) in
position to help capture dust particles. The optional dust bags help to increase the level
of filtration and dust collection. As filters and dust bags become blocked over time, you
should expect a drop in performance. This is normal and a good result, it shows that the
vacuum cleaner is effectively pulling up and trapping the dust. In short, it’s doing what it’s
supposed to.
To maintain a high cleaning performance from your machine, it is important to replace or
clean cartridge filters as necessary. This can be done with a soft paint brush, being careful
not to damage the cartridge filter. If you also use dust bags, you will need to replace these
when the bag is full or the performance drops.
A performance drop with clean filters can only be caused by a blockage in the tools or the
hose. Check all accessories for blockages, and ensure the joints between the vacuum and
the end of the nozzle are fitted correctly.
18
After Sales Helpline 03303 800 661
Page 19

Troubleshooting
PROBLEM POSSIBLE CAUSE SOLUTION
The appliance does not
work.
Dust is escaping from the
motor cover.
Power tool take-off socket
does not work.
No power.
Functional fault in the power
cord, switch, or motor.
The cartridge filter is
missing or damaged.
Misuse the cartridge filter
when wet vacuuming,
causing the damage of
cartridge filter.
Misuse the foam filter when
dry vacuuming.
Power tool wattage exceeds
max power 1400W.
Incorrect operating mode
selected.
Check the power supply and
fuse.
Have the damaged part
checked by qualified
personnel or contact the after
sales helpline.
Put in a cartridge filter or
replace it.
Replace the cartridge filter
with the foam filter.
Replace the foam filter with
the cartridge filter.
Check the wattage is
compatible with the power
tool take of socket.
Ensure the switch is moved
into position II.
Low suction power and high
operating noise / vibrations.
Dust bag is full. Replace the dust bag.
Suction nozzle, hose, or
tank inlet is blocked.
Cartridge filter is blocked.
Float valve has closed.
Check the suction nozzle,
hose, and tank inlet for
obstructions.
Remove the cartridge filter
and clean.
Empty the container of any
liquid waste and ensure
the float value located
underneath the filter is able
to move freely.
After Sales Helpline 03303 800 661
19
Page 20

Technical Data
Model Number GWD30P
Motor 220-240V~50Hz
Power input 1500W
Max. Power consumption of the power tool
take-off socket outlet
Tank volume 30L
Filter - Dry Cartridge filter, Dust bag (optional)
Filter - Wet Foam filter
Net weight 8.3kg
1400W
Replacement Parts List
Parts List Accessories
551046122 Hose
551051116 Crevice Tool
551032132 Power Tool Hose Adaptor
551023139 Round Dust Brush
551032134 Floor Nozzle
551032133 Handle with Air Flow Regulation
951446 Extension Wands
950133 Cartridge Filter
950128X2 Dust Bag
950086 Foam Filter
20
After Sales Helpline 03303 800 661
Page 21

Guarantee
This product is selected for DOMESTIC USE ONLY and not for business use.
This product is guaranteed against manufacturing defects for a period of 24 months. This
does not cover the product where the fault is due to misuse, abuse, use in contravention of
the instructions, or where the product has been the subject of unauthorised modifications
or alterations, or has been the subject of commercial use. In the event of a problem with
the product within the guarantee period please contact the after sales helpline. Your
statutory rights remain unaffected.
Recycling And Disposal
Recycle unwanted materials instead of disposing of them as waste. All tools, hoses and
packaging should be sorted, taken to the local recycling centre and disposed of in an
environmentally safe way.
Recycle rather than dispose of unwanted material in landfill whenever possible. The
machine must be delivered in rigid packaging to avoid damage during transportation. The
packaging and the machine itself are manufactured from recyclable materials and should
be disposed of accordingly.
Only dispose of electrical/battery terms in separate collection schemes, which cater for the
recovery and recycling of materials contained within. Your cooperation is vital to ensure the
success of these schemes and for the protection of the environment.
This marking indicates that this product should not be disposed with other household
wastes throughout the EU. To prevent possible harm to the environment or human
health from uncontrolled waste disposal, recycle it responsibly to promote the
sustainable reuse of material resources.
After Sales Helpline 03303 800 661
21
 Loading...