

Page 1
GUILD
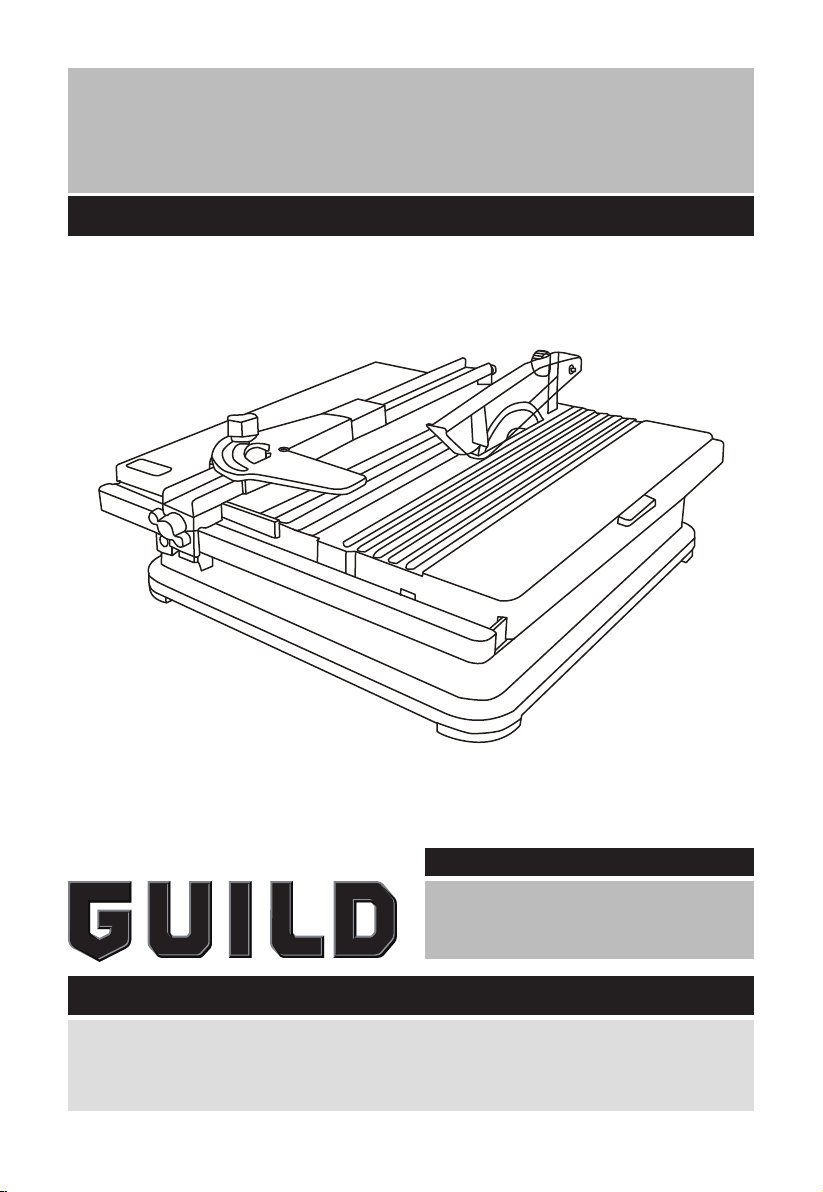
Tile cutter
Instruction Manual
BTC110G
After Sales Support
UK/Ireland 0333 3201989
Help@guildpowertools.co.uk
Important - Please read these instructions fully before operating or maintaining your Guild Tile cutter
These instructions contain important information that will help you get the best from your Guild
Tile cutter, ensuring it remains safe to operate.
If you need help or have damaged or missing parts, call the Customer Helpline on 0333 3201989
Page 2

Contents
Safety Information ����������������������������������������������������������������������������������������������������3
In The Box ����������������������������������������������������������������������������������������������������������������� 7
Accessories ��������������������������������������������������������������������������������������������������������������7
Operating Instructions ���������������������������������������������������������������������������������������������� 8
Repair ��������������������������������������������������������������������������������������������������������������������� 13
Storage ������������������������������������������������������������������������������������������������������������������� 16
Transportation ��������������������������������������������������������������������������������������������������������16
Trouble Shooting ����������������������������������������������������������������������������������������������������17
Technical Data �������������������������������������������������������������������������������������������������������� 18
Environmental Protection ���������������������������������������������������������������������������������������18
Guarantee ��������������������������������������������������������������������������������������������������������������� 19
Declaration of Conformity ���������������������������������������������������������������������������������������20
Plug Replacement (Uk & Ireland Only) �������������������������������������������������������������������21
2
Customer Helpline 0333 3201989
Page 3
Safety Information
Important - Please read these instructions fully before starting assembly
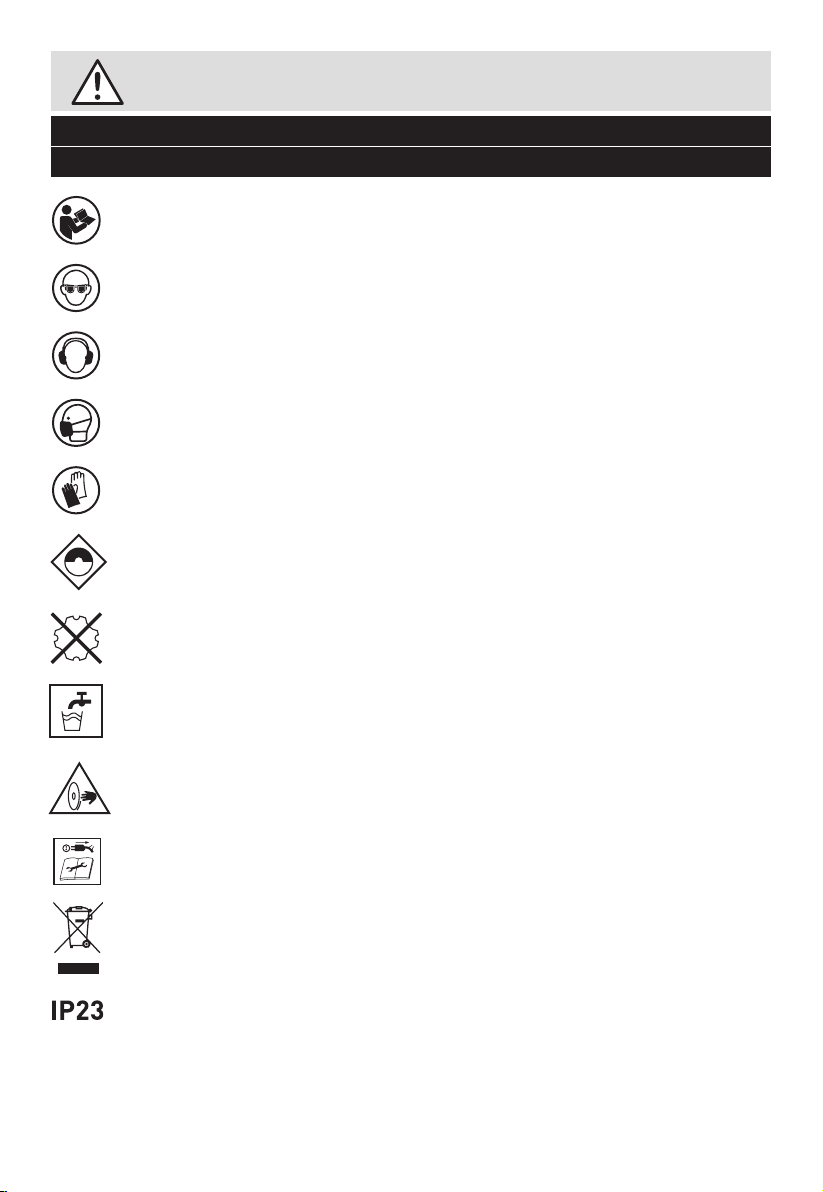
Warning Symbols
To reduce the risk of injury, Please read the instruction manual
Wear eye protection
Wear ear protection
Wear dust mask
Wear protective gloves
Use correct size of blades
Do not use segmented blade
Wet cut only
Caution,risk of cutting
Remove plug from mains before maintenance or if cord is damaged.
Waste electrical products must not be disposed of with household waste. Please recycle
where facilities exist. Check with your local authorities or retailer for recycling advice.
Degree of protection provided by enclosure.
Warning! Denotes risk of personal injury, loss of life, or damage to the tool in case of nonobservance
Customer Helpline 0333 3201989
3
Page 4

Safety Information
Important - Please read these instructions fully before starting assembly
Safety Instructions
WARNING! When using electric tools basic safety precautions should always be
followed to reduce the risk of fire, electric shock and personal injury including the
following�
Read all these instructions before attempting to operate this product and save these
instructions”�
Maintenance and Servicing
Remove the plug before carrying out any adjustment, servicing or maintenance
Safe operation
1. Keep work area clear
- Cluttered areas and benches invite injuries.
2. Consider work area environment
- Do not expose tools to rain.
- Do not use tools in damp or wet locations.
- Keep work area well lit.
- Do not use tools in the presence of flammable liquids or gases.
3. Guard against electric shock
- Avoid body contact with earthed or grounded surfaces {e.g. pipes, radiators, ranges,
refrigerators).
4. Keep other persons away
- Do not let persons, especially children, not involved in the work touch the tool or the
extension cord and keep them away from the work area
5. Store idle tools
- When not in use, tools should be stored in a dry locked-up place, out of reach of
children.
6. Do not force the tool
- It will do the job better and safer at the rate for which it was intended.
7. Use the right tool
- Do not force small tools to do the job of a heavy duty tool.
- Do not use tools for purposes not intended; for example do not use circular saws to cut
tree limbs or logs.
8. Dress properly
- Do not wear loose clothing or jewellery, they can be caught in moving parts.
- Non-skid footwear is recommended when working outdoors.
- Wear protective hair covering to contain long hair.
9. Use protective equipment
- Use safety glasses.
- Use face or dust mask if working operations create dust.
10. Connect dust extraction equipment
- If the tool is provided for the connection of dust extraction and collecting equipment,
ensure these are connected and properly used.
11. Do not abuse the cord
- Never yank the cord to disconnect it from the socket Keep the cord away from heat, oil
4
Customer Helpline 0333 3201989
Original Instructions
Page 5

Safety Information
Important - Please read these instructions fully before starting assembly
Safety Instructions
and sharp edges.
12. Secure work
- Where possible use damps or a vice to hold the work. It is safer than using your hand.
13. Do not overreach
- Keep proper footing and balance at all times.
14. Maintain tools with care
- Keep cutting tools sharp and clean for better and safer performance.
- Follow instruction for lubricating and changing accessories.
- Inspect tool cords periodically and if damaged have them repaired by an authorized
service facility.
- Inspect extension cords periodically and replace if damaged.
- Keep handles dry, clean and free from oil and grease.
15. Disconnect tools
- When not in use, before servicing and when changing accessories such as blades, bits
and cutters, disconnect tools from the power supply.
16. Remove adjusting keys and wrenches
- Form the habit of checking to see that keys and adjusting wrenches are removed from
the tool before turning it on.
17. Avoid unintentional starting
- Ensure switch is in “off” position when plugging in
18. Use outdoor extension leads
- When the tool is used outdoors, use only extension cords intended for outdoor use and
so marked.
19. Stay alert
- Watch what you are doing, use common sense and do not operate the tool when you are
tired.
20. Check damaged parts
- Before further use of tool, it should be carefully checked to determine that it will
operate properly and perform its intended function.
- Check for alignment of moving parts, binding of moving parts, breakage of parts,
mounting and any other conditions that may affect its operation.
- A guard or other part that is damaged should be properly repaired or replaced by an
authorized service centre unless otherwise indicated in this instruction manual.
- Have defective switches replaced by an authorized service centre.
- Do not use the tool if the switch does not turn it on and off.
21. Warning
- The use of any accessory or attachment other than one recommended in this instruction
manual may present a risk of personal injury.
22. Have your tool repaired by a qualified person
- This electric tool complies with the relevant safety rules. Repairs should only be
carried out by qualified persons using original spare parts, otherwise this may result in
considerable danger to the user.
23. If the replacement of the supply cord is necessary, this has to be done by the
manufacturer or his agent in order to avoid a safety hazard.
24. For tools intended to be connected to a water supply:
Customer Helpline 0333 3201989
5
Page 6

Safety Information
Important - Please read these instructions fully before starting assembly
Safety Instructions
– for tools provided with an isolating transformer: Never use the tool without the
transformer delivered with the tool or of the type as specified in these instructions,
– Replacement of the plug or the supply cord shall always be carried out by the
manufacturer of the tool or his service organisation,
– Keep water clear off the electrical parts of the tool and away from persons in the
working area.
Additional safety rules for Tile Cutter
1� Remove the mains plug from socket before carrying out any adjustment servicing�
Important additional safety notes for your Electric Tile Cutter�
2� Always wear both eye and ear protection when using the machine�
3� Ensure that the directional arrow marked on the blade corresponds with the rotational
direction of the motor�
4� Always keep the blade securing arbor and collars clean�
5� With the machine disconnected from the power supply, rotate the blade by hand to
ensure it is free from obstruction�
6� Ensure that the blade-securing bolt is securely tightened with a suitable wrench�
7� Never try to cut freehand� Always ensure that the tile to be cut is pressed firmly
against the parallel guide�
8� Ensure that the work piece to be cut off has sufficient room to move sideways� Failure
to do so may result in the off cut binding against the blade�
9� Never cut more than one tile at a time�
10� Never cut pieces too small to be held securely against the side fence without leaving
enough space for the hand to be a safe distance from the blade�
11� Ensure that the table and surrounding area are clear with the exception of the tile to
be cut�
12� Never fit substandard blades to the machine� Only fit correctly sized diamond blades�
13� Before cutting a tile piece let the saw blade run freely for a few seconds� If it makes an
unfamiliar sound or vibrate excessively switch it off immediately and disconnect from
the power supply� Investigate the cause or consult a qualified person for advice�
14� Let the blade reach full speed before commencing the cut�
15� Do not force the blade to cut the tile�
16� Let the blade come to a complete stop before removing any jammed or off cut material
from around the blade area�
17� Always use the appropriate safety equipment that is required for the product� e�g�
Goggles / Safety Spectacles, Ear defenders (essential with tools with a noise rating of
over 85 dB(A)), Gloves and face masks� In all cases ensure that the safety equipment is
in good condition�
6
Customer Helpline 0333 3201989
Page 7
In The Box
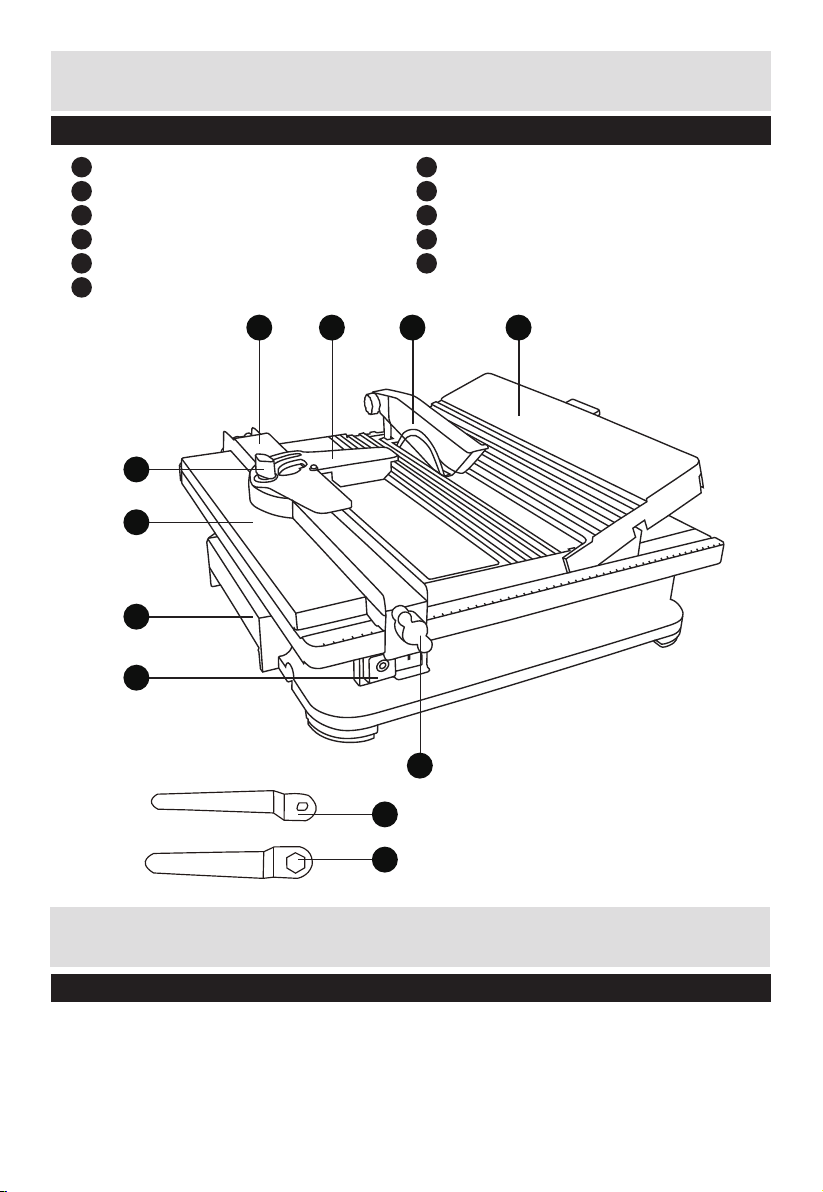
Parts
1
Parallel cutting guide
2
Angle cutting guide
3 9
Wheel guard
4
Water reservoir lid
5
On/Off switch
6
Carry handle
1 2 3 4
9
7
6
5
7
Extension table
Fixing knob of Parallel cutting guide
8
Fixing knob of Angle cutting guide
Small spanner for locking nut
10
Big spanner for outer flange
11
8
10
11
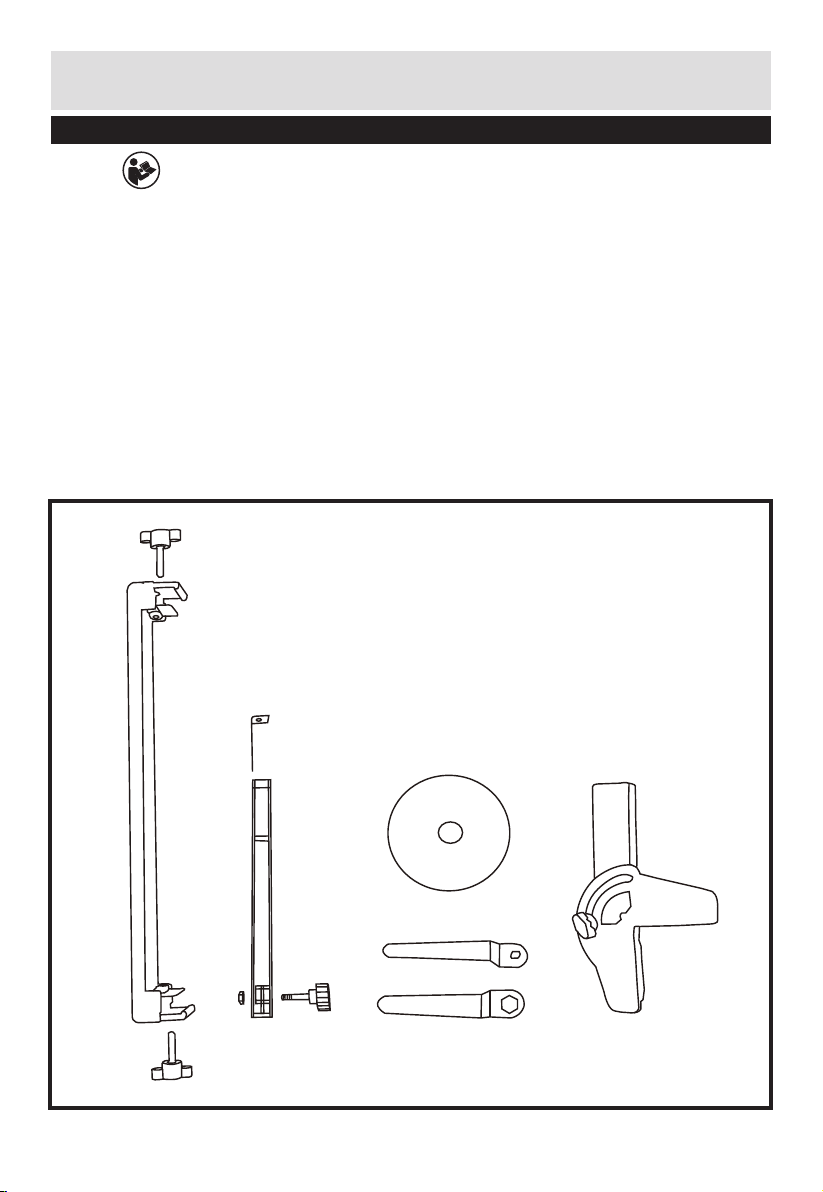
Accessories
Diamond blade 1pc
Parallel guide 1pc
Spanner 2pc
45° vertical cutting guide 1pc
Customer Helpline 0333 3201989
7
Page 8
Operating Instructions
NOTE: Before using the tool, read the instruction book carefully.
Intended Use
This product is intended for Cutting tile or marble, and other similar materials
This product is intended for private domestic use only, not for any commercial trade use. It
must not be used for any purposes other than those described.
UNPACK
Unpack all parts and lay them on a flat, stable surface.
● Remove all packing materials and shipping devices if applicable.
● Make sure the delivery contents are complete and free of any damage. If you find that
parts are missing or show damage do not
use the product but contact your dealer. Using an incomplete or damaged product
represents a hazard to people and property.
● Ensure that you have all the accessories and tools needed for assembly and operation.
This also includes proper personal protective equipment.
8
Customer Helpline 0333 3201989
Page 9

Operating Instructions
Before you start
1. REMOVE THE WATER RESERVOIR LID (SEE FIG A1,A2,A3)
1) Lift the water reservoir lid (4) up firstly and lift the right side of the water reservoir lid (4),
then move to left for removing it.
A1 A2
A3
2� INSTALL THE DIAMOND BLADE (SEE FIG B1- B8)
Loosen the screw (b) which is holding the splash guard to remove the splash guard (a).
Move the splash guard (a) to the left side and take it out.
Remove the locking nut(c) and the outer flange (d).
Fit the diamond blade (e) onto the inner flange (Note: please following the rotation direction
on the diamond blade). The direction arrows on the diamond blade must be in the same
direction as that marked on the wheel guard, or as that indicated around the spindle�
Ensure that the diamond blade (e) is fully located and centered by used small spanner for
locking nut (10) and big spanner for outer flange (11) to tighten it. Fit the big spanner for
outer flange (11) to outer flange (d) firstly and fit the small spanner for locking nut (10) to
the locking nut next. Then keep the small spanner for locking nut in the same place without
moving. lift the big spanner for outer flange (11) up to tighten.
NOTE: The outer flange (d) ensuring that the flat side of the flange is against the diamond
blade;
Push the splash guard back and tight the screw.
Customer Helpline 0333 3201989
9
Page 10

Operating Instructions
Before you start
B1 B2
b
a
B3 B4
B5 B6
e
e
the rotation direction
on the wheel guard
the rotation direction
on the diamond wheel
d
c
10
11
10
Customer Helpline 0333 3201989
Page 11

Operating Instructions
a
b
d
c
10
e
the rotation direction
on the wheel guard
the rotation direction
on the diamond wheel
e
11
B1 B2
B3 B4
B5 B6
Before you start
B7 B8
INSTALL THE ACCESSORIES (SEE FIG C1-C4)
Loosen the supplied screw (f) on the surface.
Put the fixing bracket (g) of wheel guard on the surface and using one ruler (not supplied) to
keep the diamond blade and the fixing bracket (g) of wheel guard in the same level.
Tighten the fixing bracket (g) of wheel guard to the surface using the supplied screw.
Secure the wheel guard (3) to the fixing bracket (g) using the bolt (h) and lock nut (m).
C1 C2
f
C3 C4
g
7
8
9
10
12
13
11
15
14
16 17 18 19 20
21 22 23 24 25
h m
Customer Helpline 0333 3201989
11
Page 12

Operating Instructions
Before you start
INSTALL THE PARALLEL CUTTING GUIDE AND ANGLE CUTTING GUIDE (SEE FIG D1-D6)
Tighten the two fixing knobs of Parallel cutting guide (8) to both sides of the Parallel cutting
guide (1) (Note: please tighten the fixing knobs with the gasket (n) of the Parallel cutting
guide, ensure that the fixing knobs not over the gasket ).
Locate the parallel cutting guide (1) to seat at both sides of the cutting table.
Move the parallel cutting guide (1) to the desire place, then tighten the two fixing knob of
parallel cutting guide (8).
Align the angle cutting guide (2) to the parallel cutting guide (1) and move the direction of the
angle cutting guide (2) to the desire place, then tigthen the fixing knob of Angle cutting guide (9).
D1 D2
D3 D4
n
D5 D6
12
Customer Helpline 0333 3201989
Page 13

Operating Instructions
E
Before you start
ON/OFF SWITCH (SEE FIG E)
● The saw can be switched on by
pressing the green pushbutton “I”.
● The red pushbutton “0” has to be
pressed to switch off the saw.
Operation
NOTE: Put the tile cutter on a clean, stable and flat surface.
WARNING: Before switching the tile cutter on, make sure that you have read and
understood all of the safety instructions. Make sure also that the machine has been
correctly assembled and adjusted. Make sure that the mains is disconnected from the
supply when the tile cutter is not being used or adjustments are being made.
WARNING: The disc will continue to rotate for a few seconds after the machine has
been switched off. Wait for the disc to stop before removing the workpiece or making
any adjustments.
CUTTING GUIDANCE(SEE FIG F,G)
1. To cut angled corners, position the Angle cutting guide (2) onto the fence;
Ensure the tile sits flush to the table bed and slowly move the Angle cutting guide (2) along
the Parallel cutting guide (1).
Release the fixing knob of Angle cutting guide (9) to adjust the angle of the cutting.
Then the desire angle of the cutting is ready please tighten the fixing knob of Angle cutting
guide (9)
2. You can extend the extension table(7) to support larger tiles when these are being cut.
E
F
9
G
7
Customer Helpline 0333 3201989
13
Page 14

Operating Instructions
Operation
FILLING THE WATER RESERVOIR (SEE FIG H)
● Before cutting, the water reservoir must be filled with water.
Fill two-thirds of the tray of cold and clear water. The water can cool and lubricate the disk
during the cut and it also helps to remove dust.
WARNING! Do not add chemicals or detergents to the water.
MITRE CUTS (SEE FIG I1,I2,I3)
● Lift up the water reservoir lid (4)
Pull out the two lid supports (o) located on the back of the water reservoir lid.
To cut 22.5° angles, place the two upper 22.5° miter stays(p) on the lid supports into the
two slots located inside the water reservoir.
To cut 45° angles, place the two lower 45° miter stays (q) on the lid supports into the two
slots located inside the water reservoir. Place the piece of tile facing down onto the water
reservoir lid then push the work piece towards the diamond blade.
H I1
14
I2
I3
p
o
Customer Helpline 0333 3201989
q
Page 15

Operating Instructions
Operation
STRAIGHT CUTS(SEE FIG J)
Loosen fixing knobs of the parallel cutting guide (8) at both ends of the parallel cutting
guide (1).
Set the parallel cutting guide (1) to the desired size.
Relock fixing knobs of the parallel cutting guide (8).
Place the piece of tile against the parallel cutting guide (8) then push the work piece
towards the diamond blade.
DIAGONAL CUTS(SEE FIG K)
Loosen fixing knobs of the parallel cutting guide (8) at both ends of the parallel cutting
guide(1).
Set the parallel cutting guide (1) to the distance required.
Relock fixing knobs of the parallel cutting guide (8).
Hook the angle cutting guide (2) onto the parallel cutting guide (1) .
Choose the angle desired and tighten the fixing knob of angle cutting guide (9) to secure the
angle cutting guide in conjunction with the parallel cutting guide.
Push the angle cutting guide together with the tile to be cut towards the diamond blade.
WARNING! Clean the water tank after 15min working.
J K
Customer Helpline 0333 3201989
15
Page 16

Repair
This product does not contain any parts that can be repaired by the consumer. Contact a
qualified specialist to have it checked and repaired.
Storage
1. Clean the product as described above.
2. Store the product and its accessories in a dry, frost-free place.
3. Always store the product in a place that is inaccessible to children. The ideal storage
temperature is between 10 and 30°C.
4. We recommend using the original package for storage or covering the product with a
suitable cloth to protect it against dust.
Transportation
1. Switch the product off and disconnect it from power supply before transporting it
anywhere.
2. Attach transportation guards, if applicable.
3. Always carry the product by its handle.
4. Protect the product from any heavy impact or strong vibrations which may occur during
transportation in vehicles.
5. Secure the product to prevent it from slipping or falling over.
16
Customer Helpline 0333 3201989
Page 17

Trouble Shooting
Suspected malfunctions are often due to causes that the user can fix themselves. Therefore
check the product using this section. In most cases the problem can be solved quickly.
WARNING! Only perform the steps described within these instructions! All further
inspection, maintenance and repair work must be performed by an authorized service
centre or a similarly qualified specialist if you cannot solve the problem yourself!
Problem Possible cause Solution
1. Product does not
start
2. Product does not
reach full power
3. Unsatisfactory result
1.1 Not connected to power
supply
1.2 Power cord or plug is
defective
1.3 Other electrical defect to
the product
2.1 Extension cord not
suitable for operation
with this product
2.2 Power source (e.g.
generator) has too low
voltage
2.3 Air vents are
blocked
3.1 Accessory not suitable for
work piece material
1.1. Connect to power supply
1.2. Check by a specialist
electrician.
1.3. Check by a specialist
electrician
2.1. Use a proper extension
cord
2.2. Connect to another
power source
2.3. Clean the air vents
3.1. Use proper accessory
Customer Helpline 0333 3201989
17
Page 18

Technical Data
Technical Data Table
Voltage 230-240V~50Hz
Power input 450W S2:30min
No load speed 5400 /min
Blade size Ø110 x Ø22.2mm
Cutting depth
90
45
Table bevel range 0°, 22.5°and 45°
Table size 330~395(L) * 305(W) mm
Machine weight 3.70kg
Protection class I
o
o
Noise Information
A weighted sound pressure LpA : 93dB(A)
A weighted sound power LwA : 106dB(A)
KpA & KwA=3.0dB(A)
Wear ear protection.
23mm
16mm
Environmental Protection
Waste electrical products must not be disposed of with household waste. Please
recycle where facilities exist. Check with your local authorities or retailer for
recycling advice.
18
Customer Helpline 0333 3201989
Page 19

Guarantee
This product is selected for DOMESTIC USE ONLY and not for business use.
This product is guaranteed against manufacturing defects for a period of 24 months. This
does not cover the product where the fault is due to misuse, abuse, use in contravention of
the instructions, or where the product has been the subject of unauthorised modifications
or alterations, or has been the subject of commercial use. In the event of a problem with
the product within the guarantee period please return it to your nearest store. If the item is
shown to have an inherent defect present at the time of sale, the store will provide you with
a replacement. Your statutory rights remain unaffected.
Issue1 08/2015
Customer Helpline 0333 3201989
19
Page 20

Declaration of Conformity
This Guild 450W Tile cutter model number BTC110G fully complies with the Machinery
Directive 2006/42/EC, Electromagnetic Compatibility Directive 2004/108/EC(before
2016/04/20) and 2014/30/EC(since 2016/04/20), RoHS Directive 2011/65/EU and the
following harmonized EU standards
EN 61029-1/A11: 2010
EN ISO 12100:2010
ZEK 01.4-08
EN 55014-1: 2006 + A1:2009 + A2:2011
EN 55014-2: 1997 + A1:2001 + A2:2008
EN 61000-3-2: 2014
EN 61000-3-3: 2013
This declaration is made under the sole responsibility of Argos Ltd, 489/499 Avebury
Boulevard, Milton Keynes, MK9 2NW
Category Technical Manager signed
Issued 20/10/2015
20
Customer Helpline 0333 3201989
Page 21

Plug Replacement (Uk & Ireland Only)
If you need to replace the fitted plug then follow the instructions below.
IMPORTANT
The wires in the mains lead are colored in accordance with the following code:
Blue = Neutral
Brown = Live
Green/Yellow=Earth
As the colors of the wires in the mains lead of this appliance may not correspond with the
colored markings identifying the terminals in your plug, proceed as follows. The wire which
is colored blue must be connected to the terminal which is marked with N. The wire which
is colored brown must be connected to the terminal which is marked with L. The green/
yellow wire to the earth terminal is marked with E or .
If a 13 AMP (BS 1363/A) Plug is used, a 13 AMP Fuse must be fitted, or if any other type
of plug is used a 13 AMP Fuse must be fitted, either in the Plug or Adaptor, or on the
Distribution Board.
Note: If a moulded plug is fitted and has to be removed take great care in disposing of the
plug and severed cable, it must be destroyed to prevent engaging into a socket.
Customer Helpline 0333 3201989
21
Page 22

Page 23

Page 24

 Loading...