

Page 1

GBBS ]i
BULLETIN BOARD SYSTEM
Written By
Greg Schaefer
(6, ,tiftiintre
Page 2

Page 3

GS Software Presents:
GBBS ][ BULLETIN BOARD SYSTEM
version 1.7
Copyright 1983 by Greg Schaefer
Page 4

Page 5
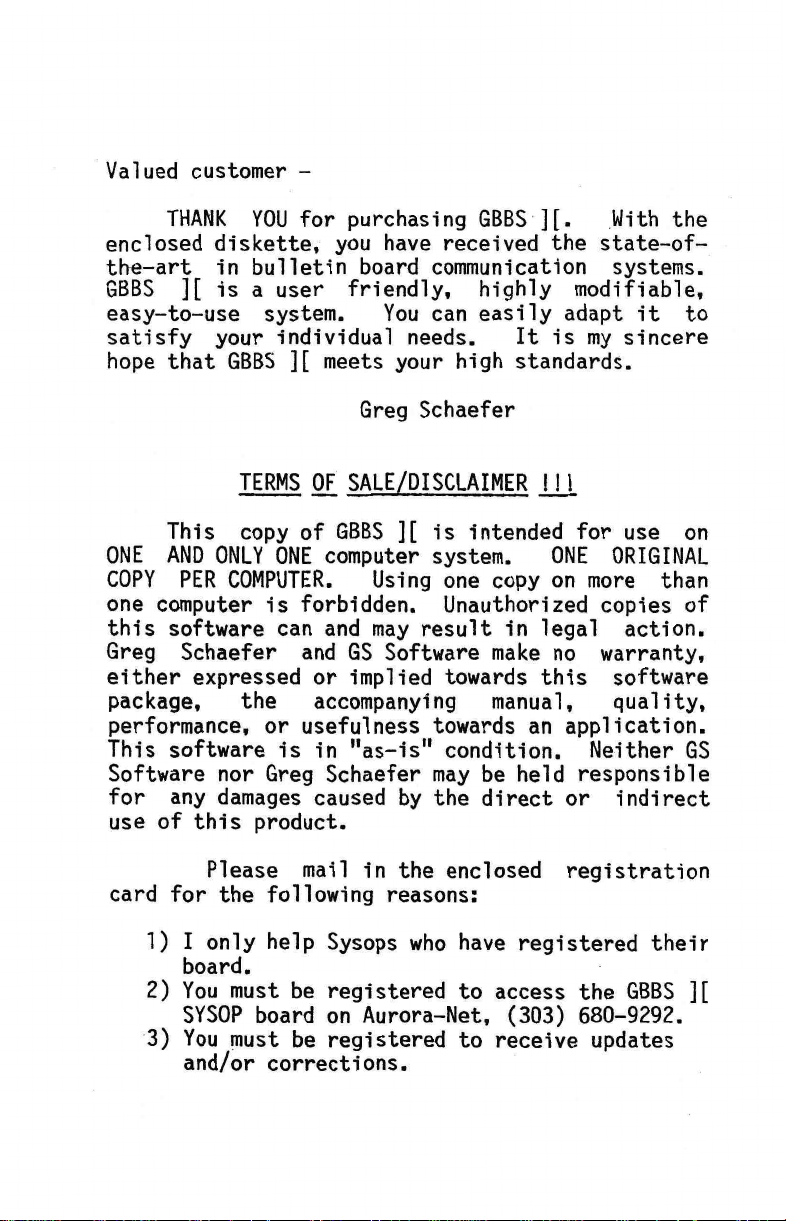
Valued customer —
THANK YOU for purchasing GBBS ][. With the
enclosed diskette, you have received the state—of—
the—art in bulletin board communication systems.
GBBS ][ is a user friendly, highly modifiable,
easy—to—use system.
satisfy your individual needs. It is my sincere
hope that GBBS ][ meets your high standards.
TERMS
OF
This copy of GBBS ][ is intended for use on
ONE AND ONLY ONE computer system.
COPY PER COMPUTER. Using one copy on more than
one computer is forbidden. Unauthorized copies of
this software can and may result in legal action.
Greg Schaefer and GS Software make no warranty,
either expressed or implied towards this software
package, the accompanying manual, quality,
performance, or usefulness towards an application.
This software is in "as—is" condition. Neither GS
Software nor Greg Schaefer may be held responsible
for any damages caused by the direct or indirect
use of this product.
You can easily adapt it to
Greg Schaefer
SALE/DISCLAIMER
!ll
ONE ORIGINAL
Please mail in the enclosed registration
card for the following reasons:
1)
I only help Sysops who have registered their
board.
2)
You must be registered to access the GBBS ][
SYSOP board on Aurora—Net, (303) 680-9292.
3)
You must be registered to receive updates
and/or corrections.
Page 6

Page 7
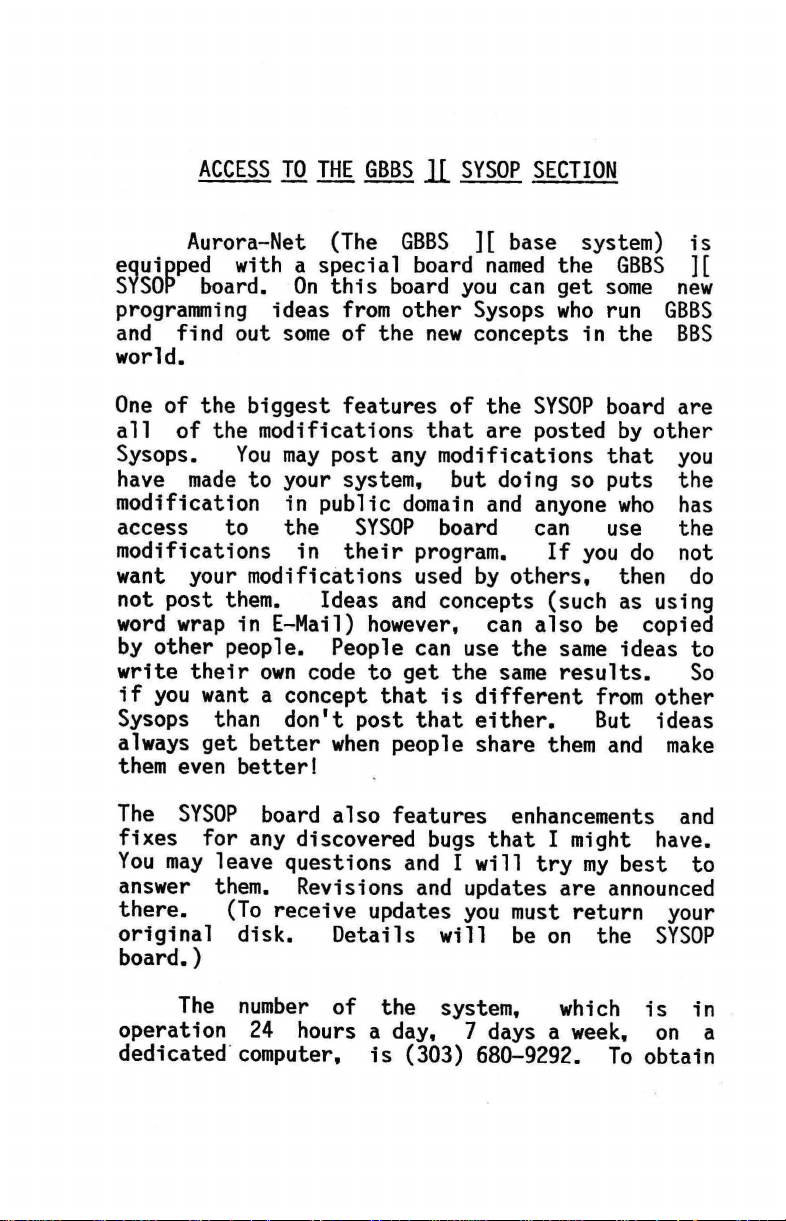
ACCESS
Aurora-Net (The GBBS ][ base system) is
equipped with a special board named the GBBS ][
SYSOP board. On this board you can get some new
programming ideas from other Sysops who run GBBS
and find out some of the new concepts in the BBS
world.
One of the biggest features of the SYSOP board are
all of the modifications that are posted by other
Sysops.
have made to your system, but doing so puts the
modification in public domain and anyone who has
access to the SYSOP board can use the
modifications in their program.
want your modifications used by others, then do
not post them.
word wrap in E-Mail) however, can also be copied
by other people. People can use the same ideas to
write their own code to get the same results.
if you want a concept that is different from other
Sysops than don't post that either.
always get better when people share them and make
them even better!
TO THE GBBS 1C
You may post any modifications that you
Ideas and concepts (such as using
SYSOP SECTION
If you do not
But ideas
So
The SYSOP board also features enhancements and
fixes for any discovered bugs that I might have.
You may leave questions and I will try my best to
answer them. Revisions and updates are announced
there.
original disk.
board.)
operation 24 hours a day, 7 days a week, on a
dedicated computer, is (303) 680-9292. To obtain
(To receive updates you must return your
Details will be on the SYSOP
The number of the system, which is in
Page 8
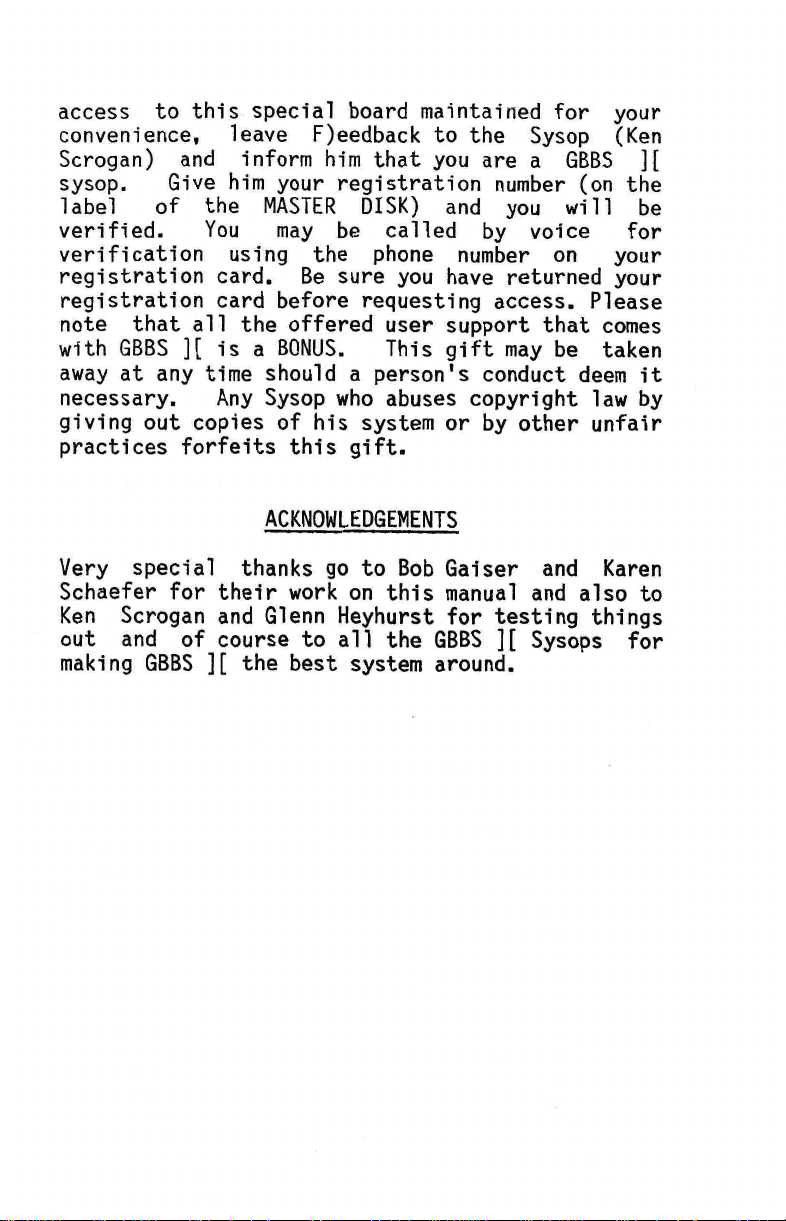
access to this special board maintained for your
convenience, leave F)eedback to the Sysop (Ken
Scrogan) and inform him that you are a GBBS ][
sysop.
label of the MASTER DISK) and you will be
verified. You may be called by voice for
verification using the phone number on your
registration card. Be sure you have returned your
registration card before requesting access. Please
note that all the offered user support that comes
with GBBS ][ is a BONUS.
away at any time should a person's conduct deem it
necessary.
giving out copies of his system or by other unfair
practices forfeits this gift.
Give him your registration number (on the
This gift may be taken
Any Sysop who abuses copyright law by
ACKNOWLEDGEMENTS
Very special thanks go to Bob Gaiser and Karen
Schaefer for their work on this manual and also to
Ken Scrogan and Glenn Heyhurst for testing things
out and of course to all the GBBS ][ Sysops for
making GBBS ][ the best system around.
Page 9
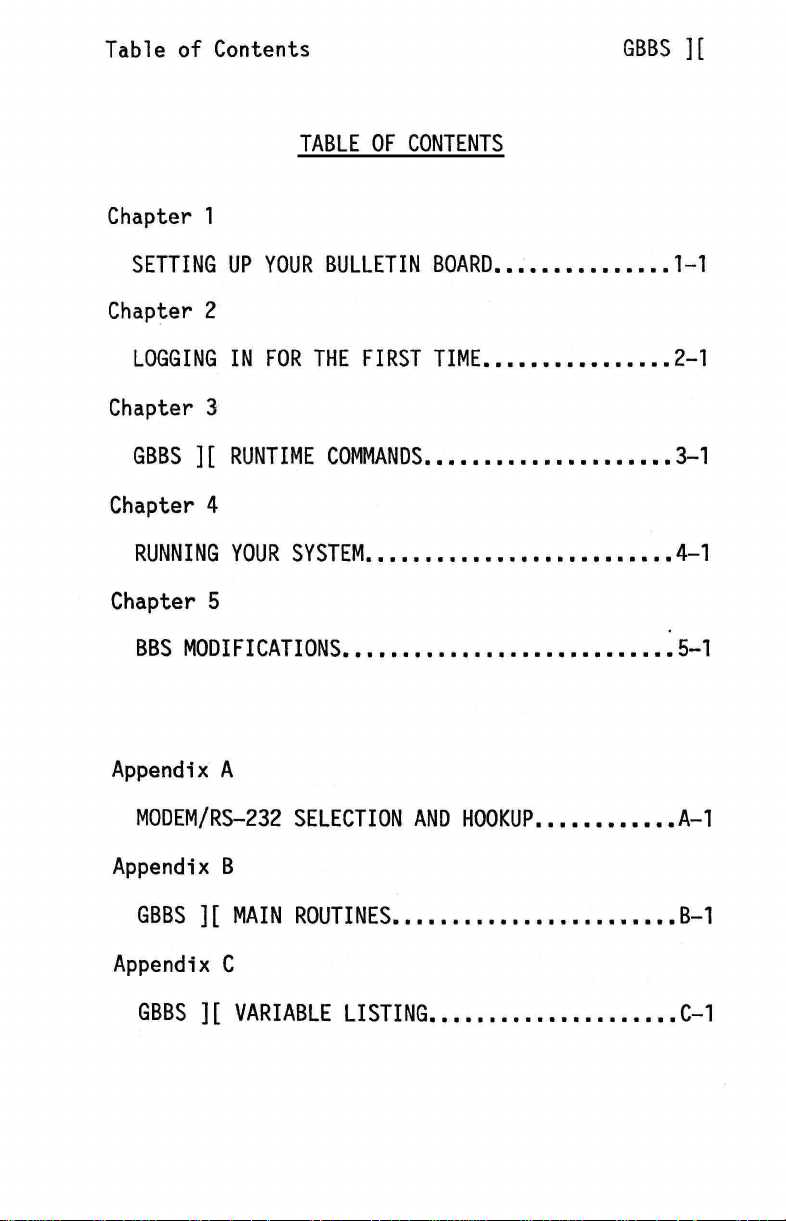
Table of Contents
TABLE OF CONTENTS
Chapter 1
GBBS ][
SETTING UP YOUR BULLETIN BOARD
Chapter 2
LOGGING IN FOR THE FIRST TIME
Chapter 3
GBBS ][ RUNTIME COMMANDS
Chapter 4
RUNNING YOUR SYSTEM
Chapter 5
BBS MODIFICATIONS
Appendix A
MODEM/RS-232 SELECTION AND HOOKUP
1-1
2-1
3-1
4-1
5-1
A-1
Appendix B
GBBS ][ MAIN ROUTINES
Appendix C
GBBS ][ VARIABLE LISTING
B-1
C-1
Page 10
Chapter 1: Setting Up
GBBS ][
SETTING
To set up your board there are five basic
steps to follow:
1)
Make a copy of your MASTER DISKETTE.
2)
Configure GBBS ][ to your hardware.
3)
Create your data diskettes.
Copy files.
4)
5)
Start your board running.
If you follow these instructions, then you
should be up and running in half an hour or less!
UP
YOUR BULLETIN BOARD
IMPORTANT
Before going any further, PLEASE complete
step one and back up your MASTER DISKETTE!
COPYA from your System Master or the ProDOS Filer
(or another disk copy program), and then put away
the MASTER in a safe place.
your back up copy. When this manual refers to the
MASTER DISK it means your back up copy of that
disk.
Always work with
Use
INITIAL SYSTEM GENERATION
The ProDOS version of the program does not
include ProDOS on the disk. You must first boot up
with a ProDOS master disk. You can directly boot
the DOS version of GBBS.
Now RUN GBBS II CONFIG (or GBBS.CONFIG for
ProDOS) from your MASTER DISKETTE. This is the
program that sets up your system to work with your
particular hardware.
you will see a menu of 6 options.
When the program comes up,
To start up
Page 1-1
Page 11
Chapter 1: Setting Up
your system, choose option number 1, INITIAL
SYSTEM CONFIGURATION.
YOU SURE ?" question.
First enter your name and phone number. Since
you can make this number available to users, you
may wish to use a voice line at which you are
available so that they can report any problems.
You must now decide on a name for your system. No
commas or colons are allowed in the name.
the name is used in a context such as: "WELCOME TO
as the first word of your name. If your system is
the NATIONAL BBS then you would have to enter "THE
NATIONAL BBS" for your name or your users will
read "WELCOME TO NATIONAL BBS" instead of "WELCOME
TO THE NATIONAL BBS." Next, enter the date. Last
of all, please enter two passwords that you will
use in logging on. The first password is your main
password and must be 7 characters long. When the
system asks for your password when logging on,
enter this. You will then be asked for a remote
password. This password can be of any length. You
should generally keep it between 8-30 characters.
When you log on remotely, you will be asked for a
remote password. You do not need to enter this
locally.
correct and write down your passwords.
Verify that all this information is
Answer "Yes" to the "ARE
GBBS ][
Since
Next, the program will present a list of
supported internal modems and RS-232 cards and
external modems.
choose the modem/RS-232 that you will be using
with your system. If you are using an Apple //c
then in config choose the Super Serial Card in
slot 2.
you may have a problem. However, some unlisted
modems will configure in the same way as one which
is listed.
compatibility with other cards. If you picked one
of the RS-232 cards, then select the modem that
If your modem/RS-232 is not listed then
From the first list of numbers
Consult your modem manual for its
Page 1-2
Page 12
Chapter 1: Setting Up
you have with your system. If you do not know
which modem to select, consult Appendix A. Enter
the slot that your card is plugged into.
When you get to the next menu, enter "Yes" if
your Apple is equipped with lowercase. If you
have uppercase only, enter "No". This will NOT
control what your users see. They will see lower—
case if equipped to receive it.
The system has a time limit built into it
which controls how long a user can be idle before
the system hangs up on him. I recommend 5 minutes.
If you have a printer then tell the system so and
what slot it is in. (It is preferable that it be
in slot 1.) No special printer type is required.
The last question is whether you want to place the
driver in the language card. If you do place it
there, you have to supply your own HI—DOS (a DOS
than runs in the language card). I suggest using
David—Dos as it has been tested and works well. If
you do not understand this question then you
should answer "No". If you are using ProDOS, the
driver will always be placed into low memory
because the operating system takes up all of high
memory. Verify that you have entered all this
information correctly.
GBBS
For the next four questions, it is best to
answer [RETURN]. These let you modify the
characters that cause the system to take certain
actions, such as skipping a bulletin and exiting
from menus. This is explained in detail in
Chapter 4.
correct. Enter a [RETURN] in answer to the next
question. Verify this information.
If you have more than one disk drive you must
decide how you want the various files arranged on
your disks.
Verify that this information is
If you are using a hard drive then
Page 1-3
Page 13
Chapter 1: Setting Up
you can arrange your files on different volumes.
There are MAIL FILES, BULLETIN FILES, and SYSTEM
FILES as well as some other types (which won't be
used at this time).
system later if the same type of files are on the
same disk or volume (i.e. all download files on a
Download disk or volume).
MAIL FILES are files that contain private
electronic mail for users.
file for each user with one or more pieces of mail
waiting.
83 users have a total of 274 pieces of mail
waiting, then there will be 83 MAIL files present.
bulletins.
system.
drive only applies to your main board.
still be able to add more boards on the same or
different drives or volumes.
If you have a system with 300 users and
BULLETIN FILES contain the public posted
There is one file per bulletin on the
The answer you give for the bulletin
It is easier to modify the
There is a separate
GBBS ][
You will
SYSTEM FILES are files such as your menus and
userlog. Four other types of files, DOWNLOAD
FILES, VOTING FILES, and GENERAL FILES, will also
be on the SYSTEM DISK or volume.
DOS 3.3 Setup
The suggested distribution of DOS 3.3 files is:
1 drive : All files on that drive.
2 drives: SYSTEM FILES on one drive, MAIL and
BULLETINS on the other.
3 drives: SYSTEM FILES on one drive, MAIL on
another, and BULLETINS on the last.
Page 1-4
Page 14
Chapter 1: Setting Up
Tell the program if you are using a hard
drive or not. You should answer "Yes" if you have
a hard drive or any form of storage that uses the
"volume" parameter with DOS. After this, tell the
system what slot and drive each disk will be in.
If you are using a hard disk then you will also
have to specify the volume for each item whether
you use a different volume for each item or not.
When using a hard drive you should use the same
slot and drive for all the files. The volume is
the only parameter that should have to be changed.
Verify the above information. Skip to "Finishing
up Config" if you are using DOS 3.3.
GBBS ][
ProDOS Volume Setup
Using the pathname structure of ProDOS, it is
possible to set up multiple directories. This is
very important and should be used to its fullest
advantage. Since ProDOS will only allow 51
files in the main directory of a disk, all files
for bulletin boards and electronic mail should be
in their own sub—directories. Try and put each
bulletin board section within its own sub—
directory. This will eliminate confusion later and
will make it easier to manage your files.
Whenever you are setting up a pathname for
the system to use, always use a full pathname.
This takes the form "/pathname/sub—path/". If you
only use a partial pathname, it is possible for
the system to get lost and crash. You should put
the SYSTEM files, the MAIL DISK or VOLUME, and the
BULLETIN files all in different sub—directories
that branch off of the main directory or sub—
directory.
bulletin and mail files on the same disk or volume
(though in different sub—directories), and system
files on another.
For example, you could put the
Page 1-5
Page 15
Chapter 1: Setting Up
As a sample configuration for a two—drive
system:
Drive 1 -- Name = /MAIN.DISK; Sub—Dir = SYSTEM
Drive 2 -- Name = /STORAGE; Sub—Dir = E.MAIL,
BULL.1
SYSTEM DISK = /MAIN.DISK/SYSTEM/
E—MAIL DISK = /STORAGE/E.MAIL/
BULLETIN DISK = /STORAGE/BULL.1/
The system files would be on the directory called
"/MAIN.DISK/SYSTEM/", the mail files would be on
the directory called "/STORAGE/E.MAILP, and the
bulletins would be on the directory called
/STORAGE/BULL.1/".
u
Under a hard drive, the same thing could be
achieved by putting both MAIN.DISK and STORAGE
under another main directory such as:
GBBS ][
SYSTEM DISK = /GBBS/SYSTEM/
E—MAIL DISK
BULLETIN DISK = /GBBS/BULL.1/
To use the built in ram drive that is available on
128k Apple //e systems, just access the volume
called "/RAM". You will then have access to about
1/2 a disk drive. Remember that this is a
temporary volume that will be destroyed when the
system is turned off. You should only place "Read
Only" type files in there.
The last piece of hardware to tell your
system about is your clock.
= /GBBS/E.MAIL/
FINISHING
Page 1-6
UP
CONFIG
If you don't have
Page 16
Chapter 1: Setting Up
one, just tell the system so. If you have a clock
but it is not listed, then check your manual. It
may work configured as a Mountain Hardware clock.
Enter the slot of your clock if present.
enter today's date. Make sure that it is correct.
Some clocks don't know the current year so they
need to get it from the system.
system knows the current year is from what you
tell it. Verify the above information. If you
realize there is a problem in a menu farther back,
press [RESET] and type: RUN. Otherwise, the disk
drive will start and the system will go to work.
After 30 to 40 seconds you will see:
"CONFIGURATION COMPLETE".
SETTING UP YOUR DISKS
You must now format at least two disks, a
BOOT DISK and a SYSTEM DISK. If you have more
than one drive you will prepare a MAIL and
BULLETIN DISK or separate disks for these two
purposes. If you are using ProDOS, then you can
use the ProDOS Filer to do this. After formatting,
you need to create your sub—directories. To do
this, go into basic and type "CREATE" and the name
of the sub—directory. After finishing all the
disks, skip doWn to copying over the files.
The only way the
GBBS
Last,
If you are using a hard drive, then you will
have to decide what volumes will contain what
You are responsible for formatting the
data.
volumes. Just get all the volumes or disks set up
This goes
so that you can copy files onto them.
for any type of storage you are using whether it
be floppy or hard disks, 5 or 8 inch.
If you are using DOS 3.3, then the BOOT DISK
will contain DOS and the GBBS ][ programs and will
be the disk you use to bring up your system. To
Page 1-7
Page 17
Chapter 1: Setting Up
create this disk, put your GBBS MASTER DISK in the
drive with the configured program on it and type
"PR#6". When the disk has booted, type "LOAD GBBS
LOAD", insert a blank disk, and INIT HELLO.
If you are using DOS on a standard Apple
drive, you can use DATA DISK MAKER, included with
your system, to make special high—storage disks,
especially useful if you are limited to only one
drive (and therefore one data disk).
normal disk contains 105 separate files, this is
not always sufficient.
have 105, 161, or 217 entries in your catalog.
Also, since there is no DOS on this disk you have
an additional 32 sectors for data. If you have a
40 track drive, then the program can use all 40
tracks for even more storage. This program is only
for standard APPLE DISK DRIVES and not with
special 80 track or 8 inch drives.
If your SYSTEM DISK must also hold MAIL and
BULLETINS then format it to hold the maximum num—
ber of files. Otherwise, 105 will be sufficient.
With this program you can
While a
GBBS ][
It is best if your MAIL DISK and BULLETIN
DISK have at least 161 entries.
more desirable.
To make these special disks, RUN DATA DISK
MAKER from your MASTER DISK. Tell it how many
entries you want to have in your catalog (105,
161, 217).
want initialized.
disk, the program will tell you how many sectors
and entries are available.
number of possible entries on the label of the
disk so you can remember what the limit is.
the program is done, you can type [RETURN] to make
another data disk or any other key to quit.
Then insert the blank disk that you
After it has formatted the
Page 1-8
217 may be even
You should mark the
When
Page 18
Chapter 1: Setting Up
Once you have formatted the disks, copy the
files from your MASTER DISK appropriately.
is a list of files and the disks to which they
should be copied. Use FID on your DOS 3.3 System
Master to copy them to the right disks.
have some special drive, use the file copy program
that was provided with it.
COPYING DOS 3.3 FILES
Onto the BOOT DISK you should copy:
GBBS ][
If you
Here
GBBS II BBS GBBS LOADED
Onto the SYSTEM DISK you should copy:
BBS #S
D1/2
DATA
G1/1
MENU1
MENUS
SYSTEM INFO
USERLIST HELP XMODEM
V1.1
Onto the BOOT DISK you should copy:
GBBS
DRIVER. DATA
You also need the files: PRODOS And
BASIC. SYSTEM. You can get them from the ProDOS
users disk.
"STARTUP."
COPYING ProDOS FILES
You should rename GBBS.STARTUP to
D1
D1/3
DRIVER DATA
G1/2
MENUO
SYSTEM NEWS
NEW USER INFO SYSTEM HELP
V1.2
GBBS. STARTUP GBBS2
DRIVER.GBBS
GBBS LOADER
D1/1
D1/4
G1
G1/3
GBBS II DRIVER
USERS
DOT. HELP
V1.3
Page 1-9
Page 19
Chapter 1: Setting Up
Onto the SYSTEM DISK you should copy:
GBBS ][
BBS
01.2
D1.5
G1.1
MENUO
NEW. USER. INFO
SYSTEM. NEWS
V1.1
The BULLETIN DISK and MAIL DISK need no files
copied onto them.
non—standard type of drive, copy the files from
the completed BOOT DISK to it. To start up your
system you will type: RUN HELLO from the slot,
drive, and volume that the BOOT DISK is located
on.
Your system is now ready to go.
BOOT DISK into slot 6, drive 1 and type PR#6. If
your system is not based around normal drives then
boot from whatever drive you are set up for. Your
system will now boot up and you will get the
message telling you to insert the correct
diskettes and type RUN.
disks and type RUN, your system will come up and
you will be ready to receive your first call.
D1
D1.3
DOT.HELP
G1.2
MENU1
SYSTEM.HELP
USERLIST.HELP
V1.2
If you are using some other
Lip and Running
When you insert those
D1.1
D1.4
G1
G1.3
MENU9
SYSTEM. INFO
XMODEM
V1.3
Insert the
Page 1-10
Page 20

Chapter 2: Logging On
LOGGING IN FOR THE FIRST TIME
Once you have your system up and running for
the first time, it is important to log on and set
some things up.
UPPERCASE only) from the keyboard which allows
local logon to your system.
"Auto Logon ?". Answer "Yes" and you will be
logged on the system automatically. The system
will check your password and come up with the
message "Calling From (City, St) —>". Enter your
city and state. If your input is not accepted,
try it again using an abbreviation with fewer
characters.
Now that you have logged on, there are many
commands which you may try. You can do anything
from reading bulletins to sending electronic mail
to changing passwords. The first thing that you
SHOULD do is go to the bulletin system.
then be prompted "LEAVE BULLETIN ?". Answer "YES"
to this.
the bulletin. The subject may be something like
"THE NEW SYSTEM." Next, the program will ask who
the bulletin is from.
this question.) You may type any name you wish.
Normally you would put "SYSOP", "SYSTEM OPERATOR",
your name, or an alias.
It will then ask you for the subject of
Type "G" (be sure to use
You will be asked
(Only the Sysop is asked
GBBS ][
You will
After this, you will enter the EDITOR where
you will type the text of your bulletin. You may
enter up to 50 lines of text that are 40 columns
wide. When you are done composing your bulletin,
press [RETURN] and then type DONE as the first
characters of the next line. This will tell the
EDITOR that you are done entering text.
then get an "OPTION (?=HELP):" prompt.
several options that can be entered here. The one
you need for the moment is "0" for OK. If you
Page 2-1
You will
There are
Page 21
Enter a
GBBS ][
Chapter 2: Logging On
enter "0" then your system will save your bulletin
and you will be returned to the bulletin menu.
While in the bulletin system you can reread
your bulletin, leave another, or exit the bulletin
system back to the main command menu. We will now
read the bulletin that you entered. Type a "1" and
[RETURN] to see the the system's first bulletin
which you just entered.
awhile (your first Sysop bulletin!) type an "A" to
abort back to the command menu. As Sysop you
cannot Auto—reply to your own bulletins.
"T" and terminate from the system.
After admiring it for
Page 2-2
Page 22
Chapter 3: Runtime Commands
GBBS
n
.
RUNTIME COMMAND
Once your system is up and running there are
some new commands to learn.
these are those that can be issued while the
system is standing idle (that is, when it is
waiting for a call).
available only on the GBBS ][ console itself and
there is no menu.
as simple upper case (NOT CTRL) characters:
G : allows you, the Sysop, to log on (GET ON) the
system locally (from your own computer). You
may then sign on under your own password as
Sysop or as any user whose password you know.
A : ANSWERs the phone in order to connect with a
caller should the modem not be connected at
the time the call was originated.
send out a carrier and attempt to make a
connection. This only works on most internal
modems.
These commands must be entered
The first few of
Obviously these are
GBBS ][
This will
Q:
can log on by typing your last name and your
Logon.
Allows you, the Sysop, to QUIT the program
and go into Applesoft BASIC. This command is
just like pressing RESET.
Once you are connected with the system, you
password when prompted.
The following is a list of each command and
it's use on your system after you configure your
program. This is very similar to what your users
will see when they type "H" for Help.
Or you can can use Auto—
System Help
Page 3-1
Page 23
Chapter 3: Runtime Commands
Bulletin Board Commands
B : The "B" will send you to the main bulletin
board. From here you can type a question
mark to see a list of commands.
A : This will return you back to the main menu.
GBBS ][
E : Use this command to edit a bulletin.
command is the same as using "G" to GET a
file in the Sysop section without having to
go there. This command is not available to
the normal user unless you set up a security
level for it.
F : You
+ : This command must be used after the "Forward"
K
can list all the bulletins starting
"Forward" at a certain number.
command. First use "F" for Forward; then
type the bulletin number you wish to start
with. At the next menu bar type a "+" and
all remaining bulletins will fly by without
stopping. Use this when you want to print
out more than one bulletin at once without
having to hit "N" after each one. Or use it
to save them all to a buffer to view later
when you log off.
"Kills" bulletins you have left.
will only be able to kill the bulletins that
he has left.
users bulletins.
You will be able to'kill any
The user
This
L : "Leave" a bulletin for all users to see. You
will be dropped into the editor to enter
your message.
M : When you "Mark" the bulletins you want, the
Page 3-2
Page 24
Chapter 3: Runtime Commands
GBBS ][
first
matically. Use the "N" command to see the
next ones you marked.
N : This retrieves "New" bulletins that have been
left since the last time you called.
S : This "Scans" message subjects starting at
a certain number. If you wish to "Mark Mes—
sages" after each title, you should answer
"Y". This will allow you to read the bulle—
tins you "marked" when you are done seeing
the titles. After 15 bulletins titles are
displayed, you will be asked if you wish to
see more titles. If you have been on the
system before, you will see a ">" in front
of the number of the titles you have not yet
read.
# : Enter the number of a bulletin on a board and
it will display that bulletin.
After using either "New",
"Marked" retrieval,
options displayed. You can use "R" to Re—Read the
bulletin. "Q" will exit back to the bulletin
menu. "N" or a [RETURN] will go to the next bulle—
tin. If you press "A" you will have an option
to send E—Mail to the person who left the bulle—
tin you are reading. You will then go back to
the line of options. The following commands are
for the editor. Whenever you use a command such as
Send E—Mail.or Leave Bulletin then you will have
to use the editor to create the message.
one you selected will print auto—
"Forward", or
you will get a line of
Editor Commands
The following dot commands can be used in the
first column of each line within the editor as you
Page 3-3
Page 25
Chapter 3: Runtime Commands
are typing in your text (they will not work in the
middle of your text):
Text Dot Commands
.0 This command will "Center" the rest of the
text that follows the dot command. It depends
on the video width that you have set.
F Sign your "Full" Name on the line that you
.
use this command.
H This will print out the Dot command help file
.
on the screen and let you continue to write
your message.
.N Sign your first "name" on the line that you
use this command.
.0 This dot command will save the file ("O.K.")
without allowing you to edit the file again.
This is helpful if you have typed in
file before you called this system and only
want to upload your file.
GBBS ][
the
.
P The ".P" command will allow you to insert a
">" at the beginning of each line so that
you
fastest rate possible.
software to send the next line when you
receive the ">" character. Typing ".P" again
will toggle off the prompt.
.
R Typing in ".R" on the following line will put
you into edit mode for the previous line. You
will receive a line number at the beginning
of the line so that you can "Re—type" the
line.
can upload a file to the editor at the
You can tell your
Page 3-4
Page 26
Chapter 3: Runtime Commands
W Toggle Word Wrap Off / On. When Word Wrap is
on it allows you to keep typing a line
without using a [RETURN] to go to the next
line. When it is off you must hit [RETURN]
at the end of each line to begin the next
line.
The following commands can be used after you
type in your text:
Edit Commands
A : If you decide you don't want to send your
message for some reason than you can "Abort"
from sending it.
C : This will let you "Continue" and append at
the end of your current text.
D
By entering a line number you can "Delete"
one or more lines. If you enter [RETURN] for
the starting line, then the attempt
aborted. You can also issue the "L" command
which works as it does with Edit.
GBBS ][
will
be
E : You can "Edit" a line of your message
entering its line number and re—typing that
line. If you enter "L" then you can list the
message using the same form as for the
command above, but line numbers will be shown
before each line of text.
I : Using
before the line number you specify. You can
use the "L" command the same way you do with
Edit.
L : You can "List" your message in part or in
whole. You will be asked for a starting line
this command
Page 3-5
you
can "Insert"
by
"L"
Page 27
Chapter 3: Runtime Commands
number. If you press [RETURN] then the
entire message will be listed. If you enter
a starting line number, then an ending line
number will be requested. If you enter
[RETURN] then it will list from the starting
line number to the ending line number.
N : If you messed up your message and wish to
redo it, then use "New" to start again.
GBBS ][
0 : This
C : "Chat" with the Sysop. You need only issue
D : With this command, you can "Download" public
stands
message is complete and you wish to send it.
The
follows:
this command once as the Sysop is constantly
reminded that you wish to chat with him.
domain programs from this system. After you
choose the program you want to download you
have a choice to use "Ascii" or "Xmodem"
download or "Exit". If you continue, you hit
[RETURN] to begin download. Xmodem download
requires that your terminal program has the
capabilities to use this feature. You will
need to use a terminal program with a Capture
buffer such as "Ascii Express Pro". After
you save it, capture it to disk and "EXEC"
the file.
rest of the system commands are as
for "Ok". It says that your
System Commands
E : The system contains a list of stats on
as well as general system stats. These
include the last date you called, what caller
number you are, the time you have been on the
Page 3-6
you
Page 28
Chapter 3: Runtime Commands
system, the time remaining if there is a time
limit, the last caller, your security level
and some of the options active.
GBBS ][
F : You can
Sysop
editor to create your message.
G : You can look at a list of "General" files
H : General system "Help". This is similar to
I : This will list "Information"
N
0 : This will give a list of "Other"
will be able to reply to your feedback.
with this command. Each number listed
represents a different topic. Enter the
number you wish to look at or [RETURN] when
done.
this section and is called System.Help.
system such
hardware configuration, and system sponsor.
You can modify the System. Info file to change
this information.
By changing the "Nulls" value, you change
the delay that follows a [RETURN].
bulletin board telephone numbers.
send comments directly to the
using "Feedback". You will use the
The Sysop
about the
as software type, GBBS
GBBS
][,
P : New users who logged on as one—time guests
can change their mind and can use this
command to obtain a "Password." If you are a
verified user you can use this command to
change your password to 4-7 characters. Your
user number remains the same.
R : If you have mail waiting and wish to "Read"
it, use this command. After each letter you
will have the option to "Auto Reply",
Page 3-7
Page 29
Chapter 3: Runtime Commands
"Continue", or "Re-Read" each letter. Auto-
Reply will will let you write a letter back
to the person who sent you the letter.
S : You can "Send" E-Mail to a user with this
command. Just enter the name of the user or
their user number. The user number is the
number that is displayed next to their name
on bulletins they post. It is also listed
next to their name in the user list. If you
entered their number, then their name will be
shown.
user exists. Once you are done with the name
or number, use the editor to enter the
message.
T : This command will "Terminate" your connec-
tion
deleted and your stats updated.
The system then verifies that the
from the system. Your mail will be
GBBS ][
U : Using this command,
all or some of the system "Users". Next to
each users name will be a number that should
be used for sending mail.
W : Video "Width" can be changed from the default
of 40 to 32, 64, 80, or 132 columns wide.
1 : There is an upload option available via this
command. It is not normally available to the
average user. If you have something to up-
load, then let the Sysop know via "Feedback"
and he will get back with you.
? : The
question mark will give a list
available commands almost anyplace in the
system.
Page 3-8
you can get a list of
of
Page 30
Chapter 3: Runtime Commands
* : The asterisk puts you into a section that is
called SYSTEM, a section for the Sysop only,
that allows you to run your system.
Sysop Section
A : ABORTs you back to the command mode.
GBBS ][
C : CATALOGs the disk.
slot & drive or volume combination.
D : Allows you to issue any DOS command.
you need to specify a slot, drive, or
volume do it via ",S ,D ,V". (Nowhere
else should you use ",S ,D ,V".) With a hard
drive under ProDOS use the full volume name.
xxxx IMPORTANT: DON'T USE DOS TO CATALOG. xxxx
xxx* USE THE "CATALOG" COMMAND INSTEAD. ****
**IF YOU USE DOS/PRODOS THE PROGRAM WILL RE—RUN!**
F : Allows you to read any sequential
FILE on the disk.
random access file and will not work.)
You must specify the name and slot/drive
of the file in order to look access it.
Exit viewing with a CTRL—X. Enter a "*"
as the first character of the filename
to send it to the printer.
You may catalog any
(The user file is a
text
If
G : Lets you GET a file in order to edit it,
or create a new file. You must either
enter the name of the file you want to
edit or a [RETURN] for a new file. In ProDOS
with a hard drive enter the path name before
the name of the new file. If
enter a file name, then you will be
Page 3-9
you
Page 31
Chapter 3: Runtime Commands
prompted for slot, drive, and volume and
the file will be loaded.
be sent to the editor. You can modify
the data in the file using the editor
commands. When you are done, use the
"Ok" command as usual.
asked for a file name, slot, drive, and
volume. The file will then be saved
back to disk, over—writing the original
file if you used the same name.
K : KILLs a user, eliminating him from your
system. You must enter his user number. For
example, the user number is 003 the
preceding zeros are not needed.
L : accesses the LOG where you have 4 options:
A : ABORTs back to the SYSTEM prompt.
D : DELETEs the userlog. Don't leave user—
logs around too long. They take up a lot
of space.
this option).
You will then
You will be
(See Chapter 5 to disable
GBBS ][
S :
SHOWs the log. Output will be to the
screen.
P : PRINTs the userlog on the printer.
N : allows you to directly add a NEW user to the
system without his logging on (which may
sometimes be desirable.) This command will
NOT check for duplicate users. It is assumed
that you know that the user is not a
duplicate.
R : allows you to READ, one—by—one, the comments
received from new users who answered the
questions in your NEW USER INFO file. After
Page 3-10
Page 32
Chapter 3: Runtime Commands
you see what each has to say, you can either
verify him (grant him access to your board)
or go on. If you choose to verify him, you
will be asked at what level. Normally you
assign new users a security level of 1.
P : lets you edit the PASSWORD or other user
stats.
user you wish to edit and all his stats
will appear, each preceded by a letter.
A : changes the users name.
B : changes the city/state from which the
C : changes the users password. Be sure to
You must enter the number of the
user calls. (Don't make this too long:
the name and place calling from may not
exceed 25 characters.)
use the correct form. Passwords must be
1-7 characters long.
a users "user number" since that is the
order of the record in the user file.
When changing your own password use the
"P" option under the main menu.
You cannot change
GBBS ][
D : changes the users phone number.
presence of a hyphen between the area
code and the number indicates that the
number is to be INvisible to other users
from the Userlist command. That is, 303-
693-1064 is INvisible to other users
while 303 693-1064 is visible.
change the second "—" to a "#", "7" or a
"k" then that changes the status of the
user
when you use the User. purge
program. The person with a phone number
of 303 693#1064 is deleted 3 months
later than his than others with the same
date, the user with the number 303
Page 3-11
If you
The
Page 33
Chapter 3: Runtime Commands
693%1064 is deleted 6 months later than
other with the same date. The user with
an "*" in place of the second "—" is
never deleted.
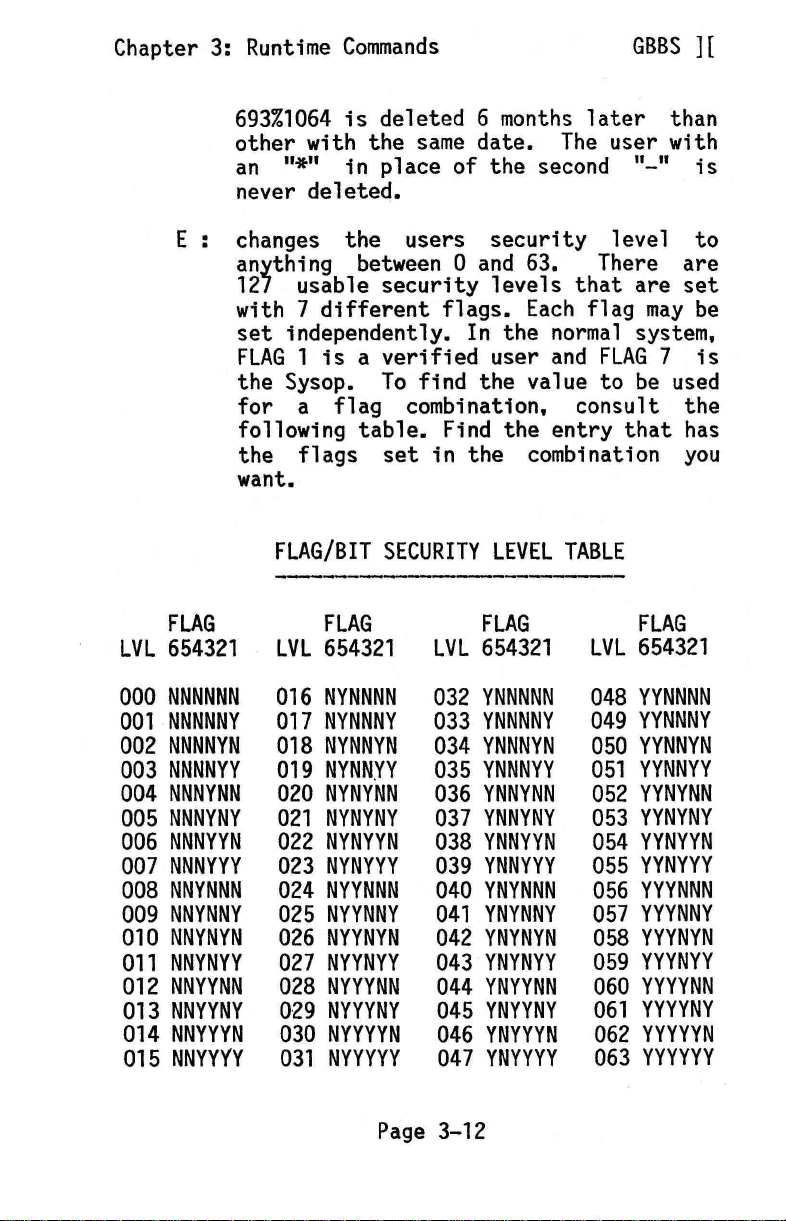
E : changes the users security level to
anything between 0 and 63.
127 usable security levels that are set
with 7 different flags. Each flag may be
set independently. In the normal system,
FLAG 1 is a verified user and FLAG 7 is
the Sysop. To find the value to be used
for a flag combination, consult the
following table. Find the entry that has
the flags set in the combination you
want.
FLAG/BIT SECURITY LEVEL TABLE
GBBS ][
There are
FLAG
LVL 654321
000 NNNNNN
001 NNNNNY
NNNNYN
002
NNNNYY
003
004
NNNYNN
NNNYNY
005
006
NNNYYN
007 NNNYYY
008 NNYNNN
NNYNNY
009
010 NNYNYN
011 NNYNYY
012 NNYYNN
013
NNYYNY
014
NNYYYN
NNYYYY
015
FLAG
LVL 654321
016 NYNNNN
017
NYNNNY
018 NYNNYN
019
NYNNYY
020
NYNYNN
021 NYNYNY
022
NYNYYN
023
NYNYYY
NYYNNN
024
025
NYYNNY
026
NYYNYN
NYYNYY
027
028
NYYYNN
NYYYNY
029
030
NYYYYN
NYYYYY
031
Page 3-12
FLAG
LVL 654321
YNNNNN
032
YNNNNY
033
YNNNYN
034
YNNNYY
035
YNNYNN
036
YNNYNY
037
038
YNNYYN
YNNYYY
039
040
YNYNNN
YNYNNY
041
042
YNYNYN
YNYNYY
043
044 YNYYNN
045
YNYYNY
046
YNYYYN
047
YNYYYY
FLAG
LVL 654321
YYNNNN
048
049 YYNNNY
050 YYNNYN
YYNNYY
051
YYNYNN
052
053 YYNYNY
YYNYYN
054
YYNYYY
055
YYYNNN
056
YYYNNY
057
YYYNYN
058
YYYNYY
059
YYYYNN
060
YYYYNY
061
062 YYYYYN
063 YYYYYY
Page 34
Chapter 3: Runtime Commands
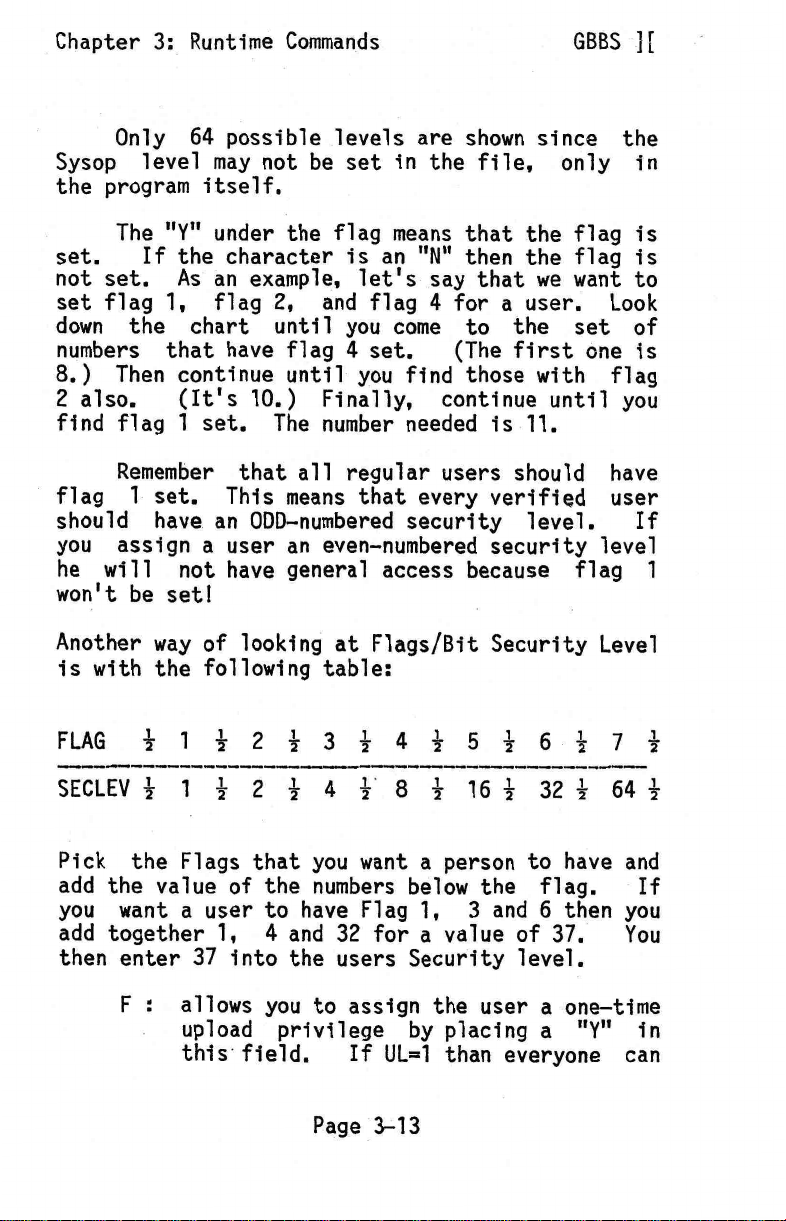
Only 64 possible levels are shown since the
Sysop level may not be set in the file, only in
the program itself.
The "Y" under the flag means that the flag is
set.
not set. As an example, let's say that we want to
set flag 1, flag 2, and flag 4 for a user. Look
down the chart until you come to the set of
numbers that have flag 4 set.
8.) Then continue until you find those with flag
2 also.
find flag 1 set. The number needed is 11.
flag 1 set. This means that every verified user
should have an ODD—numbered security level.
you assign a user an even—numbered security level
he will not have general access because flag 1
won't be set!
If the character is an "N" then the flag is
(It's 10.) Finally, continue until you
Remember that all regular users should have
(The first one is
GBBS ][
If
Another way of looking at Flags/Bit Security Level
is with the following table:
FLAG
11121314151617
SECLEV 4
Pick the Flags that you want a person to have and
add the value of the numbers below the flag.
you want a user to have Flag 1, 3 and 6 then you
add together 1, 4 and 32 for a value of 37.
then enter 37 into the users Security level.
1121418116132164
F : allows you to assign the user a one—time
upload privilege by placing a "Y" in
this field.
If UL=1 than everyone can
Page 3-13
1
1
If
You
Page 35
Chapter 3: Runtime Commands
GBBS ][
upload a file.
details).
[RETURN] gives you 2 options:
A : ABORTs the changes and goes back to the
System menu.
S : SAVEs the changes and goes back to the
System menu.
S : SETs the date if you don't have a clock. The
format used for the date should be XX/XX/XX.
(If you DO have a clock then DON'T use this
function.)
Control Commands
CTRL A : Use Control A to chat with a user.
can chat with a user when he is anywhere
in the system but the best place is at
the "Command (?—Help):" prompt.
the program is sending information to
the user Control A will not take effect
until the program is done doing this.
(See Chapter 5 for more
You
When
CTRL L : This Control Command will log a user off
the system at whatever point he is at.
This is a deadly command but is useful
at times when you want a user off
instantly.
user to disk.
CTRL X : Use Control X to abort the line you are
typing. It will will delete the entire
line that you have typed.
ESCAPE This toggles between upper and lower
case on those Apples that do not have a
shift key.
The program then logs the
Page 3-14
Page 36
Chapter 4: Running your System
GBBS ][
RUNNING
Running a GBBS ][ system requires little
effort, but there are some things that must be
done to keep the system operating smoothly. New
users need to be verified to keep the system disk
from running out of space. Since the system log
must be cleared frequently,
mended. If it is not possible to keep up with it,
there is a way to remove the log file in chapter
5. You will need to check the bulletin board and
kill off old bulletins. Last of all, as Sysop, you
generally get great quantities of mail. You need
to get on and read it so that the mail disk does
not fill up.
When you log on the system, there are 3
possible messages that you may see. The first is
that there are new users, the second that there
are new bulletins, and the third that you have
mail. The first thing you should do is to read
your mail if you have some. Once you are done with
your mail, go to the bulletin boards and read the
new bulletins. If you board is getting full, you
might wish to kill some of the old bulletins
although there is now an option that will
automatically kill off bulletins as new ones are
added.
user could kill off all of your bulletins by
adding blank ones.
You should back these up often since a
YOUR
SYSTEM
once a day is recom—
After you have done all of the above, go to
the SYSTEM menu. Start things off by going through
the log with the "L" command. Show the log and
then delete it. If you got the message that there
are new users then use the "R" command to either
verify or kill them. You will be shown all the
Page 4-1
Page 37
Chapter 4: Running your System
known info about the user. His name and stats will
be left along with the comments he left for you.
The normal questions asked by the system are: 1)
What is the callers real name? 2) What type of
computer do they use?
You will be given a list of options after the
information is displayed. If you wish to send the
user a letter, then you can use the "R" command.
Though it is not displayed, it will "REPLY" to the
user. If you wish to verify the user, use the "V"
command. Enter 1 for the security level. After
you finish with all the users, delete the file.
After these steps have been completed, you
will be done with the general system maintenance.
You may wish to use the "C" (catalog a disk)
command to check on your disk space situation.
Trying to decide what to do when you run out of
space can be a problem. Better to keep a watch on
things and stop a problem before it happens. When
you finish with the system commands, you can log
off the system or type "A" to abort back to the
user section.
GBBS
GBBS
It seems that the most difficult part of
learning how to run and modify a GBBS ][ is how
the security system works.
it, you will realize that it is quite simple. The
system is based around a group of "switches" that
we will call "FLAGS". There are a total of 7 flags
user on the system. Each flag is like a switch, it
can be either OFF or ON. Each flag is like a BIT
if that helps. You can set these flags in any
combination for a user. Since there are 7 flags
and each is independent, there are a total of 128
security levels available. When you first get the
SECURITY SYSTEM
Jj
Once you understand
Page 4-2
Page 38
Chapter 4: Running your System
system, only 2 flags are in use. Flag 1 shows that
the user is verified. Flag 7 shows that the user
has Sysop status. Flags 2-6 are undefined. They
can be made to represent anything you wish. As an
example, if you wanted to have 3 boards: general,
6502, and CP/M then with the following lines of
code, you could make each board controlled by a
separate flag.
1315 IF I$="6502" AND USR(2) THEN BB=2:S=6:D=1:
V=0:GO TO 5000
1317 IF I$="CP/M" AND USR(3) THEN BB=3:S=6:D=1:
V=0:G0 TO 5000
The access for the general board is in the
program set for flag 1 already. In GBBS ][, the
USR() statement is used to check the security
flags. In the above statements, USR(2) and USR(3)
were both used. This is the way that flags are
tested. In line 1315 we check to see if they typed
"6502" (I$). If they did then they wish to go to
the 6502 board. We then check USR(2) to see if
they have flag 2 set. If they do, then they will
be allowed access to the board. Likewise in 1317
we use a different command and flag 3. Now either
of these flags can be used to access different
things.
GBBS ][
To allow a user to access the general board
and the CP/M board but not the 6502 board, we
would write down what flags we want set. In this
case, we would want flags 1 and 3 set. We would
then look the combination up in the "FLAG/BIT
TABLE" that is in chapter 3. In this case, the
level needed would be 9. An understanding of these
flags will be needed if you wish to make any
special mods to the system. Make sure that all
users on the system have at least level 1. Level 0
is un—verified user status. There is more
information of programming available in chapter 5.
Page 4-3
Page 39
Chapter 4: Running your System
GBBS ][
USING: GBBS
This program is used for changing the con—
figuration of your hardware. If you get new hard—
ware or change your current hardware, then it will
be necessary to tell the system the new infor—
mation. This program will also change a few soft—
ware functions of the system. When you type "RUN
GBBS II CONFIG" (or "RUN GBBS.CONFIG for ProDOS)
you will get a menu of possible options. If you
use option 1, your entire system will be wiped
out. For changing individual parts, options 2-5
should be used. The only option that I will ex—
plain here is option 5. The rest are hand—holding.
Option 5 allows you to change the CONTROL KEYS
used by the system. Once you have used the system,
you will become aware that there are 3 keys that
cause things to happen. These keys are ctrl—s,
ctrl—x, and ctrl—n. Because ctrl—s is a known
standard, it can not be changed. Ctrl—x and ctrl—n
on the other hand, can be changed to fit your
taste. Once you select option 5, you will be asked
for the "File Stop" character. This is the char—
acter, initially ctrl—x, that allows you to exit
from bulletins, mail, etc. Whatever key you press
will be used. You will then be able to edit the
message that goes with the key. You will then be
asked for the "File Skip" character. This char—
acter, normally ctrl—n, is used to skip to the
next bulletin. You can then edit the message. You
can then edit the "Mail Divider" last of all. It
is a string of 39 characters that is used to
"divide" sections of text up and make it easier to
read.
CONFIG
Page 4-4
Page 40
Chapter 4: Running your System
GBBS ][
USING:
This program requires the use of a printer. If
you do not have a printer, you can not run it.
This program assumes that your printer is in slot
1. This program will get a list of system users
and sort them by name, phone, last date on,
user number, or security level. The sorted list
will then be printed on your printer. Insert your
MASTER DISK and type "RUN GBBS II USERLIST" (or
"RUN GBBS.USERLIST" for ProDOS). The program will
run and ask you which field to sort by. You will
then be asked if you want the passwords shown.
Last of all, you will be able to mask out users if
you want. If you tell the system a security flag
to screen by, only users will that flag set will
be printer. Use 0 for all users. Sorting may well
take a minute or two so don't get concerned if
things seem to come to a halt.
USING: GBBS
This program will kill off old users from
your system. Depending on the popularity of your
system and your disk space, you will want to kill
off users that have not called in a long time.
With this program, you can enter a date to kill
users by. I would suggest that you kill users that
have not been on for 1 month at the minimum.
Generally, 3 months is a more reasonable length of
time. Example: If today is 8/12/85 and you want to
kill all users that have not called in the last 3
months, you would kill all users that have not
called since 5/12/85. To run the program, "RUN
GBBS II USERPURGE" from the MASTER DISK (or "RUN
GBBS.USERPURGE for ProDOS).
GBBS
USERLIST
USERPURGE
Page 4-5
Page 41
Chapter 4: Running your System
There are 2 modes of killing users. If you
answer "Yes" to the "Request before killing"
question then the system will ask you before it
deletes the User. Otherwise, they will be deleted
automatically. Their mail will also be deleted at
the same time. After the purge is complete, some
statistics will be printed out. The number of free
slots is how many more new users you can get
before the user file gets any bigger. The
allocated number of slots is the number of users.
The total number of slots includes both empty and
filled slots.
GBBS ][
Page 4-6
Page 42
Chapter 5: BBS Modifications
BBS
MODIFICATIONS
You may customize your GBBS ][ BBS program in
a variety of ways. Be sure to work on a back up
copy of your program and try out the new feature
before you SAVE it.
When reference is made to GBBS ][ BBS, it
refers to whatever the Applesoft part of your
board is named on the disk.
Though the mods are shown for the DOS ver—
sion, all the mods will work under ProDOS unless
noted. The differences between the two different
operating systems is minimal. The two main differ—
ences are in the file naming and the way you
specify a drive. In DOS where S,D,V are set for
slot, drive, volume, ProDOS X$ is set to the
pathname that you want to use. As far as file
names; Under DOS, files are named like "Dx/y" and
such. Under ProDOS they are "Dx.y" and such. The
slash is a period under ProDOS.
GBBS
1)
2)
HOW TO USE AN 80
For DOS:
Load in GBBS
For ProDOS:
Load in "GBBS".
Add a line:
7 S = 3
COLUMN
BBS.
Page 5-1
CARD
Page 43
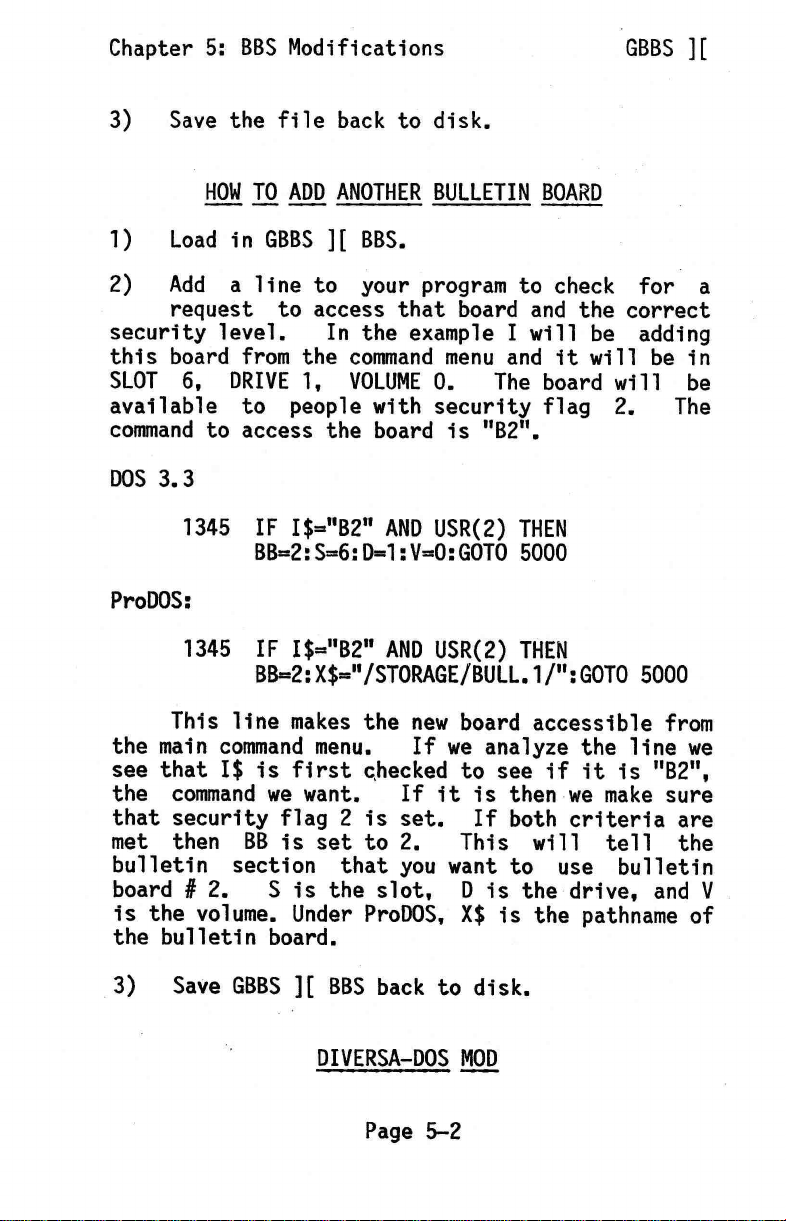
Chapter 5: BBS Modifications
3)
Save the file back to disk.
GBBS ][
HOW TO ADD
1)
2)
security level.
this board from the command menu and it will be in
SLOT 6, DRIVE 1, VOLUME O.
available to people with security flag 2.
command to access the board is "B2".
Load in GBBS ][ BBS.
Add a line to your program to check for a
request to access that board and the correct
DOS 3.3
1345 IF 1$="B2" AND USR(2) THEN
BB=2:S=6:D=1:V=0:GOTO 5000
ProDOS:
1345 IF 3=
BB=2:X$="/STORAGE/BULL.1/":GOTO 5000
This line makes the new board accessible from
the main command menu.
see that 1$ is first checked to see if it is "B2",
the command we want.
that security flag 2 is set. If both criteria are
met then BB is set to 2.
bulletin section that you want to use bulletin
board # 2.
is the volume. Under ProDOS, X$ is the pathname of
the bulletin board.
S is the slot, D is the drive, and V
ANOTHER BULLETIN BOARD
In the example I will be adding
The board will be
1
%2" AND USR(2) THEN
If we analyze the line we
If it is then we make sure
This will tell the
The
3)
Save GBBS ][ BBS back to disk.
DIVERSA—DOS
Page 5-2
MOD
Page 44
Chapter 5: BBS Modifications
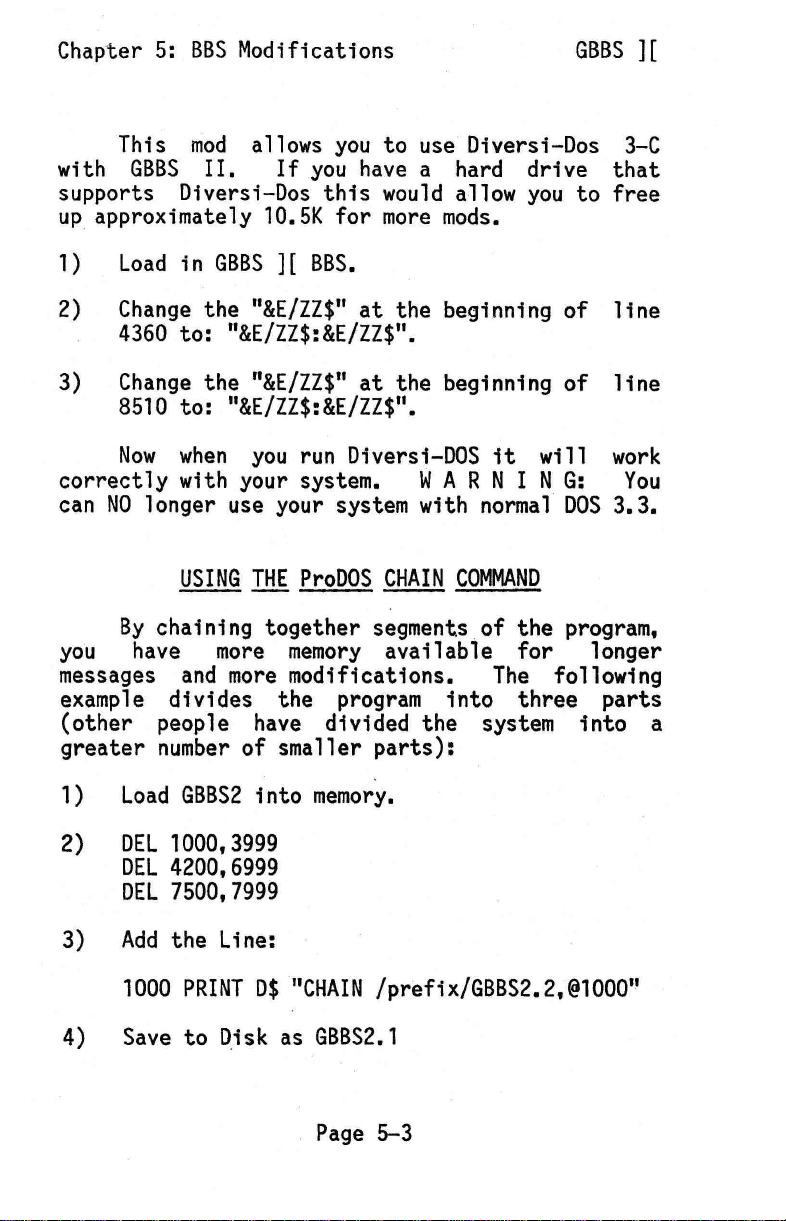
This mod allows you to use Diversi-Dos 3-C
with GBBS II.
supports Diversi-Dos this would allow you to free
up approximately 10.5K for more mods.
If you have a hard drive that
GBBS ][
1)
2)
3)
correctly with your system. W A R N I N G: You
can NO longer use your system with normal DOS 3.3.
example divides the program into three parts
(other people have divided the system into a
Load in GBBS ][ BBS.
Change the "&E/ZZ$" at the beginning of line
4360 to: "&E/ZZ$:&E/ZZ$".
Change the "&E/ZZ$" at the beginning of line
8510 to: "&E/ZZ$:&E/ZZ$".
Now when you run Diversi-DOS it will work
THE
USING
By chaining together segments of the program,
you have more memory available for longer
messages and more modifications.
greater number of smaller parts):
1)
Load GBBS2 into memory.
ProDOS CHAIN COMMAND
The following
2)
3)
4)
DEL 1000,3999
DEL 4200,6999
DEL 7500,7999
Add the Line:
1000 PRINT D$ "CHAIN /prefix/GBBS2.2,@1000"
Save to Disk as GBBS2.1
Page 5-3
Page 45
Chapter 5: BBS Modifications
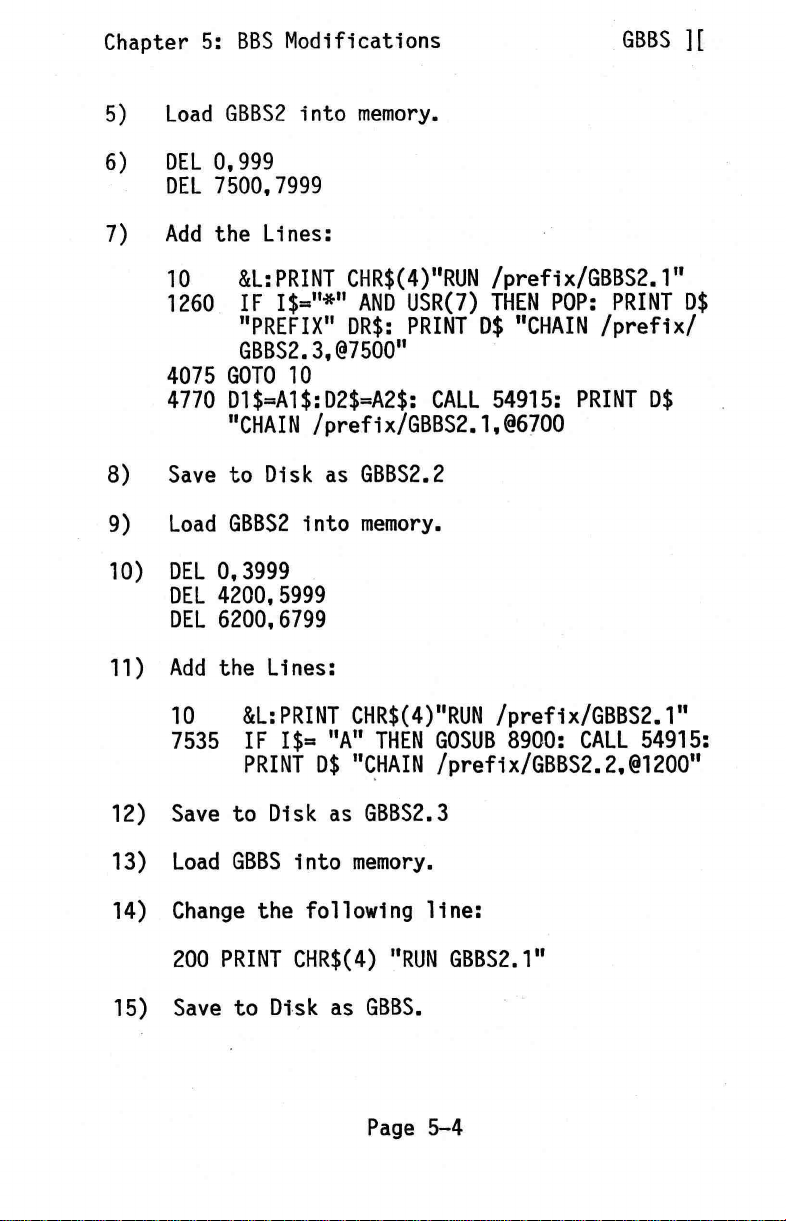
GBBS ][
5)
6)
7)
8)
9)
10)
11)
Load GBBS2 into memory.
DEL 0,999
DEL 7500,7999
Add the Lines:
10
1260 IF I$="*" AND USR(7) THEN POP: PRINT D$
4075 GOTO 10
4770 D1$=A1$:D2$42$: CALL 54915: PRINT D$
Save to Disk as GBBS2.2
Load GBBS2 into memory.
DEL 0,3999
DEL 4200,5999
DEL 6200,6799
Add the Lines:
&L:PRINT CHR$(4)"RUN /prefix/GBBS2.1"
"PREFIX" DR$: PRINT D$ "CHAIN /prefix/
GBBS2.3,@7500"
"CHAIN /prefix/GBBS2.1,@6700
10 &L:PRINT CHR$(4)"RUN /prefix/GBBS2.1"
7535 IF I$= "A" THEN GOSUB 8900: CALL 54915:
PRINT D$ "CHAIN /prefix/GBBS2.2,@1200"
Save to Disk as GBBS2.3
12)
13)
14)
Load GBBS into memory.
Change the following line:
200 PRINT CHR$(4) "RUN GBBS2.1"
Save to Disk as GBBS.
15)
Page 5-4
Page 46
Chapter 5: BBS Modifications
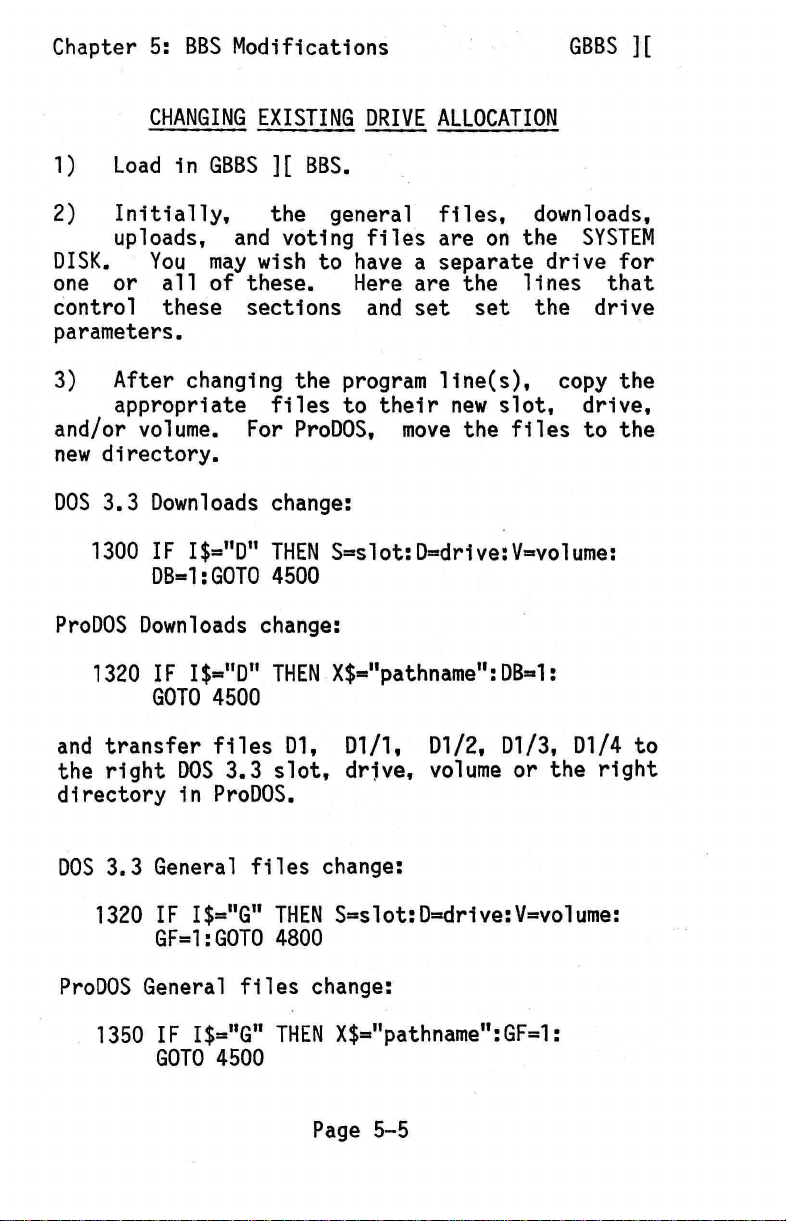
CHANGING EXISTING DRIVE ALLOCATION
1)
Load in GBBS ][ BBS.
GBBS ][
2)
DISK.
one or all of these. Here are the lines that
control these sections and set set the drive
parameters.
3)
and/or volume. For ProDOS, move the files to the
new directory.
DOS 3.3 Downloads change:
ProDOS Downloads change:
Initially, the general files, downloads,
uploads, and voting files are on the SYSTEM
You may wish to have a separate drive for
After changing the program line(s), copy the
appropriate files to their new slot, drive,
1300 IF 1$="D" THEN S=slot:D=drive:V=volume:
DB=1:GOTO 4500
1320 IF I$="D" THEN X$="pathname":DB=1:
GOTO 4500
and transfer files D1, D1/1, D1/2, D1/3, D1/4 to
the right DOS 3.3 slot, drive, volume or the right
directory in ProDOS.
DOS 3.3 General files change:
1320 IF I$="G" THEN S=slot:D=drive:V=volume:
GF=1:GOTO 4800
ProDOS General files change:
1350 IF 1$="G" THEN X$="pathname":GF=1:
GOTO 4500
Page 5-5
Page 47
Chapter 5: BBS Modifications
and transfer files: Gl, G1/1, G1/2, G1/3 to the
right DOS 3.3 slot, drive, volume or the right
directory in ProDOS.
DOS 3.3 Uploads change:
1410 IF 1$="!" AND (UP OR USR(7)) THEN S=slot:
D=drive:V=volume:GOTO 4900
ProDOS Uploads change:
1440 IF I$="!" AND (UP OR USR(7)) THEN X$=
"pathname":GOTO 4900
DOS 3.3 Voting change:
1250 IF 1$="V" THEN S=slot:D=drive:V=volume:
VS=1:GOTO 6200
ProDOS Voting change:
GBBS ][
1250 IF 1$="V" THEN X$="pathname":VS=1:
GOTO 6200
and transfer files: V1/1, V1/2, V1/3, V1/4 to the
right DOS 3.3 slot, drive, volume or the right
directory in ProDOS.
3)
Save GBBS ][ BBS back to disk.
HOW TO ADD
1)
We will use "2" for our example.
2)
Use an editor to create a file named "Dxx"
where xx is the section # you want to add.
Into this file put the names of the files you
ANOTHER DOWNLOAD SECTION
Page 5-6
Page 48
Chapter 5: BBS Modifications
have for downloading and how long they are.
the file size in sectors minis 1 (or the file
length in blocks times 2 minus 1). We will have 3
files in this section:
023 SUPER—EDIT
006 DISK COPY 48K
023 BACK SONGS
GBBS ][
3)
4)
6, DRIVE 2 (or for ProDOS in /STORAGE/STUFF/). We
already know that it is section # 2. We will make
"D2" the command to access it.
security is flag 2. We will add a line that looks
like this:
DOS 3.3:
ProDOS:
Load in GBBS ][ BBS.
Add the line that will access the new board.
We will say that our new section is in SLOT
The required
1275 IF 1$="D2" AND USR(2) THEN DB=2:S=6:D=2:
V=O:GOTO 4500
1275 IF I$="02" AND USR(2) THEN DB=2:X$=
"/STORAGE/STUFFP:GOTO 4500
5)
Save GBBS ][ BBS back to disk.
HOW TO ADD FEEDBACK TO A USER
1)
2)
questions to the Dungeon Master.
Load in GBBS ][ BBS.
Imagine that you have an online D & D game
going on and you would like the players to
have an easy way to leave their comments and
You are not the
Page 5-7
Page 49
Chapter 5: BBS Modifications
GBBS ][
DM since another user is.
FEEDBACK section for your DM?
"THE DM" (real original) and you want this feed—
back labeled "<><> COMMENTS FROM A PLAYER <><>".
(The "<><>" are on the line just for looks. They
don't affect the performance of this mod.) Adding
this line would enable us to leave the feedback:
1375 IF 1$="DM" AND USR (3) THEN 1500
DM is the name of our command.
only accessible to those people of security level
3.
You must branch to a separate part of the
program as this command requires more than 1 line.
DOS 3.3:
1500 0$=E$+"A question to the DM"+E$:
GOSUB 7000:GOSUB 7100
1510 IF NOT X THEN 0$=EWABORTED":GOTO 7000
1520 D1$="THE DM":D2$="<><> COMMENTS FROM
A PLAYER <><>
1530 D3$=".COMMENT SAVED":CR=1:GOTO 6800
ProDOS:
How do you add a
The DM's name is
The feedback is
1500 0$=E$+"A question to the DM
GOSUB 7000:GOSUB 7100
1510 IF NOT X THEN 0$=EWABORTED":GOTO 7000
1520 D1=the user number of the dm:D2$="<><>
COMMENTS FROM A PLAYER <><>
1530 D3W.COMMENT SAVED":CR=1:GOTO 6800
Line 1500 serves as a prompt to the user.
1510 goes to the editor.
aborted. Line 1520 will abort him. Otherwise the
appropriate variables are set.
DOS 3.3:
If X=0 then the user
Page 5-8
H
+E$:
Line
Page 50
Chapter 5: BBS Modifications
D1$="who you are sending to".
D2$="heading for the letter".
D3$="response when letter is saved".
ProDOS:
D1=the persons user number
D2$="heading for the letter".
D3$="response when letter is saved".
(CR must be set to 1 or D2$ will not be added. If
you don't want D2$ at the top of the letter then
set CR=O.) The command does not need to stretch
over 4 lines as it did. Here is how the same
command can be written in just 2 lines:
1500 O$=E$+"A QUESTION TO HIS HIGHNESS":
GOSUB 7000:GOSUB 7100: IF NOT X THEN
0$=EWABORTED":GOTO 7000
1510 D1$="THE DM":D2$="<><> COMMENTS FROM A
USER <><>":D3$=".COMMENTS SAVED":CR=1:
GOTO 6800
.
GBBS ][
3. Save GBBS ][ BBS back to disk.
HOW TO ADD OTHER SYSOPS
1)
2)
To do this we just add an extra line to the
flag 7 is set which enables access to the sysop
Load in GBBS ][ BBS.
Before you make this very simple modification
be sure to recognize that you are giving
another user power equal to your own as SYSOPI
program that checks the name against that of the
persons logging on. When he logs on, security
commands.
In our example, "FRED BAXTER" is our
Page 5-9
Page 51
Chapter 5: BBS Modifications
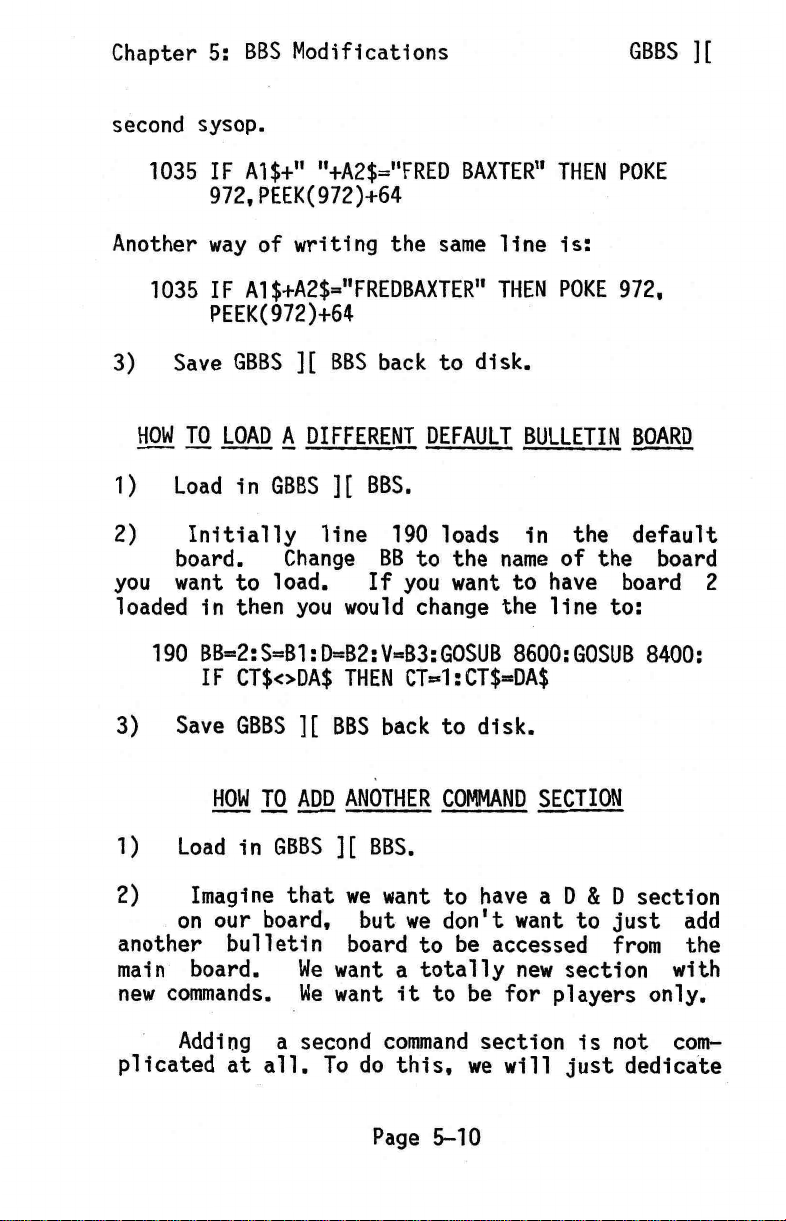
second sysop.
1035 IF A1$+" "+A2$="FRED BAXTER" THEN POKE
972,PEEK(972)+64
Another way of writing the same line is:
1035 IF A1$+A2$="FREDBAXTER" THEN POKE 972,
PEEK(972)+64
Save GBBS ][ BBS back to disk.
3)
GBBS ][
HOW TO LOAD A
1)
2)
Load in GBBS ][ BBS.
Initially line 190 loads in the default
board. Change BB to the name of the board
you want to load. If you want to have board 2
loaded in then you would change the line to:
190 BB=2:S=B1:D=B2:V=B3:GOSUB 8600:GOSUB 8400:
IF CT$<>DA$ THEN CT=1:CT$=DA$
3)
1)
2)
Save GBBS ][ BBS back to disk.
HOW TO ADD
Load in GBBS ][ BBS.
Imagine that we want to have a D & D section
on our board, but we don't want to just add
another bulletin board to be accessed from the
main board.
new commands. We want it to be for players only.
DIFFERENT DEFAULT BULLETIN BOARD
ANOTHER COMMAND SECTION
We want a totally new section with
Adding a second command section is not com—
plicated at all. To do this, we will just dedicate
Page 5-10
Page 52
Chapter 5: BBS Modifications
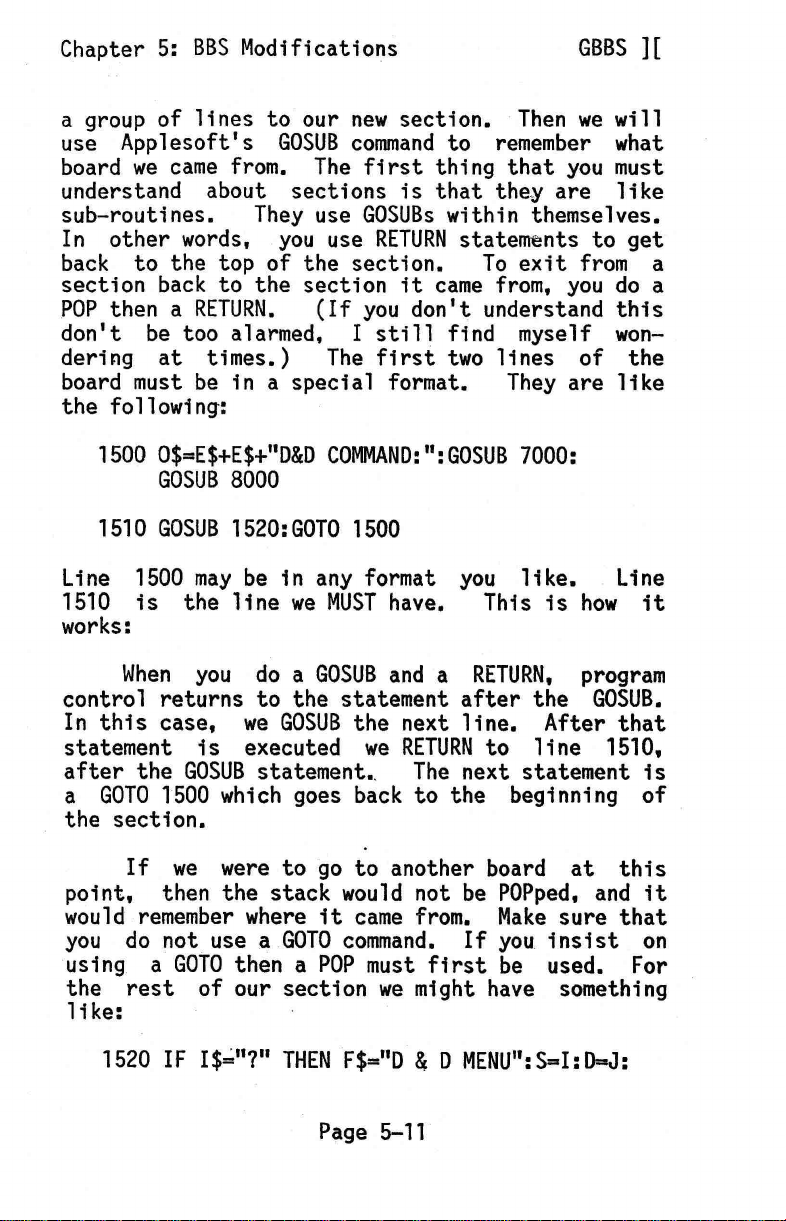
a group of lines to our new section. Then we will
use Applesoft's GOSUB command to remember what
board we came from. The first thing that you must
understand about sections is that they are like
sub—routines. They use GOSUBs within themselves.
In other words, you use RETURN statements to get
back to the top of the section. To exit from a
section back to the section it came from, you do a
POP then a RETURN.
don't be too alarmed, I still find myself won—
dering at times.)
board must be in a special format.
the following:
1500 0$=E$+E$+"D&D COMMAND:":GOSUB 7000:
GOSUB 8000
1510 GOSUB 1520:GOTO 1500
Line 1500 may be in any format you like. Line
1510 is the line we MUST have.
works:
(If you don't understand this
The first two lines of the
They are like
This is how it
GBBS ][
When you do a GOSUB and a RETURN, program
control returns to the statement after the GOSUB.
In this case, we GOSUB the next line. After that
statement is executed we RETURN to line 1510,
after the GOSUB statement.
a GOTO 1500 which goes back to the beginning of
the section.
If we were to go to another board at this
point, then the stack would not be POPped, and it
would remember where it came from. Make sure that
you do not use a GOTO command. If you insist on
using a GOTO then a POP must first be used. For
the rest of our section we might have something
like:
1520 IF I$="?" THEN F$="D & D MENU":S=I:D=J:
The next statement is
Page 5-11
Page 53
Chapter 5: BBS Modifications
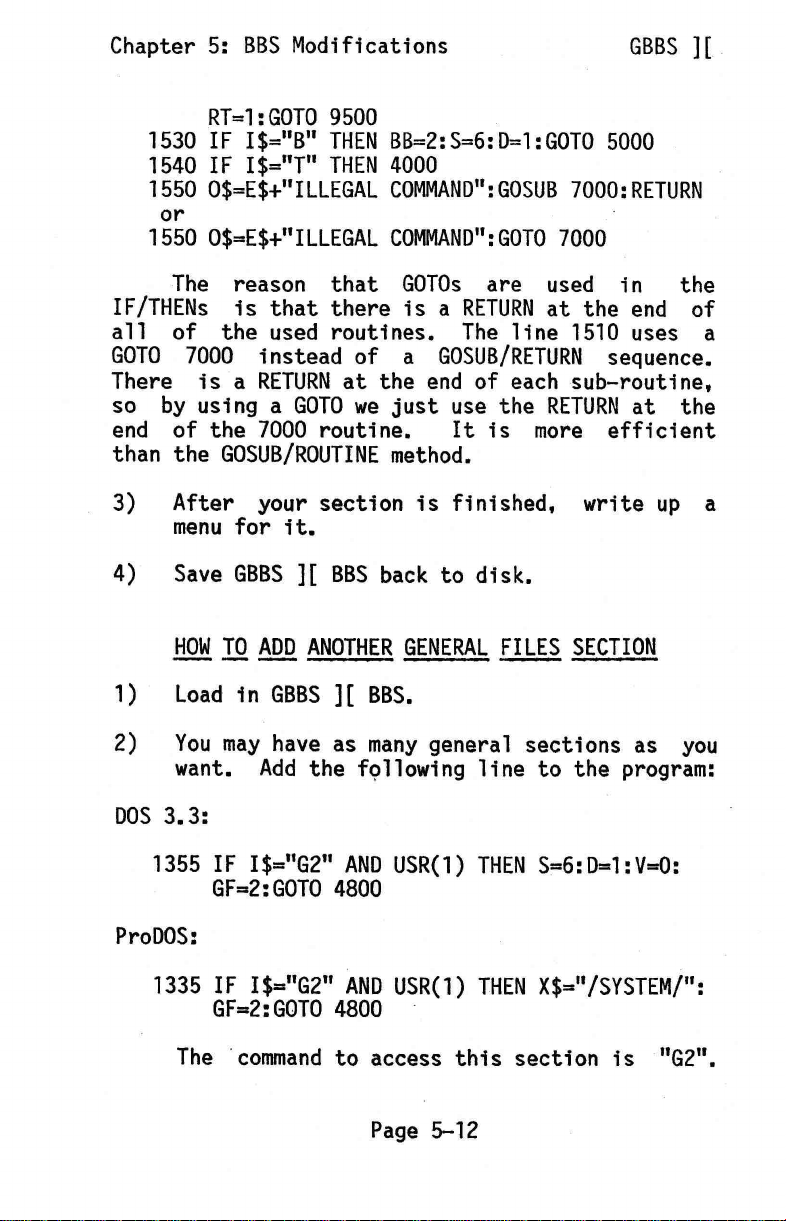
RT=1:GOTO 9500
1530 IF I$="B" THEN BB=2:S=6:D=1:GOTO 5000
1540 IF 1$="T" THEN 4000
1550 0$=E$+"ILLEGAL COMMAND":GOSUB 7000:RETURN
or
1550 0$=E$+"ILLEGAL COMMAND":GOTO 7000
The reason that GOTOs are used in the
IF/THENs is that there is a RETURN at the end of
all of the used routines. The line 1510 uses a
GOTO 7000 instead of a GOSUB/RETURN sequence.
There is a RETURN at the end of each sub—routine,
so by using a GOTO we just use the RETURN at the
end of the 7000 routine.
than the GOSUB/ROUTINE method.
It is more efficient
GBBS ][
3)
After your section is finished, write up a
menu for it.
4)
Save GBBS ][ BBS back to disk.
HOW TO ADD
1)
2)
DOS 3.3:
ProDOS:
Load in GBBS ][ BBS.
You may have as many general sections as you
want. Add the following line to the program:
1355 IF 1$="G2" AND USR(1) THEN S=6:D=1:V=0:
GF=2:GOTO 4800
1335 IF I$="G2" AND USR(1) THEN X$="/SYSTEM/":
GF=2:GOTO 4800
The command to access this section is "G2".
ANOTHER GENERAL
FILES
SECTION
Page 5-12
Page 54
Chapter 5: BBS Modifications
GBBS ][
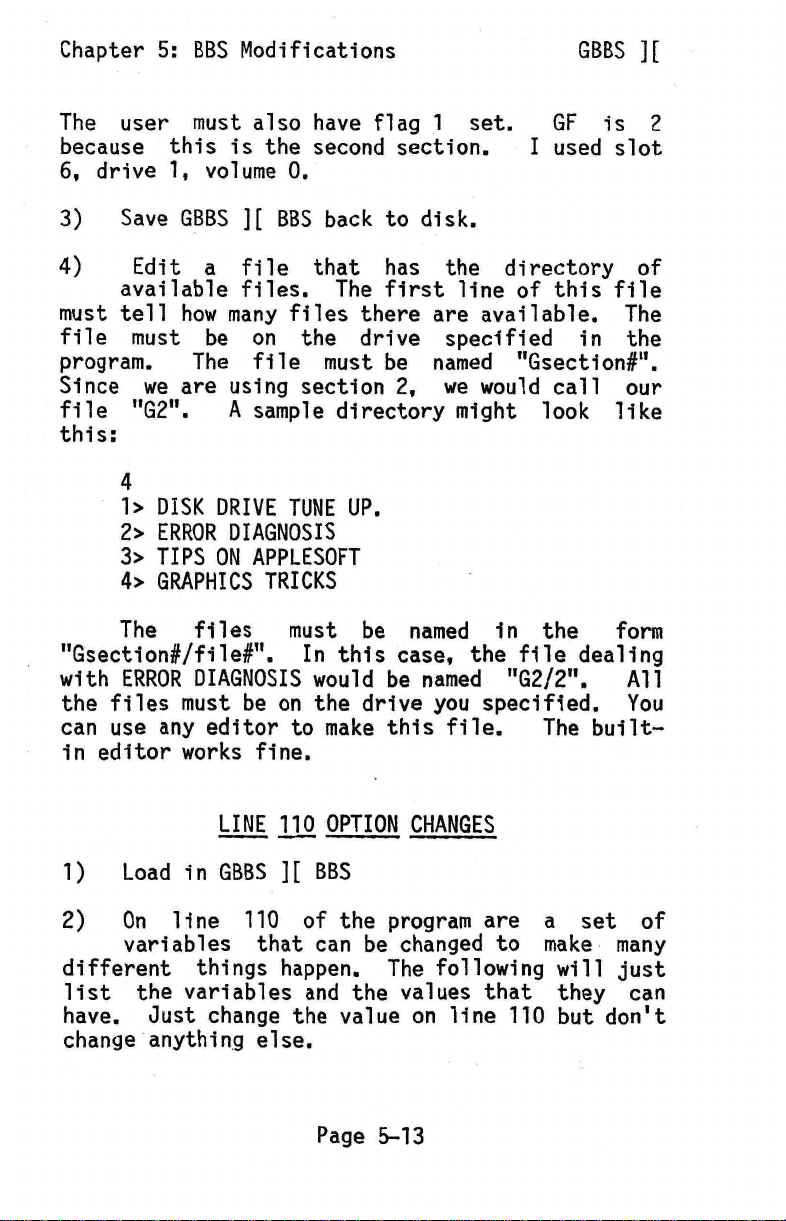
The user must also have flag 1 set.
because this is the second section.
6, drive 1, volume O.
3)
4)
file must be on the drive specified in the
Since we are using section 2, we would call our
file "G2".
this:
"Gsection#/filee. In this case, the file dealing
Save GBBS ][ BBS back to disk.
Edit a file that has the directory of
available files. The first line of this file
must tell how many files there are available. The
program.
with ERROR DIAGNOSIS would be named "G2/2".
the files must be on the drive you specified. You
can use any editor to make this file.
in editor works fine.
The file must be named "Gsection#".
A sample directory might look like
4
1> DISK DRIVE TUNE UP.
2> ERROR DIAGNOSIS
3> TIPS ON APPLESOFT
4> GRAPHICS TRICKS
The files must be named in the form
GF is 2
I used slot
The built-
All
LINE 110
1)
2)
different things happen. The following will just
list the variables and the values that they can
change anything else.
Load in GBBS ][ BBS
On line 110 of the program are a set of
variables that can be changed to make many
have. Just change the value on line 110 but don't
OPTION CHANGES
Page 5-13
Page 55
Chapter 5: BBS Modifications
GBBS ][
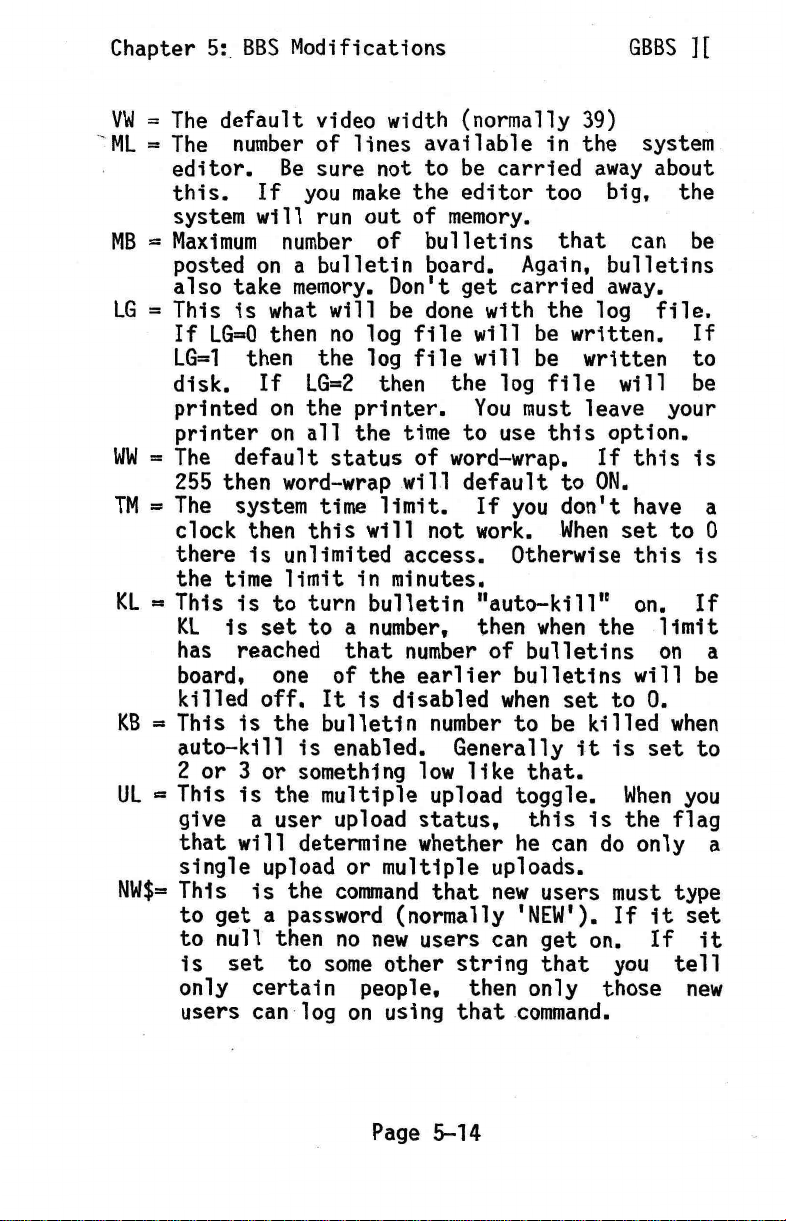
VW = The default video width (normally 39)
ML = The number of lines available in the system
-
editor. Be sure not to be carried away about
this. If you make the editor too big, the
system will run out of memory.
MB = Maximum number of bulletins that can be
posted on a bulletin board. Again, bulletins
also take memory. Don't get carried away.
LG = This is what will be done with the log file.
If LG=0 then no log file will be written. If
LG=1 then the log file will be written to
disk. If LG=2 then the log file will be
printed on the printer. You must leave your
printer on all the time to use this option.
WW = The default status of word—wrap. If this is
255 then word—wrap will default to ON.
TM = The system time limit. If you don't have a
clock then this will not work. When set to 0
there is unlimited access. Otherwise this is
the time limit in minutes.
KL = This is to turn bulletin "auto—kill" on. If
KL is set to a number, then when the limit
has reached that number of bulletins on a
board, one of the earlier bulletins will be
killed off. It is disabled when set to O.
KB = This is the bulletin number to be killed when
auto—kill is enabled. Generally it is set to
2 or 3 or something low like that.
UL = This is the multiple upload toggle. When you
give a user upload status, this is the flag
that will determine whether he can do only a
single upload or multiple uploads.
NW$= This is the command that new users must type
to get a password (normally 'NEW'). If it set
to null then no new users can get on. If it
is set to some other string that you tell
only certain people, then only those new
users can log on using that command.
Page 5-14
Page 56
Chapter 5: BBS Modifications
GBBS ][
DATA FILE
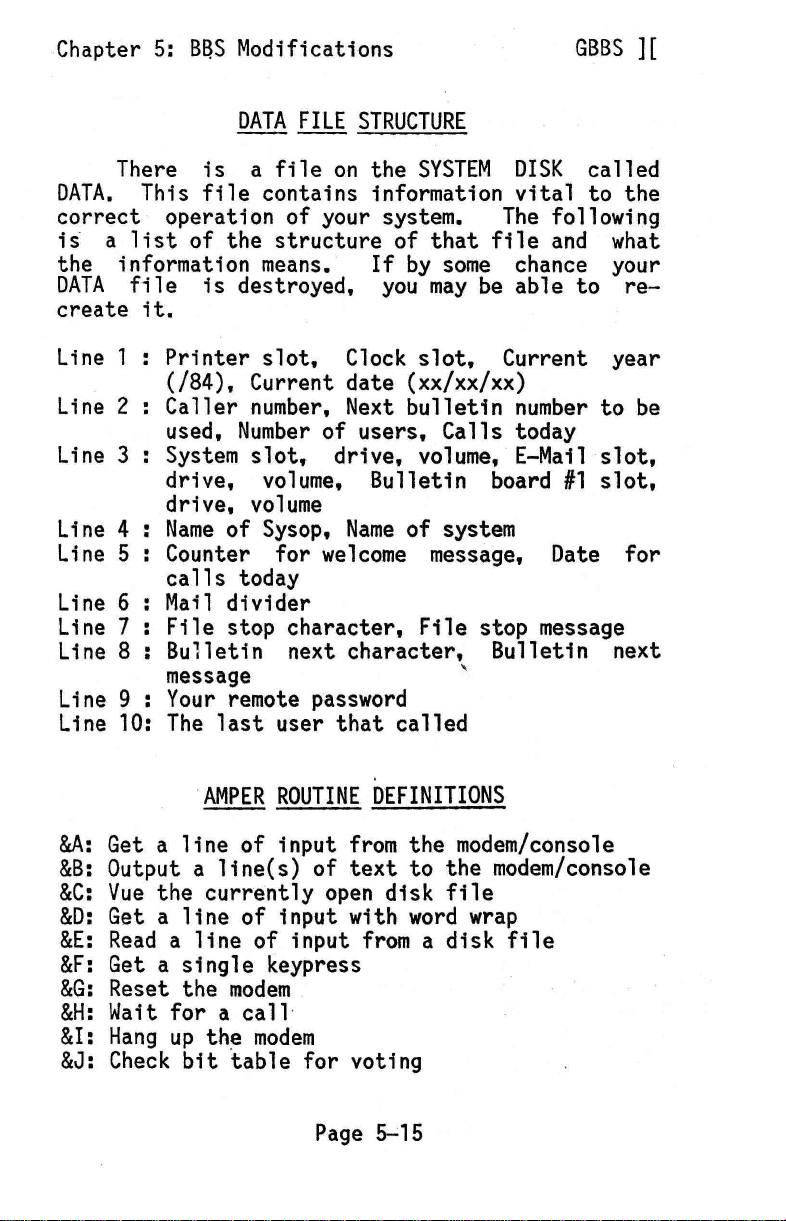
There is a file on the SYSTEM DISK called
DATA. This file contains information vital to the
correct operation of your system. The following
is a list of the structure of that file and what
the information means.
DATA file is destroyed, you may be able to re—
create it.
Line 1 : Printer slot, Clock slot, Current year
(184), Current date (xx/xx/xx)
Line 2 : Caller number, Next bulletin number to be
used, Number of users, Calls today
Line 3 : System slot, drive, volume, E—Mail slot,
drive, volume, Bulletin board #1 slot,
drive, volume
Line 4 : Name of Sysop, Name of system
Line 5 : Counter for welcome message, Date for
calls today
Line 6 : Mail divider
Line 7 : File stop character, File stop message
Line 8 : Bulletin next character, Bulletin next
message
Line 9 : Your remote password
Line 10: The last user that called
STRUCTURE
If by some chance your
AMPER ROUTINE DEFINITIONS
&A:
Get a line of input from the modem/console
Output a line(s) of text to the modem/console
&B:
&C:
Vue the currently open disk file
&D:
Get a line of input with word wrap
&E:
Read a line of input from a disk file
&F:
Get a single keypress
&G:
Reset the modem
&H:
Wait for a call
&I:
Hang up the modem
&J:
Check bit table for voting
Page 5-15
Page 57
Chapter 5: BBS Modifications
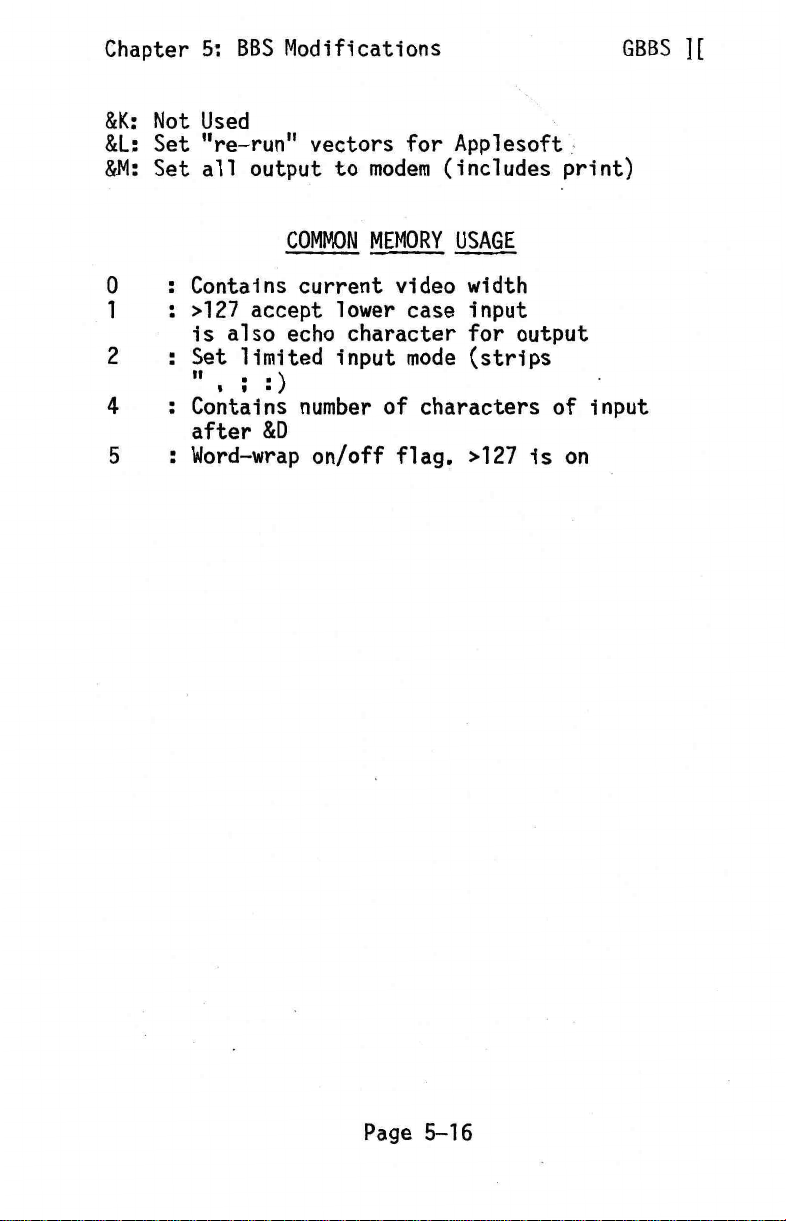
&K:
Not Used
&L:
Set "re—run" vectors for Applesoft
Set all output to modem (includes print)
&M:
COMMON MEMORY USAGE
0 : Contains current video width
1
2
4
: >127 accept lower case input
is also echo character for output
: Set limited input mode (strips
: Contains number of characters of input
after &D
5 : Word—wrap on/off flag. >127 is on
GBBS ][
Page 5-16
Page 58
Appendix A
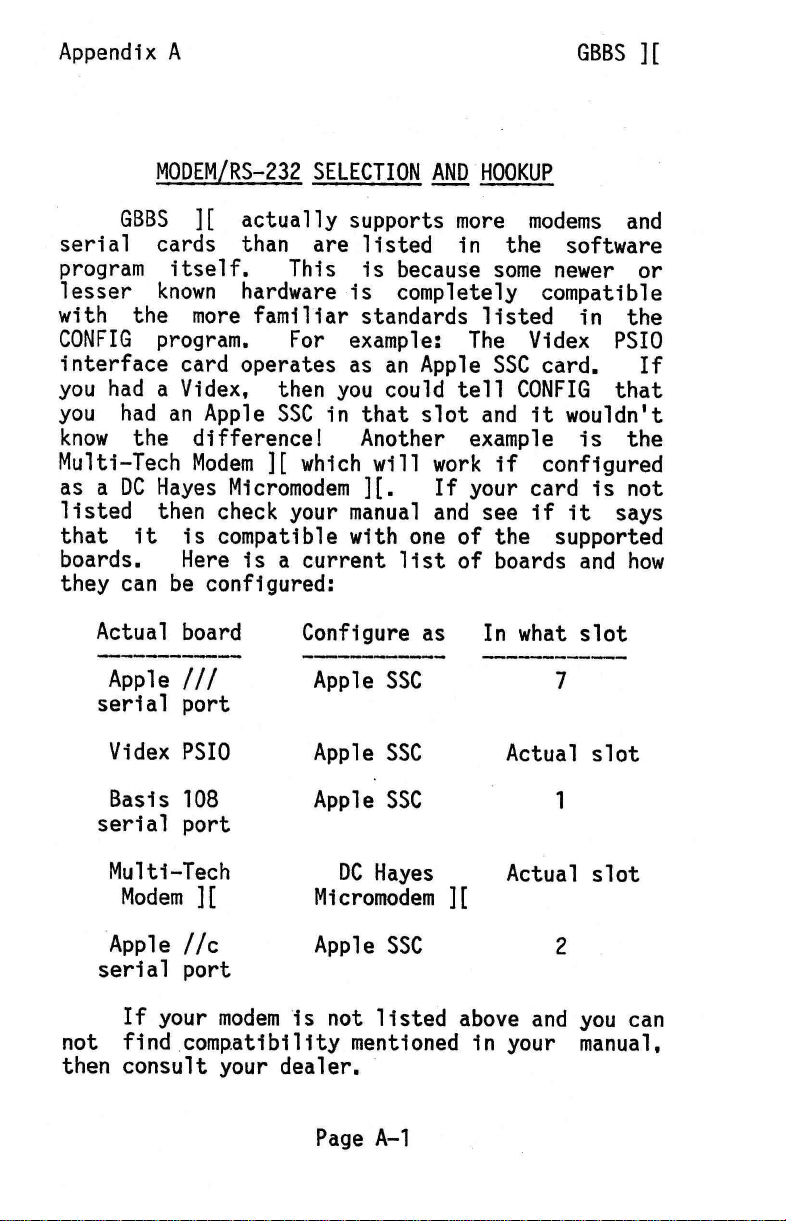
serial cards than are listed in the software
program itself.
lesser known hardware is completely compatible
with the more familiar standards listed in the
CONFIG program. For example: The Videx PSIO
interface card operates as an Apple SSC card.
you had a Videx, then you could tell CONFIG that
you had an Apple SSC in that slot and it wouldn't
know the difference! Another example is the
Multi—Tech Modem ][ which will work if configured
as a DC Hayes Micromodem ][.
listed then check your manual and see if it says
that it is compatible with one of the supported
boards.
they can be configured:
MODEM/RS-232 SELECTION AND HOOKUP
GBBS ][ actually supports more modems and
This is because some newer or
If your card is not
Here is a current list of boards and how
GBBS ][
If
Actual board
Apple ///
serial port
Videx PSIO
Basis 108
serial port
Multi—Tech
Modem ][
Apple //c
serial port
If your modem is not listed above and you can
not find compatibility mentioned in your manual,
then consult your dealer.
Configure as
Apple SSC
Apple SSC
Apple SSC
DC Hayes
Micromodem ][
Apple SSC
Page A-1
In what slot
7
Actual slot
1
Actual slot
2
Page 59
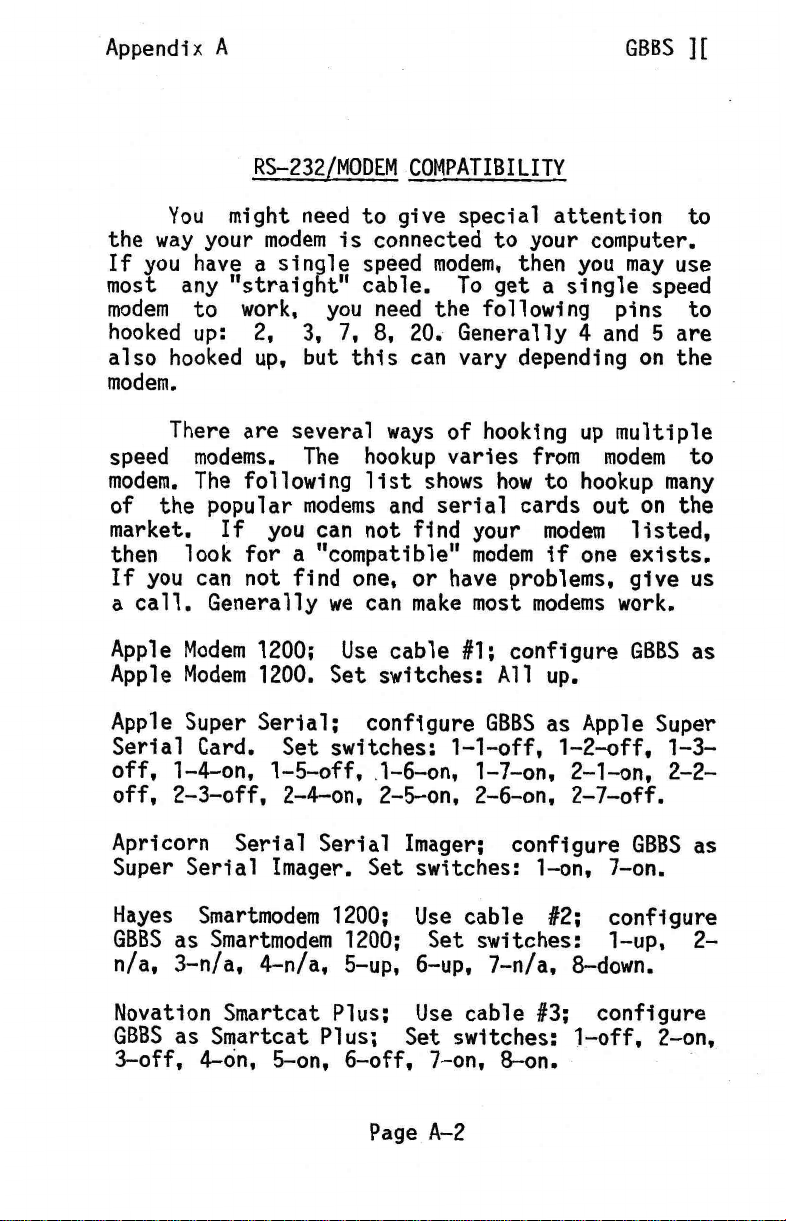
Appendix A
the way your modem is connected to your computer.
If you have a single speed modem, then you may use
most any "straight" cable. To get a single speed
modem to work, you need the following pins to
hooked up: 2, 3, 7, 8, 20. Generally 4 and 5 are
also hooked up, but this can vary depending on the
modem.
speed modems. The hookup varies from modem to
modem. The following list shows how to hookup many
of the popular modems and serial cards out on the
market. If you can not find your modem listed,
then look for a "compatible" modem if one exists.
If you can not find one, or have problems, give us
a call. Generally we can make most modems work.
RS-232/MODEM COMPATIBILITY
You might need to give special attention to
There are several ways of hooking up multiple
GBBS ][
Apple Modem 1200; Use cable #1; configure GBBS as
Apple Modem 1200. Set switches: All up.
Apple Super Serial; configure GBBS as Apple Super
Serial Card. Set switches: 1-1-off, 1-2-off, 1-3-
off, 1-4-on, 1-5-off, 1-6-on, 1-7-on, 2-1-on, 2-2-
off, 2-3-off, 2-4-on, 2-5-on, 2-6-on, 2-7-off.
Apricorn Serial Serial Imager; configure GBBS as
Super Serial Imager. Set switches: 1-on, 7-on.
Hayes Smartmodem 1200; Use cable #2; configure
GBBS as Smartmodem 1200; Set switches: 1-up, 2-
n/a, 3-n/a, 4-n/a, 5-up, 6-up, 7-n/a, 8-down.
Novation Smartcat Plus; Use cable #3; configure
GBBS as Smartcat Plus; Set switches: 1-off, 2-on,
3-off, 4-on, 5-on, 6-off, 7-on, 8-on.
Page A-2
Page 60
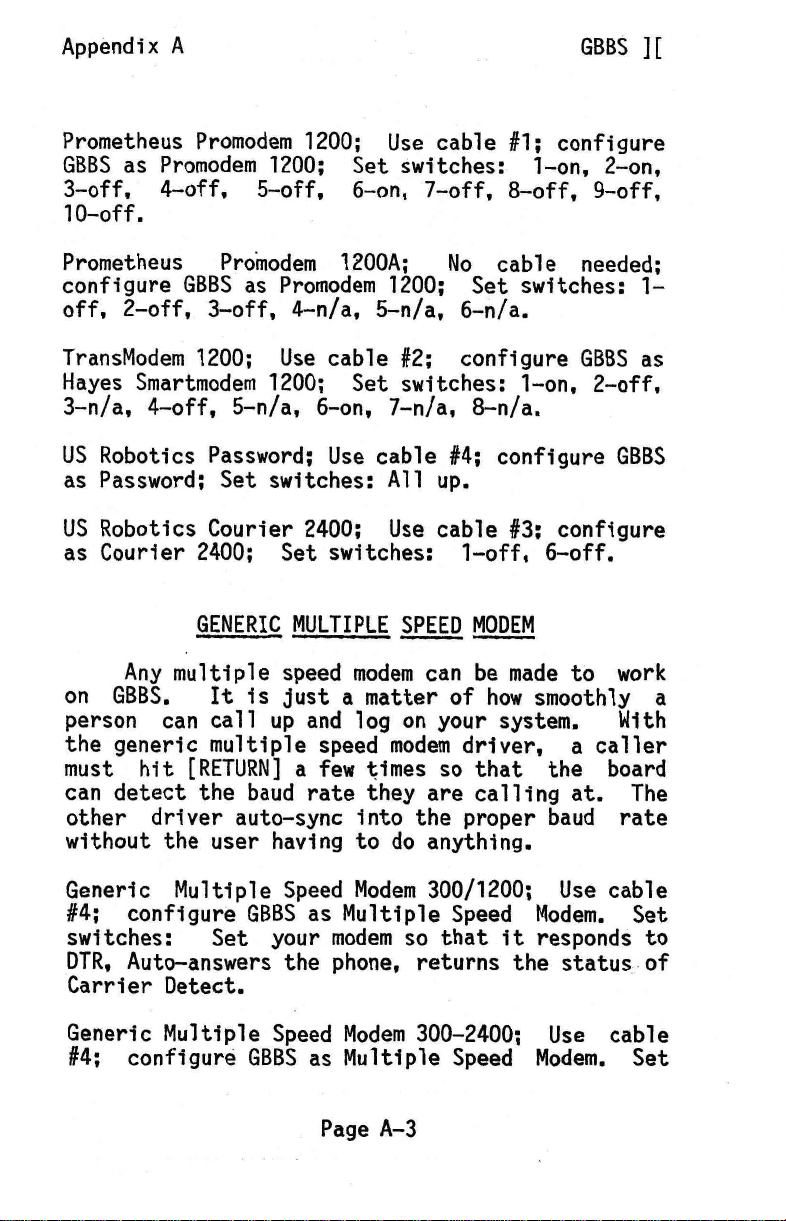
Appendix A
Prometheus Promodem 1200; Use cable #1; configure
GBBS as Promodem 1200; Set switches: 1-on, 2-on,
3-off, 4-off, 5-off, 6-on, 7-off, 8-off, 9-off,
10-off.
Prometheus Promodem 1200A; No cable needed;
configure GBBS as Promodem 1200; Set switches: 1-
off, 2-off, 3-off, 4-n/a, 5-n/a, 6-n/a.
TransModem 1200; Use cable #2; configure GBBS as
Hayes Smartmodem 1200; Set switches: 1-on, 2-off,
3-n/a, 4-off, 5-n/a, 6-on, 7-n/a, 8-n/a.
US Robotics Password; Use cable #4; configure GBBS
as Password; Set switches: All up.
US Robotics Courier 2400; Use cable #3; configure
as Courier 2400; Set switches: 1-off, 6-off.
GBBS ][
GENERIC MULTIPLE
Any multiple speed modem can be made to work
on GBBS.
person can call up and log on your system. With
the generic multiple speed modem driver, a caller
must hit [RETURN] a few times so that the board
can detect the baud rate they are calling at. The
other driver auto-sync into the proper baud rate
without the user having to do anything.
Generic Multiple Speed Modem 300/1200; Use cable
#4; configure GBBS as Multiple Speed Modem. Set
switches: Set your modem so that it responds to
DTR, Auto-answers the phone, returns the status of
Carrier Detect.
Generic Multiple Speed Modem 300-2400; Use cable
#4; configure GBBS as Multiple Speed Modem. Set
It is just a matter of how smoothly a
Page A-3
SPEED
MODEM
Page 61
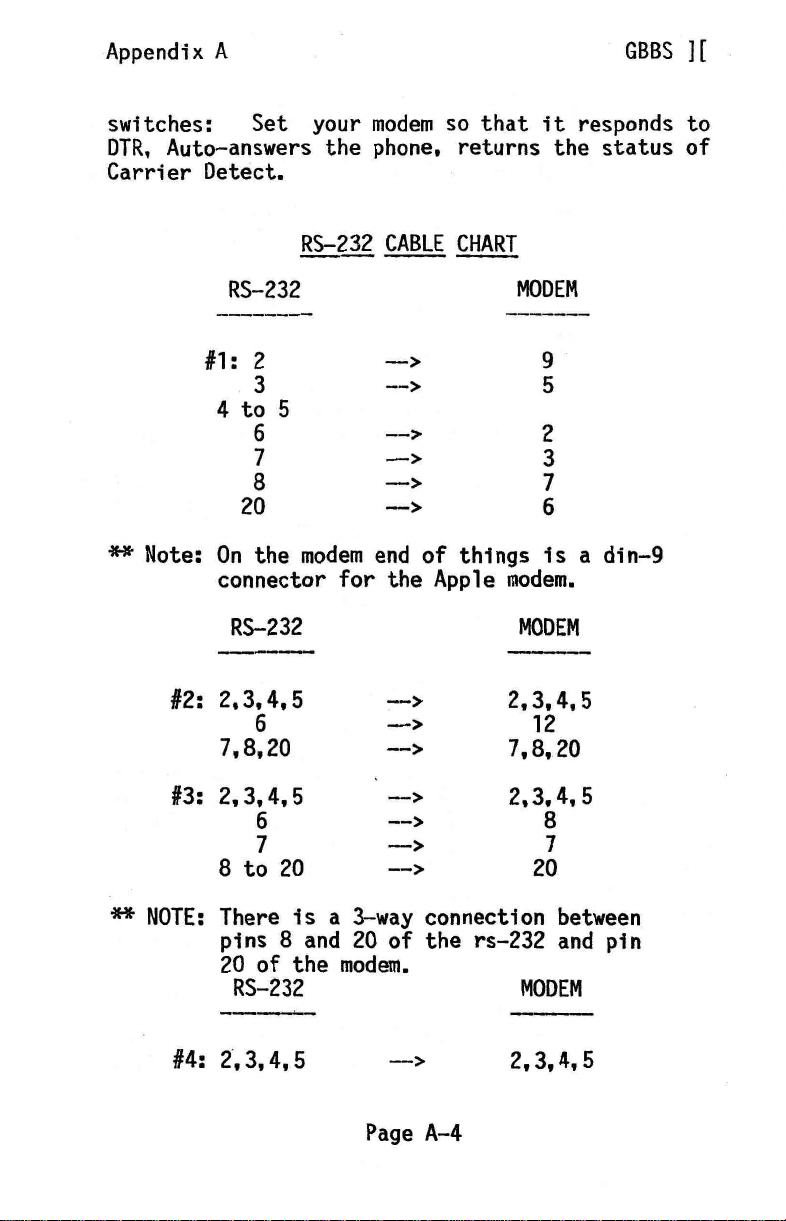
Appendix A
switches: Set your modem so that it responds to
DTR, Auto—answers the phone, returns the status of
Carrier Detect.
RS-232 CABLE CHART
GBBS ][
RS-232
2
#1:
3
4 to 5
6
7
8
20
** Note: On the modem end of things is a din-9
connector for the Apple modem.
RS-232
2,3,4,5
#2:
6
7,8,20
2,3,4,5
#3:
6
7
8 to 20
-->
-->
-->
—>
_—>
-->
-->
-->
-->
-->
-->
—>
-->
MODEM
9
5
2
3
7
6
MODEM
2,3,4,5
12
7,8,20
2,3,4,5
8
7
20
** NOTE: There is a 3—way connection between
pins 8 and 20 of the rs-232 and pin
20 of the modem.
RS-232
#4: 2,3,4,5
—>
Page A-4
MODEM
2,3,4,5
Page 62
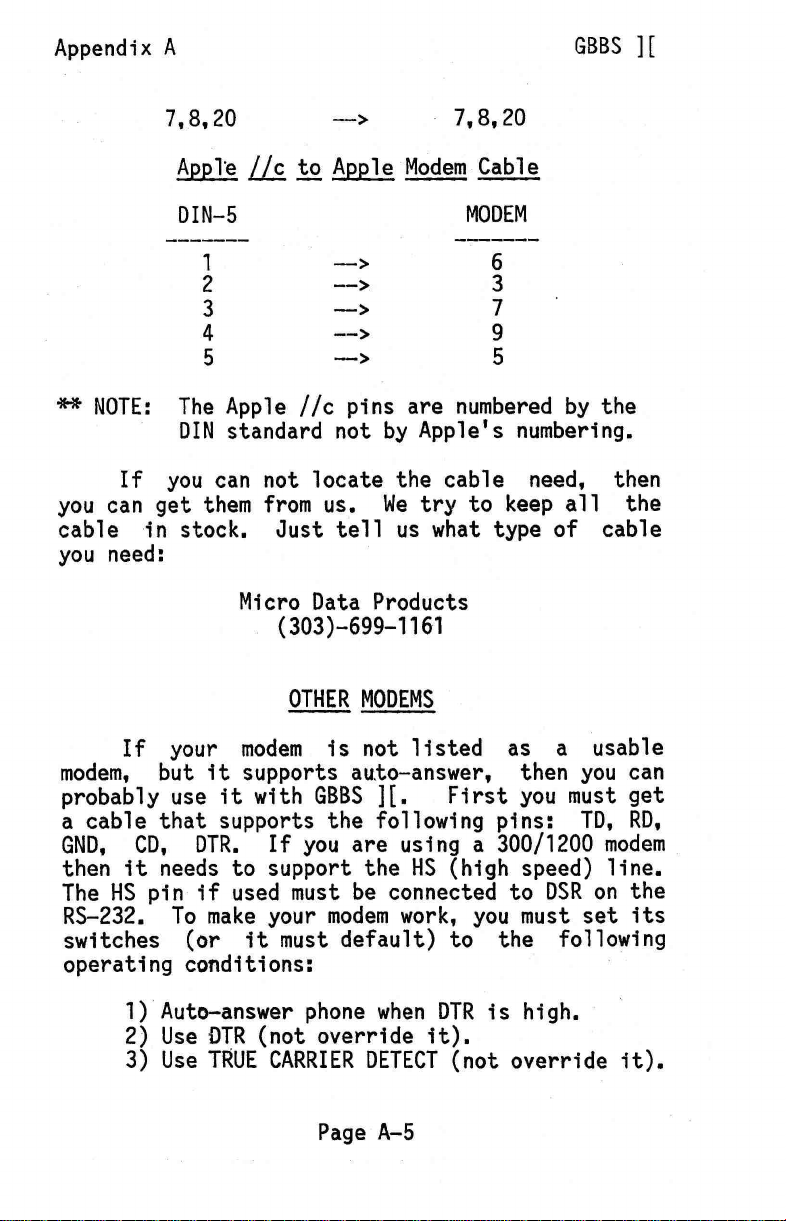
Appendix A
GBBS ][
7,8,20
->
7,8,20
Apple //c to Apple Modem Cable
DIN-5
1
2
3
4
5
—>
-->
-->
-->
MODEM
6
3
7
9
5
** NOTE: The Apple //c pins are numbered by the
DIN standard not by Apple's numbering.
If you can not locate the cable need, then
you can get them from us. We try to keep all the
cable in stock. Just tell us what type of cable
you need:
Micro Data Products
(303)-699-1161
OTHER MODEMS
If your modem is not listed as a usable
modem, but it supports auto—answer, then you can
probably use it with GBBS ][.
First you must get
a cable that supports the following pins: TD, RD,
GND, CD, DTR. If you are using a 300/1200 modem
then it needs to support the HS (high speed) line.
The HS pin if used must be connected to DSR on the
RS-232. To make your modem work, you must set its
switches (or it must default) to the following
operating conditions:
1)
Auto—answer phone when DTR is high.
Use DTR (not override it).
2)
3)
Use TRUE CARRIER DETECT (not override it).
Page A-5
Page 63
Appendix A
following conditions, select either "300 baud
modem" or "300/1200 baud modem from config.
Not respond to any commands sent to it by
4)
the computer. (If it is a smart—type modem
and takes commands, then disable its
command recognition.)
Hang up/reset upon loss of DTR.
5)
Once you have set your modem to work with the
GBBS ][
Page A-6
Page 64
Appendix B
flexible by using subroutines. All of these
routines may be accessed by code which you
yourself write and add to the board.
every case at a main routine (with the exception
of SYSTEM), you should gosub to the sub—routine
and you will return back to the line from which
you originally called the sub—routine from.
accessed with a GOTO instead of a GOSUB. This is
because the command routine does a GOSUB inside of
itself (more about that in chapter 5) so that you
need not GOSUB every routine individually.
[RETURN] inside of of the routine will send it
back to the COMMAND prompt. GOOD LUCK WITH ANY
MODS YOU MAY MAKE!
GBBS
11
.
MAIN
In writing GBBS ][ I tried to keep it very
From the command menu all routines should be
ROUTINES
GBBS ][
In almost
The
GENERAL CHANGES
General changes can cover a lot of things. I
will simply discuss how you can add text output
and input statements. To output a string of text,
the procedure is fairly simple.
BASIC, however, in which you use a PRINT
statement.
output will go to the console only. To output to
the modem also, the text must be assigned into 0$.
After that, you just need to GOSUB 7000 (the
routine that outputs the text in 0$).
wanted to output a line that said: "HELLO OUT
THERE" we could just add the line:
If you use a PRINT statement then the
XXXX 0$="HELLO THERE":GOSUB 7000
Page B-1
It is not like
Now, if we
Page 65
Appendix B
Now, that statement would output "HELLO THERE" to
the modem. You may find that a round—about way to
output, but it has some advantages:
GBBS ][
All output is through 1 routine.
1)
change something about ALL the output
just requires changing 7000.
2)
You may have fragments sticking out (like
a ";" in BASIC) and still issue DOS
/ProDOS commands.
3)
You can output a group of lines in 1
statement.
When you normally output, a [RETURN] is NOT
You must add the
added to the end of the line.
[RETURN] yourself by adding the variable E$ to 0$
where you want [RETURN]s.
after the line so we say:
XXXX 0$="HELLO THERE"+E$:GOSUB 7000
Note that the E$ is added to 0$ to give the
[RETURN]. If we wanted 2 [RETURN]S then we would
have to add 2 E$'s. Now, to output a whole
section of text we just do the following.
XXXX 0$="HELLO THERE"+E$+E$+"THIS IS A TEST
OF THE"+E$+"OUTPUT ROUTINES USED WITH
GBBS j["+E$:GOSUB 7000
Ex: We want a [RETURN]
To
If we RUN this, then we see:
HELLO THERE
THIS IS A TEST OF THE OUTPUT ROUTINES USED
WITH GBBS ][
Page B-2
Page 66
Appendix B
There are several routines available to INPUT
text:
1)
2)
3)
4)
special routines. Normally, the input is returned
in 1$.
returned in A as well. To ask a question such as:
"WHAT IS YOUR NAME?" and input the response would
require:
a second variable that you need be aware of: CR.
CR controls whether to allow just a single
[RETURN] to be entered as the reply to your
request for input. Normally, a single [RETURN] is
not accepted. To allow a single [RETURN] as a
response just set CR=1 before the GOSUB. Here are
descriptions of the 5 input routines available:
Normal input
Numeric input
Input without commas and colons
Single character input
Like output, input is done through GOSUBs to
If numeric input is used, then it is
XXXX 0$="WHAT IS YOUR NAME?":GOSUB 7000:
GOSUB 8000
The answer would be returned in 1$. There is
GBBS ][
GOSUB 8000: General line input.
[RETURN].
GOSUB 8100: General numeric input.
the value of the input in A, the actual input in
1$ and CR controls [RETURN].
GOSUB 8200: Same as GOSUB 8000 except no
commas or colons allowed.
GOSUB 8300: Same as GOSUB 8000 except only
the first character of input is returned in 1$.
Page B-3
CR control
Returns
Page 67
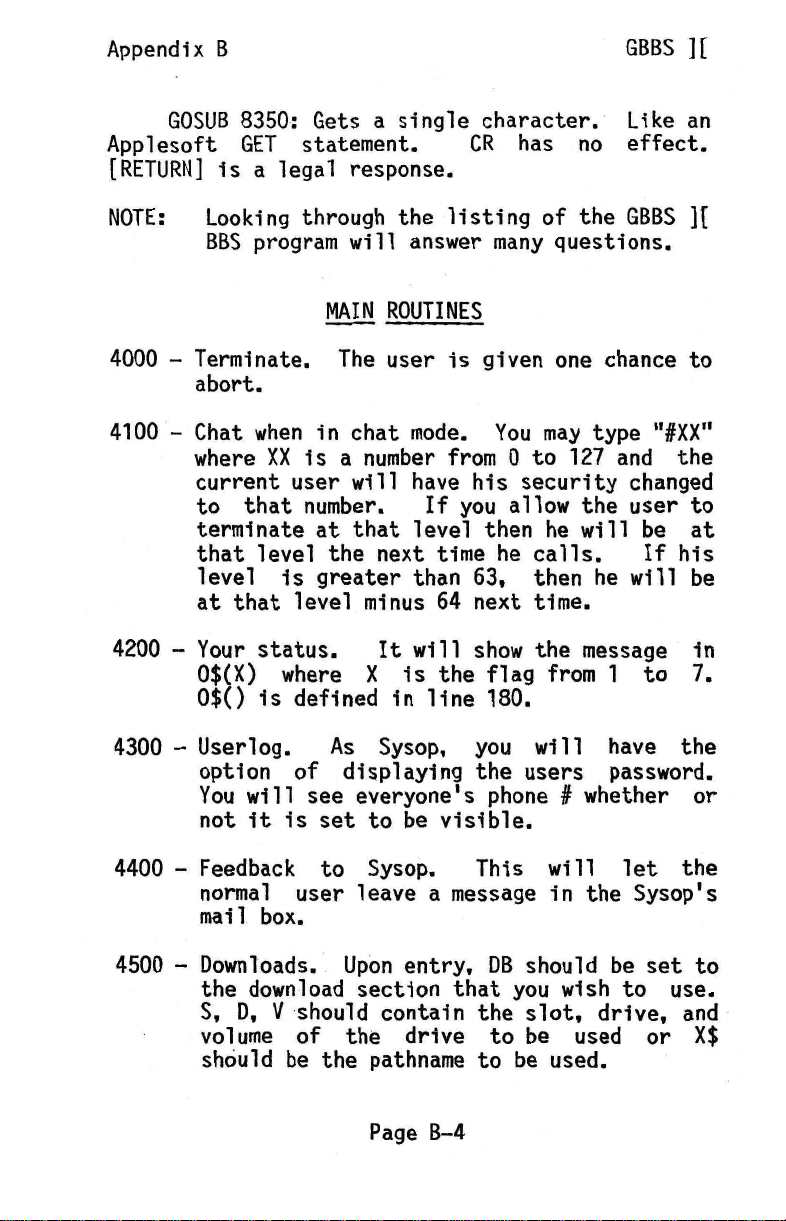
Appendix B
Applesoft GET statement.
[RETURN] is a legal response.
GOSUB 8350: Gets a single character. Like an
GBBS ][
CR has no effect.
NOTE:
Looking through the listing of the GBBS ][
BBS program will answer many questions.
MAIN ROUTINES
4000 - Terminate. The user is given one chance to
abort.
4100 - Chat when in chat mode. You may type "#XX"
where XX is a number from 0 to 127 and the
current user will have his security changed
to that number.
terminate at that level then he will be at
that level the next time he calls. If his
level is greater than 63, then he will be
at that level minus 64 next time.
4200 - Your status.
0$(X) where X is the flag from 1 to 7.
0$() is defined in line 180.
4300 - Userlog. As Sysop, you will have the
option of displaying the users password.
You will see everyone's phone # whether or
not it is set to be visible.
If you allow the user to
It will show the message in
4400 - Feedback to Sysop. This will let the
normal user leave a message in the Sysop's
mail box.
4500 - Downloads. Upon entry, DB should be set to
the download section that you wish to use.
S, D, V should contain the slot, drive, and
volume of the drive to be used or X$
should be the pathname to be used.
Page B-4
Page 68
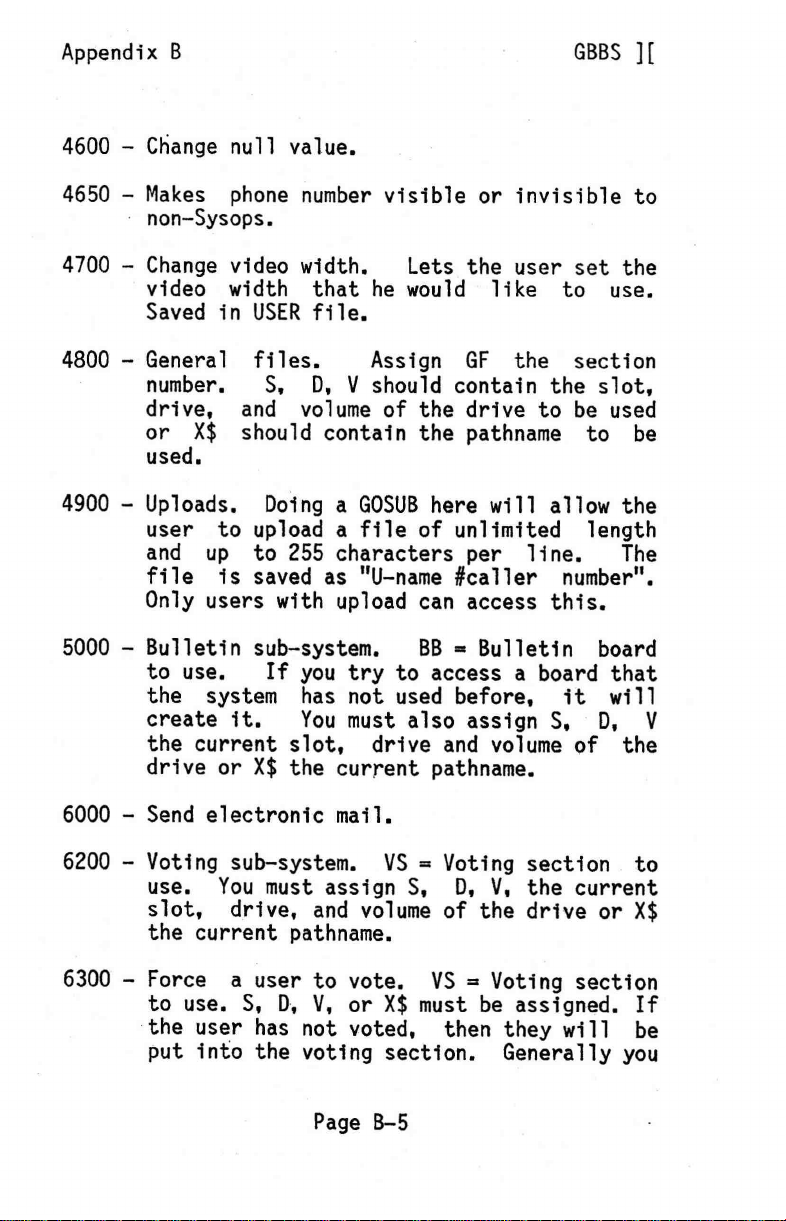
Appendix B
4600 — Change null value.
4650 — Makes phone number visible or invisible to
non—Sysops.
GBBS ][
4700 — Change video width.
video width that he would like to use.
Saved in USER file.
4800 — General files.
number.
drive, and volume of the drive to be used
or X$ should contain the pathname to be
used.
4900 — Uploads. Doing a GOSUB here will allow the
user to upload a file of unlimited length
and up to 255 characters per line.
file is saved as "U—name #caller number".
Only users with upload can access this.
5000 — Bulletin sub—system.
to use.
the system has not used before, it will
create it.
the current slot, drive and volume of the
drive or X$ the current pathname.
6000 — Send electronic mail.
S, D, V should contain the slot,
If you try to access a board that
You must also assign S, D, V
Lets the user set the
Assign GF the section
BB = Bulletin board
The
6200 — Voting sub—system. VS = Voting section to
use. You must assign S, D, V, the current
slot, drive, and volume of the drive or X$
the current pathname.
6300 — Force a user to vote. VS = Voting section
to use. S, D, V, or X$ must be assigned. If
the user has not voted, then they will be
put into the voting section. Generally you
Page B-5
Page 69
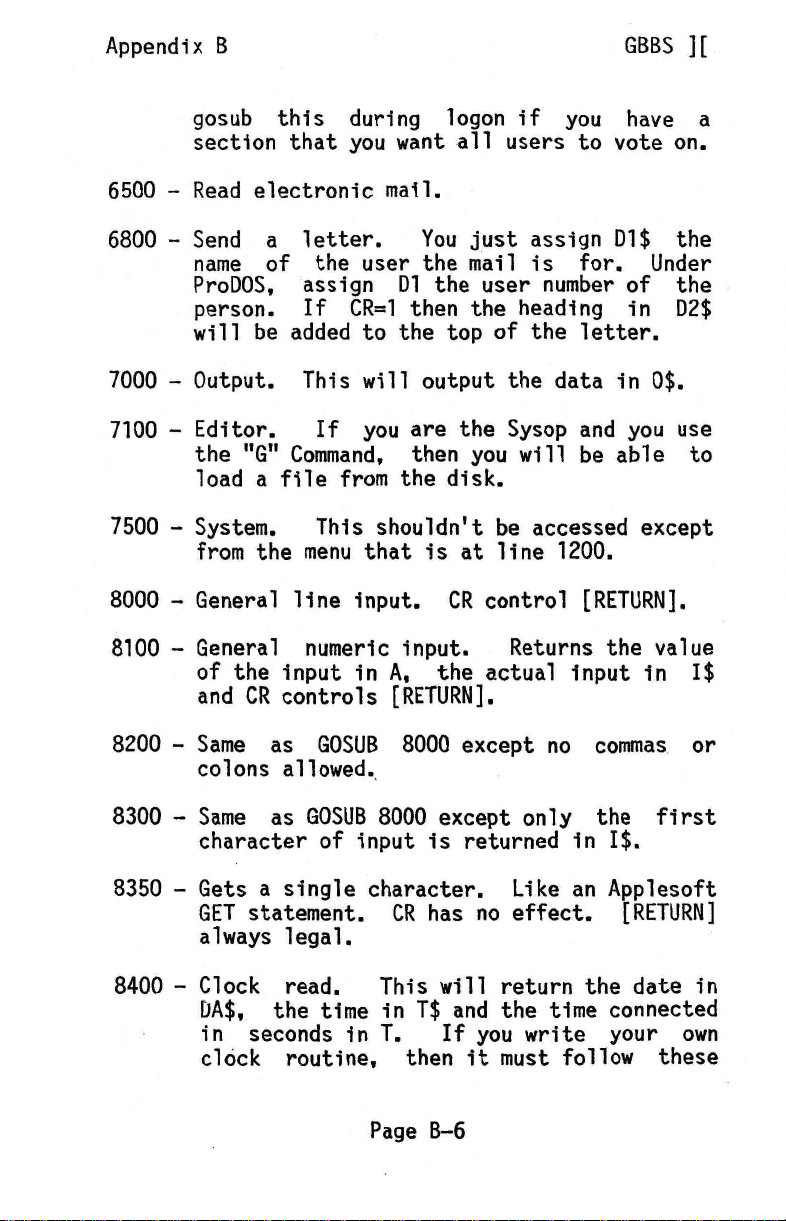
Appendix B
6500 - Read electronic mail.
gosub this during logon if you have a
section that you want all users to vote on.
GBBS ][
6800 - Send a letter.
name of the user the mail is for. Under
ProDOS, assign 01 the user number of the
person. If CR=1 then the heading in D2$
will be added to the top of the letter.
7000 - Output. This will output the data in 0$.
7100 - Editor.
the "G" Command, then you will be able to
load a file from the disk.
7500 - System.
from the menu that is at line 1200.
8000 - General line input. CR control [RETURN].
8100 - General numeric input.
of the input in A, the actual input in 1$
and CR controls [RETURN].
8200 - Same as GOSUB 8000 except no commas or
colons allowed.
8300 - Same as GOSUB 8000 except only the first
character of input is returned in 1$.
If you are the Sysop and you use
This shouldn't be accessed except
You just assign 01$ the
Returns the value
8350 - Gets a single character. Like an Applesoft
GET statement. CR has no effect. [RETURN]
always legal.
8400 - Clock read.
UA$,
in seconds in T. If you write your own
clock routine, then it must follow these
the time in T$ and the time connected
This will return the date in
Page B-6
Page 70
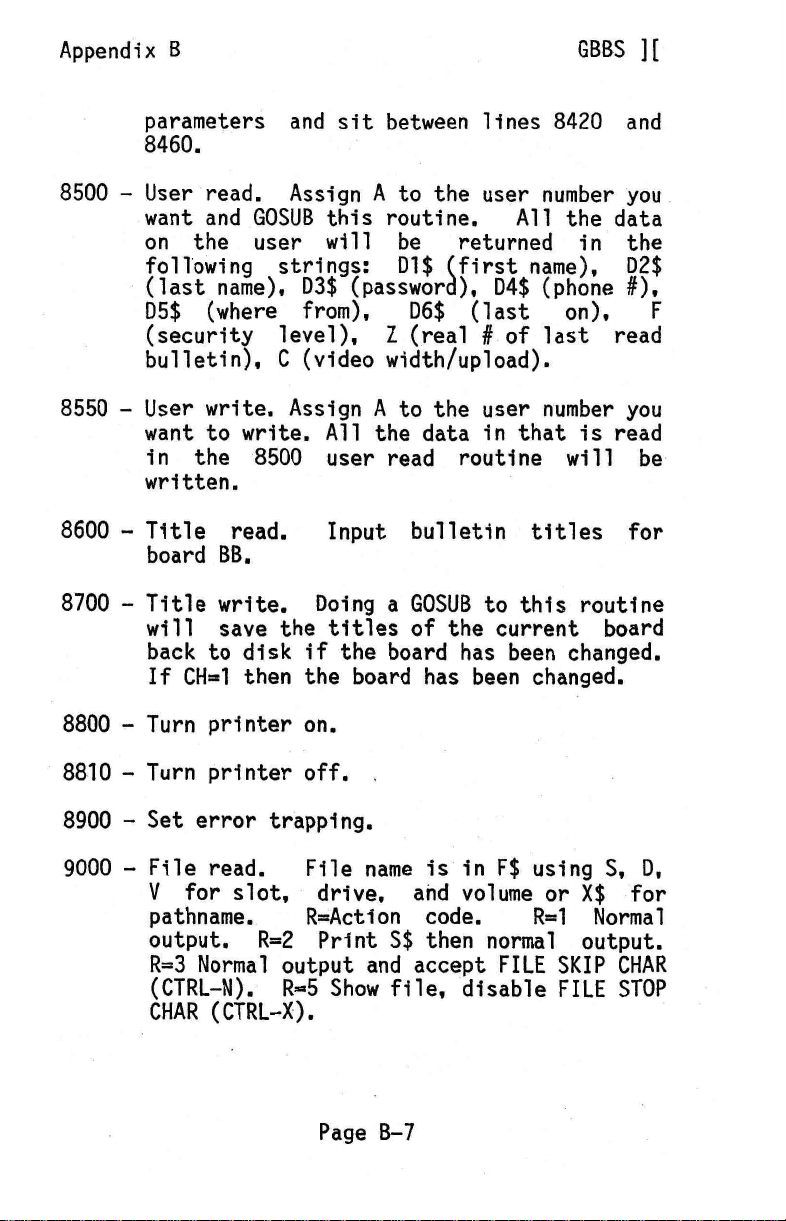
Appendix B
8500 — User read. Assign A to the user number you
8550 — User write. Assign A to the user number you
parameters and sit between lines 8420 and
8460.
want and GOSUB this routine.
on the user will be returned in the
following strings: Dl$ (first name), D2$
(last name), D3$ (password), D4$ (phone #),
D5$ (where from), D6$ (last on), F
(security level), Z (real # of last read
bulletin), C (video width/upload).
want to write. All the data in that is read
in the 8500 user read routine will be
written.
All the data
GBBS ][
8600 — Title read.
board BB.
8700 — Title write. Doing a GOSUB to this routine
will save the titles of the current board
back to disk if the board has been changed.
If CH=1 then the board has been changed.
8800 — Turn printer on.
8810 — Turn printer off.
8900 — Set error trapping.
9000 — File read. File name is in F$ using S, D,
V for slot, drive, and volume or X$ for
pathname.
output. R=2 Print S$ then normal output.
R=3 Normal output and accept FILE SKIP CHAR
(CTRL—N). R=5 Show file, disable FILE STOP
CHAR (CTRL—X).
Input bulletin titles for
R=Action code.
R=1 Normal
Page B-7
Page 71
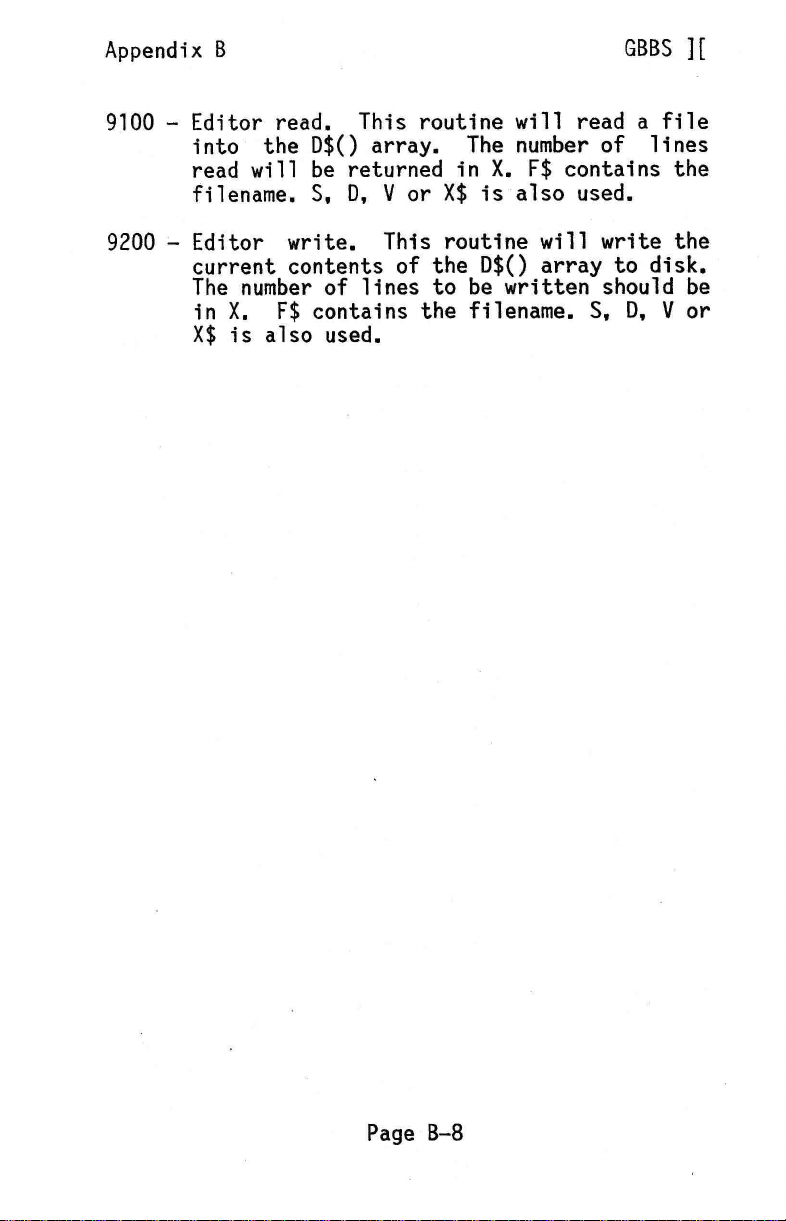
Appendix B
9100 - Editor read. This routine will read a file
9200 - Editor write. This routine will write the
into the D$() array. The number of lines
read will be returned in X. F$ contains the
filename. S, D, V or X$ is also used.
current contents of the D$() array to disk.
The number of lines to be written should be
in X. F$ contains the filename. S, D, V or
X$ is also used.
GBBS ][
Page 6-8
Page 72
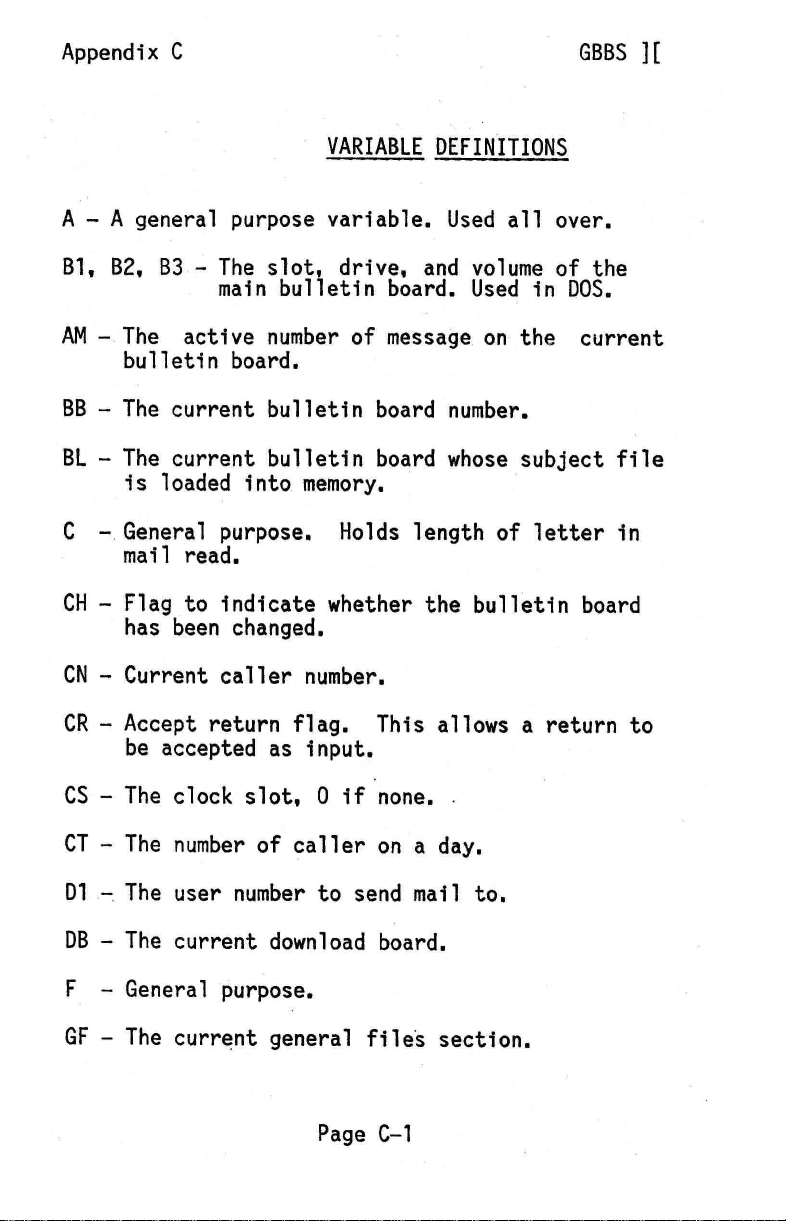
Appendix C
GBBS ][
VARIABLE DEFINITIONS
A - A general purpose variable. Used all over.
Bi, B2, B3 - The slot, drive, and volume of the
main bulletin board. Used in DOS.
AM - The active number of message on the current
bulletin board.
BB - The current bulletin board number.
BL - The current bulletin board whose subject file
is loaded into memory.
C - General purpose. Holds length of letter in
mail read.
CH - Flag to indicate whether the bulletin board
has been changed.
CN - Current caller number.
CR - Accept return flag. This allows a return to
be accepted as input.
CS - The clock slot, 0 if none.
CT - The number of caller on a day.
D1 - The user number to send mail to.
DB - The current download board.
F - General purpose.
GF - The current general files section.
Page C-1
Page 73
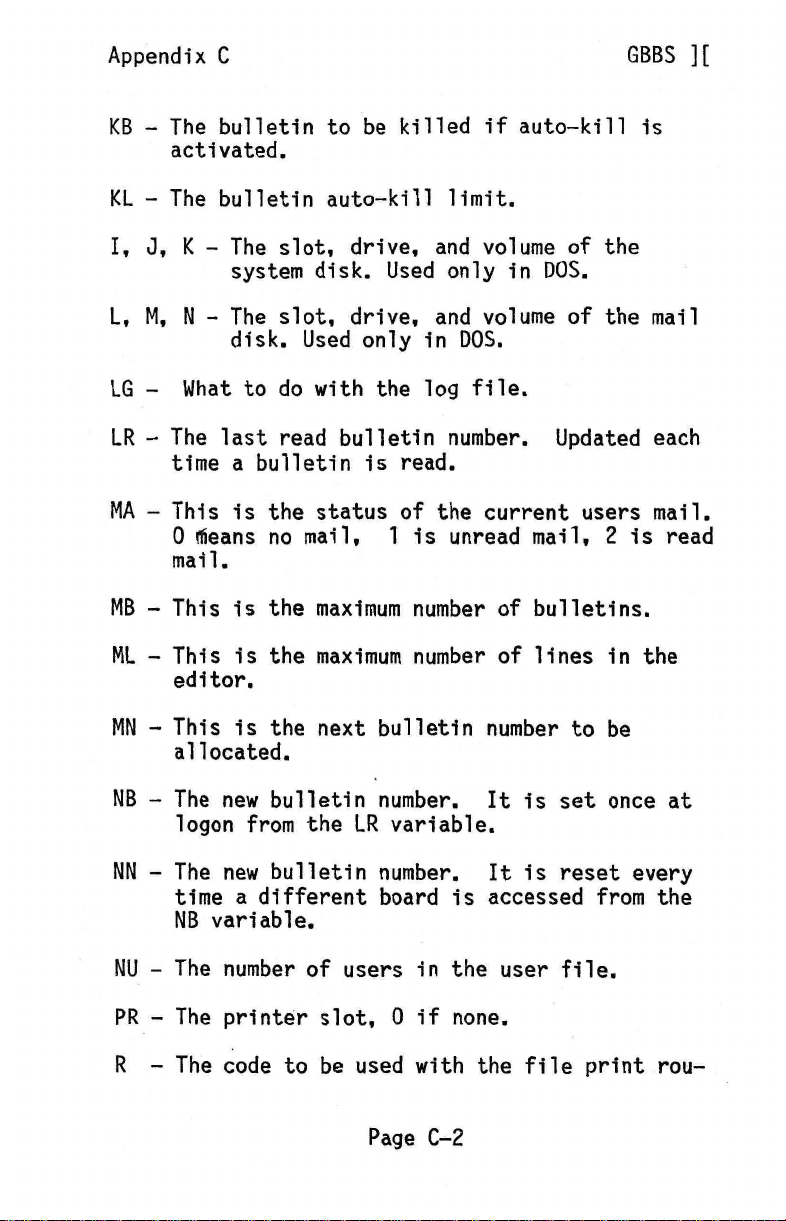
Appendix C
KB — The bulletin to be killed if auto—kill is
KL — The bulletin auto—kill limit.
I, J, K — The slot, drive, and volume of the
L, M, N — The slot, drive, and volume of the mail
LG — What to do with the log file.
LR — The last read bulletin number. Updated each
MA — This is the status of the current users mail.
MB — This is the maximum number of bulletins.
activated.
system disk. Used only in DOS.
disk. Used only in DOS.
time a bulletin is read.
0 Means no mail, 1 is unread mail, 2 is read
mail.
GBBS ][
ML — This is the maximum number of lines in the
editor.
MN — This is the next bulletin number to be
allocated.
NB — The new bulletin number. It is set once at
logon from the LR variable.
NN — The new bulletin number. It is reset every
time a different board is accessed from the
NB variable.
NU — The number of users in the user file.
PR — The printer slot, 0 if none.
R — The code to be used with the file print rou—
Page C-2
Page 74
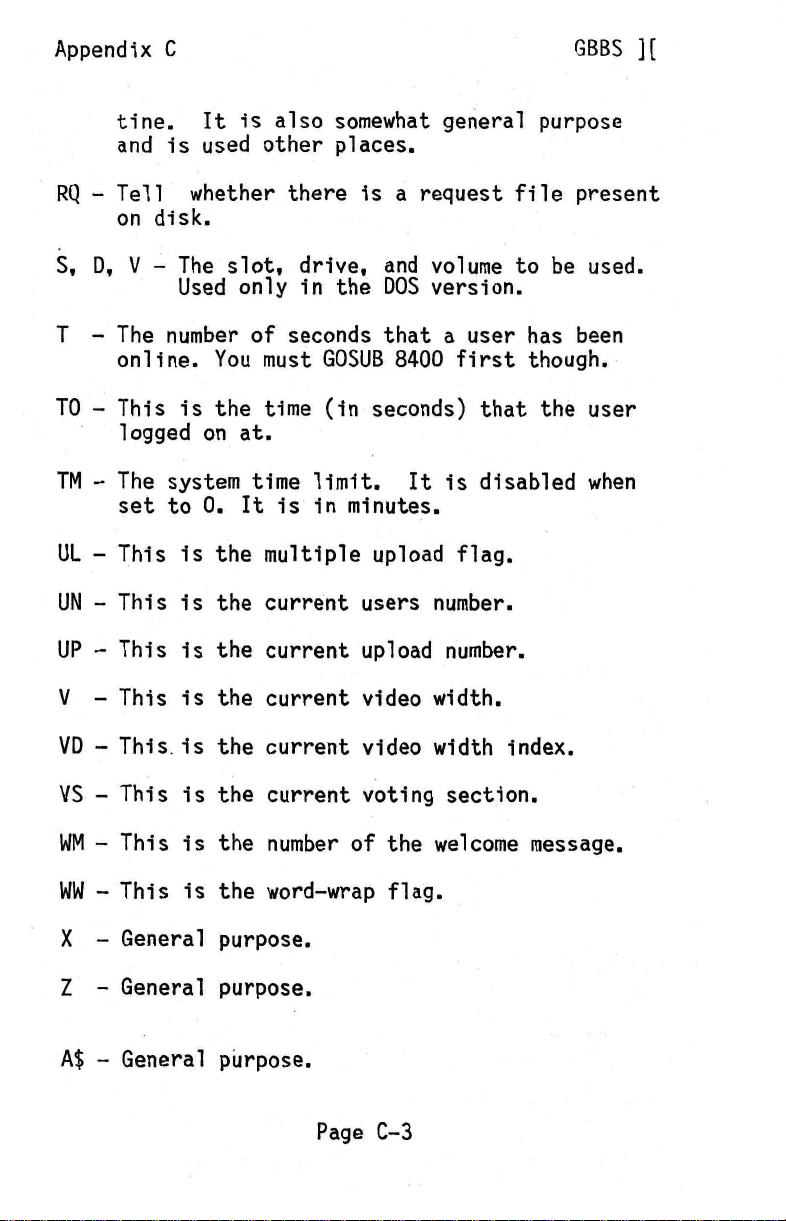
Appendix C
RQ - Tell whether there is a request file present
S, D, V - The slot, drive, and volume to be used.
T - The number of seconds that a user has been
TO - This is the time (in seconds) that the user
TM - The system time limit. It is disabled when
UL - This is the multiple upload flag.
UN - This is the current users number.
tine. It is also somewhat general purpose
and is used other places.
on disk.
Used only in the DOS version.
online. You must GOSUB 8400 first though.
logged on at.
set to O. It is in minutes.
GBBS ][
UP - This is the current upload number.
V - This is the current video width.
VD - This is the current video width index.
VS - This is the current voting section.
WM - This is the number of the welcome message.
WW - This is the word-wrap flag.
X - General purpose.
Z - General purpose.
A$ - General purpose.
Page C-3
Page 75
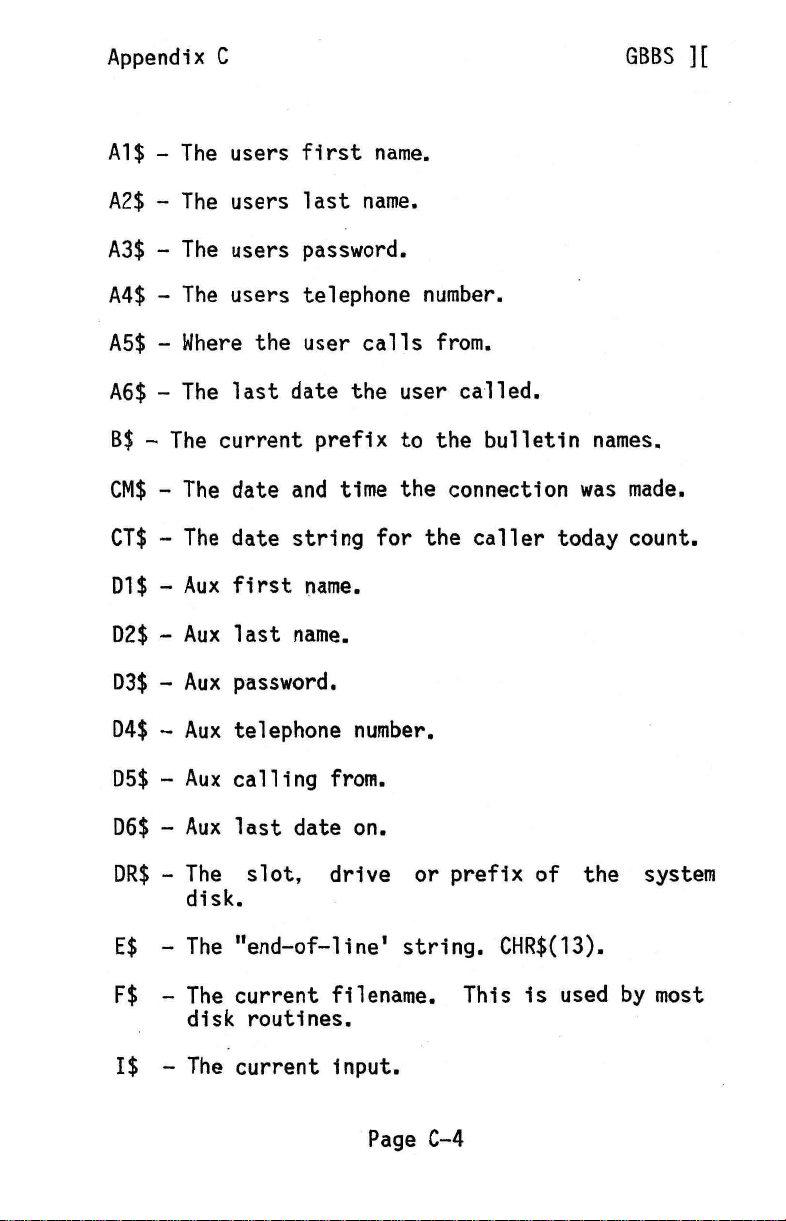
Appendix C
Al$ — The users first name.
A2$ — The users last name.
A3$ — The users password.
A4$ — The users telephone number.
A5$ — Where the user calls from.
A6$ — The last date the user called.
B$ — The current prefix to the bulletin names.
CM$ — The date and time the connection was made.
CT$ — The date string for the caller today count.
D1$ — Aux first name.
D2$ — Aux last name.
GBBS ][
D3$ — Aux password.
D4$ — Aux telephone number.
D5$ — Aux calling from.
D6$ — Aux last date on.
DR$ — The slot, drive or prefix of the system
disk.
E$ — The "end—of—line' string. CHR$(13).
F$ — The current filename. This is used by most
disk routines.
1$ — The current input.
Page C-4
Page 76
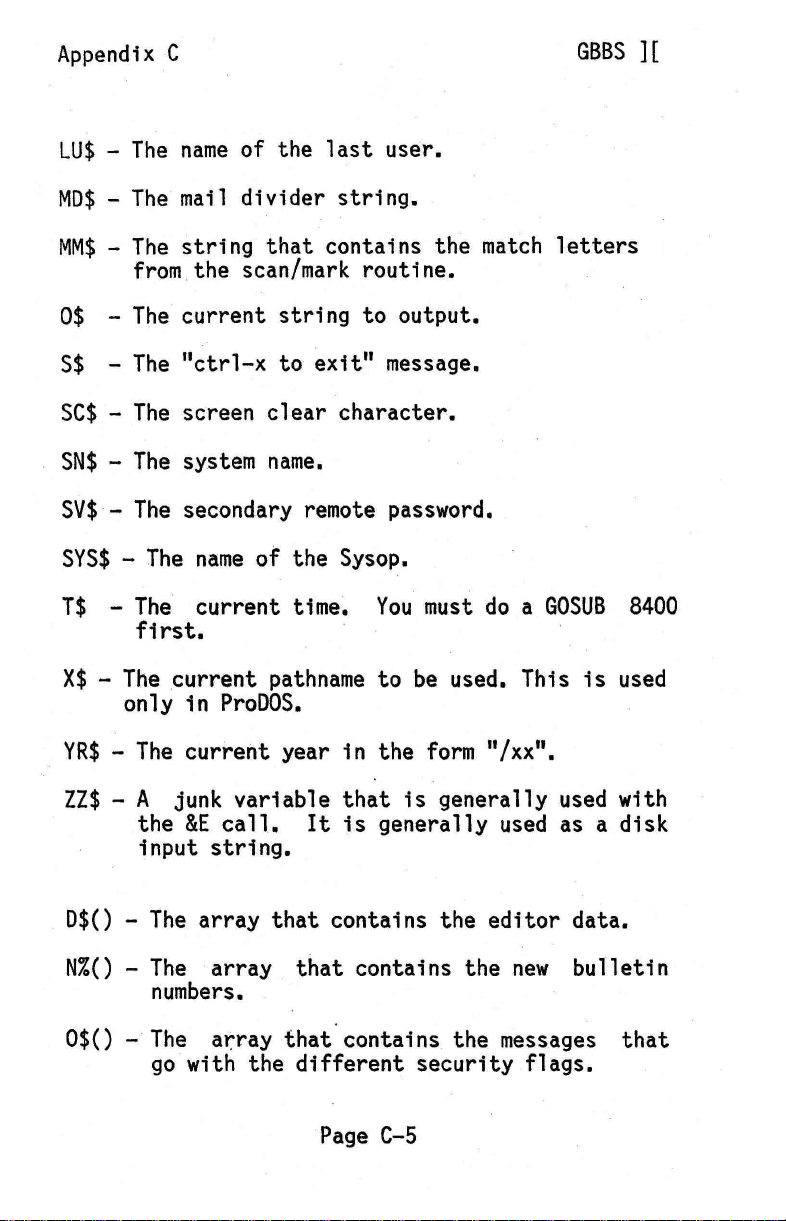
Appendix C
LU$ — The name of the last user.
MD$ — The mail divider string.
MM$ — The string that contains the match letters
0$ — The current string to output.
S$ — The "ctrl—x to exit" message.
SC$ — The screen clear character.
from the scan/mark routine.
GBBS ][
SN$
SV$ — The secondary remote password.
SYS$ — The name of the Sysop.
T$ — The current time. You must do a GOSUB 8400
X$ — The current pathname to be used. This is used
YR$ — The current year in the form "/xx".
ZZ$ — A junk variable that is generally used with
D$() — The array that contains the editor data.
N%() — The array that contains the new bulletin
0$() — The array that contains the messages that
The system name.
first.
only in ProDOS.
the &E call. It is generally used as a disk
input string.
numbers.
go with the different security flags.
Page C-5
Page 77
Appendix C
T$() - The titles of the different bulletins.
V() - The 5 different video widths.
GBBS ][
Page C-6
 Loading...