

Page 1
Instructions
PNEG-1784
1004 East Illinois Street • Assumption, IL 62510 • 1-217-226-4421
BFT Bin Lid Assembly
Additional Tools and Materials Needed:
•Clamp
• Assorted Wrench Set
• Ratchet and Socket Set
• Ground Control Chain (If you do not already have one)
Instructions
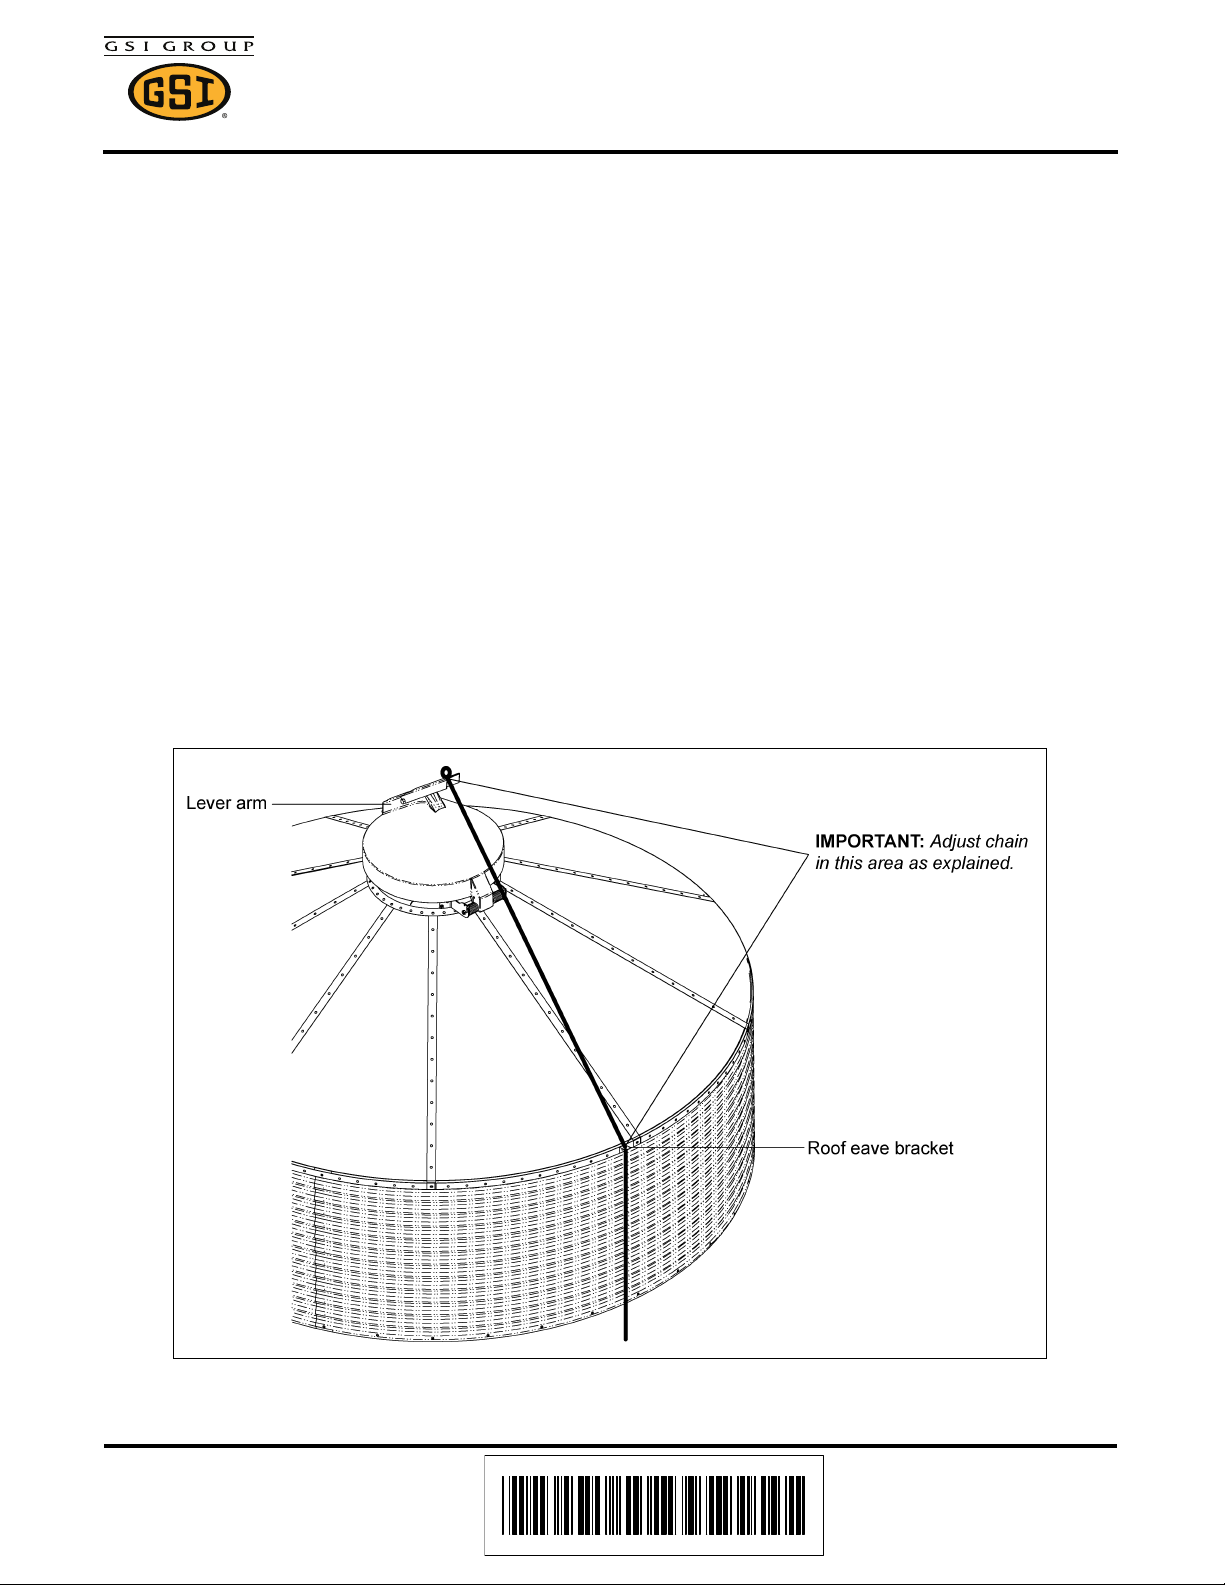
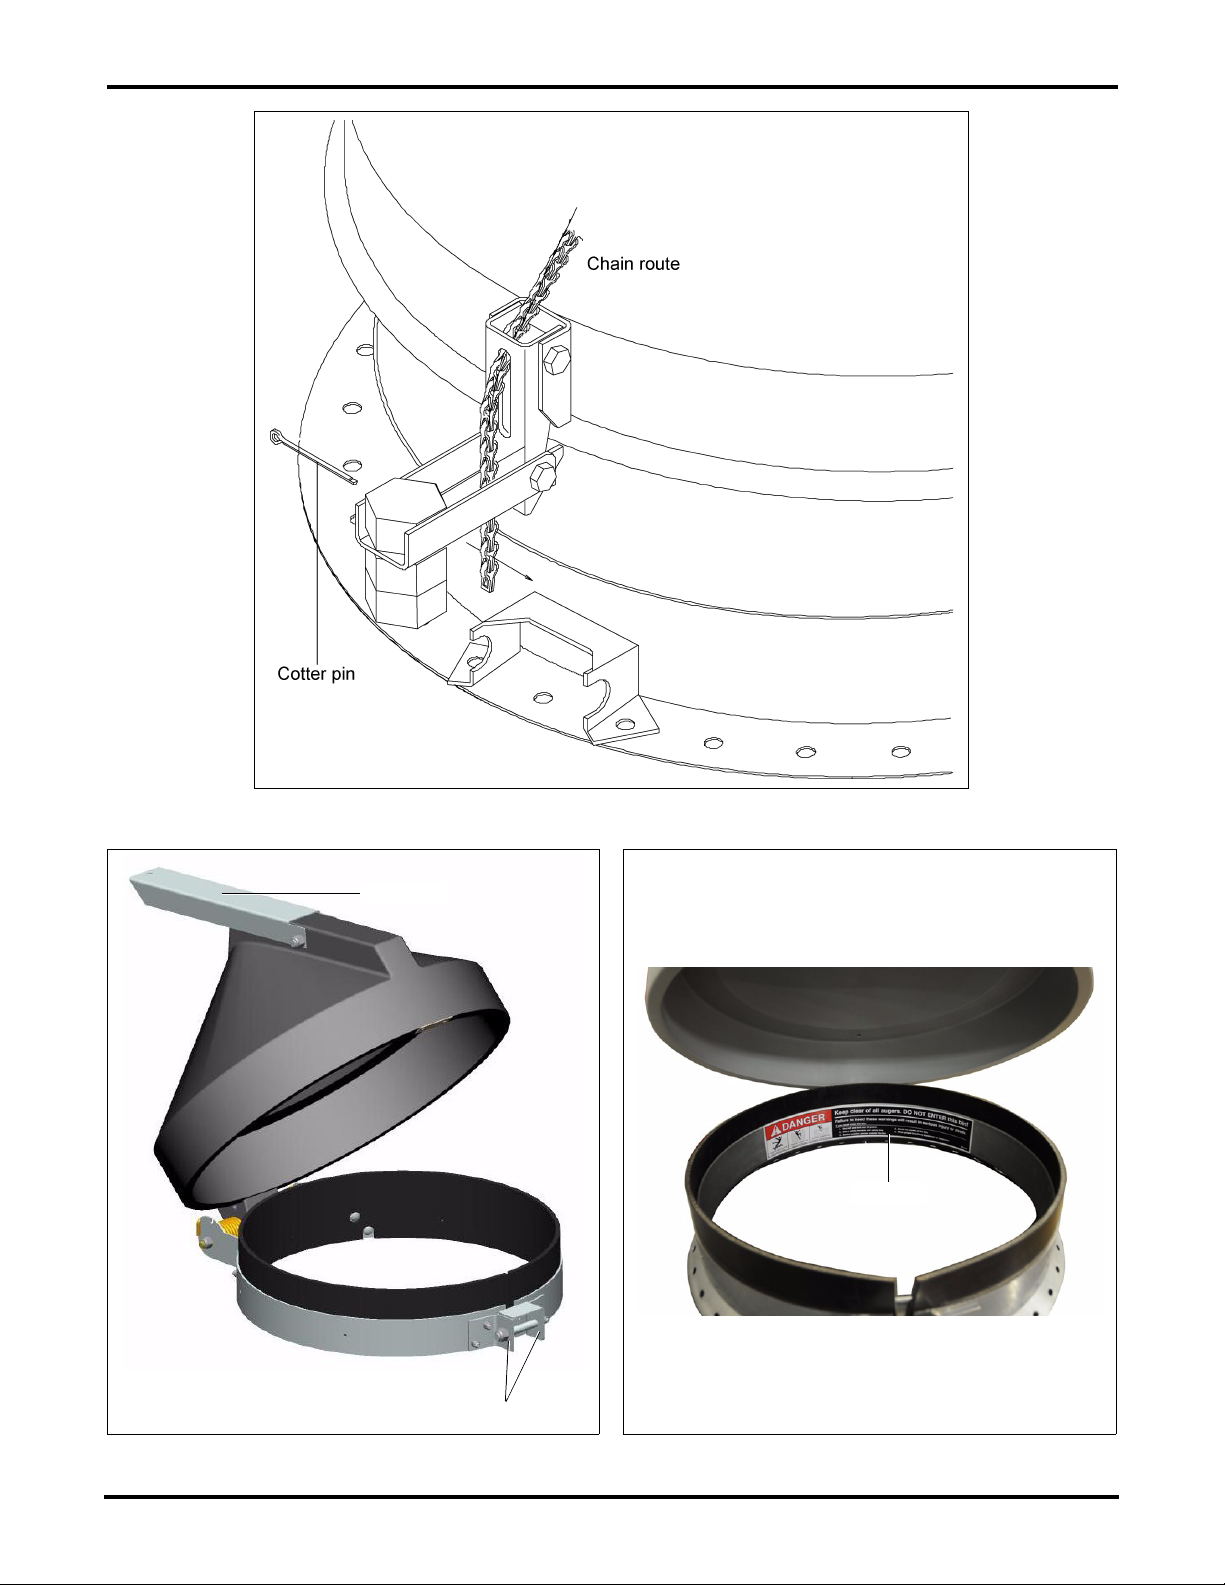
1. Disassemble existing lid. Start by detaching the current cotter pins located in the ground control chain
on latch side of the bin lid. Retain the end of the chain for easy access when re-attaching the chain
to the new bin lid lever arm. (See Figure 2 on Page 2.) Ensure there is a functional roof eave bracket
in place to use with the new lid.
Carefully loosen and remove the back bracing bolts of the old lid. Be sure to have firm grasp on the
nuts on the inside of the bin to prevent them from falling down into the bin. Be aware that the lid
is spring loaded and can close rapidly. Next with the lid closed, loosen existing bolt on the front
mounting bracket of the old lid. Dispose of the old lid.
NOTE: If there was no previous chain, roof eave bracket or chain holder bracket, a chain will need
to be purchased and the brackets included will need to be attached to the side of the bin,
vertically aligned with the lever arm. (See Figure 1.)
Date: 06-14-12
Printed in the U.S.A.
Copyright © 2012 by GSI Group
www.gsiag.com
Figure 1
PNEG-1784
Page 1 of 5
CN-208787
Page 2
BFT Bin Lid Assembly
Lever arm
Mounting brackets
DC-2123
Figure 2
Page 2 of 5 PNEG-1784
Figure 3
Figure 4
Page 3

BFT Bin Lid Assembly
Mounting brackets
Clamp
2. With the lid closed, align the hole in the lever arm with the hole in the bin lid. Insert 1/2" bolt through
the hole and fasten with the nylock nut using 3/4" wrench and ratchet. NOTE: DO NOT over tighten.
This is a pivot bolt and the lever arm must be able to pivot freely.
Figure 5 Install Lever Arm and Chain
3. Place the new lid assembly over the existing peak ring collar and rotate lid assembly such that the
lever arm and spring hinge line up with the roof eave bracket. (See Figure 1 on Page 1.) Use a clamp
to pull the mounting brackets together. Slide the 3/8" carriage bolt supplied through the mounting
bracket and loosely fasten with nut. (See Figure 6.) Remove clamp and then tighten the bolt with
9/16" ratchet, ensuring that the vertical flange tightens past the left edge of the top, horizontal flange.
(See Figure 7 on Page 4.)
PNEG-1784 Page 3 of 5
Figure 6 Mount Lid to Peak Ring
Page 4

BFT Bin Lid Assembly
Bracket should
extend over flange.
Figure 7 Tighten Bolts Until Flush with Bracket
4. Thread the existing chain through the hole on the end of the lever arm and fasten it to the provided
key ring. (See Figure 5 on Page 3.) Ensure that the ground control chain is freely looped through the
roof eave bracket and chain holder. After removing the slack in the chain while the lid is fully closed
and in latched position, re-position the key ring 2" below the roof eave bracket. (See Figure 8.)
Re-adjust the existing handle and key ring so the handle is positioned for easy access from
ground. (See Figure 9.) Check to make sure that the key rings allow the cap to fully close, but will
not allow the chain enough slack on top of the cap to become wrapped around the lever arm in a
high wind condition.
5. Install the decal DC-2123 to the inside of peak ring on the hinge side of the lid as shown in Figure 4
Page 4 of 5 PNEG-1784
Figure 8
on Page 2. Decal should be clearly visible when lid is open.
Figure 9
Page 5

BFT Bin Lid Assembly
Parts List for BFT Lid Without Peak Ring for Retro (BLK-13102)
Part # Description Qty
BLK-13062 BFT, Lid Assembly 1
BLK-13027 Spring, Left Hand Side Rear 1
BLK-13028 Spring, Right Hand Side Rear 1
BLK-13038 Support, Spring BFT 2
BLK-13048 Leverage Arm - BFT Lid 1
BLK-13053 Bumper, Reinforced Rubber Belting 1
BLK-13058 Retainer, Magnet, BFT Lid 1
BLK-13059 BFT, Lid Clamp Band 1
BLK-13061 BFT, Lid Clamp Band Bracket 1
BLK-13064 BFT, Lid Pivot Tube 1
BLK-13065 BFT, Lid Clamp Band Bracket 1
BLK-13066 BFT, Lid Clamp Band Bracket 1
BLK-13067 BFT, Lid Clamp Band Bracket 1
BLK-13068 BFT, Lid Magnet 1
BLK-13070 BFT, Lid 1
S-10121 Bolt, HHCS 7/16"-14 x 9" ZN Grade 5 1
S-10138 Bolt, FHSCS #10-32 x 3/8" ZN 2
S-10225 Carriage Bolt 3/8"-16 x 5-1/2" ZN Grade 5 1
S-7236 Rivet, POE 3/16" Diameter x 0.565" Long ARSM 7
S-7382 Nylock Nut 5/16"-18 ZN Grade 5 8
S-7383 Nylock Nut 3/8"-16 ZN Grade 5 1
S-7645 Carriage Bolt 5/16"-18 x 3/4" ZN Grade 5 8
S-8234 Nylock Nut 7/16"-14 ZN Grade 2 1
S-8260 Nylock Nut 1/2"-13 ZN Grade 5 1
S-8314 Bolt, HHCS 1/2"-13 x 3-1/2" YDP Grade 8 1
S-9085 Carriage Bolt 3/8"-16 x 3-1/2" ZN Grade 5 1
BLK-13104 BFT, Ground Control Hardware Package 1
BLK-11796 4" Plastic Handle 1
BLK-11949 BFT, Chain Holder Bracket 1
BLK-11950 BFT, Roof Eave Bracket w/ Grommet 1
S-4318 Ring, 0.072" x 1.1" Key Style 3
BX-611 Box, 25 x 25 x 19 275 B/C RSC 1
DC-2123 Decal, Suffocation/Flighting, English, Grain Bin 2
PNEG-1784 Page 5 of 5
 Loading...