

Grundig SONOCLOCK 220, SONOCLOCK 230 USB User manual [DE,EN,FR,IT,PL,ES]
CLOCK RADIO
SONOCLOCK 220
SONOCLOCK 230 USB
DE EN FR
IT PL ES
___________________________________________________________
WAKE UP
LIGHT
1 ... 4
1 ... 3
O
A
ON/OFF
MIN
SNOOZE
R
HOUR
SLEEP
DC 5V
ANTENNA
BATTERY
C
7
SET
>
3

__________________________________________________________
DEUTSCH 05 -18
ENGLISH 19 - 31
FRANÇAIS 32 - 46
ITALIANO 47 - 60
POLSKI 61 - 74
ESPAÑOL 75 - 88
4

SET-UP AND SAFETY
Please note the following instructions
when setting up the system:
7
The device is designed for the playback of audio signals. Any other use is
expressly prohibited.
7
If you want to set up the device on wall
shelves or in cupboards, please ensure
that it is adequately ventilated. There
must be at least 10 cm of space at the
side, above and behind the device.
7
Do not cover the device with newspapers, table cloths, curtains, etc.
7
When setting up the device, remember
that furniture is often coated with various types of varnish and plastic, which
often contain chemical additives. These
additives may cause corrosion to the
feet of the unit. This may leave stains on
the surface of the furniture which can
be difficult or impossible to remove.
7
The device is designed for use in dry
rooms. If you use it outdoors, make
sure it is protected from moisture such
as dripping or splashing water.
7
Only use the device in a moderate climate.
7
Do not place the device close to heating units or under direct sunlight, as this
will impair cooling.
_____________________________
7
Do not place any vessels containing
liquids, such as vases, on the device.
7
Do not place any objects such as burning candles on the device.
7
Thunderstorms are a danger to all
electrical devices. Even if the device is
switched off, it can be damaged by a
lightning strike to the mains cable. Always disconnect the mains cable during a storm.
7
If malfunctions occur due to static electricity charges or brief mains voltage
surges, reset the device. To do this, pull
out the mains adapter and connect it
again after a few seconds.
7
Do not open the device casing under
any circumstances. Warranty claims
are excluded for damage resulting
from improper handling.
7
Do not connect any other equipment
while the device is switched on. Switch
off the other devices as well before
connecting them.
7
Only plug the device into the mains
socket after you have connected the
external devices.
7
Make sure the power supply unit is
freely accessible.
ENGLISH
19
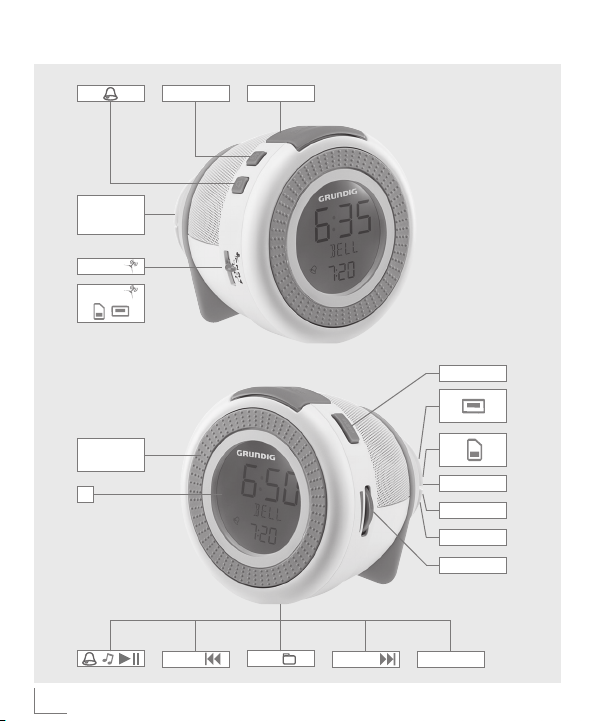
OVERVIEW (SC 220)
See the illustration on page 3.
Activates and deactivates the alarm
time.
ON/OFF
Switches the device in and out of
standby mode.
SNOOZE
Interrupts the alarm function for 6
minutes.
1 ... 4
Preset buttons for storing and selecting
radio stations.
WAKE UP LIGHT
Optical alarm signal and night light.
SLEEP
Sets the sleep timer;
switches the sleep timer off.
DC 5V > 0.5 A
For connecting the power supply unit
(5 V > 0.5 A).
ANTENNA
Wire antenna for FM reception. It´s
possible to wrap up the antenna on
the rear.
BATTERY
For inserting the back-up battery. (2 x
1,5 V LR 03/AM 4/AAA).
20
ENGLISH
_____________________________
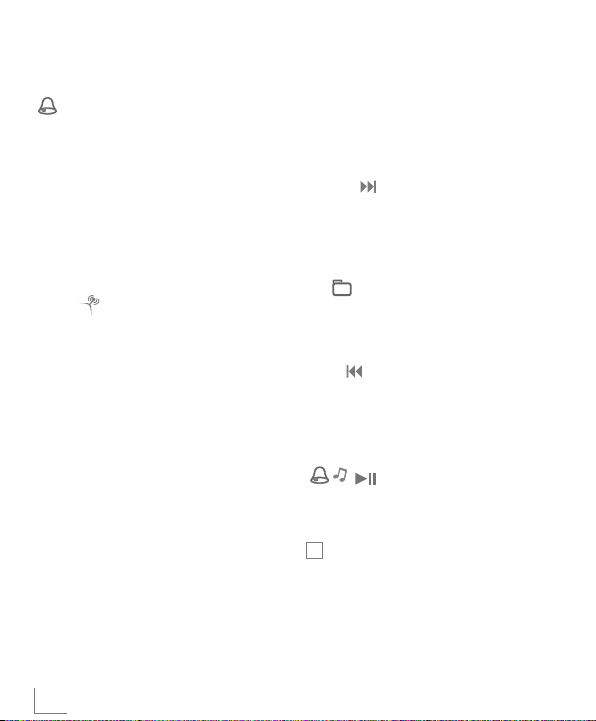
C
Adjusts the volume.
7
SET
Activates and confirms several set-
tings.
HOUR
In Stand-by mode: For setting the
clock (hours).
In Radio mode: For setting the radio
stations.
R
In Stand-by mode: Adjusts the bright-
ness of the display (high, medium,
low, off).
MIN
In Stand-by mode: For setting the
clock (minutes).
In Radio mode: For setting the radio
stations.
Select the alarm signal (signal or
radio station).
A
Display
Displays information about the current
time, the frequency and the alarm time.
O
Rotating swivel, for setting the alarm
time.

OVERVIEW (SC 230 USB)
See the illustration on page 3.
Activates and deactivates the alarm
time.
ON/OFF
Switches the device in and out of
standby mode.
SNOOZE
Interrupts the alarm function for 6 min-
utes.
1 ... 3
Preset buttons for storing and selecting
radio stations and selects the audio
sources for USB and SD card.
WAKE UP LIGHT
Optical alarm signal and night light.
SLEEP
Sets the sleep timer;
switches the sleep timer off.
USB port type A.
For connecting MP3 player, or a USB
memory stick.
Card slot for inserting a memory card
(Micro SD/SDHC).
DC 5V > 1.0 A
For connecting the power supply unit
(5 V > 1 A).
ANTENNA
Wire antenna for FM reception. It´s
possible to wrap up the antenna on the
rear.
BATTERY
For inserting the back-up battery. (2 x
1,5 V LR 03/AM 4/AAA).
C
Adjusts the volume.
SET
Activate and confirms several settings.
In USB/SD mode: Interrupts the play-
back.
HOUR
In Stand-by mode: For setting the clock
(hours).
In Radio mode: For setting the radio sta-
tions.
In USB/SD mode: Select files or tracks.
R
In Stand-by mode: Adjusts the bright-
ness of the display (high, medium, low,
off).
In USB/SD mode: Select folders.
_______________________
7
ENGLISH
21
 Loading...