

Page 1

ǵ
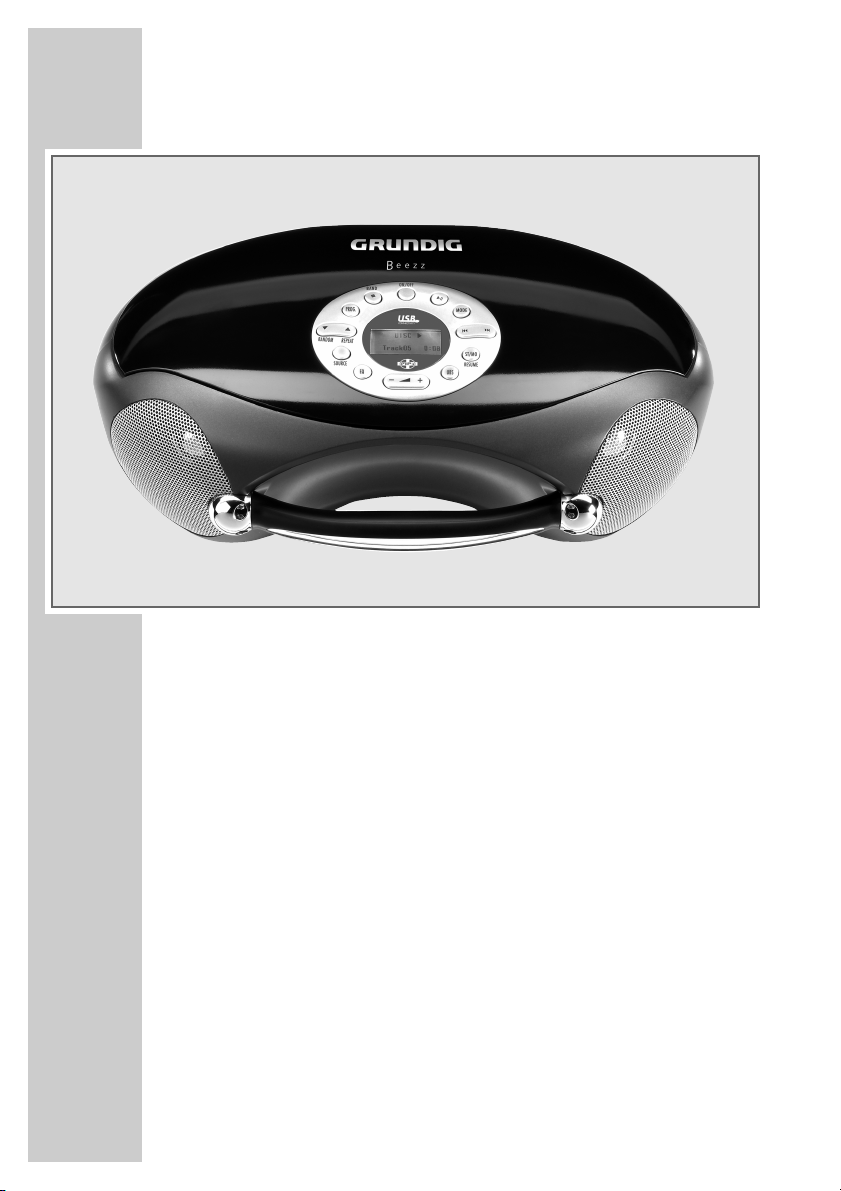
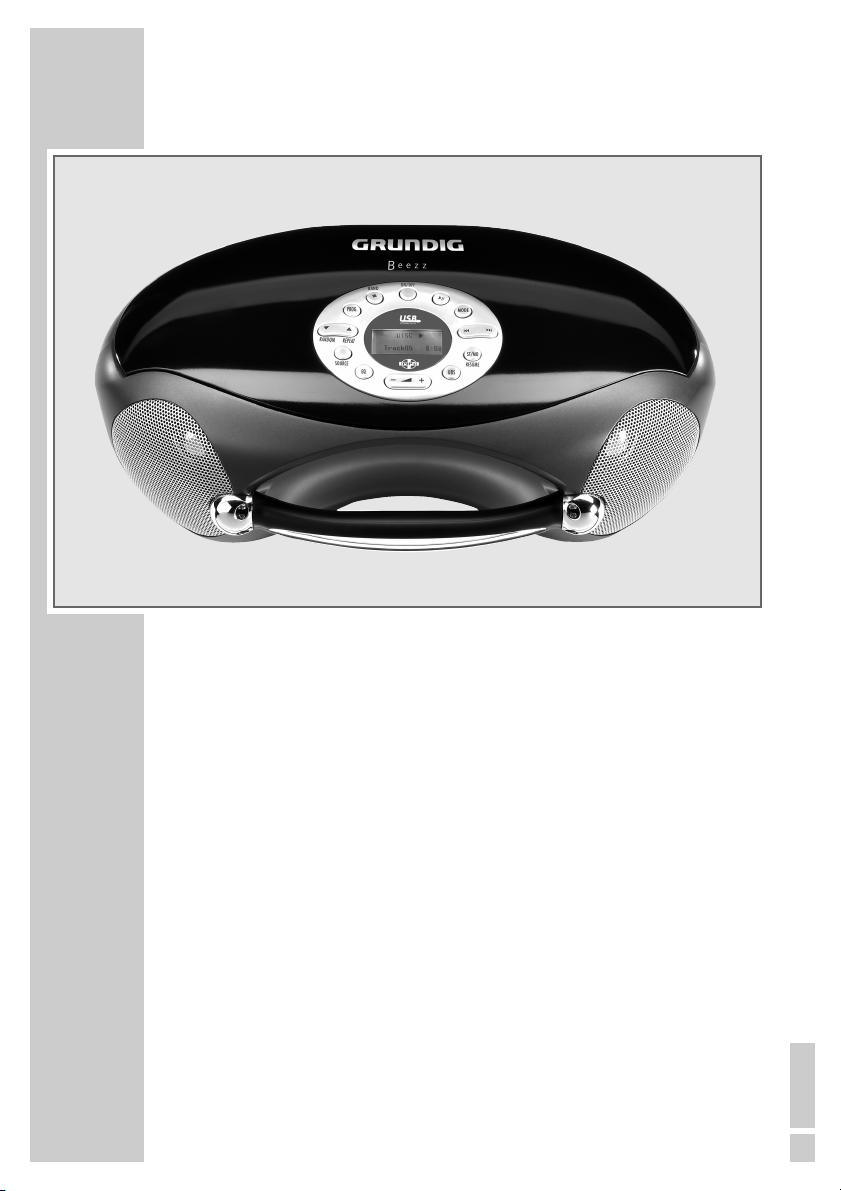
PORTABLE
RADIO
CD/MP3/WMA
PLAYER
Beezz
RCD 6800 DEC/A
Page 2

2
4 Sicherheit und Pflege 16 Radio-Betrieb
5 Auf einen Blick 18 CD/MP3/WMA-Betrieb
13 Anschließen/Vorbereiten 21 USB- und SD/MMC-Betrieb
15 Allgemeine Funktionen 22 Informationen
24 Care and safety 36 Radio mode
25 Overview 38 CD/MP3/WMA mode
33 Connection and preparation 41 USB and SD/MMC mode
35 General functions 42 Information
44 Sécurité et entretien 56 Mode radio
45 Vue d’ensemble 58 Mode CD/MP3/WMA
53 Raccordements et préparatifs 61 Mode USB et SD/MMC
55 Fonctions générales 62 Informations
64 Sicurezza e cura 76 Funzionamento Radio
65 In breve 78 Funzionamento CD/MP3/WMA
73 Collegamento/preparazione 81 Funzionamento USB e
75 Funzioni generali SD/MMC
82 Informazioni
84 Segurança e conservação 96 Função rádio
85 Vista geral 98 Função CD/MP3/WMA
93 Ligação/preparação 101 Função USB e SD/MMC
95 Funções gerais 102 Informações
104 Seguridad y cuidado 116 Modo Radio
105 Vista general 118 Modo CD/MP3/WMA
113 Conectar/preparativos 121 Modo USB y SD/MMC
115 Funciones generales 122 Información
__________________________________________________________________________
DEUTSCH
FRANÇAIS
ITALIANO
PORTUGUÊS
ESPAÑOL
ENGLISH
Page 3

3
__________________________________________________________________________
POLSKI
DANSK
SVENSKA
SUOMI
TÜRKÇE
124 Veiligheid en onderhoud 136 Radiomodus
125 In een oogopslag 138 Cd/mp3/wma-modus
133 Aansluiten/voorbereiden 141 Usb- en sd/mmc-modus
135 Algemene functies 142 Informatie
144 Bezpieczeństwo/czyszczenie 158 Obsługa odtwarzacza CD/
145 Przegląd funkcji MP3/WMA
153 Podłączanie/przygotowanie 161 Obsługa USB i SD/MMC
155 Funkcje ogólne 162 Informacje
156 Obsługa radia
164 Sikkerhed/vedligeholdelse 176 Radiofunktion
165 Kort oversigt 178 Cd/MP3/WMA-funktion
173 Tilslutning og forberedelse 181 USB- og SD/MMC-funktion
175 Generelle funktioner 182 Informationer
184 Säkerhet och skötsel 196 Radion
185 En överblick 198 CD/MP3/WMA
193 Ansluta/förbereda 201 USB och SD/MMC
195 Allmänna funktioner 202 Information
204 Turvallisuus ja huolto 216 Radiotoiminto
205 Yleiskatsaus 218 CD/MP3/WMA-toiminto
213 Liitäntä/valmistelu 221 USB- ja SD/MMC-toiminto
215 Yleiset toiminnot 222 Tietoja
224 Güvenlik ve Bakım 236 Radyo Modu
225 Genel Bakış 238 CD/MP3/WMA Modu
233 Bağlantı/Hazırlık 241 USB ve SD/MMC Modu
235 Genel İşlevler 242 Bilgiler
NEDERLANDS
Page 4

24
To ensure that this device provides you with long-term satisfaction and enjoyment, please
observe the following instructions.
This device is designed for the playback of audio signals. Any other use is expressly prohibited.
Protect the device and the CDs from rain, moisture (dripping or splashing water), sand and
heat. Do not leave it next to heaters or inside parked cars in the sun.
Make sure there is adequate ventilation when positioning the device. There must be a free
space of at least 10 cm behind the device. Do not place objects on the ventilation slots.
Do not place any vessels containing liquids (for example, vases) on the device. Do not insert
objects into the CD compartment of the device.
Do not place any naked flames such as candles on the device.
Bringing the device in from the cold can cause condensation on the CD lens, which prevents it
from playing. Give the device time to warm up.
The CD part contains self-lubricating bearings, which must not be oiled or greased.
Never open the device casing under any circumstances. No warranty claims are accepted for
damage caused by incorrect handling.
Thunderstorms are a danger to all electrical devices. Even if the device is switched off, it can
be damaged by a lightning strike to the mains. Always remove the power plug during a
thunder storm.
Do not use any cleaning agents as they may damage the housing. Clean the device with a
clean, moist leather cloth.
When deciding where to put the device, remember that furniture is often coated with various
types of varnish and plastic. Many of these contain chemicals which can corrode the feet of
the device, leaving marks on the surface of the furniture which can be difficult or impossible
to remove.
Caution:
If malfunctions occur due to brief mains overloads or static electricity charges, reset the
device. To do this, pull out the power plug and connect it again after a few seconds.
General information on laser devices
You will find a symbol similar to the one shown here on the bottom of the device.
CLASS 1 LASER PRODUCT means that the laser is designed in such a way as to
ensure that the maximum permissible emission value cannot be exceeded under any
circumstances.
If operating devices or methods other than those specified here are employed, it may
lead to dangerous exposure to emissions.
Invisible laser radiation is emitted if the CD compartment is opened and the safety locking
mechanism is shorted. Do not expose yourself to this radiation.
CARE AND SAFETY
________________________________________
ENGLISH
CLASS 1
LASER PRODUCT
Page 5

Controls
General information
Display LC display. Lights up during operation.
ON/OFF Switch the device on and off.
– z + Adjust the volume.
SOURCE Switches between the Radio, Disc, USB and SD/MMC input sources.
EQ Selects the Flat, Classic, Jazz, Pop, Rock sound settings.
UBS Switches the Ultra Bass System on and off.
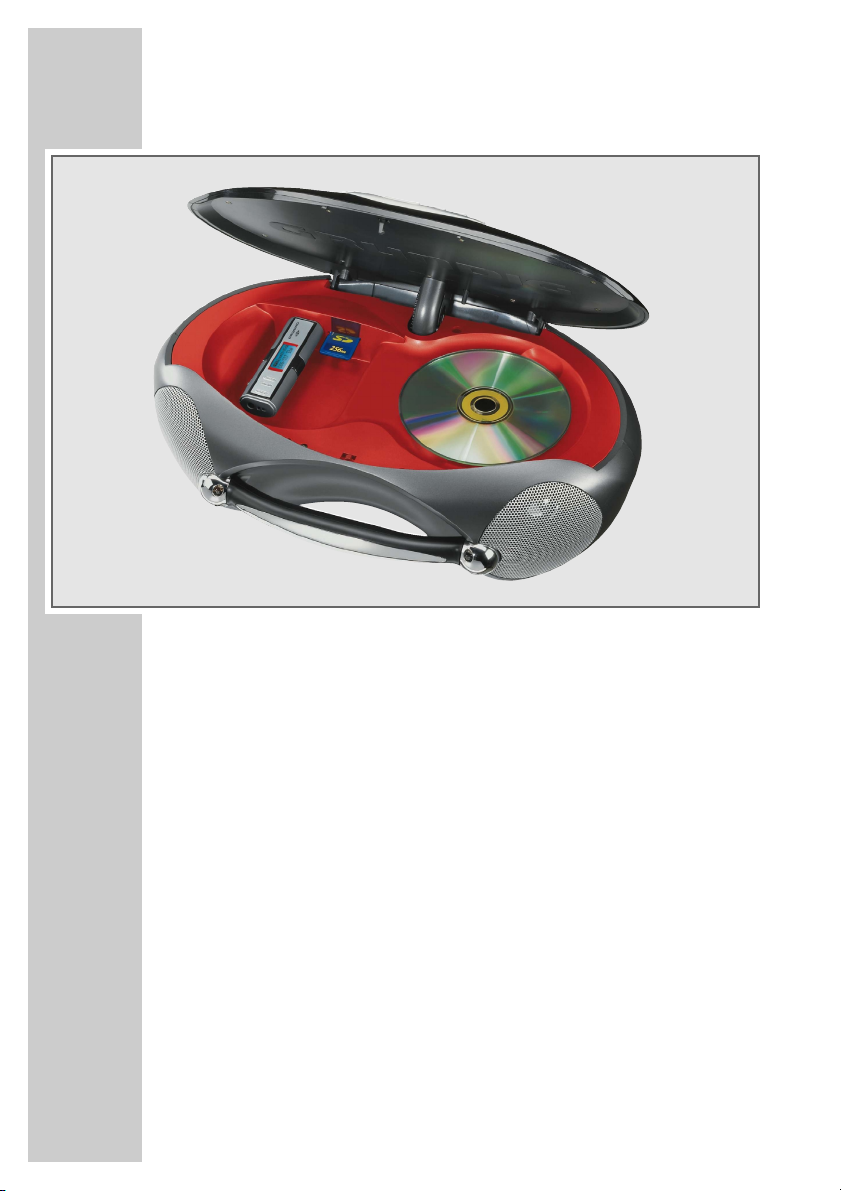
OPEN Opens the CD, USB and SD/MMC compartment on the front of the
device.
REMOTE
•
Infrared sensor for remote control signals on the front side of the
device.
0 Headphone jack for connecting a stereo headphone set with a
jack plug (3.5 mm) on the back of the device.
This automatically switches off the loudspeakers.
AC~ Socket for connecting the power cord on the back of the device.
Battery Compartment for 6 x 1.5 V batteries (type IEC LR14/AM2/C size) on
compartment the bottom of the device.
ENGLISH
25
OVERVIEW
______________________________________________________
Page 6
26
Radio mode
Antenna Telescopic antenna for FM (VHF) reception.
BAND
7
Switches between the FM (VHF) and MW (medium wave) frequency
bands.
89 Press briefly to change the frequency backwards or forwards. Press
and hold down to start a forward or reverse search for a station.
PROG. For storing radio stations as presets.
S
A
Select presets backwards or forwards. Select the previous or next preset number when storing radio stations.
ST/MO Switches between mono and stereo reception.
RESUME
In CD-DA mode
ı
II Starts and pauses playback.
89 Press briefly to select the next or previous track.
Press and hold down to start a forward or reverse search.
OVERVIEW
______________________________________________________
Page 7
ENGLISH
27
BAND
7
Ends playback and deletes a track memory.
MODE For repeating a track or the whole CD, for playing the intros to tracks,
for playing tracks in random order.
RESUME Activates and deactivates the resume function.
ST/MO
PROG. For storing tracks when creating a track memory.
MP3/WMA, USB and SD/MMC mode
ı
II Starts and pauses playback.
89 Press briefly to select the previous or next track,
press and hold down during playback to start a forward or reverse
search.
OVERVIEW
______________________________________________________
Page 8
28
MODE For repeating a track, all tracks on the current album or the whole
CD, for playing the intros to tracks, for playing tracks in random
order.
RESUME Activates and deactivates the resume function.
ST/MO
BAND
7
Ends playback and deletes a track memory.
PROG. For storing tracks when creating a track memory.
S
A
When stopped: select albums forwards or backwards in the album list.
USB USB interface for connecting a USB memory stick or an MP3 player in
the CD compartment.
SD/MMC Card slot for inserting a SD or MMC memory card in the CD com-
partment.
USB USB interface for connecting a USB memory stick or an MP3 player
with a USB cable, on the back of the device.
((
OVERVIEW
______________________________________________________
Page 9

ENGLISH
29
Displays
R The SD/MMC input source is selected.
CD CD input source is selected.
Radio Radio input source is selected.
USB USB input source is selected.
BASS The Ultra Bass System is activated.
EQ A sound setting has been selected.
In CD, MP3/WMA, USB and SD/MMC mode: a track is repeated.
ALL In CD, MP3/WMA, USB and SD/MMC mode: all tracks are repeated.
FOLDER In MP3/WMA, USB and SD/MMC mode: all the tracks on the current
album are played back repeatedly.
FOLDER In MP3/WMA, USB and SD/MMC mode: the albums are displayed.
INTRO In CD, MP3/WMA, USB and SD/MMC mode: a short introduction to the
tracks is played.
PROG In CD, MP3/WMA, USB and SD/MMC mode: lights up when a playlist is
created and when a playlist is played back.
RANDOM In CD, MP3/WMA, USB and SD/MMC mode: the tracks are played back
in random order.
s In CD, MP3/WMA, USB and SD/MMC mode: playback.
II In CD, MP3, USB and SD/MMC mode: pauses playback.
WMA In MP3/WMA, USB and SD/MMC mode: indicates the WMA playback
format.
MP3 In MP3/WMA, USB and SD/MMC mode: indicates the MP3 playback format.
w
w
w
OVERVIEW
______________________________________________________
ALL FOLDER BASS EQ
INTRO PROG RANDOM
WMA MP3
kHz MHz
STEREORS
Radio
w
CD
R
s
II
O00000:.00
USB
Page 10

30
000000:00 In radio mode: shows the preset, the waveband and the frequency.
In CD-DA mode: shows the total number of tracks and the total playing
time. Shows the current track and its elapsed playing time.
In MP3/WMA, USB and SD/MMC mode: displays the total number of
tracks, the total number of albums and the currently selected album.
Shows the ID3 tag (ticker text).
In CD and MP3/WMA mode: the resume function is activated.
In radio mode: an FM stereo channel is being received.
kHz In radio mode: in combination with the MW frequency indicator.
MHz In radio mode: in combination with the FM frequency indicator.
STEREO
RS
OVERVIEW
______________________________________________________
ALL FOLDER BASS EQ
INTRO PROG RANDOM
WMA MP3
kHz MHz
STEREORS
Radio
w
CD
R
s
II
O00000:.00
USB
Page 11

ENGLISH
31
The remote control
ON/OFF Switch the device on and off.
MODE In CD-DA mode: for repeating a track or the
whole CD, for playing the intros of tracks, for
playing tracks in random order.
In MP3/WMA, USB and SD/MMC mode: for
repeating a track, all tracks on the currently
selected album or the whole CD, for playing the
intros to tracks, for playing tracks in random
order.
RESUME In radio mode: switches between the stereo and
ST/MO mono reception.
In CD, MP3/WMA, USB and SD/MMC mode:
activates and deactivates the resume function.
PROG. In radio mode: for storing radio stations on pre-
set channels.
In CD, MP3/WMA, USB and SD/MMC mode:
for storing tracks when creating a track memory.
p Switches the loudspeakers to and from mute
mode.
EQ Selects the Flat, Classic, Jazz, Pop, Rock sound
settings.
UBS Switches the Ultra Bass System on and off.
A In radio mode: switches forwards through presets.
In MP3/WMA, USB and SD/MMC mode: when
stopped, switches forwards through albums.
8 In radio mode: press briefly to switch the frequency backwards step-by-step,
press and hold down to start the reverse station search.
In CD-DA, MP3/WMA, USB and SD/MMC mode: press briefly to select the
previous track, press and hold down to start a reverse search.
ı
II In CD, MP3/WMA, USB and SD/MMC mode: starts and pauses playback.
OVERVIEW
______________________________________________________
BAND
RESUME
ST/MOMODE
RCD 6800 DEC/A
Page 12

32
9 In radio mode: press briefly to switch the
frequency forwards step-by-step,
press and hold down to start the forwards station
search.
In CD-DA, MP3/WMA, USB and SD/MMC
mode: press briefly to select the next track, press
and hold down to start a forwards search.
S In radio mode: switches backwards
through presets.
In MP3/WMA, USB and SD/MMC mode: when
stopped, switches backwards through albums.
BAND
7
In radio mode: switches between the FM (VHF)
and MW (medium wave) frequency bands.
In CD, MP3/WMA, USB and SD/MMC mode:
ends playback. Deletes a playlist.
SOURCE Switches between the Radio, Disc, USB and
SD/MMC input sources.
– z + Adjust the volume.
OVERVIEW
______________________________________________________
BAND
RESUME
ST/MOMODE
RCD 6800 DEC/A
Page 13

ENGLISH
33
Power supply
Mains operation
Note:
Check that the mains voltage on the type plate (on the bottom of the device) corresponds
to your local mains supply.
If this is not the case, contact your specialist dealer.
1 Plug the power cord supplied into the »AC
~
« socket on the back of the device.
2 Plug the power cord into the wall socket.
Caution:
The only way to disconnect the device from the mains is to pull out the plug.
Battery operation
1 Press the catch and remove the lid to open the battery compartment on the bottom of the
device.
2 Insert six batteries (6 x 1.5 V, type IEC LR14/AM2/C size), observing the polarity
marked in the battery compartment.
Notes:
Remove the batteries when they are flat or when you are not using the device.
The manufacturer accepts no liability for damage caused by leaking batteries.
The batteries are switched off during mains operation.
Environmental note:
Batteries, including those which contain no heavy metals, may not be disposed of with
household waste. Please dispose of used batteries in an environmentally sound manner.
Find out about the legal regulations which apply in your area.
Connecting an MP3 player or a USB memory stick
The device supports most USB memory sticks and MP3 players.
1 Switch off the appliance.
2 Plug the USB memory stick or the USB cable of the MP3 player into the USB interface
»
USB
« in the CD compartment
or
plug the USB memory stick or the USB cable of the MP3 player into the USB interface
»
USB
« on the back of the device.
Notes:
The USB cable should not be longer than 2 m.
Switch off the device before removing USB memory stick or MP3 player.
((
CONNECTION AND PREPARATION
___________
Page 14

34
Inserting a memory card
The device supports SD and MMC memory cards.
1 Switch off the device.
2 Insert the card carefully into the card slot »SD/MMC« (in the CD compartment) with the
contacts facing downwards until it latches into place.
Caution:
– Do not use excessive force when inserting the card. Only apply slight pressure.
– The memory cards are resistant to dirt and moisture, but must only be inserted into the
device in a dry and clean condition.
– Never remove memory cards during operation. This can damage the memory card.
This type of damage will invalidate your warranty.
Removing a memory card
1 Switch off the device.
2 Press the card inwards slightly until the latch is released. Then pull out the card.
Activating the remote control battery
1 Activate the remote control battery by pulling on the film protruding from the battery
holder.
Changing the batteries
1 Pull out the battery holder.
2 When inserting the battery (3 V, lithium), make sure the positive terminal (+) is facing
upwards and the buttons on the remote control are facing downwards (see battery icon
on the bracket).
3 Push the battery holder back into the remote control until it latches into place.
Note:
If the device no longer reacts properly to remote control commands, the battery may be
flat. Always remove used batteries. The manufacturer accepts no liability for damage
caused by leaking batteries.
Environmental note:
Batteries, including those which contain no heavy metals, may not be disposed of with
household waste. Please dispose of used batteries in an environmentally sound manner.
Find out about the legal regulations which apply in your area.
CONNECTION AND PREPARATION
___________
Page 15

ENGLISH
35
Switching on and off
1 Press »ON/OFF« to switch on the device.
2 Press »ON/OFF« to switch off the device.
Selecting the input source
1 Press »SOURCE« to select the input source (Radio, Disc, USB or SD/MMC).
Adjusting the volume
1 Adjust the volume with »– z +«.
Switching the Ultra Bass System on and off
This function boosts the bass frequencies.
1 Switch the Ultra Bass System on and off by pressing »UBS«.
Selecting sound settings
1 Press »EQ« to select the sound settings (Flat, Classic, Jazz, Pop, Rock).
Muting
This function enables you to mute the loudspeakers.
1 Press »p« on the remote control to activate the mute function.
2 Press »p« on the remote control to deactivate the mute function.
Listening with headphones
1 Connect the headphones to the »0« headphone jack (3.5 mm) (back the device).
– This automatically switches off the loudspeakers.
GENERAL FUNCTIONS
__________________________________
Page 16

36
Antennas
1 For FM stations (VHF) extend the telescopic antenna »Antenne«.
Note:
If the FM signal is too strong, it is advisable to push in the telescopic antenna.
2 The radio has a built-in rod antenna for MW reception. Turn the device around to align
the antenna.
Selecting the radio input source
1 Press »SOURCE« to select the input source.
Setting and storing radio stations
Automatic station search
1 Press »BAND 7« to select the frequency band (FM or MW).
2 Activate the station search by pressing »
8« or »9« until the frequency display changes
to rapid run-through.
– The search stops when a station is found.
Manual station search
1 Press »8« or »9« briefly several times to move the frequency up in steps.
– The frequency changes in 50 kHz steps (FM) and 9 kHz steps (MW).
Storing stations as presets
You can store up to 20 stations in the FM band and up to 10 stations in the MW band.
1 Press »BAND 7« to select the frequency band (FM or MW).
2 Press »
8« or »9« to select the station.
3 Press »PROG.« briefly to activate the memory function.
4 Select the preset with »A« or »
S
«.
5 Press »PROG.« to save the station.
6 To store more stations, repeat steps 2 to 5.
Note:
You can replace a station on a preset with a new one by carrying out steps 2 to 5 as
described above.
RADIO MODE
_________________________________________________
Page 17

ENGLISH
37
Selecting a preset
1 Press »BAND 7« to select the frequency band (FM or MW).
2 Select the preset with »A« or »
S
«.
Stereo/mono reception
If the device receives an FM stereo station, » « appears in the display. However, if
the signal from the FM stereo station is weak, you can improve the sound quality by switching
to mono reception.
1 Switch to mono reception with »RESUME ST/MO«.
2 Press »RESUME ST/MO« to switch to stereo reception.
STEREO
RADIO MODE
_________________________________________________
Page 18

38
The device is suitable for music CDs displaying the logo shown here (CD-DA) and for
CD-Rs and CD-RWs with MP3 and WMA formats.
In MP3 mode, the terms “album” and “file” are very important. “Album” corresponds
to a folder on a PC, “file” to a file on a PC or a CD-DA track.
The device sorts the albums, or the tracks on an album, by name into alphabetical
order. If you want to order them differently, change the name of the track or album
and put a number before the name.
When burning CD-R and CD-RWs with audio files, various problems may arise which
could lead to problems with playback. This can be caused by faulty software or hardware settings or by the CD being used. Should such problems arise, contact the customer services of
your CD burner or software manufacturer or look for relevant information, for example on the
Internet. When you are making audio CDs, observe all legal guidelines and ensure that the
copyright of third parties is not infringed.
Always keep the CD compartment closed to prevent dust from collecting on the laser optics.
Do not attach adhesive labels to CDs. Keep the surfaces of CDs clean. You can play standard
12 cm CDs as well as 8 cm CDs on your device. An adapter is not necessary.
Selecting the disc input source
1 Press »SOURCE« to select the input source.
2 Press »OPEN « to open the CD compartment with the sliding switch.
3 Insert a CD in the compartment with its label facing upwards.
4 Close the lid of the CD compartment.
– The device scans the content of the CD. The total number of tracks appears in the
display.
CD playback
1 Press »ıII« to start playback.
– Playback begins with the first track (CD-DA).
– Playback starts with the first track of the first album (MP3/WMA).
– Display: the current track number and the elapsed playing time of the track.
– Playback stops at the end of the CD.
2 Press »
ı
II« to pause playback.
3 Press »ıII« to resume playback.
4 Press »BAND
7
« to end playback.
5 Open the CD compartment with the »OPEN « sliding switch and remove the CD.
6 Close the CD compartment.
CD/MP3/WMA MODE
__________________________________
Page 19

ENGLISH
39
Pausing and resuming playback
When the resume function is activated (display: » «) you can continue playback at the
beginning of the same track after switching off and on again in CD/MP3/WMA mode.
However, changing the input source deactivates the resume function.
1 Activate the resume function with »RESUME ST/MO«.
2 To deactivate the resume function, press »RESUME ST/MO« again.
Selecting tracks
1 During playback, press »8« or »9« until the number of the track you want to hear
appears in the display.
– Playback of the selected track starts automatically.
Note:
You can also select tracks in the stop position. However, you must then start playback of
the track with »
ı
II«.
Searching for a passage within a track
1 During playback, press »8« or »9« and hold it down until you find the passage you
want to hear.
– Playback starts when you release »8« or »9«.
Selecting albums and tracks (only MP3/WMA)
1 In stop mode, press »A« or »
S
«.
– The list of albums appears in the display.
2 Select the album by pressing »A« or »
S
«.
3 Select the track by pressing »
8 or 9«.
4 Press »ıII« to start playing back the track.
Playback functions
1 During playback press »MODE« until the function appears in the display.
– Display: » «.
– The current track is repeated.
– Display: » ALL«.
– All of the tracks are repeated.
– Display: » FOLDER« (only MP3/WMA).
– All the tracks on the current album are played back repeatedly.
– Display: »INTRO«.
– The first ten seconds of the following track are played.
– Display: »RANDOM«.
– All tracks on the CD are played back once in random order.
2 To quit the function, press »MODE« until all the repeat functions disappear from the
display.
w
w
w
RS
CD/MP3/WMA MODE
__________________________________
Page 20

40
Creating a playlist
You can create a track memory of up to thirty-two tracks for the current CD in any order you
choose and then play them back in that sequence. A track may be stored more than once.
Programming is only possible in stop mode.
Selecting and storing tracks
1 Press »PROG.« to select the function.
– Display: »T0000« for the track stored, »P:01« for the first preset and »PROG«.
2 Select the track by pressing »
8 or 9«.
3 Press »PROG.« to save the track.
– Display: »P:02« for the second preset and »PROG«.
4 To store more tracks, repeat steps 2 to 3.
Playing back a playlist
1 Press »ıII« to start the playlist.
– Playback begins with the first programmed track.
2 Press »BAND
7
« to end playback.
3 Press »ıII« to play the playlist again.
Deleting the playlist
The CD must be in the stop position.
1 Open the CD compartment with the »OPEN « sliding switch
or
press »BAND 7«.
CD/MP3/WMA MODE
__________________________________
Page 21

ENGLISH
41
For MP3/WMA mode using a USB stick, MP3 player, or MMC/SD memory card, the
same playback and search functions are available as for CD/MP3/WMA mode (see pages
18 to 20).
Playing the contents of an MP3 player or USB memory stick
1 Plug the USB memory stick or the USB cable of the MP3 player into the USB interface
»
USB
« in the CD compartment
or
plug the USB memory stick or the USB cable of the MP3 player into the USB interface
»
USB
« on the back of the device.
2 Switch on the device and select the USB input source with »SOURCE«.
– Display: »READING«, then MP3 mode with the total number of albums in stop mode and
» «.
3 Press »
ı
II« to start playback.
– Playback starts with the first track of the first album.
Playing the contents of a memory card
1 Insert a memory card in the card slot »SD/MMC« (in the CD compartment).
2 Switch on the device and select the SD/MMC input source with »SOURCE«.
– Display: briefly »READING«, then MP3 mode with the total number of albums in stop
mode and » R«.
3 Press »
ı
II« to start playback.
– Playback starts with the first track of the first album.
Notes:
The USB interface of this device is a standard interface. All currently known MP3 chip
concepts were taken into account when it was developed. Due to rapid developments in
MP3 technology and new manufacturers appearing every day, the compatibility of MP3
players/USB memory sticks can only be partially guaranteed.
If USB operation is impaired or is not possible, this does not indicate a malfunction of the
device.
Caution:
Bi-directional data transfer as defined for ITE devices in EN 55022/EN 55024 is not
possible.
USB transfer is not in itself an operating mode. It is only an additional function.
(
((
USB AND SD/MMC MODE
__________________________
Page 22

42
Technical data
This device is noise-suppressed according to the applicable EU directives.
This product fulfils the European directives 89/336/EEC, 73/23/EEC and 93/68/EEC.
This device conforms to the safety regulation DIN EN 60065 (VDE 0860) and therefore the
international safety regulation IEC 60065.
Never open the device casing. No warranty claims are accepted for damage caused by
incorrect handling.
The type plate is located on the bottom of the device.
INFORMATION
_______________________________________________
Power supply
Mains operation: 230 volts, 50/60 Hz
Battery operation:
6 x 1.5 V IEC (LR14/AM2/C size)
Max. power consumption
Operation: 15 W
Standby: < 1.5 W
Output
DIN 45324, 10 % THD
Audio power: 2 x 1.5 W
Sine wave power: 2 x 1.5 W
Radio unit
Frequency bands
FM 87.5 ...108.0 MHz
MW 522 ... 1620 kHz
CD unit
Frequency response: 20 Hz ... 20 kHz
Noise voltage ratio: ≥ 65 dB
MP3/WMA
Suitable formats: MP3, WMA
Playback format: MPEG 1 layer 3 (MP3)
File system/file management: ISO 9660 Level 1,
Joliet, Romeo
USB
Suitable formats: MP3, WMA
SD/MMC
Suitable formats: MP3, WMA
Dimensions and weight
W x H x L: 360 x 145 x 235 mm
Weight (without batteries): approx. 2.37 kg
Technical and design modifications reserved.
Environmental note
This product has been made from high-quality parts and materials which can be re-used
and recycled.
Therefore, do not throw the product away with normal household waste at the end of its
life. Take it to a collection point for recycling electrical and electronic devices. This is indicated by this symbol on the product, in the operating manual and on the packaging.
Please find out about collection points operated by your local authority.
Help protect the environment by recycling used products.
Page 23

ENGLISH
43
Troubleshooting
If a fault occurs, first refer to this information before you take the device for repair.
If you are unable to rectify the fault using the information given here, contact your local dealer or service specialist.
Under no circumstances should you attempt to repair the device yourself, as this would invalidate the guarantee.
INFORMATION
_______________________________________________
PROBLEM
GENERAL
INFORMATION
No sound
The device does not
respond to button
commands
RADIO
Poor radio reception
CD
Playback will not start
The CD player skips tracks
CD-Rs or CD-RWs are not
being played back,
or being played back
incorrectly
USB
MP3 player/USB memory
stick is not detected
SD/MMC
Memory card is not
detected
POSSIBLE CAUSE
Volume is too low
Headphones are connected
Batteries are flat
Batteries are incorrectly inserted
Power cord incorrectly connected
Static electrical discharge
Weak radio antenna signal
Interference from electrical devices
such as televisions, video recorders,
computers, neon lamps etc.
The CD is damaged or dirty
A stored playlist is being played.
The RANDOM function is activated
The CD is faulty or the software or
hardware settings were incorrect
during burning
MP3 player/USB memory stick is not
compatible
Memory card is not
compatible
REMEDY
Increase volume
Disconnect the headphones
Insert new batteries
Insert batteries correctly
Connect power cord correctly
Switch off the device, disconnect the
mains cable and plug it in again
after a few seconds
Remove any batteries
VHF (FM): tilt and turn thetelescopic
antenna
MW: turn the whole device
Keep the radio recorder away from
electrical devices
Replace or clean the CD
Switch to normal playback or delete
Switch off the RANDOM function
Check the components of your CD
burner/burner software or change
the CD you are using
Switch the device off and on again
Use another MP3 player/USB
memory stick
Switch the device off and on again
Use another memory card
Page 24

Grundig Multimedia B.V.
Atrium, Strawinskylaan 3105 • NL-1077 ZX Amsterdam • http://www.grundig.com
72011 406 9500
 Loading...