

Page 1

>> User Guide
English
Page 2

1
Contents
Contents
1. Introduction ..................................................3
1.1 Scope of supply..............................................3
1.2 Accessories ....................................................3
1.3 Explanation of signalwords and symbols in this
Operating Instruction ......................................3
1.4 Saftety information .........................................4
Purpose of use ...............................................4
1.5 Special hazards ..............................................5
Electrical Voltage ............................................5
Rechargeable batteries ...................................6
Traffic .............................................................6
Particular groups of persons ...........................6
Obstacle .........................................................7
Electronic components ...................................7
Cleaning .........................................................7
Disposal .........................................................7
Defects...........................................................8
2. Comment Controls/Keys and Connections . 9
3. Initial Setup ................................................12
3.1 Battery operation..........................................12
Inserting batteries ........................................12
3.2 Operating using rechargeable batteries ........12
Instructions for rechargeable battery pack 962
12
Inserting rechargeable batteries ...................13
Charging the rechargeable battery ...............14
3.3 Operation with USB power supply ................14
3.4 Switching the device on/off ..........................15
Switching on for the first time ......................15
3.5 Switching the device on/off ..........................16
Switching on ................................................16
Switching off ................................................16
3.6 Profiles .........................................................16
Easy Mode ...................................................16
Menu Mode ..................................................17
Change of profile ..........................................17
3.7 Help function ................................................18
3.8 Navigation ....................................................18
Button functions ...........................................18
NEW button ...............................................18
OK button ..................................................18
MENU button .............................................18
Up/down buttons .......................................19
Display buttons in menu ............................19
Text editor ....................................................19
Keylock ........................................................20
3.9 Memory options ...........................................20
Internal/External memory .............................20
Instructions for memory card .......................21
Inserting memory card .................................21
Removing memory card ...............................21
Formatting memory card ..............................22
4. Operating ....................................................23
4.1 Recording of new dictation ...........................23
4.2 Play-back dictation .......................................23
Select dictation ............................................24
Listen to dictation .........................................24
Setting the volume .......................................24
Fast forward and rewind ..............................25
Fast play-back .............................................25
Set an index mark during play-back .............25
4.3 Change a dictation .......................................26
Insertion of a dictation part ..........................26
Overwrite dictation parts ..............................26
Adding of dictation parts ..............................27
4.4 Changing of dictation features ......................28
Dictation lock ...............................................29
Encryption ....................................................29
Priority .........................................................30
Postponed ....................................................30
Deadline .......................................................30
Filename ......................................................31
Secretary .....................................................31
Worktype ......................................................31
Group/category ............................................32
Numbers/reference (characters) ...................32
Dictation ID ..................................................33
Scan in new Dictation ID ...........................34
Change dictation ID ...................................35
Delete dictation ID .....................................35
Dataset ........................................................36
Display/edit dataset ...................................36
Delete dataset ...........................................37
Status info ....................................................37
Author name ................................................37
4.5 Info/Index function........................................37
Add info message ........................................38
Delete info message.....................................38
Add index .....................................................39
Delete index .................................................39
4.6 Delete dictation ............................................40
Delete entire dictation ..................................40
Delete dictation part .....................................41
5. Menu functions ..........................................42
5.1 The menu mode at a glance .........................42
5.2 USB-operations ............................................43
5.3 Data list .......................................................43
Select ........................................................... 44
Page 3

2
Contents
Contents
Workflow ......................................................44
Delete ..........................................................45
5.4 Scanner........................................................45
Use scanner to search for dataset for new
dictation .......................................................45
Search for dictation ...................................45
Scan workflow .............................................46
Programming ...............................................47
5.5 Folder ...........................................................47
5.6 Profiles .........................................................48
5.7 Recording .....................................................48
Microphone sensitivity ..................................48
Voice activation ............................................48
Recording format .........................................49
Automatic follow-up dictation .......................51
5.8 Display .........................................................52
Screen .........................................................53
Date and time ..............................................54
Illumination ..................................................55
Brightness ....................................................55
Contrast .......................................................56
Language .....................................................56
5.9 Workflow ......................................................57
Secretary .....................................................57
Worktype ......................................................58
Group/category ............................................58
Priority .........................................................59
Numbers/reference ......................................60
5.10 Device settings ............................................. 60
Sleep mode ..................................................60
Acoustic signals ...........................................61
USB connection ............................................61
Speaker........................................................62
Fast forward/rewind .....................................63
Rechargeable batteries ................................. 63
Foot control ..................................................64
Configuration of the foot control during
recording ...................................................65
Configuration of the foot control during play-
back ..........................................................65
Reset counter ...............................................65
Change PIN ..................................................66
Reset............................................................67
5.11 Device info ...................................................68
Version .........................................................68
License key ..................................................69
Memory........................................................69
6. Barcode scanner ........................................71
6.1 Using barcodes ............................................71
6.2 Connect scanner ..........................................71
6.3 Scan barcode for a dictation ........................72
6.4 Display barcode for a dictation .....................72
6.5 Scan barcode for an existing dictation ..........72
6.6 Search for dictation corresponding to a
barcode ........................................................72
6.7 Delete barcode from a dictation ...................72
6.8 Configure barcode scanner ..........................73
7. Communication with the PC ......................74
7.1 Connect/disconnect the dictation machine with
the PC ..........................................................74
Connect dictation machine to the PC ............74
7.2 USB-operations ............................................74
USB power supply ........................................74
PC file transfer (removable storage device) .. 74
PC microphone operation (USB-Audio, USB-
HID) ..............................................................75
Record a dictation .....................................76
Change mode ...............................................76
Switch off USB mode ................................76
Switch on USB mode .................................76
8. Possible configurations with the PC
software “Digta Configurator” ..................78
8.1 Configuration software .................................78
8.2 PIN/PUK ........................................................78
Enter PIN ......................................................79
Change PIN ..................................................79
8.3 Folder functions ...........................................79
Select folder .................................................79
Delete contents of folder ..............................79
8.4 EOL function .................................................80
Activate EOL function ...................................80
Using the EOL function .................................80
8.5 Free configuration of buttons ........................81
9. Operation with Digta Station .....................82
9.1 USB interface ...............................................82
9.2 Charging the battery in the battery
compartment of the dictation machine .........82
9.3 Dictation with foot control ............................83
10. Firmware update ........................................84
11. Technical Data ............................................85
12. Trouble shooting .........................................86
Page 4

3
Introduction
Introduction1.
Your Digta is a digital handheld dictation machine. When used with the
included software, it can be used as a single user station dictation system. It can also be integrated into a network (local network with several
authors and transcribers).
Please read the entire operating instruction before usage. Grundig Business Systems cannot accept any liability for damages resulting from
non-observance of the operating instruction. Please keep the user manual for future references.
For safety reasons, follow all safety precautions to ensure a safe handling with the device!
Warning! Never open the dictation machine. This voids the warranty. You
may open only the cover for the battery compartment.
The CE mark confirms that the device corresponds to the
relevant guidelines of the European Union..
Scope of supply1.1
Dictation machine Digta 7 Push• DVD with PC-software and doc-•
umentation
USB-cabel• Pouch•
These operating instructions describe how to use the device with accessories as well as how to operate the device using only the standard
scope of delivery. Accessories that are not included in the scope of
delivery are marked with “*”.
1.2 Accessories
For the latest accessories like Digta Card, Digta Station 447, rechargeable battery pack 962, power supply, foot control, plug-on microphone
and earphone, please visit the Grundig Website on the internet at
www.grundig-gbs.com.
The performance characteristics described by Grundig Business Systems are only valid when using original accessories released by Grundig
Business Systems. Grundig Business Systems cannot accept liability for
lacks caused through the utilization of accessories which are not Grundig Business Systems genuine accessories. This also applies to accessories which are neither released nor recommended by Grundig Business Systems.
Explanation of signalwords and symbols in this 1.3
Operating Instruction
Important notes for your safety are highlighted. Please pay particular
attention to these notes in order to avoid accidences and damages to
the device:
Warnings
Warnings are indicated by symbols. In addition they are introduced with
signal words that express the scope of the hazard.
All instructions must strictly complied with!•
Page 5

4
Introduction
When working always act cautiously to prevent accidents, personal •
injury, or property damage!
Saftety information1.4
Purpose of use
Please use your Digta only for such purposes as described in this Quick
Reference Guide or in the comprehensive manual. The device may
only be used for its intended purpose. Any other kind of utilization is
forbidden.
Keep the dictation machine and the accessories out of the reach of •
children.
Protect the dictation machine from spray water or rain.•
Do not place the dictation machine directly next to a heater or place •
it away from direct heat or bright sunlight.
Do not modify the device.•
Indicates useful tips and recommendations as well as
information for efficient and trouble-free operation.
DANGER
Indicates a hazardous situation which, if not avoided, will result in
death or serious injury.
WARNING
Indicates a hazardous situation which, if not avoided, could result
in death or serious injury.
CAUTION
Used with the safety alert symbol indicates a hazardous situation
which, if not avoided, could result in minor or moderate injury.
Used to address practices not related to personal injury. It indicates specific actions which prevent from damage to the device
and from loss of dictations.
NOTICE
Page 6

5
Introduction
Special hazards1.5
Electrical Voltage
Danger of life due to electric shock!
The power supply* operates with 230 V alternating current. Improper
utilization may result in injury due to electric shock. Follow all safety
precautions as follows to avoid accidences:
Never touch the connector plug of the power supply with wet •
hands.
Do not insert metal objects or like into the power supply.•
Never open the power supply or modify the plug or cable.•
Do not use the power supply if the housing or connection cable is •
damaged or the power supply does not function properly.
Always unplug the power cable from the wall jack by pulling the •
connector plug but never use the power cable for plugging off
because the cable could tear apart.
Do not bend, clamp or drive over the power cable, and keep it •
away from heat.
Data indicated on the tool identification plate must match the •
technical data of the mains supply otherwise this may destroy
your device.
If the power supply is dropped, have it checked by an authorized •
dealer to ensure that it functions correctly and safely.
Disregarding these precautions means risking a fatal electric shock.
Danger of fire, explosion and overheating!
Use the power supply only with the line voltage specified on the •
rating label.
Use the power supply only with its original connection cable or •
adapter (European, UK and USA version). Never use other connection cables or adapters with different plugs.
Do not place heavy objects on the power supply or connection •
cable, and do not cover the power supply.
Use the power supply only in a dry indoor environment. Protect the •
power supply from moisture in the form of water and high humidity.
Do not bend the connection cable of the power supply.•
Do not operate or store the power supply near heaters or direct •
sunlight. Ensure adequate ventilation. The permitted temperature
range is:
-4°F (-20°C) to 158°F (70°C) for storage
5°F (-15 °C) to 95°F (35°C) for operation
Grundig Business Systems power supplies are only to be used •
with Grundig Business Systems office equipment.
Pull the power supply out of the socket to separate the device •
from the power grid.
Unplug the power supply before cleaning it.•
DANGER
WARNING
Page 7

6
Introduction
Disregarding these precautions means risking fire, explosion or
overheating.
Rechargeable batteries
Danger of explosion and burns!
The device operates with batteries and rechargeable batteries*.
Follow all safety precautions as follows to avoid accidences:
Do not throw batteries or rechargeable batteries into fire. Do not •
try to short-circuit the electric contacts, this may lead to explosion.
Batteries or rechargeable batteries should not be kept unpacked in •
a bag and should not be opened or modified. Caution - there is the
risk of burns through leakage.
Rechargeable batteries should only be charged in the dictation •
machine. The attempt to charge a rechargeable battery beyond its
electrical capacity may lead to explosion.
Disregarding these precautions means risking explosions and burns.
Signal interference!
Do not make recordings near mobile telephones. In case of inter-•
ferences (such as hissing), increase the distance.
Disregarding these instruction lead to disruption of the recording by
interferences.
Traffic
Danger of accidents!
Do not use the device while operating vehicles (such as cars, bicy-•
cles, motorcycles, ATVs, etc.).
Disregarding these precautions can lead to traffic accidents.
Particular groups of persons
Risk of injury!
Do not leave the device unattended and use it with extreme cau-•
tion if children or persons who cannot assess the danger are nearby.
Keep the device away from persons (including children) who are •
unable to use it safely due to their physical, sensory or mental limitations, lack of experience or lack of knowledge.
Disregarding these precautions means risking injury.
WARNING
NOTICE
WARNING
CAUTION
Page 8

7
Introduction
Obstacle
Stumbling hazard!
Ensure that the power supply is always in a safe position and that •
neither the power supply nor any cables connected to the device
or to the docking station* constitute obstacles.
Disregarding these precautions may lead to a stumbling hazard.
Electronic components
Risk of damage and void warranty!
Protect the device from moisture (such as rain or water spray).•
Do not place the device near a heater nor in direct sunlight. The •
permitted temperature range is:
-4°F (-20°C) to 158°F (70°C) for storage
5°F (-15 °C) to 95°F (35°C) for operation
Do not open the device under any circumstances.•
Do not modify the device.•
Disregarding these instructions can cause the device to be damaged
and the warranty to become void.
Cleaning
Risk of damage!
Unplug the power supply before cleaning it.•
Clean the device only on the outside with a dry, soft cloth. Do not •
use any chemical cleaning agents such as alcohol, thinner, gasoline or the like.
Disregarding these instructions can cause the device to be damaged.
Disposal
Electronic waste is not allowed to be disposed of with the domestic
waste. Electronic waste has to be returned to collecting points at public
recycling authorities set up for this purpose.
Consumers are obliged by law to return batteries or rechargeable batteries at the end of their service lives to the public collecting points at
public waste disposal authorities or point of sale set up for this purpose.
CAUTION
NOTICE
NOTICE
Page 9

8
Introduction
Defects
Risk of injury due to a defect device!
Do not try to repair a defect device. The device may only be repaired
by a specialised dealer.
A list of the specialised dealers is available on our website: www.
grundig-gbs.com
WARNING
Page 10

9
Comment Controls/Keys and Connections
2. Comment Controls/Keys and Connections
Fig. 4: Fig. 1: Fig. 3:
Fig. 2:
16
20 19 18
17
21 22
Fig. 5:
30393128 2927
38
32
33
34
35
37
36
5
7
6
14
3
13
10 9
8
12
4
1
11
23
24
26
25
2
15
Page 11

10
Comment Controls/Keys and Connections
No Description Meaning
1 Microphone hole internal microphone
2 Keypad Record control and play-back control of the
current dictation (see Fig. 4, 23-26)
3 Display buttons Labeling in the display
4 Up-Down-buttons Navigation
5 On/Off button Digta On- and Off switching
6 Battery compartment For rechargeable 962- or AAA-batteries
7 Unlocking button Unlocking button for the battery compartment
8 Menu button Digta menu access
9 OK button Key button
End recording of dictation and play it back
(only if activated in the Digta Configurator)
10 New button Create a new dictation
End recording and create a new dictation
11 Left-right-buttons Navigation
12 Display Operational status indicator and indicator of
the adjustable menu functions (for details see
Fig. 5)
13 Lower function button Press button briefly: Help for the current On-/•
Off-setting of functions
Long pressing: Keylock On/Off switch•
14 Upper function button Press button briefly: Display illumination •
On-/Off
Press button long: EOL* (if activated)•
15 Battery compartment Battery compartment for batteries or recharge-
able batteries*
No Description Meaning
16 Memory card* Memory medium for recorded dictations
17 Recording LED Multicolored LED lights up during recording,
blinks regularly during recording pause
red = overwrite/append•
orange = insert•
green = play-back in USB-audio mode•
yellow = USB-connection/data transmission•
18 Microphone socket Connection for external extra microphone
19 Card slot For memory card
20 Earphone jack Connection for earphone or headphone
21 Contact strip Docking station* connection
22 USB-connection Interface for PC and Grundig power supply
23
g REC button
Control of the current dictation‘s recording:
Start recording, record pause and continue the
recording
Only for devices with speech recognition*:
Keep pressing: Activates speech recognition •
for input of numbers and letters
24
i REW button
Rewind the dictation
End dictation via short backspace and automatic play-back
25
h FF button
Forward dictation (fast forward)
26
e STOP / f PLAY
button
End recording of the dictation
Play-back dictation and stop play-back
27 Clock Time in hours and minutes
28 Voice Activation Speech activation On/Off
Page 12

11
Comment Controls/Keys and Connections
No Description Meaning
29 Remaining memory
time
Display of free memory space in minutes and
seconds
30 Card indicator Memory card is inserted in the device, the data
is saved on the external memory card
31 Battery/rechargeable
battery*
Charge level of battery; blinks when the batteries are low
32 Status bar Device settings (see No 27-31)
33 Advanced status bar Folder name•
File format/recording quality of the next •
recording
Encryption•
Load: charge level in %•
Discharge: display of remaining battery •
charge in hours and minutes
34 Key functions
Current function of the keys on the keypad
g Recording
ll Record pause
i Rewind
End rewinding
h Fast forward
End forwarding
e Stop / f Play-back
End of play-back
35 Display button
labeling
Function of display buttons in the current operational status mode
36 Dictation time After dictation selection: length of dictation•
During recording and play-back: dictation •
time at the current recording-/play-back
position
No Description Meaning
37 Progress bar Shows the current dictation position and
marks
Insert Overwrite
Info* Index
38 Dictation field Dictation data (dictation name, position
number,
dictation ID/bar code)
39 Dictation information Deadline, priority, postponed, encryption, dic-
tation lock
This product or function is not included in the delivery and available as an *
accessory.
Page 13

12
Initial Setup
3. Initial Setup
Danger of explosion and burns!
The device operates with batteries and rechargeable batteries*.
Follow all safety precautions as follows to avoid accidences:
Do not throw batteries or rechargeable batteries into fire. Do not •
try to short-circuit the electric contacts, this may lead to explosion.
Batteries or rechargeable batteries should not be kept unpacked in •
a bag and should not be opened or modified. Caution - there is the
risk of burns through leakage.
Rechargeable batteries should only be charged in the dictation •
machine. The attempt to charge a rechargeable battery beyond its
electrical capacity may lead to explosion.
3.1 Battery operation
With fully charged alkaline batteries, you can work with the dictation
machine for approx. 25 hours. To operate the device, you need 2 x 1.5 V
AAA batteries, for instance LR 03/AM-4.
Inserting batteries
Press the unlocking button of the battery compartment and lift it up x
to open it.
Open the battery compartment. x
Battery compartment with batteries
Make sure that the polarity is correct x and insert the batteries.
Close the battery compartment. x
3.2 Operating using rechargeable batteries
Instructions for rechargeable battery pack 962
New rechargeable batteries do not reach their full capacity until after
several chargings. Therefore, the battery life with a new rechargeable
battery may occasionally be less than 3 hours.
With a full rechargeable battery, you can work with the dictation
machine for up to 25 hours (DSS standard play) (test criteria according
to Grundig Business Systems).
WARNING
Battery compartment
Page 14

13
Initial Setup
Battery compartment with rechargeable battery pack 962
To ensure optimal operation with the rechargeable battery*, you should
always switch off the dictation machine following dictation and insert it
into the Digta Station* so that it can be recharged.
The charge level is shown on the display screen of the dictation
machine:
» •
« Battery full
» •
« Battery approx. 75%
» •
« Battery approx. 50%
» •
« Battery approx. 25%
» •
« Battery nearly empty
If the rechargeable battery is nearly empty, a short warning signal will
sound and the battery symbol »
« will flash on the display. No warning signal will sound during recording. You can still record and playback for several more minutes until the dictation machine switches off
automatically.
We recommend charging the dictation machine or connecting it to a
power supply once the warning signal sounds and the battery symbol
»
« begins to flash.
You can display details about the battery/rechargeable battery* under
the battery symbol in the extended status line.
Charge (dictation machine switched on): charge level in %•
Charge remaining (dictation machine switched on and not connect-•
ed to the USB or power supply): remaining battery charge in hours
and minutes
The operating system of the dictation machine is “shut down” when
switched off (as with a PC). This requires that an adequate amount of
power remains.
Data loss
If you switch on the device after an automatic shut down without first
charging the battery or connecting it to the power supply, your saved
dictations could be permanently lost.
Inserting rechargeable batteries
Press the unlocking button of the battery compartment and lift the x
cover upward.
Open the battery compartment. x
Battery compartment
NOTICE
Page 15

14
Initial Setup
Observe the correct polarity x and insert the rechargeable battery*.
Close the battery compartment. x
Charging the rechargeable battery
Danger of explosion and burns!
Rechargeable batteries should only be charged in the dictation •
machine.
Do not use damaged batteries.•
Insert the plug of the power supply only into power sockets which •
provide the line voltage specified on the rating label. Otherwise
there is a danger of fire, explosion and overheating.
Disregarding these precautions means risking fire, explosion or burns.
Switch your Digta off. x
Plug the power supply* plug to the wall outlet. x
Connect the other end of the mains supply cable - the USB plug - x
with the “USB-connection” of your dictation machine.
Shortly afterwards, the animated load indicator appears on the display. The current loading level is shown in percentage.
Rechargeable battery charged 67%
The rechargeable battery is fully charged after approx. 4 hours. In
the display appears “
”.
Disconnect the power supply* from the socket and the USB plug of x
the power supply cable from the “USB-connection” of your device.
3.3 Operation with USB power supply
You can operate your dictation machine while it is connected to your PC
using a USB cable (included with delivery).
The dictation machine is then supplied with power from the PC. You
can then use the Digta for recording and play-back as you would when
operating using a battery or a rechargeable battery. Switch from USB
mode to dictation mode.
Press „ x MENU“.
Use the up/down buttons to navigate to the „ x Dictation mode“
menu item and confirm by pressing „OK“.
WARNING
Load indicator
Page 16

15
Initial Setup
If the dictation machine is switched on and a power supply is connected to the USB socket, the dictation machine is supplied with power by
the power supply.
In both cases, the batteries are not drained and rechargeable batteries
are charged.
When operating using a power supply, the »
« symbol appears on
the display.
3.4 Switching the device on/off
Switching on for the first time
Press „ x MENU“ until the first display appears.
A list of the possible user languages opens. You must select a language when switching the device on for the first time.
Select the desired language for the list of possible languages using x
the up/down buttons.
Confirm your selection using „ x OK“.
The setup window for the date and time appears. You must enter the
date and time when switching on the device for the first time.
Setup window for date and time
Enter the day, month, year, hour and minutes using the up/down but- x
tons and confirm each using „OK“.
Select the format for the date and time using the up/down buttons. x
You select select whether the day or the month is displayed first in
the date and whether the time is displayed in 12 or 24 hours.
Complete the entry using „ x Save“.
The date and time settings are saved. The Digta returns to the main
screen and opens an example dictation. You can begin play-back or
record a new dictation.
Setup window
Format for date and time
Page 17

16
Initial Setup
Switching the device on/off3.5
Switching on
Press the “ x MENU” button until the initial display view appears on the
display.
After a few seconds, the Digta changes to the main screen and is
ready for operation.
When a request for a PIN appears, please input the digits by means x
of the up-down buttons and confirm each individual digit with the
“OK” button.
Please select your name when an authors list appears by means of x
the up-down buttons and confirm it with the “OK” button.
When a profile list appears, please select the required profile by x
using the up-down buttons and confirm it by pressing the “OK” button.
Switching off
Press the “ x MENU” button until the device switches off.
3.6 Profiles
The Digta allows you to switch between a number of predefined user
profiles (max. 20). For each profile, you can save device settings, add or
remove items from the display and turn entire functions on or off. Your
system administrator can create and manage these profiles.
The profiles can be created using the configuration software and
transferred to the dictation machine.
The Easy Mode and the Menu Mode are available in form of predefined default profiles. However, the system administrator can
change these profiles by means of the configuration software and
transfered them to the device.
Easy Mode
All functions needed for dictating, play-back, deleting or inserting of
dictations are available in the Easy Mode. In the Easy Mode, the menu
functions are in an off-state.
The display is organized more clearly in the Easy Mode. The risk that
operating errors are made is diminished because only the most important functions can be activated.
Profiles
Default settings of profiles
Page 18

17
Initial Setup
Display im Easy Mode
In the menu of Easy mode, you can view important information about
your Digta under “Device info”, e.g. serial number, version of the device
software (firmware) or the current status of the memory capacity. To
allow you to use the majority of the settings in the menu, switch to
Menu mode under “Profiles”.
Main menu in Easy mode
Menu Mode
The full range of functions are available in the Menu Mode. You can
adjust your Digta to your personal requirements by means of the menu
functions. This includes adding/removing information from the display,
adjusting the microphone sensitivity and activating workflow functions.
Display im Menu Mode
Change of profile
Press „ x MENU“.
Use the up/down buttons to navigate to the “ x Profile” menu item and
confirm by pressing “OK”.
A list of possible profiles appears on the display.
Please select the required profile by using the up-down buttons and x
confirm it by pressing the “OK” button.
Press the “ x Back” button if you do not want to adopt the changes
made.
Easy Mode
Limited menu functions
Menu Mode
Page 19

18
Initial Setup
After a few seconds, the Digta changes to the main screen and is
ready for operation.
3.7 Help function
The Digta offers a help function. Brief help texts shall support you by
using your dictation machine correctly. Additional information is put at
disposal when special operating situations occur, for example, during
the recording of dictations or in the menu.
Please press briefly the lower function button until the brief help x
texts are displayed.
You can scroll through longer quick help texts using the up/down x
buttons.
Press the lower function button again in order to close the help texts. x
You will be resetted to the initial situation/screen.
3.8 Navigation
Button functions
You can navigate through the Digta using the three display buttons, the
up/down buttons and “NEW”, “OK”, and “MENU”.
The functions of the display buttons change according to the mode of
operation.
NEW button
Create a new dictation•
OK button
During play-back, set the volume or speed to the middle value•
Confirm part of an entry (e.g. accept a character in the editing bar •
in text editor, confirm a digit of the PIN, confirm an entry field when
entering date and time)
Open subitem of a selected menu item•
Add check/bullet to activate a property•
Remove check/bullet to deactivate a property•
MENU button
Turn device on/off by pressing and holding•
Open device settings menu•
Close device settings menu•
Help function
Page 20

19
Initial Setup
Up/down buttons
Navigate up and down in the menu•
Increase or decrease when entering a number•
Increase and decrease the speed or volume during play-back•
Display buttons in menu
Left display button:
Escape: go up one menu level without accepting changes•
Back: up one menu level•
Middle display button:
• : delete last character in an entry line
Right display button:
Save: Save all changes and jump up one menu level•
Text editor
The Digta offers you a text editor for entering characters and digits
when using certain functions, for instance changing file names. It contains three types of entry: capital letters, lowercase letters and numbers/symbols. Entry starts out with capital letters by default.
Entering text in the text editor
You can navigate in the Digta’s text editor using “NEW”, “MENU” and
the up/down buttons.
You can jump between lines using the up/down buttons. The “NEW” and
“MENU” buttons serve as left/right buttons to move between characters in a line.
You can change between the three types of entry by selecting among
the symbols “AB”, “ab” and “1?” and pressing “OK”.
Select among the symbols using “ x NEW”, “MENU” and the up/down
buttons. Confirm your selection using “OK”.
If you have made a mistake in the entry, press “ x
”.
The entry is deleted one character at a time and can then be
reentered.
Finish retyping the entry and confirm using “ x Save”.
If you wish to cancel the entry, press x “Escape”.
Text editor
Page 21

20
Initial Setup
For quicker selection of characters, the set of possible characters
can be limited by the system administrator, for example if only digits
(patient number) are permissible.
Keylock
The key lock helps to avoid that the active recording or play-back process can be switched off by mistake.
Please press the lower function button until a locking symbol and x
»Device locked« are indicated on the display.
Display during keylock
Except when recording and playing back, you can switch off the device
normally even when the buttons are locked.
When your Digta is switched off, the button lock feature prevents
the device from being switched on inadvertently, e.g. in your briefcase. When the device is switched on, the message “Device locked”
is displayed. You can remove this lock by pressing the lower function button until the main screen is fully visible. The buttons are now
unlocked. If you do not deactivate this function, the device switches off
automatically.
3.9 Memory options
Internal/External memory
Dictations are stored on the internal memory of the Digta as long as no
external, removable memory card (Digta Card*) is inserted. As soon as a
Digta Card is inserted, all dictations will be stored on this memory card.
Copying between the internal memory and the external memory card is
impossible.
The icon “memory card active” pops up on the display.
Directories and files with administrative data are saved in both the internal and the external memory. Therefore, not all of the memory capacity
is available for recording dictations.
If a memory card is used, access to the internal memory is blocked.
Limited character (reference) selection
Keylock
Display “memory card active”
Page 22

21
Initial Setup
Instructions for memory card
You can use memory cards (not included with delivery) in place of the
internal memory. We recommend the Digta Card from Grundig Business Systems’ line of accessories. All MultiMediaCards and SecureDigital Cards (MMC/SD) can be used.
If a full memory card (for instance with over 300 dictations) is inserted
into a dictation machine with factory settings (or with a reset dictation
counter), it can take up to 20 seconds before a new dictation is created.
This time is required because the dictation machine searches for the
first free dictation number beginning at “1”. This time is also dependent
on the manufacturer of the memory card and can thus vary.
Ensure that the electrical contacts on the bottom of the memory card
are not exposed to any strong mechanical pressure.
Although the cards are not sensitive to dirt and moisture, they may
only be inserted into the dictation machine if they are clean and dry.
Inserting memory card
Do no apply excessive force when inserting the memory card. Only
gentle pressure is required.
Insert the slanted side of the memory card into the card slot. A sym- x
bol on the top of the reverse side of the device shows the correct
position of the slanted corner.
Data regarding the memory capacity of the inserted memory card
will appear on the display shortly.
Display of memory capacity
Removing memory card
Press gently on the memory card until the snap-lock mechanism x
releases the card.
Data loss
Never remove the card during active recording or during data transfer
to or from a PC. This can lead to data loss.
Condition of the memory card
Correct insertion
Memory capacity
NOTICE
Page 23

22
Initial Setup
Formatting memory card
New memory cards – even pre-formatted cards – must be formatted
using the dictation machine before they can be written for the first time.
If an error message appears when an unformatted memory card is
inserted, confirm it by pressing “OK”.
The memory card cannot be formatted as a removable storage device
using the formatting function of a PC.
We recommend reformatting the memory card using a PC after several re-recordings. Formatting defragments the memory card. This allows
further dictations to be accessed more quickly.
Page 24

23
Operating
4. Operating
Recording of new 4.1 dictation
Please press the button “ x NEW”.
The dictation machine switches over to the recording pause »ll«, the
LED-indicator blinks red.
Start the recording by clicking the » x
g« button. Dictate your new text.
The recording indicator lights red in the Overwrite recording mode
and shines orange in the Insert recording mode. The progress bar
increases as well as the dictation length.
Pause the recording by clicking the » x
g« button once again.
The dictation machine switches over to the recording pause »ll«, the
LED-indicator blinks red resp. orange.
Continue the recording by clicking the x »
g« button again. Go on dic-
tating your text.
End the recording by clicking the x »
e/f« button.
Record several test dictations and pay attention to the volume indicator. The volume bars should remain inside the window marked on the
display.
During play-back, ensure that the dictation has been recorded at an
easily understandable volume. The dictation should be able to be
heard clearly and without distortion at the middle volume setting.
If your test dictation is too loud or too quiet, adjust the dictation
machine’s microphone sensitivity to your voice.
Details on this adjustment can be found in the section “Menu functions/Recording/Microphone sensitivity”.
4.2 Play-back dictation
If you do not select a new dictation after switching the dictation
machine on, the last dictation that was being worked on will be
played back from the point it was at before the device was switched
off.
Dictation volume
Select dictation after switching on the device
Page 25

24
Operating
Select dictation
Please press the button x »e/f« first if a recording or play-back is
running.
The device turns to recording stop.
Select the desired dictation by using the up-down navigation but- x
tons.
Listen to dictation
Press the button » x e/f« again to listen to the dictation.
The progress bar on the display increases. The minutes and seconds
of the current dictation position shown on the display increase.
If play-back via OK is activated, you can start and pause the play- x
back process by pressing the “OK” button.
End the play-back by clicking the button » x
e/f« or “OK”.
Continue the play-back by clicking the button x »
e/f«.
Setting the volume
Volume control display
Press the up-down buttons during play-back. x
The volume indicator appears on the display.
Set the play-back volume as desired x by means of the up-down but-
tons.
The play-back volume can be turned up/down or soundless.
Speaker icon is struck through when the speaker is
muted
Volume control
Speaker off
Page 26

25
Operating
Danger of hearing impairment
Do not hold the dictation machine near an ear during play-back, particularly when the volume is turned up to a maximum in order to save
you from hearing damages.
Fast forward and rewind
You can jump ahead/back in recorded dictations using the fast-forward
and rewind functions.
Press the button x »
h« (fast forward) or »i« (rewind).
The progress bar increases or decreases and the dictation position
changes.
Fast play-back
Press the button x »e/f«.
The device turns to recording stop.
If the device is already in stop mode, play-back of the current dictation starts immediately.
Press the button » x
e/f« again to listen to the dictation.
The progress bar on the display increases. The minutes and seconds
of the current dictation position shown on the display increase.
Display during play-back
Press the button “ x Speed”.
Set the x play-back speed as desired by means of the up-down but-
tons.
Pause the play-back by clicking the button x »
e/f«.
Set an index mark during play-back
Press the button x »e/f«.
Press the button » x
e/f« again to listen to the dictation.
In the display the progress bar advances. The current dictation position in minutes and seconds increases.
At the desired position in the dictation press “ x Index”.
The word »Index« and a corresponding number appear in the display
and a mark is placed in the progress bar.
Play-back of the dictation continues.
WARNING
Play-back
Page 27

26
Operating
4.3 Change a dictation
Insertion of a dictation part
Additional dictation parts can be inserted at any position desired.
Press the button x »
e/f«.
The device turns to recording stop.
Select the desired dictation by using the up-down navigation but- x
tons.
Press the button » x
e/f« to listen to the dictation.
Press the button » x
e/f« again at the desired dictation position.
Control if the insertion mode is activated. x
The insertion mode is marked through a triangle in the progress bar.
If another recording mode is activated, please press the button x
“RecMode”.
A list of possible recording modes appears on the display.
Use the up/down buttons to navigate to the “ x Insert” recording mode
and confirm by pressing “OK”.
End your selection with the button “ x Save”.
Start the recording by clicking the » x
g« button. Dictate the text which
shall be inserted.
The recording indicator blinks orange. The progress bar increases as
well as the dictation length.
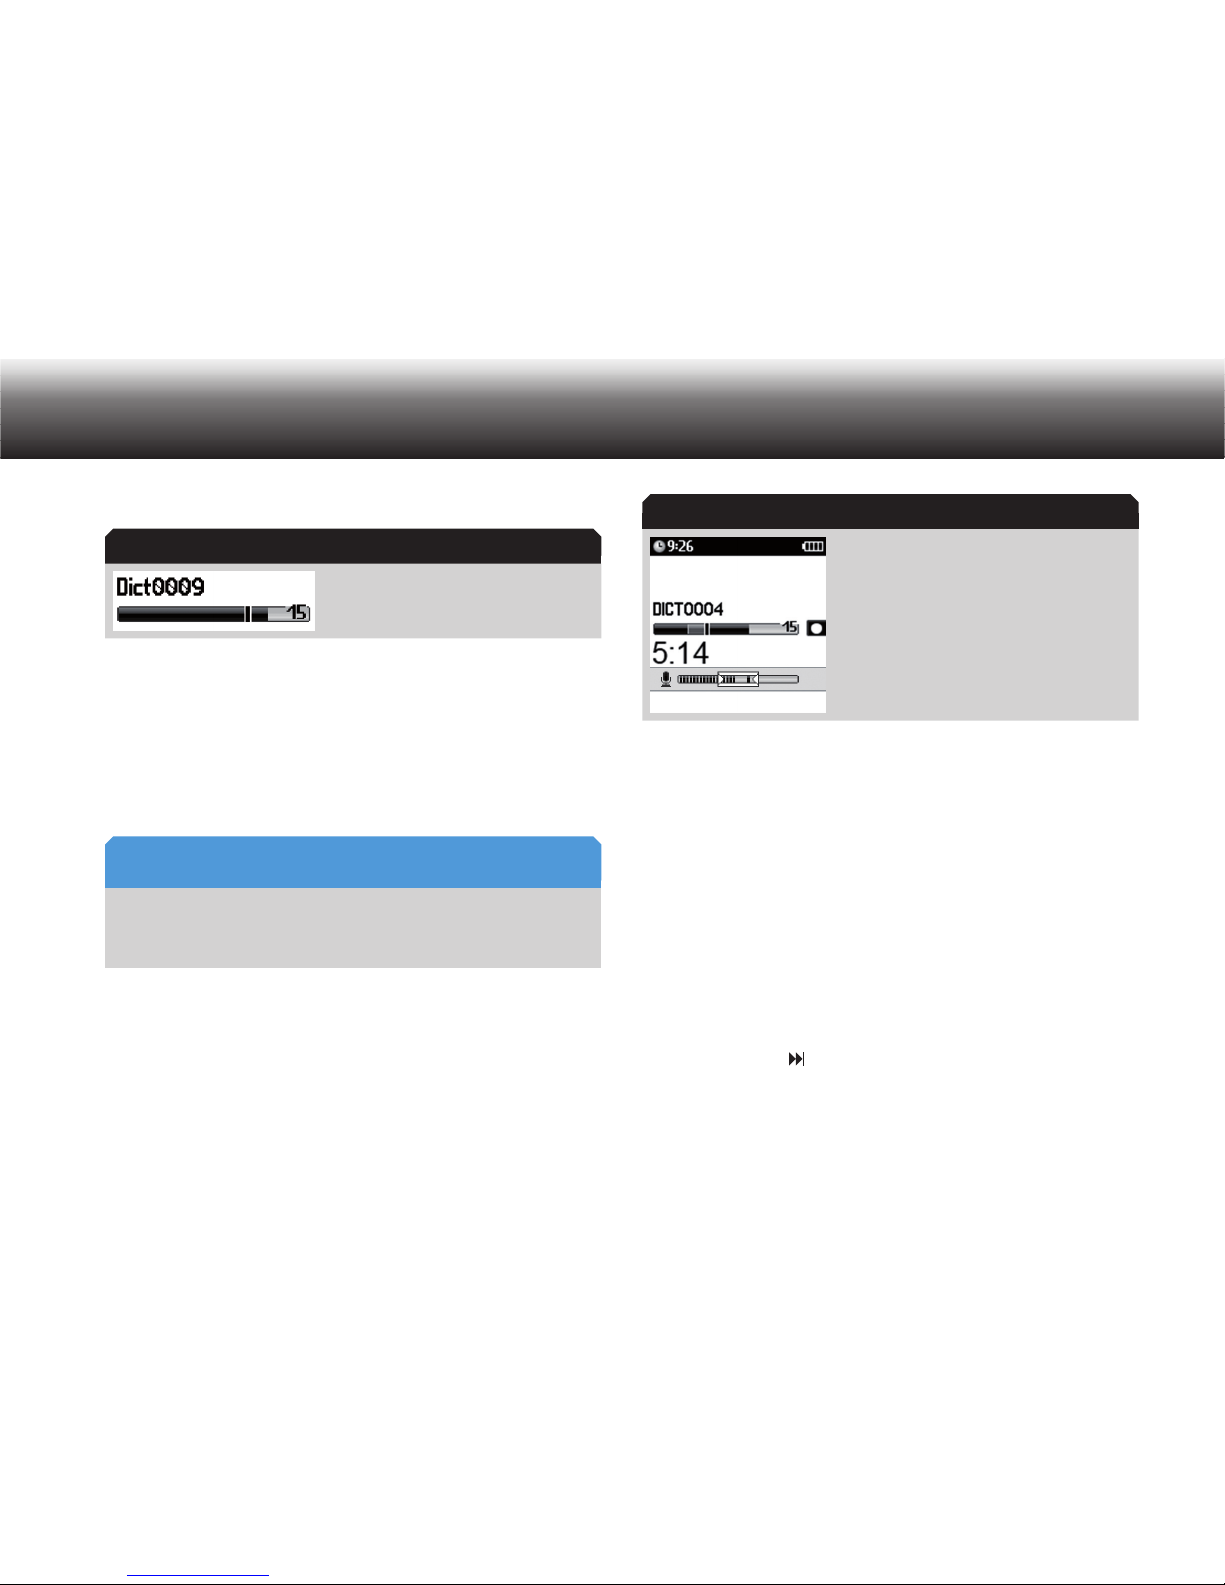
Recording in the insertion mode
Stop the recording by pressing the x »e/f« button.
Overwrite dictation parts
You can overwrite a dictation from any dictation position on.
Press the button x »
e/f«.
The device turns to recording stop.
Select the desired dictation by using the up-down navigation but- x
tons.
Press the button » x
e/f« again to listen to the dictation.
Press the button » x
e/f« again at the desired dictation position.
Insertion mode
Insertion mode
Page 28
27
Operating
Control if the overwriting mode is activated. x
The overwriting mode is marked by means
of a line in the progress bar.
If another recording mode is activated, please press the button x
“RecMode”.
A list of possible recording modes appears on the display.
Use the up/down buttons to navigate to the “ x Overwrite” recording
mode and confirm by pressing “OK”.
End your selection with the button “ x Save”.
Overwriting of data
The dictation will be overwritten from the selected dictation position
on.
Start the recording by clicking the » x
g« button. Dictate the modified
text.
The recording indicator lights red.
Recording in the overwriting mode
Stop the recording by pressing the x »e/f« button.
Adding of dictation parts
An additionally recorded text can be added at the end of a recorded
dictation.
Press the button x »
e/f«.
The device turns to recording stop.
Select the desired dictation by using the up-down navigation but- x
tons.
Press the button » x
e/f« again to listen to the dictation.
Press the button x »
« (skip to the end).
Overwriting modee
NOTICE
Overwriting mode
Page 29
28
Operating
The cursor skips to ( ) the next mark when dictation infos or indices
exist (see chapter “Operating / Info/Index-function”). Skip until the
dictation end is reached.
Start the recording by clicking the » x
g« button. Dictate the text which
you like to add.
The recording indicator lights red. The progress bar increases as
well as the dictation length.
Stop the recording by pressing the x »
e/f« button.
You can also preset the attaching function for all following recordings.
Press the button x “RecMode”.
A list of possible recording modes appears on the display.
Use the up/down buttons to navigate to the “ x Append” recording
mode and confirm by pressing “OK”.
End your selection with the button “ x Save”.
4.4 Changing of dictation features
The dictation features of stored dictations can be adapted subsequently.
The “Changing dictation features” function is not available in the
WAV* and MP3* recording format
Press the button x »
e/f«.
The device turns to recording stop.
Select the desired dictation by using the up-down navigation but- x
tons.
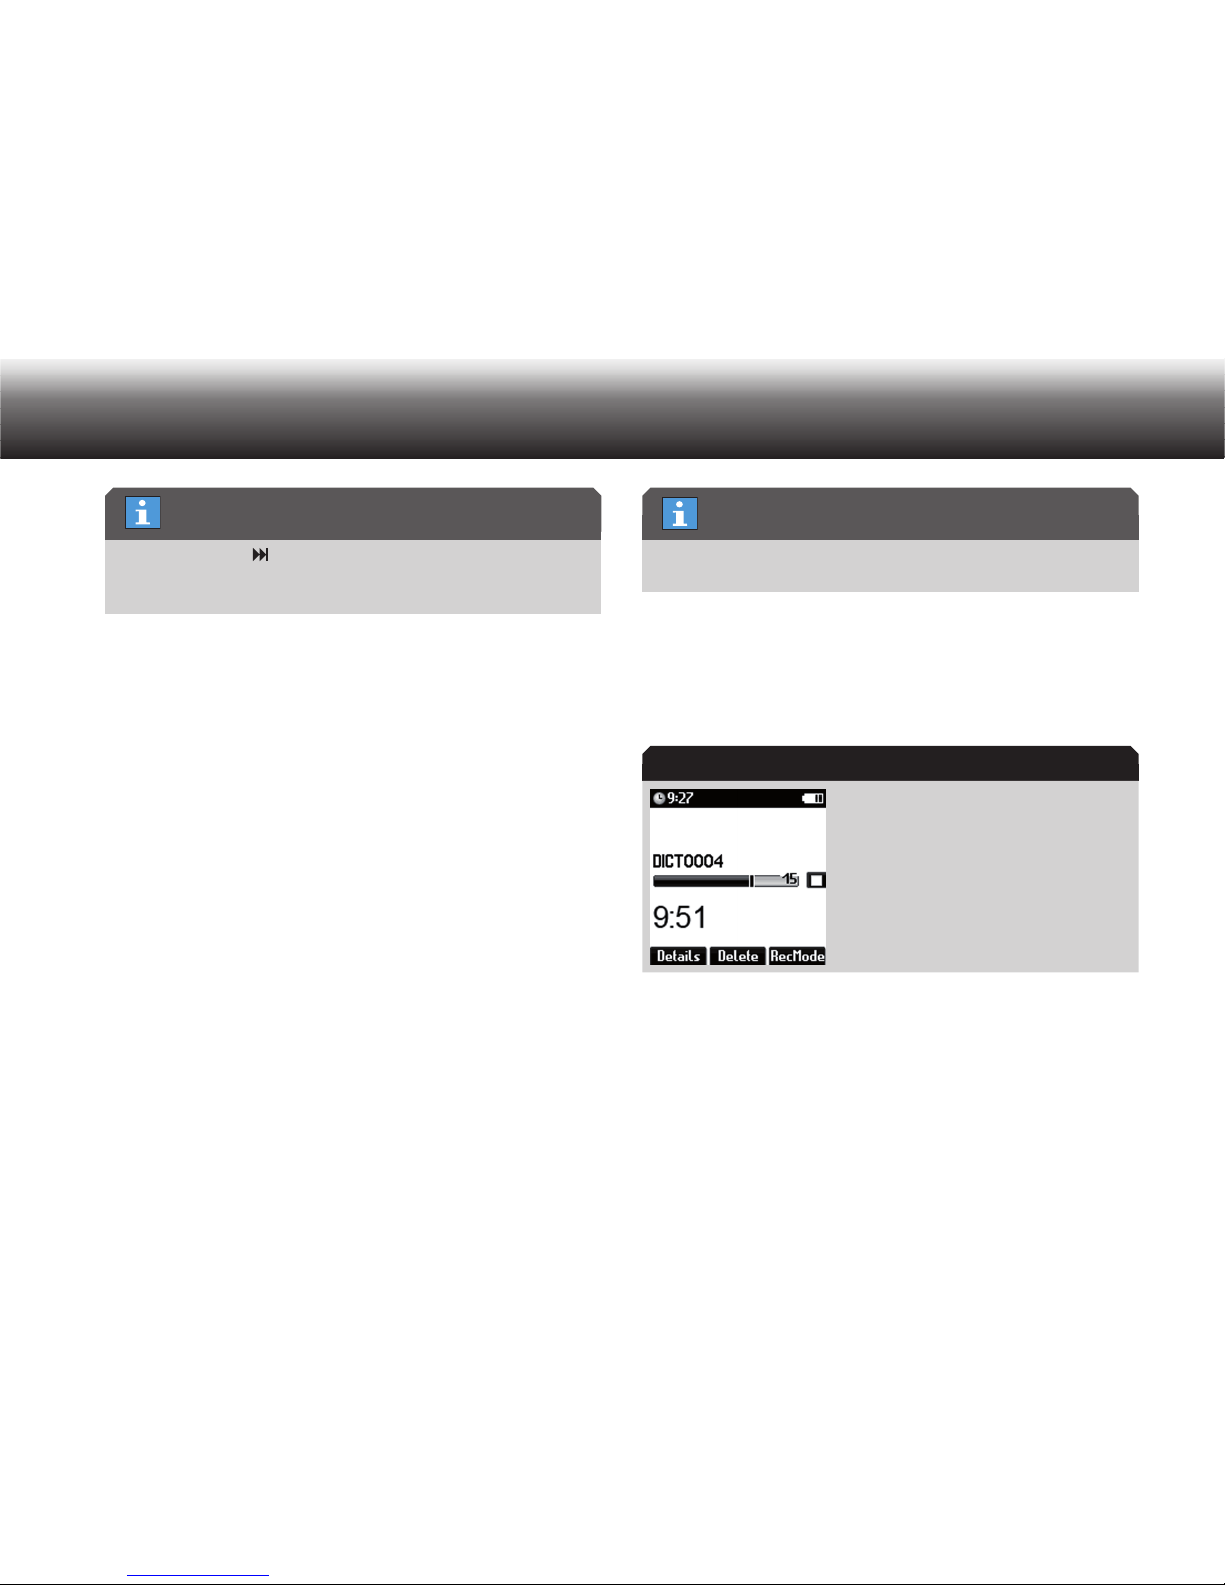
Selected dictation in “e” position
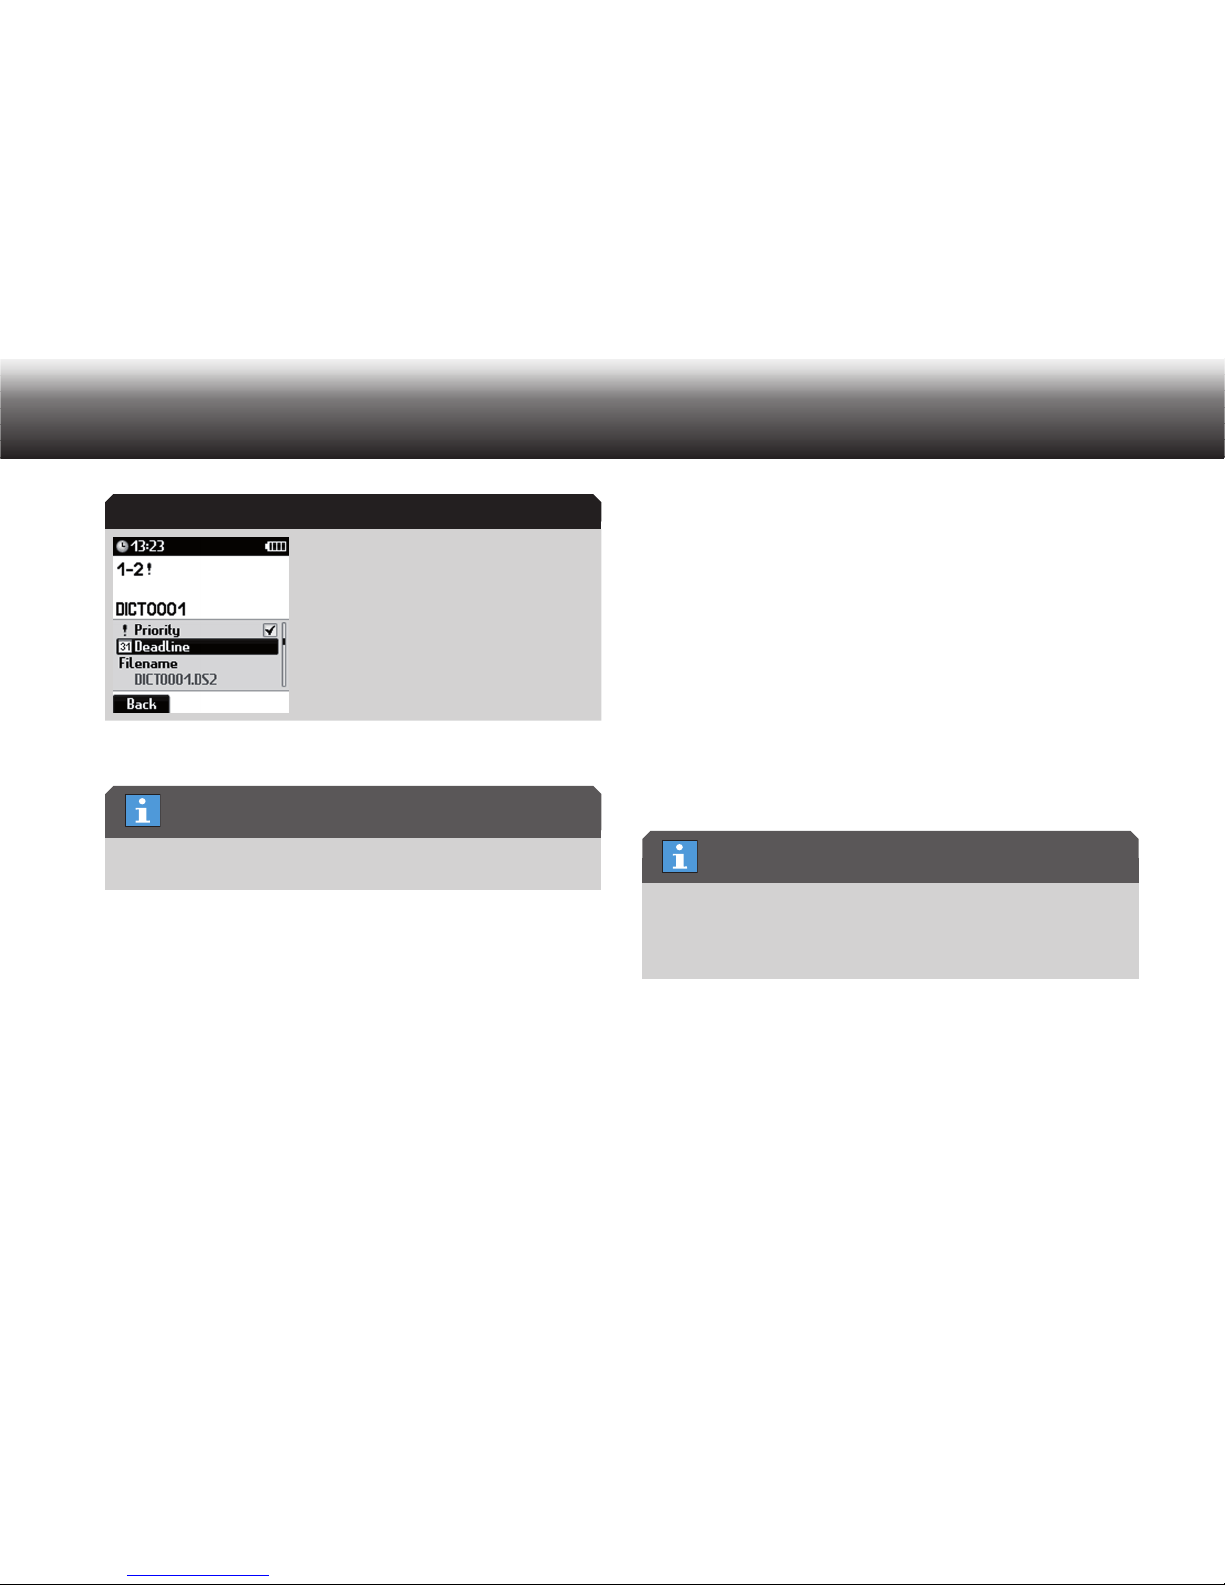
Press the button x “Details”.
The menu for changing the dictation features appears on the display.
The cursor is placed on the feature chosen last.
Skip mark aim
Dictation features
Stop mode
Page 30
29
Operating
Select the desired feature by navigating using the up/down buttons. x
Depending on which menu item you choose, changing the selected
features will require different procedures.
Proceed according to the feature selected as described in the follow- x
ing sections.
Dictation lock
With the dictation lock* function, you can prevent a dictation from inadvertently being changed or deleted on the dictation machine. This write/
delete protection also applies to the note accompanying the dictation.
The dictation can then only be changed or deleted within the entire
Grundig PC dictation system when the dictation lock is switched off
from a PC or a dictation machine.
Activate or deactivate the dictation lock by pressing “ x OK”.
The check mark after the feature appears or disappears. The feature
is activated or deactivated.
Confirm the change using “ x Save”.
If you do not wish to save the change, press x “Escape”.
Encryption
The dictation is encrypted against unauthorized access on PCs or other
dictation machines.
The encryption function is only available on DSS Pro dictation
machines (.ds2, QP). Details can be found in the section “Menu functions/Recording/Recording format”. The device must be configured by
the system administrator with a user-specific encryption password.
Activate or deactivate the encryption by pressing “ x OK”.
The check mark after the feature appears or disappears. The feature
is activated or deactivated.
Confirm the change using “ x Save”.
If you do not wish to save the change, press x “Escape”.
Menu “Details”
Differing menu navigation
DSS Pro function
Page 31
30
Operating
Priority
With the »priority« feature, you can determine whether a dictation is
selected as a priority.
Details can be found in the section “Menu functions/Workflow/Priority”.
Activate or deactivate the priority function by pressing “ x OK”.
The check mark after the feature appears or disappears. The feature
is activated or deactivated.
Confirm the change using “ x Save”.
If you do not wish to save the change, press x “Escape”.
Postponed
With the “postponed”* feature you can label a dictation as incomplete.
It will not be sent with the completed dictations during the automatic
transfer to the PC (by the DSS Mover) and will not be sent to the secretary. You can complete the dictation at a later time.
Activate or deactivate the x feature by pressing “OK”.
The check mark after the feature appears or disappears. The feature
is activated or deactivated.
Confirm the change using “ x Save”.
If you do not wish to save the change, press x “Escape”.
Deadline
With the “deadline feature” you can set the time by which the secretary
should have the dictation transcribed.
If a deadline already exists, it is displayed in the menu.
Activate or deactivate the deadline by pressing “ x OK”.
The check mark after the feature appears or disappears. The feature
is activated or deactivated.
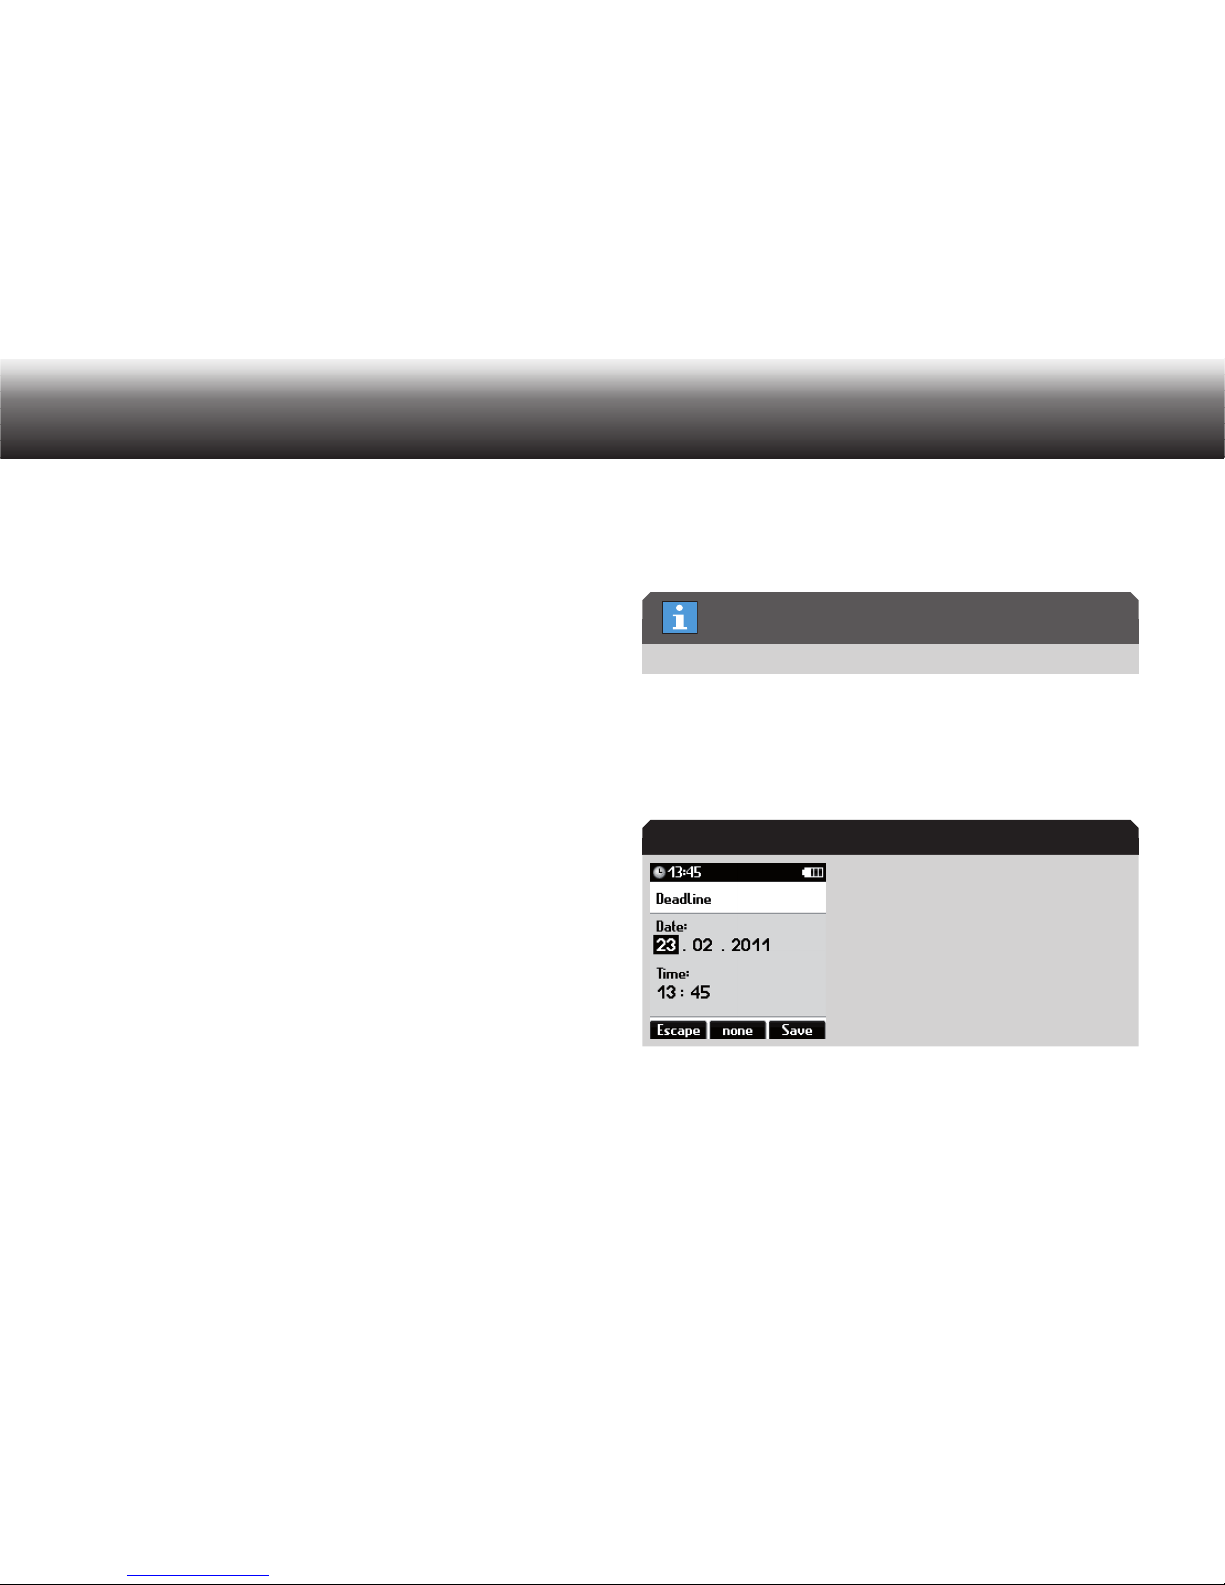
When you activate the x feature, the deadline editor appears.
Deadline setup window
Existing deadline
Deadline
Page 32
31
Operating
When you assign a deadline to dictation for the first time, the deadline
editor displays the current date and time.
Initial deadline setting
When you assign a deadline to dictation for the first time, the deadline
editor displays the current date and time.
Enter the day, month, year, hour and minutes using the up/down but- x
tons and confirm each using “OK”.
Complete the entry using “ x Save”.
The deadline is saved. The Digta returns to the details menu.
If you do not wish to save the change, press x “Escape”.
If you would like to delete an existing deadline, press “ x None”.
The deadline is deactivated and the check mark after the feature
disappears.
Filename
Press “ x OK”.
The text editor appears.
Details can be found in the section “Navigation/Text Editor”.
Enter a filename. x Complete the entry using “Save”.
The filename is saved. The Digta returns to the details menu.
If you do not wish to save the change, press x “Escape”.
Secretary
Details can be found in the section “Workflow/Secretary” .
Press “ x OK”.
A list appears with the possible secretaries that can be selected.
If there are no secretaries in the list, only the item “No entry” can be
selected. In this case no secretaries can be assigned to this dictation.
Select the desired entries using the up/down buttons and confirm x
the selection by pressing “OK”.
If you do not wish to assign a secretary to the dictation, select “ x No
entry” using the up/down buttons. Confirm your selection using
“OK”.
Complete the entry using “ x Save”.
Worktype
Details can be found in the section “Workflow/Worktype“.
Press “ x OK”.
Existing deadline
NOTICE
List empty
Page 33
32
Operating
A list appears with the possible worktypes that can be activated.
If there are no worktypes in the list, only the item “No entry” can be
selected. In this case no worktypes can be assigned to this dictation.
Select the desired entries using the up/down buttons and confirm x
the selection by pressing “OK”.
If you do not wish to assign a worktype to the dictation, select “ x No
entry” using the up/down buttons. Confirm your selection using
“OK”.
Complete the entry using “ x Save”.
Group/category
Details can be found in the section “Workflow/Group/Category”.
Press “ x OK”.
A list appears with the possible categories that can be activated.
If there are no groups/categories in the list, only the item “No entry”
can be selected. In this case no group/category can be assigned to
this dictation.
Select the desired entries using the up/down buttons and confirm x
the selection by pressing “OK”.
If you do not wish to assign a group/category to the dictation, select x
“No entry” using the up/down buttons. Confirm your selection using
“OK”.
Complete the entry using “ x Save”.
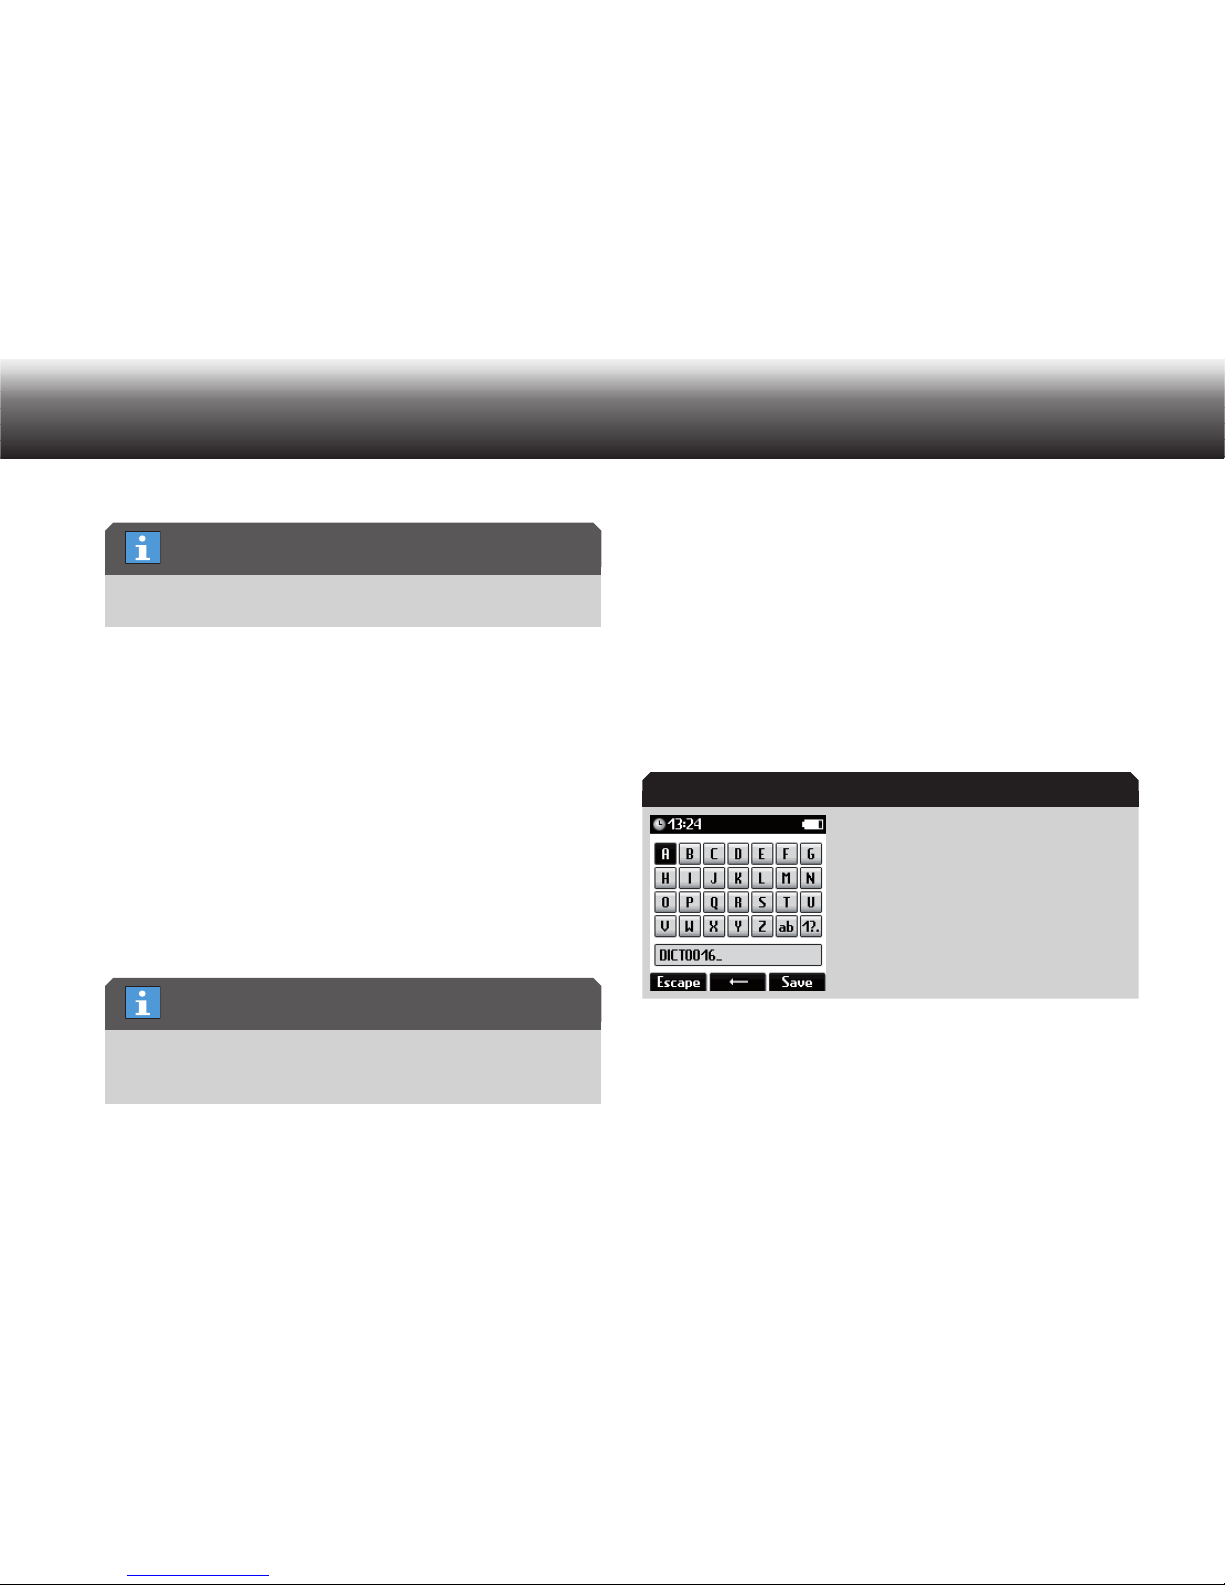
Numbers/reference (characters)
Details can be found in the section “Menu functions/Workflow/ Number/
reference (characters)”.
“Number/reference” details menu
Press “ x OK”.
The text editor appears.
Details can be found in the section “Initial Setup/Navigation/Text
editor”.
List empty
List empty
Number/reference
Page 34
33
Operating
Enter up to 16 characters. x Complete the entry using the “Save” but-
ton.
The numbers/characters are saved. The Digta returns to the details
menu.
If you wish to cancel the entry, press x “Escape”.
In addition to the text editor, the Digta also offers another method for
entering filenames and numbers/references (characters). You can also
use the speech recognition function*:
Spell out your text (letters digits, characters), holding down the x
record button while you are speaking.
Your spoken text is recognized as an entry. The recognized numbers
and characters are displayed in capital letters on the display.
You can speak each digit individually and slowly. However, it is quicker and better for the speech recognition if you speak the numbers in
full.
If you have made a mistake in the entry, press the “ x
” button.
You will return to the previous digit and can repeat the entry via
speech recognition.
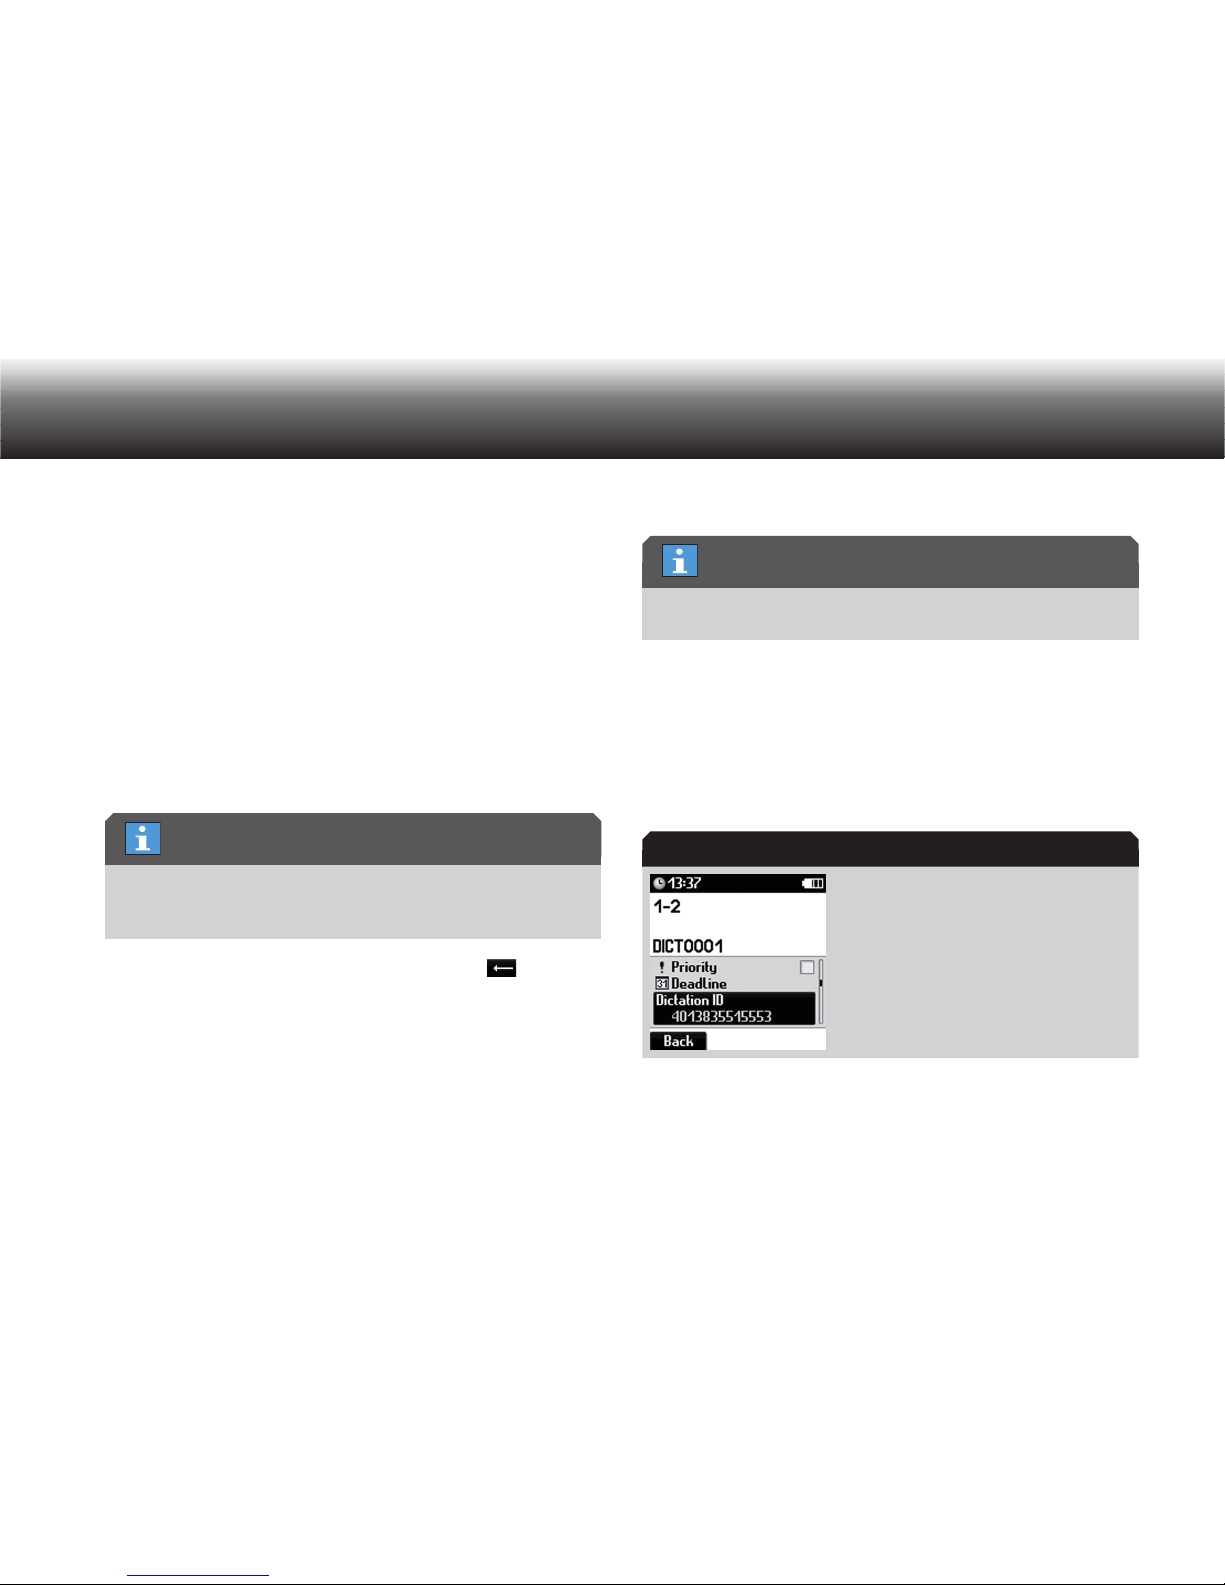
Dictation ID
The “dictation ID” function is only shown if a scanner has been connected and no data list has been scanned.
In the details menu you can use the dictation ID function to assign additional data to the dictation, for instance patient or client information.
If patient numbers or file references are administered using barcodes,
the data can associated with the dictations using a scanner without risk
of mixing up entries.
Details can be found in the section “Menu functions/Scanner”.
“Dictation ID” details menu
Press “ x OK”.
The data list functions appear.
Speech recognition of digits
“Dictation ID” feature
Dictation ID
Page 35
34
Operating
Depending on which function you wish to use, proceed as described x
in the following sections.
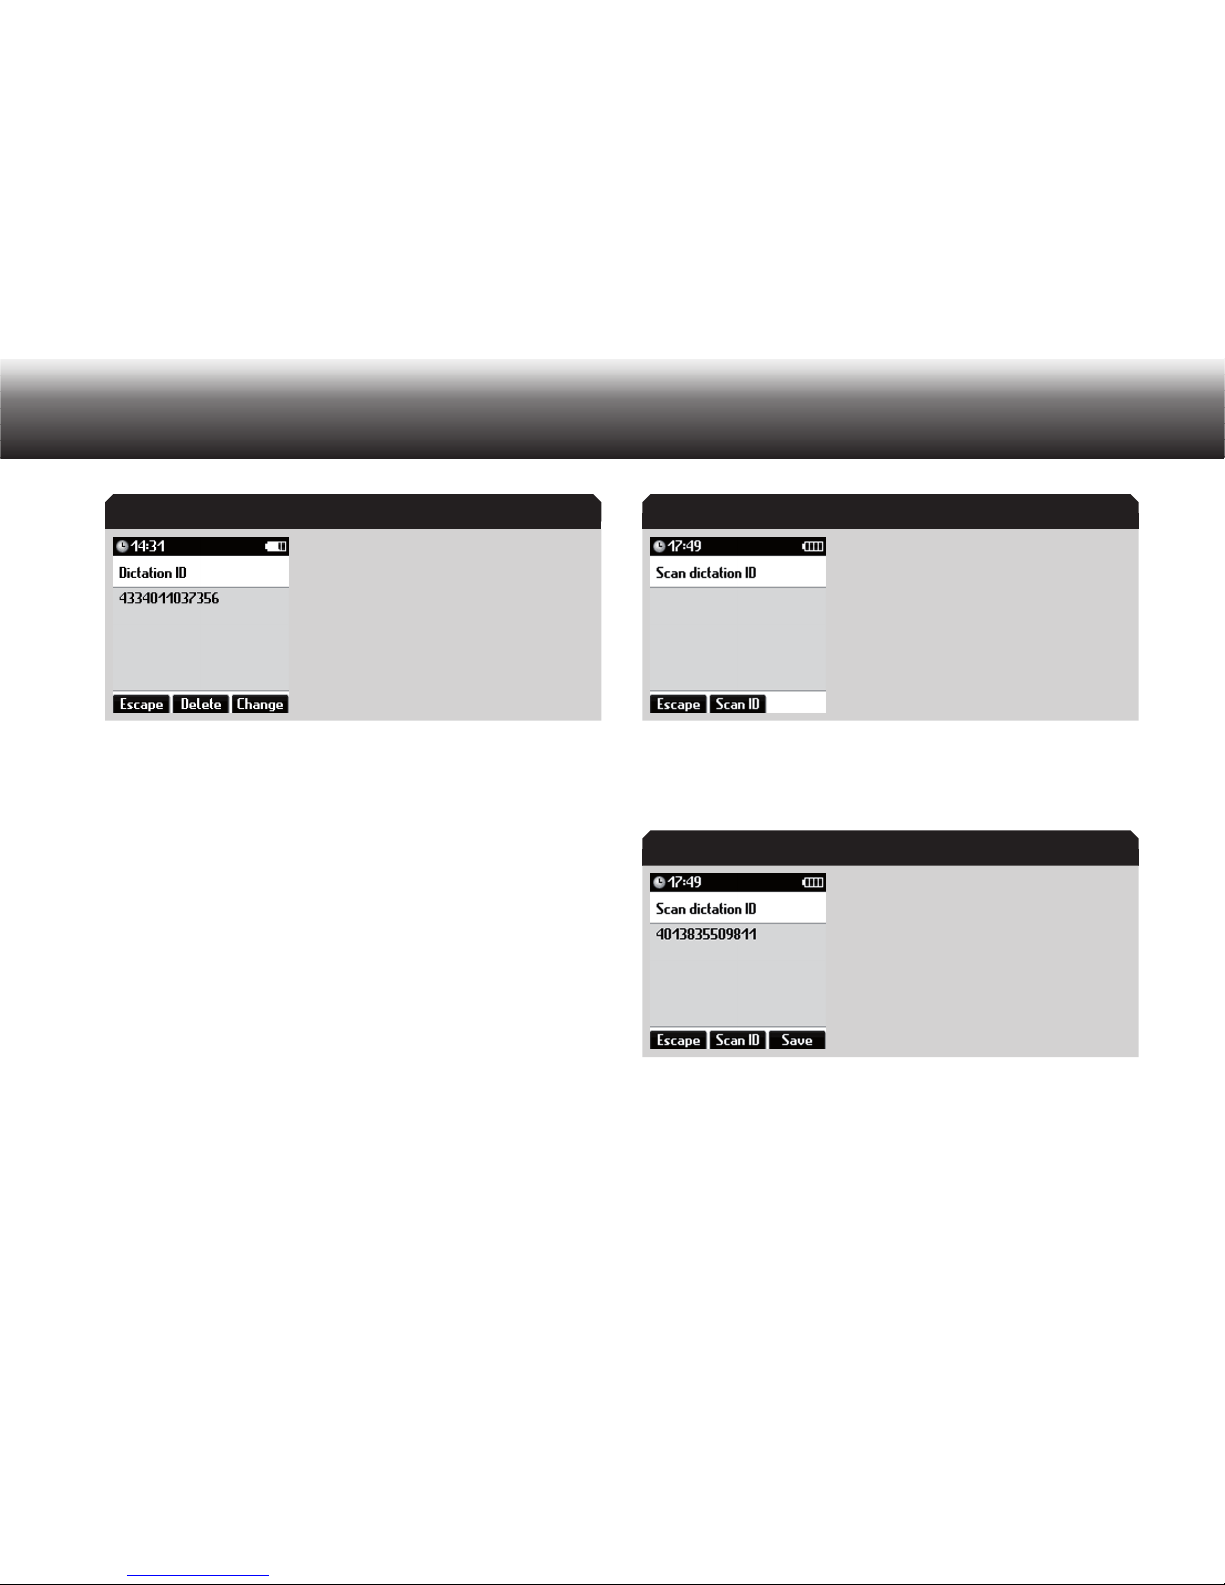
Scan in new Dictation ID
You can scan in a dictation ID using a barcode scanner to assign a dataset to a dictation, even after the dictation is complete.
Select the “Dictation ID” function from the details menu using the up x
and down buttons. Confirm your selection using “OK”.
Hold the scanner near the barcode and press the “ x Scan ID” button.
The Digta confirms the successful scanning of the ID with an acoustic tone. The corresponding dataset is shown on the display.
Press “ x Save” to confirm the dictation ID.
If you wish to scan in another barcode, press the “ x Scan ID” button
again.
Dictation ID Scan dictation ID
Scanned dictation ID
Page 36
35
Operating
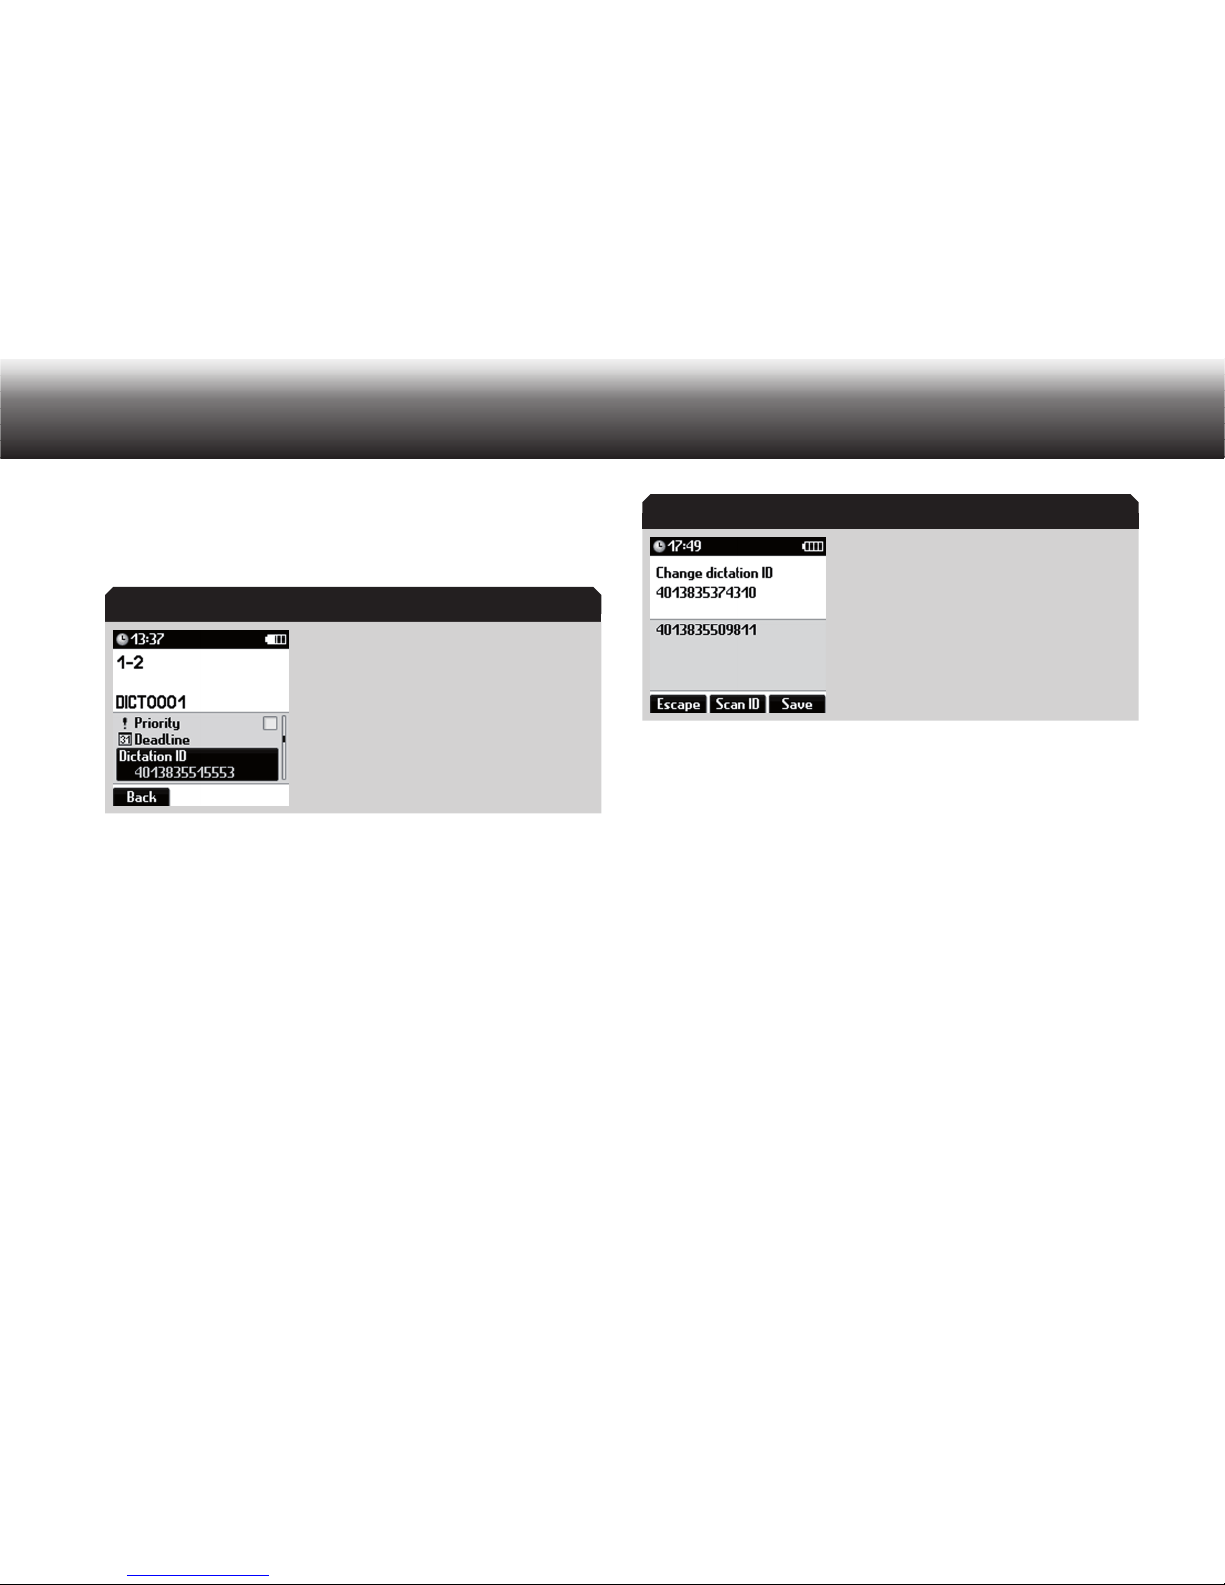
Change dictation ID
If a dictation ID is saved for a dictation, it is displayed in the details
menu.
Press “ x OK”.
The complete dictation ID is displayed.
Press “ x Change”.
Hold the scanner near the barcode and press “ x Scan ID”.
The Digta confirms the successful scanning of the ID with an acoustic tone. The display shows the old dictation ID on top and the new
one on bottom.
Press “ x Save” to confirm the dictation ID.
If you wish to scan in another barcode, press the “ x Scan ID” button
again.
Delete dictation ID
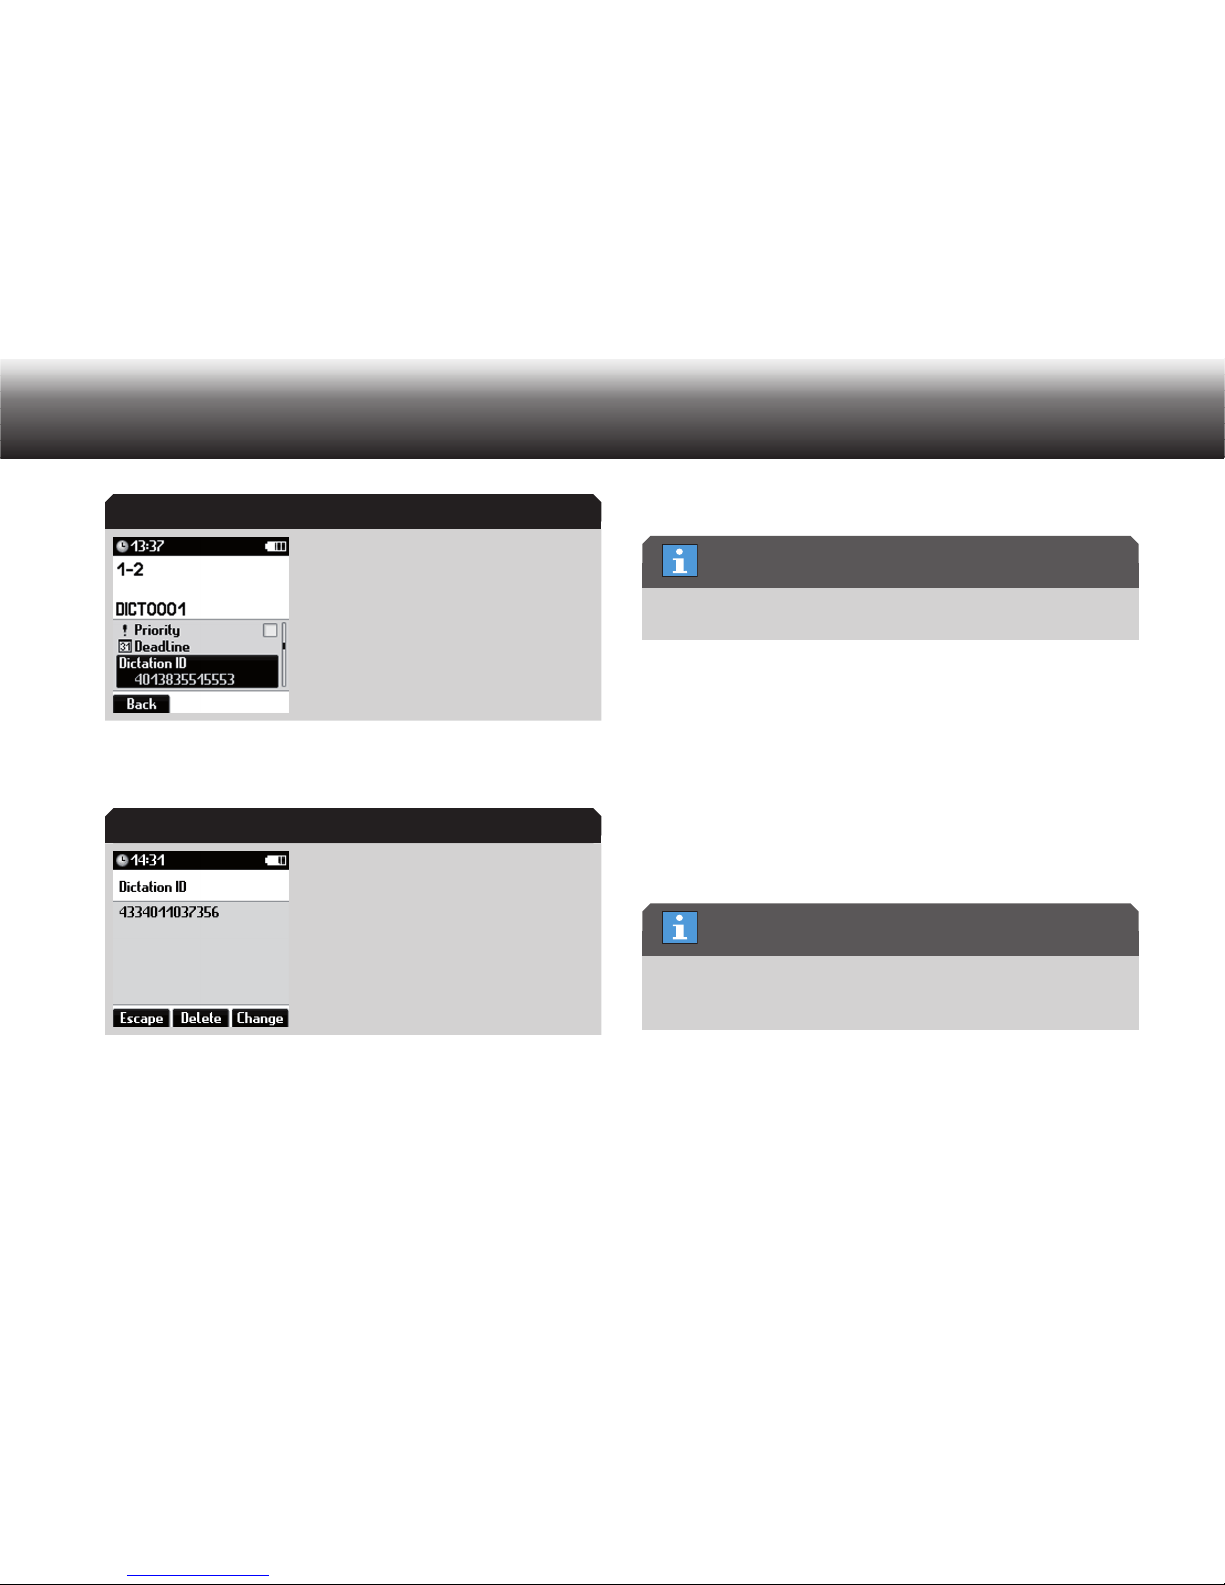
If a dictation ID is saved for a dictation, it is displayed in the details
menu.
Existing dictation ID
New dictation ID
Page 37
36
Operating
Press “ x OK”.
The complete dictation ID is displayed.
Press the “ x Delete” button.
A confirmation prompt appears.
Confirm using “ x OK” to delete the dictation ID permanently.
Dataset
The “dataset” function is only displayed if a data list has been
scanned.
Display/edit dataset
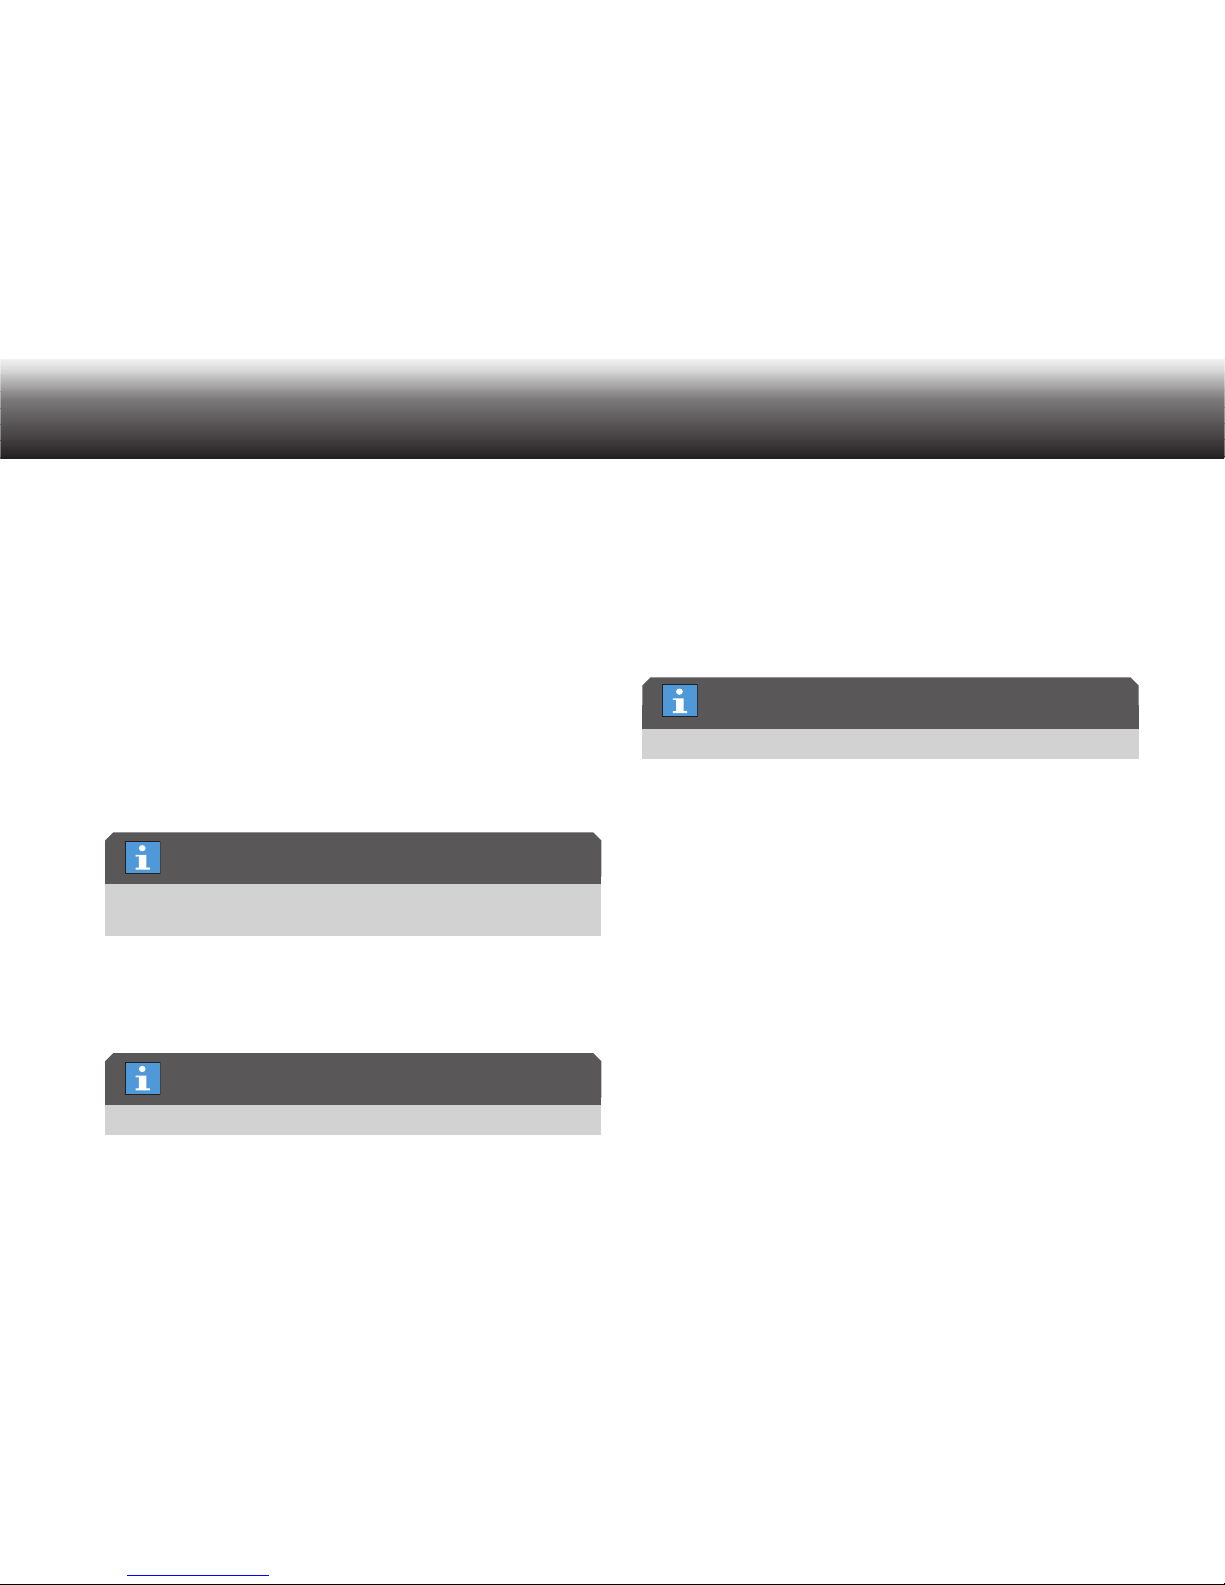
Press “ x OK”.
The complete dataset is displayed.
Read the dataset using the up/down buttons. x
Press the “ x Change” button to select another dataset
The complete data list is displayed.
Scroll through the data list using the left/right buttons (NEW, MENU).
The “Scan ID” function is only displayed if a barcode scanner is connected. “Scan ID” searches for and displays the dataset corresponding to the scanned barcode.
Press the “ x Save” button to confirm the dataset to be entered as the
current dictation ID.
A confirmation prompt appears.
Confirm using “ x OK” to change the dataset permanently.
Existing dictation ID
Dictation ID
"Dataset" property
“Scan ID” button
Page 38
37
Operating
If you only wish to read the data, press the “ x Escape” button.
Delete dataset
Press x OK.
The complete dataset is displayed.
Move to the desired dataset using the up/down buttons. Confirm x
using the “None” button to delete the dataset.
A confirmation prompt appears.
Confirm using “ x OK” to delete the dataset permanently.
There is no longer a dataset saved in the current dictation.
If you do not wish to deleted the dataset at this time, press x
“Escape”.
The dataset in the data list is retained and can be reassigned to a
dictation.
Status info
The “Status info” function is solely a display function.
If you press OK, the message »Just info, not changeable!« appears.
The status info function displays the status of the current dictation: “dictated”, “sent”, “postponed”. If a dictation has been transferred from a
transcription kit back to the dictation machine, the statuses “Received”,
“In process”, “Finished” and “Query” also appear.
Author name
The “author name” function is solely only a display function.
If you press OK, the message »Just info, not changeable!« appears.
When a new dictation is created, the author name is entered by the dictation machine and cannot be changed.
For dictation from other authors/dictation machines, the author is displayed. If no author has been set up in the dictation machine, the complete author name is missing. In this case, only the author ID is shown in
square brackets.
4.5 Info/Index function
Additionally you can include specific information* and index markings
for the typist to specified dictation parts.
Dataset in the data list
User information
User information
Page 39
38
Operating
The “Info” and “Index” functions are not available in the WAV* and
MP3* recording formats.
An audible signal is generated during the play-back of the infos and
indices. The infos and indices are transfered to the PC together with the
dictation.
Add info message
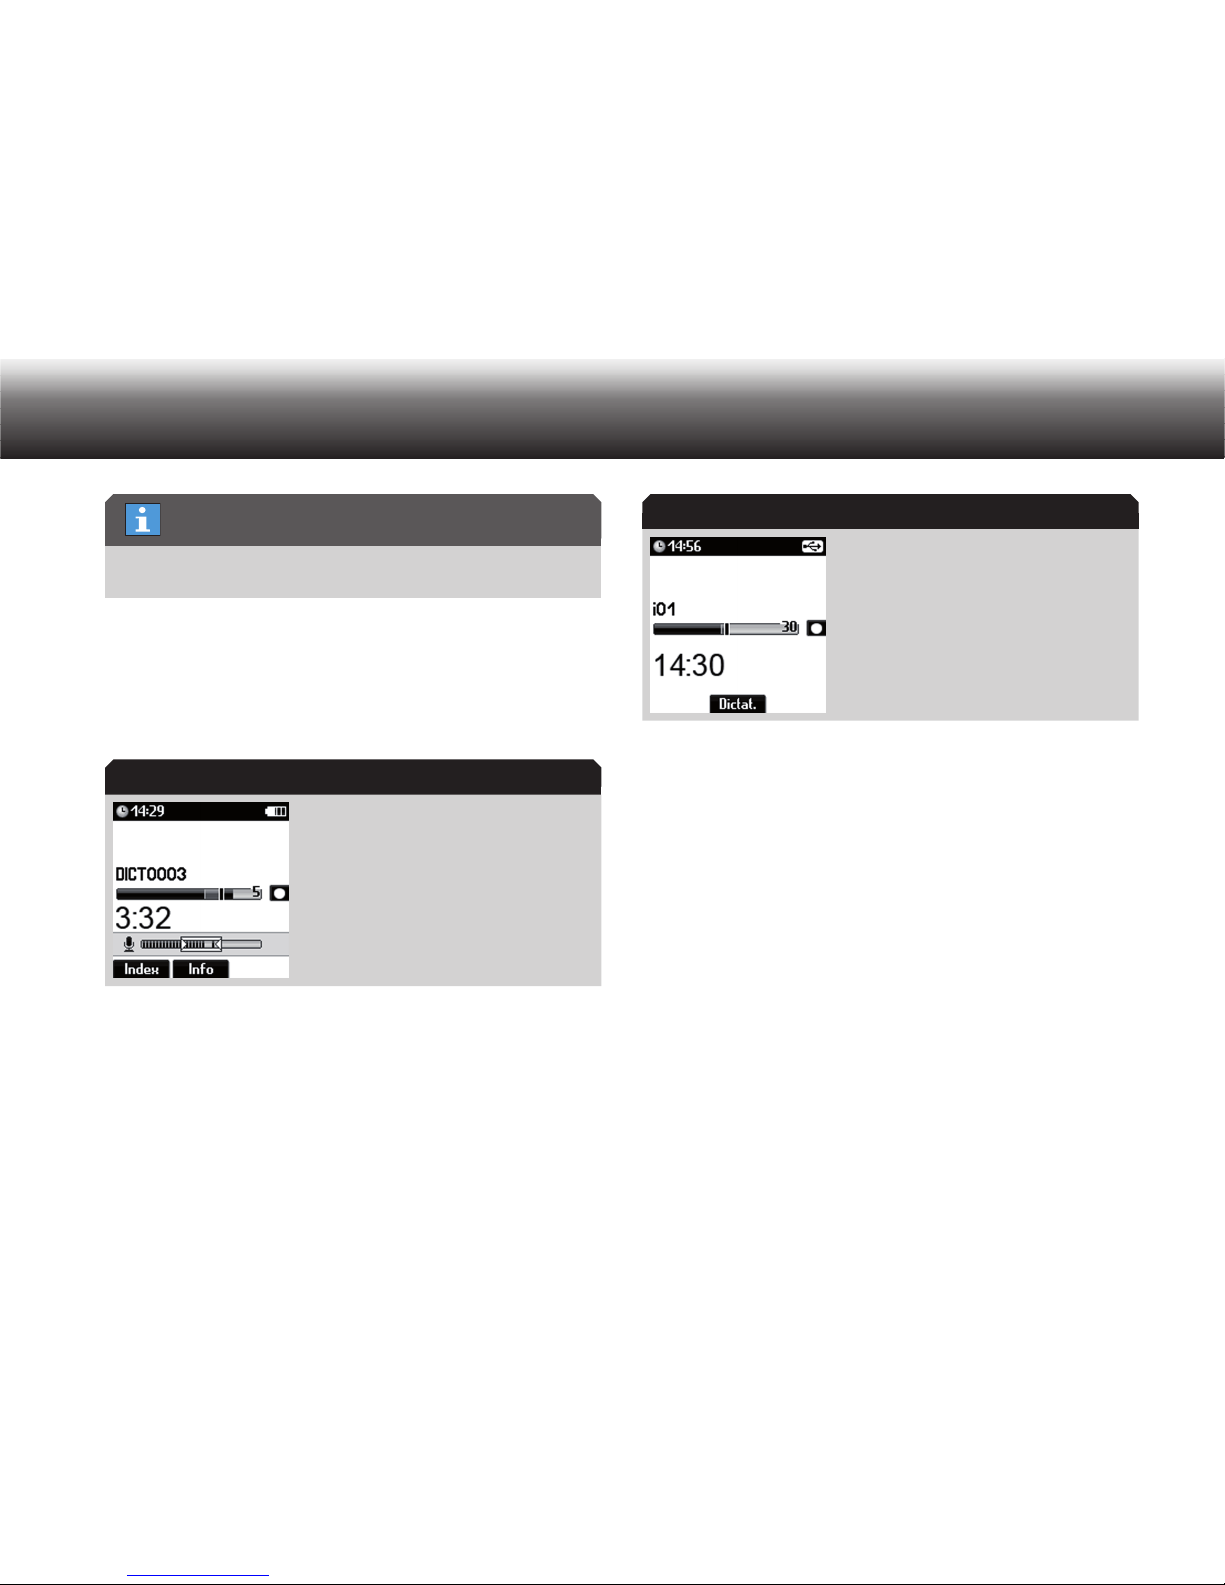
The “Info” and “Index” buttons can be used
during recording.
Press the “ x Info” button during recording.
The word “Info” and a corresponding number appear in the display
and a mark is placed in the progress bar.
Press the » x
g« button. Speak the desired info message.
Recording of an Info
Pause the info message by pressing the » x g« button.
End the info message by pressing the “ x Dictat.” button.
Recording of the dictation resumes.
Delete info message
Press the button x »e/f« to listen to the dictation until the info* to be
deleted is displayed.
Press the button x »
e/f« again.
Press the “ x Delete” button.
A list appears with the elements that can be deleted (dictations or
info messages).
Info/Index function
Recording
Info
Page 40
39
Operating
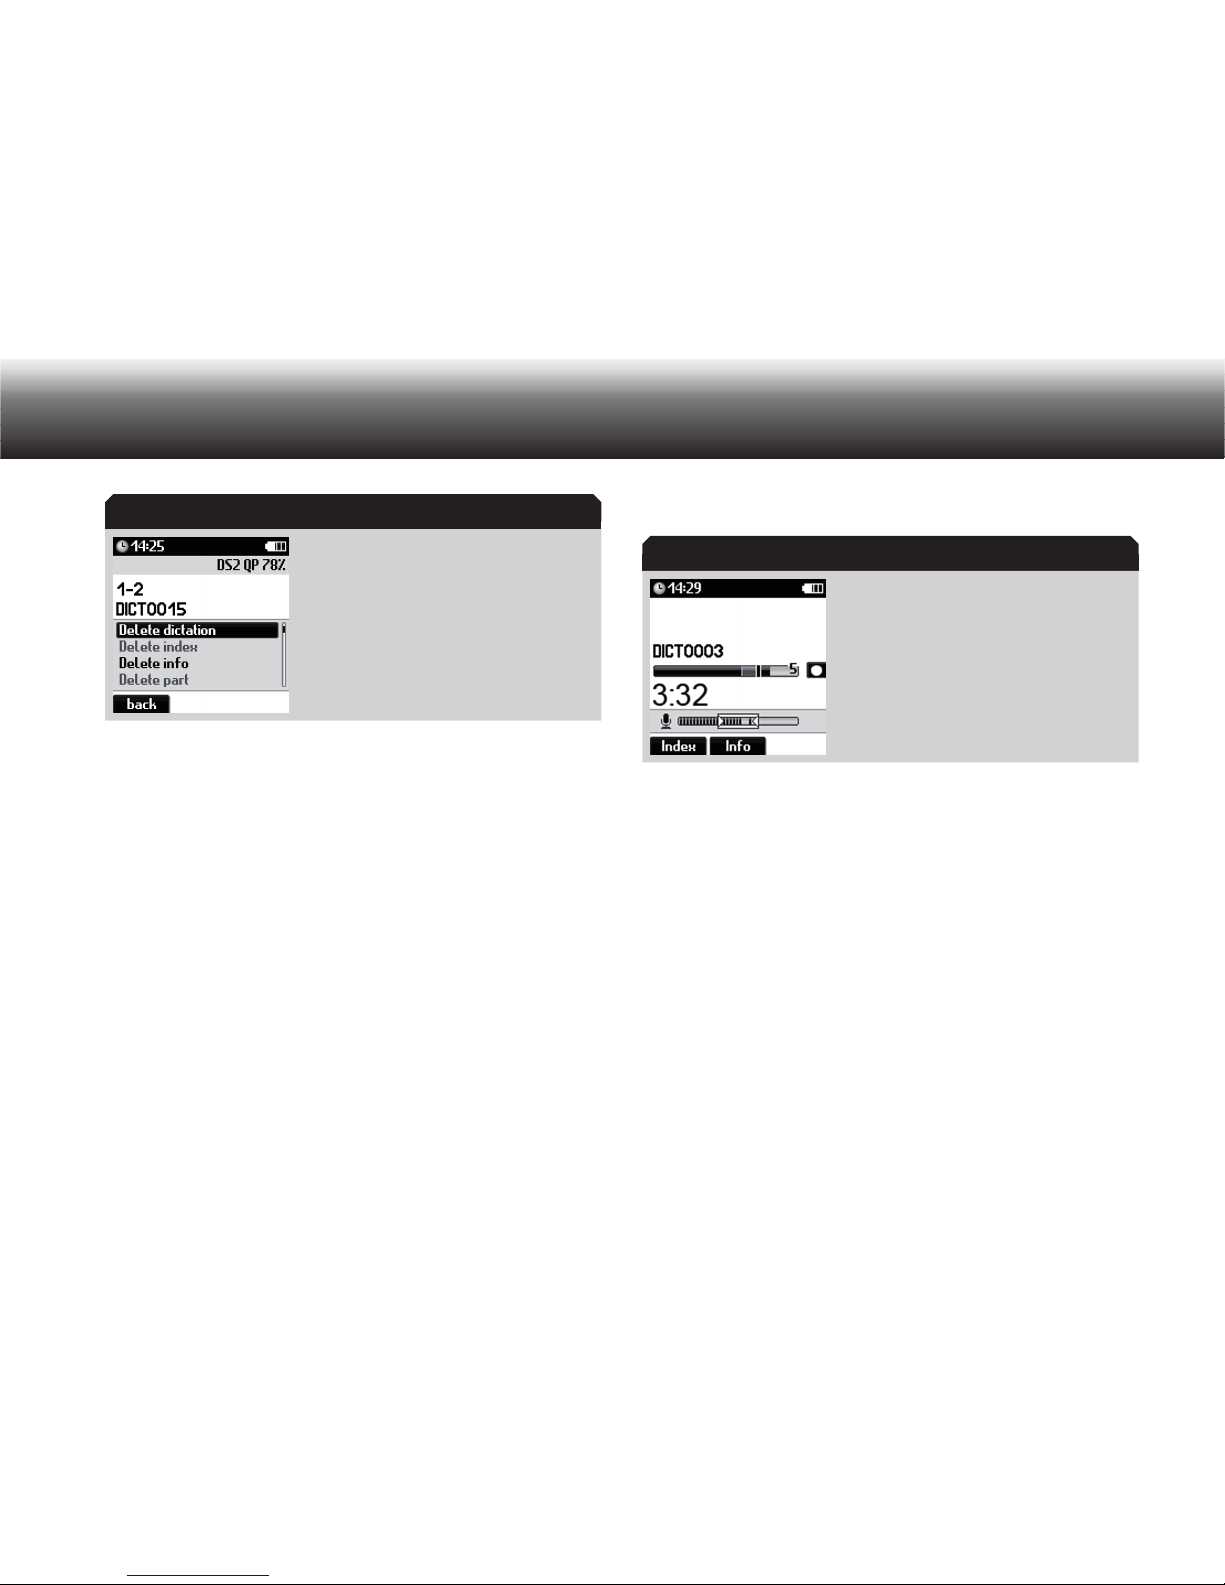
List of deletable elements
Use the up/down buttons to select “ x Delete info” from the list of
deletable elements.
Confirm your selection using “ x OK”.
A confirmation prompt appears.
Confirm using “ x OK” to delete the info message permanently.
If you do not wish to delete the information, press the “ x Back” button.
Add index
The “Info” and “Index” buttons can be used
during recording.
Press the “ x Index” button during recording.
The word »Index« and a corresponding number appear in the display
and a mark is placed in the progress bar.
Recording of the dictation resumes.
Delete index
Press the button x »e/f« to listen to the dictation until the index to be
deleted is displayed.
Press the button x »
e/f« again.
Press the “ x Delete” button.
A list appears with the elements that can be deleted (dictations or
indices).
Deletable elements
Recording
Page 41
40
Operating
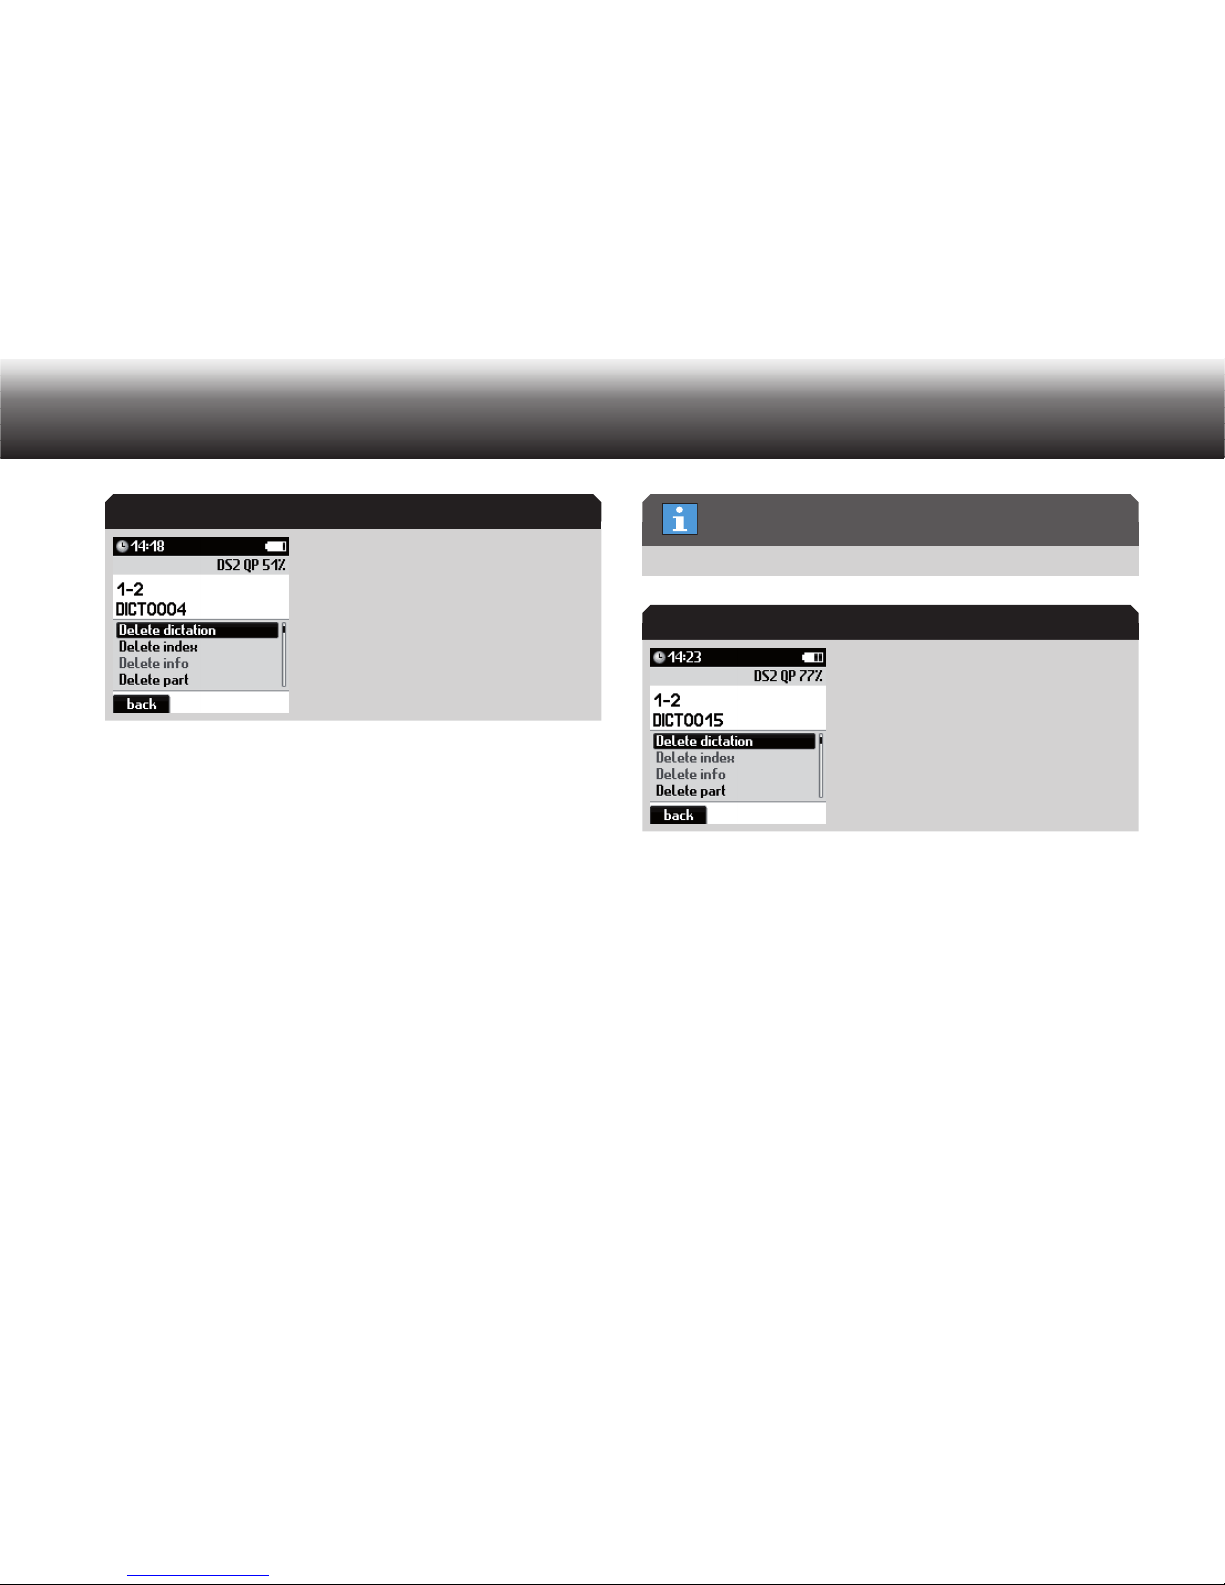
List of deletable elements
Use the up/down buttons to select “ x Delete index” from the list of
deletable elements.
Confirm your selection using “ x OK”.
A confirmation prompt appears.
Confirm using “ x OK” to permanently delete the index.
If you do not wish to delete the index, press the “ x Back” button.
4.6 Delete dictation
Delete entire dictation
Press the button x »e/f«.
Press the “ x Delete” button.
A list featuring all elements which you can delete appears (dictation,
index or info, dictation part, folder).
The deletable elements list is only available in the Menu Mode.
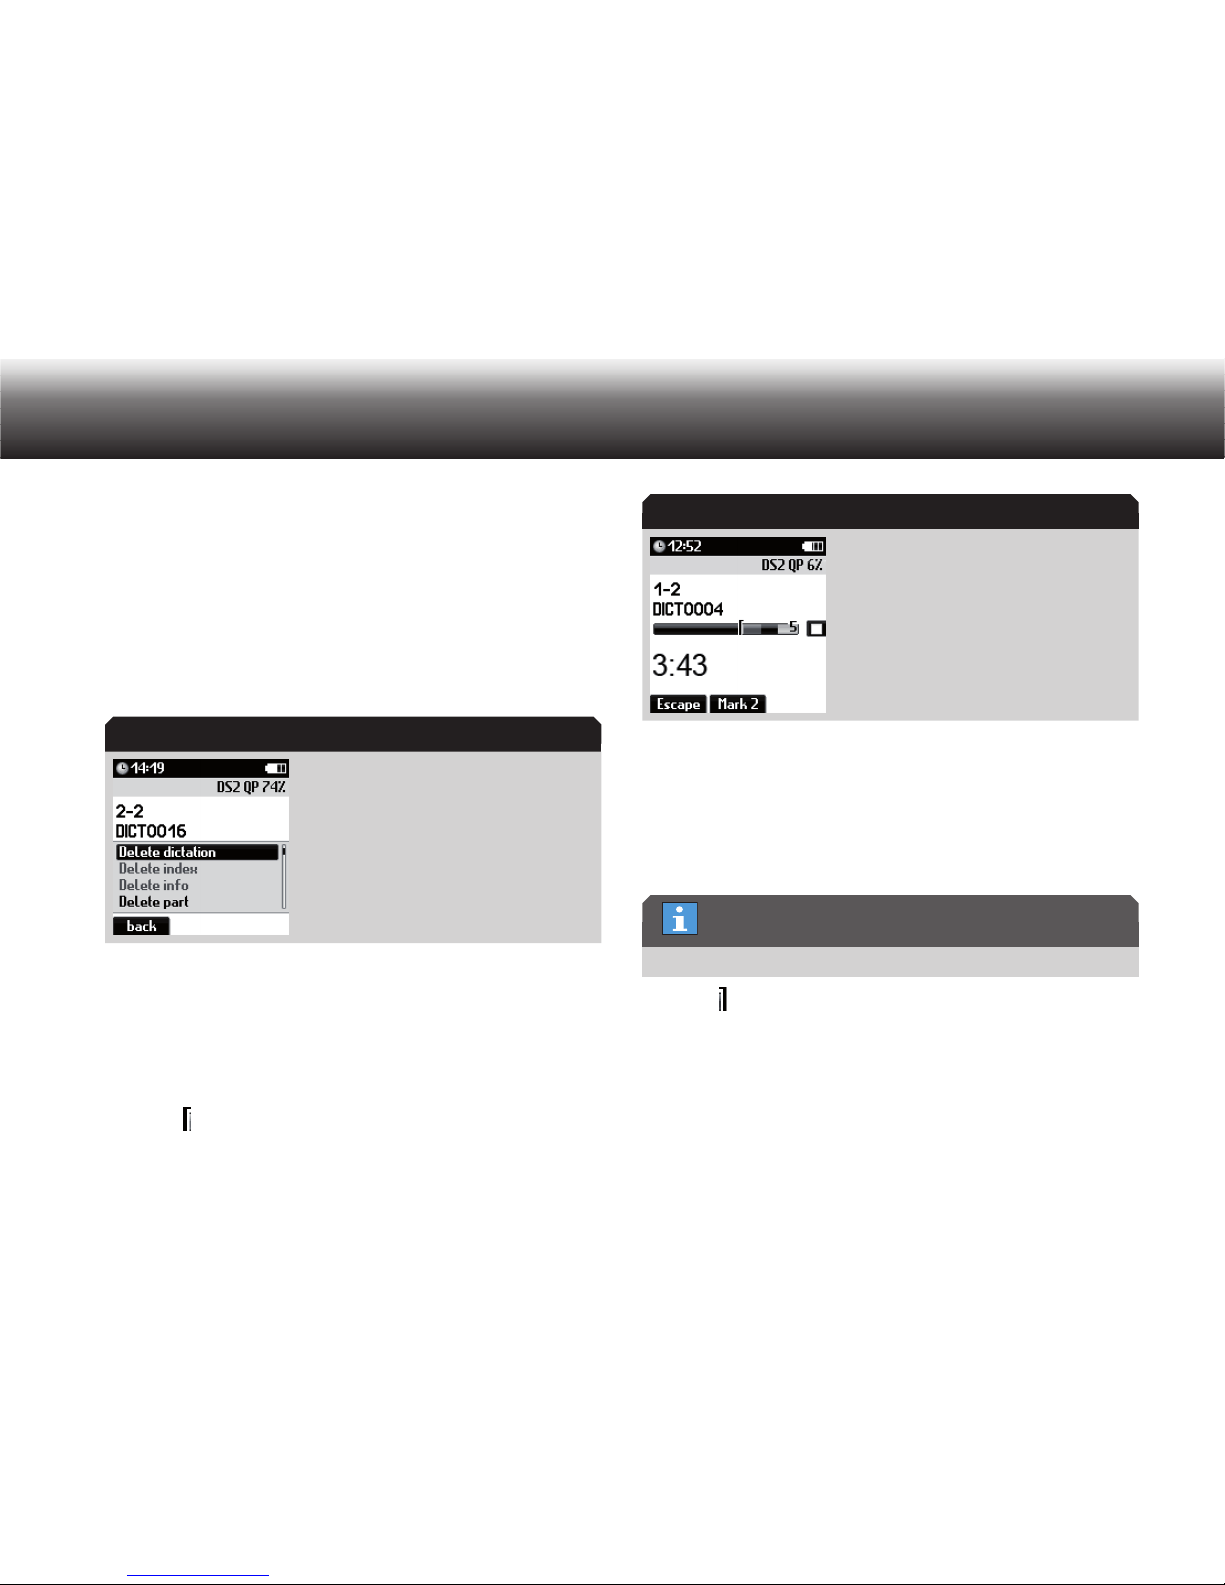
List of deletable elements
Control if x “Delete dictation” has been selected and confirm it by
pressing the “OK” button.
A security question prompts, to prevent deleting dictation parts by
mistake.
Confirm the question by pressing the “ x OK” button to delete the entire
dictation.
Press the “ x Back” button in case that you do not want to delete the
dictation.
Deletable elements
Deletable elements list
Deletable elements
Page 42
41
Operating
Delete dictation part
Press the button x »e/f« to listen to the dictation until you arrive at
the beginning of the part to be deleted.
Press the button x »
e/f« again.
Press the “ x Delete” button.
A list appears with the elements that can be deleted (dictation, dictation part).
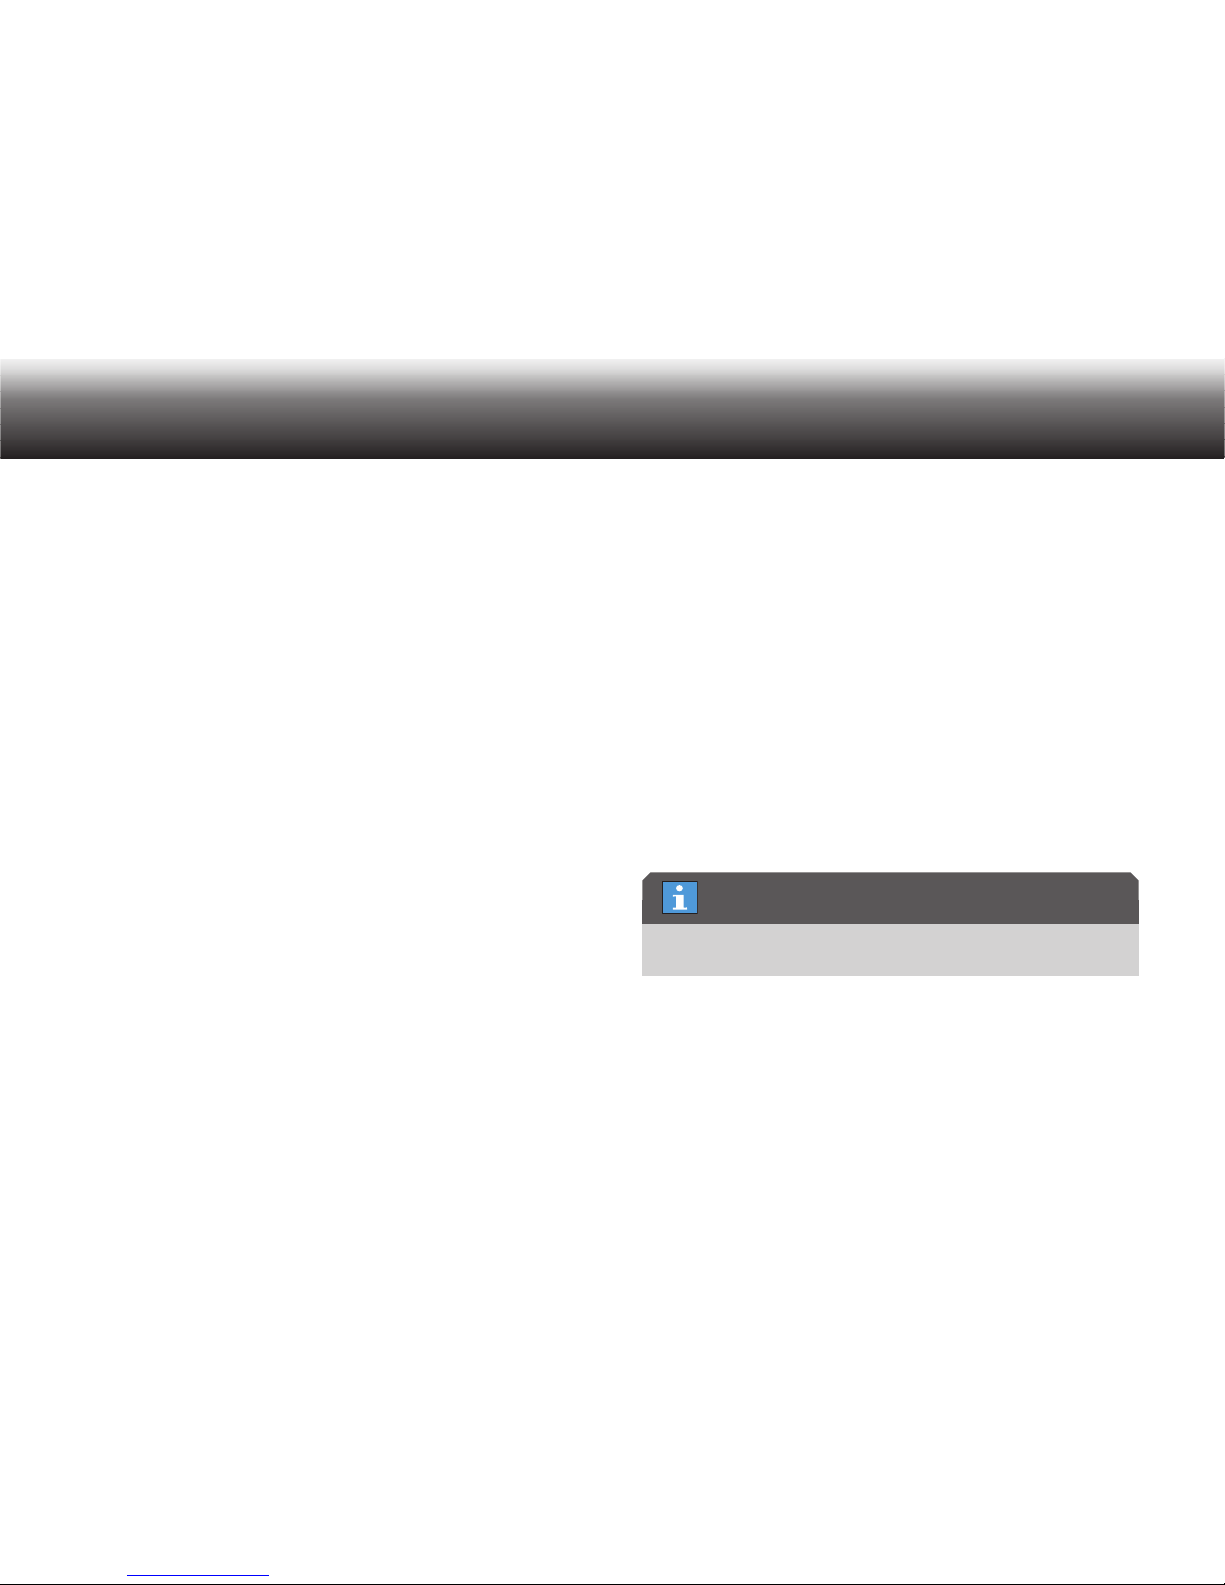
List of deletable elements
Use the up/down buttons to select “ x Delete part” from the list of
deletable elements.
Confirm your selection using “ x OK”.
Mark the beginning of the part to be deleted by pressing the “ x Mark
1” button.
A mark
appears in the progress bar.
Mark when deleting a dictation part
Press the button x »e/f« to listen to the dictation until you arrive at
the end of the segment to be deleted.
Press the button x »
e/f« again.
Mark the end of the part to be deleted by pressing the “ x Mark 2” but-
ton.
You can place mark 2 either before or after mark 1.
A mark
appears in the progress bar.
Press the “ x Delete” button.
A confirmation prompt appears.
Confirm using “ x OK” to delete the dictation part permanently.
If you do not wish to delete the dictation part, press the “ x Back” but-
ton.
Deletable elements
Mark 1
Position of mark 2
Page 43

42
Menu functions
5. Menu functions
The menu mode at a glance5.1
The menu functions are switched off in the Easy Mode. For switching
over to the Menu Mode, please press the “MENU” button. Use the up/
down buttons to navigate to the “Profile” menu item and confirm by
pressing “OK”. Please select the Menu Mode from the displayed profile list.
USB-operations (Only available when there is a USB connection to
the PC)
Activation of USB connecting (only when the device settings are set •
to “Manually connecting”)
Data list* (only available when the data list was read in)
Select: Select data set for a new dictation•
Workflow: Activation of data set request by pressing the NEW-button •
for a new dictation
Delete: Delete data list•
Scanner* (Only available when a scanner is connected)
Dictation search: Search of data set by means of the scanner•
Scan-Workflow: Enable scanner in workflow•
Programming: Programme barcode-reader•
Folder
Select the folder in which the dictation shall be saved (main folder •
and sub-folder A, B, C, D, E or F)
Profile
Select user profile based on the predefined device settings•
Recording
Microphone sensitivity: Set microphone sensitivity•
Voice Activation: Switch on voice activation (The recording stops •
automatically during recording pause)
Recording format: Select recording format (DSS/WAV*/MP3*, sam-•
ple rates)
Automatic follow-up dictation: New dictation automatically by setting •
a specific time
Display
View: Display of main screen (recording, playback) switching on and •
off (time, extended status line, dictation position number, no/reference/ID, recording progress display, recording symbol)
Date and time: Set of date and time•
Illumination: Setting of display illumination operation time•
Brightness: Set the brightness of the display•
Contrast: Set the contrast of the display•
Language: Selection of the display language•
Page 44
43
Menu functions
Workflow
Request to typist, worktype, group*, category* priority and number/•
reference activation by pressing the NEW-button for a new dictation
Device settings
Sleep mode: Select the time when the energy saving, non-operative •
state shall be activated automatically. The Digta will switch off completely after 30 minutes.
Audio signals: On-/Off-switching of audio signals•
USB connecting: Automatically USB connecting or after having •
selected it in the menu
Loudspeaker: Switch off the loudspeakers for play-back with head-•
phones in the Digta Station*
Forward-/rewind: Change the forward/rewind speed. Switching on/off •
fragmented play-back
Rechargeable batteries: Switching over from battery to external •
charged NiMH-rechargeable battery
Foot control: Selection of foot control functions for recording or play-•
back and changing the operation time of short backspace (only available in combination with Digta Station*)
Change PIN: Change personal identification number (PIN)•
Play-back with OK: Switching on/off the Play-back function for the •
“OK” display button
Reset: Reset dictation counter to “1”, format memory and reset of •
device settings
Device info
Version: Information about serial number and firmware-version•
License key: License key of the activated functions•
Disk: Information about the memory capacity of the internal or exter-•
nal memories
USB-operations5.2
With the “USB-operations” function you can manually set up a USB
connection.
Press “ x MENU”.
Move to the “ x USB-operations” menu item using the up/down but-
tons.
Confirm by pressing „ x OK“ to set up the USB connection.
5.3 Data list
The “data list” function is not available in the WAV* and MP3* recording formats.
With the “data list”* function, dictations and text entries can be saved to
an ID (e.g. patient or client number or scanned barcode).
These text entries are created on a PC in CSV format (comma-separated
values), using Excel for instance. After you have saved the file under the
name “ids.csv”, transfer the data into the Digta system folder (see “Per-
“Data list” menu
Page 45
44
Menu functions
form firmware update”). The dictation machine reads this information
once it switched on again.
Select
In the “Select” menu, you can select a dataset for a new dictation. The
dataset is then entered automatically in the new dictation (ID and dictation data in the DSS header).
Press „ x MENU“.
Use the up/down buttons to navigate to the “ x Data list” menu item
and confirm using „OK“.
Select the “ x Select” subitem using the up/down buttons. Confirm
your selection using „OK“.
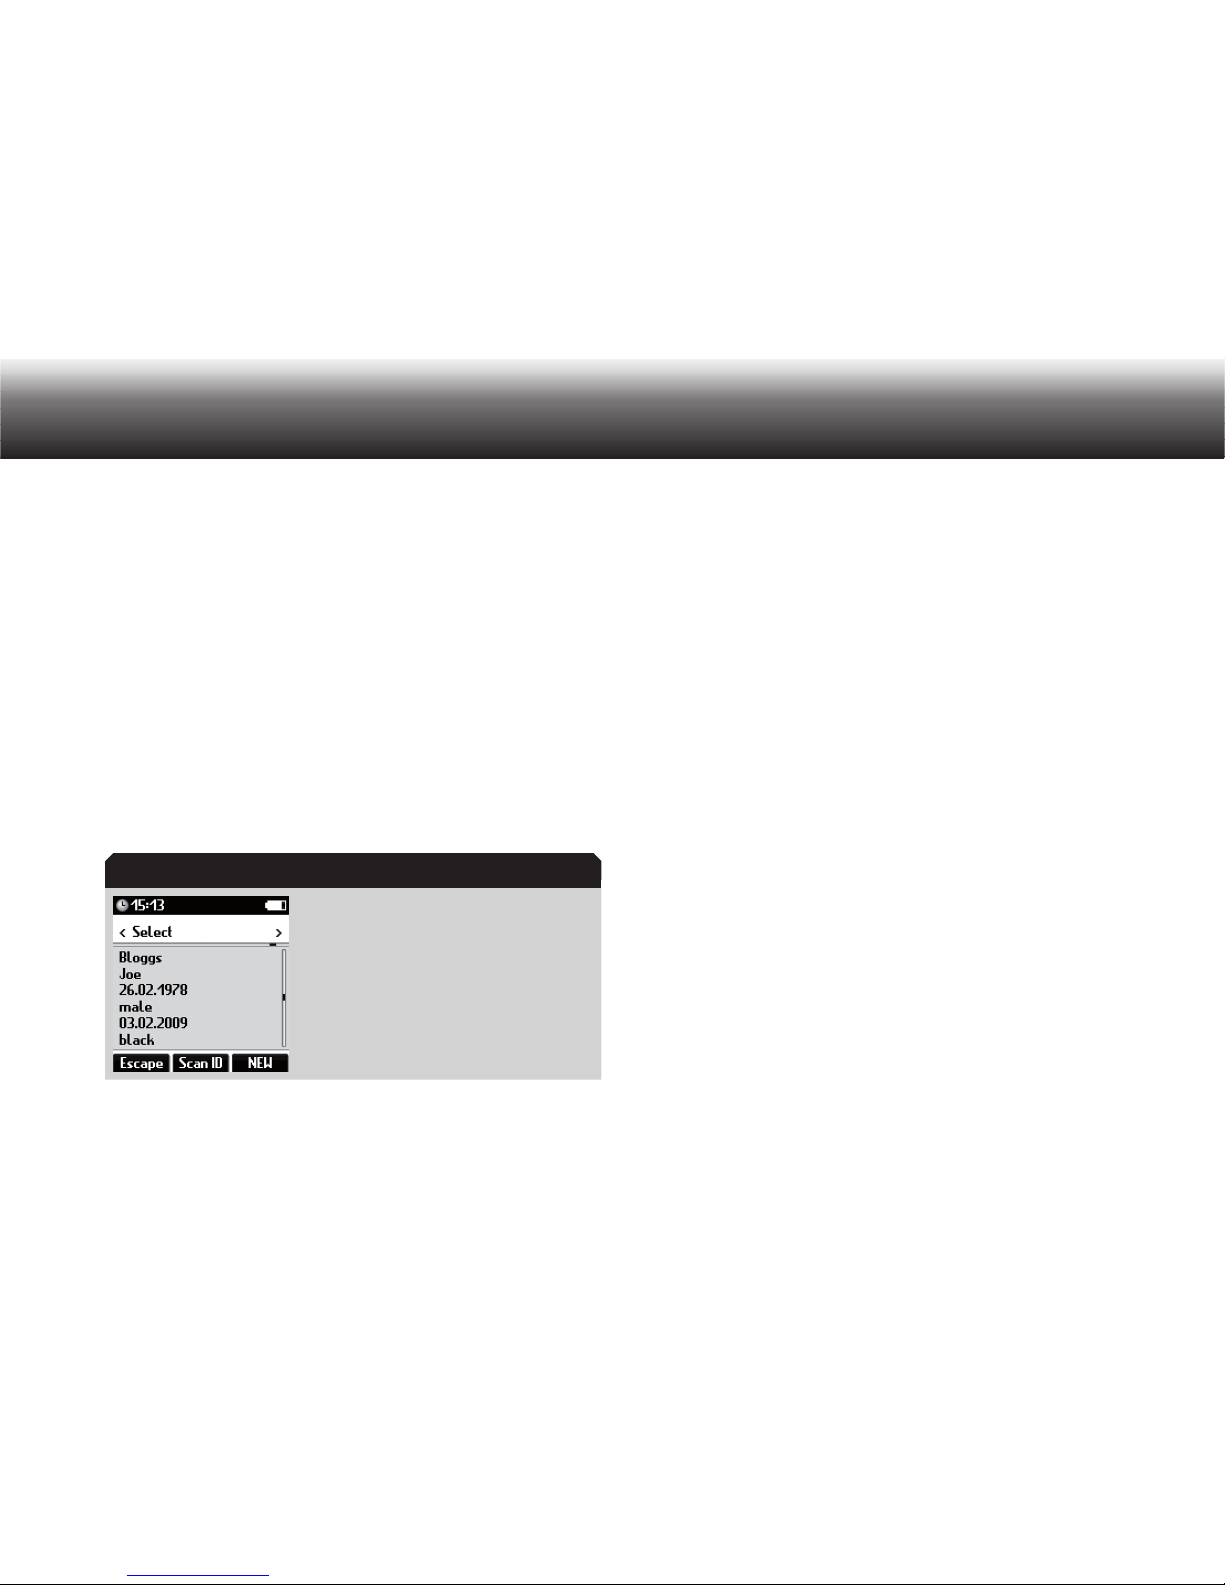
The dataset is shown on the display.
Dataset displayed
Use the left/right buttons (NEW, MENU) to move through the entire x
data list to the desired dataset.
If you wish to begin a new dictation in which this dataset is to be x
entered, press the display button “NEW”.
The dictation ID and the dataset are saved for the current dictation.
Begin recording by pressing the “ x
g” button. Speak your new text.
The recording indicator lights up red. The progress bar advances and
the dictation duration increases.
Workflow
Press x MENU.
Use the up/down buttons to navigate to the “ x Data list” menu item
and confirm using „OK“.
Select the “ x Workflow” subitem using the up/down buttons. Confirm
your selection using „OK“.
Select one of the following settings: x
»No entry«: no dataset is entered•
»On request«: • for each new dictation the option to enter data-
sets is given. If no datasets are entered, “No entry” is shown on
the display.
Activate the selected option by pressing „ x OK“.
The marker bullet moves to the highlighted bar.
Confirm the change using “ x Save”.
If you do not wish to save the change, press the “ x Escape” button.
Example:
Dataset
Page 46
45
Menu functions
“ID”, “last name”, “first name”, “birthdate”
“1443”, “Doe”, “John”, “5/24/2000”
“3221”, “Doe”, “Jane”, “1/1/1911”
The values are separated by commas/semicolons. The first line contains
the field names. The values can be contained in quotation marks.
Delete
In the “Delete” menu, you can delete entire data lists.
Data loss
This function deletes the entire data list. The data list functions are
then no longer available until a new data list is imported.
Press „ x MENU“.
Use the up/down buttons to navigate to the “ x Data list” menu item
and confirm using “OK”.
Select the “ x Delete” subitem using the up/down buttons. Confirm
your selection using “OK”.
Use the up/down buttons to move to the desired dataset and x confirm
by pressing “OK” in order to display further data in the dataset.
Confirm the deletion by pressing “ x OK”.
A confirmation prompt appears.
Confirm using “ x OK” to delete the data list permanently.
5.4 Scanner
The “Scanner” menu item is not displayed unless a scanner is
connected.
The “Scan dictation ID” function is not available in the WAV* and
MP3* recording formats.
Use scanner to search for dataset for new dictation
Search for dictation
If there is a barcode with the ID number (e.g. on an X-ray film or file
envelope), your dictation machine can search for the corresponding dictation using a barcode scanner*.
Press „ x MENU“.
Use the up/down buttons to navigate to the “ x Scanner” menu item
and confirm using “OK”.
NOTICE
“Scanner” menu
„Scan dictation ID“
Page 47
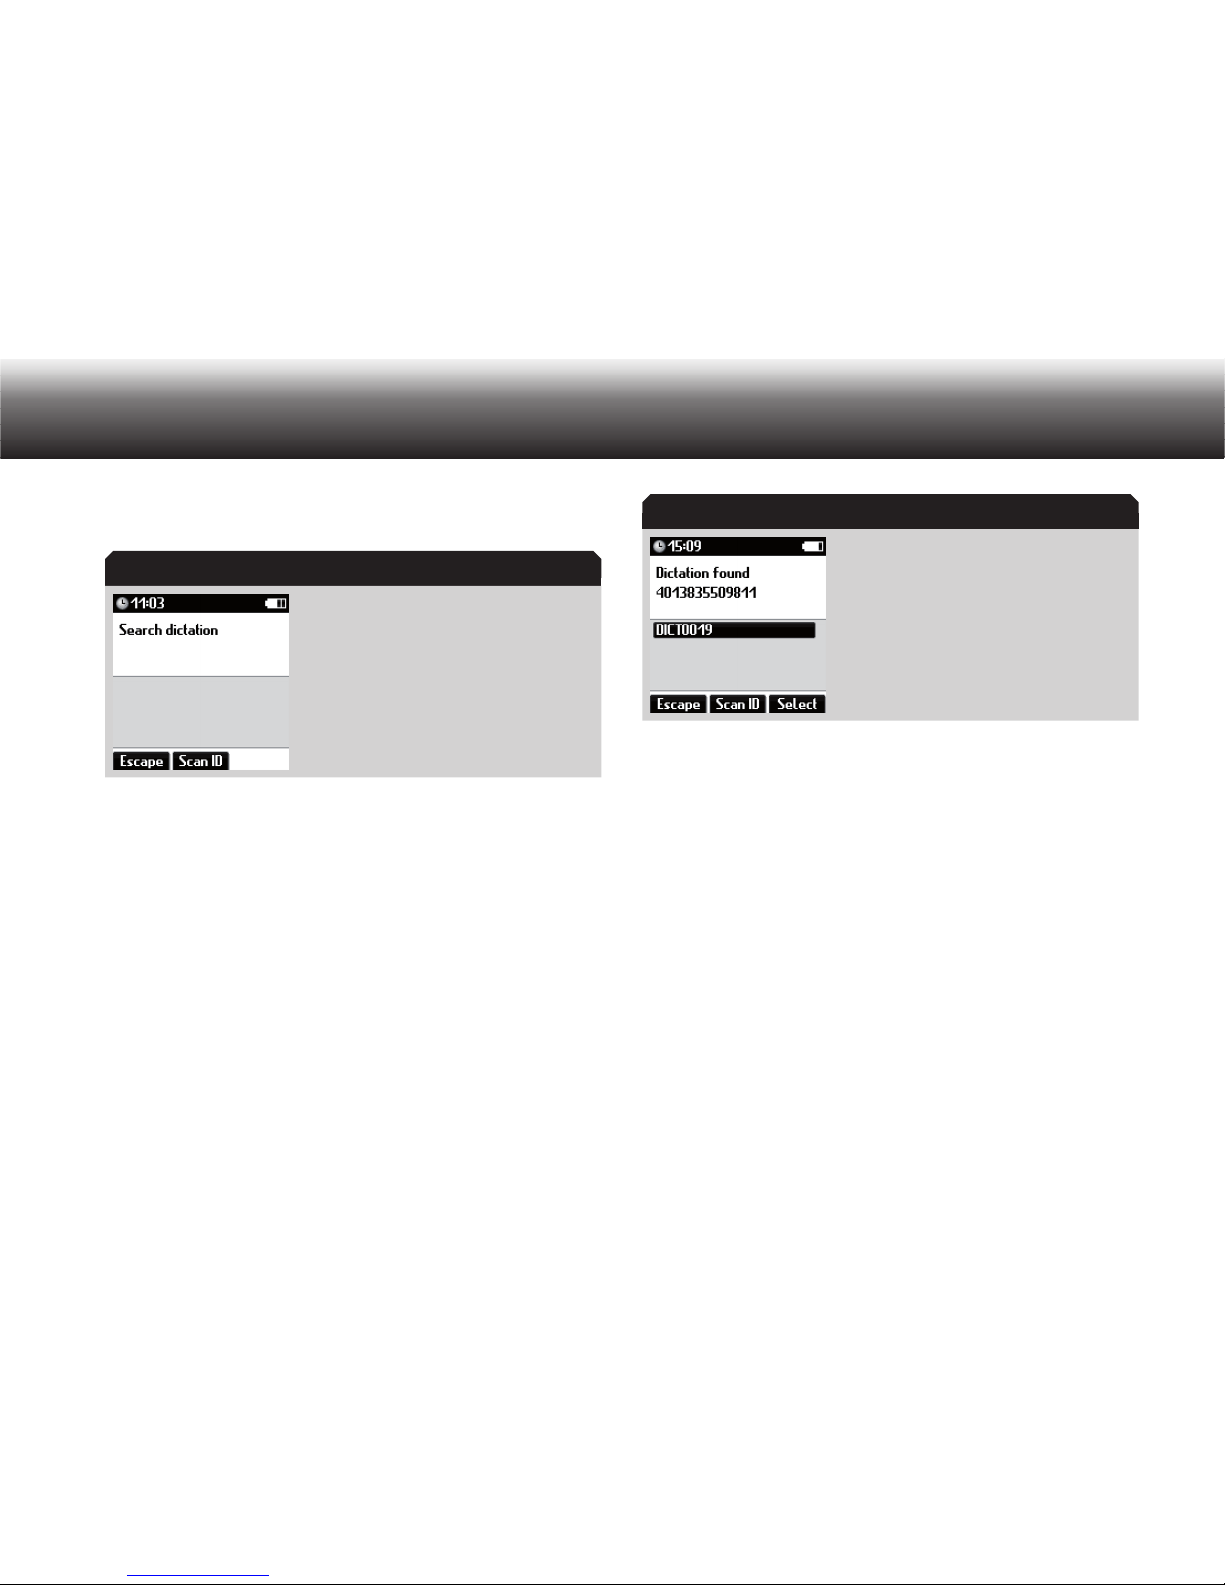
46
Menu functions
Select the “ x Search dictation” subitem using the up/down buttons.
Confirm your selection using “OK”.
Press the button “ x Scan ID” and hold the scanner near the barcode.
Confirm by pressing “OK”.
The Digta confirms the successful scanning of the ID with an acoustic tone. The scanned barcode/dictation ID is shown on the display.
If dictation exists which corresponds to this dictation ID, this is also
shown on the display.
If a scanned barcode cannot be associated with any dictation, »No
dictation found« appears.
Display showing dictations found
If several dictations with this ID are found, select the desired dicta- x
tion use the up/down buttons.
If you wish to listen to or change the dictation that was found, press x
the “Select” button.
If you wish to scan in another barcode, press the “ x Escape” button.
The dictation found becomes the current dictation. The Digta returns
to the main screen with play-back paused.
Scan workflow
Press “ x MENU”.
Use the up/down buttons to navigate to the “ x Scanner” menu item
and confirm using “OK”.
Select the “ x Workflow” subitem using the up/down buttons. Confirm
your selection using “OK”.
Search for dictation
Dictations found
Page 48
47
Menu functions
Select one of the following settings: x
»No entry«: no dictation ID is entered for new dictations•
»On request«: • for each new dictation, the user is prompted to
scan a dictation ID. “Scan dictation ID!” appears on the display.
Activate the selected option by pressing “ x OK”.
The marker bullet moves to the highlighted bar.
Confirm the change using “ x Save”.
If you do not wish to save the change, press the “ x Escape” button.
Programming
The barcode scanner* must be connected to the dictation machine
(see section “Barcode scanner*/Connect scanner”).
To program the scanner, you need a table of programming codes. Further details can be found in the section “Barcode scanner*/Configure
barcode scanner”.
Press “ x MENU”.
Use the up/down buttons to navigate to the “ x Scanner” menu item
and confirm using “OK”.
Select the “ x Programming” subitem using the up/down buttons.
Confirm your selection using “OK”.
Scan in the desired programming code. x
An acoustic signal confirms that the barcode has been successfully scanned.
You can scan in as many successive programming codes as you like. x
If the device cannot read the barcode, “Scan error” appears on the
display.
Confirm the error message using “ x OK” and repeat the scan.
Complete the programming using the “ x Save” button.
If you do not wish to save the change, press “ x Escape”.
5.5 Folder
In the “Folder” menu, you can set the folder in which you want to save
your dictation.
Six folders are available. The folders are labeled A-F by default. You can
use the folders to organize dictations (e.g. to separate business and private dictations).
Details regarding folders can be found in the section “Possible configurations with PC software/Folder functions”.
Scanner
Programming codes
Page 49
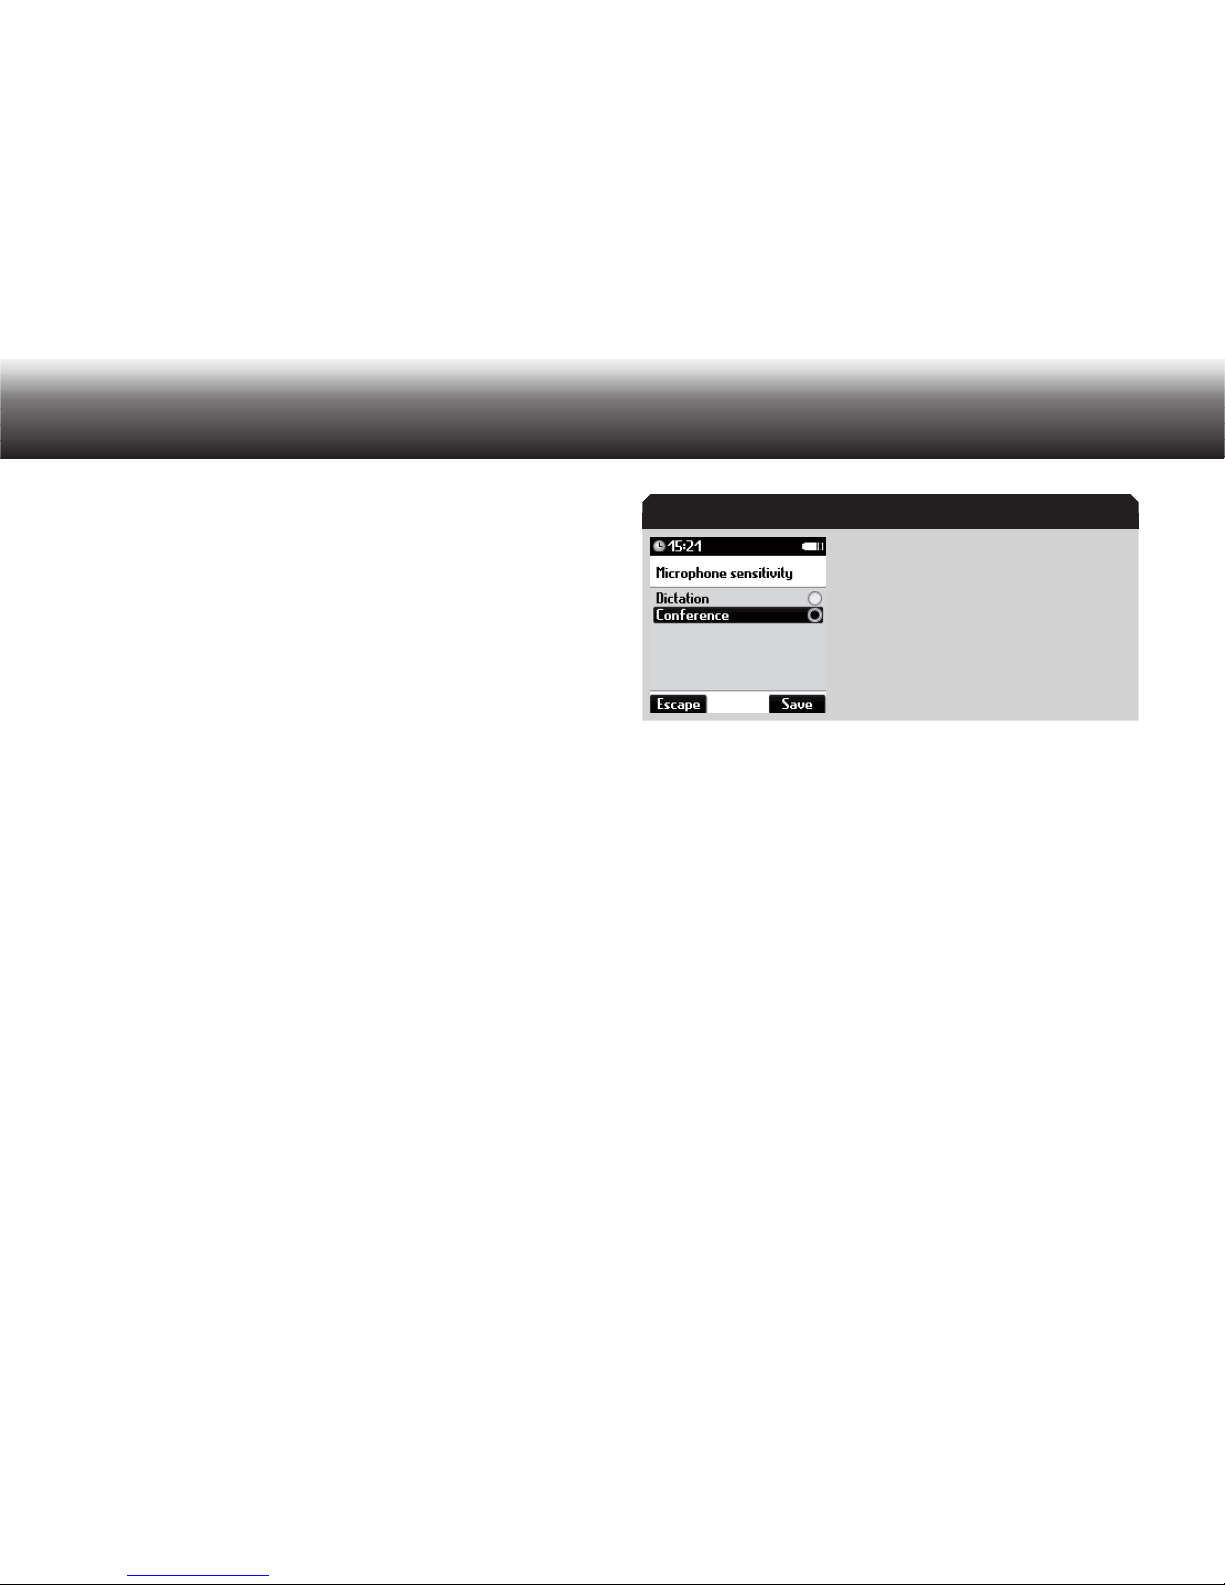
48
Menu functions
Profiles5.6
In the “Profiles” menu, you can select a profile from among the predefined user profiles.
Press “ x MENU”.
Use the up/down buttons to navigate to the “ x Profiles” menu item
and confirm using “OK”.
Use the up/down buttons to navigate to the desired profile and con- x
firm using “OK”.
If you do not wish accept the change, press “ x Back”.
Details regarding profiles can be found in the section “Initial setup/
Profiles”.
5.7 Recording
Microphone sensitivity
In the “Microphone sensitivity” menu, you can set the Digta’s recording quality.
Press “ x MENU”.
Use the up/down buttons to navigate to the “ x Recording” menu item
and confirm using “OK”.
Select the “ x Microphone sensitivity” subitem using the up/down
buttons. Confirm your selection using “OK”.
“Microphone sensitivity” menu
Move to the desired option using the up/down buttons. x
Dictation•
Conference•
Activate the selected option by pressing “ x OK”.
The marker bullet moves to the highlighted bar.
Confirm the change using “ x Save”.
If you do not wish to save the change, press the “ x Escape” button.
Voice activation
In the “Voice activation” menu, you can switch the Digta’s voice activation function on and off. If the “Voice activation” function is switched
on, recording is paused during breaks in speech if the surrounding environment is quiet. The recording automatically resumes when you begin
speaking again.
Microphone sensitivity
Page 50
49
Menu functions
You can switch the dictation machine to record and set it in front of you.
This allows you to dictate while having your hands free.
Press “ x MENU”.
Use the up/down buttons to navigate to the “ x Recording” menu item
and confirm using “OK”.
Select the “ x Voice activation” subitem using the up/down buttons.
Confirm your selection using “OK”.
Move to the desired option using the up/down buttons. x
On•
Off•
Activate the selected option by pressing “ x OK”.
The marker bullet moves to the highlighted bar.
Confirm the change using “ x Save”.
If you do not wish to save the change, press the “ x Escape” button.
Recording format
In the “Recording format” menu, you can select the quality and file size
of the recorded dictation. You can select among DSS, DSS Pro, WAV and
MP3.
With DSS Pro you can set the quality and select from various sampling
rates. The encryption of the dictations can be selected independently of
this.
The WAV and MP3 recording formats are not included in the standard
version of the device and are only available by purchasing the respective licenses separately.
Due to large amounts of data and missing dictation information in the
file header, the following functions are not available for WAV and MP3
recording formats:
info/index•
audible fast forward/rewind•
automatic follow dictation•
menu “Details” and workflow functions•
saving barcodes as dictation ID•
data lists •
Format Application
DSS Standard quality with the lowest memory requirements for dic-
tations, low memory use for listening to and transcribing dictations in a typing pool
DSS Pro Better quality than DSS, especially suited for speech recogni-
tion, dictation encryption possible
WAV* and MP3*
Restrictions to WAV* and MP3*
Page 51
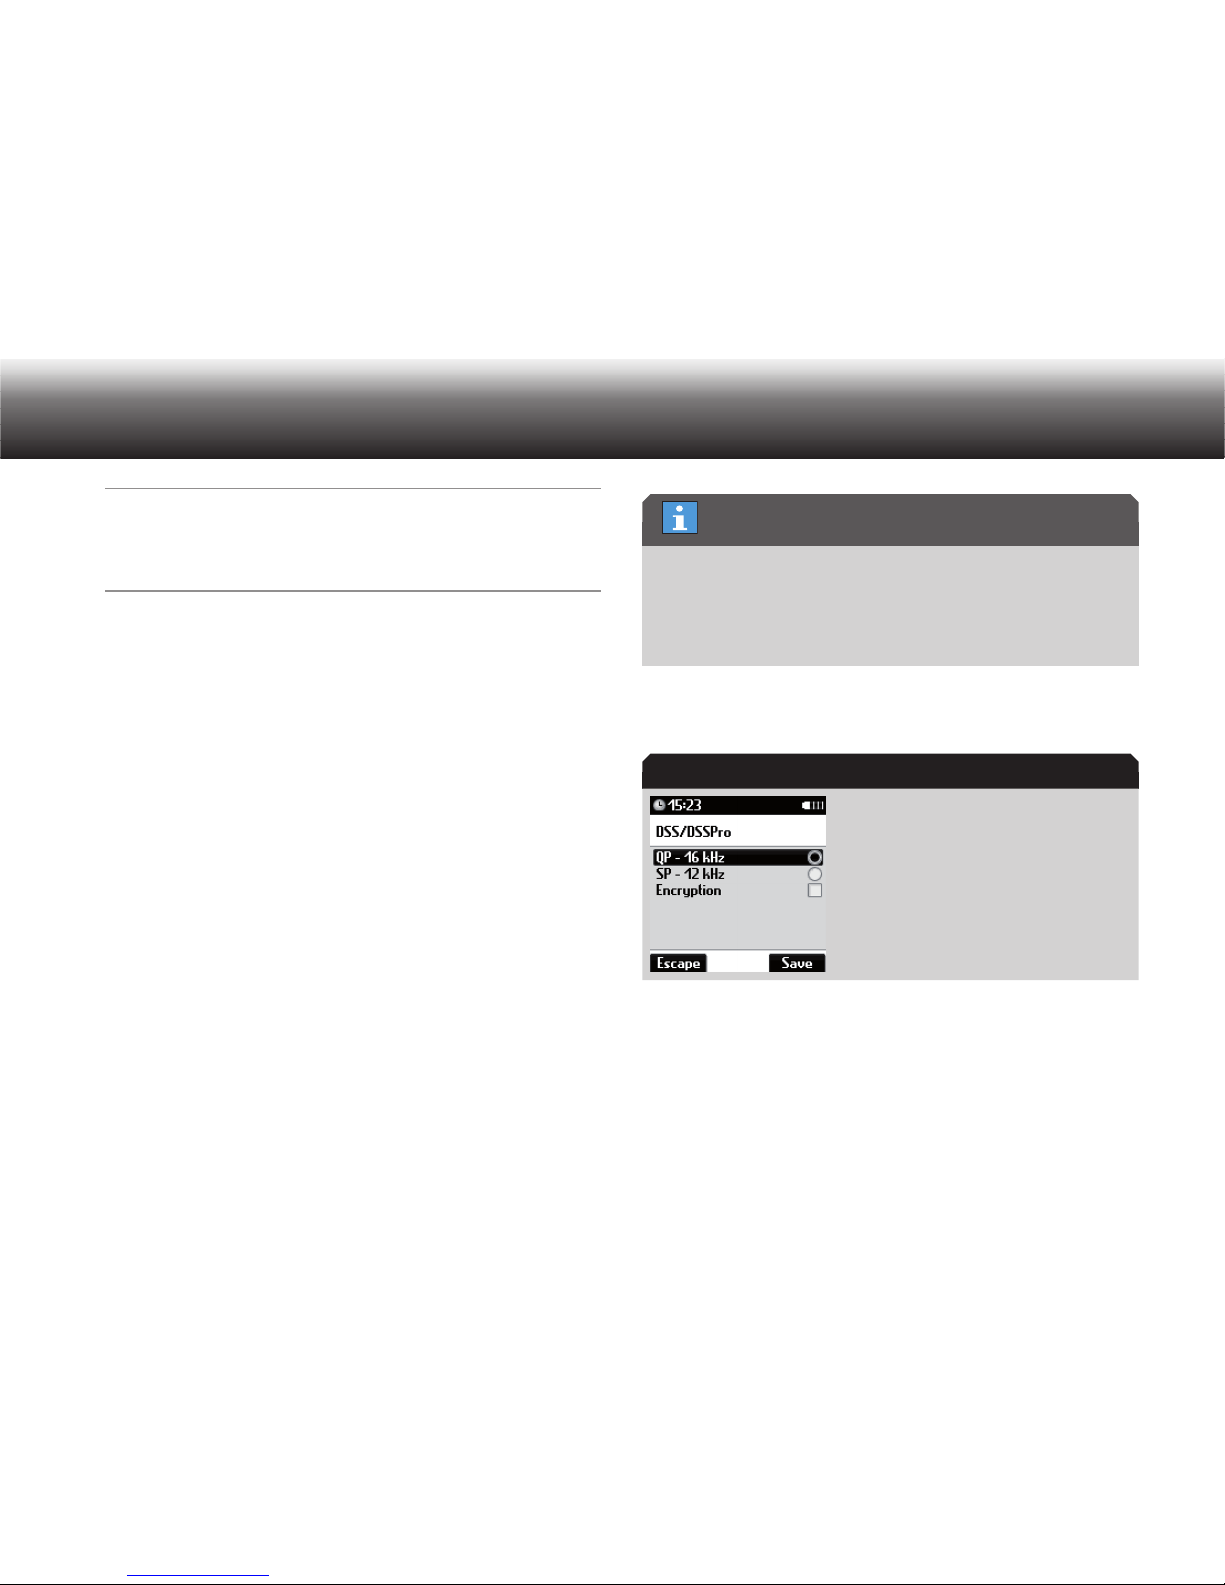
50
Menu functions
WAV* PCM recording, compatible with PCs and studio equipment, e.g.
11.025 kHz/mono for speech recognition or 22.050 kHz/stereo
for music with CD quality (Stereo recording only with external
stereo microphones or with two internal microphones with the
Digta 7 Premium)
MP3* low memory space usage, compatible with MP3 players
Press “ x MENU”.
Use the up/down buttons to navigate to the “ x Recording” menu item
and confirm using “OK”.
Select the “ x Recording format” subitem using the up/down buttons.
Confirm your selection using “OK”.
Select one of the following formats using the up/down buttons: x
DSS/DSS Pro•
WAV•
MP3•
Confirm your selection using “ x OK”.
You are directed to a submenu with the possible recording quality options, which you can determine by selecting the sampling frequency and activating/deactivating stereo recording.
Move to the desired sampling frequency using the up/down buttons. x
QP (Quality Play) from DSS Pro, file extension ».ds2«
SP (Standard Play) from DSS, file extension ».dss«
Even though “Encryption” is a DSS Pro function, it can be combined
with SP to save memory space.
Activate the selected sampling frequency by pressing “ x OK”.
The marker bullet moves to the highlighted bar.
Activate or deactivate the x options “Encryption” or “Stereo” by press-
ing “OK”.
The check mark after the option appears or disappears. The option is
activated or deactivated.
If “Encryption” is activated in DSS, three settings options are shown.
Recording quality for DSS/DSS Pro
Sampling frequency
Page 52
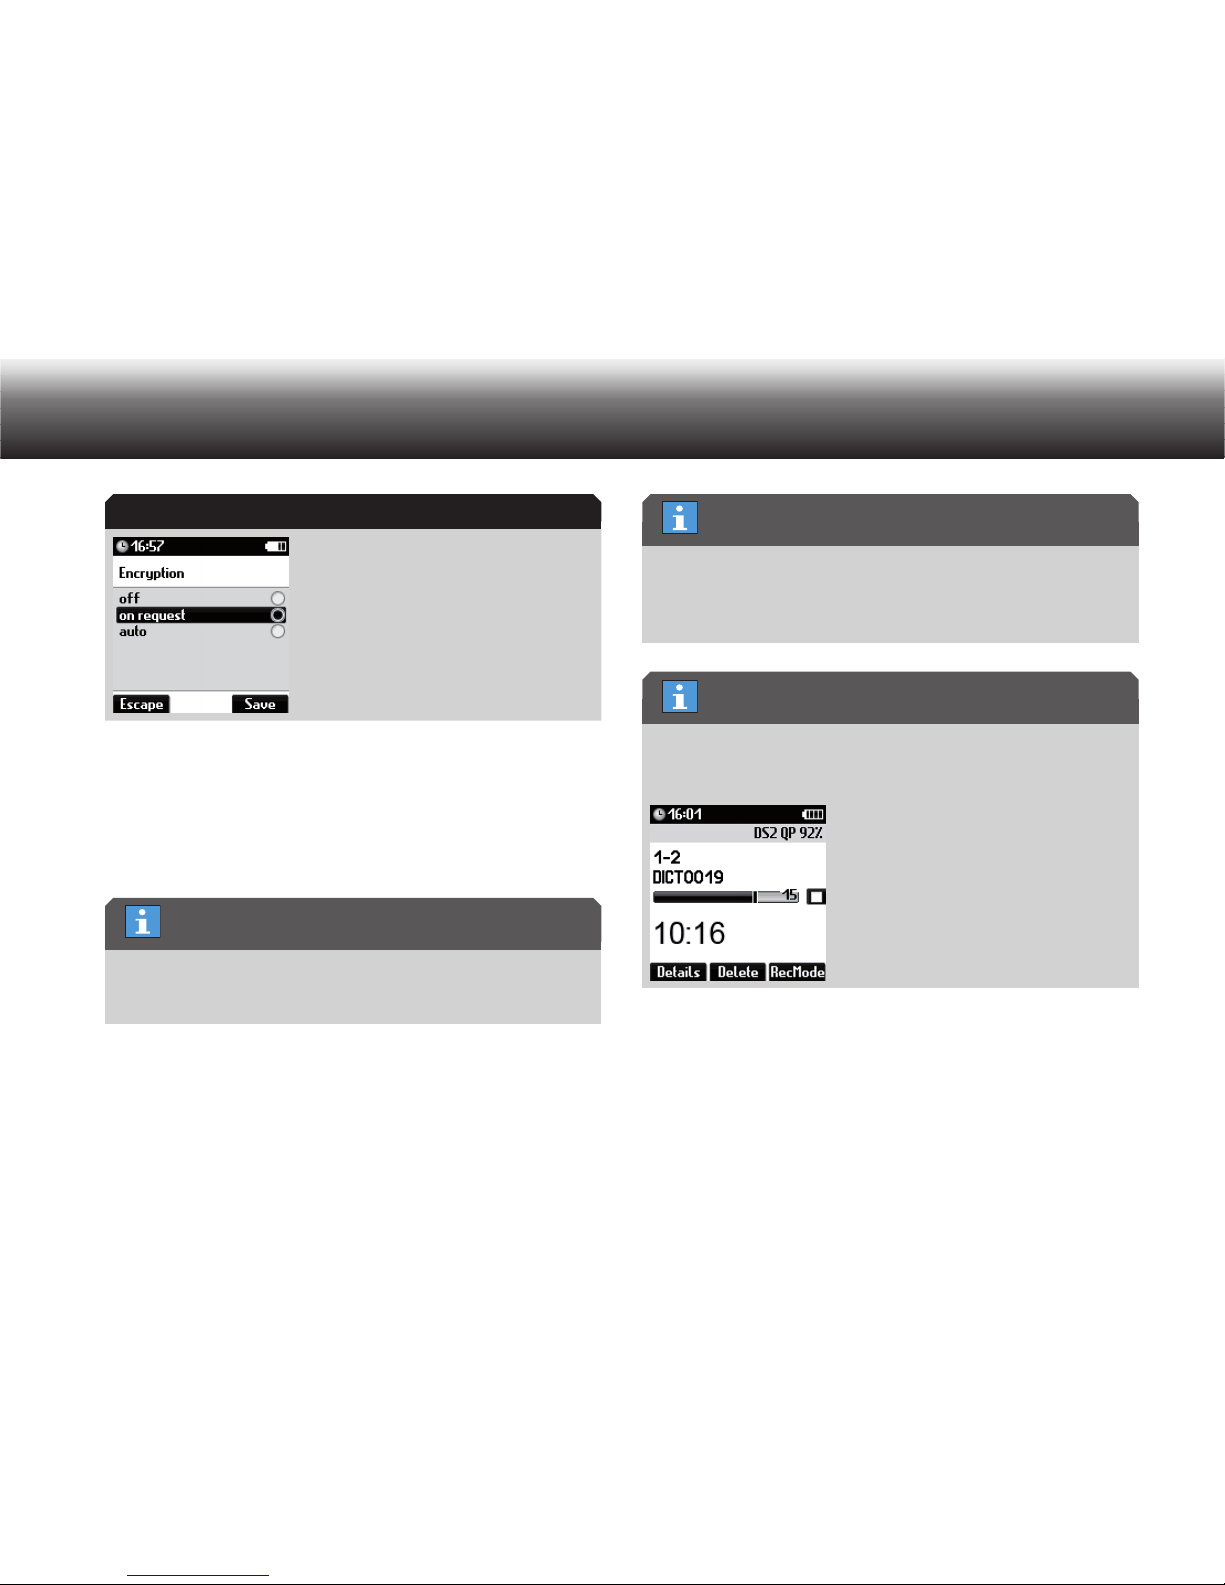
51
Menu functions
Select one of the following settings using the up/down buttons: x
»off«: encryption is not offered•
»on request«: Encryption will be offered for each new dictation•
»auto«: Each new dictation will be automatically encrypted•
Confirm your selection using “ x OK”.
You can switch between recording formats by selecting the sampling
frequency in a different format; i.e. if you select the sampling frequency for a certain recording format, this format is then active.
Confirm the change using “ x Save”.
If you do not wish to save the change, press the “ x Escape” button.
If WAV* and MP3* are not licensed for your device, this items do not
appear in the menu. In this case, in the “Recording” menu you are
immediately directed to the “DSS/DSS Pro” menu with the corresponding subitems.
The recording format that is currently set for new dictations is shown
in the extended status line. Activate the extended status line in the
menu “Display/Screen”.
Automatic follow-up dictation
Long recordings, e.g. conferences, can be automatically recorded in
several follow-up dictations.
Encryption
Selecting the recording format
“WAV” and “MP3” menus
Current setting
Page 53
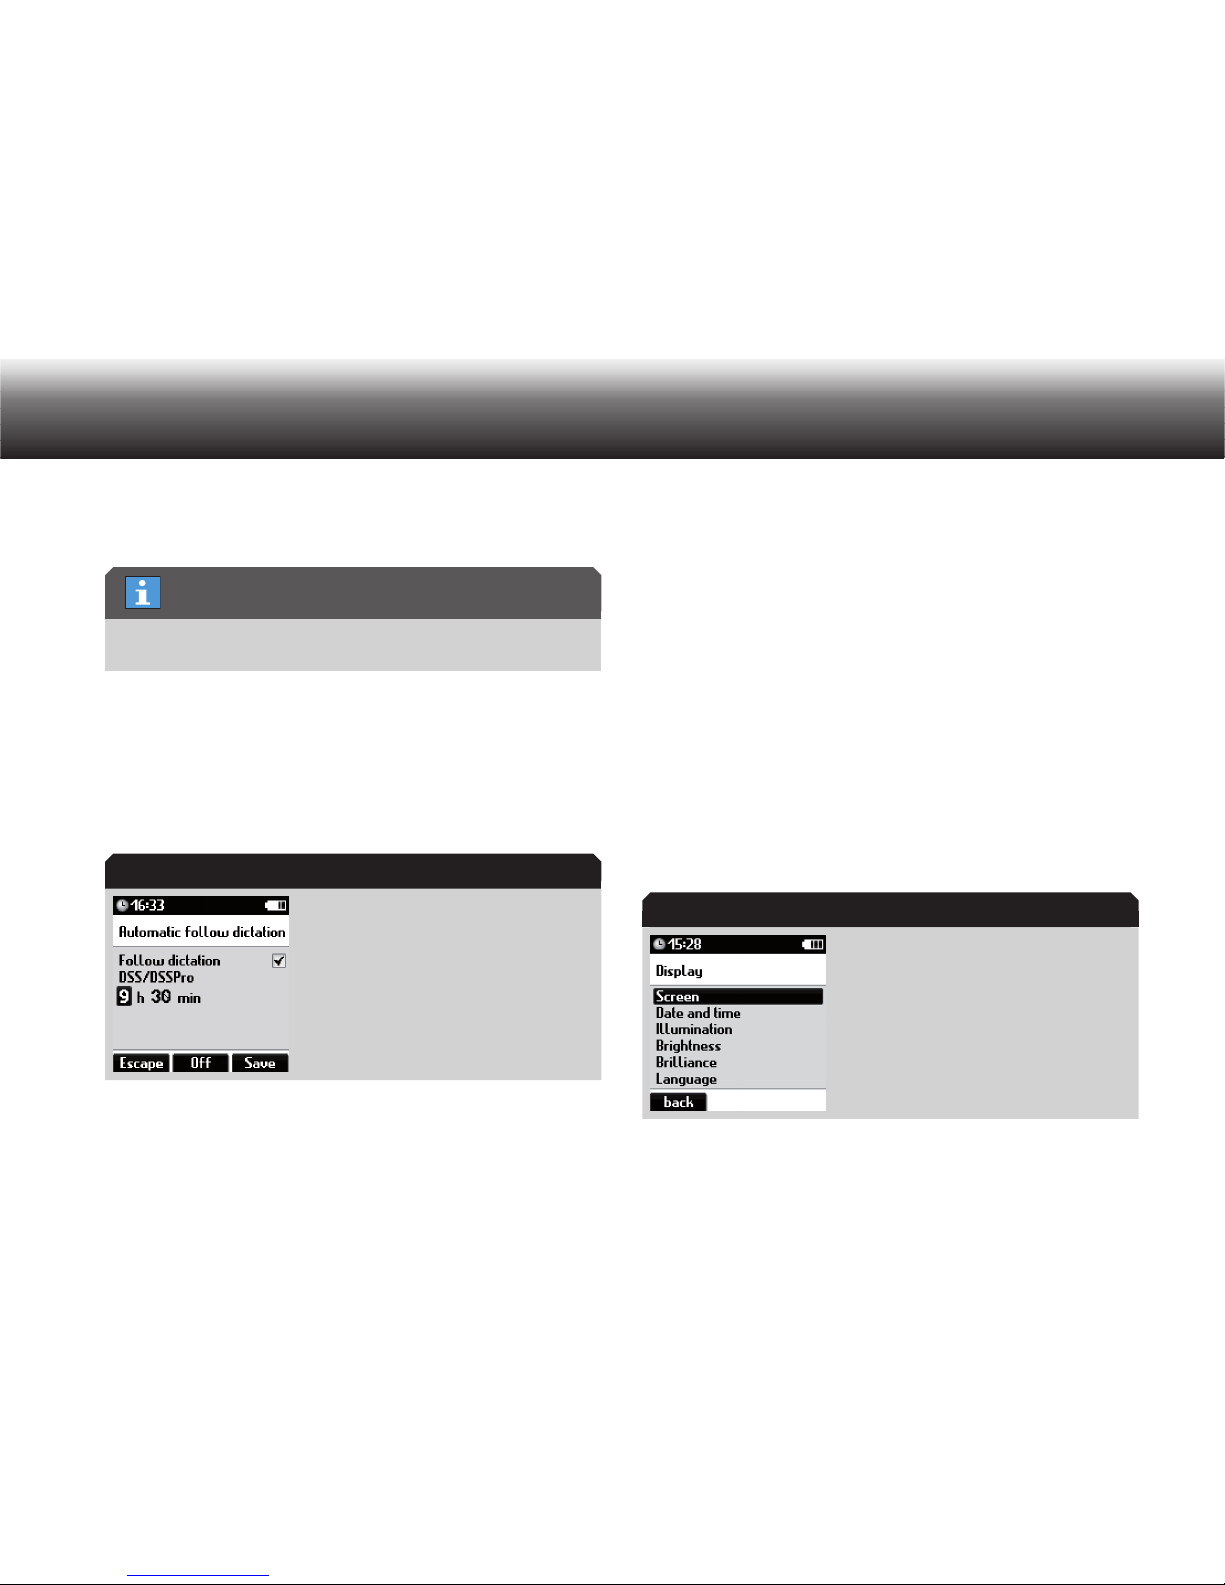
52
Menu functions
In order to be able to hear all sentences or sections at the end of the
dictation or the beginning of the follow-up dictation, up to 15 seconds of
overlap between dictations is saved.
Due to large amounts of data the “automatic follow dictation” function
is not available for WAV and MP3 recording formats.
Press “ x MENU”.
Use the up/down buttons to navigate to the “ x Recording” menu item
and confirm using “OK”.
Select the “ x Automatic follow dictation” subitem using the up/down
buttons. Confirm your selection using “OK”.
“Automatic follow dictation” entry
Activate or deactivate the x option by pressing “OK”.
The check mark after the option appears or disappears. The option
is activated or deactivated. The cursor moves to the field for entering the hour.
Enter the hour and the minutes using the up/down buttons and con- x
firm each using “OK”.
The left-right buttons are used to jump between entering in hours and
minutes.
Complete the entry using the “ x Save” button. The selections for auto-
matic follow-up dictations are saved.
If you do not wish to save the change, press the “ x Escape” button.
If you want to deactivate the automatic follow dictation function, x
press the “Off” button.
5.8 Display
“Display” menu
“WAV” and “MP3”
Automatic follow dictation
Menü „Anzeige“
Page 54
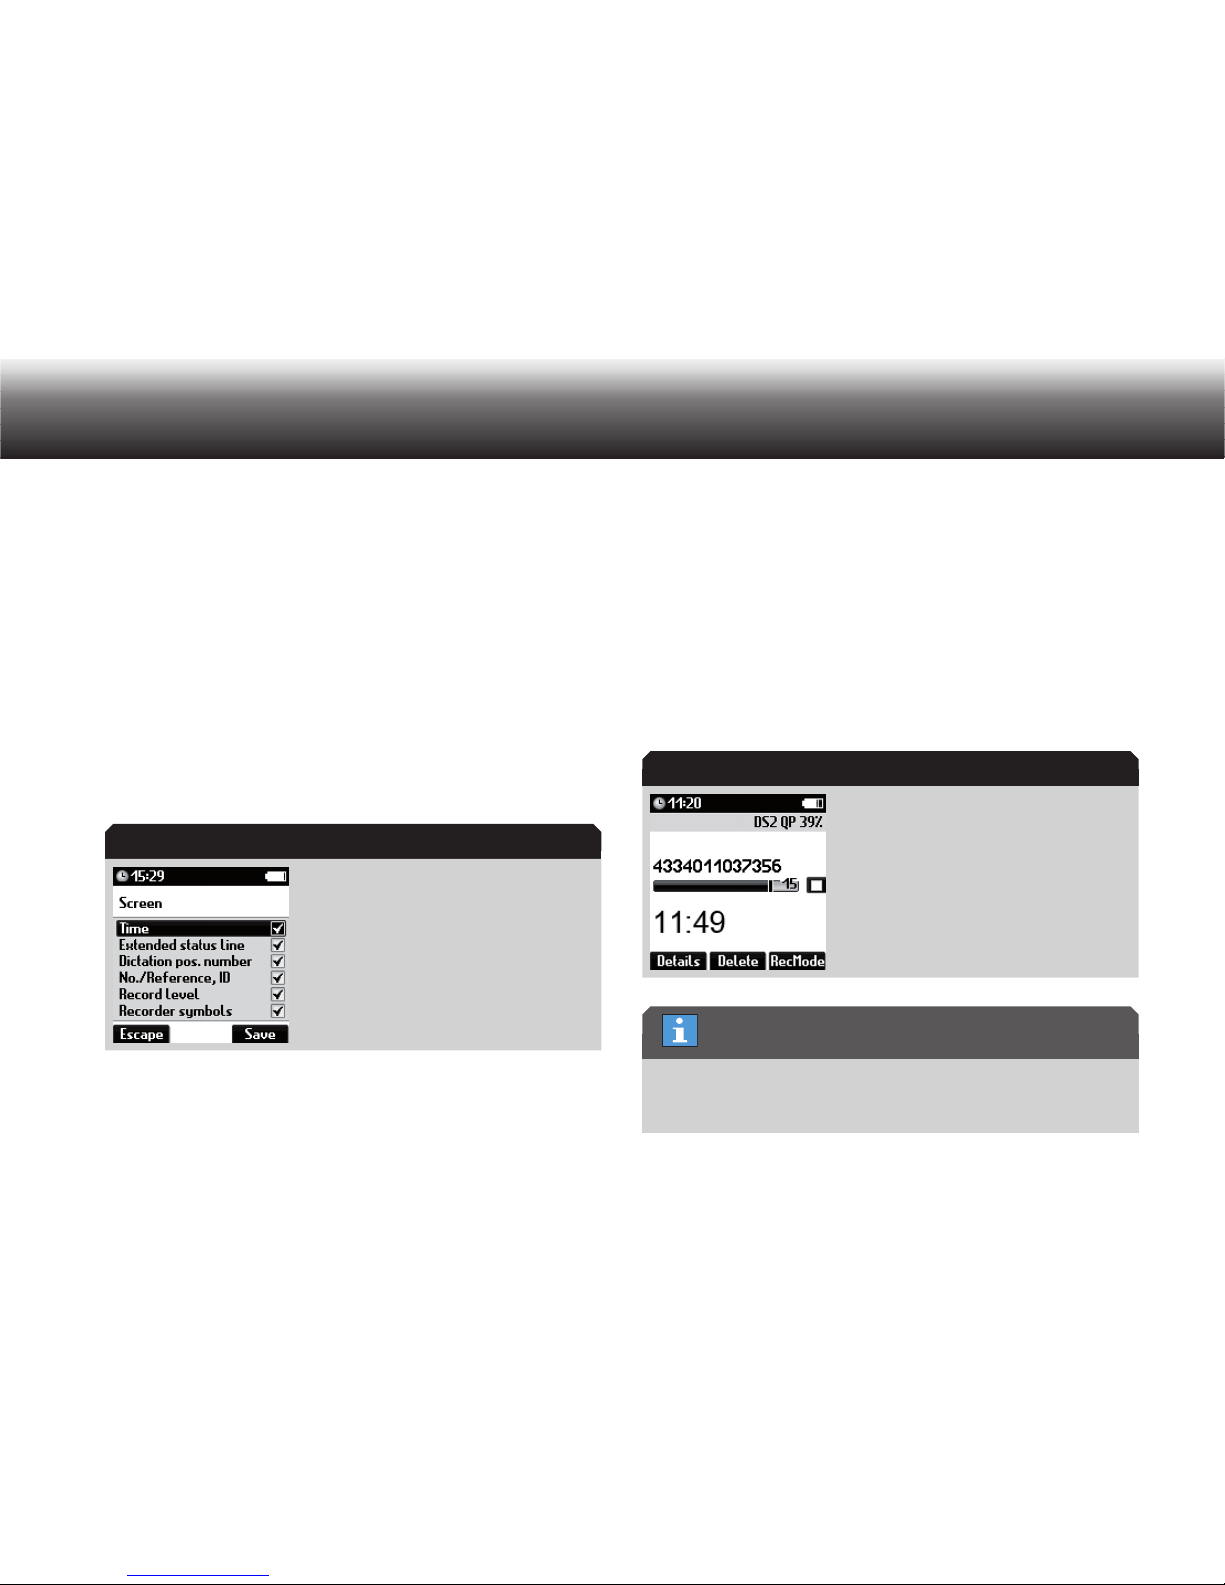
53
Menu functions
Screen
In the “Screen” menu, you can switch on and off which items are shown
on the main screen (recording, play-back).
Two of the four dictation labels (dictation name, dictation position number, dictation ID, number/reference) can be selected to be shown in the
dictation field and are shown in two lines.
Press “ x MENU”.
Use the up/down buttons to navigate to the “ x Screen” menu item and
confirm using “OK”.
Select the “ x Screen” subitem using the up/down buttons. Confirm
your selection using “OK”.
Display in “Screen” menu
Move to the desired screen option using the up/down buttons. x
Time•
The current time is shown on the display.
• Extended status line
This bar displays the name of the current folder, the file format
(including stereo), the “encryption” feature and the battery status
(charge in %, remaining operating time).
• Dictation position number
Dictation position number relative to all dictations, e.g. 5-12 means
the fifth dictation of 12 dictations in the current folder. Renamed dictations are sorted in alphabetical order.
Number/reference, ID•
The dictation ID (barcode/data list ID) or numbers/reference (characters) are shown if available for the current dictation.
Dictation ID shown on the display
If “Dictation pos. number” and “No./Reference, ID” are activated in the “Screen” menu, no dictation name is shown due to space
constraints.
„Screen“ menu
Dictation ID
Dictation position number and dictation ID
Page 55
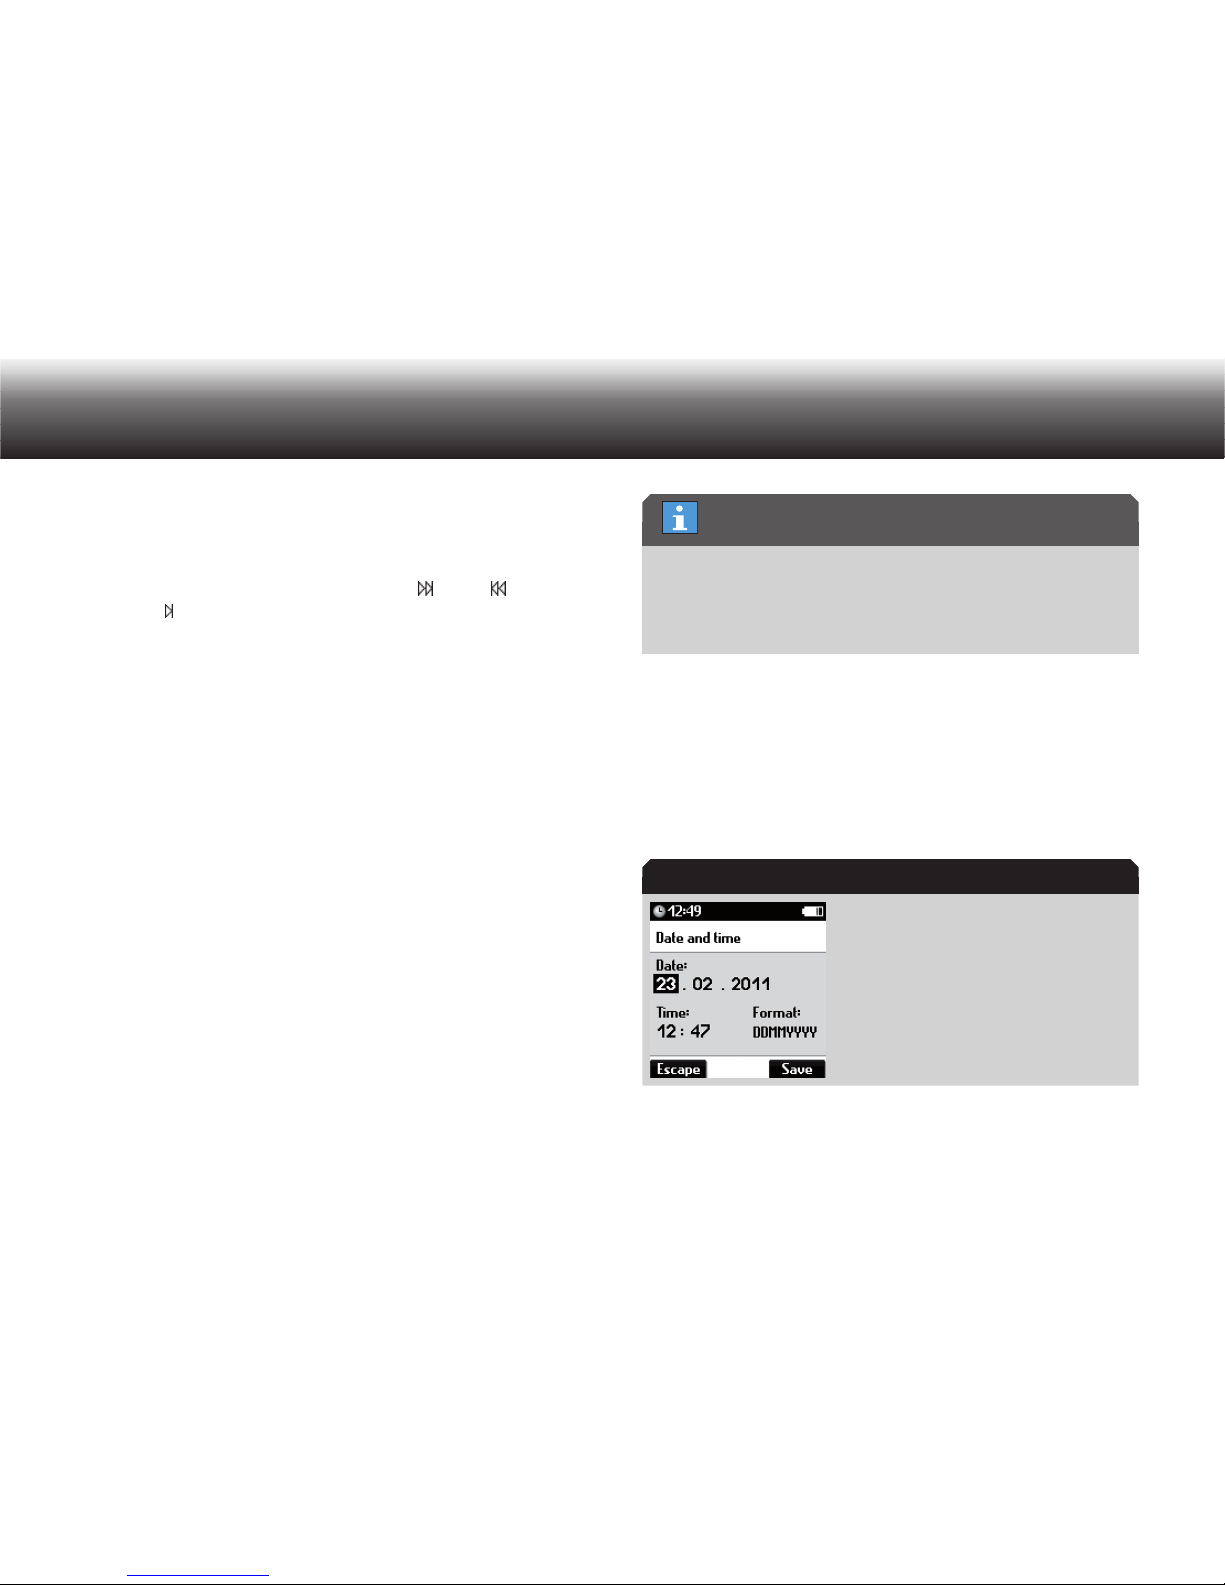
54
Menu functions
Record level display•
The display can be switched off if the pulsing level indicator is distracting during recording.
Recorder symbols•
This displays the symbols “
g”, “ll”, “i”, “ ”, “h”, “ ”, “e”, “f”,
and “
” on the right side of the screen.
They indicate the current function of the keys and help beginners
operate the keypad. If the recorder symbols are switched off, the
progress bar is longer and can more exactly indicate the dictation
position.
Activate or deactivate the x display option by pressing “OK”.
The check mark after the option appears or disappears. The option is
activated or deactivated.
Confirm the change using “ x Save”.
If you do not wish to save the change, press the “ x Escape” button.
Date and time
In the “Date and time” menu, you can set the current date and time. You
can select the format for the display.
If your Digta is connected via an USB connection to a PC with running
DigtaSoft or AdapterServerConfig, the date and time are automatically
synchronized with the settings on the PC.
You select select whether the day or the month is displayed first in the
date and whether the time is displayed in 12 (am/pm) or 24 hours.
DDMMYYYY 24hr., DDMMYYYY 12hr., MMDDYYYY 24hr., MMDDYYYY
12hr.
Press “ x MENU”.
Use the up/down buttons to navigate to the “ x Screen” menu item and
confirm using “OK”.
Select the “ x Date and time” subitem using the up/down buttons.
Confirm your selection using “OK”.
The setup window for the date and time appears.
Display in “Date and time” menu
You can use the left/right buttons to select the desired entry fields. x
Format for date and time
„Date and time“ menu
Page 56
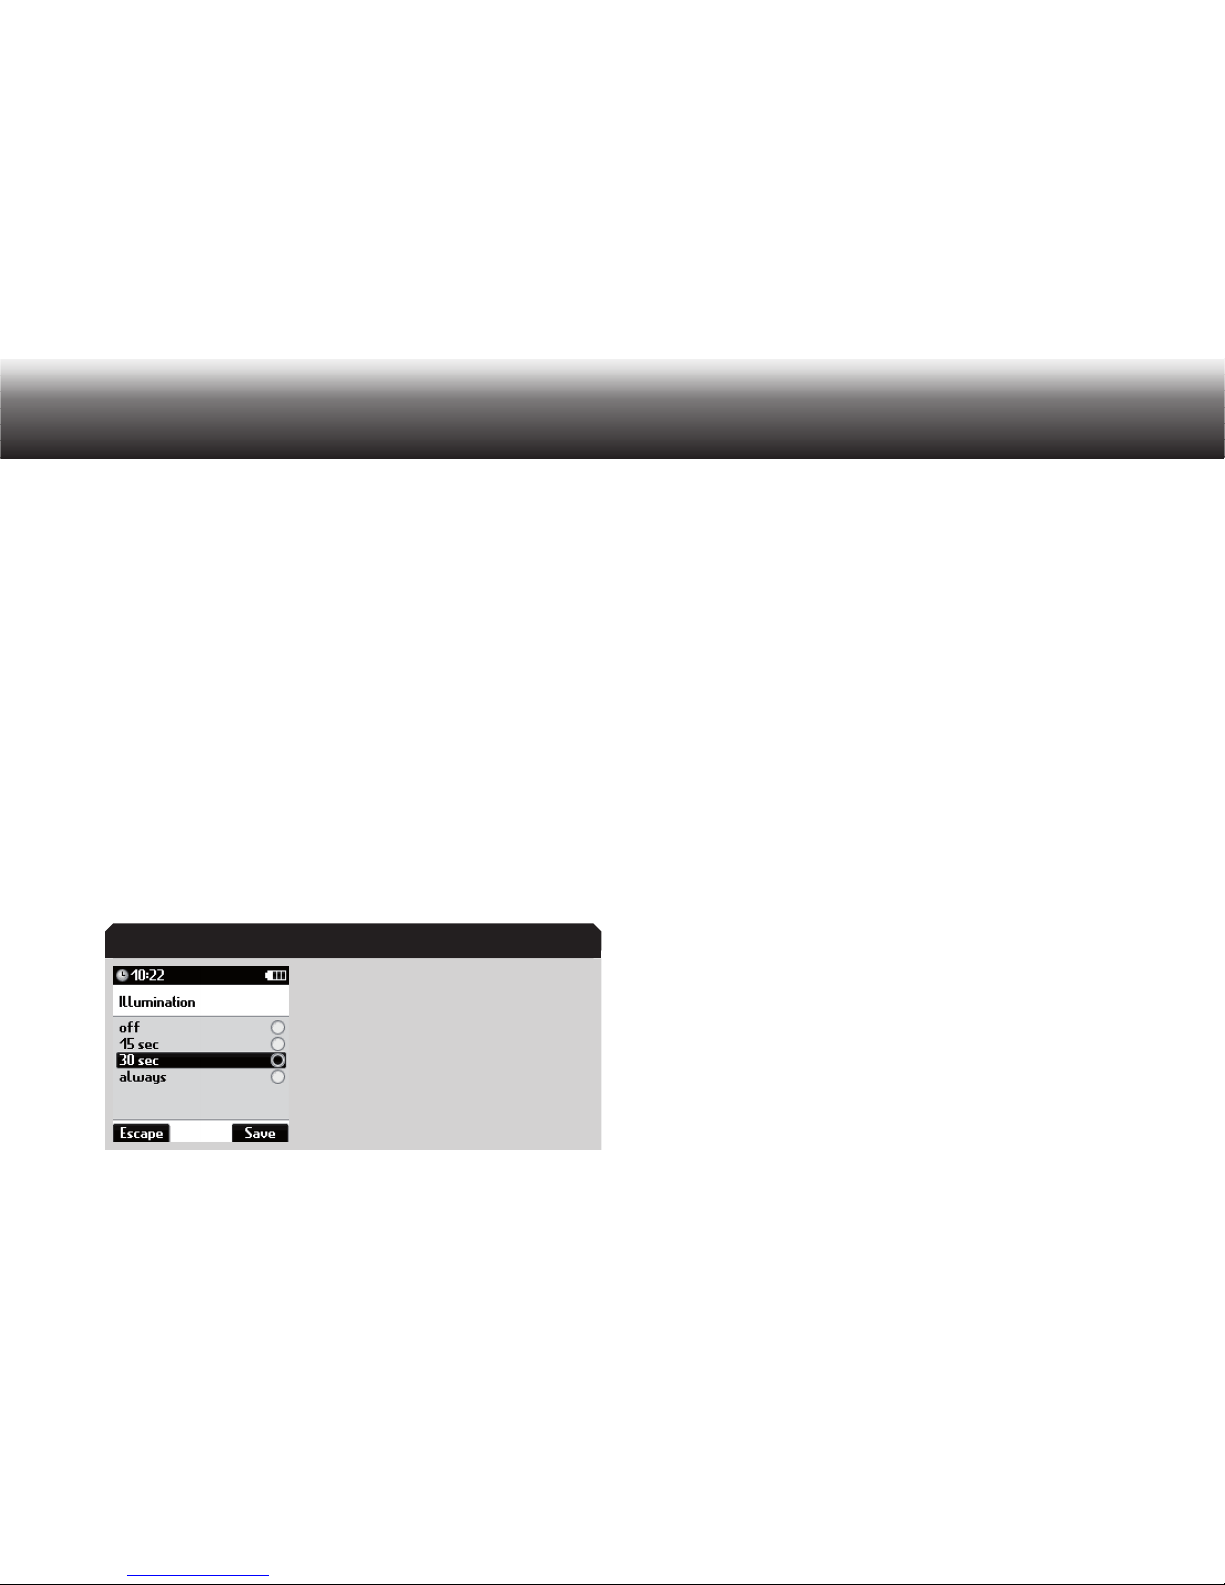
55
Menu functions
Enter the day, month, year, hour and minutes using the up/down but- x
tons and confirm each using “OK”.
Select the format for the date and time using the up/down buttons. x
Complete the entry using the “ x Save” button.
The date and time settings are applied.
If you do not wish to save the change, press the “ x Escape” button.
Illumination
In the “Illumination” menu, you can set the duration of the backlight.
Press “ x MENU”.
Use the up/down buttons to navigate to the “ x Screen” menu item and
confirm using “OK”.
Select the “ x Illumination” subitem using the up/down buttons.
Confirm your selection using “OK”.
Display in “Illumination” menu
Move to the desired option using the up/down buttons. x
Off•
15 sec.•
30 sec.•
Always•
Activate the selected display option by pressing “ x OK”.
Confirm the change using “ x Save”.
If you do not wish to save the change, press the “ x Escape” button.
Brightness
Press “ x MENU”.
Use the up/down buttons to navigate to the “ x Display” menu item
and confirm using “OK”.
Use the up/down buttons to navigate to the “Brightness” option and x
confirm using “OK”.
The setup window for the brightness appears.
“Illumination” menu
Page 57
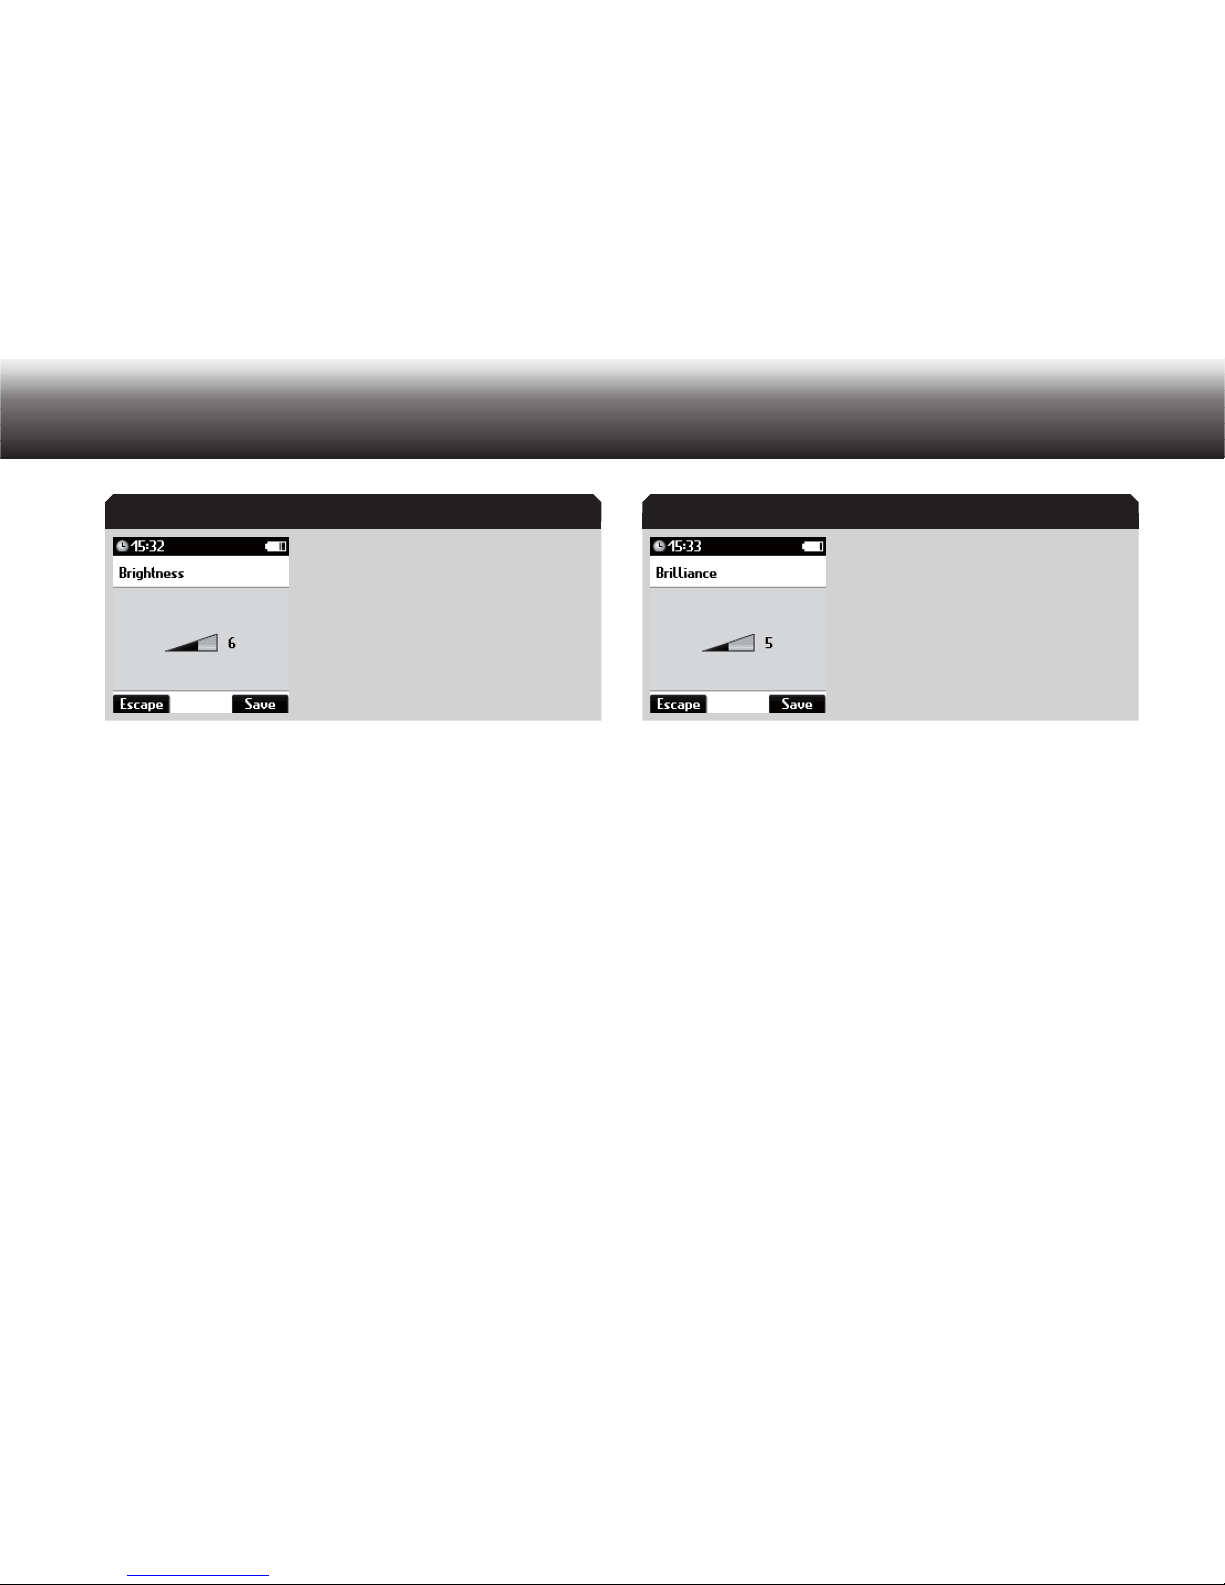
56
Menu functions
Display when setting the brightness
Adjust the brightness as desired using x the up/down buttons to select
a brightness level between 1 and 9.
The illumination becomes incrementally brighter/darker.
Confirm the change using “ x Save”.
If you do not wish to save the change, press the “ x Escape” button.
Contrast
Press “ x MENU”.
Use the up/down buttons to navigate to the “ x Display” menu item
Use the up/down buttons to navigate to the “ x Contrast” option and
confirm using “OK”.
The setup window for the contrast appears.
Display when setting the contrast
Adjust the contrast as desired using the up/down buttons to select a x
contrast level between 1 and 9.
The contrast of the display becomes incrementally stronger or
weaker.
Confirm the change using “ x Save”.
If you do not wish to save the change, press “ x Escape”.
Language
In the “Language” menu, you can select the language for all of the Digta’s displays and menus.
Press “ x MENU”.
Use the up/down buttons to navigate to the “ x Display” menu item
and confirm using “OK”.
Brightness Contrast
Page 58
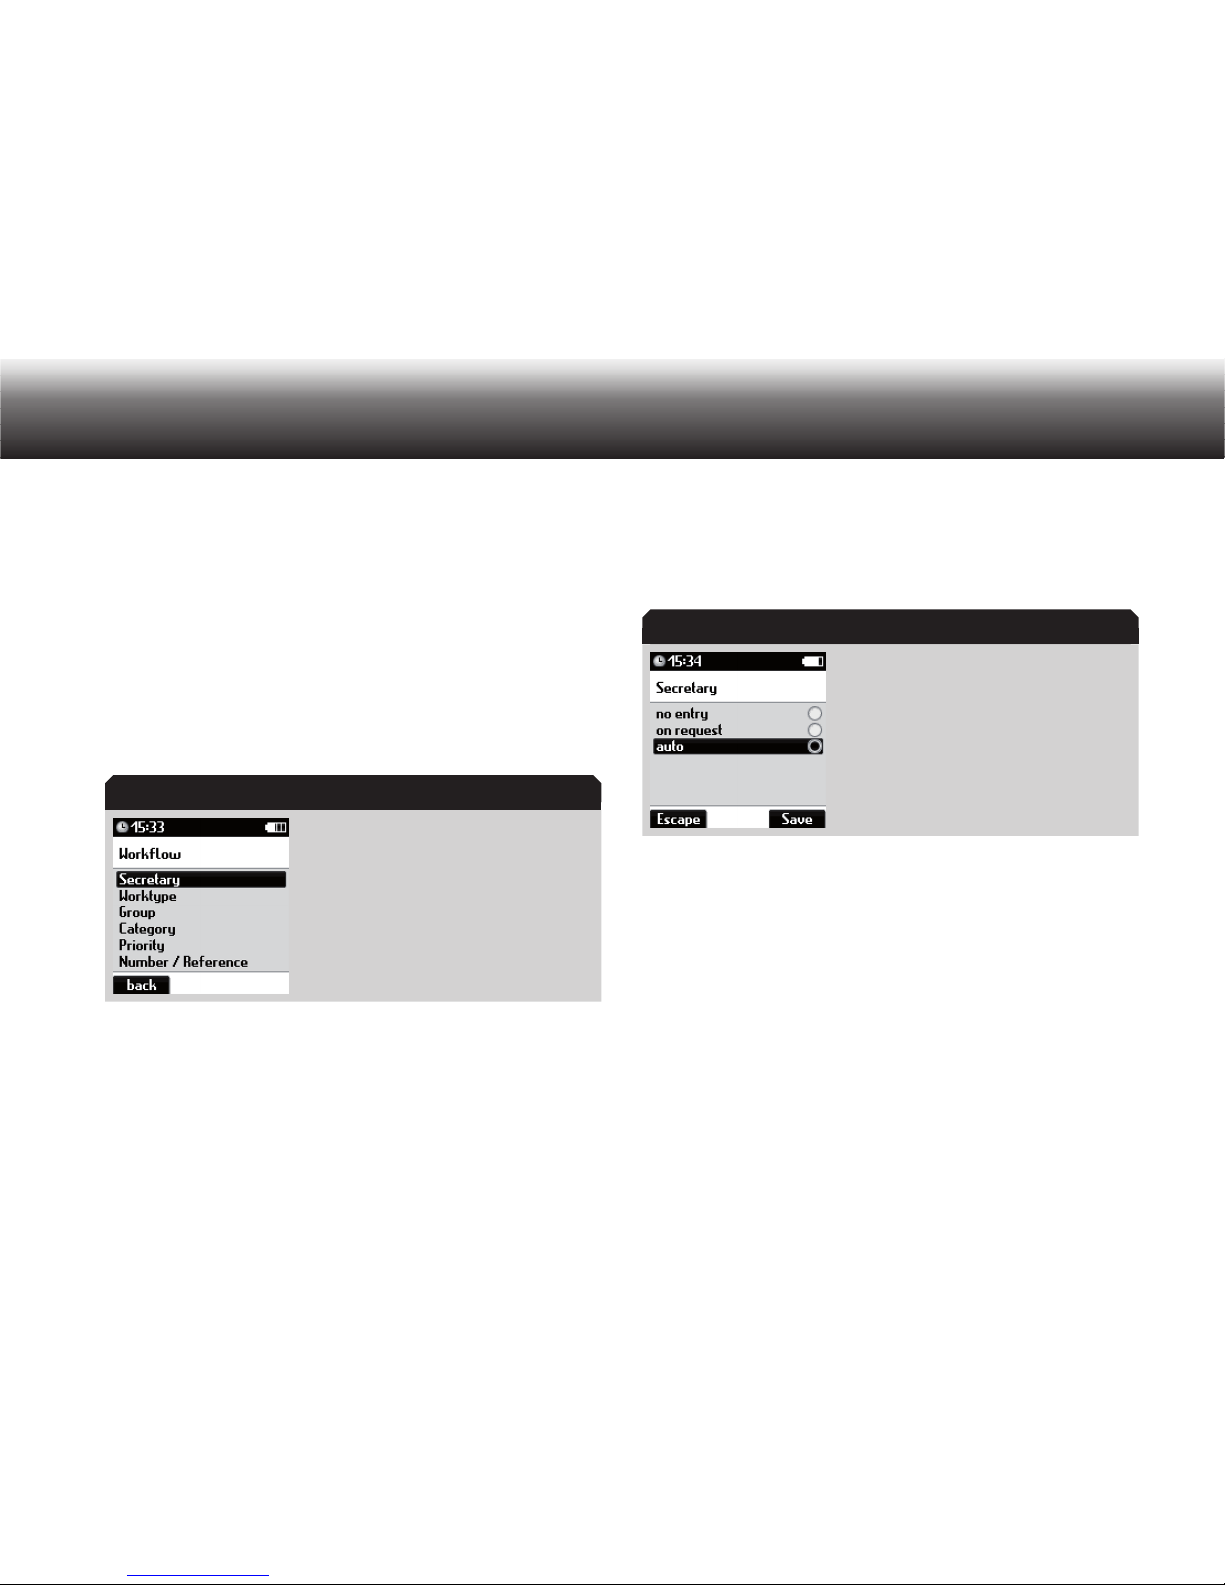
57
Menu functions
Select the “ x Language” subitem using the up/down buttons. Confirm
your selection using “OK”.
Move to the desired language using the up/down buttons. x
Activate the selected language by pressing “ x OK”.
The marker bullet moves to the highlighted bar.
Confirm the change using “ x Save”.
If you do not wish to save the change, press the “ x Escape” button.
5.9 Workflow
Display in “Workflow” menu
Secretary
With the “Secretary” function, you select which secretary receives your
dictation.
Press “ x MENU”.
Use the up/down buttons to navigate to the “ x Workflow” menu item
and confirm using “OK”.
Select the “ x Secretary” subitem using the up/down buttons. Confirm
your selection using “OK”.
Display in “Secretary” menu
Select one of the following settings using the up/down buttons: x
»On request«: • for each new dictation, a secretary is chosen from
a list
»No entry«: no • secretary is entered
»Auto«: The secretary is entered automatically, and each new dic-•
tation is assigned to the same secretary
Confirm the selection using the “ x Save” button.
If you have selected the “Auto” function, use the up/down buttons to
select a secretary from the list to whom all dictations will be sent. With
the “On request” setting, the secretary list also appears when a new
„Workflow“ menu
„Secretary” menu
Page 59
58
Menu functions
dictation is created in Easy mode. If no secretaries have been predefined in the list, “No entry” is shown on the display.
The list of secretaries is created by the system administrator and
can be transferred to the dictation machine using the configuration
software.
Worktype
With the “Worktype” function, you can select which standard form is
to be used for the dictation: for instance letter, meeting minutes and
invoice.
Press “ x MENU”.
Use the up/down buttons to navigate to the “ x Workflow” menu item
and confirm using “OK”.
Select the “ x Worktype” subitem using the up/down buttons. Confirm
your selection using “OK”.
Select one of the following settings using the up/down buttons: x
»On request«: • the user is asked to choose a standard form for
each new dictation
»No entry«: no • worktype is entered
»Auto«: • every new dictation has the same worktype
Confirm your selection using “ x OK”.
If you have selected the “Auto” function, use the up/down buttons to
select a worktype from the list which will be applied to all dictations.
With the “On request” setting, the list of worktypes also appears when a
new dictation is created in Easy mode. If no worktypes have been predefined in the list, “No entry” is shown on the display.
The list of worktypes is created by the system administrator and
can be transferred to the dictation machine using the configuration
software.
Group/category
With the “Group”* and “Category”* functions, you can assign further
classifications to your dictations, for instance a department, a cost center or a speech recognition dictionary. Your system administrator defines
the list items for “Group” and “Category” and can also rename the lists
as required.
Press “ x MENU”.
Use the up/down buttons to navigate to the “ x Workflow” menu item
and confirm using “OK”.
Select the “ x Group” or “Category” subitem using the up/down but-
tons. Confirm your selection using “OK”.
Select one of the following settings using the up/down buttons: x
»On request«: the option is given to choose a classification to •
Predefining list items
Predefining list items
Page 60
59
Menu functions
which to assign the dictation for each new dictation
»No entry«: no group/category is entered•
»Auto«: every new dictation has the same classification•
Confirm your selection using “ x OK”.
If you have selected the “Auto” function, use the up/down buttons to
select a classification from the list which will be applied to all dictations. With the “On request” setting, the group/category list also appears
when a new dictation is created in Easy mode. If no groups/categories
have been predefined in the list, “No entry” is shown on the display.
The lists of groups/categories are created by the system administrator and can be transferred to the dictation machine using the configuration software.
Priority
With the “Priority” function, you can select whether a new dictation
should be assigned a priority because its transcription should take
precedence.
The dictation is labeled with “!” above the dictation field.
In DSS Standard, priority levels from 1 (highest priority) to 16 (no priority) are possible. For every author that has been set up, you can
associate an individual maximum author priority to a dictation. The
preset priority for the author DICT is 15.
The dictation machine should be configured using the accompanying PC
software. Transfer your author names and a maximum priority less than
16 to your dictation machine.
If the dictation software is installed on a network, a system administrator must configure the dictation machine.
Press “ x MENU”.
Use the up/down buttons to navigate to the “ x Workflow” menu item
and confirm using “OK”.
Select the “ x Priority” subitem using the up/down buttons. Confirm
your selection using “OK”.
Select one of the following settings using the up/down buttons: x
»No entry«: no priority is set for new dictations•
»On request«: for each new dictation, you can choose between •
“Without priority” and “With priority” (maximum priority level for
author)
Confirm your selection using “ x OK”.
Predefining list items
Predefining list items
Page 61
60
Menu functions
The priority of a dictation can also be set or deleted in the main screen
under “Details” (see section “Changing of dictation features/Priority”).
Numbers/reference
With the “No./Reference” function, you can enter up to 16 characters for
your dictation, for example file references or patient numbers.
Press “ x MENU”.
Use the up/down buttons to navigate to the “ x Workflow” menu item
and confirm using “OK”.
Select the “ x No./Reference” subitem using the up/down buttons.
Confirm your selection using “OK”.
Select one of the following settings: x
»On request«: • for each new dictation, the option to enter a refer-
ence is given.
»No entry«: no number/reference is entered•
»Auto«: • every new dictation has the same number/reference
»Prefix on/off«: Switch the prefix on/off•
Confirm your selection using “ x OK”.
If you have selected the “On request” function, when a new dictation is
created either an empty field or a fixed predefined entry is displayed.
Use the text editor to enter your reference (characters) (see the section
“Initial Setup/Navigation/Text editor“).
The predefined entry can be set to your typical initial number or reference using the configuration software.
If something was entered for the previous dictation, the previous entry is
displayed. You can accept the entry or delete it.
5.10 Device settings
Sleep mode
With the “Sleepmode” function, you can determine whether the device
automatically switches to an energy-saving “sleep mode” with a time
and date display after several minutes. The device can be immediately reactivated by pressing any button. If the device is not switched off
manually, it switches itself off after 30 minutes of sleep mode.
In the “Sleepmode” menu, you can set the amount of time after which
the device automatically switches to sleep mode.
Press “ x MENU”.
Use the up/down buttons to navigate to the “ x Device settings” menu
item and confirm using “OK”.
Select the “ x Sleepmode” subitem using the up/down buttons.
Confirm your selection using “OK”.
Move to the desired option using the up/down buttons. x
Limited character (reference) selection
Page 62
61
Menu functions
5 min•
15 min•
30 min•
Never•
Activate the selected option by pressing “ x OK”.
The marker bullet moves to the highlighted bar.
Confirm the change using “ x Save”.
If you do not wish to save the change, press the “ x Escape” button.
Acoustic signals
In the “Acoustic signals” menu, you can switch on/off the signals you
find bothersome.
Press “ x MENU”.
Use the up/down buttons to navigate to the “ x Device settings” menu
item and confirm using “OK”.
Select the “ x Acoustic signals” subitem using the up/down buttons.
Confirm your selection using “OK”.
Move to the desired option using the up/down buttons. x
Acknowledge beeps•
Warning beeps•
Notification beeps•
Activate or deactivate the desired acoustic signal by pressing “ x OK”.
The check mark after the function appears or disappears. The
acoustic signal is activated or deactivated.
Confirm the change using “ x Save”.
If you do not wish to save the change, press x “Escape”.
If all signals are switched off, no signal sounds when the memory is
full or the rechargeable battery* is empty. In this case, if you dictate
without paying attention to the screen the device may switch off without a signal sounding. You may continue to dictate and the text will
not be recorded.
If only the warning signals are switched on, no notification signals will
sound, for example the standby signal after the device is switched on
or the info and index signals.
USB connection
You can choose whether the dictation machine automatically switches
to USB mode when a USB connection to a PC is established or whether
you would prefer to activate this function manually from the menu.
Press “ x MENU”.
Use the up/down buttons to navigate to the “ x Device settings” menu
item and confirm using “OK”.
Acoustic signals absent
Page 63
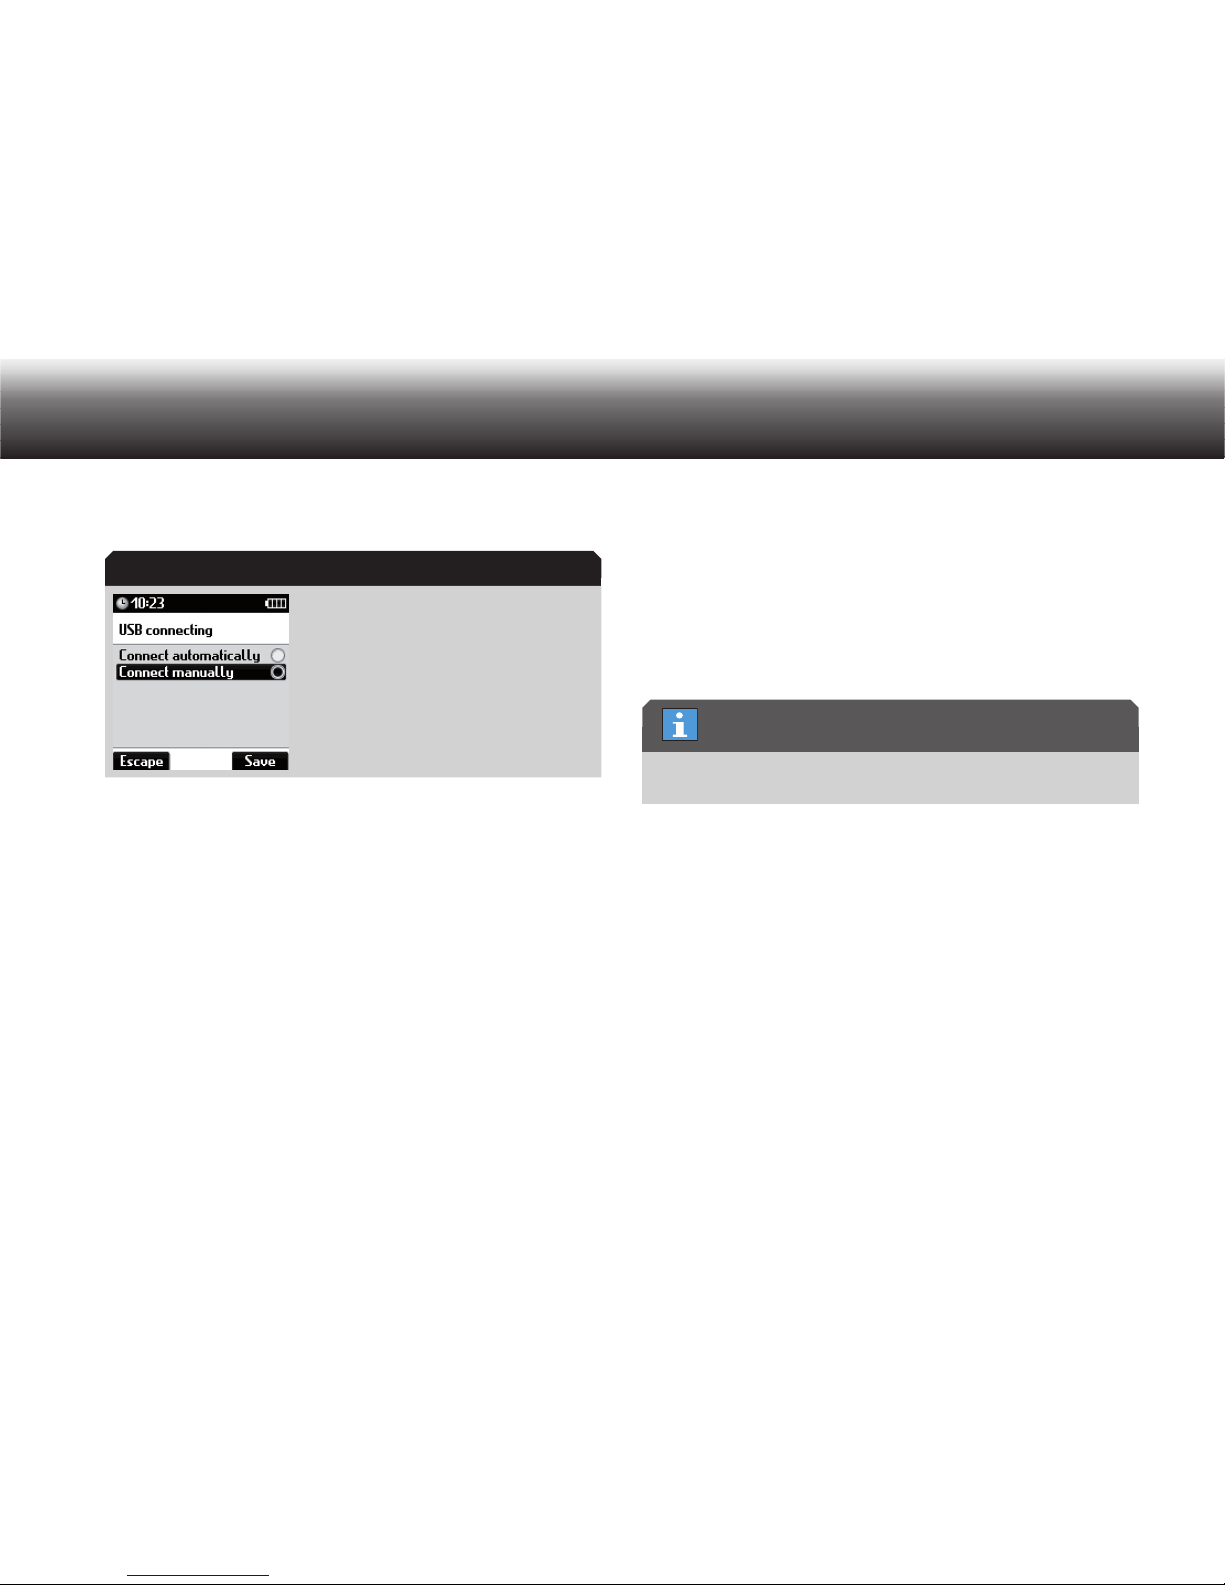
62
Menu functions
Select the “ x USB connecting” subitem using the up/down buttons.
Confirm your selection using “OK”.
Display in “USB connecting” menu
Select one of the following settings: x
»Connect automatically• «: USB mode switches on automatically
»Connect manually• «: USB mode is only switched on manually
Confirm the selection using the “ x Save” button.
If you do not wish to save the change, press the “ x Escape” button.
If “Connect automatically” is selected, USB mode automatically switches
on when a switched-on dictation machine is connected to the USB port
of a PC. The PC recognizes the device as a removable storage device
and USB Audio and USB HID are active. You can now exchange data
between the PC and the dictation machine, as well as using the dictation machine as a USB microphone.
For the setting “Connect manually”, the dictation machine remains in
dictation mode when connected via USB. It is supplied with power from
the PC. If you wish to transfer dictations to the PC, select “USB mode”
from the menu and confirm by pressing OK. The device then establishes
a connection with the PC.
Speaker
If you are listening to your dictation using headphones that are connected to the Digta Station*, you can switch off the speaker of the dictation
machine.
If you connect an earpiece to the Digta’s earphone jack, the dictation
machine’s speaker is automatically switched off.
In the “Speaker” menu, you can switch the Digta’s speaker on or off.
Press “ x MENU”.
Use the up/down buttons to navigate to the “ x Device settings” menu
item and confirm using “OK”.
Select the “ x Speaker” subitem using the up/down buttons. Confirm
your selection using “OK”.
Move to the desired option using the up/down buttons. x
Speaker on•
Speaker off•
Activate the selected option by pressing “ x OK”.
The marker bullet moves to the highlighted bar.
“USB connecting” menu
Earpiece
Page 64
63
Menu functions
Confirm the change using “ x Save”.
If you do not wish to save the change, press the “ x Escape” button.
Fast forward/rewind
In the “Fast forward/rewind” menu, you can switch on or off the audible
play-back during fast forward/rewind. You can also adjust the speed of
the fast forward and rewind to your preferences.
Press “ x MENU”.
Use the up/down buttons to navigate to the “ x Device settings” menu
item and confirm using “OK”.
Select the “ x Fast forward/rewind” subitem using the up/down but-
tons. Confirm your selection using “OK”.
Select the desired option using the up/down buttons: x
»Audible«: During fast forward and rewind, snippets of the record-•
ing are played back. This could cause you to encounter long
pauses or different speakers. If this play-back is bothersome it
can be switched off. The fast forward and rewind is then somewhat faster.
The fast forward/rewind function is not audible with the WAV and MP3
recording formats.
»Speed«: When listening for specific information during rewind, •
you may miss the intended position. You can thus reduce the
speed of the fast forward and rewind. If the fast forward and
rewind is too slow for long dictations, you can increase the
speed.
The play-back speed for fast forward and rewind can be set to the
following levels: 30, 50, 80, 100, 120, 150 and 200 percent.
Confirm your selection using x “OK”.
You enter the submenu with the settings that can be used for switching the play-back of snippets on and off during fast forward and
rewind as well as determining the speed of that play-back.
Activate the selected setting by pressing “ x OK”.
The marker bullet moves to the highlighted bar.
Confirm the change using “ x Save”.
If you do not wish to save the change, press the “ x Escape” button.
Rechargeable batteries
In the “Rechargeable batteries” menu, you can set the the power supply
for your Digta. If you wish to operate the device using other, externally
charged rechargeable batteries, for instance NiMH batteries, you must
switch the power source in this menu. Only then will the battery display
and the automatic shutoff function correctly.
WAV* and MP3*
Speed of fast forward and rewind
Page 65
64
Menu functions
Data protection when rechargeable battery is empty
If you do not switch the power source, the Digta will not recognize
when the rechargeable battery is almost empty and can therefore not
save dictations and switch off in time.
Press “ x MENU”.
Use the up/down buttons to navigate to the “ x Device settings” menu
item and confirm using “OK”.
Select the “ x Rechargeable batteries” subitem using the up/down
buttons. Confirm your selection using “OK”.
Move to the desired option using the up/down buttons: x
Batt.Pack962/batteries•
Other recharg. batt.•
Activate the selected power source by pressing “ x OK”.
The marker bullet moves to the highlighted bar. If you have selected x
“Brightness”, the submenu for setting the brightness opens.
Confirm the change using “ x Save”.
Foot control
With the “Foot control” function, you can select the functions of the foot
control* for recording or play-back. You can set whether the foot control
is to be used for transcription* or for hands-free dictation.
The foot control comes preconfigured for hands-free dictation. For
transcription, it first must be switched to “Fast forward” in the “Foot
control/Middle pedal” menu.
Press “ x MENU”.
Use the up/down buttons to navigate to the “ x Device settings” menu
item and confirm using “OK”.
Select the “ x Foot control” subitem using the up/down buttons.
Confirm your selection using “OK”.
Select the desired option using the up/down buttons: x
»Middle pedal«: The pedal can either be used for recording •
(hands-free dictation) or for fast forward (transcription).
»Short rewind«: Here you can set the length of the short rewind •
between 0 and 10 seconds. Each time play-back is started, the
current dictation position is moved backwards by the set amount
of time. This causes the most recent dictation part to be repeated.
NOTICE
Factory settings
Page 66
65
Menu functions
Short rewind is only available when using the Digta Station* and the
foot control.*
The “Short rewind” function is only possible when the foot control is
set to “Fast forward”. During hands-free dictation, the right pedal is
without short rewind.
Confirm your selection using x “OK”.
You enter the submenu with the possible settings for the middle
pedal and the time for the short rewind.
Activate the selected setting by pressing “ x OK”.
The marker bullet moves to the highlighted bar.
With the “Fast forward” menu setting, it is not possible to change an
existing dictation or create a new dictation. If the NEW button or the
record button is pressed, the message “Play-back only” appears.
Confirm the change using “ x Save”.
If you do not wish to save the change, press the “ x Escape” button.
Configuration of the foot control during recording
The switches of the foot control are configured for hands-free dictation.
Left pedal Middle pedal Right pedal
Rewind• Quick press: Switch •
recording on/off
Long press: create new •
dictation (same function
as “NEW” button on the
dictation machine)
The red recording indicator lights up, a new dictation name appears.
Start/stop record-•
ing and play-back
(same function as
keypad on the dictation machine)
Configuration of the foot control during play-back
The switches of the foot control are configured for transcription.
Left pedal Middle pedal Right pedal
Rewind• Fast forward• Start/stop play-•
back
Reset counter
In the “Reset counter” menu, you can reset the dictation counter.
Availability of short rewind
Fast forward
Page 67
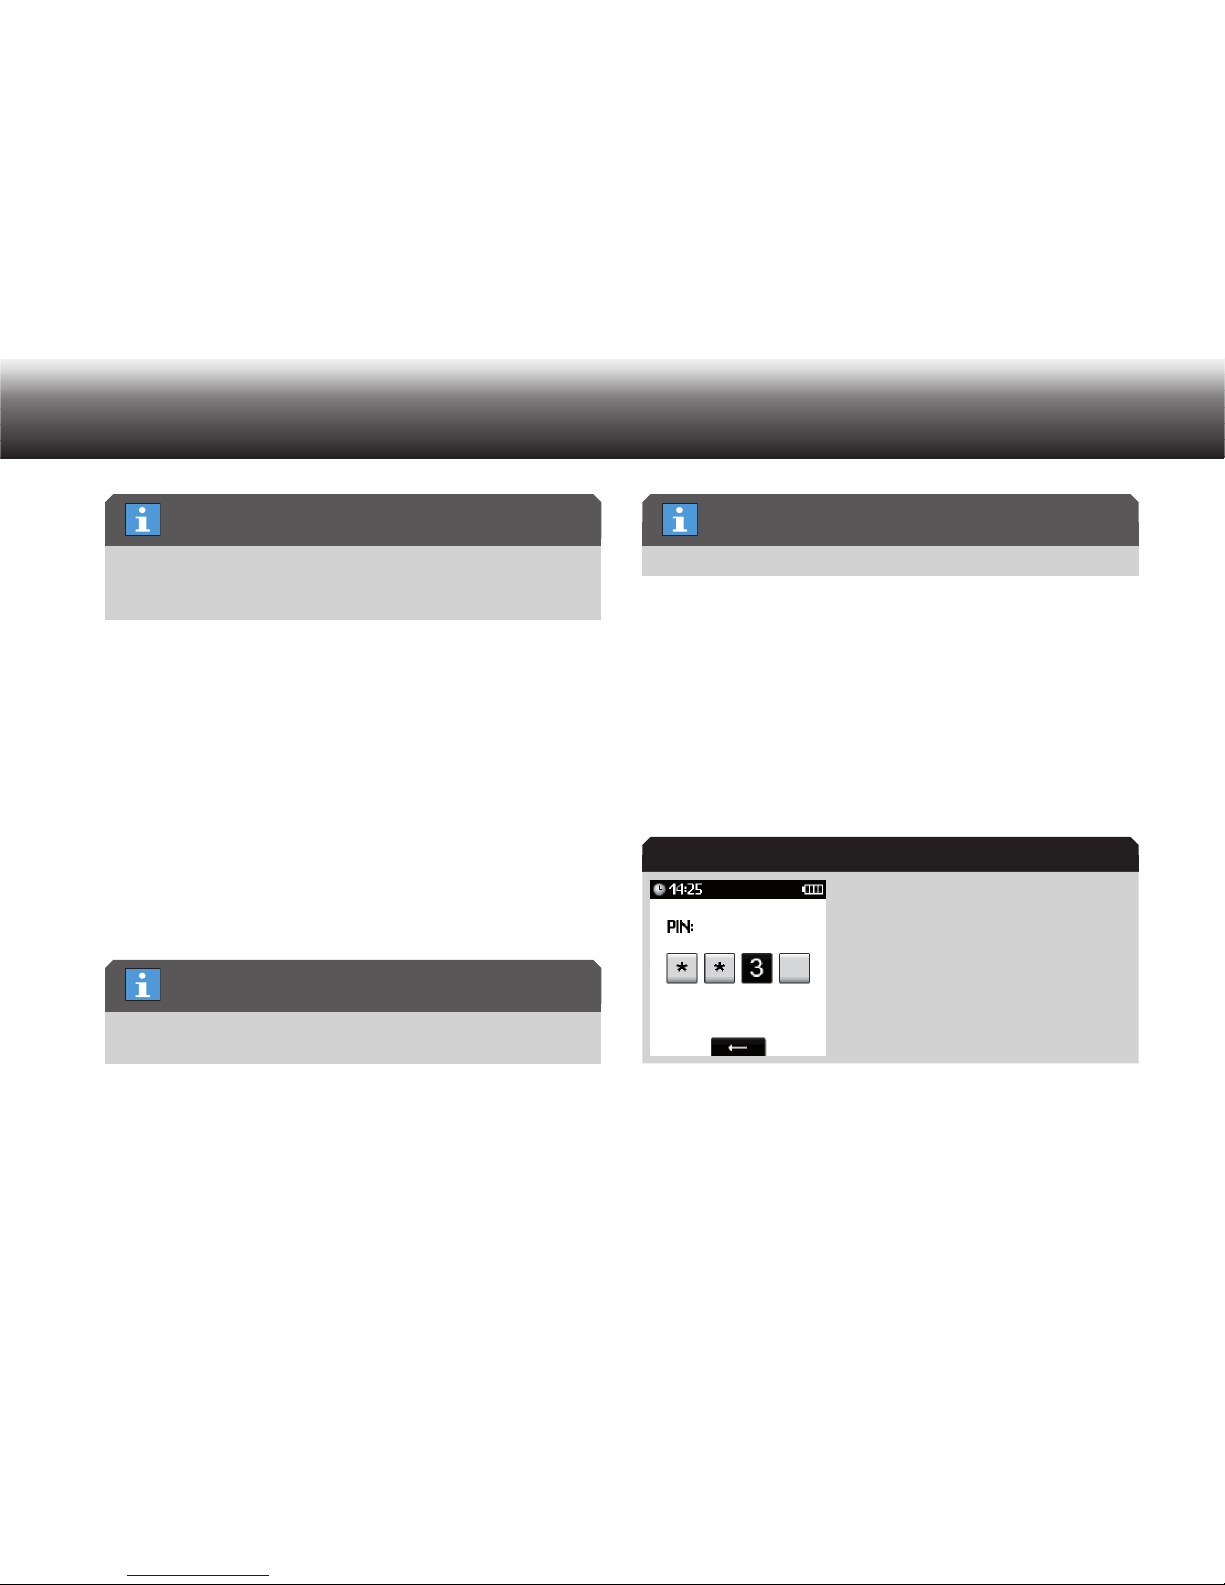
66
Menu functions
The dictation counter goes up to 9999. You should not reset the Digta’s counter too often; otherwise conflicts could arise as a result of
dictations having the same name saved on the PC.
Press “ x MENU”.
Use the up/down buttons to navigate to the “ x Device settings” menu
item and confirm using “OK”.
Select the “ x Reset counter” subitem using the up/down buttons.
Confirm your selection using “OK”.
A confirmation prompt appears.
Confirm using “ x OK” to reset the counter permanently.
The next dictation that you record will then have the lowest available number.
Change PIN
You Digta is equipped with a PIN/PUK function. The PIN can be activated using the software included with delivery.
Activating the PIN (personal identification number) protects your device
against unauthorized use. Use a number combination that is known only
to you as your pin.
The factory setting of the PIN is 0000.
In the “Change PIN” menu, you can delete the previous PIN and set a
new PIN.
Press “ x MENU”.
Use the up/down buttons to navigate to the “ x Device settings” menu
item and confirm using “OK”.
Select the “ x Change PIN” subitem using the up/down buttons.
Confirm your selection using “OK”.
A prompt for the previous PIN appears.
Display during PIN prompt
Enter the previous PIN by selecting the digits using the up/down but- x
tons and confirming each individual digit by pressing “OK”.
Resetting frequency
PIN/PUK function
PIN/PUK function
PIN prompt
Page 68
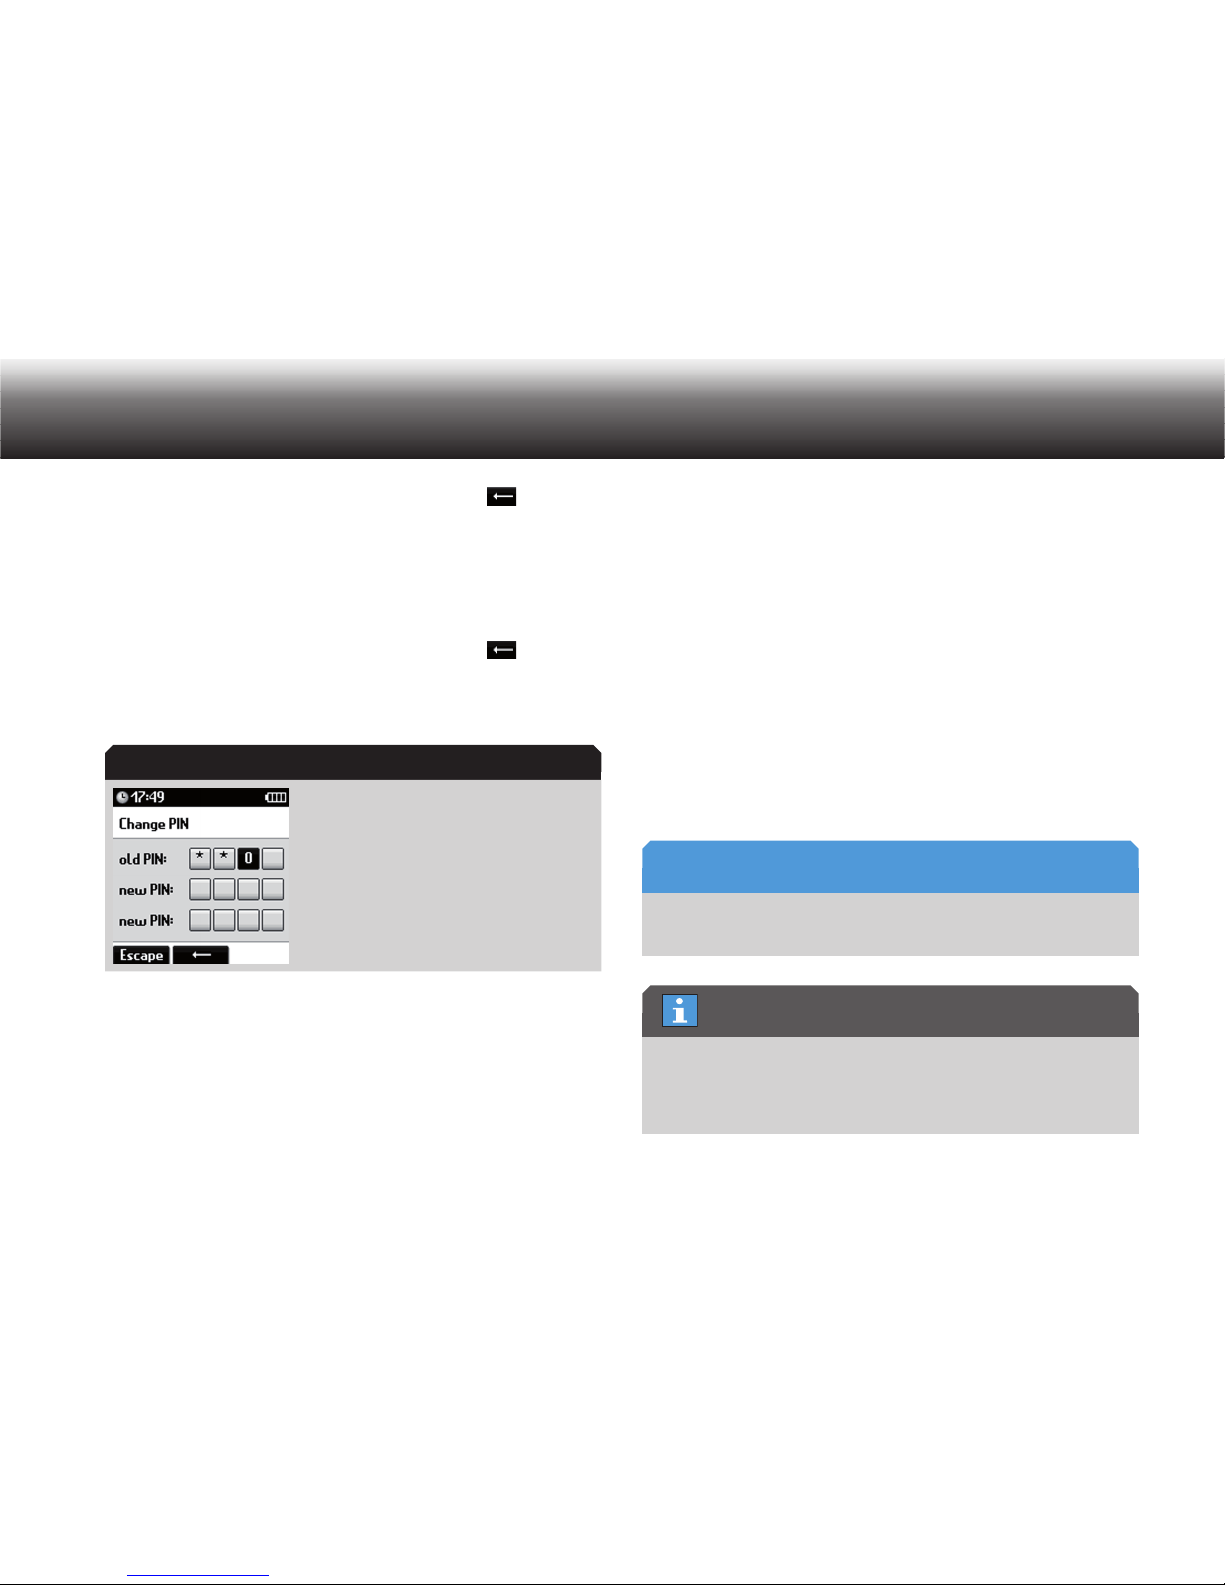
67
Menu functions
If you have made a mistake in the entry, press the “ x ” button.
You will return to the previous digit and can repeat the entry. x
A window appears for entering a new PIN.
Enter the new 4-digit PIN by selecting the digits using the up/down x
buttons and confirming each individual digit by pressing “OK”.
If you have made a mistake in the entry, press the “ x
” button.
You will return to the previous digit and can repeat the entry. x
A prompt for the new PIN appears.
Display during PIN entry
Enter the new PIN again to confirm it. x
The new PIN is saved.
Reset
In the “Reset” menu, you can reset the memory and device settings of
the Digta.
Press “ x MENU”.
Use the up/down buttons to navigate to the “ x Device settings” menu
item and confirm using “OK”.
Select the “ x Reset” subitem using the up/down buttons. Confirm your
selection using “OK”.
Move to the desired option using the up/down buttons. x
»• Format memory«: formats the internal memory or a removable
external memory card. During the formatting process, a busy
indicator appears as a revolving point. A notice appears on the
display when formatting is completed. Confirm by pressing OK.
Directories and files with administrative data are saved in both
the internal and the external memory. Therefore, not all of the
memory capacity is available for recording dictations.
Data loss
Formatting the memory causes all dictations and files to be deleted.
If a list with several authors is installed in the Digta, the function “Format memory” is only available if there are no dictations in the memory. This prevents dictations from inadvertently being deleted by another user.
Change PIN
NOTICE
Formatting with several authors
Page 69
68
Menu functions
Ensure that an external memory card is inserted so that the internal
memory is not inadvertently formatted.
The internal memory and the external memory card must not be formatted as removable storage devices using the formatting function
of a PC.
»• Reset settings«: all settings which were changed in the menus
or using the configuration software are reset to factory settings.
Saved dictation, files and data (e.g. PIN, author name, workflow
lists) are retained.
»• Factory reset«: all settings are completely reset to factory set-
tings and all files and data are deleted. Presets for the note
accompanying the dictation that were changed using the PC software are reset to “No entry”. The author name is reset to “DICT”.
Data loss
During a factory reset, all dictations, files, data and settings are
deleted.
If a list with multiple authors is installed in the Digta, the “Factory reset” function is only available if there are no dictations in the
memory. This prevents dictations from inadvertently being deleted by
another user.
Activate the selected option by pressing “ x OK”.
Confirm the change using “ x Save”.
If you do not wish to save the change, press the “ x Escape” button.
5.11 Device info
Version
Using the “Version” function, you can display the version of the device
software (firmware), the serial number and the version of the printed
circuit board.
For information on new firmware versions, please visit our website:
www.grundig-gbs.com
Press “ x MENU”.
Formatting the external memory
Formatting using a PC
NOTICE
Factory reset when there are several authors
Application
Page 70
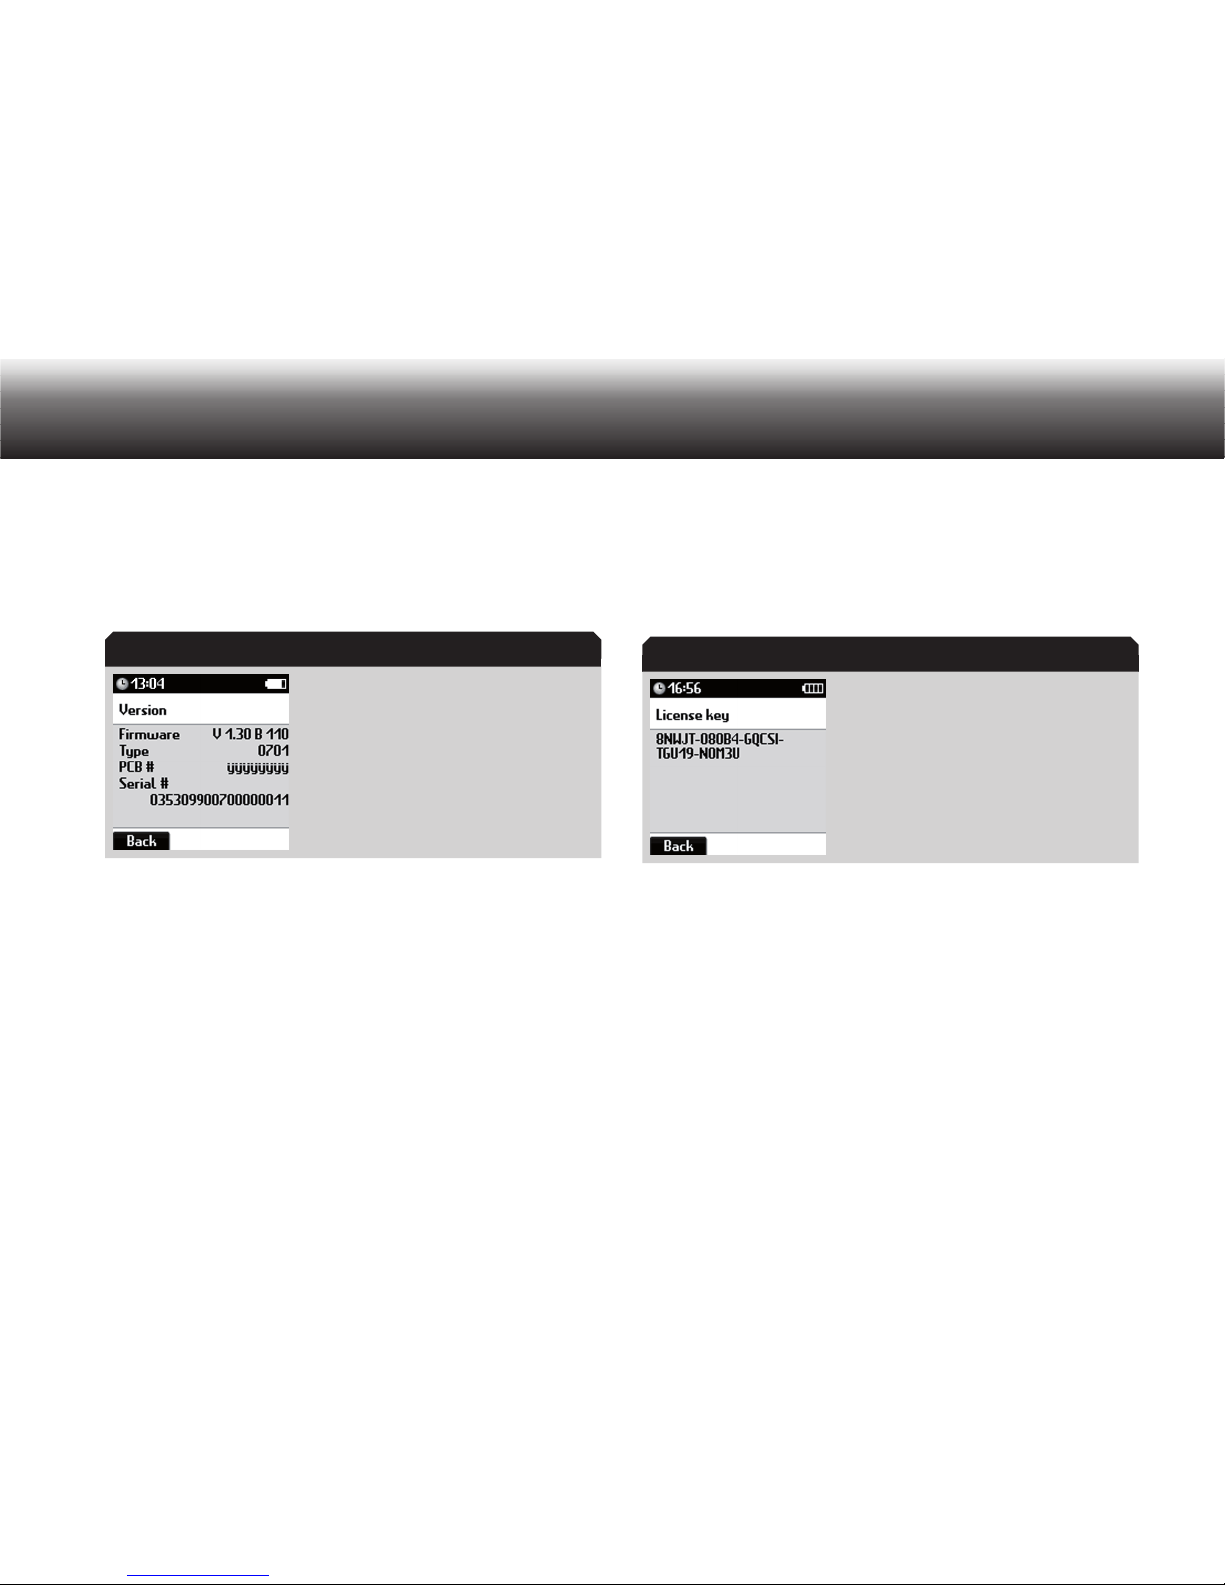
69
Menu functions
Use the up/down buttons to navigate to the “ x Device info” menu item
and confirm using “OK”.
Select the “ x Version” subitem using the up/down buttons. Confirm
your selection using “OK”.
The version information appears on the display.
Display of version information
»Firmware«:• version of the device software
»Type«: device type•
»PCB #«: version number of the printed circuit board•
»Serial #«: model and serial number•
Pressing the “ x Back” button, takes you back to the “Device info”
menu.
License key
The license code is displayed in the menu under “Device info/License
key”. This helps to find out which additional functions (e.g. speech
recognition) are activated in the event of servicing or during hotline
counseling.
Memory
Using the “Memory” function, you can display the current capacity of
the internal or external memory.
Press “ x MENU”.
Use the up/down buttons to navigate to the “ x Device info” menu item
and confirm using “OK”.
Select the “ x Memory” subitem using the up/down buttons. Confirm
your selection using “OK”.
Version information
License key
Page 71
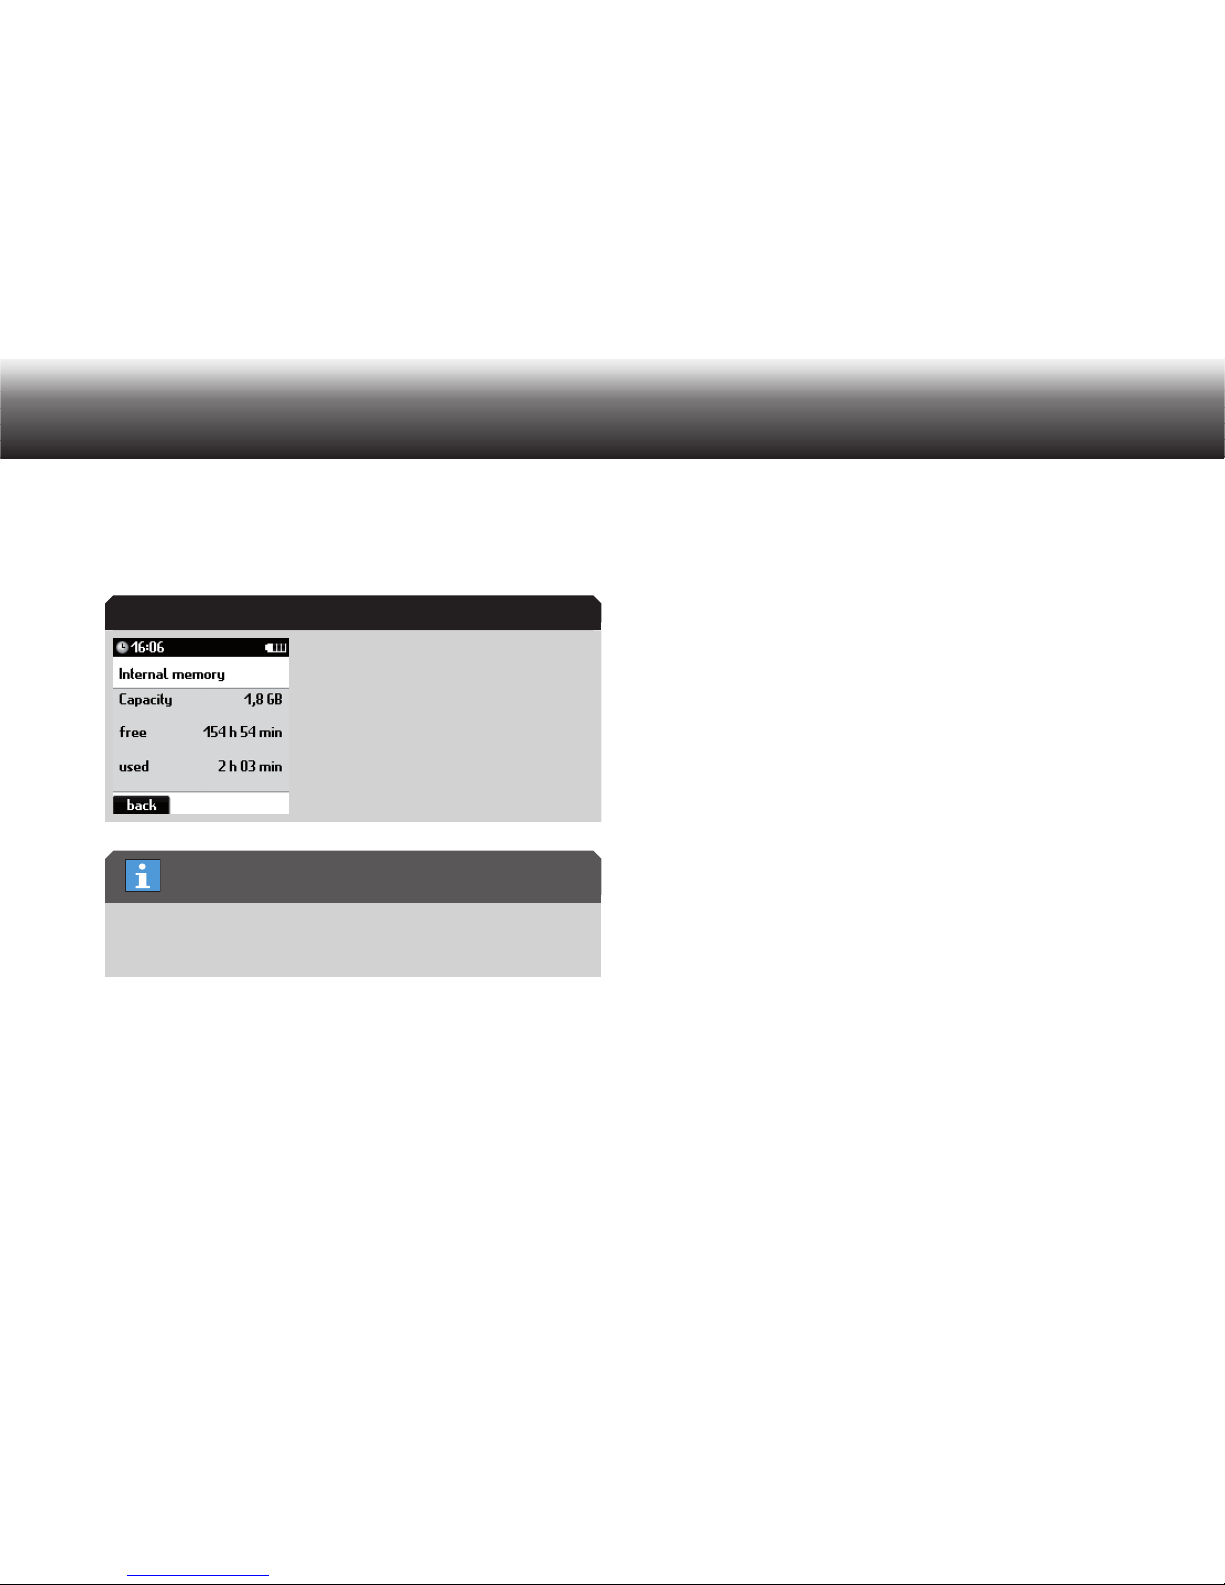
70
Menu functions
The data regarding the capacity of the current memory appears on
the display:
»• Internal memory«: factory-installed internal memory
»• External memory«: MMC or SD card inserted into the device
Display of memory capacity for the example of
the internal memory
The displayed time in hours and minutes corresponds to dictation
time in the current recording quality (for instance SP, QP, WAV, MP3,
...).
Pressing the “ x Back” button, takes you back to the “Device info”
menu.
Memory capacity
Memory capacity in dictation time
Page 72
71
Barcode scanner
Barcode scanner6.
Using barcodes6.1
You can scan in a barcode for every new dictation. The recognized barcodes are saved in the header of the DSS file in the “Subject” field and
thus also displayed in the note accompanying the dictation. Other software which evaluates the DSS header (for instance a database system)
can then organize the dictations using the scanned barcodes.
The scanned barcodes can later be displayed or automatically processed by software that evaluates the DSS header (for instance a database system).
The scanned barcodes are displayed in the PC software delivered with
the dictation machine and in the transcription software, both
in the overview of the note accompanying the dictation (see •
“Accompanying note” in the program’s help section), and
in the dictation list (if the “Topic” field is activated; see “Sort” in the •
program’s help section).
We offer a software development kit (SDK) for integrators that evaluate the note accompanying the dictation, for instance to create links
to database entries.
6.2 Connect scanner
The scanner’s connector is mechanically and electrically identical to
that of a memory card.
The corresponding menu items can only be selected on the hand-held
dictation machine when a scanner* is connected.
Damage
Switch the dictation machine off before plugging or unplugging the
Digta Scan.
Connect the Digta Scan to your hand-held dictation machine as x
shown in the following figure:
Helpful software
NOTICE
Page 73
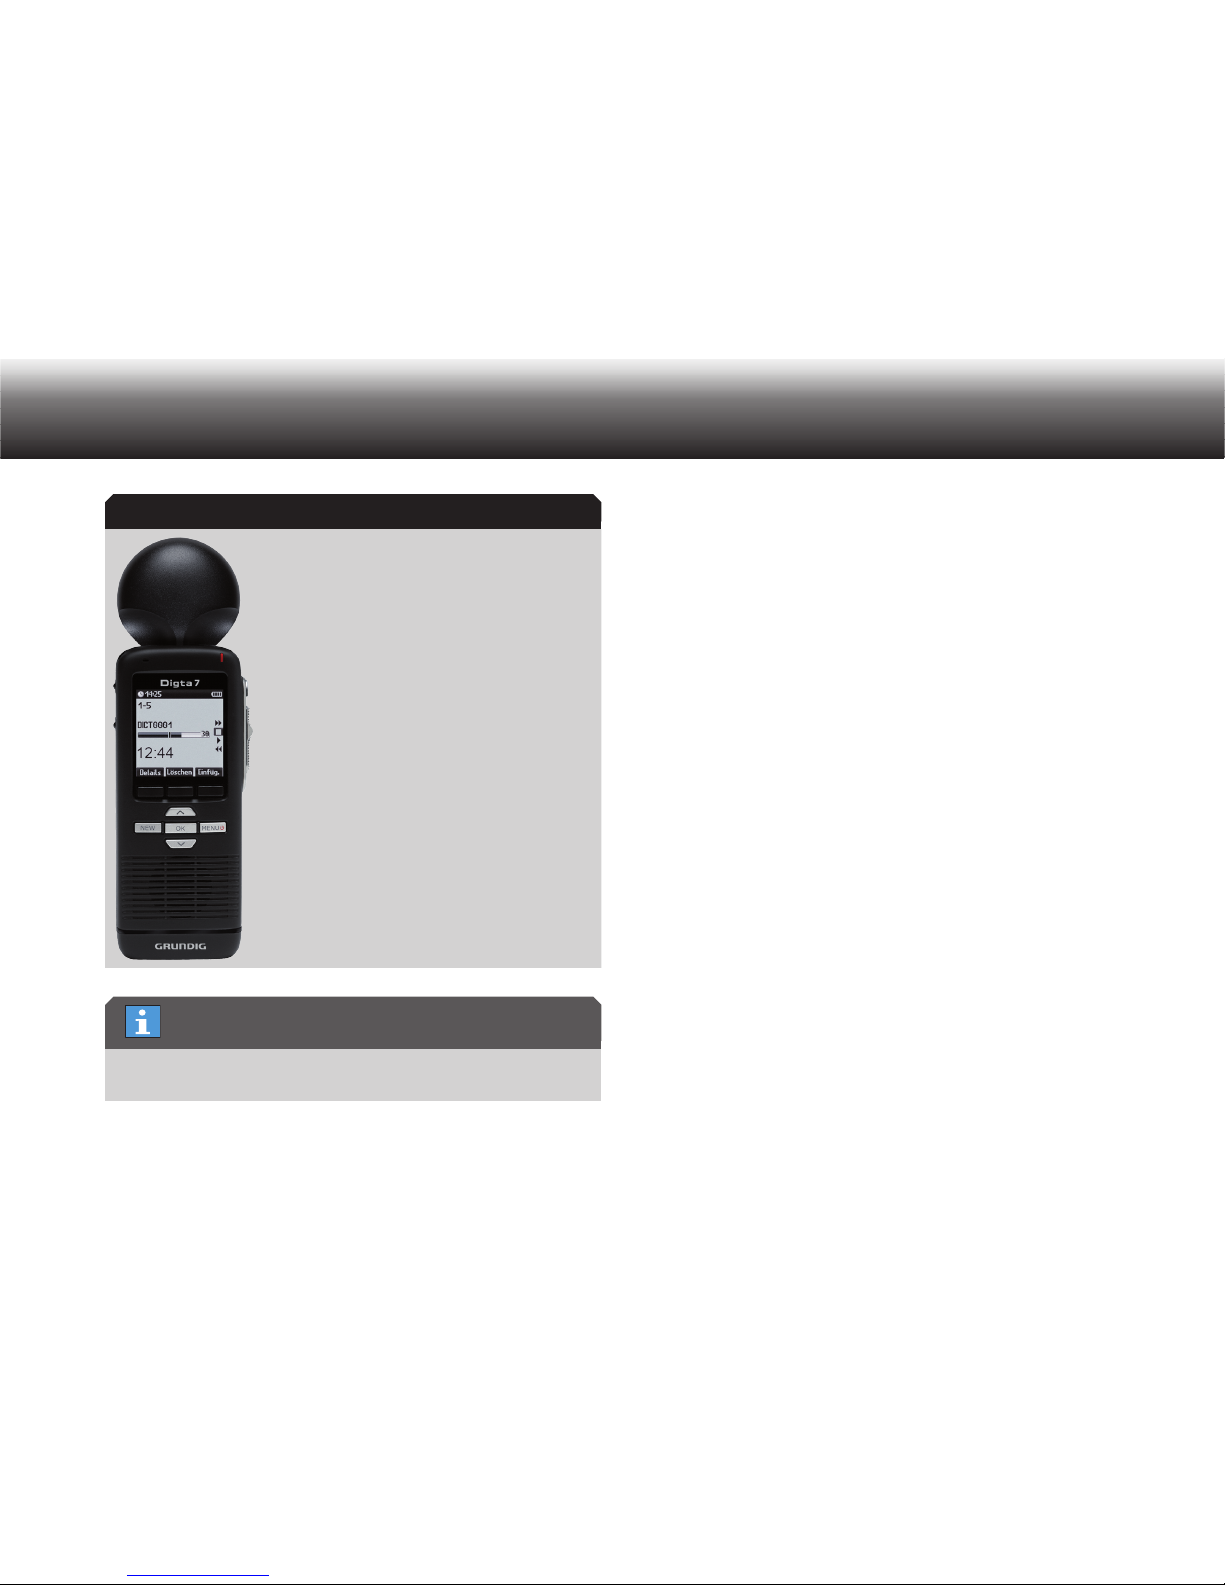
72
Barcode scanner
Digta 7 with Digta Scan 407
Ensure that the scanner’s carrying clip locks into place in the slot on
the back of the dictation machine.
Scan barcode for a dictation6.3
Details can be found in the section “Menu functions/Data list/Select”.
Display barcode for a dictation6.4
Details can be found in the section “Operation/Changing of dictation
features”.
Scan barcode for an existing dictation6.5
Details can be found in the section “Operation/Changing of dictation
features”.
Search for dictation corresponding to a 6.6
barcode
Details can be found in the section “Menu functions/Scanner*/Use scanner to search for dataset for new dictation/Search for dictation”.
Delete barcode from a dictation6.7
Details can be found in the section “Operation/Changing of dictation
features”.
Scanner* in the dictation machine
Carrying clip
Page 74
73
Barcode scanner
6.8 Configure barcode scanner
The machine comes delivered with the barcode symbology EAN-13 activated. If you would like to use a different symbology, this can be set on
the Digta.
We have provided you with a table of programming codes in barcode
format. This table is in English in PDF format and can be opened with
Acrobat Reader.
The programming code table can be found at »http://www.grundiggbs.com«.
Download the current version of the programming code table from x
the internet.
Print the desired programming codes from the table. x
Use a laser printer or similar to produce a useable printout.
here are always two programming codes given for each of the barcode
symbologies that can be used: the top code to ENABLE the symbology
and the bottom code to DISABLE it.
Program the barcode scanner* in the “Scanner” menu of the Digta. x
Details can be found in the section “Menu functions/Scanner*/
Programming”.
Free download at http://www.adobe.de/products/acrobat/readstep.
html
Programming code table
Acrobat Reader
Page 75
74
Communication with the PC
Communication with the PC7.
Connect/disconnect the dictation machine with 7.1
the PC
Connect dictation machine to the PC
Connect your Digta by means of the USB-cable to your PC in order to x
transfer dictations to your PC and to transmit them to your typist.
The dictation machine must be switched on to enable the communi- x
cation between the two devices.
The Grundig PC software can only be used with one dictation
machine. If a second dictation machine is connected to the USB interface, the PC will not recognize it; it will only appear in Windows as a
removable disk drive.
If automatic USB connection is selected x , USB mode switches on
automatically when a dictation machine that is switched on is connected via USB.
The computer identifies the device as removable disk and as USB
audio/HID device. The Grundig Business System PC-software can be
configurated so that the PC transfers the dictations from the dictation machine automatically, and transfers them so that the memory
space of the dictation machine is fully available again.
If x automatic USB connection is switched off, set up the connection
manually by selecting the “USB mode” menu item using “OK”.
Data transfer incomplete
Stop the USB connection using the task bar on the PC, as otherwise
the transfer may not be complete.
7.2 USB-operations
USB power supply
The Digta is not recognized as a device by the PC. You can use the Digta
for recording/playback as in battery operation, but the dictation machine
is supplied with power from the PC.
PC file transfer (removable storage device)
If the dictation machine is connected to a PC via a USB cable, the PC
supplies the dictation machine with power. The PC recognizes the
device as a USB removable storage device for transferring dictations/
files to and from the PC.
If automatic USB connection is switched off, set up the connection
manually.
Press “ x MENU”.
PC software
NOTICE
Page 76
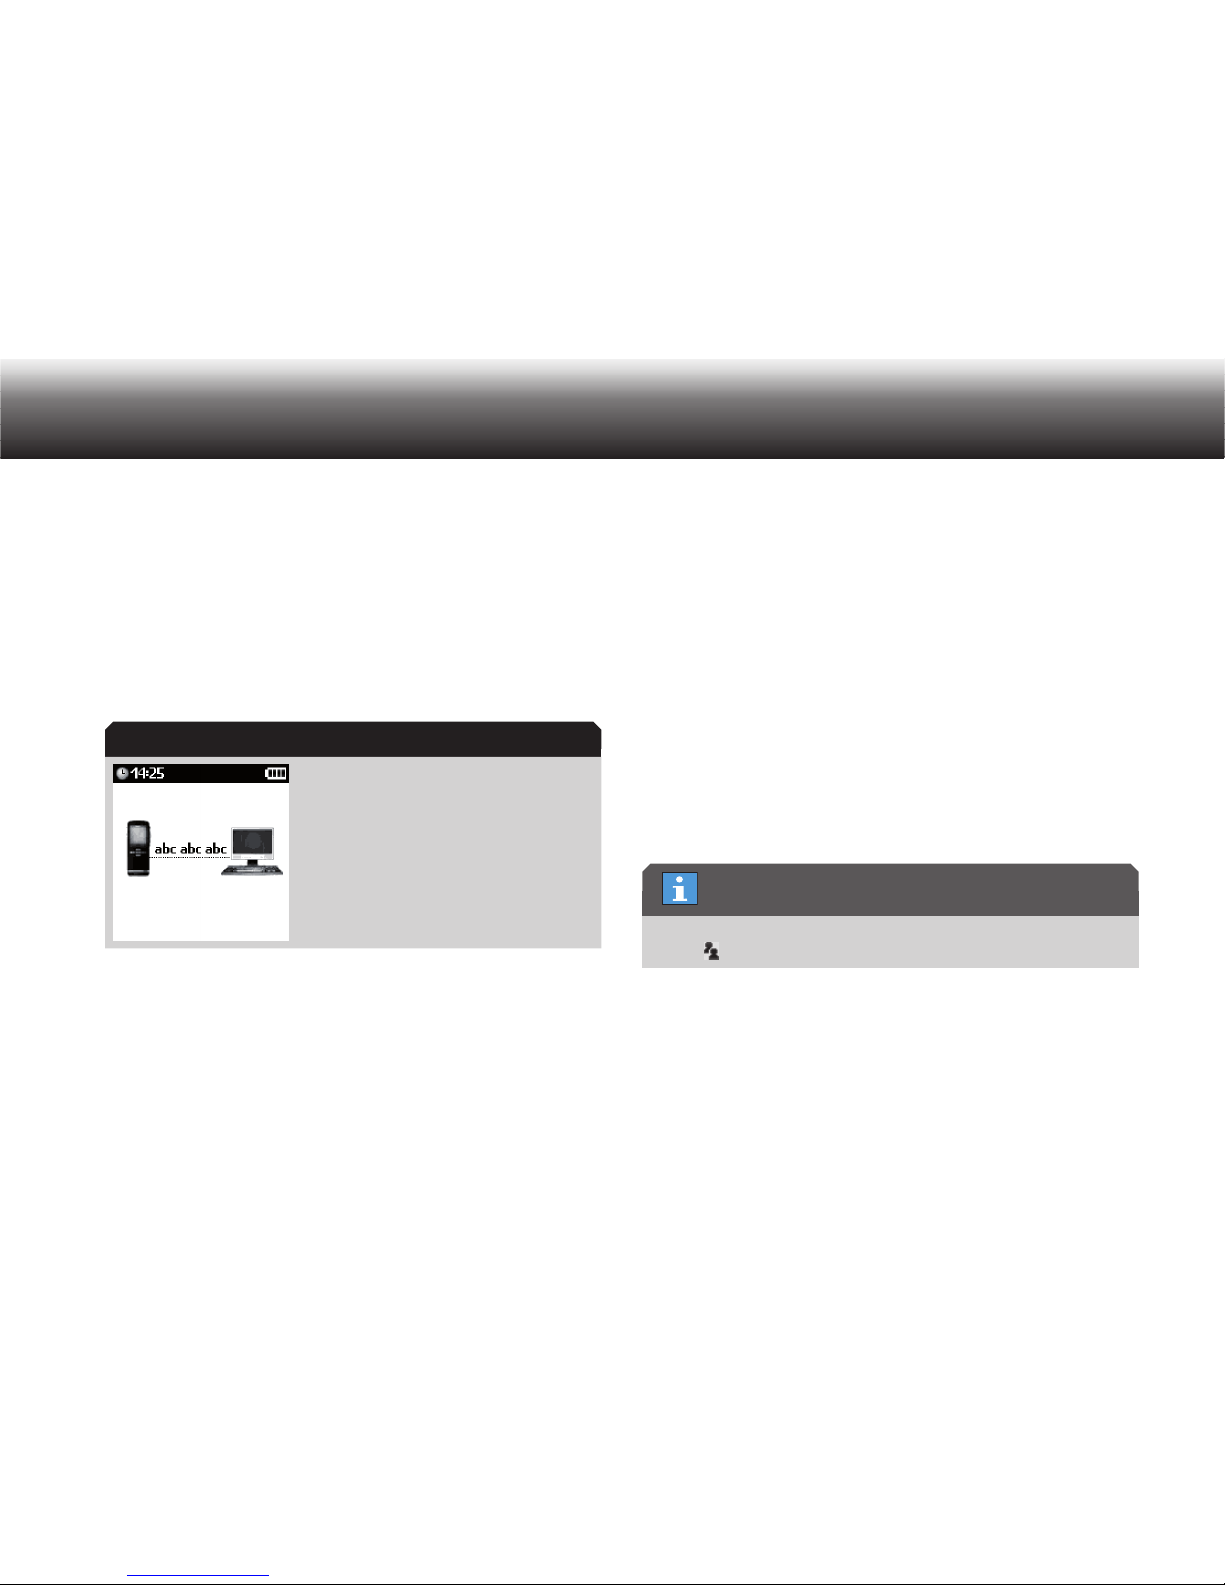
75
Communication with the PC
Move to the “ x USB mode” menu item using the up/down buttons.
Confirm by pressing “ x OK” to set up the USB connection.
Details can be found in the section “Menu Functions/Device settings/
USB connecting”.
The USB data transfer is indicated by an animation on the display. When
data is being transferred, the group of letters “abc” runs repeatedly in
the direction of transfer until the transfer is complete. The “abc” disappears when no file transfer is taking place.
USB data transfer
PC microphone operation (USB-Audio, USB-HID)
When the dictation machine is connected to a PC with a USB cable,
the device is also registered for USB Audio and USB HID. The dictation
machine can thus be used as the PC microphone, e.g. for direct dictation into the Grundig PC software or into a speech recognition system.
Switch the dictation machine on by pressing the “ x MENU” button until
the first display appears.
Connect the dictation machine to the PC via the USB interface. x
Press “ x MENU” a second time.
Use the up/down buttons to navigate to the “ x Microphone sensitivi-
ty” menu item and confirm using “OK”.
Select one of the following settings: x
Dictation•
Conference•
Confirm the selection using the “ x Save” button.
The microphone sensitivity for USB Audio is saved.
If you do not wish to save the change, press the “ x Escape” button.
If the microphone sensitivity is set to “Conference”, the conference
symbol is shown in the display during recording.
If a sound program or speech recognition system (e.g. AudioRecorder or
DigtaSoft) is running on your PC in record or play-back mode, the symbols for recording, recording paused and play-back appear on the display in the PC symbol. The recording LED lights up green and you can
hear the recording from the speaker of the dictation machine.
Data transfer
Conference
Page 77
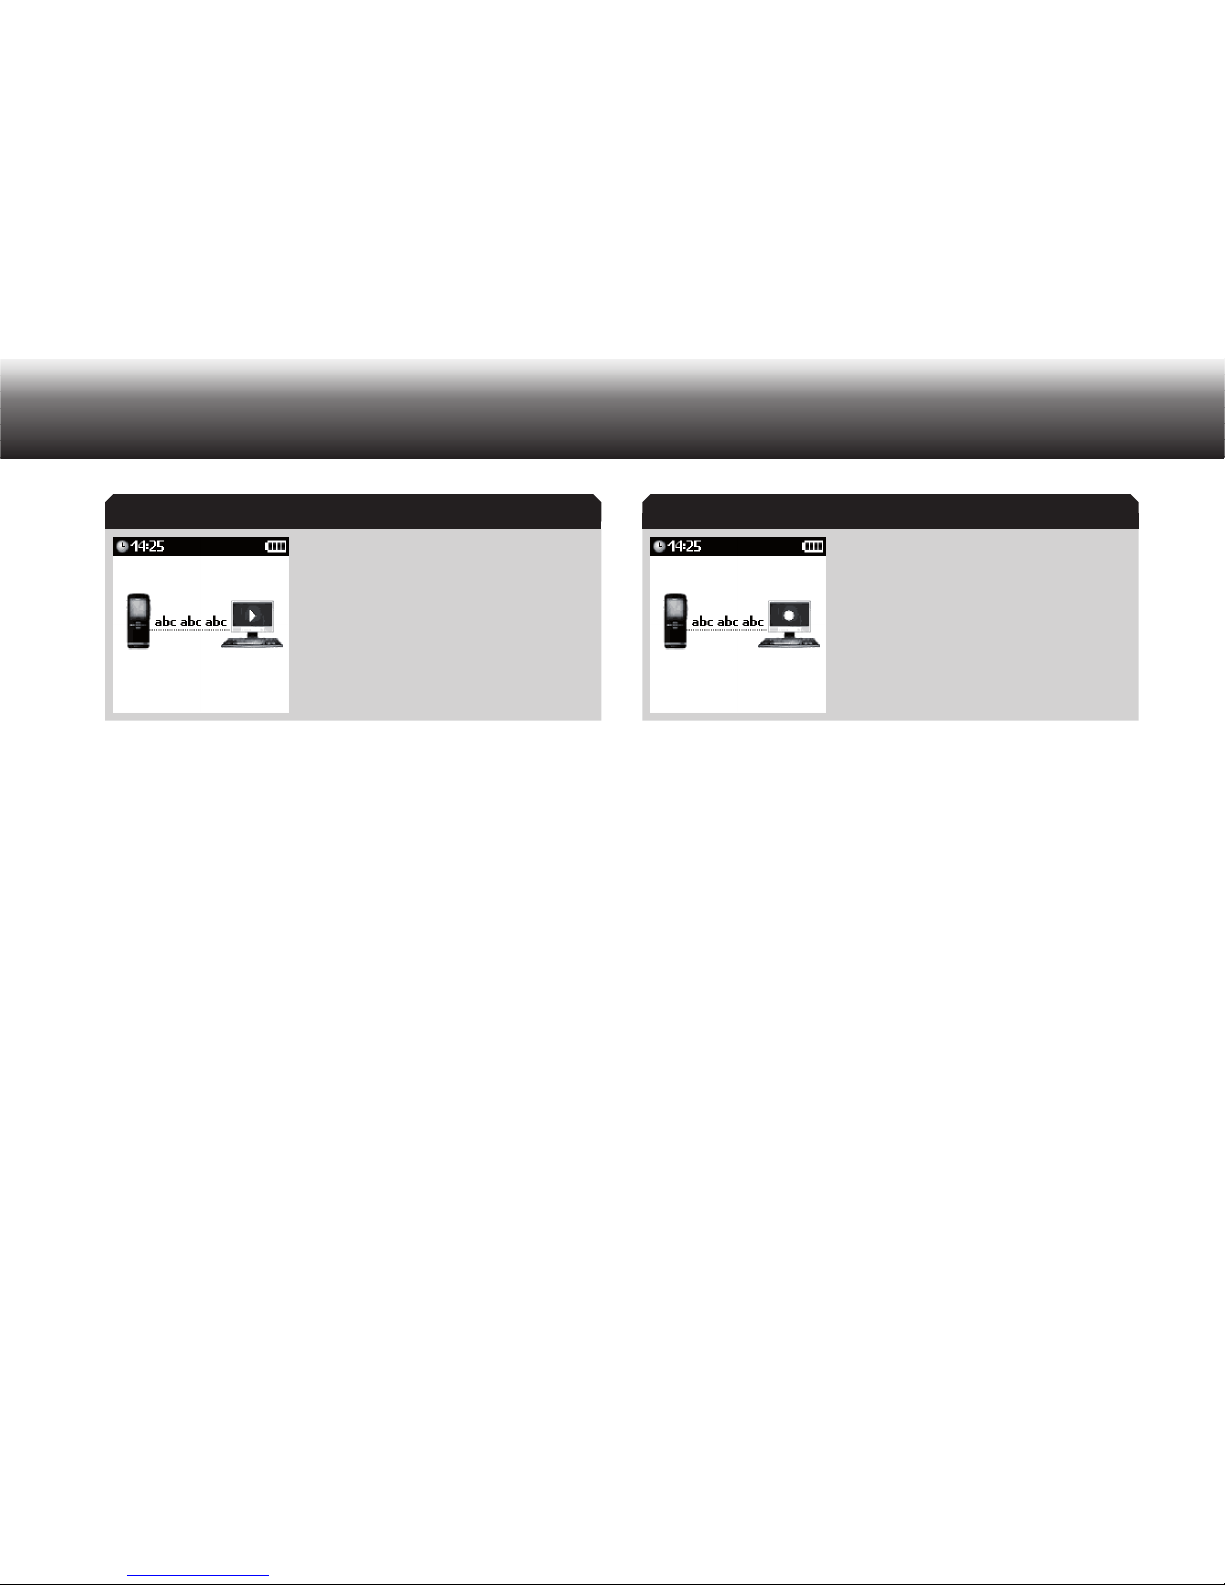
76
Communication with the PC
USB audio during play-back
If you want to control other PC applications with the Digta, such as a
speech recognition program, you can assign key commands to the Digta’s buttons in USB HID mode. Only the MENU button is reserved for the
menu function and switching off the device. Find out more about the
configuration options with the help functions in the Digta configurator
and adapter server software applications from Grundig.
Record a dictation
Select a sound program on your PC, for instance a Grundig dictation x
software, a speech recognition system or the Windows audio recorder.
Start the recording in your sound program and speak your text. x
A recording symbol appears in the PC symbol on the display and the
recording LED lights up red.
USB Audio during recording
Change mode
Switch off USB mode
Press “ x MENU”.
Use the up/down buttons to navigate to the “ x Dictation machine”
menu item and confirm using “OK”.
The Digta restarts and is not recognized as a device by the PC. You
can use the Digta for recording/playback as in battery operation, but
the dictation machine is supplied with power from the PC.
Switch on USB mode
Press “ x MENU”.
Use the up/down buttons to navigate to the “ x USB mode” menu item
and confirm using “OK”.
USB-Audio USB Audio
Page 78
77
Communication with the PC
The Digta restarts and is recognized as a device by the PC. USB
mode is active.
The “USB mode” menu item in the main menu is only displayed when
there is a USB connection to a PC.
USB-operations
Page 79
78
Possible configurations with the PC software “Digta Configurator”
Possible configurations with the PC 8.
software “Digta Configurator”
Configuration software8.1
The Digta Configurator configuration software is a tool from Grundig
Business Systems for adjusting your dictation machine to your personal
working requirements and to the optimal workflow for your company.
Digta Configurator can be used for the following purposes:
Reading dictation machine information•
General configuration of the dictation machine•
Personalizing your dictation machine•
Extending the functions of your dictation machine•
Connect the dictation machine to the PC using the USB cable and start
the Digta Configurator. The setting options for your Digta are listed in the
“Detected devices” directory of the Digta Configurator.
Further details on installation and use of the Digta Configurator can
be found in the “Digta Configurator” operating instructions.
8.2 PIN/PUK
Your Digta is equipped with a PIN/PUK function. Activating the PIN (personal identification number) protects your machine against unauthorized
use. Use a number combination that is known only to you as your pin.
The factory setting of the PIN is 0000. You can change this PIN within a menu function (see section “Menu functions/Device settings/
Change PIN”).
You must enter the PIN each time the device is switched on and when
activating it out of sleep mode. Only then can the device be operated.
You can activate the PIN using the PC software included with delivery
or you can contact the service hotline. The contact information can be
found on the internet at:
www.grundig-gbs.com
Dictations on external, removable memory cards (Digta Card) can not
be protected through the PIN/PUK function.
When changing to an external memory card a prompt appears. Confirm that you would like to work with an external memory card without PIN protection.
Digta Configurator
PIN factory settings
External memory without PIN protection
Page 80
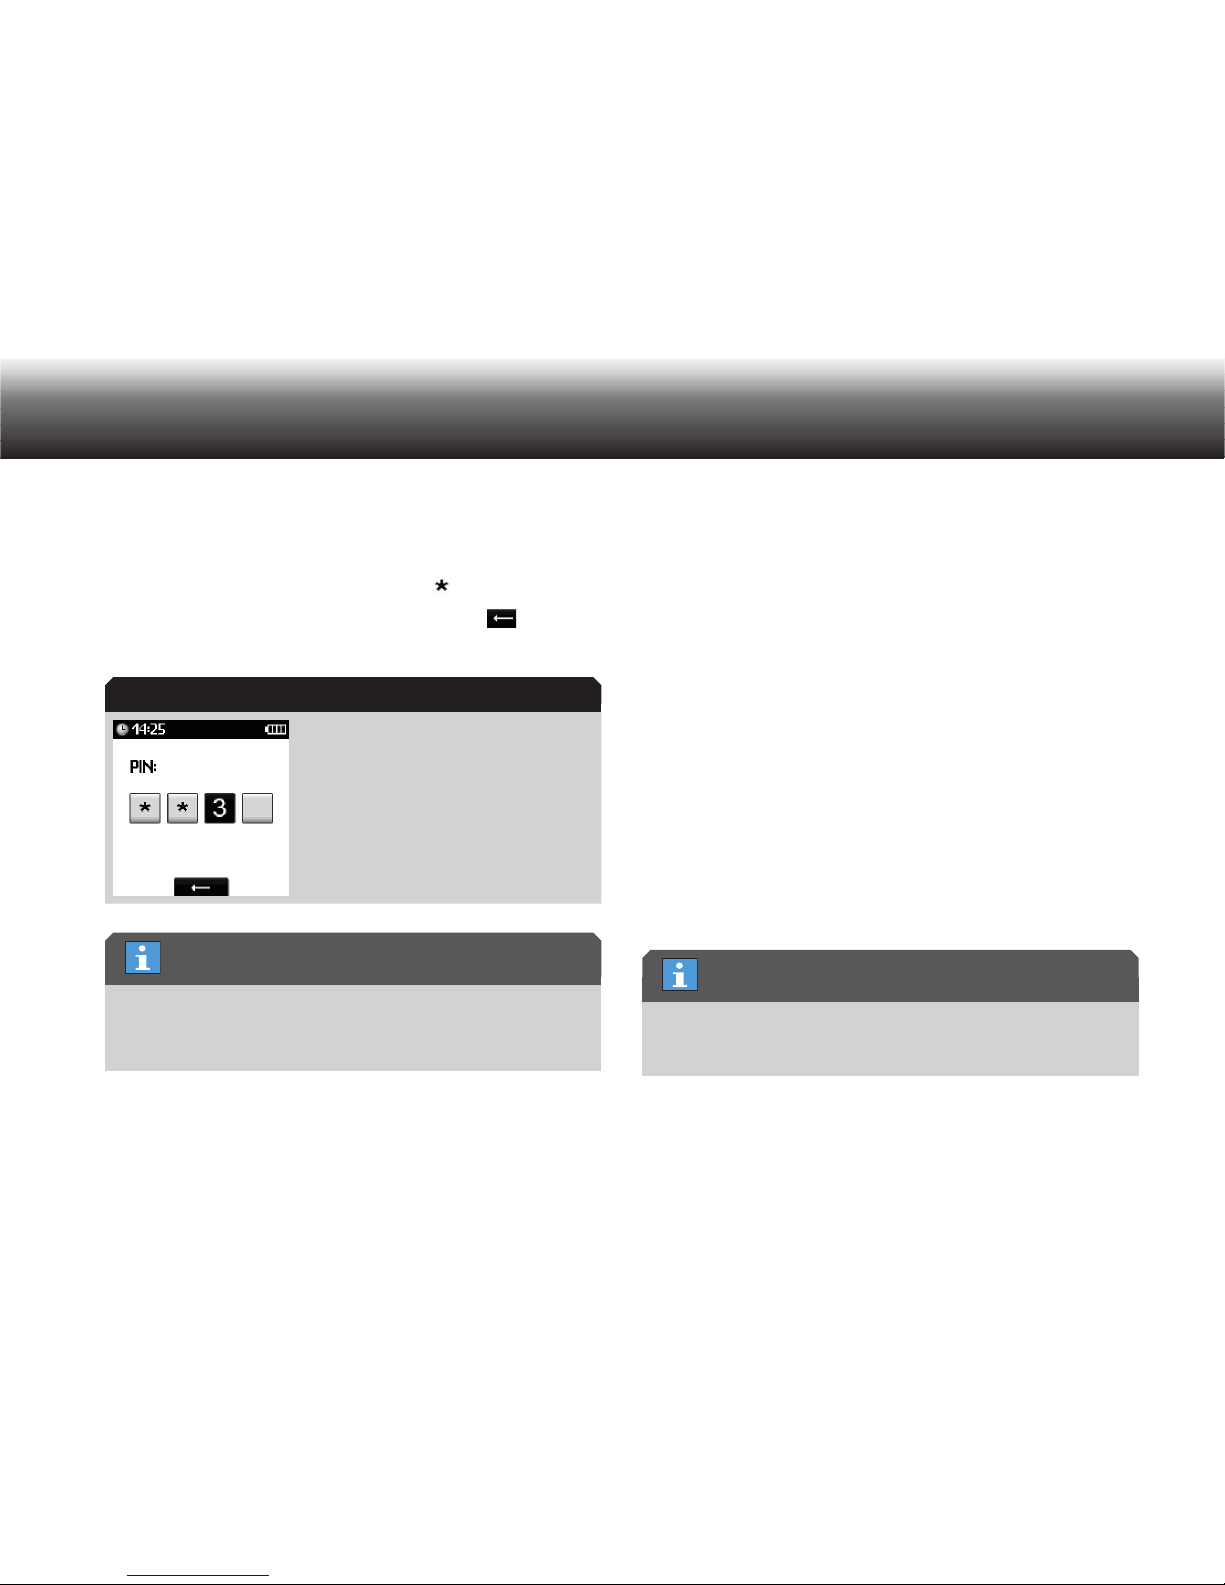
79
Possible configurations with the PC software “Digta Configurator”
Enter PIN
When a PIN prompt appears, select the digits using the up/down but- x
tons and confirm each digit individually by pressing “OK”.
After it is confirmed, the digit is changed to “
” (hidden PIN entry).
If you have made a mistake in the entry, press the x “
”.
You will return to the previous digit and can repeat the entry.
Display during PIN entry
You have 9 chances to enter the PIN correctly.
If all 9 attempts are unsuccessful, the device is locked and can only
be unlocked again using a PUK (personal unblocking key).
Change PIN
Details about changing the PIN can be found in the section “ x Menu
functions/Device settings/Change PIN”.
8.3 Folder functions
Select folder
There are six folders available for saving your dictations. The folders are
labeled A-F by default. You can use the folders to organize dictations
(e.g. to separate business and private dictations).
You can change the names of the folders (e.g. “business”, “private”)
using the “Digta Configurator” PC software.
Delete contents of folder
In addition to deleting individual dictations, you can also delete all dictations within a selected folder.
If a folder is used by more than one author, the folder cannot be deleted. The dictations contained within are protected against inadvertent
deletion by another user.
Press “ x MENU”.
PIN entry
Incorrect PIN entry
Data protection with several authors
Page 81
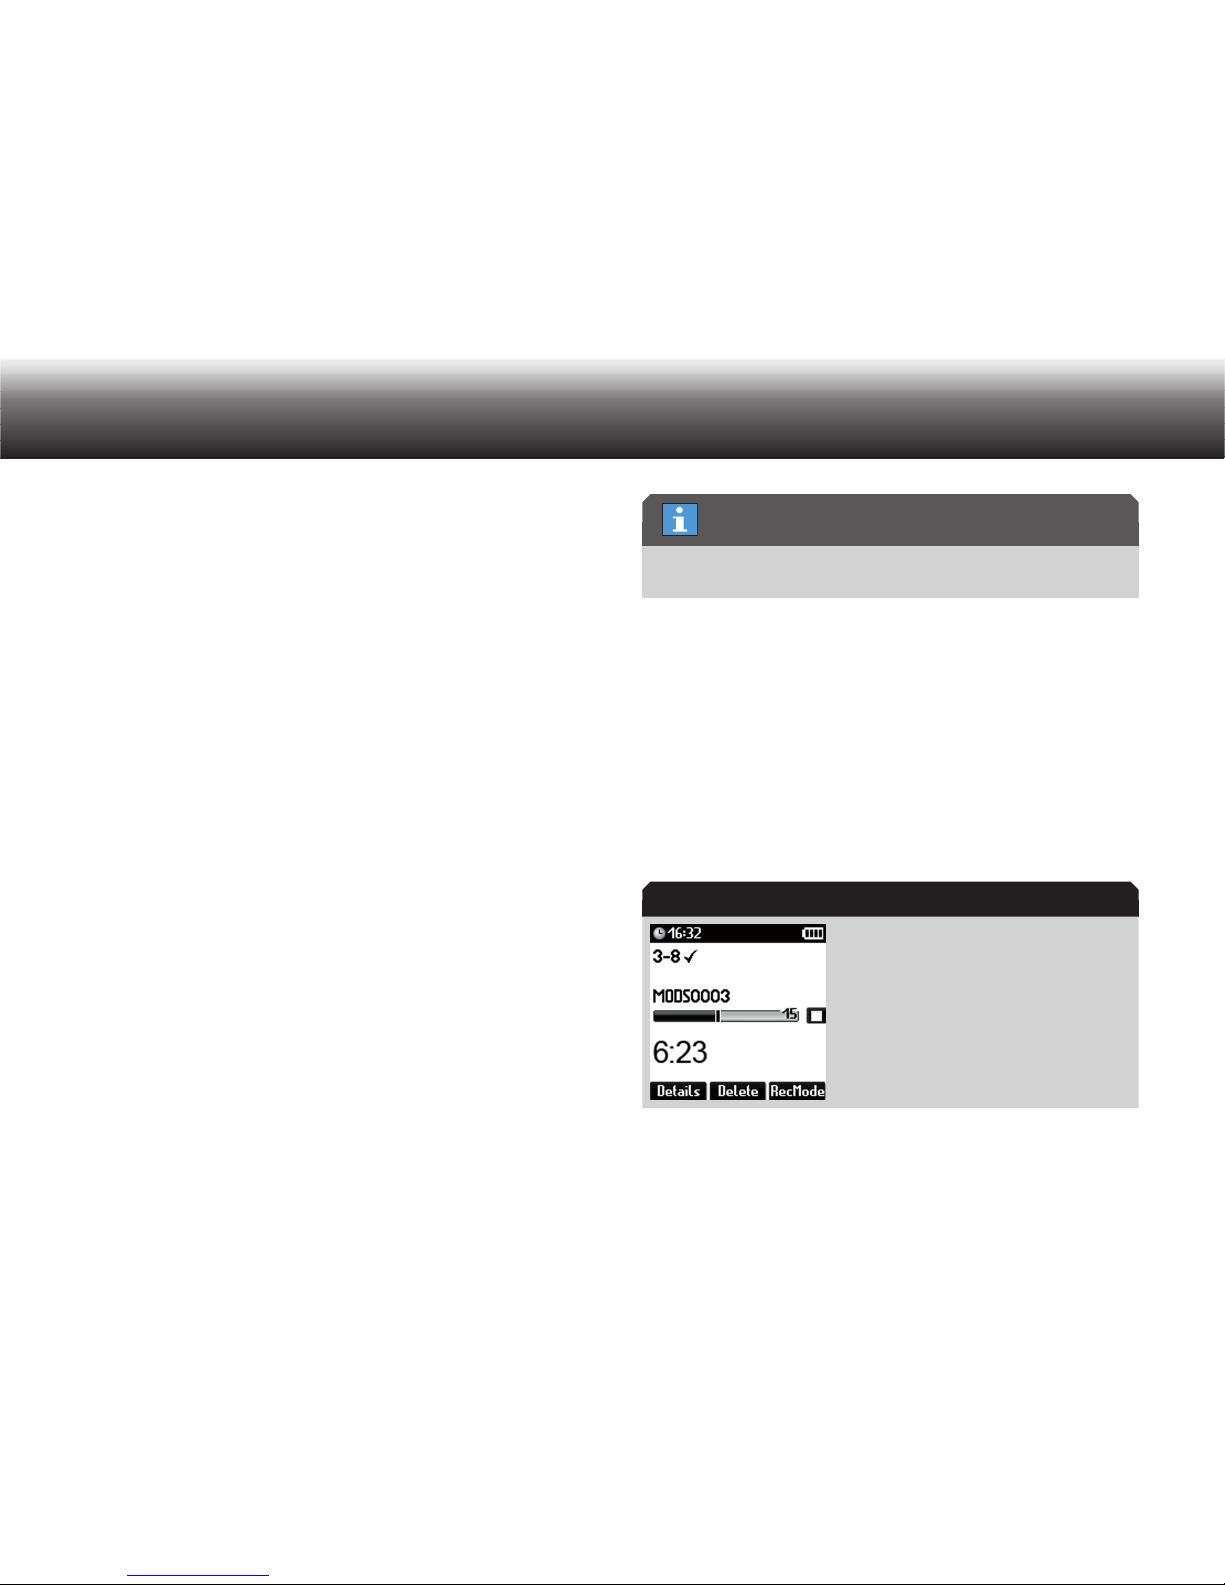
80
Possible configurations with the PC software “Digta Configurator”
Use the up/down buttons to navigate to the “ x Folder” menu item and
confirm using “OK”.
Select the desired folder by navigating using the up/down buttons. x
Press the “ x Delete” button.
A list appears with the elements that can be deleted (selected folder, all folders).
Confirm your selection using “ x OK”.
A confirmation prompt appears.
Confirm using “ x OK” to permanently delete the folder.
The message “Folder deleted!” appears.
If you do not wish to delete the folder, press the “ x Back” button.
EOL function8.4
With the EOL function* you can designate a dictation as completed and
ready for delivery. If EOL (end of letter) is activated, it is shown as a
check mark in the display. Dictations not designated EOL are not transferred to the PC.
Activate EOL function
The EOL function can be activated using the configuration software. You
can choose whether you wish to work with the EOL button or the “Postponed” dictation feature (see section “Operation/Changing of dictation
features/Postponed”).
The EOL function and the “Postponed” dictation feature are mutually exclusive.
In the configuration software you can also determine whether a new
dictation is created when the EOL button is pressed. This also triggers
the NEW button.
Using the EOL function
To interrupt a running recording, please press the » x g« button. If a
play-back is running, press the »
e/f« button.
If the EOL function is activated, press the upper function button long x
(approx. 2 sec) to apply EOL to the current dictation.
Dictation with activated EOL
EOL constraint
EOL mark
Page 82

81
Possible configurations with the PC software “Digta Configurator”
When the EOL button is pressed, the dictation is locked against the following changes:
Add dictation part in the middle or onto the end•
Delete dictation or dictation part•
Set index•
Add info message•
To make any changes, you must remove the EOL designation for the
current dictation. Do this by pressing the EOL button again (approx.
2 sec).
Free configuration of buttons8.5
You can adjust the configuration of the upper and lower function buttons
to suit your needs* using the Digta Configurator. You can also configure
each button separately for pressing once, pressing longer, or pressing
and holding (only for speech recognition). For the exact options, consult
the current version of the Digta Configurator.
Some examples of free configuration of the buttons include:
Function of the “NEW” button (new dictation) configured to one of the •
function buttons located on the side for user who are left-handed
EOL function configured to the lower side function button to make it •
easier to handle
Activate the priority feature for a dictation using one of the buttons•
Page 83
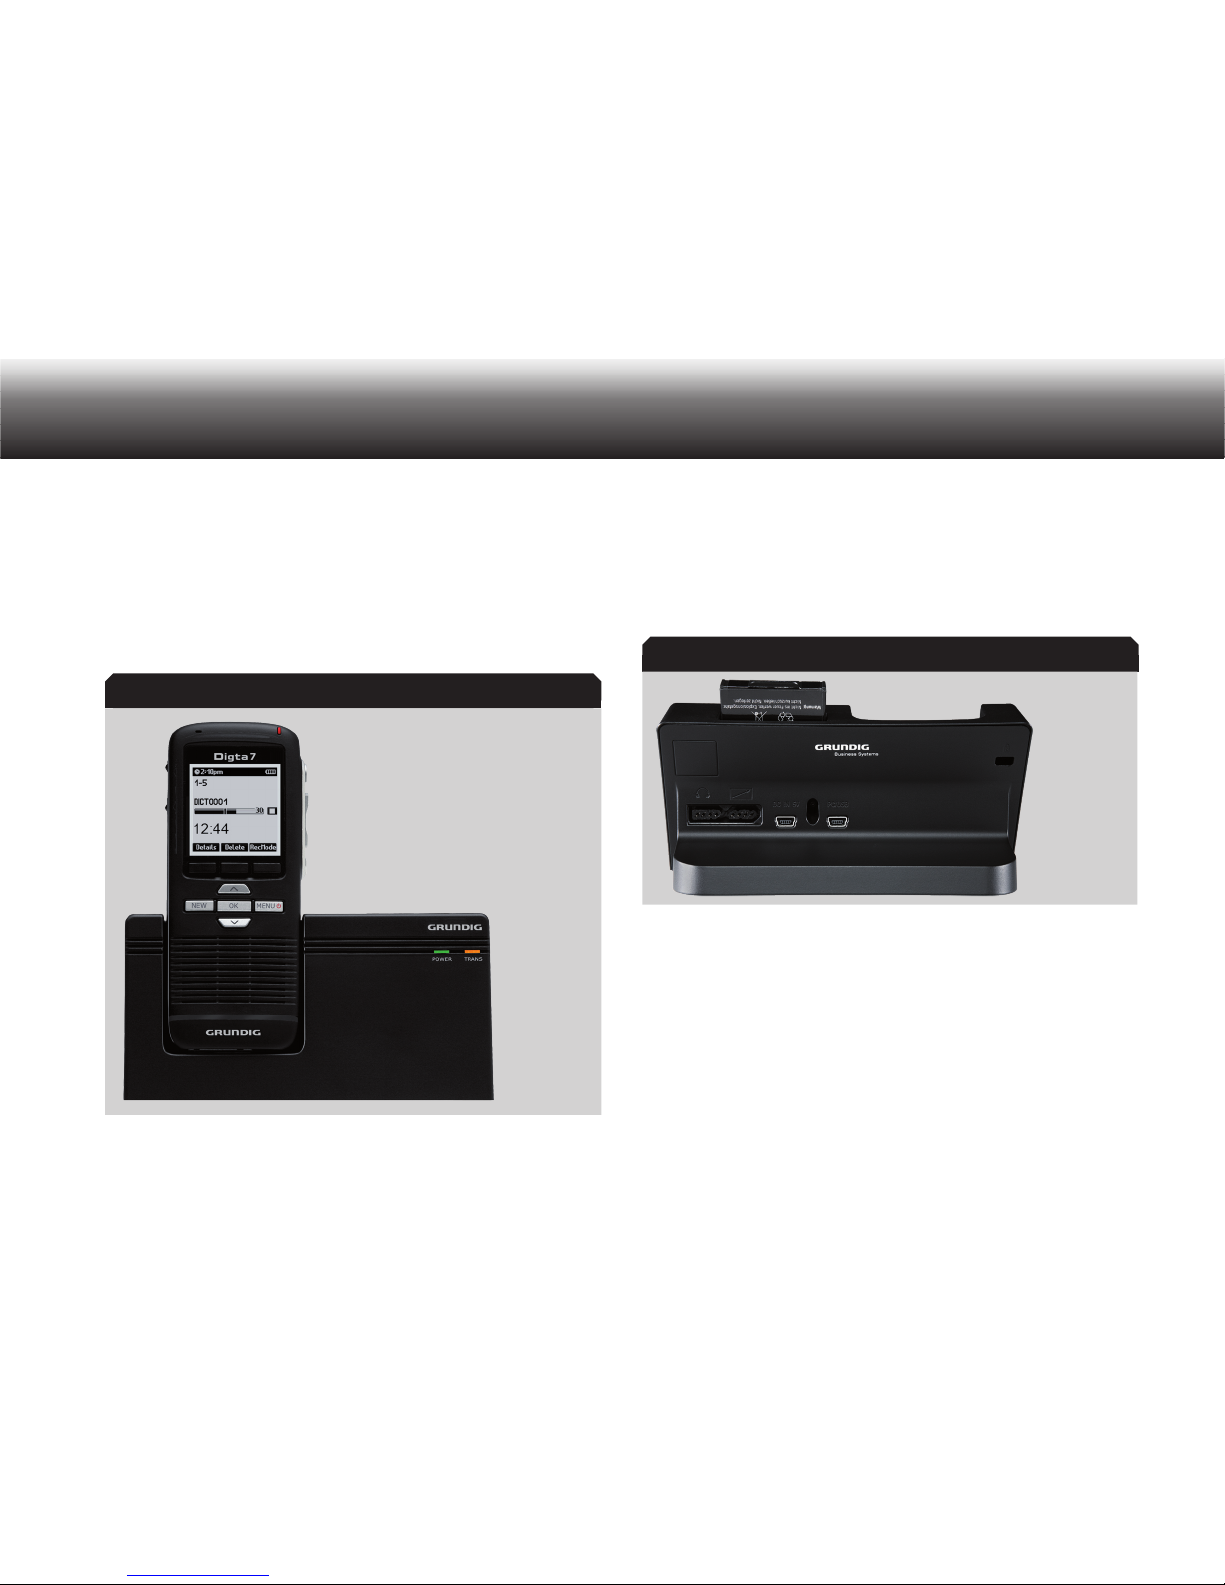
82
Operation with Digta Station
Operation with Digta Station9.
The Digta Station* serves as a communication interface between the
dictation machine and the PC, as a charging station and as a base for
the dictation machine. A foot control* and headphones* can be connected additional to the Digta Station Plus*. Also it is possible to charge a
rechargeable battery pack in a special slot of the Digta Station Plus.
Digta Station
with Digta 7
USB interface9.1
Connecting the device to the PC via the USB interface (yellow indicator
on the Digta Station) sets up a data transfer. A USB audio/HID function
can also be used to dictate in the Grundig PC software or in speech recognition systems.
Connections of Digta
Station
9.2 Charging the battery in the battery
compartment of the dictation machine
Connect the USB plug on the power supply cable into the “DC IN 5V” x
socket on the Digta Station*.
Connect the plug of the power supply unit into the wall socket. x
Press and hold “ x MENU” until the device switches off.
Digta Station
Digta Station
Page 84
83
Operation with Digta Station
Connect the switched off dictation machine to the Digta Station. x
After a short time the charge indicator will appear on the display of
the device and the LED indicator will flash green.
The rechargeable battery is fully charged after approx. 4 hours.
»
« is shown on the display.
Dictation with foot control9.3
Connecting a foot control allows your to achieve hands-free dictation
and transcription*.
Details can be found in the section “Menu functions/Device settings/
Foot control”.
Page 85
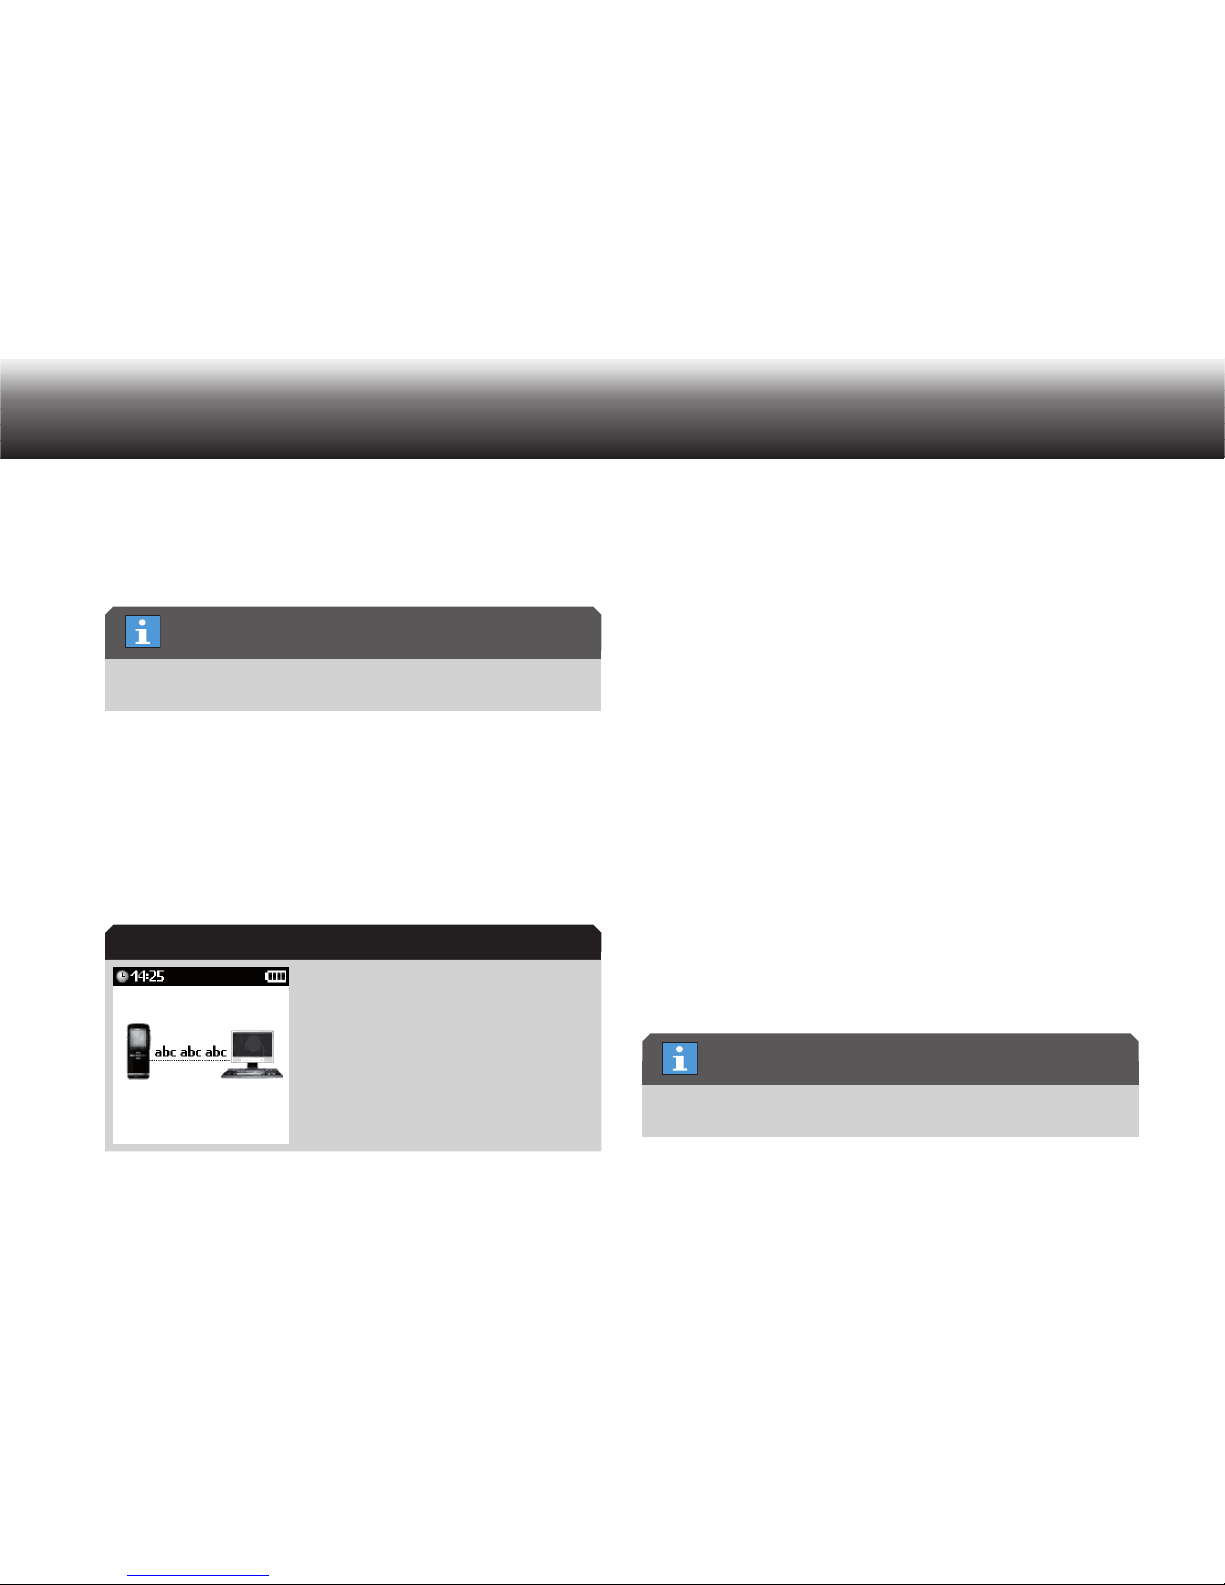
84
Firmware update
10. Firmware update
The firmware update function allows you to keep your Digta’s firmware
always up-to-date.
The current firmware version can be found on the internet at
www.grundig-gbs.com
Switch off your Digta. x
Switch on the PC and download the current firmware version from x
the internet.
Switch on your Digta. x
Connect the Digta to the PC using the USB cable. x
The device is detected by the PC as a removable storage device.
Animated data transfer display
Copy the downloaded file “gh0700.hex” into the »SYSTEM« folder on x
the drive of the dictation machine (removable storage device).
The data transfer is indicated on the display. “abc” travels from the
PC to the dictation machine until the data transfer is complete.
When the data transfer is complete, stop the USB connection x
between the Digta and the PC using the task bar on the PC, as otherwise the transfer may not be complete.
Remove the USB plug from the dictation machine. x
The security prompt “Apply update?” appears.
If you do not wish to apply the firmware update, press “ x Escape”.
Confirm using “ x OK” to permanently apply the firmware update.
An animated busy indicator appears on the display.
After successful update the message “Update successful. Please
turn off!” appears.
Confirm the message with “ x OK” or press “MENU” until the machine
switches off.
The next time the Digta is switched on it will operate with the new
firmware.
You can check the current version of the firmware in the “Device info”
menu under “Version”.
The most current firmware at the time of delivery is contained on the
DVD included with delivery.
Current firmware version
Data transfer
Status at delivery
Page 86
85
Technical Data
Technical Data11.
The storage capacity for recording: 10 minutes
DSS Standard Play (SP):
DSS Pro Quality Play (QP):
WAV Mono* (depending on sample rate):
WAV Stereo* (depending on sample rate):
approx. 1 MB
approx. 2 MB
9.6 MB (8 kHz sample rate) up to 57.6 MB (48 kHz sample rate)
19.2 MB (8 kHz sample rate) up to 115.2 MB (48 kHz sample rate)
Response area
DSS Standard Play (SP):
DSS Pro Quality Play (QP):
WAV Mono* / WAV Stereo*:
200 - 5 500 Hz
200 - 7 500 Hz
200 - 3 500 Hz to 200 - 20 000 Hz, depending on the sample rate selected
Microphone socket 3.5 mm jack; stereo
Earphone jack 3.5 mm jack; stereo (mono earphone can be used)
PC-Interface USB 1.1, USB 2.0 High Speed
Batteries 2 x 1.5 V; type Micro/AAA
Rechargeable battery Rechargeable battery pack 962 (Li-polymer rechargeable battery, 3.7 V/ 1000 mAh)
Battery operation Up to 25 hours
Dimensions (W x H x D, without protruding operating elements) approx. 130 x 52 x 22 mm / 5.12 x 2.05 x 0.87 inch
Weight incl. rechargeable battery pack 962 approx. 122 g / 4.303 oz
Page 87
86
Trouble shooting
12. Trouble shooting
Electrical devices can bring along malfunctions. These malfunctions cannot necessarily be referred to the device. You can check if you can remedy the
errors by means of the following table.
Malfunctions Possible reasons Removal of defect
The devices cannot be switched on. The battery is empty.
The current supply is interrupted.
Charge the batteries or exchange them.
(see chapter “Inserting batteries”, “Inserting rechargeable battery”
and “Charging the rechargeable battery”)
The device is not responding to button
operations.
The keylock is activated. Press the lower function button until the keylock is deactivated.
There is no sound or too quiet. The microphone sensitivity or the play-back volume
are not set correctly.
Set the microphone sensitivity in the menu “recording” to “conference” or hold the device closer to your mouth during recording.
Set up the play-back volume. (see chapter “Setting the volume”)
The sound is distorted or too loud. The microphone sensitivity or the play-back volume
are not set correctly.
Set the microphone sensitivity in the menu “recording” to “dictation”
or increase the distance between the device and your mouth during recording.
Turn down the play-back volume. (see chapter “Setting the volume”)
No menu function available. The device is running in the Easy Mode. Switch over to the Menu Mode when switching on the device. (see
chapter “Change of profile”)
Page 88
Grundig Business Systems GmbH
Weiherstraße 10
D-95448 Bayreuth
Germany
www.grundig-gbs.com
Ind 00 11/2011
 Loading...