

Page 1

Easy ModE
MEnu ModE
+
Digta 420
>> Quick Reference Guide
English
Page 2

Symbols in this Operating Instruction
Important notes for your safety are highlighted. Please pay particular attention to these notes in order to avoid accidences and
damages to the device:
WARNING
Failure to observe this warning signal may endanger your health, and it indicates possible risks of
injury.
CAutION
Failure to observe this warning may damage the
device or lead to data loss.
NOteS
Points out useful tips in the operating instruction.
Open the inner leaflet at the beginning of this operating manual to
view the dictating machine and the control elements.
References to the control elements are always shown in [square
brackets].
Introduction
Your Digta 420 is a digital portable dictating machine. Dictations
can be recorded and stored as digital files, and afterwards be
transfered to a pc.
For the latest information on the dictating machines and the software, please see the „Readme.txt” file on the enclosed CD. A
detailed user guide is also provided on the CD in the directory
„Docu”.
Please read the entire operati ng instruction before usage. Grundig
Business Systems cannot accept any liability for damages resulting from non-observance of the operating instruction.
For safety reasons, follow all safety precautions to ensure a safe
handling with the device!
Scope of delivery
Dictating machine Digta 420■ CD with pc-software■
USB-cable■ Pouch■
Ce-Note
The CE-mark confirms that the device corresponds
with the relevant EU-guide lines.
i
Page 3

Illustration 1: Device front
Illustration 2: Display
Illustr. 3: Device rear,
battery compartment
27
30
25
1
2
4
6
5
7
3
8
12
13
15
16
17
9
24
22
21
23
14
18 19
20
10
11
26
32
31
29
28
Page 4

No Description Functional significance
1 Record button Recording/stop of dictation
2 Slide switch
►►
FFWD Fast forward
Stop
►
StARt Recording and playback
◄◄
ReW Rewind
3 Loudspeaker Playback of sound signals
4 „NEW“ button Create new dictation
5 Navigation button Dictation-/function selection
6 Selection button Menu activation, cancel or execute a
function
7 Display Operational status indicator and indicator
of the adjustable menu functions,
for details see illustration 2
8 Record indicator Lights up during recording,
blinks regularly during recording pause
9 Dictation indicator Dictation-no., info-no., index-no.
10 Start-Stop-indicator Recording/playback runs or stops
11 Charging indicator Rechargeable battery, USB-, power supply
12 Active key functions
E.g. modify dictation, select dictation, menu
13 Status bar Length of dictation
14 Dictation positions no. Position of dictation in the active folder
15 Encryption Indicator if dictation is encrypted or not
No Description Functional significance
16 Active function
► Play-back
Recording
Recording pause
_▼_
Insert
Play-back end
►►
Fast forward
◄◄
Rewind
17 Clock Time in hours and minutes
18 Folder indicator Play-back/recording in the active folder
19 Voice activation On/Off
20 Card indicator Recording/play-back of dictations stored
on the inserted memory card
21 Remaining storage time Free memory shown in hours and minutes
22 Microphone sensitivity Record volume adjustment (in 3 levels)
23 Priority indicator Dictation with priority (PR)
24 Dictation length Length of active dictation in hours, minutes
and seconds
25 Digta card MMC / SD-card to save dictations on an
external memory card
26 Microphone socket For external extra microphone
27 Microphone loophole Built-in, internal microphone
28
On/Off-switch
On/Off-switch of device, key lock
29 USB-socket For mini-USB-cable to the pc
30 Battery compartment For rechargeable 466- or AAA-batteries
31 Card slot For Digta card to store dictations
32 Earphone socket Output voltage max. 90 mV
Explanation of User Controls and Connections
Page 5

5
Contents
Contents
Safety Notes ...............................................6
Purpose of use............. ...............................6
Cleaning ......................................................6
Defects ........................................................6
Disposal .......................................................6
Hazard due to electric shock ....................... 6
Handling of batteries and rechargeable
batteries .......................................................7
Accessories .................................................7
Initial operation ..........................................8
Insert batteries or rechargeable
batteries............. ..........................................8
Charging of rechargeable batteries ............. 8
Switching on the Digta 420 .........................8
Utilization of internal or external memories .9
Key lock ....................................................... 9
Software ......................................................9
System requirements ..................................9
Operating .................................................. 10
Easy ModE - MEnu ModE............. ...............10
Switchover of the modis Easy ModE to MEnu
ModE ..........................................................10
Easy ModE .................................................. 10
Initial display view ......................................10
Create a new dictation .............................. 10
Insertion of a dictation part .........................11
Modify a dictation ......................................12
Select and listen to a dictation ..................13
Setting the Volume ....................................13
Fast play-back ...........................................13
Fast skip to the start/end position of a
dictation .....................................................14
Delete an entire dictation ..........................14
Automatic formatting .................................14
Data transfer to the pc and forwarding ...... 14
Page 6
6
Safety Notes
Safety Notes
Purpose of Use
The Digta 420 has been designed exclusively for the recording,
storage and play-back of dictations only. The device may only be
used for its intended purpose. Any other kind of utilization is forbidden.
Keep the Digta 420 and the accessories out of the reach of children.
Protect the Digta 420 from spray water or rain.
Do not modify the device.
Cleaning
For cleaning use a dry, soft cloth. Do not use any chemical cleaning agents.
Defects
WARNINg
Risk of injury due to a defect device!
■
■
■
Do not try to repair a defect device. The device may only be
repaired by a specialised dealer. A list of the specialised dealers is
available on our website: www.grundig-gbs.com
Disposal
Electronic waste is not allowed to be disposed of with the domestic waste. Electronic waste has to be returned to collecting points
at public recycling authorities set up for this purpose.
Used batteries as well as rechargeable batteries have to be disposed of to collective points set up for this purpose.
Hazard due to Electric Shock
WARNINg
Danger of life due to electric shock!
The power supply operates with 230 V alternating current. Improper utilization may result in injury due to electric shock. Follow all
safety precautions as follows to avoid accidences:
Never touch the connector plug of the power supply with wet
hands.
Do not bend, clamp or drive over the power cable, and keep it
away from heath.
■
■
Page 7
7
Safety Notes
Always unplug the power cable from the wall jack by pulling
the connector plug but never use the power cable for plugging
off because the cable could tear apart.
Data indicated on the the tool identification plate must match
the technical data of the mains supply otherwise this may
destroy your device.
Handling of Batteries and Rechargeable Batteries
WARNINg
The improper use of batteries and rechargeable
batteries may result in personal injury!
The device operates with batteries and rechargeable batteries.
Please pay particular attention to the following:
Do not throw batteries or rechargeable batteries into fire. Do
not try to short-circuit the electric contacts, this may lead to
explosion.
Batteries or rechargeable batteries should not be kept
unpacked in a bag and should not be opened or modified.
Caution - there is the risk of burns through leakage.
■
■
■
■
Rechargeable batteries should only be charged in the dictating machine. The attempt to charge a rechargeable battery
beyond its electrical capacity may lead to explosion.
Accessories
CAUtION
Damage to the device due to unreleased accessories.
Original accessories for the Digta 420 released by the
manufacturer
can be
looked up on the internet: www.grundig-gbs.com
The performance features described by Grundig Business
Systems only apply to genuine Grundig Business Systems
accessories. Please make sure to choose only genuine
accessories from Grundig Business Systems. Product liability
and warranty service are provided only in this case. The use of
non-Grundig-Business-Systems accessories or those which are
not recommended and approved by Grundig Business Systems
automatically void any warranty claims towards Grundig Business
Systems.
■
Page 8
8
Initial Operation
Initial Operation
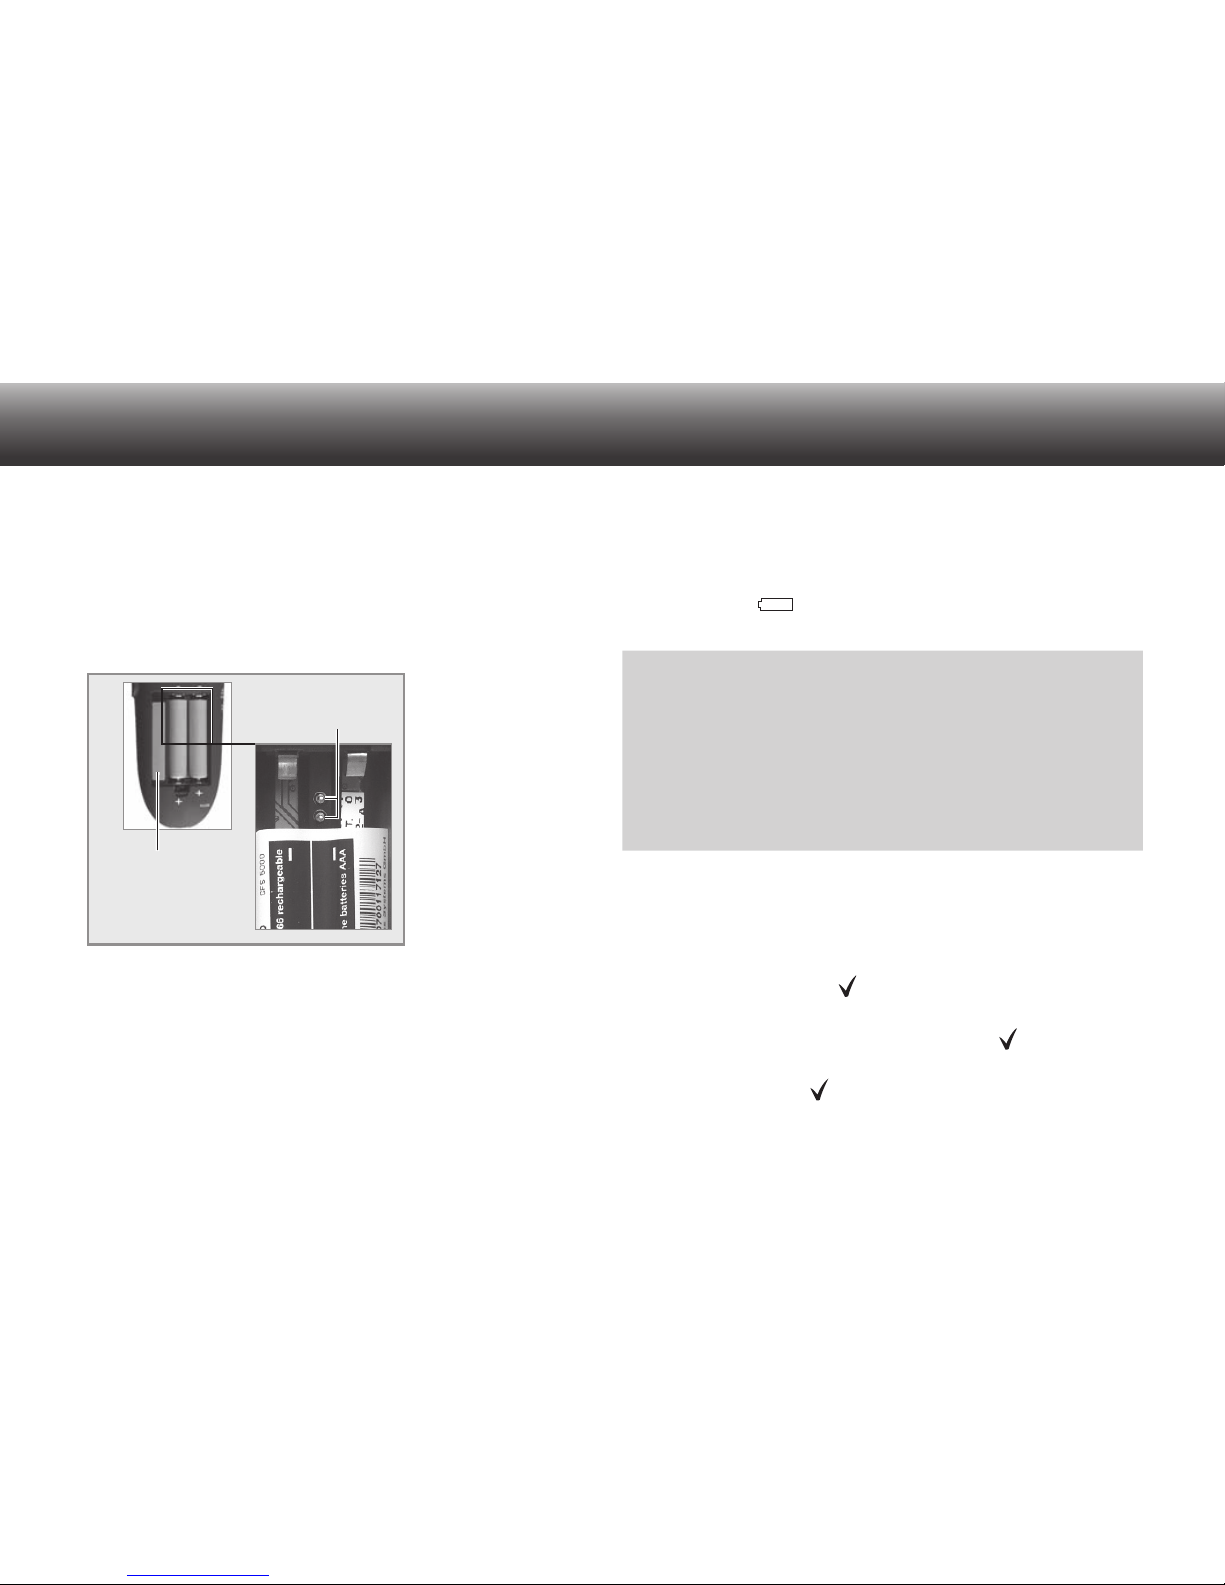
Insert Batteries or Rechargeable Batteries
Open the rechargeable/battery compartment and insert the
rechargeable 466 or batteries (Typ Micro / AAA, 2 x 1.5 V).
Make sure the polarity is correct.
Charging of Rechargeable Batteries
After switching off the Digta 420, connect the power supply 475
to the PC/USB-jack of the Digta 420.
– Shortly afterwards, the load indicator will appear on the dis-
play, and the LED-indicator will blink green.
– The
rechargeable battery i
s fully charged after ca. 4 hours. The
load indicator will disappear, and the
LED-indicator
will go off.
►
►
Unplug the power supply from the wall socket, and pull the
USB-socket of the power supply cable out of the »PC/USB«
socket.
The symbol » « will blink when the batteries or the
rechargeable batteries are low.
i
NOtE
Further information about the operational use of
batteries, Grundig power supply 475, Grundig
rechargeable battery 466 by means of the Digta station* is described in the comprehensive user
manual. You will find this manual in the „Docu”
directory on the included CD.
Switching on the Digta 420
Move the On/Off switch down to the »ON« position.
When the unit is started for the first time, select the required
language in the user guide using the navigation button »
◄►
«
and confirm it with the » « button. Then set the date and time.
Use the navigation button to enter the year, month, day, hours
and minutes and confirm it by pressing the » « button.
When an author-list appears, then select your name and con-
firm it by using the » « button..
►
►
►
►
►
►
Battery/rechargeable
battery compartment
Battery sensor
contact
* Extra equipment
Page 9
9
Initial Operation
Utilization of Internal or External Memories
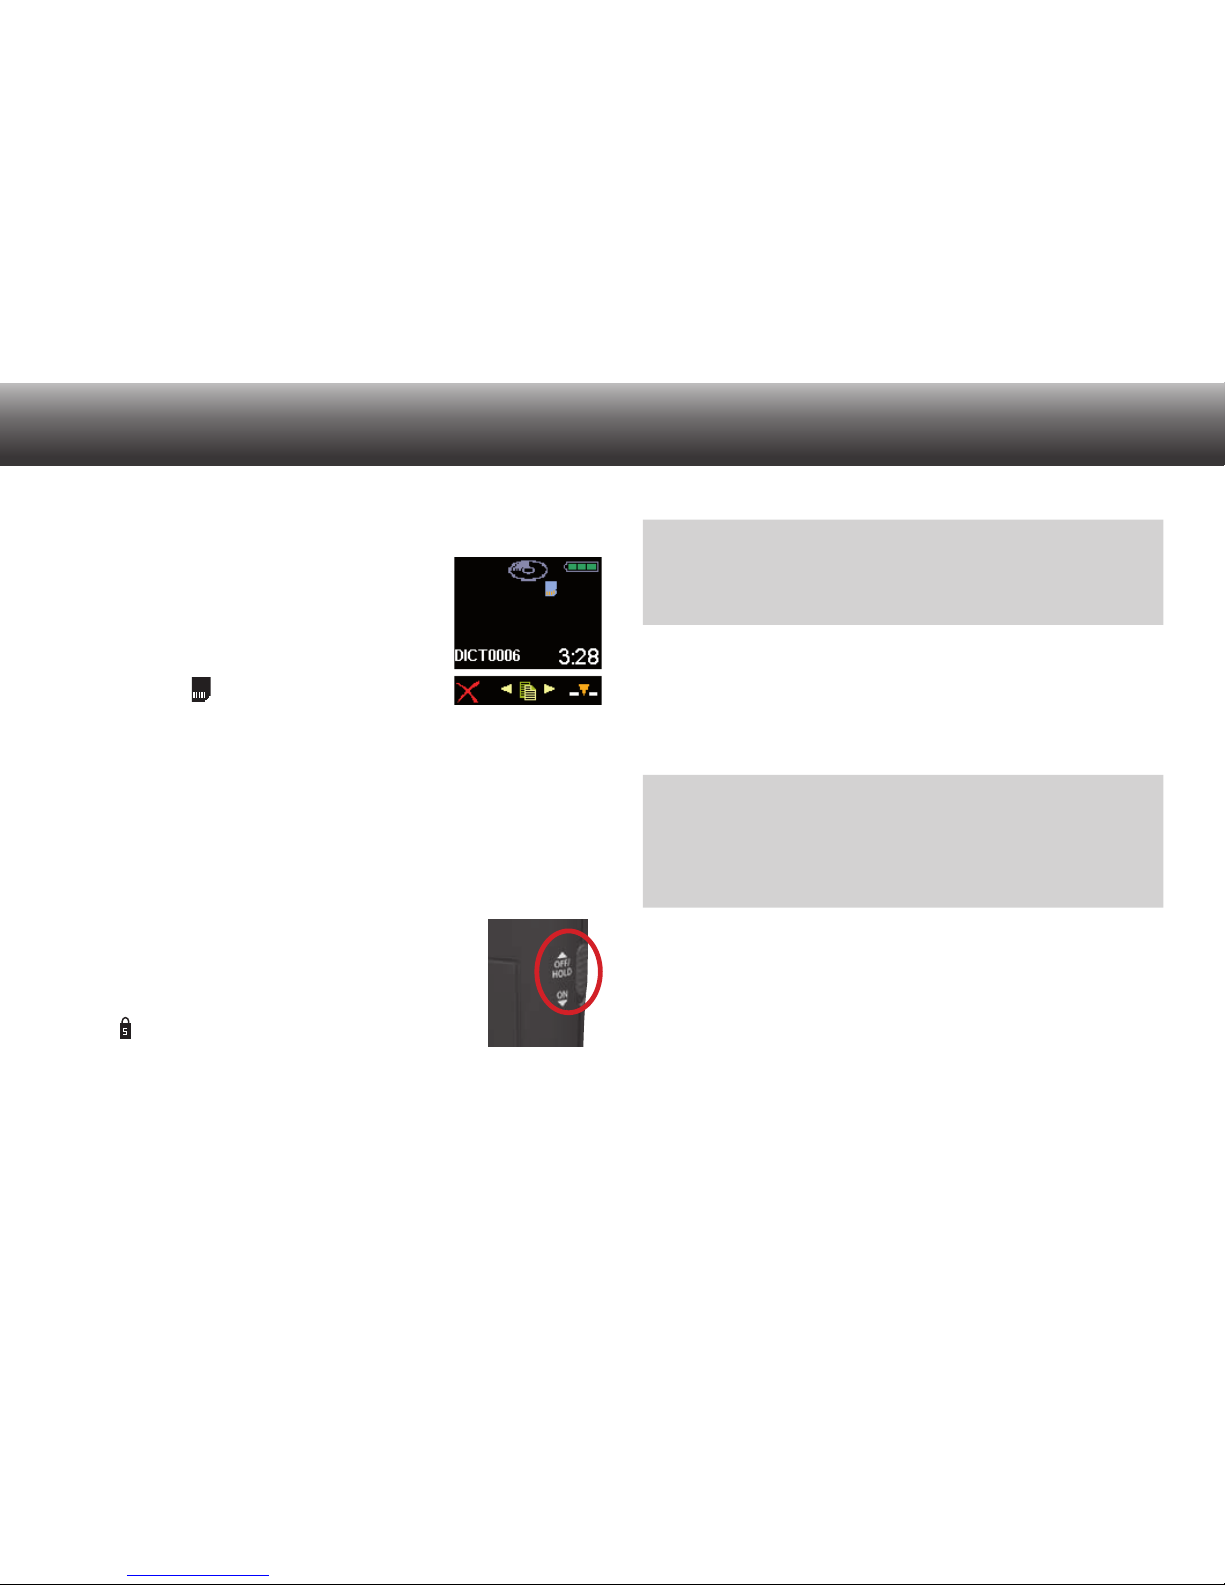
Dictations are stored on the internal memory
of the dictation machine as long as no external, removable memory card (Digta card) is
inserted. If a DigtaCard is inserted, all dictations are stored on this memory card. The
card symbol » « will appear on the display.
In this case the internal memory is protected against access. It's
not possible to copy between the internal memory and the memory card.
Key Lock
The key lock helps to avoid that the active recording or play-back
process can be switched off by mistake.
Move the On/Off switch to the »OFF/
HOLD« position during recording or
play-back. Then the buttons and the
slide switch will be locked. The symbol
»
HOLD
« will appear on the display.
Move the On/Off switch to the »ON« position to deactivate the
key lock. Then the recording or play-back can be stopped again.
►
i
NOtE
The dictation machine will go off when using the
On/Off switch during other functions.
Software
Insert the CD containing the software for administration, sending
of dictations and configuration information of the Digta 420 in your
pc drive. Follow the instructions displayed on your pc.
i
NOtE
Further information about the configuration/system
requirements/firmware-update/usage of
accessories
is described in the comprehensive user‘s manual.
System Requirements
Processor (500 MHz or higher)
Windows 2000 SP4 (Rollup 1), XP SP2, Vista, Windows 7
USB 1.1 or USB 2.0
MAPI-compatible E-Mail-Program for E-Mail-connection
(for example: Microsoft Outlook)
■
■
■
■
Page 10
10
Operating
Easy ModE - MEnu ModE
The Easy ModE serves for making the pure dictation functionality of
the Digta 420 available for the author.
The menu functions are in an off-state in the Easy ModE.
The switchover from the Easy ModE to MEnu ModE is achieved
through switching on the Digta 420.
A description about the full functionality of the Digta 420 is included
in the comprehensive user manual. You will find this manual in the
„Docu” directory on the delivered CD.
Switchover of the Modis from Easy ModE to MEnu ModE
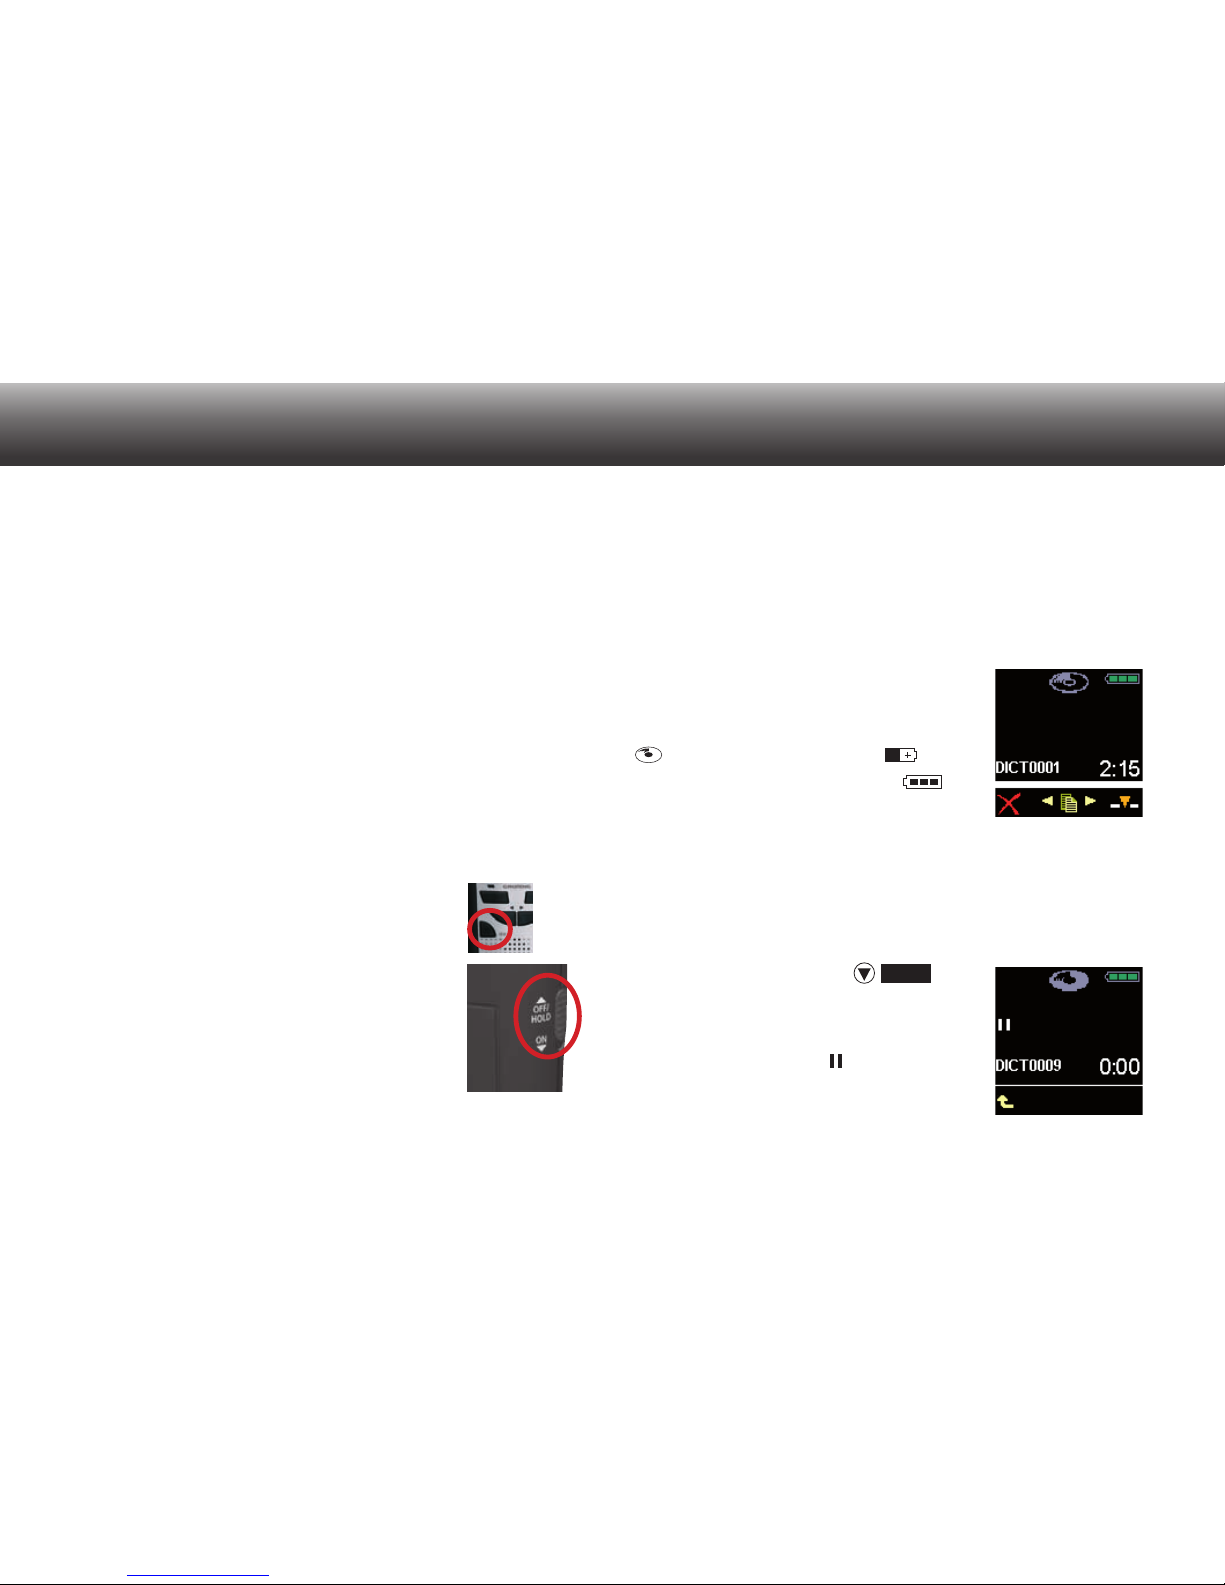
Press the „NEW“ button of the Digta 420.
Switch on the Digta 420 by means of the On/Off
switch and keep the „NEW“ button pressed until
the initial signal appears on the display (hour
glass and progress bar).
►
►
Easy ModE
All functions needed for dictating, play-back or erasing dictations
work in the Easy ModE.
Initial Display View
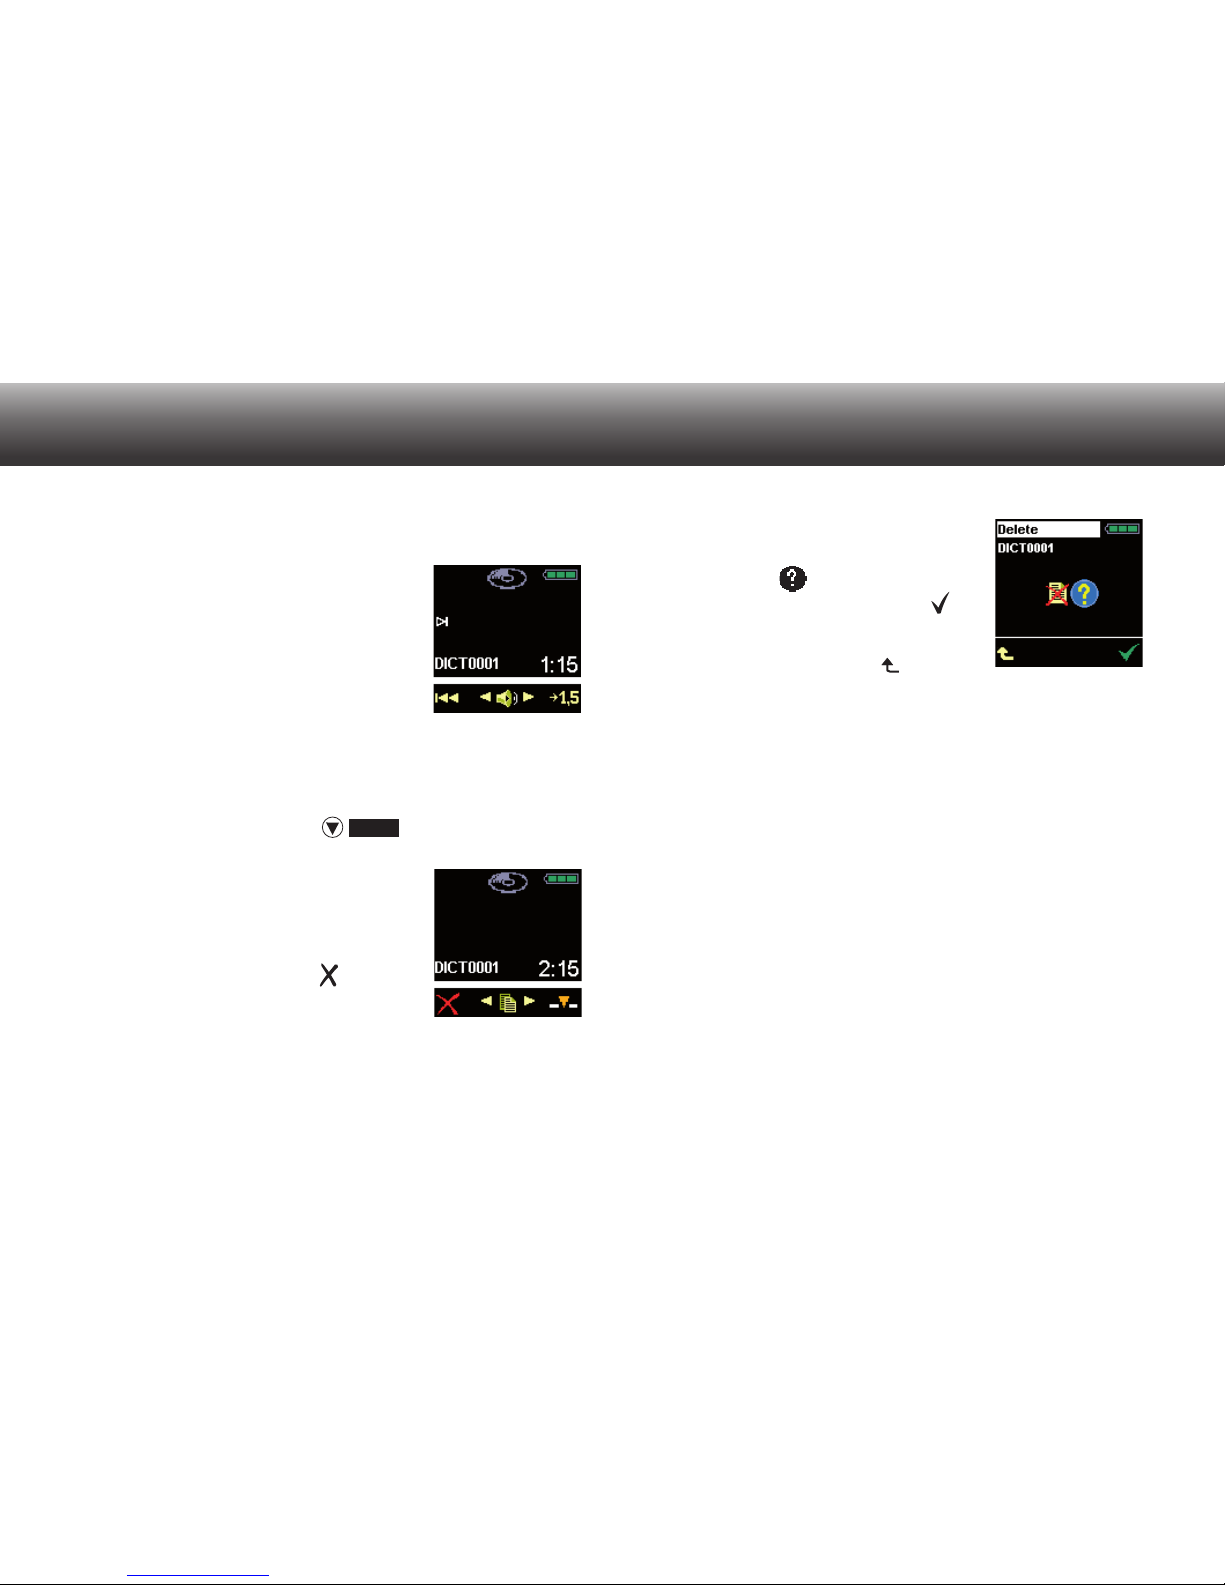
A dictation name and the length of the dication is displayed. In case that there are no
dictations stored, the Start/Stop indicator
» « and the battery indicator » « or
the rechargeable battery indicator » «
will appear on the display.
Pay attention to the remaining free memory space. When the
remaining memory space is less than 60 minutes, the remaining
memory space will appear in the upper right corner of the display.
Create a New Dictation
Move the slide switch to »
STOP
«.
Press the „NEW“ button to start a new
dictation. The
Digta 420 will switch over
to the recording pause , the LED-indicator of the Digta 420 will blink red .
►
►
Operating
Page 11
11
Operating
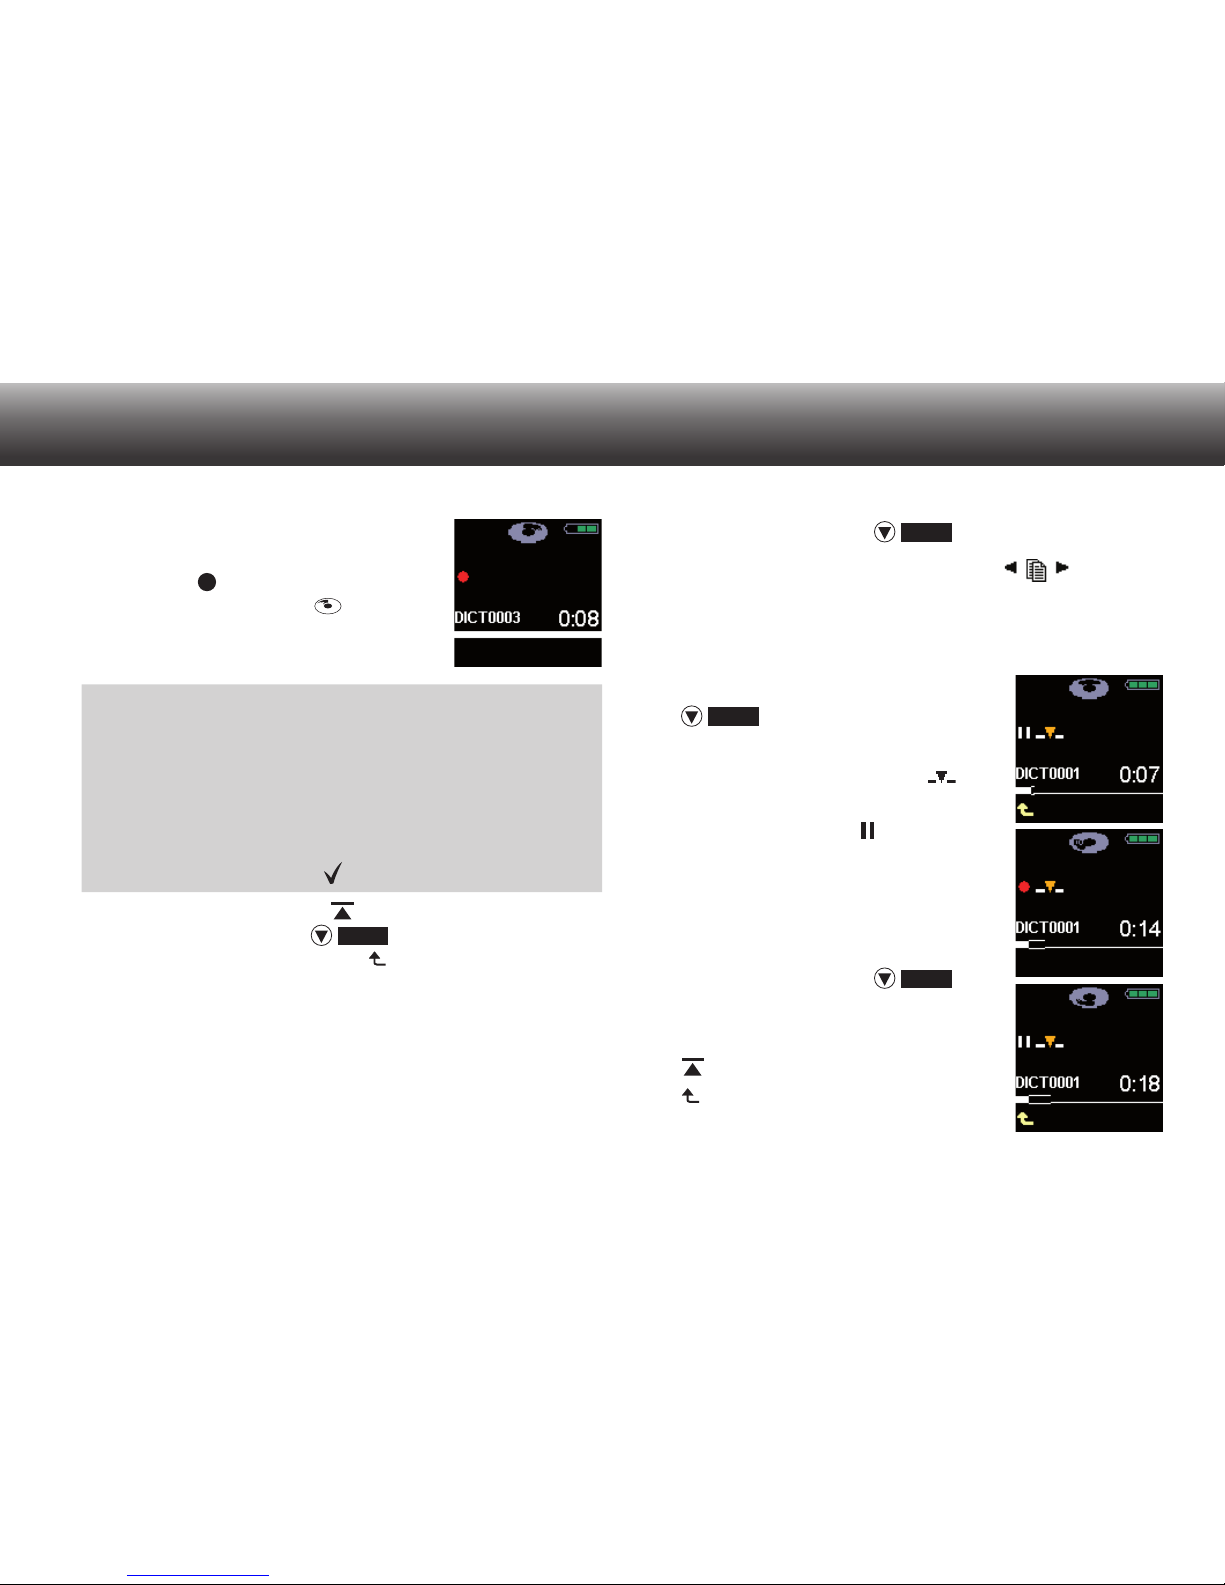
Move the slide switch to the
»►START« position to start the
recording » «.
The Start-Stop-indicator » « starts to
rotate. The dictation length counter starts
to run.
i
NOtE
In case that workflow-functions such as „typist“,
„group“, „dictation type“, „priority“ or „No./reference“ have been activated in the MEnu ModE, you
now will be prompt to select an item by using the
navigation button and to confirm it by using the
function button » «.
Press the red recording button
» DICT«
to end a recording or
move the slide switch to the
»
STOP
« (recording pause) position. Press the left selection button » « to stop the recording
pause.
Insertion of a Dictation Part
During recording, a new recording can be inserted at a specific
dictation position.
►
Move the slide switch to »
STOP
«.
Select by means of the navigation button » « the dictation desired.
Move the slide switch to the »►START« position in order to
listen to the dictation.
Move the slide switch during recording to
»
STOP
« and to the dictation position
where you intent to insert the text.
Press the right selection button » «,
the recording indicator will blink orange,
and the pause symbol » « will appear
on the display.
Move the slide switch to the
»►START«
position and dictate the text to be inserted.
Move the slide switch to »
STOP
« at
the end of the insertion process.
Then press the red recording button
»
DICT
« or the left selection button
» « to finish the process.
►
►
►
►
►
►
►
►
Page 12
12
Modify a Dictation
You can rerecord the dictated text during the play-back process
from a specific dictation point on or record an additional text at the
end of the dictation.
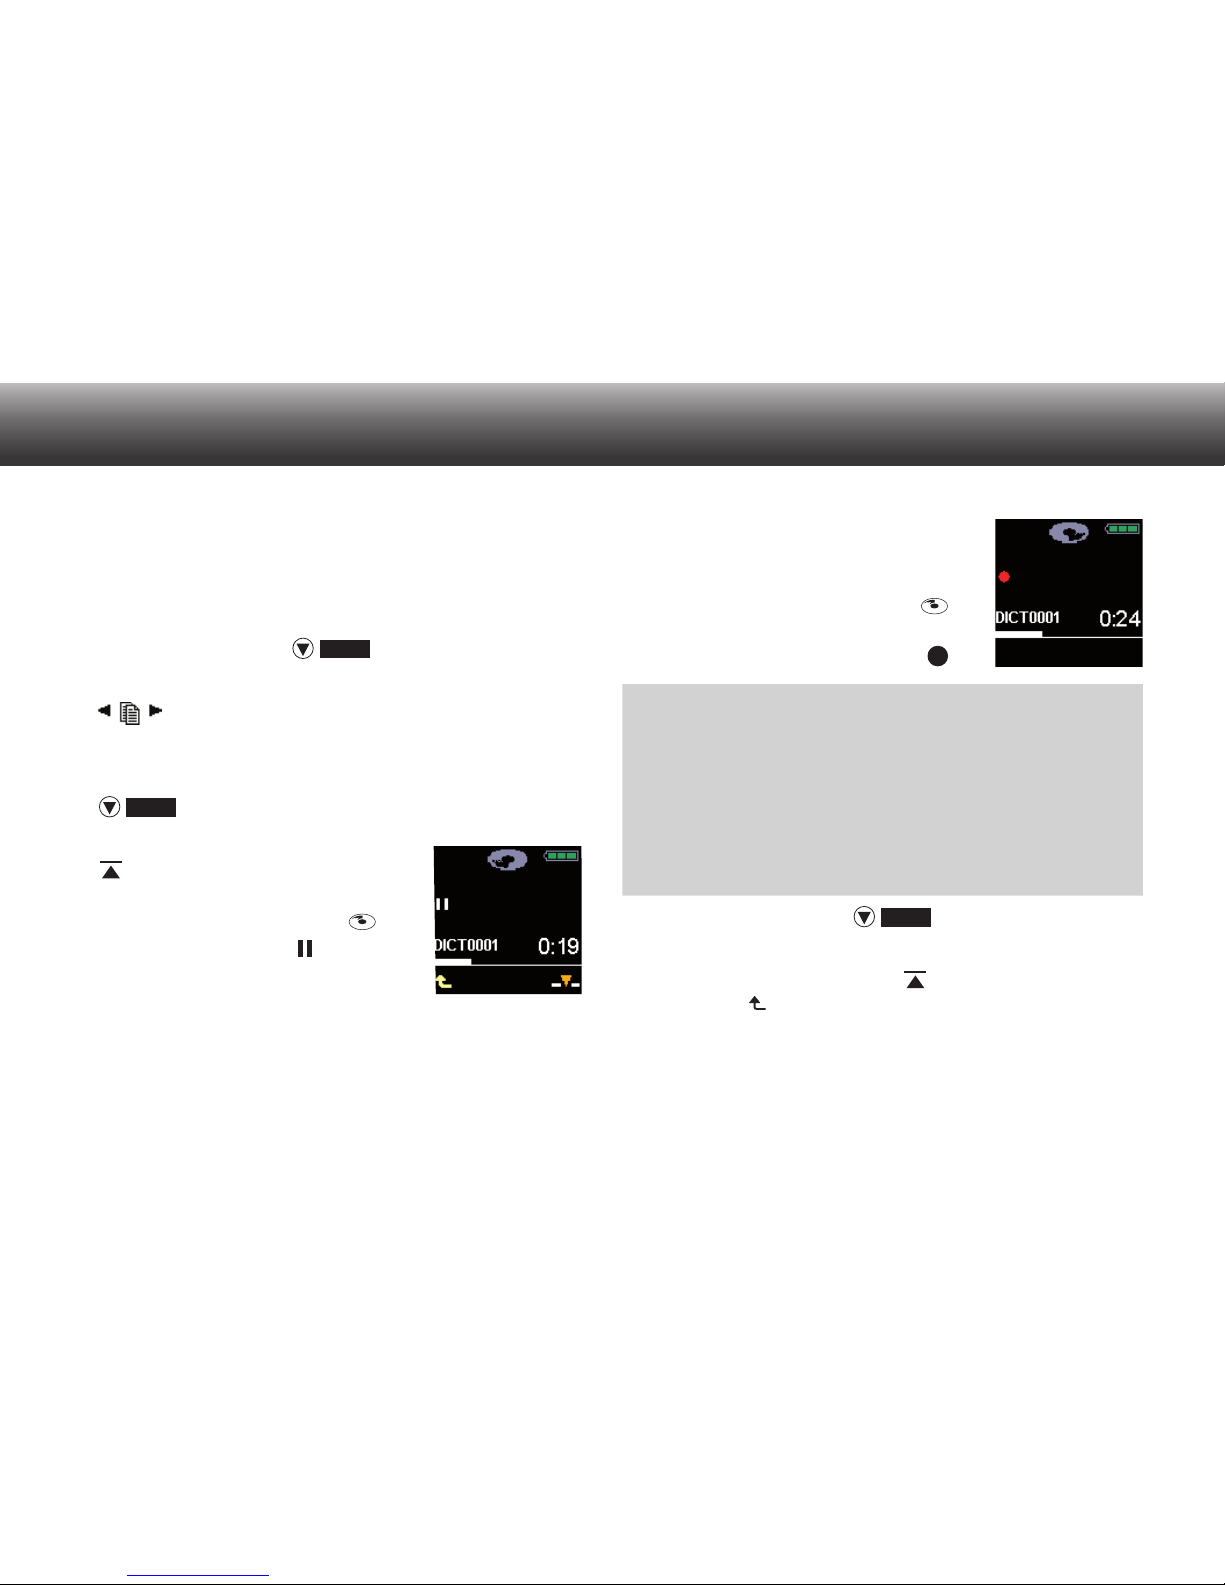
Move the slide switch to »
STOP
« position.
Select the desired dictation by using
the
navigation
buttons
» «.
Move the slide switch to the »►START« (play-back)
position
.
Move the slide switch to the desired dictation position to
»
STOP
« during play-back.
Press the red recording button
» DICT
«, the red recording indicator
will blink and the bright Start-Stop-indicator will appear on the display » « as
well as the pause symbol » «.
►
►
►
►
►
Move the slide switch to the
»►START« position and dictate your
new text. The red recording indicator will
light up. The Start-Stop indicator » «
will turn around and the pause symbol
will turn into the recording symbol
» «.
i
NOtE
From this point on, your old dictation will be overwriten.
When pressing the red recording button during
play-back, the dictation machine changes into the
recording mode after releasing the button, and
your old dictation will be overwriten.
Move the slide switch to »
STOP
« at the end of the dicta-
tion.
Press the red recording button » DICT« or the left selec-
tion button » « to stop the recording.
►
►
►
Operating
Page 13
13
Operating
Select and Listen to a Dictation
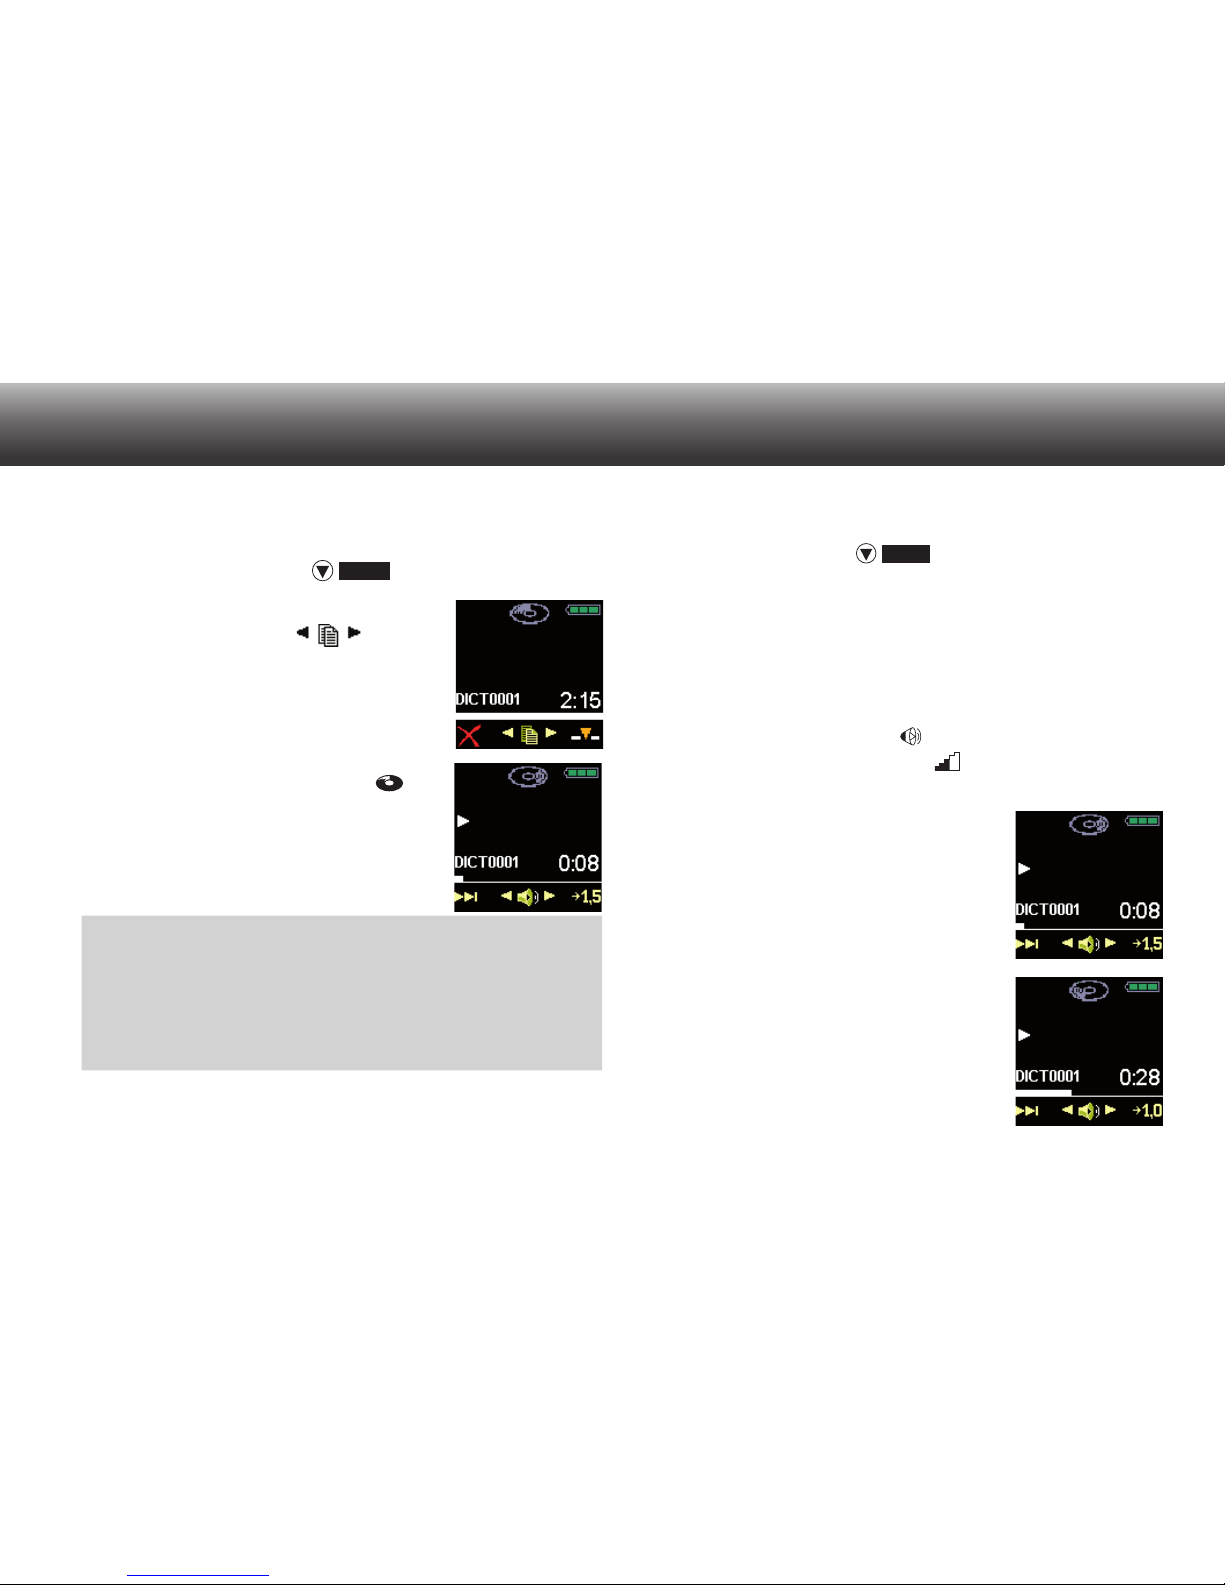
Move the slide switch to »
STOP
« position.
Select the desired dictation by using
the navigation buttons » «. The
selected dictation name will appear on
the display, for example:
»DICT0001«
.
Move the slide switch to the
»►START«
position.
– The dark Start-Stop indicator »
«
on the display will start to turn around:
The play-back symbol »►« will
appear on the left side of the display.
The progress bar will start running.
i
NOtE
When you switch ON the dictation machine and do
not select „new dictation,“ the dictating machine
will skip exactly to the last position of the last dictation which was in progress.
►
►
►
When you intent to interrupt the play-back process, just move
the slide switch to the »
STOP
« position.
Setting the Volume
Press the left navigation button during the play-back process
to turn down the volume or press the right one to turn up the
volume.
–
The loudspeaker symbol
» « in the display will turn into
the volume setting symbol » «.
Fast Play-Back
Press the right selection button»
→
1,5
«
during the play-back process.
– The play-back will run ca 1.5 times
faster.
Press the right selection button
»
→
1,0
« during the fast play-back process to return to the standard play-back
speed.
.
►
►
►
►
Page 14
14
Fast Skip to the Start/End Position of a Dictation
Move the slide switch to the
»►START« position.
You can skip to the end or the beginning
of the dictation by lightly pressing the
selection button.
Delete an Entire Dictation
Move the slide switch to the »
STOP
« position.
Select the desired dictation by means
of the navigation button »
◄►
«. The
selected dictation name will appear on
the display, for example:
»DICT0001«.
Press the left selection button » «,
to
access the menu item „delete“.
►
►
►
►
►
A prompt appears, and you are asked
whether you really want to delete the
entire dictation » «. If so, confirm it by
pressing the right selection button » «.
Then, the dictation will be deleted.
Press the left selection button » «,
in
case that you do not want to delete the
dictation.
Automatic Formatting
When 50 dictations have been stored and deleted, the memory
will be formatted automatically when switching off the device. This
process is progressed during the shut-down process.
Data transfer to the PC and Forwarding
Connect the Digta 420 to the USB-cable and plug the USB-cable
to the pc in order to transfer the dictations to your pc first, and in a
next step, you can send the data to your typist. The Grundig Business System pc-software can be configurated so that the entire
process runs automatically. The used memory space is then available again.
►
►
Instructions For Use
Page 15
Menu Function Overview
Easy ModE - MEnu ModE
The menu functions are switched off in the Easy
ModE. Press the „NeW“ button when switching on
the Digta 420 till the initial display view appears
on the display (hour glass and progress bar).
Menu Function Overview
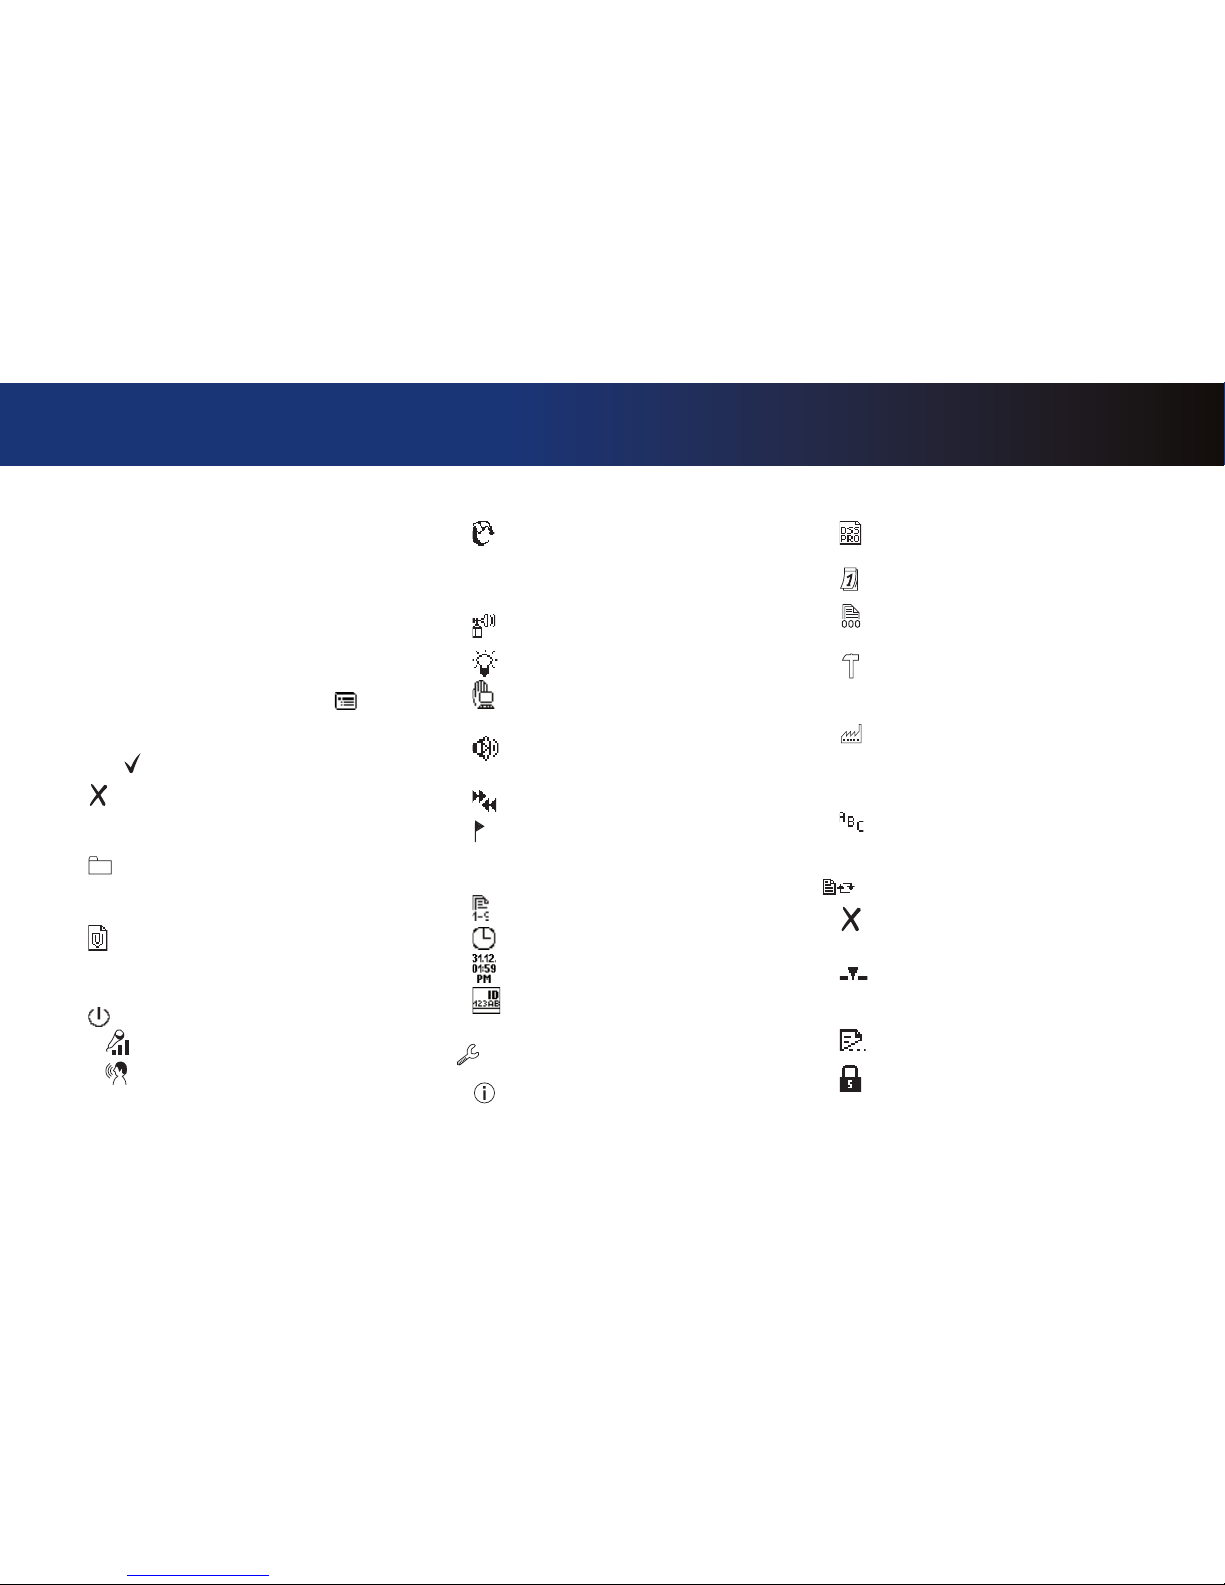
Press the right selection button » «. The following functions can be selected by means of the
nagivation button »
◄►
« and by confirming with
the » « button.
– Delete: dictation, all dictations in a folder,
all
dictations in all folders.
– Folder selection; for sorting of new
dictations and play-back of dictations
stored in different folders.
– Workflow-function (typist, dictation type,
group, priority, No./reference) activation.
– Switch functions:
– Set microphone sensitivity.
– Voice activation. The recording stops
automatically during silent periods or recording pause).
– Select time when the energy saving,
non-operative state shall be activated
automatically. The Digta will switch off
completely after 30 minutes.
– Switch off audio signals.
– Display illumination bright/dimmed.
– Pc-data transfer automatically through USB-connection or manual selection.
– Switch off the loudspeakers for play back with earphones in the Digta station.
– Change the fast forward/rewind speed.
– Set an index or 1.5 fold play-back
speed with the right selection button
during play-back.
– Dictation position number on/off.
– Time indicator on/off.
- Change of the date-/time format.
- ID-contents (barcode) indicator on/off.
– Basic settings of the device:
– Information about serial number and
firmware-version.
–
Selection of the DSS standard "SP",
DSS
Pro "QP"and encryption.
– Change of date/time.
– Reset dictation counter to "1".
– Reformat data medium.
Attention: data loss! All dictations and
other data will be erased.
– Restore the factory setting of the device
Attention: data loss! All dictations and
other files as well as settings will be
erased.
– Selection of display language.
– Functions in the modify menu:
– Delete a dictation or a part of the
dictation.
– Insert a text, an info or an index.
PR – Set dictation priority.
– Postpone a dictation.
– Lock a dictation.
Page 16
Mit allen Funktionen, durch die
professionelle Vieldiktierer effektiv
Zeit sparen. Mit einer überzeugenden
Bedienerfreundlichkeit.
Und mit einer technischen Ausstattung, die
keine Wünsche offen lässt.
Grundig Business Systems GmbH
Weiherstraße 10
D-95448 Bayreuth
Germany
www.grundig-gbs.com
36174 941 1102 07/2009
 Loading...