

Page 1
COLOR TELEVISION
MW 82-2699 NIC/FT
V
Page 2
Contents
ķ
2
If the dealer has already installed the TV set and
made adjustments, then begin on page 7 of this
instruction manual.
❒
Safety, installation and connections
3
Safety precautions . . . . . . . . . . . . . . . . . . . . . . . 3
Example of connections . . . . . . . . . . . . . . . . . . . 3
❒
Preparations and
assigning program positions 4-6
Inserting batteries in the remote control . . . . . . 4
Switching the set on and off . . . . . . . . . . . . . . . . 4
The DIALOG CENTER as a user guide . . . . . . . . . 4
Assigning program positions with the
Automatic Tuning System ATS . . . . . . . . . . . . . 5
Deleting programmes . . . . . . . . . . . . . . . . . . . . . 5
Sorting programmes . . . . . . . . . . . . . . . . . . . . .5
Limiting program position selection . . . . . . . . . . 5
Manual tuning of TV programmes . . . . . . . . . . . 6
❒
The remote control, short description
for TV operation 7
❒
Sound tuning 8
Calling up the »Sound« menu . . . . . . . . . . . . . . 8
Stereo width . . . . . . . . . . . . . . . . . . . . . . . . . . . . 8
Sound (Stereo-/two-tone, mono) . . . . . . . . . . . . 8
Treble, bass, balance . . . . . . . . . . . . . . . . . . . . . 8
❒
Picture tuning 8
Calling up the »Picture« menu . . . . . . . . . . . . . 8
Contrast . . . . . . . . . . . . . . . . . . . . . . . . . . . . . . . 8
Picture sharpness . . . . . . . . . . . . . . . . . . . . . . . . 8
Brightness and colour contrast . . . . . . . . . . . . . 8
Switching the picture format to 16:9 . . . . . . . . . 9
❒
Videotext operation 10-13
Short description of videotext . . . . . . . . . . . . . 10
TOP-FLOF text operation . . . . . . . . . . . . . . . . . . 11
Normal videotext operation . . . . . . . . . . . . . . . 11
Enlarging the videotext page . . . . . . . . . . . . . . 11
Page-freeze for multi-page displays . . . . . . . . . 12
Calling up sub-pages directly . . . . . . . . . . . . . . 12
Answer release . . . . . . . . . . . . . . . . . . . . . . . . . 12
»Page catching« – select certain videotext
pages directly and call up . . . . . . . . . . . . . . . . . 12
Bridging waiting times . . . . . . . . . . . . . . . . . . . 13
❒
Comfort functions 14-15
Special functions . . . . . . . . . . . . . . . . . . . . . . . 14
TV on with . . . . . . . . . . . . . . . . . . . . . . . . . . . . 14
Picture/sound scale . . . . . . . . . . . . . . . . . . . . . 14
Station name . . . . . . . . . . . . . . . . . . . . . . . . . . 14
Equalizing the volume . . . . . . . . . . . . . . . . . . . . 14
Sleep Timer . . . . . . . . . . . . . . . . . . . . . . . . . . 14
Displaying the programme position number . . . 14
Parental lock . . . . . . . . . . . . . . . . . . . . . . . . . 15
Decoder selection . . . . . . . . . . . . . . . . . . . . . . . 15
Manually adjusting the colour norm . . . . . . . . . 15
Selecting a blue screen . . . . . . . . . . . . . . . . . . . 15
Selecting a black screen . . . . . . . . . . . . . . . . . . 15
Sat . . . . . . . . . . . . . . . . . . . . . . . . . . . . . . . . . . . 15
Service code . . . . . . . . . . . . . . . . . . . . . . . . . . . 15
❒
Connection possibilities
and operations 16-17
AUDIO/VIDEO connections . . . . . . . . . . . . . . . . 16
Connecting a decoder or
satellite receiver . . . . . . . . . . . . . . . . . . . . . . . . 16
Connecting a video recorder or
SET TOP box . . . . . . . . . . . . . . . . . . . . . . . . . . 16
Copying video tapes
via the TV set . . . . . . . . . . . . . . . . . . . . . . . . . . 17
Connecting a camera recorder . . . . . . . . . . . . . . 17
Connecting headphones . . . . . . . . . . . . . . . . . . 17
❒
Technical data 18
❒
Correcting problems yourself 19
Environmentally relevant information is marked using this symbol.
Notes on the environment by
Grundig
Technology and ecology combine into a convincing
overall concept with this TV set. Ecologically highquality materials are used exclusively. The housing
contains a high amount of recyclable parts from
used plastics and the surface colours used are
water-based, partly recycled. Wherever possible,
painting of individual housing parts has been omitted. Due to the optimized housing construction,
flame protection materials have been omitted. The
number of plastic types has been reduced through
and through in order to ensure high-quality recycling when the set is put out of use – all larger
plastic parts are marked. For optimum re-use, this
TV set has been constructed in such a way as to
make dismantling very easy.
Page 3
Safety, installation and connections
ķ
3
Ń
!
Opening and maintenance of the set may be carried
out only by authorized service personnel.
Ń
!
This TV set is designed to receive and reproduce
picture and sound signals.
Any other use is expressly prohibited.
Connections
❒
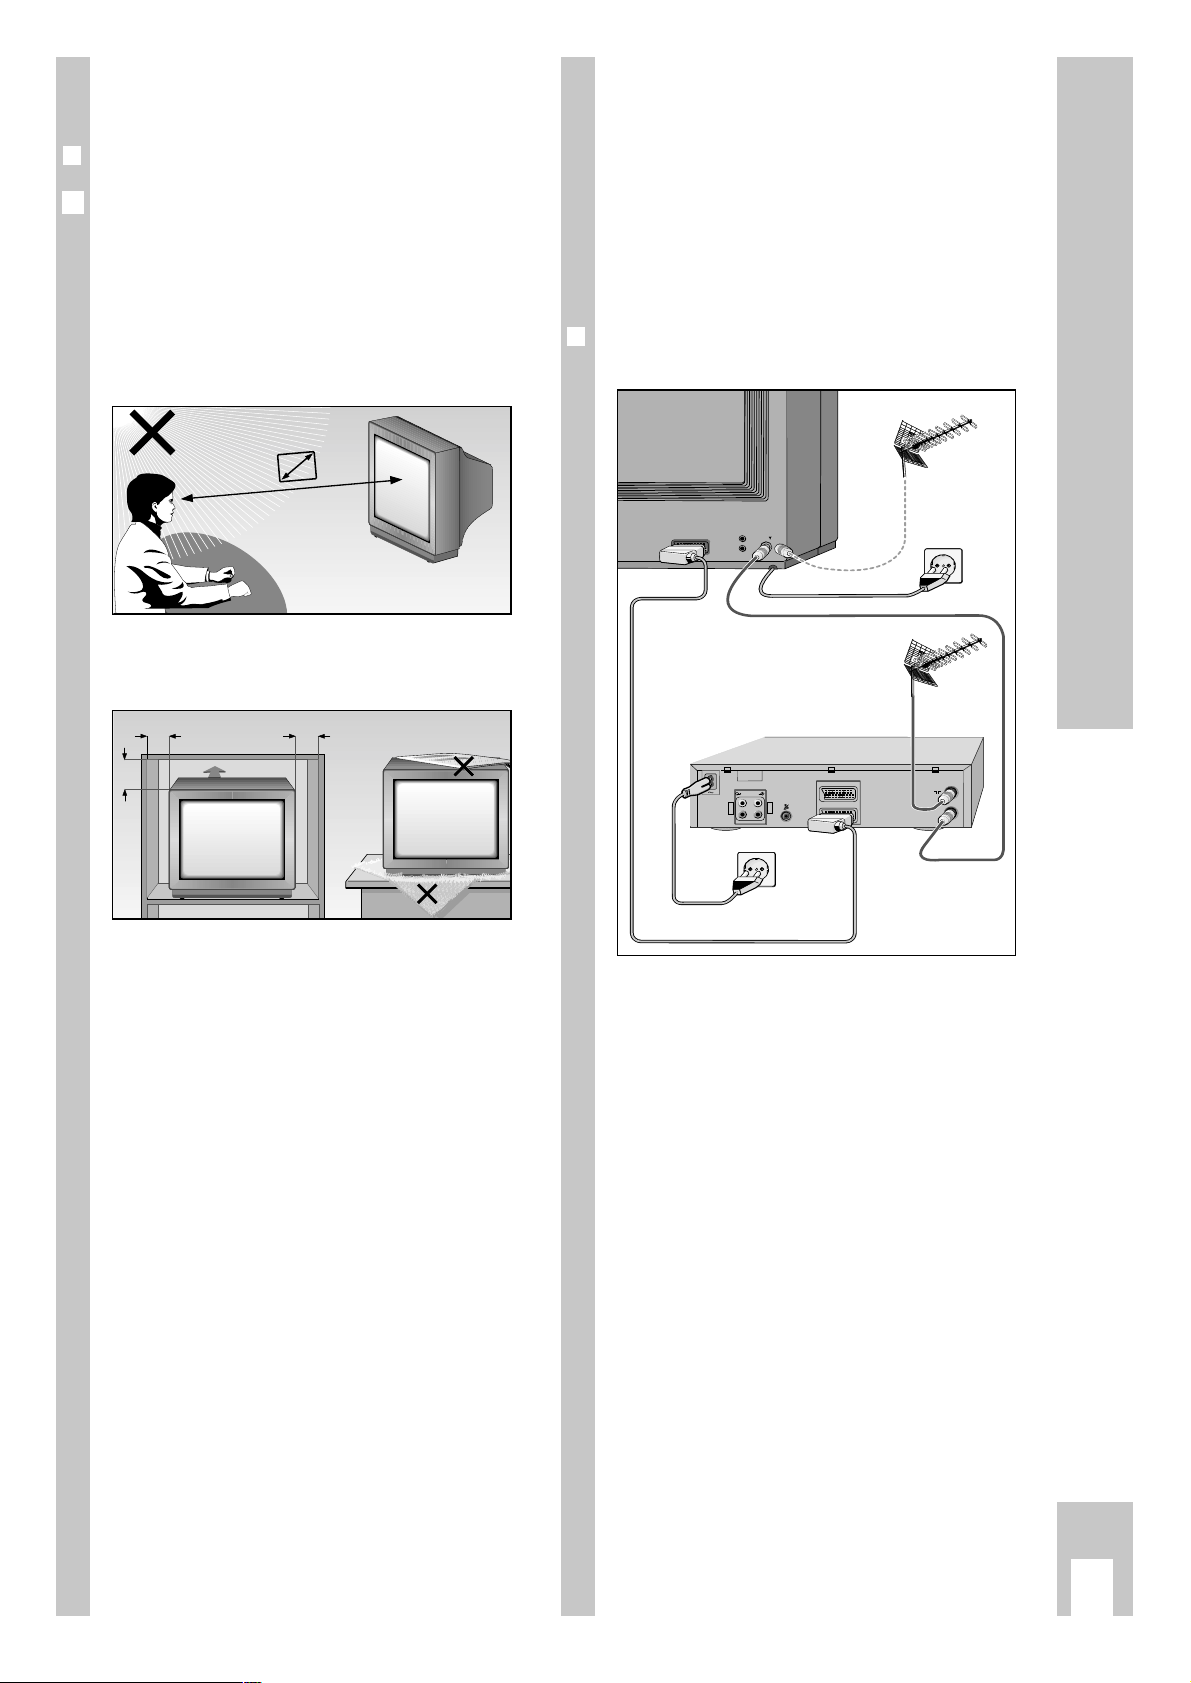
Example of connections
(TV set and video recorder)
ń
R
L
AUDIO
R
L
I
N
O
U
T
EURO - AV 2
AV 1
EURO - AV 1
AV1
AV1
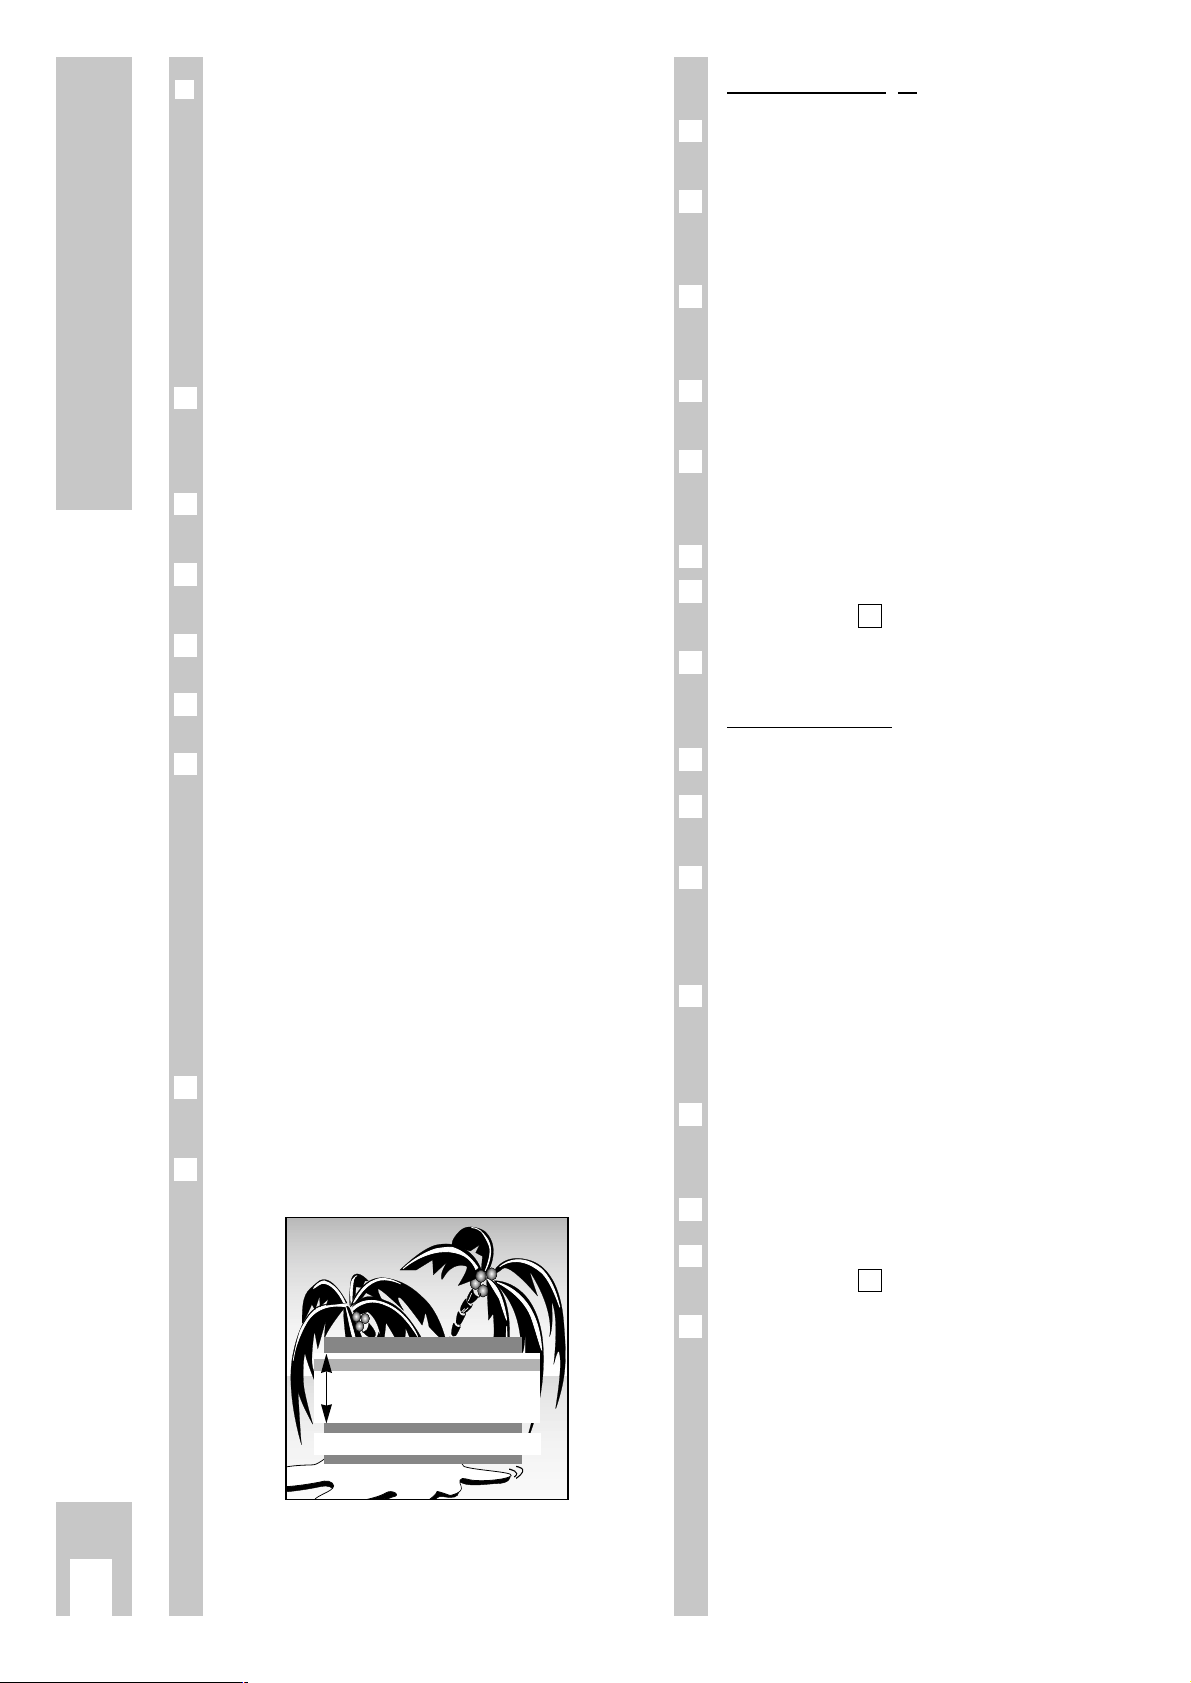
Safety and installation
❒
Dear customer
In order that you may enjoy the entertainment of
this high-quality comfortable TV set for a long time
it is very important that you observe the following
points when installing the set.
Ń
!
The ideal position for viewing is 5 times the diagonal width of the screen.
External lights in the direction of the screen have a
negative influence on picture quality.
Ń
!
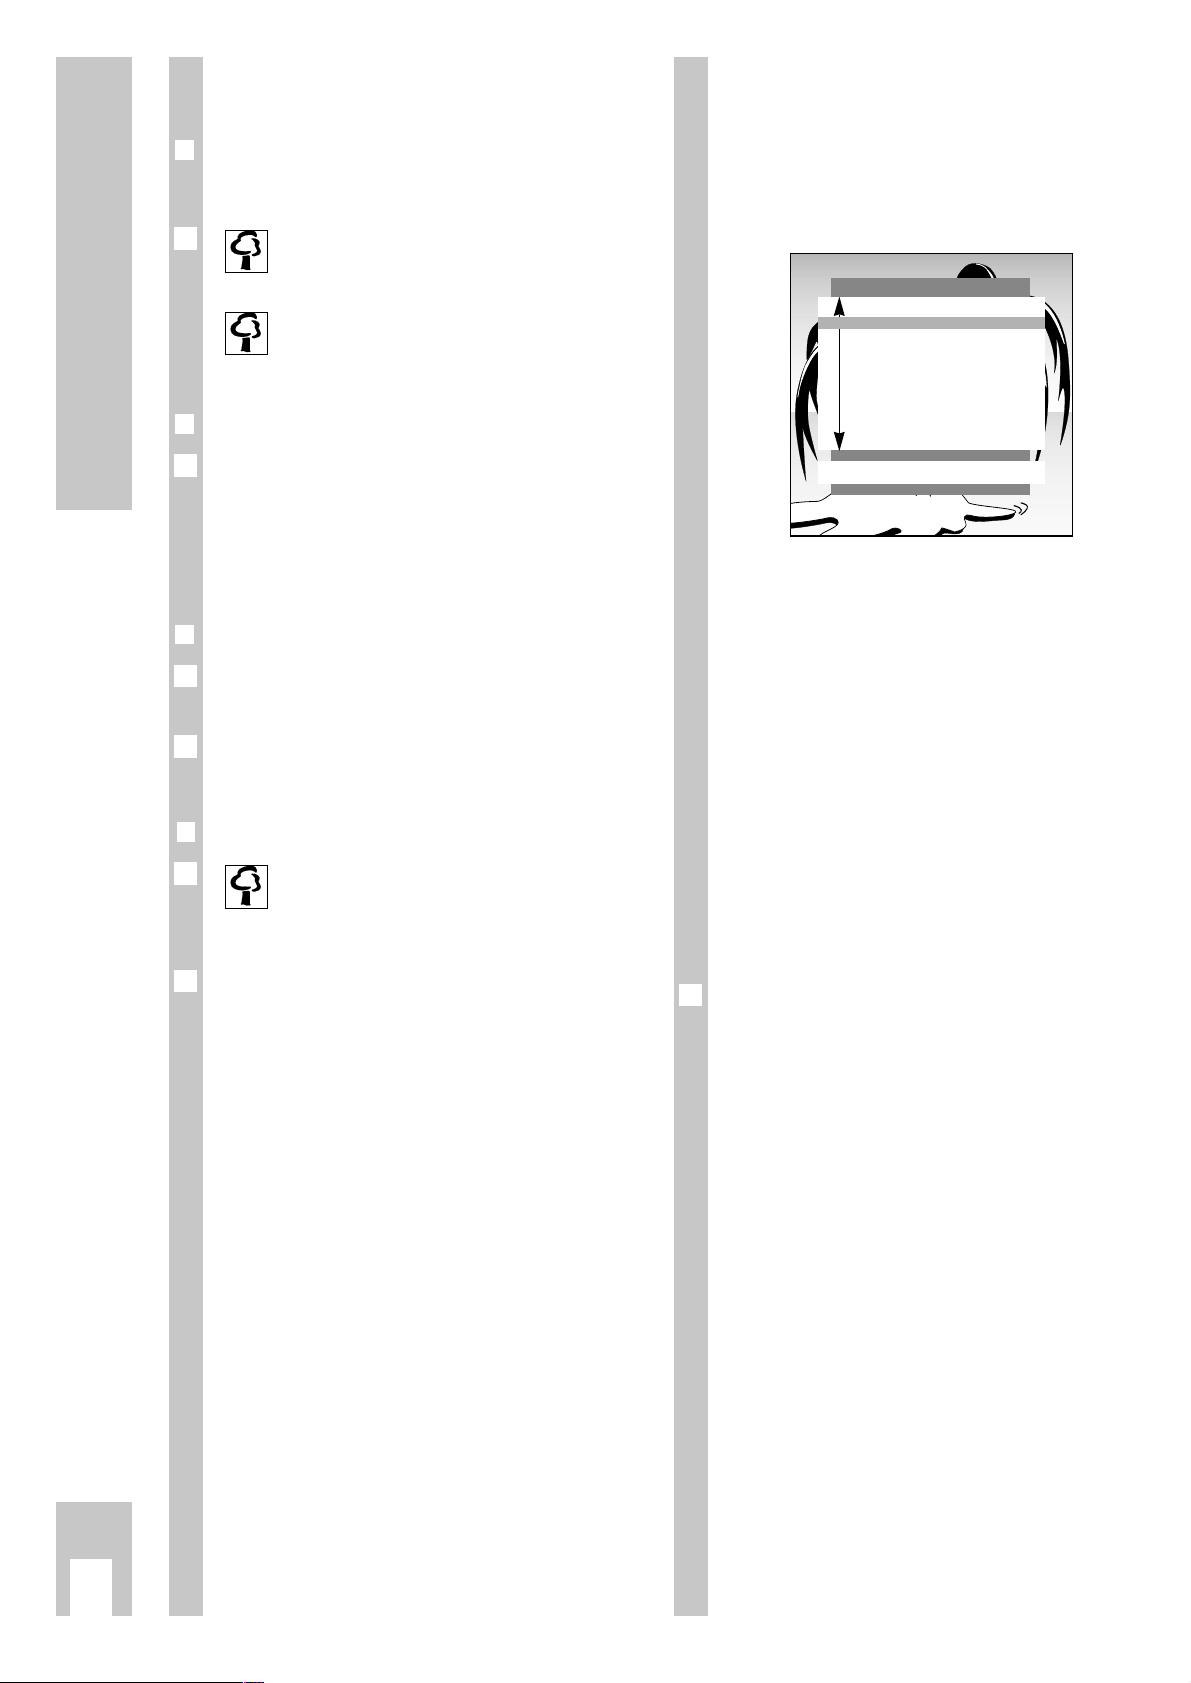
Sufficient space inside cabinets in a corresponding
location.
Ń
!
Do not place any covers on the ventilation slits.
Ń
!
Heat could build up inside the set.
Heat building up inside the set causes danger and
has a negative influence on the life expectancy of
the set. From time to time, have a specialist remove
the particles which have collected inside the set.
Ń
!
Do not damage the mains supply cable.
“The appliance may only be operated using the
mains cable set supplied. It prevents mains interference and is an integral part of the device approval”.
Ń
!
Do not set up any magnetic fields (e.g. loudspeakers) near the set.
Ń
!
Make sure that no liquids or external objects penetrate the appliance (danger of short circuits).
Ń
!
Clean the screen with a soft damp cloth only. Use
only clear water.
Ń
!
Avoid damage by lightning by removing the mains
and aerial cables.
Even if the set is switched off, damage can occur
due to lightning striking the mains supply and/or
the aerial cable.
Krieg am Golf
10
cm
10
cm
20
cm
20 cm
Ǻ
5 x
Page 4
Preparations
ķ
4
Preparations
❒
Inserting batteries in the remote control
Ń
!
Observe polarity in the battery case.
When the batteries are spent a prompt
»Battery« will appear on the screen.
Spent batteries must always be removed.
Dispose of spent batteries in an environmentally safe manner.
❒
Switching the set on
Press button ü on the set.
If the display lights up, then the set is in standby.
Use number buttons 1–
AV
0
or the P
button on the remote control to switch the TV set
on completely.
❒
Switching the set to standby
Press button A on the remote control.
The set is not switched off completely.
The set can be switched back on using the remote
control.
❒❒
Switching the set off completely
If you are not using the set for a longer
period of time (e.g. at night), then switch the
set off completely.
This saves energy.
Press button ü on the set.
1
Ǻ
Ǻ
1
1
Ǻ
The DIALOG CENTER as a user
guide
The DIALOG CENTER and the individual pages of
the user guide display the possible functions and
the buttons on the remote control with which these
functions may be activated.
Button symbols and dialogue lines display possible
operating steps.
The characters on the screen are symbols for
the following buttons on the remote control:
Symbol Button Function
Ń Pp Selects lines or functions
Ľ step by step on a page.
ľı FE Changes settings.
Ǻ h Calls up the DIALOG CENTER
(h and G) and switches
back from the pages to the
DIALOG CENTER.
OK G Confirms functions.
TXT
¢
TXT
Exit settings.
Please memorize these buttons, they are required
repeatedly for the following operating steps!
Ǻ
DIALOG CENTER
OK TXT
LANGUAGE SELECTION
SLEEP TIMER
PARENTAL LOCK
SPECIAL FUNCTIONS
PROGRAM SORT
MANUAL TUNING
AUTOMATIC TUNING SYSTEM
SERVICE
Page 5

Settings
ķ
5
Assigning programme positions
with the automatic tuning system
ATS
The set is equipped with the automatic programme
position search system ATS which carries out programme position assignment for you.
You start the automatic search and may afterwards
sort the programmes in a sequence of your choice.
You may also delete programmes which have been
found more than once or those with bad reception
from the programme list.
After switching on the set the page
»LANGUAGE SELECTION« appears.
A selection can be made from several languages for
the dialogue between you and the TV.
The user guide displays appear in the selected
language.
Select the dialogue language with button p or P
and confirm with the G button.
Select the countrywith the p or button P and confirm with the G button.
If you do not find your country in the list, then select »Others« and confirm with the G button.
The page »AUTOMATIC TUNING SYSTEM « appears.
The page » AUTOMATIC TUNING SYSTEM « can
also be called up directly from the » DIALOG
CENTER«.
Depending on the number of programs received, this
activity can take one minute or longer.
Ǻ
Ǻ
3
2
Ǻ
1
AUTOMATIC TUNING SYSTEM
OK Start
■
After searching, the set switches to program position 1 and the page »SORT« appears.
❒
Deleting programmes
Select the programme to be deleted with button p,
P.
Delete the programme with the -button.
To delete more programmes, repeat, beginning
with step .
❒
Sorting programmes
Select the programme which is to be re-sorted by
pressing button p, P.
Mark the programme with the G button.
Select a new programme position with button p,
P.
Save the setting with the G button.
To sort more programmes, repeat, beginning with
step .
Exit setting by pressing
¢
TXT
.
Pages »AUTOMATIC TUNING SYSTEM«, » SORT«
(under » Programme sorting «) and » LANGUAGE
SELECTION« can also be called up directly from the
»DIALOG CENTER«.
Ǻ
5
1
Ǻ
4
3
2
1
1
Ǻ
2
1
Ǻ
SORT
OK Sort
AUX Delete
ǺǺ
Return
TXT
TV
P 01
P 02
P 03
P 04
P 05
P 06
P 07
P 08
P 09
P 10
LANGUAGE SELECTION
OK
D Deutsch
DK Dansk
E Español
F Français
FIN Suomi
GB English
GR Hellas
I Italiano
N Norge
NL Nederlands
P Portugues
S Svenska
TR Türkçe
Page 6
Settings
ķ
6
❒
Limiting the programme position
selection
The ATS search saves all programmes it has found
and automatically “locks” the first position to which
no program is assigned. In this way, when programme positions are selected step by step (“zapping“), using buttons p, P only programmes
which have been found can be selected.
You may also enter this limit manually, in the example the “lock” has been activated as of programme
position 6.
Press the h button and then G.
The page » DIALOG CENTER « will appear on the
screen.
Select the line » MANUAL TUNING « using button
p or P and confirm with G.
Select programme position 6 on the » MANUAL
TUNING« page with the F or E button.
Select the line called »C/S«, then select »Channel«
using F or E.
Select the line called »Channel«, then select » 00«
using 0 … 9.
Save this setting with G and exit using button
¢
TXT
.
Now only the first 5 channel positions can be switched through in rapid sequence with the p or P
button.
All single digit channel positions – as well as the
“blocked” – can continue to be selected using the
digit buttons 0 … 9.“All” channel positions can
be selected using the digit buttons if a two digit
channel position is blocked.
Setting TV programmes manually
Press the h button and then the G button.
The page »DIALOG CENTER« appears.
Select the line »MANUAL TUNING« with the p or
P button and confirm with the G button.
2
1
6
5
4
3
2
1
Direct channel input
Select the programme position with the digit buttons 0 … 9 or with the F
or
E button.
Select the line »C/S« with the p or P button.
Select »channel« or »s-channel« with the F
or
E
button.
Select the line »Channel« with the p or P button.
Enter the desired channel number with the digit
buttons 0 … 9 or with the F
or
E button.
Select the line »Standard« witht the p or P button.
Select the required setting with the F
or
E button.
Fine-tune the picture if necessary. To do this select
the line »Finetun.« with button p or P.
Alter fine tuning with buttons F
or
E.
Store setting with the G button.
To set more programmes, repeat the procedure
starting at point .
End setting with the
¢
TXT
button.
Automatic sear
ch
Select the line »Channel« with the p or P button.
Start the automatic station search with the »blue«
button.
Select the line »Programme« with button p or P.
Select the channel position, at which you would like
to save the channel once found, with the numeric
buttons 0 … 9 (01 – 99).
The colour and sound standards are allocated automatically. If the colour and/or sound not correct,
select the line »Standard« with button p or P. Select the required setting with the F
or
E button.
Fine-tune the picture if necessary. To do this select
the line »Finetun.« with button p or P.
Alter fine tuning with buttons F
or
E.
Store setting with the G button.
To set more programmes, repeat the procedure
starting at point .
End setting with the
¢
TXT
button.
6
1
Ǻ
5
4
Ǻ
3
2
1
7
1
Ǻ
6
5
4
3
2
1
MANUAL TUNING
ǺǺ
OK Memorize 0 – 9 TXT
Program ľ 01 ı
C/S
Channel
Channel C 34
Finetun. 00
Standard automatic
Page 7

The remote control
ķ
7
Short description for TV operation
On this page the buttons of the remote control are
only briefly explained. Detailed descriptions can be
found in the various chapters.
Remote contr
ol video recorder
You may also use the remote control for this TV set
to operate a GRUNDIG video recorder. Your
specialist dealer can inform you on which ones are
suitable.
Press the VIDEO button and keep it depressed.
This converts the remote control to video recorder
operation.
Now press the required button.
The following list tells you which button operates
which recorder functions.
ĵķ (Button – i) = Picture search backward
ĶŁ (Button i +) = Picture search forward
● (Button k) = Record start
■ (Button g) = Stop
ĵĵ (Button –
v
) = Rewind
ŁŁ (Button
v
+) = Fast forward
ll ll (Button j) = Pause
ı (Button h) = Playback start
p = Channel position –
P = Channel position +
0…9 Switch on set from standby;
or
select programme position
AV
0
Select AV.
P Move forwards from one program-
me position to the next (1, 2, 3 …).
p Move backwards from one program-
me position to the next (… 3, 2, 1)
or
p, P Move the cursor up/down
FE Volume;
or
FE Move the cursor to the
left/rightts.
G Switches between both of the
channels last viewed.
Changes and activates several
functions,
Switches to optimum values
(button
-
and G).
h Call up » DIALOG CENTER «
(button
h and G).
h Clock ON/OFF (Time display only
for TV programmes with videotex
k Select »Picture« menu.
™
Adjust colour intensit.
VIDEO Remote control GRUNDIG video
recorder (keep VIDEO button
depressed).
VIDEO SAT
PIP AUX
321
654
987
0
TXT
TV-GUIDE
TELEPI LOT 810C
OK
P
P
A Switch set to standby.
¢
ĭ Sound on/off (mute)
¢
TXT
Videotext operatation ɫ TV operation
¢
D
ohne Funktion.
g Select »SOUND« menu.
®
Adjust brightnessn.
AUX
Select »Aux« menu; sound selection (with -and 2).
SAT Remote control GRUNDIG satelliten
receiver (keep SAT button depressed and select satellite program
using button p or P ).
E
Switch picture format
Page 8

Sound and picture tuning
ķ
8
Sound tuning
To make individual picture adjustments, select the
menu page »Sound«.
❒
Select the menu »Sound«
Press button g.
The menu page »Sound« appears.
Select the desired adjustment using button p or P.
The following adjustments are all terminated using
button g.
❒
Stereo width
Widens the sound effect for stereo transmissions
and improves mono reception.
Select the line »ʀ.. ǁ« and using button F or E
select the adjustment »ʀ....... ǁ«.
❒
Sound (stereo/two-tone, mono)
If the device receives two-tone transmissions – e.g.
a film in the original on sound channel B (display:
»DUAL B«) and the synchronized version on sound
channel A (display: »DUAL A«) – then you may select the desired sound channel.
If the set receives stereo or NICAM transmissions,
it automatically switches to stereo sound (display:
Stereo).
If the stereo reception is bad, then the sound
should be switched to »Mono«.
Select the line »
ʀ
P01« and using button F or E
select the desired sound type; » Mono « or
» Stereo « and for two-tone transmissions
»Dual A« or »Dual B«.
If the sound for a particular programme is to be
permanently in mono, then select the line »
ʀ
P«
and press the G button.
To reverse the function, repeat step .
❒
Treble, bass, balance
Tone settings can be adjusted to your individual
wishes.
Select the line »
u
« (balance), »ɼ « (bass) or
» ɦ « (treble) and make the desired adjustment
using F or E.
1
2
Ǻ
2
1
1
Ǻ
2
1
Picture tuning
If you would like to make individual picture adjustments, you may do this using the menu page »Picture« or using the remote control buttons.
❒
Call up the »Picture« menu
Press button k.
The menu page »Picture« appears.
Select the desired adjustment by pressing p or P.
The following adjustments are all terminated by
pressing button k.
❒
Contrast
The set has been tested using maximum contrast,
in order to check for reliability of all modules.
Depending on the location of the set and the
brightness in the room (surrounding light) it does
however make sense to reduce contrast slightly for
the best possible picture impression.
Adjust »Contrast« using button F or E.
❒
Sharpness
This allows you to adjust optimum picture sharpness according to your wishes.
Adjust »Sharpness« using button F or E.
❒
Brightness and colour contrast
Press » – « (minus) or » + « (plus) of the corresponding button until the desired adjustment is
obtained.
Adjust »Brightness« with button
®
.
Adjust »Colour contrast« (colour intensity) using
button
™
.
2
1
Ǻ
1
1
Ǻ
2
1
PICTURE
TXT
Contrast ľ ■■■■■■■■■■■ ı
Sharpness ■■■■■
SOUND
TXT
ʀ..ǁ
ľ
ʀ
..
ǁ
ı
ʀ
P 01 MONO
y MONO
u
ɼ
ɦ
Page 9

Switching the picture format to 16:9
ķ
9
❒
Switching picture formats
PALplus is the compatible further developement of
the PAL color television which has proved itself
over decades in a new 16:9 picture format which
has been developed by European broadcasting corporations and entertainment electronics corporations.
PALplus transmissions in 16:9 format are noted
specially in relevant magazines and in videotext.
The unit switches automatically to the 16:9 format
during PALplus transmissions.
Under bad reception conditions, it is possible for
the picture format to switch between 16:9 and 4:3.
In this case, the automatic picture format switching
function can be turned off. Read page 14 in the
chapter «Service» for information on this topic.
With the
¢
E
button, you can choose between
the picture formats: » Automatic format «,
» Format 16:9 «, » CINEMA «, » Format 4:3 « and
»PANORAMA «.
Automatic format
During 16:9 transmissions, the unit switches automatically to the »16:9« picture format.
During 4:3 transmissions, the picture is always displayed so as to fill the entire screen.
This setting is possible only if the the picture switching format in the »Service« menu is set to
»manual« (see page 14)
16:9 picture format
During 4:3 transmissions– with the » 16:9 picture
format « function selected – the picture appears
spread out horizontally.
The picture geometry is stretched out in the horizontal direction.
With actual 16:9 signal sources – fed in from a
separate decoder (for example a digital television
system » set-on-top « decoder) via the Euro AV
socket – the picture is completely filled and the picture geometry is correct.
Ǻ
1
Ǻ
Ǻ
CINEMA
This operating mode is designed primarily for
transmissions in the 16:9 format.
The black stripes one normally sees above and
below the picture are overwritten.
The Cinema operating mode displays 4:3 pictures
so that they fill the entire screen.
The transmitted pictures are enlarged, which means
that some picture content on the top and bottom of
the screen is lost. Howevere the picture geometry is
maintained.
PANORAMA
This operating mode is designed for cinema films transmitted by broadcasters – with extreme
width/height ratios.
For 4:3 transmissions – with the »Panorama Zoom«
function selected– the picture appears spead out
horizontally.
The picture geometry is stretched out in the horizontal direction.
Page 10

Videotext operation
ķ
10
S
ymbol explanatons
Make symbol line appear using button -.
Select function using button F or E.
Call up function using G.
Enlarge character height.
Bridge waiting time during TV operation.
Call up sub-page directly.
Answer release.
Page-freeze.
5
4
3
2
1
54321
G K HLI
Short description for videotext
operation
ǵ…Ǿ
Select videotext pages.
p, P Page Catching. Select
videotext pages directly
and call up using the
G button.
¢
TXT
Videotext operation
ɫ
TV operation.
j (yellow) Move on to next chapter
with overflow to next
topic; move on to next
“10” page.
g (blue)
Move on to next topic;
move on to next “100” page
®
» + « Answer release;
» – « Stop page.
¢
AUX
Call up symbol line (see
below).
VIDEO SAT
PIP AUX
321
654
987
0
TXT
TV-GUIDE
TELEPI LOT 810C
OK
P
P
h Call up videotext table of
contents.
k (red) Page back.
h (green)Page forward with over-
flow to next chapter.
™
» + « Enlarge page;
»–«
Call up sub-page
directly.
Page 11

Videotext operation
ķ
11
❒
Normal videotext operation
Switch on videotext with button
¢
TXT
.
The table of contents page no. 100 or the videotext
page last selected appears.
Select the videotext page. To do this, enter the page
number using the number buttons 0 … 9,
always using three digits.
After a brief waiting period, the page appears.
Use the red k or green button h to page up or
down inside the videotext pages.
Use the yellow button to page forward to the next
“10” videotext page.
Use the blue button g to page forward to the
next “100” videotext page.
Use button h to page back to the table of contents
page no. 100.
Switch off videotext with button
¢
TXT
.
❒
Functions for both videotext operation
types
These functions can be called up directly using the
remote control buttons or using the dialogue on the
videotext page.
Switch on videotext with button
¢
TXT
.
Enlarging the videotext page
Press » + « (plus) on button
™
repeatedly,
or
Press button-, the symbol line appears at the bot-
tom edge of the screen.
Select the symbol G with button F or E and
confirm with button G.
Repeated pressing of G results in:
double size letters in the top screen half;
double size letters in the bottom screen half;
normal picture.
3
2
G K HLI
1
1
1
7
6
5
4
3
2
1
Videotext …
… consists of a large number of text pages, for
instance news from topics such as sport and politics, exchange markets, weather reports and all
kinds of other information.
The scope of information offered by videotext as
well as the way it is organised and the layout of
individual pages varies from station to station.
❒
TOP text (Table Of Pages) or
FLOF text operation
Various topics, chapters and individual pages may
be called up from the table of contents at the push
of a button.
Switch on videotext using button
¢
TXT
.
The table of contents page no. 100 or the videotext
page last called up appears.
An info line consisting of a red, green, yellow and
blue text field appears at the bottom edge of the
screen.
The remote control has similarly colour-coded buttons.
Select the desired topic using the blue button g.
The blue info line displays the next topic.
Select the desired chapter of the topic with the yellow button (with an overflow to the next topic).
The yellow info line displays the next chapter of the
topic selected.
If the selected chapter has several individual pages,
then it is possible to call these up: use the green
button to page forward to the next existing page
(with an overflow to the next chapter).
Use the red button k to page back.
Videotext pages may also be selected using the
number buttons 0 … 9.
Use button h to return to the table of contents
page no. 100.
Switch off videotext using button
¢
TXT
.
7
6
5
4
3
2
Ǻ
1
Page 12

Videotext operation
ķ
12
Pa
ge-freeze on multi-page displays
A multi-page display can contain several sub-pages
which are “paged forward” within a certain time
cycle by the broadcasting station.
Multi-page displays are marked. 3/6 indicates, for
instance, that you are currently viewing page 3 of 6.
If you wish to view a sub-page for longer, then the
page may be “frozen”.
Press »
– « (minus) on button
®
,
or
Press button -, the symbol line is displayed at the
bottom edge of the screen.
Use button F or E to select the symbol I and
confirm with G.
The page displayed is now »frozen«, is no longer
updated, and switching over to other sub-pages no
longer takes place.
Switch the function off with button G.
Callin
g up sub-pages directly
Press » – « (minus) on button
™
;
Select »Sub-page«, to do this enter the page number using the number buttons 0 … 9, always
using four digits.
After a brief waiting period, the page appears;
Switch off »Sub-page« with » – « (minus) on button
™
, the current sub-page appears.
or
Press button-, the symbol line appears at the bottom of the screen.
Use button F or E to select the symbol H and
confirm with G.
The selected videotext page number, e.g. 155/0001
appears in the symbol line.
Select »Sub-page«, to do this enter the page number using the number buttons 0 … 9, always
using four digits.
After a brief waiting period, the page appears.
Switch off »Sub-page « with button G, the current sub-page appears.
4
3
2
1
3
2
1
3
2
1
1
Answer release
It is possible to let “hidden” answers appear in certain videotext pages or insert information (release),
e.g. to solve puzzles,
or
in order to check VPS times for video recorder
programming.
Press » + « (plus) on button
®
,
or
Press button -, the symbol line appears at the bot-
tom of the screen.
Use button F or E to select the symbol L and
confirm with G, the “hidden” information is inserted in the videotext page.
Switch off »Answer release« with button G.
»Page Catching« (selecting certain videotext pages directly and calling them up)
Many table of contents pages contain three-digit
page numbers which may be selected directly.
This saves entering of the page number.
Switch on »Page Catching« with button p or P.
»Page Catching ➝ OK« is displayed at the top of
the screen.
A bright rectangle blinks behind the first page num-
ber of the table of contents page.
Use button p or P to select the desired three-digit
page number and confirm with G, the page
appears in the screen after a brief waiting period.
Use button h to return to table of contents page
no. 100.
3
2
1
3
2
1
1
Page 13

Videotext operation
ķ
13
Brid
ging waiting times
You may use this function to bridge waiting times,
during the time it takes for your videotext decoder
to search for a page.
Assuming you would like to watch TV but still be
informed, then first select the relevant page – e.g.
page 143 – and then press:
Press button -, the symbol line appears at the bottom edge of the screen.
Use button F or E to select the symbol K and
confirm with G.
You will see the TV picture and the videotext symbol ķwill appear at the top edge of the screen.
Later, instead of the videotext symbol ķthe number 143 appears, indicating that the page has been
found.
Call up the page found with the G button.
The videotext page appears.
Exit the function with
¢
TXT
.
4
3
2
1
Ǻ
Page 14

Comfort functions
ķ
14
Special functions
The following adjustments are carried out using the
»DIALOG CENTER«.
Call up »DIALOG CENTER« with button h and but-
ton G.
Adjustments are always terminated by pressing
¢
TXT
.
❒
TV on with ...
If you frequently use the set as an AV monitor – e.g.
together with a camera as a monitoring system or
together with a satellite receiver – then this function
can give priority to the programme position
» AV «. After switching on with the on/off switch,
instead of programme position »P 1«, programme
position »AV« will appear.
Select the line » SPECIAL FUNCTIONS « from the
»DIALOG CENTER« with button p or P and confirm with G.
Select the line »TV on with« and select the desired
program position »Prog 1« or »AV« with F or E.
❒
Picture/sound scale
To adjust volume, brightness and colour contrast,
scales appear. These may be switched off.
Select the line » SPECIAL FUNCTIONS « from the
»DIALOG CENTER« with button p or P and confirm with G.
Select the line » Pic./sound opt. « and select » off «
with button F or E.
❒
Station name (SERVICE-functions)
Some broadcasting stations broadcast their station
name. When changing programme position this is
briefly displayed. You may switch this display off.
Select the line » SERVICE « from the » DIALOG
CENTER « with button p or P and confirm with
G.
Select the line » Station name « and select » off «
with button F or E.
When changing programme position, only the num-
ber of the programme position is displayed.
2
1
2
1
2
1
Ǻ
Ǻ
❒
Equalizing the volume
The volume of normal TV broadcasts and commercials may be different. You may equalize this
volume.
Select the line » SPECIAL FUNCTIONS « from the
»DIALOG CENTER« with button p or P and confirm with G.
Select the line » Volume limiter « and select »on«
with button F or E.
❒
Setting the Sleep Timer
You can input a switch off time for your TV set with
the »SLEEP TIMER« menu. The set switches to
standby after the set time has elapsed.
Select the »SLEEP TIMER« line from the »DIALOG
CENTER« with the P or p button and confirm by
pressing the G button.
The »SLEEP TIMER« menu appears.
Input the desired switch off time to two places
(from 01 … 99 min) with the 0 … 9 digit keys.
The input switch off time can be canceled with the
-
button.
Setting is ended with the
¢
TXT
button.
Displaying the programme position
number
It is possible to permantently display the number of
the selected programme position.
Press the h button until the »OK Dialog Center«
on-screen display disappears.
The programme position number is permanently
displayed.
Press the h button twice if you wish to cancel this
function.
2
1
5
4
3
2
1
Ǻ
2
1
SLEEP TIMER
ǺǺ
0 – 9 TXT
Ȅ
– –
Ȅ
min.
Page 15

Comfort functions
ķ
15
Parental lock
Using this function, you may enter a number code
which blocks all functions.
❒
Activating parental lock
Call up the » DIALOG CENTER « using buttons h
and G.
Select and call up the line »Parental lock«.
Enter a number code with the number buttons
0…9, always using four digits (e.g. 1111).
Save the number code with G.
The key appears in red, switch off the page
»PARENTAL LOCK« with button
¢
TXT
.
After switching off the set and switching on again
the page »Parental lock« appears, all functions are
locked.
Please take good note of the number code!
❒
Switching off parental lock
Switch on the set.
Enter a number code with the number buttons
0 … 9, always using four digits (e.g. 1111).
The set switches to the TV screen. After switching
off again the parental lock is activated again.
To cancel the parental lock function, select and call
up the line “Parental lock” from the » DIALOG
CENTER«. Enter the number code with four digits
and press button -.
If you forget the number code, a number combination on the last page of this instruction manual will
assist you. If you press these buttons in sequence
on the remote control, the “lock” will be cancelled.
SERVICE
Call up the »DIALOG CENTER« with the h and the
G buttons.
Select the »SERVICE« line with the P or p button
and call it up using the G button.
Select the desired functions with the P or p but-
tons.
Change with the F or E buttons.
Each setting is ended with the
¢
TXT
button.
Ǻ
4
3
2
1
Ǻ
2
1
Ǻ
Ǻ
4
3
2
1
❒
Decoder selection
Refer to »Setting for operation with decoder«
(refer to page 16).
❒
Colour (manually adjust the colour
norms)
The colour norms are automatically assigned when
allocating the channel position with channel search.
You do not need to carry out this setting if the
colour is already well adjusted on the different
channels.
Select the required colour norm.
❒
Select the blue screen
With this setting a grainy image can be switched to
a blue image.
❒
Select the black screen
With this setting it is possible to avoid distracting
flickering of channels whilst switching channel
position.
❒
Station name on/off
Switch the station display on or off (see »Station
name«).
❒
SAT
This settin is only necessary if an external SNR 105
MicroSAT receiver is connected.
Three settings can be selected: »ON1«, »ON2« and
»off«. See the operating manual of the SNR 105 to
determine which setting you must make.
Ń
!
If no SNR 105 is connected, this setting must be set
to »off«.
Channel position selection is not possible if SAT
»ON1« is selected without a connected SNR 105,
the screen remains dark and »SAT« is displayed.
❒
Switching formats
The automatic picture format switching function
can be switched off in poor reception conditions.
Select the desired setting.
❒
Service Code
The functions of this line are reserved for authorised dealers.
Ǻ
1
1
Page 16

Connection possibilities
ķ
16
O
peration
Select the programme position to which the encoded programme is assigned;
or
for operation using a satellite receiver programme
position, select » AV1 « with button
AV
0
.
❒
Connecting a video recorder or SET TOP
box to the »AV 2« socket
Connect the »AV2« socket of the TV set and corresponding socket of the SET TOP box with a
EURO/AV (Scart) cable.
Press button
AV
0
repeatedly until the set displays
»AV2«.
Adjust video standard (VHS or SVHS)
This adjustment depends on the video recorder
connected.
Call up the »DIALOG CENTER« with buttons h and
G.
Select and call up the line »SPECIAL FUNCTIONS«.
Select and call up the line »Video« and using but-
ton F or E select »VHS« or »SVHS«.
Playback
Switch on the video recorder or SET TOP box and
select the desired function.
The TV set will let you see and hear the picture and
sound information from the external device.
1
3
2
1
2
1
AV1 AV2
EURO-AV
AUDIO
1
AUDIO/VIDEO connections
The TV set is equipped with a variety of socket
connections. Various auxiliary devices – e.g. cam-
corder, video recorder, SAT receiver, SET TOP box,
Pay TV decoder etc. – may be connected here.
❒
Connecting a decoder to the »AV 1«
socket
Some stations – whose programs are received by
cable or satellite receiver – encode their broadcasts.
Both picture and sound become unrecognizable.
A decoder will allow you to decode these programs.
Alternatively, a satellite receiver may be connected
to this socket or a second video recorder.
Connectin
g
Connect the » AV 1 « socket of the TV set and the
corresponding socket of the decoder or satellite
receiver with a EURO/AV (Scart) cable.
Ad
justment for decoder operation
Select the program position to which the encoded
program is assigned.
The TV set automatically switches to program posi-
tion »AV1«.
Call up the »DIALOG CENTER« with buttons h and
G.
Select and call up the line »SPECIAL FUNCTIONS«.
Select the line » Decoder P .. «. This line displays
the programme position which was previously selected.
Press button F or E (choice between ON1, ON2,
ON3 – this depends on the decoder used).
This setting can also be activated on the »SERVICE«
page for all program positions (1 – 99).
Exit with button
¢
TXT
.
6
Ǻ
5
4
3
2
1
1
Ǻ
AV1 AV2
Page 17

Connection possibilities
ķ
17
Sound si
gnal (stereo or mono)
Connect the white and red socket (L AUDIO R) of
the TV set to the sound sockets of the stereo camcorder.
or
Connect the white socket (AUDIO L) of the TV set to
the sound socket of the mono camcorder.
Press button
AV
0
repeatedly until the set displays
»AV3«.
Playback
Switch the camcorder on, insert the cassette and
playback.
The TV set will let you see and hear the picture and
sound information from the camcorder.
❒
Headphones
Connectin
g
Insert the headphone connector (3.5 mm ø jack)
into the headphone socket on the front side of the
set.
The volume for the headphones may be adjusted
separately (headphone impedance max. 32Ω).
Changin
g the sound (stereo/two-tone,
mono
) of the headphones
Select page »SOUND« with button g.
Select the line »
y « and with button F or E sel-
ect the desired tone:
For stereo »stereo« or »mono«;
for Nicam stereo »stereo« or »analogue«;
for two-tone transmission »Dual A« or »Dual B«.
Switch off page »SOUND« with button g.
Ad
justing the volume of the headphones
Press button -and then adjust the volume of the
headphones using button F or E.
The altered value is displayed on a scale.
1
3
2
1
1
VIDEO L AUDIO R
m
P
1
2
1
❒
Copying video tapes via the TV set
You may copy video recorder/camcorder tapes
onto a video recorder.
The possibilities:
camcorder (AV3) to video recorder (AV1)
video recorder (AV1) to video recorder (AV2)
video recorder (AV2) to video recorder (AV1).
You may switch over to TV viewing during the
recording.
It is not possible to copy from a SVHS video/camcorder to a SVHS video/camcorder.
Select the AV program position with button
AV
0
.
Press button-.
Activate the copy function with button
AV
0
.
Start playback/copying on the camcorder/video
recorder.
Copying has started, you may now view any TV programme without interfering with the recording.
Switch off the copy function, to do this repeat steps
to .
❒
Connecting a camcorder to the
»AV 3« socket
Pictur
e signal
Connect the yellow socket (VIDEO) of the TV set to
the corresponding picture socket of the camera
recorder.
1
VIDEO L AUDIO R
m
P
31
Ǻ
4
3
2
1
Ǻ
P
Page 18

Technical data
ķ
18
❒
Mains voltage:
220 – 240 V, 50/60 Hz
(Power supply control range 165 … 265 V)
“The appliance may only be operated using the
mains cable set supplied. It prevents mains interference and is an integral part of the device
approval”.
For replacement purposes please order from an
approved service specialist only the mains cable
set with the description “Part number 8290.991386”.
❒
Power consumption:
approx. 95 W, Standby 6 W
❒
Reception range:
Channels C01 … C99
Special channels S01 … S41
❒
Sound output:
2 x 20 W music power, (2 x 10 W sinus)
❒
Additional equipment:
The set has been prepared for satellite reception, Dolby
Surround ProLogic and PIP (Picture in Picture). With
the built-in PIP function, another TV programme or an
AV picture (e.g. from a video cassette recorder or a
video camera) can be superimposed as a small picture.
This TV set is prepared for satellite reception. As
extension kit, the module SER 250 is provided.
Ask your dealer.
The product fulfils the requirements of the
following EU guidelines:
73/23/EEC Guideline concerning electrical operating
units within certain voltage limits.
89/336/EEC guideline on electro-magnetic compatibility.
The unit is accordance with the norms:
EN 60065, EN 55013, EN 55020
❒
Contact assignment EURO-AV socket
If you intend to connect auxiliary appliances to the
TV set (e. g. computer, amplifier system), then your
service specialist will be able to make a connection
compatible with official standards by following the
connection table below:
Pin Signal
11 = Audio output right
12 = Audio input right
13 = Audio output left
14 = Audio earth
15 = Blue earth
16 = Audio input left
17 = RGB blue input
18 = Switching voltage
19 = Green earth
10 = Data cable
11 = RGB green input
12 = –
13 = Red earth
14 = earth
15 = RGB red input (Chroma; S VIDEO)
16 = RGB switching voltage
17 = Video earth
18 = RGB switching voltage earth
19 = Video output
20 = Video input
21 = Shielding/earth
220
21
119
All rights to modifications and to errors reserved!
Warning
In case this appliance is supplied with a Safety Standard Approved mains lead fitted with a non-rewireable 13 Amp mains plug which, if unsuitable for your
socket, should be cut off and an appropriate plug fitted by a
qualified electrician. The fuse and fuse holder must be removed from the plug as
accidental insertion of the redundant plug into a 13 Amp socket is likely to cause
an electrical hazard.
Note: The severed plug must be destroyed to avoid a possible shock hazard
should it be inserted into a 13 Amp socket elsewhere.
If it is necessary to change the fuse in the non-rewireable plug, the correct type
and rating (5 Amp ASTA or BSI approved BS 1362) must be used and the fuse
cover must be refitted. If the fuse cover is lost or damaged the lead and plug must
not be used until a replacement is obtained. Replacement fuse covers should be
obtained from your dealer.
If a non-rewireable plug or a rewireable 13 Amp (BS 1363) plug is used, it must
be fitted with a 5 Amp ASTA or BSI approved BS 1362 fuse. If any other type of
plug is used it must be protected by a 5 Amp fuse either in the plug or at the distribution board.
Important:
The wires in the mains lead are coloured in accordance with the follow-ing code:
BLUE – NEUTRAL
BROWN – LIVE
As the colours of the wires in the mains lead of your appliance may not correspond with the coloured marking identifying the terminals in your plug, proceed
as follows:
Connect the BLUE coloured wire to plug terminal marked with the letter "N" or
coloured black.
Connect the BROWN coloured wire to the plug terminal marked with a letter "L" or
coloured red.
In no circumstance must any of the wires be connected to the terminal marked
with a letter "E", earth symbol , coloured green or green and yellow.
Replacement mains lead can be obtained from your dealer.
Page 19

Correcting problems yourself
ķ
19
Problem Possible cause Remedy
no picture, no audio no mains voltage mains cable connected?
mains switch on?
TV set in standby switch on with remote control
TV set is not on a switch to another channel position
occupied AV channel position
picture is bright (grainy or blue) aerial cable aerial cable connected?
but no program can be seen check aerial system?
no TV channel programmed start channel search
picture contrast incorrect picture settings change brightness, contrast, or
color settings
problem is with the broadcaster test another channel
poor picture and/or sound interference from other appliances change the position of the appliances
(household appliances, mobile
telephones etc.)
double image, reflection channel setting automatic or manual
channel setting/fine tuning
aerial have aerial cable or device checked
no color color intensity is on minimum adjust color upward
TV standard setting select proper color standards
(if setting possibility is available)
problem is with the broadcaster test another channel
colors wrong, color spots strong magnetic field from increase distance of speaker
speakers (or other) to TV set
with permanent color spots, switch off
the TV set with the mains switch and
switch back on after after 10 minutes
problem with terrestrial magnetic field change appliance position
picture is there, no sound volume at minimum or increase/switch on volume
speakers switched off
volume regulation activated select sound output via speaker
via audio cinch socket
(if this possibility is available)
problem is with the broadcaster test another channel
SAT mode check AV cable between
TV set and receiver
sound unclear sound setting correct sound setting
poor or no Teletext TV channel (has no Teletext) check with another channel, possibly
or check aerial system double image or reflection or fine tuning
transmission signal too weak check aerial system
(picture grainy)
remote control does not work no optical connection point remote control at the TV set
remote control batteries check or replace the batteries
pay attention to polarity
undefinable operating mode switch off TV set with the main
power button for about 2 minutes
After switching on, child lock is activated enter secret number or number
“child lock” appears on the menu combination 7038.
If the remedies below do not lead to a good result, contact an authorised GRUNDIG dealer or call the GRUNDIG.
Please consider that problems can also be caused by external appliances, such as video recorders and satellite
receivers.
Page 20

Printed in Germany
21820-941.0801
✁
GRUNDIG
+
P
+
P
-
✁
GRUNDIG
+
P
+
P
-
7 0 3 8
Grundig UK Limited
Elstree Way, Borehamwood
Hertfordshire WD6 1RX
 Loading...