

Page 1

66"" GGRRIINNDDEERR
MMOODDEELL GG99771177
IINNSSTTRRUUCCTTIIOONN MMAANNUUAALL
COPYRIGHT ©2000 BY GRIZZLY INDUSTRIAL, INC.
1821 VALENCIA ST., BELLINGHAM, WA 98227
WWAARRNNIINNGG:: NNOO PPOORRTTIIOONN OOFF TTHHIISS MMAANNUUAALL MMAAYY BBEE RREEPPRROODDUUCCEEDD IINN AANNYY SSHHAAPPEE
OORR FFOORRMM WWIITTHHOOUUTT TTHHEE WWRRIITTTTEENN AAPPPPRROOVVAALL OOFF GGRRIIZZZZLLYY IINNDDUUSSTTRRIIAALL,, IINNCC..
MARCH, 2000 PRINTED IN CHINA
ONLINE MANUAL DISCLAIMER
THE INFORMATION IN THIS MANUAL REPRESENTS THE CONFIGURATION OF THE MACHINE AS IT IS CURRENTLY BEING SHIPPED. THE MACHINE
CONFIGURATION CAN CHANGE AS PRODUCT IMPROVEMENTS ARE INCORPORATED. IF YOU OWN AN EARLIER VERSION OF THE MACHINE, THIS
MANUAL MAY NOT EXACTLY DEPICT YOUR MACHINE . CONTACT CUSTOMER SERVICE IF YOU HAVE ANY QUESTIONS ABOUT DIFFERENCES. PRE-
VIOUS VERSIONS ARE NOT AVAILABLE ONLINE.
Page 2
G9717 6" Grinder
-1-
SSaaffeettyy IInnssttrruuccttiioonnss FFoorr PPoowweerr TToooollss
GGEENNEERRAALL SSAAFFEETTYY RRUULLEESS
55.. KKEEEEPP CCHHIILLDDRREENN AANNDD VVIISSIITTOORRSS AAWWAAYY
.
All children and visitors should be kept a
safe distance from work area.
66.. MMAAKKEE WWOORRKK SSHHOOPP CCHHIILLDD PPRROOOOFF
with
padlocks, master switches, or by removing
starter keys.
77.. DDOONN’’TT FFOORRCCEE TTOOOOLL
. It will do the job
better and safer at the rate for which it was
designed.
88.. UUSSEE RRIIGGHHTT TTOOOOLL..
Don’t force tool or
attachment to do a job for which it was not
designed.
11.. KKEEEEPP GGUUAARRDDSS IINN PPLLAACCEE
and in working
order.
22.. RREEMMOOVVEE AADDJJUUSSTTIINNGG KKEEYYSS AANNDD
WWRREENNCCHHEESS
. Form habit of checking to
see that keys and adjusting wrenches are
removed from tool before turning on
..
33.. KKEEEEPP WWOORRKK AARREEAA CCLLEEAANN
. Cluttered
areas and benches invite accidents.
44.. DDOONN’’TT UUSSEE IINN DDAANNGGEERROOUUSS EENNVVIIRROONN--
MMEENNTT
. Don’t use power tools in damp or
wet locations, or where any flammable or
noxious fumes may exist. Keep work area
well lighted.
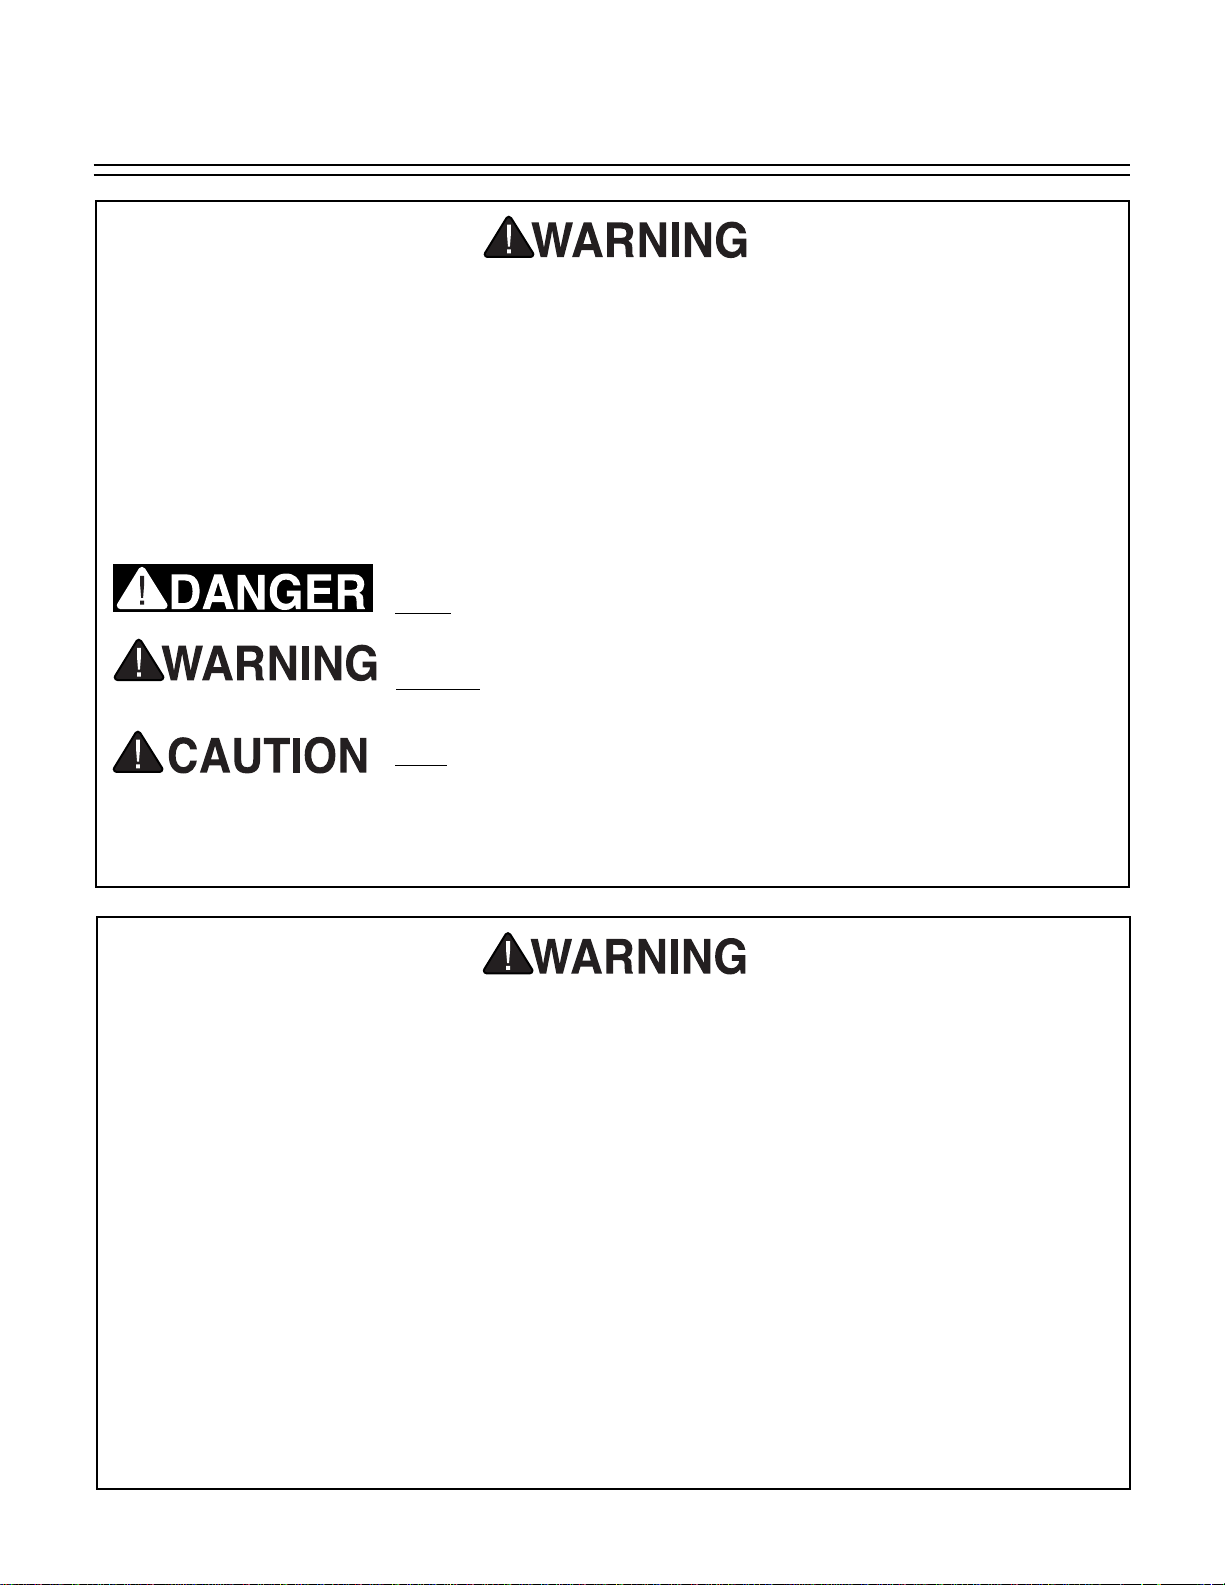
FFoorr YYoouurr OOwwnn SSaaffeettyy RReeaadd IInnssttrruuccttiioonn MMaannuuaall
BBeeffoorree OOppeerraattiinngg TThhiiss EEqquuiippmmeenntt
IInnddiiccaatteess aann iimmmmiinneennttllyy hhaazzaarrddoouuss ssiittuuaattiioonn wwhhiicchh,, iiff nnoott aavvooiiddeedd,,
WWIILLLL rreessuulltt iinn ddeeaatthh oorr sseerriioouuss iinnjjuurryy..
IInnddiiccaatteess aa ppootteennttiiaallllyy hhaazzaarrddoouuss ssiittuuaattiioonn wwhhiicchh,, iiff nnoott aavvooiiddeedd,,
CCOOUULLDD
rreessuulltt iinn ddeeaatthh oorr sseerriioouuss iinnjjuurryy..
IInnddiiccaatteess aa ppootteennttiiaallllyy hhaazzaarrddoouuss ssiittuuaattiioonn wwhhiicchh,, iiff nnoott aavvooiiddeedd,,
MMAAYY
rreessuulltt iinn mmiinnoorr oorr mmooddeerraattee iinnjjuurryy.. IItt mmaayy aallssoo bbee uusseedd ttoo
aalleerrtt aaggaaiinnsstt uunnssaaffee pprraaccttiicceess..
TThhiiss ssyymmbbooll iiss uusseedd ttoo aalleerrtt tthhee uusseerr ttoo uusseeffuull iinnffoorrmmaattiioonn aabboouutt
pprrooppeerr ooppeerraattiioonn ooff tthhee eeqquuiippmmeenntt..
TThhee ppuurrppoossee ooff ssaaffeettyy ssyymmbboollss iiss ttoo aattttrraacctt yyoouurr aatttteennttiioonn ttoo ppoossssiibbllee hhaazzaarrddoouuss ccoonnddiittiioonnss.. TThhiiss mmaann--
uuaall uusseess aa sseerriieess ooff ssyymmbboollss aanndd ssiiggnnaall wwoorrddss wwhhiicchh aarree iinntteennddeedd ttoo ccoonnvveeyy tthhee lleevveell ooff iimmppoorrttaannccee ooff
tthhee ssaaffeettyy mmeessssaaggeess.. TThhee pprrooggrreessssiioonn ooff ssyymmbboollss iiss ddeessccrriibbeedd bbeellooww.. RReemmeemmbbeerr tthhaatt ssaaffeettyy mmeessssaaggeess
bbyy tthheemmsseellvveess ddoo nnoott eelliimmiinnaattee ddaannggeerr aanndd aarree nnoott aa ssuubbssttiittuuttee ffoorr pprrooppeerr aacccciiddeenntt pprreevveennttiioonn mmeeaass--
uurreess..
NNOOTTIICCEE
Page 3
G9717 6" Grinder
-2-
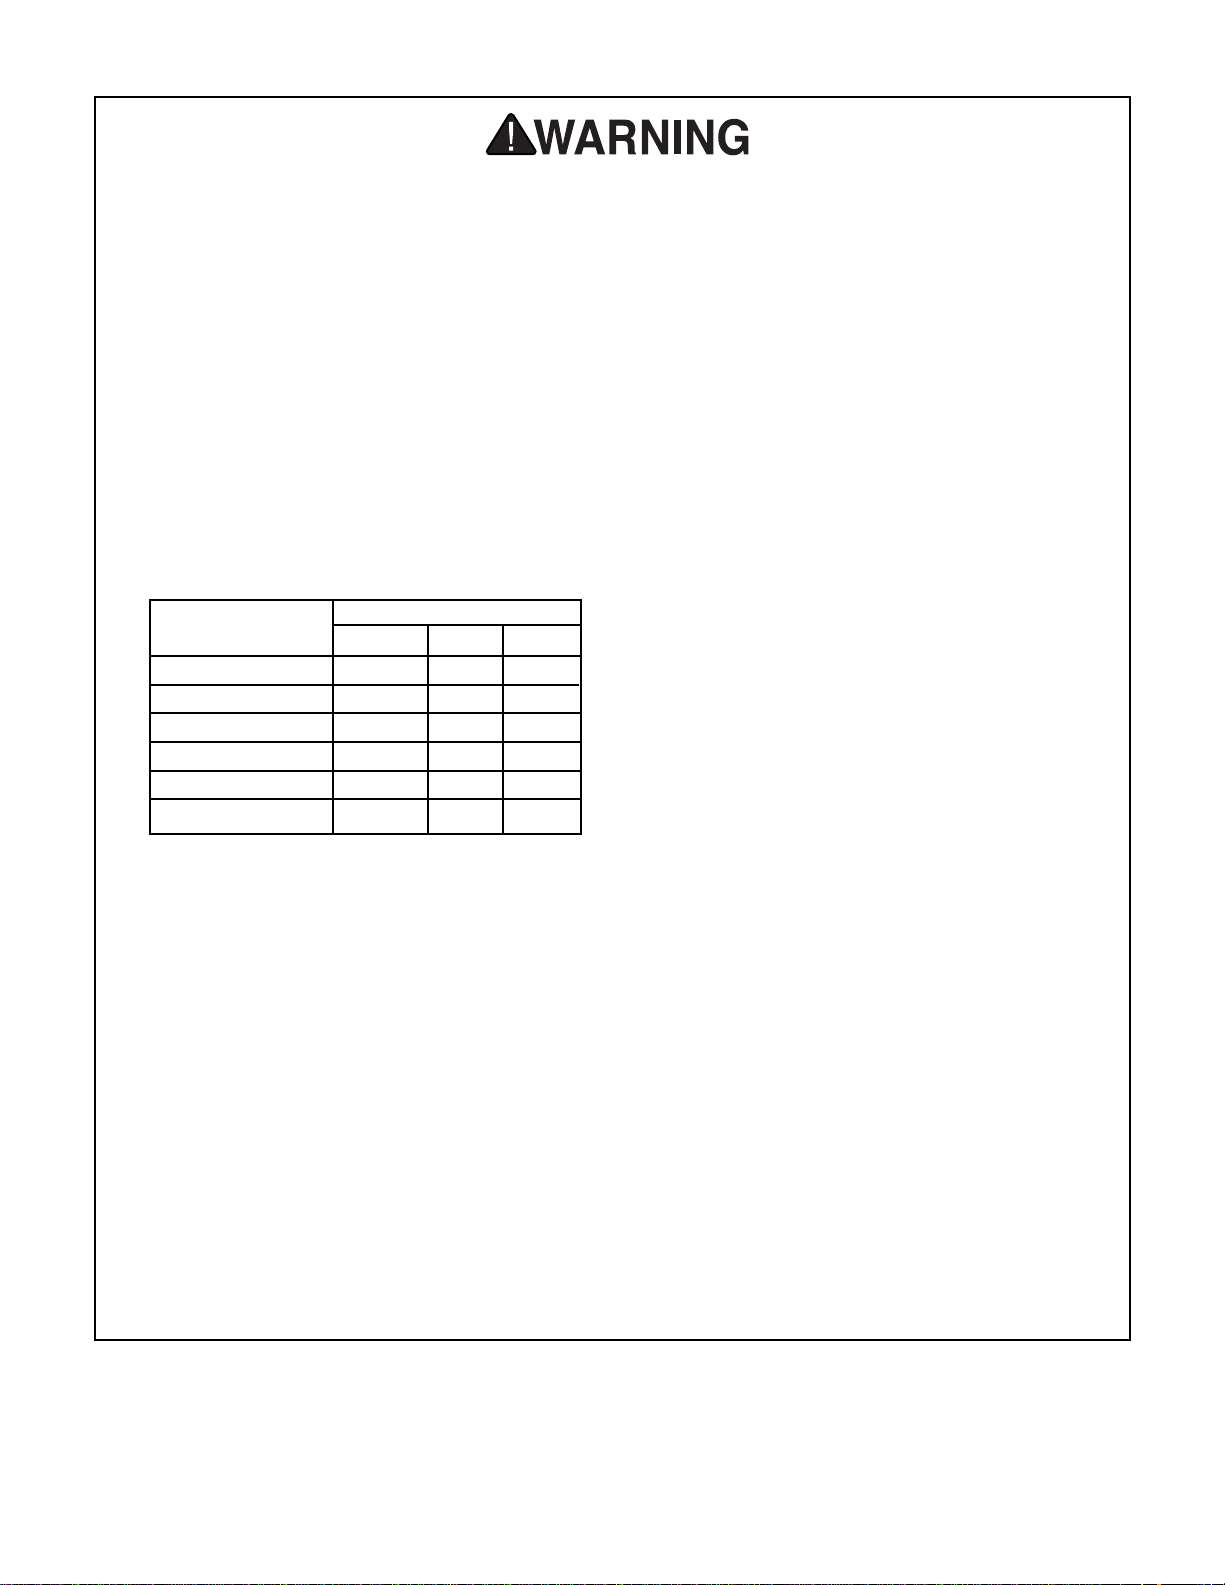
99.. UUSSEE PPRROOPPEERR EEXXTTEENNSSIIOONN CCOORRDD
. Make
sure your extension cord is in good condition. Conductor size should be in accordance with the chart below. The amperage
rating should be listed on the motor or tool
nameplate. An undersized cord will cause
a drop in line voltage resulting in loss of
power and overheating. Your extension
cord must also contain a ground wire and
plug pin. Always repair or replace extension cords if they become damaged.
Minimum Gauge for Extension Cords
1100.. WWEEAARR PPRROOPPEERR AAPPPPAARREELL..
Do not wear
loose clothing, gloves, neckties, rings,
bracelets, or other jewelry which may get
caught in moving parts. Non-slip footwear
is recommended. Wear protective hair
covering to contain long hair.
1111.. AALLWWAAYYSS UUSSEE SSAAFFEETTYY GGLLAASSSSEESS..
Also
use face or dust mask if cutting operation
is dusty. Everyday eyeglasses only have
impact resistant lenses, they are NOT
safety glasses.
1122.. SSEECCUURREE WWOORRKK..
Use clamps or a vise to
hold work when practical. It’s safer than
using your hand and frees both hands to
operate tool.
LLEENNGGTTHH
AAMMPP RRAATTIINNGG 2255fftt 5500fftt 110000fftt
0-6 18 16 16
7-10 18 16 14
11-12 16 16 14
13-16 14 12 12
17-20 12 12 10
21-30 10 10 No
SSaaffeettyy IInnssttrruuccttiioonnss FFoorr PPoowweerr TToooollss
1133.. DDOONN’’TT OOVVEERRRREEAACCHH..
Keep proper footing
and balance at all times.
1144.. MMAAIINNTTAAIINN TTOOOOLLSS WWIITTHH CCAARREE..
Keep
tools sharp and clean for best and safest
performance. Follow instructions for lubricating and changing accessories.
1155.. DDIISSCCOONNNNEECCTT TTOOOOLLSS
before servicing
and changing accessories, such as blades,
bits, cutters, and the like.
1166.. RREEDDUUCCEE TTHHEE RRIISSKK OOFF UUNNIINNTTEENNTTIIOONN--
AALL SSTTAARRTTIINNGG..
Make sure switch is in off
position before plugging in.
1177.. UUSSEE RREECCOOMMMMEENNDDEEDD AACCCCEESSSSOORRIIEESS..
Consult the owner’s manual for recommended accessories. The use of improper
accessories may cause risk of injury.
1188.. CCHHEECCKK DDAAMMAAGGEEDD PPAARRTTSS..
Before further use of the tool, a guard or other part
that is damaged should be carefully
checked to determine that it will operate
properly and perform its intended function.
Check for alignment of moving parts, binding of moving parts, breakage of parts,
mounting, and any other conditions that
may affect its operation. A guard or other
part that is damaged should be properly
repaired or replaced.
1199.. NNEEVVEERR LLEEAAVVEE TTOOOOLL RRUUNNNNIINNGG UUNNAATT--
TTEENNDDEEDD.. TTUURRNN PPOOWWEERR OOFFFF..
Don’t
leave tool until it comes to a complete stop.
Page 4
G9717 6" Grinder
-3-
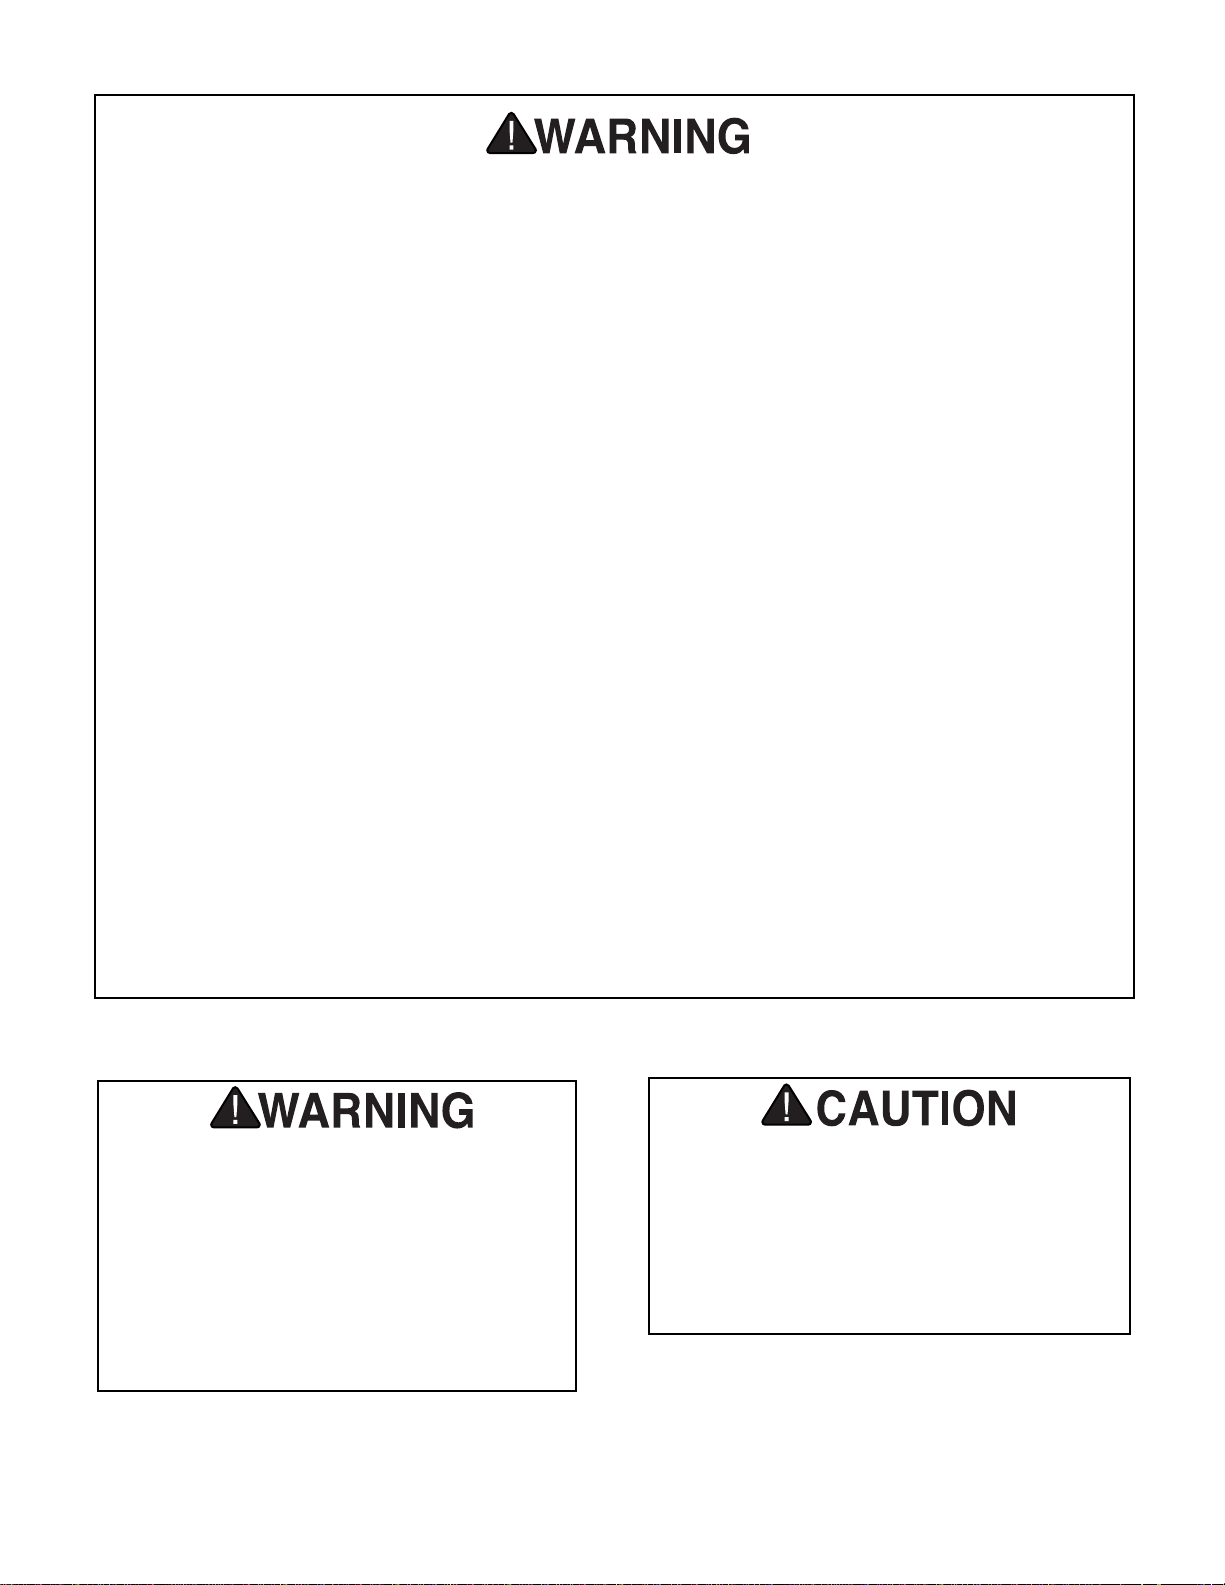
AAddddiittiioonnaall SSaaffeettyy IInnssttrruuccttiioonnss FFoorr GGrriinnddeerrss
NNoo lliisstt ooff ssaaffeettyy gguuiiddeelliinneess ccaann bbee ccoommpplleettee..
EEvveerryy sshhoopp eennvviirroonnmmeenntt iiss ddiiffffeerreenntt.. AAllwwaayyss
ccoonnssiiddeerr ssaaffeettyy ffiirrsstt,, aass iitt aapppplliieess ttoo yyoouurr iinnddii--
vviidduuaall wwoorrkkiinngg ccoonnddiittiioonnss.. UUssee tthhiiss aanndd ootthheerr
mmaacchhiinneerryy wwiitthh ccaauuttiioonn aanndd rreessppeecctt.. FFaaiilluurree ttoo
ddoo ssoo ccoouulldd rreessuulltt iinn sseerriioouuss ppeerrssoonnaall iinnjjuurryy,,
ddaammaaggee ttoo eeqquuiippmmeenntt oorr ppoooorr wwoorrkk rreessuullttss..
OOppeerraattiinngg tthhiiss eeqquuiippmmeenntt hhaass tthhee ppootteennttiiaall ttoo
pprrooppeell ddeebbrriiss iinnttoo tthhee aaiirr wwhhiicchh ccaann ccaauussee eeyyee
iinnjjuurryy.. AAllwwaayyss wweeaarr ssaaffeettyy ggllaasssseess oorr ggoogggglleess
wwhheenn ooppeerraattiinngg eeqquuiippmmeenntt.. EEvveerryyddaayy ggllaasssseess
oorr rreeaaddiinngg ggllaasssseess oonnllyy hhaavvee iimmppaacctt rreessiissttaanntt
lleennsseess,, tthheeyy aarree nnoott ssaaffeettyy ggllaasssseess.. BBee cceerrttaaiinn
tthhee ssaaffeettyy ggllaasssseess yyoouu wweeaarr mmeeeett tthhee aapppprroo--
pprriiaattee ssttaannddaarrddss ooff tthhee AAmmeerriiccaann NNaattiioonnaall
SSttaannddaarrddss IInnssttiittuuttee ((AANNSSII))..
11.. AALLWWAAYYSS WWEEAARR
a face shield and/or safe-
ty goggles.
22.. SSEECCUURREE TTHHIISS GGRRIINNDDEERR
firmly to a
benchtop or stand.
33.. NNEEVVEERR UUSSEE AA GGRRIINNDDIINNGG WWHHEEEELL
which
has evidence of cracking or chips. “Ring
Check” the wheel to test its integrity (See
Page 9 for checking procedure).
44.. UUSSEE OONNLLYY PPRROOPPEERRLLYY SSIIZZEEDD WWHHEEEELLSS
which have the right bore size and overall
diameter.
55.. DDRREESSSS TTHHEE GGRRIINNDDIINNGG WWHHEEEELL
when its
surface becomes rutted or uneven.
Replace the wheel if the wear or damage
becomes excessive.
66.. AALLLLOOWW TTHHEE WWHHEEEELL TTOO AATTTTAAIINN FFUULLLL
SSPPEEEEDD
before introducing the workpiece.
77.. AALLWWAAYYSS UUSSEE TTHHEE SSAAFFEETTYY SSHHIIEELLDDSS
AANNDD TTOOOOLL RREESSTT
when grinding. The
shields prevent sparks from flying, and the
tool rest provides a firm rest on which to
position the workpiece.
88.. NNEEVVEERR GGRRIINNDD SSMMAALLLL SSTTOOCCKK..
Do not
attempt to grind or sharpen anything which
can’t be adequately supported by the tool
rest. Use clamping pliers or a similar holder
when grinding parts which can’t be easily
held by hand.
99.. GGRRIINNDDIINNGG CCRREEAATTEESS SSPPAARRKKSS
, make
sure your work area is free of combustible
materials.
1100.. AAVVOOIIDD OOVVEERRHHEEAATTIINNGG TTHHEE WWOORRKK--
PPIIEECCEE..
Excessive prolonged grinding on a
workpiece can heat it to the point of being
dangerously hot. Keep a water reservoir
handy when grinding to quench hot parts.
Overheating can also change the metallurgical properties of your part.
1111.. NNEEVVEERR SSTTIICCKK AANN OOBBJJEECCTT AAGGAAIINNSSTT TTHHEE
WWHHEEEELL TTOO SSTTOOPP TTHHEE WWHHEEEELL RROOTTAA--
TTIIOONN..
Page 5
G9717 6" Grinder
-4-
SSEECCTTIIOONN 22:: CCIIRRCCUUIITT RREEQQUUIIRREEMMEENNTTSS
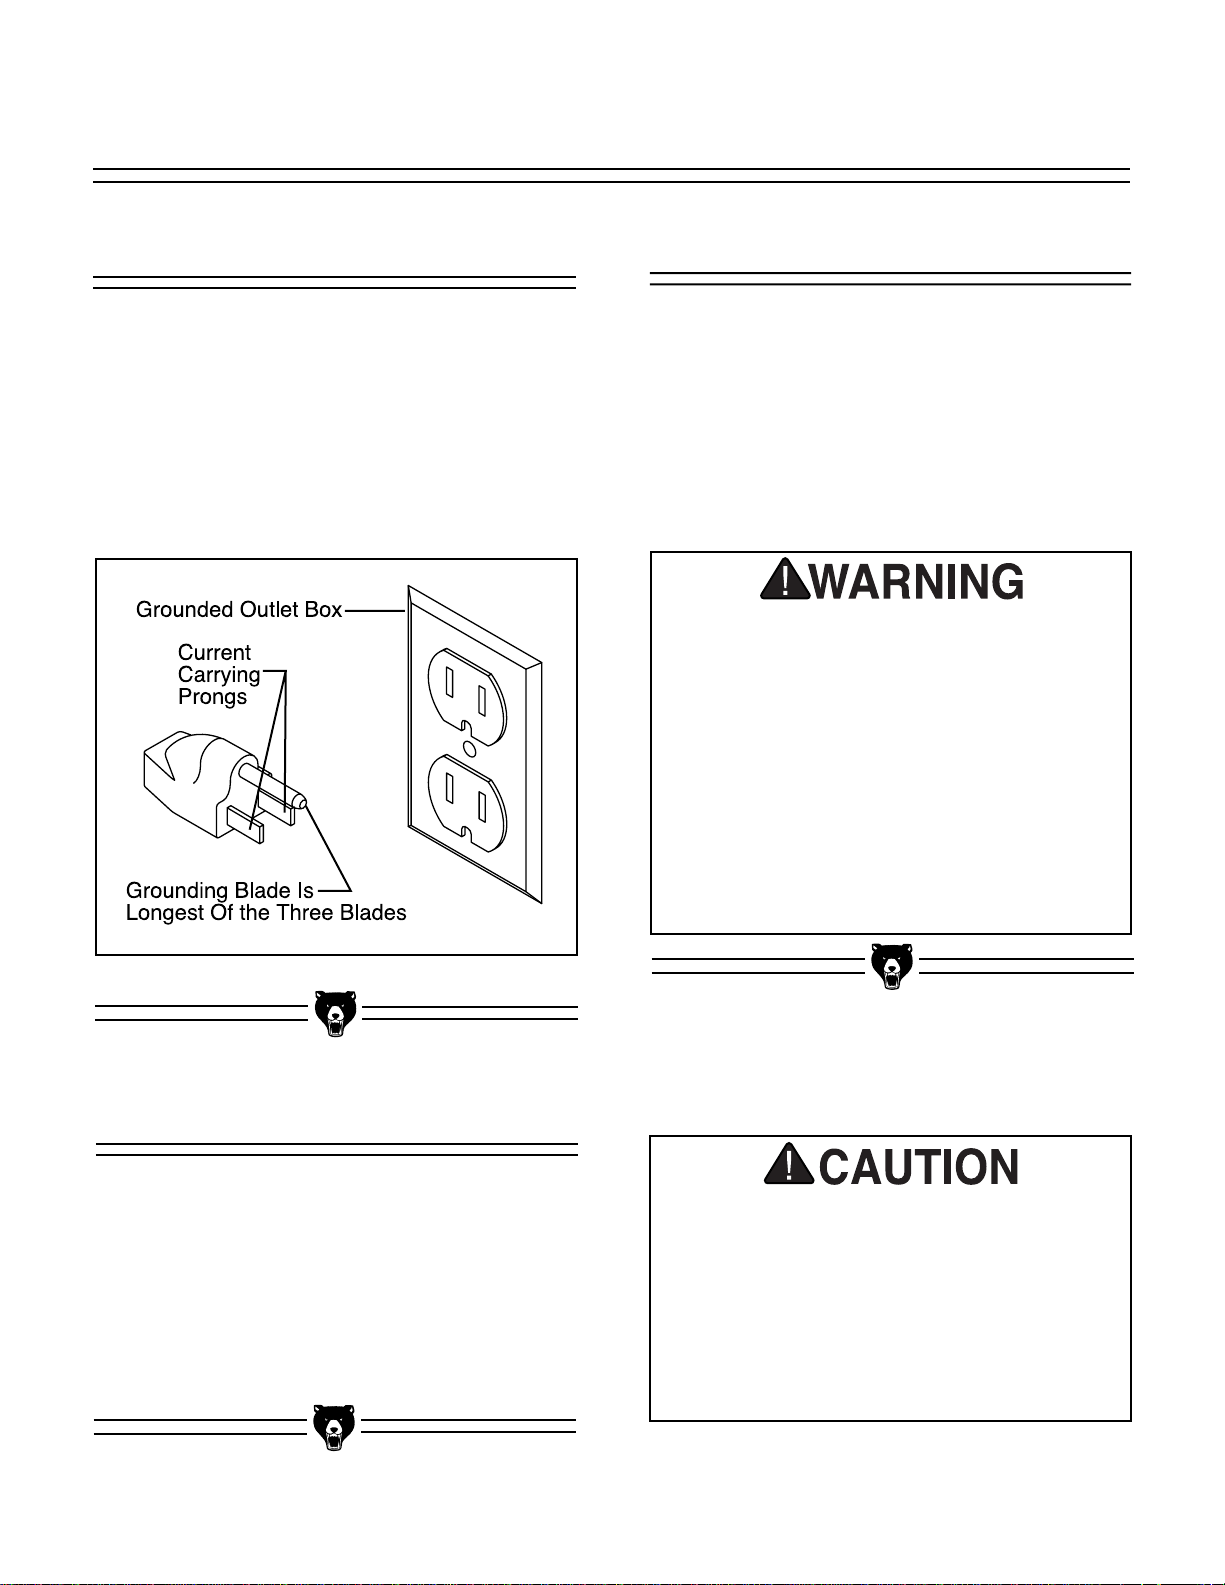
111100VV OOppeerraattiioonn
The motor supplied with the G9717 must be operated at 110V. Use an outlet configuration as
shown in
FFiigguurree 11..
Under normal use, the motor
draws approximately 2-3 amps @ 110V. We recommend a 15 amp circuit breaker for 110V operation. This should be satisfactory for normal use,
while providing enough protection against motor
damage caused by power surges.
FFiigguurree 11..
Typical 110V plug and outlet.
Should it be necessary to use an extension when
operating at 110V, make sure the cord is rated
Hard Service (grade S) or better. Refer to the
chart in Section 1: Safety Instructions to determine the minimum gauge for the extension cord.
The extension cord must also contain a ground
wire and plug pin. Always repair or replace extension cords when they become worn or damaged.
EExxtteennssiioonn CCoorrddss
TThhiiss eeqquuiippmmeenntt mmuusstt bbee ggrroouunnddeedd..
Please
ensure that this machine is continuously
grounded from the motor to the machine frame
and then to a known ground. Verify that any
existing electrical outlet and circuit you intend
to plug into is actually grounded. If it is not, it
will be necessary to run a separate 12 A.W.G.
copper grounding wire from the outlet to a
known ground. Under no circumstances should
the grounding pin from any three-pronged plug
be removed.
SSeerriioouuss ppeerrssoonnaall iinnjjuurryy mmaayy
ooccccuurr..
GGrroouunnddiinngg
In the event of an electrical short, grounding
reduces the risk of electric shock by providing a
path of least resistance to disperse electric current. This tool is equipped with a power cord having an equipment-grounding conductor.
SSeeee
FFiigguurree 11..
The outlet must be properly installed
and grounded in accordance with all local codes
and ordinances.
WWee hhaavvee ccoovveerreedd ssoommee bbaassiicc eelleeccttrriiccaall
rreeqquuiirreemmeennttss ffoorr tthhee ssaaffee ooppeerraattiioonn ooff yyoouurr
SSuurrffaaccee GGrriinnddeerr.. TThheessee rreeqquuiirreemmeennttss aarree nnoott
nneecceessssaarriillyy ccoommpprreehheennssiivvee.. YYoouu mmuusstt bbee ssuurree
tthhaatt yyoouurr ppaarrttiiccuullaarr eelleeccttrriiccaall ccoonnffiigguurraattiioonn
ccoommpplliieess wwiitthh llooccaall aanndd ssttaattee ccooddeess.. EEnnssuurree
ccoommpplliiaannccee bbyy cchheecckkiinngg wwiitthh yyoouurr llooccaall mmuunniicc--
iippaalliittyy oorr aa lliicceennsseedd eelleeccttrriicciiaann..
Page 6
G9717 6" Grinder
-5-
SSEECCTTIIOONN 33:: GGEENNEERRAALL IINNFFOORRMMAATTIIOONN
To operate this, or any power tool, safely and
efficiently, it is essential to become as familiar
with its characteristics as possible. The time
you invest before you begin to use your Model
G9717 will be time well spent. DO NOT operate this machine until you are completely familiar with the contents of this manual. Make sure
you read and understand all of the safety procedures. If you do not understand something,
DDOO NNOOTT
operate the machine.
CCoommmmeennttaarryy
We are proud to offer the Grizzly Model G9717
6" Grinder. This Grinder is part of a growing
Grizzly family of fine metalworking machinery.
When used according to the guidelines set forth
in this manual, you can expect years of troublefree, enjoyable operation and proof of Grizzly’s
commitment to customer satisfaction.
The Model G9717 is intended for home and
hobby-type use. It features a
1
⁄3 HP, 110V motor,
two 6" grinding wheels, one 60 grit and one 30
grit. Eye shields and tool rests are included to
ensure safe operation of the wheels.
Replacement wheels with a 6" diameter and a 1⁄2"
bore are available through the Grizzly catalog.
We are also pleased to provide this manual with
the Model G9717. It was written to guide you
through assembly, review safety considerations,
and cover general operating procedures. It represents our effort to produce the best documentation possible. If you have any comments regarding this manual, please write to us at the address
below:
Grizzly Industrial, Inc.
C
/O Technical Documentation
P.O. Box 2069
Bellingham, WA 98227-2069
Most importantly, we stand behind our machines.
If you have any service questions or parts
requests, please call or write us at the location
listed below.
The specifications, drawings, and photographs
illustrated in this manual represent the Model
G9717 as supplied when the manual was prepared. However, owing to Grizzly’s policy of continuous improvement, changes may be made at
any time with no obligation on the part of Grizzly.
Whenever possible, though, we send manual
updates to all owners of a particular tool or
machine. Should you receive one, we urge you to
insert the new information with the old and keep
it for reference.
Grizzly Industrial, Inc.
1203 Lycoming Mall Circle
Muncy, PA 17756
Phone:(570) 546-9663
Fax:(800) 438-5901
E-Mail: techsupport@grizzly.com
Web Site: http://www.grizzly.com
Page 7

G9717 6" Grinder
-6-
SSEECCTTIIOONN 44:: AASSSSEEMMBBLLYY
TTooooll RReesstt
The Tool Rest provides a surface which can be
used to support the workpiece during grinding.
Certain types of grinding may require jigs or
accessories to assure the proper angle of the
piece against the wheel.
The Tool Rest assembles to the inboard side of
the Wheel Guard. Use two (2) hex bolts and lockwashers inserted through the rest support and
thread into the tapped holes. Repeat this installation for the opposite side wheel. The Tool Rest
can be adjusted in and out by loosening these
bolts. Always retighten before beginning grinding
operations.
EEyyee SShhiieelldd
The Eye Shield should be positioned between the
grinding wheel and the operator’s face during
grinding. This lessens the possibility for sparks or
metal bits to go flying directly at the operator.
The Eye Shield has a clear plastic panel which is
attached to a support bracket. Thread the long
Phillips
®
head screw through the bracket, then
through the shield, and then through the other
side of the bracket. Use a nut and lockwasher,
but leave it loose enough so the angle of the Eye
Shield can be adjusted.
Attach the support bracket to the top end of the
wheel rim guard with a Phillips
®
head screw, flat
washer and lockwasher into the tapped hole.
Note that there is a slot in the support bracket
which allow adjusting the Eye Shield up and
down.
Repeat the Eye Shield installation for the opposite side wheel.
FFiigguurree 22..
Tool rest installed.
FFiigguurree 33..
Eye shield in operating position.
Page 8

G9717 6" Grinder
-7-
MMoouunnttiinngg ttoo BBeenncchh
NNootteess
The grinder base has two holes directly under the
wheel shaft. These holes can be used to mount
the grinder to a workbench, table top, or other
solid surface. Since grinding does develop a lot of
force, it is best to mount the grinder solidly before
using. If you wish for the grinder to remain
portable, it can be temporarily clamped to a table.
Just make certain no part of the clamping device
interferes with the wheels or the tool rests.
Page 9

G9717 6" Grinder
-8-
OOppeerraattiioonn ooff tthhiiss eeqquuiippmmeenntt hhaass tthhee ppootteennttiiaall
ttoo pprrooppeell ddeebbrriiss iinnttoo tthhee aaiirr wwhhiicchh ccaann ccaauussee
eeyyee iinnjjuurryy.. AAllwwaayyss wweeaarr ssaaffeettyy ggllaasssseess oorr ggoogg--
gglleess wwhheenn ooppeerraattiinngg eeqquuiippmmeenntt.. EEvveerryyddaayy
ggllaasssseess oorr rreeaaddiinngg ggllaasssseess oonnllyy hhaavvee iimmppaacctt
rreessiissttaanntt lleennsseess,, tthheeyy aarree nnoott ssaaffeettyy ggllaasssseess..
BBee cceerrttaaiinn tthhee ssaaffeettyy ggllaasssseess yyoouu wweeaarr mmeeeett
tthhee aapppprroopprriiaattee ssttaannddaarrddss ooff tthhee AAmmeerriiccaann
NNaattiioonnaall SSttaannddaarrddss IInnssttiittuuttee ((AANNSSII))..
DDOO NNOOTT mmaakkee aaddjjuussttmmeennttss wwhhiillee tthhee ggrriinnddeerr iiss
rruunnnniinngg.. EEnnssuurree tthhaatt tthhee sswwiittcchh iiss ooffff,, ppoowweerr iiss
ddiissccoonnnneecctteedd aanndd mmoovviinngg ppaarrttss hhaavvee ssttooppppeedd
bbeeffoorree mmaakkiinngg aaddjjuussttmmeennttss.. FFaaiilluurree ttoo ccoommppllyy
ccoouulldd rreessuulltt iinn sseerriioouuss iinnjjuurryy oorr eelleeccttrriiccaall sshhoocckk
hhaazzaarrdd..
SSEECCTTIIOONN 55:: OOPPEERRAATTIIOONNSS
SSttaarrttiinngg aanndd SSttooppppiinngg
Once assembly has been completed, the G9717
Grinder is ready for use in the shop.
The switch is located on the front of the grinder.
To turn the grinder “ON”, push the right hand side
of the rocker switch, to turn it “OFF”, push the left
hand side of the switch. Always make sure the
wheels come up to full speed before introducing
the workpiece to the wheel.
When mounting a new wheel, or when there is
any concern about wheel integrity, stand away
from the line of rotation of the wheel and then turn
the wheel “ON”. If there is a potential problem it
will generally occur when the wheel is first started.
Aluminum oxide and silicon carbide wheels are
marked in a somewhat uniform manner by all the
major manufacturers. Understanding these markings will help you understand the capabilities of
various wheels. Always refer to the manufacturer’s grinding recommendations when selecting a
wheel for your project.
The basic format for wheel numbering is:
PPrreeffiixx AAbbrraassiivvee GGrriitt GGrraaddee BBoonndd
TTyyppee SSiizzee TTyyppee
3366 AA 6600 LL VV
The most common abrasive types used are A for
Aluminum Oxide and C for Silicon Carbide, and
occasionally SG for seeded gel. The prefix is the
manufacturer’s designation for a particular type.
The grit size is a number referring to the size of
the abrasive grain in the wheel. The lower the
number the coarser the wheel - 10 is a very
coarse wheel for roughing and 220 is usually the
upper range for fine finish work.
Grade is an indication of the hardness of the
wheel, with A being softest to Z the hardest.
Bond Type refers to the type of bonding material
used to hold the abrasive material. Most general
purpose wheels will have a V indicating Vitrified
clay is used, providing a high strength and good
porosity. The other most common is B for resin
where synthetic resins are used. These are used
to grind cemented carbide and ceramic materials
There may be other numbers inserted which
have meaning for a particular type of wheel.
Refer to the manufacturer’s technical data for a
complete explanation.
WWhheeeell SSeelleeccttiioonn
Page 10

G9717 6" Grinder
-9-
WWhheeeell MMoouunnttiinngg
Before mounting any wheel, check it for integrity
by performing a “ring check”. Balance the wheel
on one finger, then lightly tap the rim of the wheel
with a piece of wood such as the handle of a
hammer. The wheel should have a ringing or
harmonic type of sound. If it responds with a dull
thud it may indicate that the wheel has cracks. Do
not use a wheel which is suspected of having
cracks, or if there are visual chips, nicks or dents
in the wheel surface. These discontinuities can
lead to wheel failure where the wheel flies apart
at operating speed. Always be sure to use a
wheel which is rated for operating at speeds
equal to or greater than 3450 RPM.
The wheel guard assembly must be removed in
order to mount or dismount a grinding wheel.
11
. Remove the three Phillips
®
head screws
and nuts which go through the outer guard.
22..
Remove the outer guard and rim guard.
SSeeee FFiigguurree 44..
FFiigguurree 44..
Wheel guard components.
FFiigguurree 55..
Grinding wheel assembly.
NNEEVVEERR aasssseemmbbllee aa ggrriinnddiinngg wwhheeeell oonn tthhee
aarrbboorr wwiitthhoouutt ppaappeerr oorr ffiibbeerr ddiissccss bbeettwweeeenn tthhee
wwhheeeell aanndd tthhee ffllaannggee.. OOmmiittttiinngg tthhee ddiissccss ccaann
ppuutt uunndduuee ssttrreessss oonn tthhee wwhheeeell ccaauussiinngg iitt ttoo
ccrraacckk aanndd ppoossssiibbllyy ffllyy aappaarrtt.. AALLWWAAYYSS ““rriinngg
cchheecckk”” aa wwhheeeell bbeeffoorree aasssseemmbbllyy ttoo mmaakkee cceerr--
ttaaiinn iitt iiss ssoouunndd wwiitthh nnoo ccrraacckkss oorr ffllaawwss..
33..
Use a
3
⁄4" or 19mm open end wrench on the
nut which holds the wheel on the arbor.
Hold the wheel from turning with the other
hand. Note that the wheel on the left hand
side of the machine is a left hand thread, so
loosening it will require turning it clockwise.
44
. Remove the outer wheel flange and the
paper disc.
55..
Pull the wheel free from the arbor. There
will also be a paper disc and a wheel flange
on the back side of the wheel. Always make
certain there is a paper or fiber disc
between the wheel flanges and the wheel
itself, this helps to spread the rotational
forces across the inner area of the wheel.
SSeeee FFiigguurree 55..
66..
Mount the new wheel in the reverse order.
First a wheel flange, a paper disc, the
wheel, a paper disc, a wheel flange and
finally the nut itself. Tighten the nut snugly
but do not over tighten. Over tightening can
crack the wheel.
77..
Run a new wheel for at least 1-2 minutes
while standing clear of the line of rotation.
If a wheel does have defects it will generally fail as soon as it gets up to full speed
.
Page 11

G9717 6" Grinder
-10-
SSEECCTTIIOONN 66:: MMAAIINNTTEENNAANNCCEE
Make a habit of inspecting your Grinder each
time you use it. Check for the following conditions
and repair or replace when necessary:
11..
Loose mounting bolts.
22..
Worn switch.
33..
Worn or damaged cords and plugs.
44..
Damaged Grinding Wheel.
55..
Any other condition that could hamper the
safe operation of this machine.
GGeenneerraall
GGrriinnddiinngg WWhheeeellss
The grinding wheel should be inspected before
every use. Use the ring check method noted in
the Grinding Wheel section in Operations to verify the structural integrity. If using coolant during
grinding, always run the wheel for 5-10 minutes
at the end of the operation to remove any coolant
from the wheel. Take care in storing grinding
wheels to keep them free from potential damage
by being dropped, or having other items drop on
them.
Replace the wheel when the wheel diameter is
reduced to 4". Operating at anything less than
this diameter does not allow the proper alignment
of the Tool Rest and the Eye Shield.
Depending on the type of grinding you do, the
grinding wheel may require periodic dressing.
There are several different types of wheel dressing devices available on the market. Use a suitable diamond or silicon carbide stick type dresser. Sweep it smoothly and evenly several times
across the face of the wheel. Dressing restores
the abrasive quality of the wheel surface, plus it
will bring the wheel edge back to a square form.
Refer to the instructions which accompany your
dressing accessory for complete detail on wheel
dressing.
LLuubbrriiccaattiioonn
The Model G9717 features factory-sealed bearings. A sealed bearing requires no lubrication
during its lifetime. Should a bearing fail, your
grinder will probably develop a noticeable rumble,
which will increase when the machine is put
under load. If the bad bearing is not replaced, it
will eventually seize - possibly doing damage to
other parts of the machine. Bearings are standard
sizes and can be replaced through Grizzly.
Page 12

G9717 6" Grinder
-11-
This section covers the most common processing problems encountered in grinding and what to do about
them. Do not make any adjustments until grinder is unplugged and moving parts have come to a complete
stop.
TTRROOUUBBLLEESSHHOOOOTTIINNGG
SSYYMMPPTTOOMM
Motor will not start.
Motor will not start; fuses or
circuit breakers blow.
Motor overheats.
Motor stalls (resulting in
blown fuses or tripped circuit).
Machine slows when operating.
Wavy condition on surface
of workpiece.
Lines on surface of workpiece.
Burning spots or cracks in
the workpiece.
Wheel dulls quickly, grit falls
off.
Wheel clogs and workpiece
shows burn marks.
PPOOSSSSIIBBLLEE CCAAUUSSEE
1. Low voltage.
2. Open circuit in motor or loose
connections.
1. Short circuit in line cord or plug.
2. Short circuit in motor or loose
connections.
3. Incorrect fuses or circuit breakers in power line.
1. Motor overloaded.
2. Air circulation through the motor
restricted.
1. Short circuit in motor or loose
connections.
2. Low voltage.
3. Incorrect fuses or circuit breakers
in power line.
4. Motor overloaded.
Depth of cut too great.
1. Machine vibrating.
2. Workpiece not being held firmly.
3. Wheel face uneven.
4. Wheel is too hard.
1. Impurity on wheel surface.
2. Workpiece not being held tightly.
1. Improper type of grinding wheel.
2. Improper feed rate.
3. Coolant required.
1. Depth of cut too great.
2. Wheel is too soft.
3. Wheel diameter too small.
4. Bad wheel dress.
5. Defective wheel bonding.
1. Wheel is too hard.
2. Feed rate too slow.
3. Bad wheel dress.
4. Coolant required.
CCOORRRREECCTTIIVVEE AACCTTIIOONN
1. Check power line for proper voltage.
2. Inspect all lead connections on motor for loose or open connections.
1. Inspect cord or plug for damaged insulation and shorted wires.
2. Inspect all connections on motor for loose or shorted terminals or
worn insulation.
3. Install correct fuses or circuit breakers.
1. Reduce load on motor.
2. Clean out motor to provide normal air circulation.
1. Inspect connections on motor for loose or shorted terminals or
worn insulation.
2 Correct the low voltage conditions.
3. Install correct fuses or circuit breakers.
4. Reduce load on motor.
Slow down the rate of movement of the workpiece into wheel.
1. Make sure machine is securely mounted on a solid surface.
2. Use a holding device to firmly retain the workpiece.
3. Dress the grinding wheel.
4. Use softer wheel, or reduce the feed rate.
1. Dress the grinding wheel.
2. Use a holding device to firmly retain the workpiece.
1. Try a wheel which is softer style or a coarser grit.
2. Slow down the rate of movement of the workpiece into wheel.
3. Add optional coolant system or introduce coolant by hand.
1. Slow down the rate of movement of the workpiece into wheel.
2. Wheel too soft for the material being ground, select harder bond.
3. Replace the wheel.
4. Dress the wheel.
5. Consult manufacturer of grinding wheel.
1. Wheel too hard for the material being ground, select softer bond.
2. Increase the rate of movement of the workpiece into wheel.
3. Dress the wheel.
4. Add optional coolant system or introduce coolant by hand.
Page 13

G9717 6" Grinder
-12-
Ref# Part# Description
001 P9717001 WHEEL COVER LH OUTER
002 P9717002 WHEEL NUT LH
003 P9717003 WHEEL DISC
004 P9717004 SPARK BREAKER
005 P9717005 EYESHIELD
006 P9717006 WHEEL COVER LH INNER
007 P9717007 TOOL REST LH
008 P6202 BALL BEARING 6202ZZ
009 P9717009 BEARING HOUSING
010 P9717010 ROTOR
011
PWRCRD110L POWER CORD 110V W/PLUG
012 P9717012 STATOR
013 P9717013 WAVY WASHER
014 P9717014 STRAIN RELIEF
015 P9717015 MOUNTING PLATE
016 P9717016 MOTOR BODY
017A P9717017A WARNING LABEL
017B P9717017B NAMEPLATE LABEL
018 P9717018 WHEEL COVER RH INNER
019 P9717019 WHEEL RIM GUARD
020 P9717020 TOOL REST RH
021 P9717021 GRINDING WHEEL 60 GRIT
022 P9717022 WHEEL FLANGE
Ref# Part# Description
023 P9717023 WHEEL NUT RH
024 P9717024 WHEEL COVER RH OUTER
025 P9717025 BASE
026 P9717026 SWITCH PROTECTOR
027 P9717027 SWITCH
029 P9717029 CAPACITOR
030 P9717030 BASE PLATE
031 P9717031 RUBBER FOOT
032 P9717032 GRINDING WHEEL 30 GRIT
034 PW02M FLAT WASHER 5MM
035 PLW01M LOCK WASHER 5MM
036 PS05M PHLP HD SCR M5-.8 x 8
037 PS07M PHLP HD SCR M4-.7 X 8
038 PN06M HEX NUT M5-0.8
039 P9717039 PHLP HD SCR M5-.8 X 45
040 PS09M PHLP HD SCR M5-.8 X 10
041 P9717041 PHLP HD SCR M5-.8 X 13
042 PB06M HEX BOLT M8-1.25 X 12
043 PW01M FLAT WASHER 8MM
044 PLW04M LOCK WASHER 8MM
044 PB18M HEX BOLT M6-1 X 15
045 PW03M FLAT WASHER 6MM
Page 14

G9717 6" Grinder
-13-
Page 15

G9717 6" Grinder
-14-
Grizzly Industrial, Inc. warrants every product it sells for a period of
11 yyeeaarr
to the original purchaser from
the date of purchase. This warranty does not apply to defects due directly or indirectly to misuse, abuse,
negligence, accidents, repairs or alterations or lack of maintenance. This is Grizzly’s sole written warranty
and any and all warranties that may be implied by law, including any merchantability or fitness, for any particular purpose, are hereby limited to the duration of this written warranty. We do not warrant or represent
that the merchandise complies with the provisions of any law or acts unless the manufacturer so warrants.
In no event shall Grizzly’s liability under this warranty exceed the purchase price paid for the product and
any legal actions brought against Grizzly shall be tried in the State of Washington, County of Whatcom.
We shall in no event be liable for death, injuries to persons or property or for incidental, contingent, special, or consequential damages arising from the use of our products.
To take advantage of this warranty, contact us by mail or phone and give us all the details. We will then
issue you a “Return Number’’, which must be clearly posted on the outside as well as the inside of the carton. We will not accept any item back without this number. Proof of purchase must accompany the merchandise.
The manufacturers reserve the right to change specifications at any time because they constantly strive to
achieve better quality equipment. We make every effort to ensure that our products meet high quality and
durability standards and we hope you never need to use this warranty.
Please feel free to write or call us if you have any questions about the machine or the manual.
Thank you again for your business and continued support. We hope to serve you again soon.
WWAARRRRAANNTTYY AANNDD RREETTUURRNNSS
Page 16

G9717 6" Grinder
-15-
WWAARRRRAANNTTYY CCAARRDD
NAME_______________________________________________ PHONE NUMBER___________________
STREET________________________________________________________________________________
CITY_______________________________STATE_________ZIP ___________________________________
MODEL# _________________ INVOICE#_________________
The following information is given on a voluntary basis. This information will be used for marketing purposes to help
Grizzly develop better products. Your name will be included in our mailing
lliisstt
only. It will not be sold to other com-
panies. of course, all information is strictly confidential.
11..
How did you find out about us?
__Advertisement __Friend __Website
__Catalog __Card deck __Other____________________
22..
Do you think your machine represents good value? __YES __NO
33..
Would you allow us to use your name as a reference for Grizzly customers in your area? __YES __NO
((NNoottee::
Your
nnaammee
will be used a maximum of three
ttiimmeess..))
44..
To which of the following publications do you subscribe? Check all that apply.
__Home Shop Machinist __Rifle Magazine Other ________________
__Projects in Metal __Hand Loader Magazine
__Modeltec __Precision Shooter
__Live Steam __RC Modeler
__Shotgun News __Model Airplane News
55..
What is your annual household income?
__$20,000-$30,000 __$50,001-$60,000 __$80,000-$90,000
__$30,001-$40,000 __$60,001-$70,000 __+$90,000
__$40,001-$50,000 __$70,001-$80,000
66..
To which age group do you belong?
__20-30 __41-50 __61-70
__31-40 __51-60 __+70
77..
Which of the following machines or accessories do you own? Check all that apply.
__Engine Lathe __Abrasive Cutoff __Sheet Metal Machine
__Band Saw (Metal) __Arc Welder __Other _____________________________
__Band Saw (Wood) __Oxy/Ac. Outfit
__Milling Machine __Air Compressor
__Bench Grinder __Drill Press
88..
How many of the machines you checked in Question 7 are Grizzly machines? ______________________
99..
Which of the following tooling and accessories do you own? Check all that apply.
__Milling Vises __Collet Closer __Digital Readout
__Indexing Head __Taper Attachment __Tool Post Grinder
__Rotary Table __Boring Head __Other _________________________________________
1100..
In the space below, list three tools you would like Grizzly to carry.
1111..
Of all the mail order metalworking company’s you have purchased from, how do you rate Grizzly in terms of overall customer satisfaction?
__The best __Above average __Average
__Below average __The worst
1122..
Comments_______________________________________________________________________________
_____________________________________________________________________________________________
_____________________________________________________________________________________________
________________________________________________________________________________________________
CUT ALONG DOTTED LINE
Page 17

FOLD ALONG DOTTED LINE
FOLD ALONG DOTTED LINE
GGRRIIZZZZLLYY IINNDDUUSSTTRRIIAALL,, IINNCC..
PP..OO.. BBOOXX 22006699
BBEELLLLIINNGGHHAAMM,, WWAA 9988222277--22006699
Place
Stamp
Here
TAPE ALONG EDGES--PLEASE DO NOT STAPLE
Name_______________________________
Street_______________________________
City______________State______Zip______
Send a Grizzly Catalog to a friend:
 Loading...