

Page 1
!
Introduction
INSTRUCTIONS FOR
C2314-C2317 REVERSIBLE
STILE AND RAIL SET
The Model C2314-C2317 Reversible Stile and Rail
Sets allow you to shape ¾" material into door stiles
and then simply reverse the cutter components to
shape the door rails. This set comes complete with
a ball bearing guide and shims.
21⁄2"
1
⁄4"
Reversible Stile and Rail Set
• Failure to follow these guidelines will result
in serious personal injury.
• Follow the safety guidelines set forth by the
manufacturer of the shaper.
• DO NOT remove guards and anti-kickback
devices from the shaper.
• ALWAYS WEAR ANSI APPROVED EYE AND
EAR PROTECTION when using this bit.
• Unplug shaper before installing or
cutter.
• Always inspect workpiece for cracks, knots,
or other imperfections that could cause the
workpiece to kick or shatter while milling.
• Always feed the workpiece against the cut
ter rotation.
1"
adjusting
-
Always disconnect power
to the machine when set
ting up or making adjust
ments. Failure to do this
may result in serious per
sonal injury.
-
-
-
Cutting Rails
For safety and best results, we recommend using
a shaper with adjustable fences and a miter gauge.
These instructions are only intended for setting up
the cutter for counterclockwise rotation.
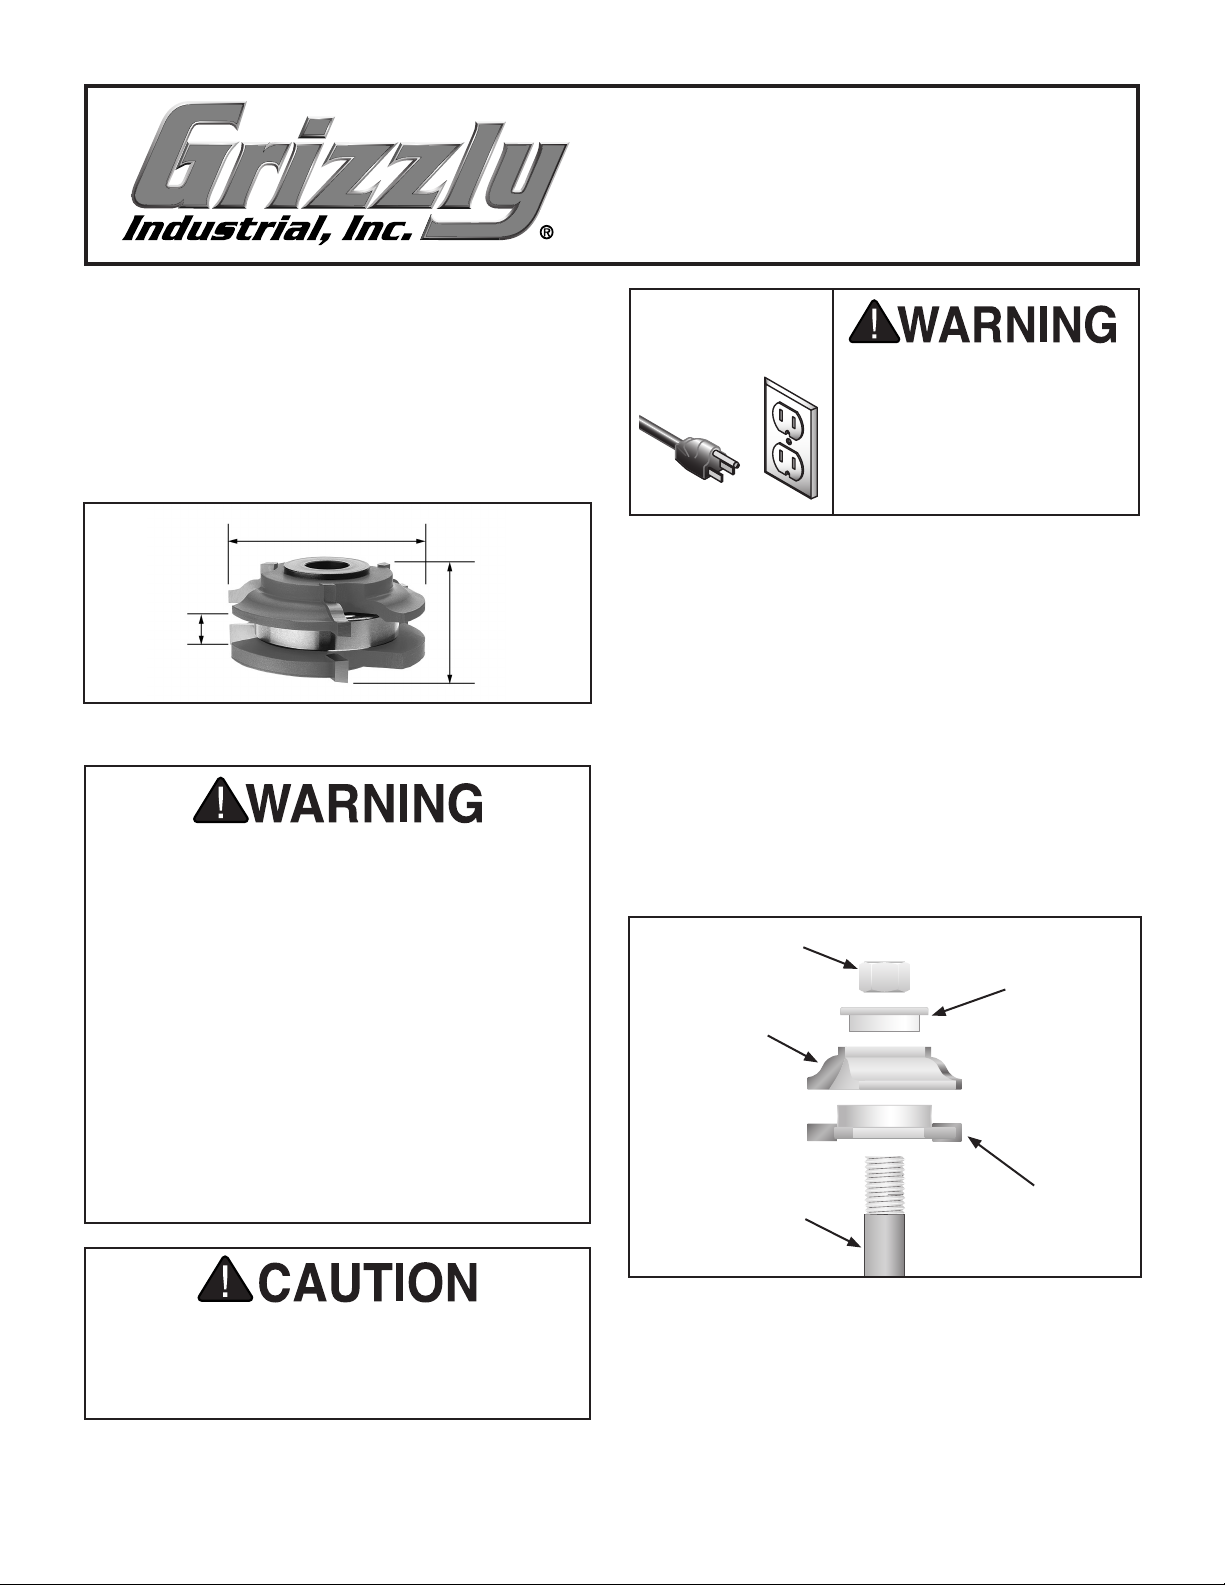
To cut the rail ends:
1. UNPLUG THE SHAPER!
2. Slide the flat cutter, bearing side up, over the
spindle as shown in Figure A
Spindle Nut
Profile
Cutter
Spindle
.
Bushing
Flat
Cutter
These shaper bits have sharp edges. Use care
while removing the waxy protective coating.
Never turn on the shaper with the protective
coating still on the bit.
Figure A. Set-up for cutting rails.
3. Place the bushing into the hole in the profile cut-
ter and slide both onto the spindle.
4. Thread the spindle nut against the bushing and
tighten it with a wrench.
-1-
Page 2
5. Use a straightedge to align the fences with the
edge of the guide bearing.
Cutting Stiles
6. Align the bottom edge of the shaper cutter with
the top, or slightly below the top of the table.
7. Before turning the shaper ON, place a test rail
on against the miter gauge finished face up and
slide it against the fence.
Note—We recommend using a back-up piece of
wood behind the rail to prevent tear-out.
8. Turn ON the shaper and slide the miter gauge
and test rail through the shaper cutter as shown
in Figure B.
Note—The workpiece must always be fed
against the cutter rotation and the full depth of
profile should be made in one pass to ensure a
precise cut.
These instructions are intended for
COUNTERCLOCKWISE spindle operation only.
DO NOT operate the shaper in the clockwise
direction to make a climb cut. If this warning
is ignored, the workpiece can kick forward,
and may pull the hand into the shaper cutter,
causing severe injury or death!
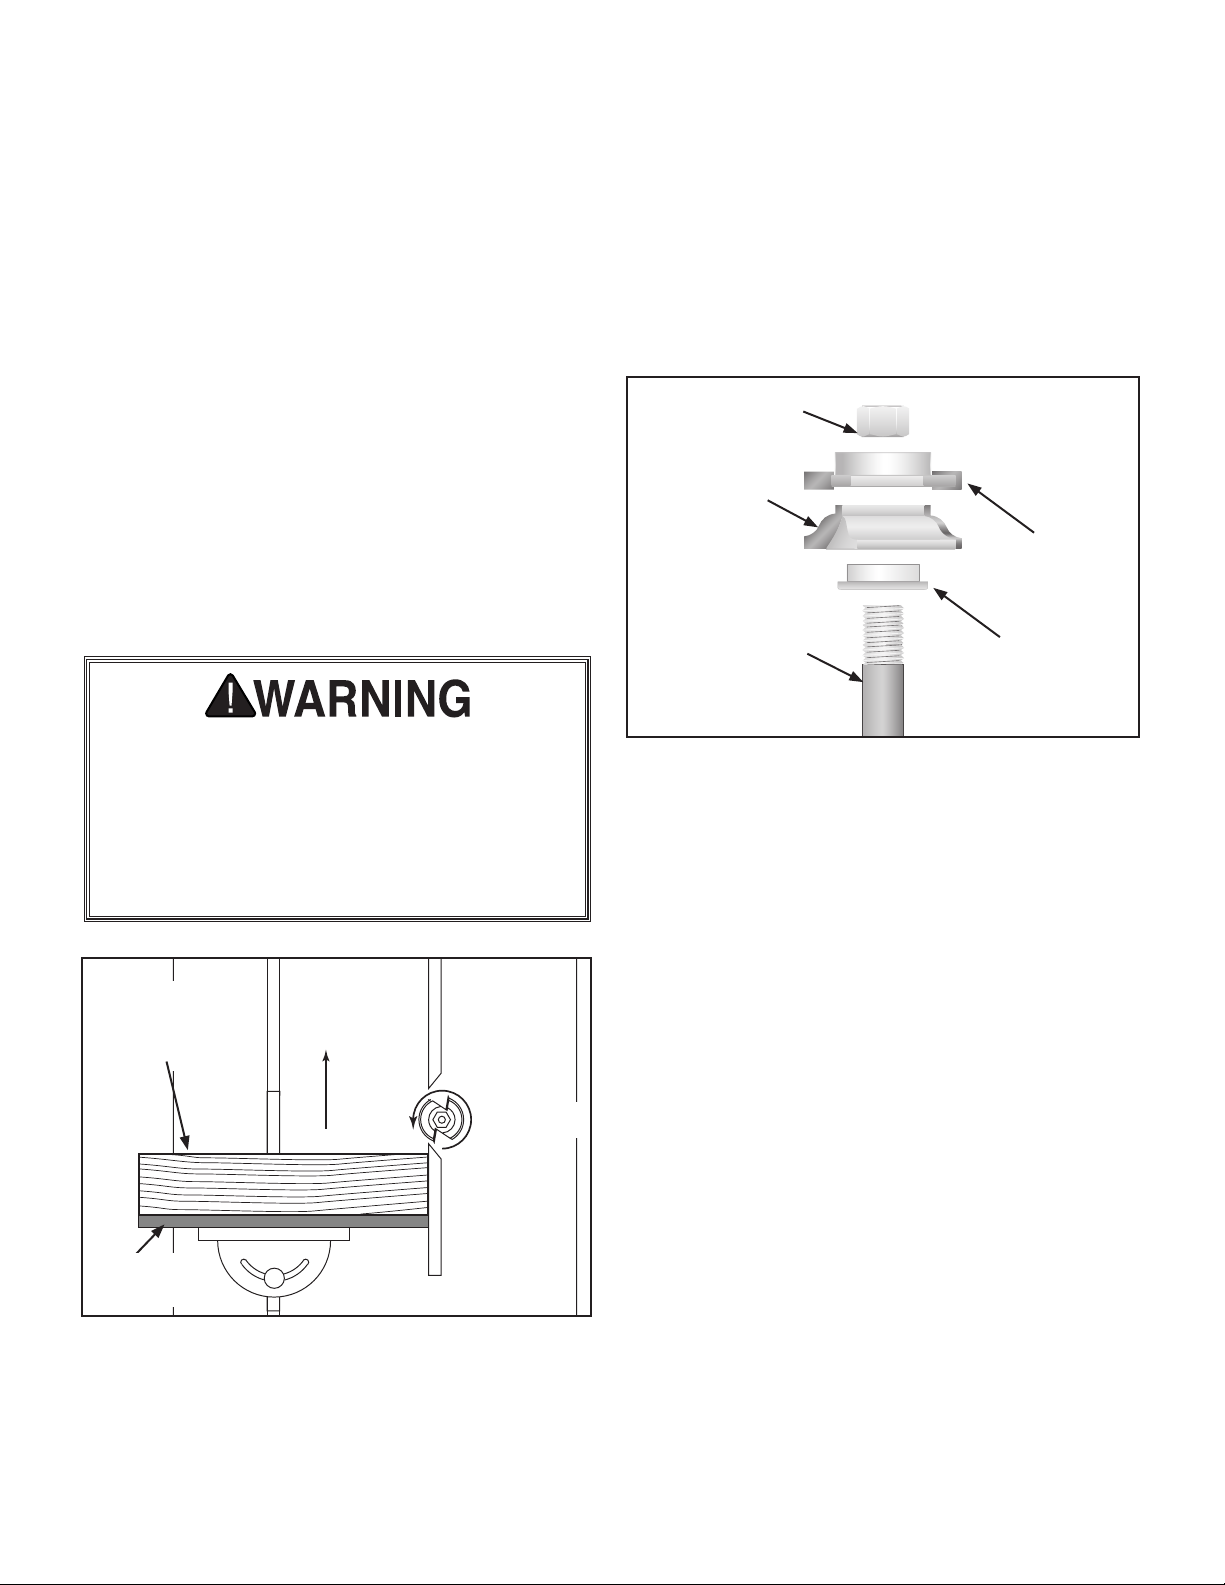
To cut the stile edges:
1. Unplug the shaper!
2. Place the bushing into the hole in the profile cut-
ter from the bottom, as shown in Figure C,
slide both onto the spindle.
Spindle Nut
Profile
Cutter
Flat
Cutter
Spindle
Figure C. Set-up for cutting stiles.
3. Slide the flat cutter, bearing side up, over the
spindle as shown in Figure C
4. Thread the spindle nut against the bushing and
tighten it with a wrench.
Bushing
.
and
RAIL
WORKPIECE
FACE UP
BACK-UP
BOARD
Figure B. Cutting the ends of rails.
9. Rotate the board and cut the edge, and then the
other end, maintaining the face-up position.
FEED
ROTATION
5. Check the alignment of the fences with the edge
of the guide bearing with a straightedge. This
should already be aligned from Step 5 of
Rails.
6. Align the bottom edge of the shaper cutter with
the top, or slightly below the top of the table.
7. Turn ON the shaper and slide a test stile, face
up, through the shaper cutter.
Note—The workpiece must always be fed
against the cutter rotation and the full depth of
profile should be made in one pass to ensure a
precise cut.
8. Turn ON the shaper and slide a test stile, face
up, through the shaper cutter.
9. Place the test stile and rail together to check for
a smooth fit
-2-
.
Cutting
Page 3

Adjustments
If the test pieces are not flush (Figure D) then check
the following:
Improper Height Adjustment Shown
NOTICE
If you have never used this type of machine
or equipment before, WE STRONGLY RECOM
MEND that you read books, trade magazines,
or get formal training before beginning any
projects. Regardless of the content in this
instruction sheet, Grizzly Industrial will not
be held liable for accidents caused by lack of
training.
-
Figure D. Improperly fitting stile and rail.
—If the bottom edge lines up, but the top does
not, make sure the thickness of the stile mate
rial is the same as the rail material.
—If both the top and bottom edges do not line
up as shown in Figure D, adjust the height
of the shaper spindle, or fine tune the cutter
height by placing the included metal shims
between the bushing and the profile cutter.
—If the panel wont slide into the groove in the
stile and rails, place a metal shim between
the guide bearing and the profile cutter as
shown in Figure E
.
We stress the importance of working with good qual
ity material and insuring that all pieces are machined
the same and that all ends and edges are cut square.
Follow all recommended safety procedures and
always test your setup using sample pieces.
If this is your first time performing panel door con
struction, start simple by making a square door.
Doors having more intricate designs, such as arched,
tombstone or curved panels, should only be done
when you are confident of your ability. If your proj
ect requires curved pieces then freehand shaping
will be necessary. Remove the fence(s) and always
incorporate the use of a starting pin or block to sup
port the workpiece as it is initially fed into the cutter.
Always use some type of jig or hold-down device to
make the operation safer and to avoid having your
hand in close proximity to the spinning cutter.
Figure F is a sample of how all the stile and rail
pieces should fit together.
-
-
-
-
SHIM
Insert Shim
When Joint Is
Too Tight
Figure E. Adjustment to fit panel.
Figure F. Stile and rail assembly.
-3-
 Loading...