

Page 1
Pliers
8mm, 10mm, 12mm socket
Ratchet
Flathead
Screwdriver
GrimmSpeed Install Guide Series
Installing the GrimmSpeed 02-07 Top Mount Intercooler (TMIC)
Updated 3/25/13
Introduction: This guide will illustrate the installation of the GrimmSpeed Top
Mount Intercooler on your 02-07 Subaru. This install is moderately challenging, so if
this is your first TMIC swap, set aside at least a few hours so that you can take your
time and do it right. A seasoned veteran may only spend 30min on the installation.
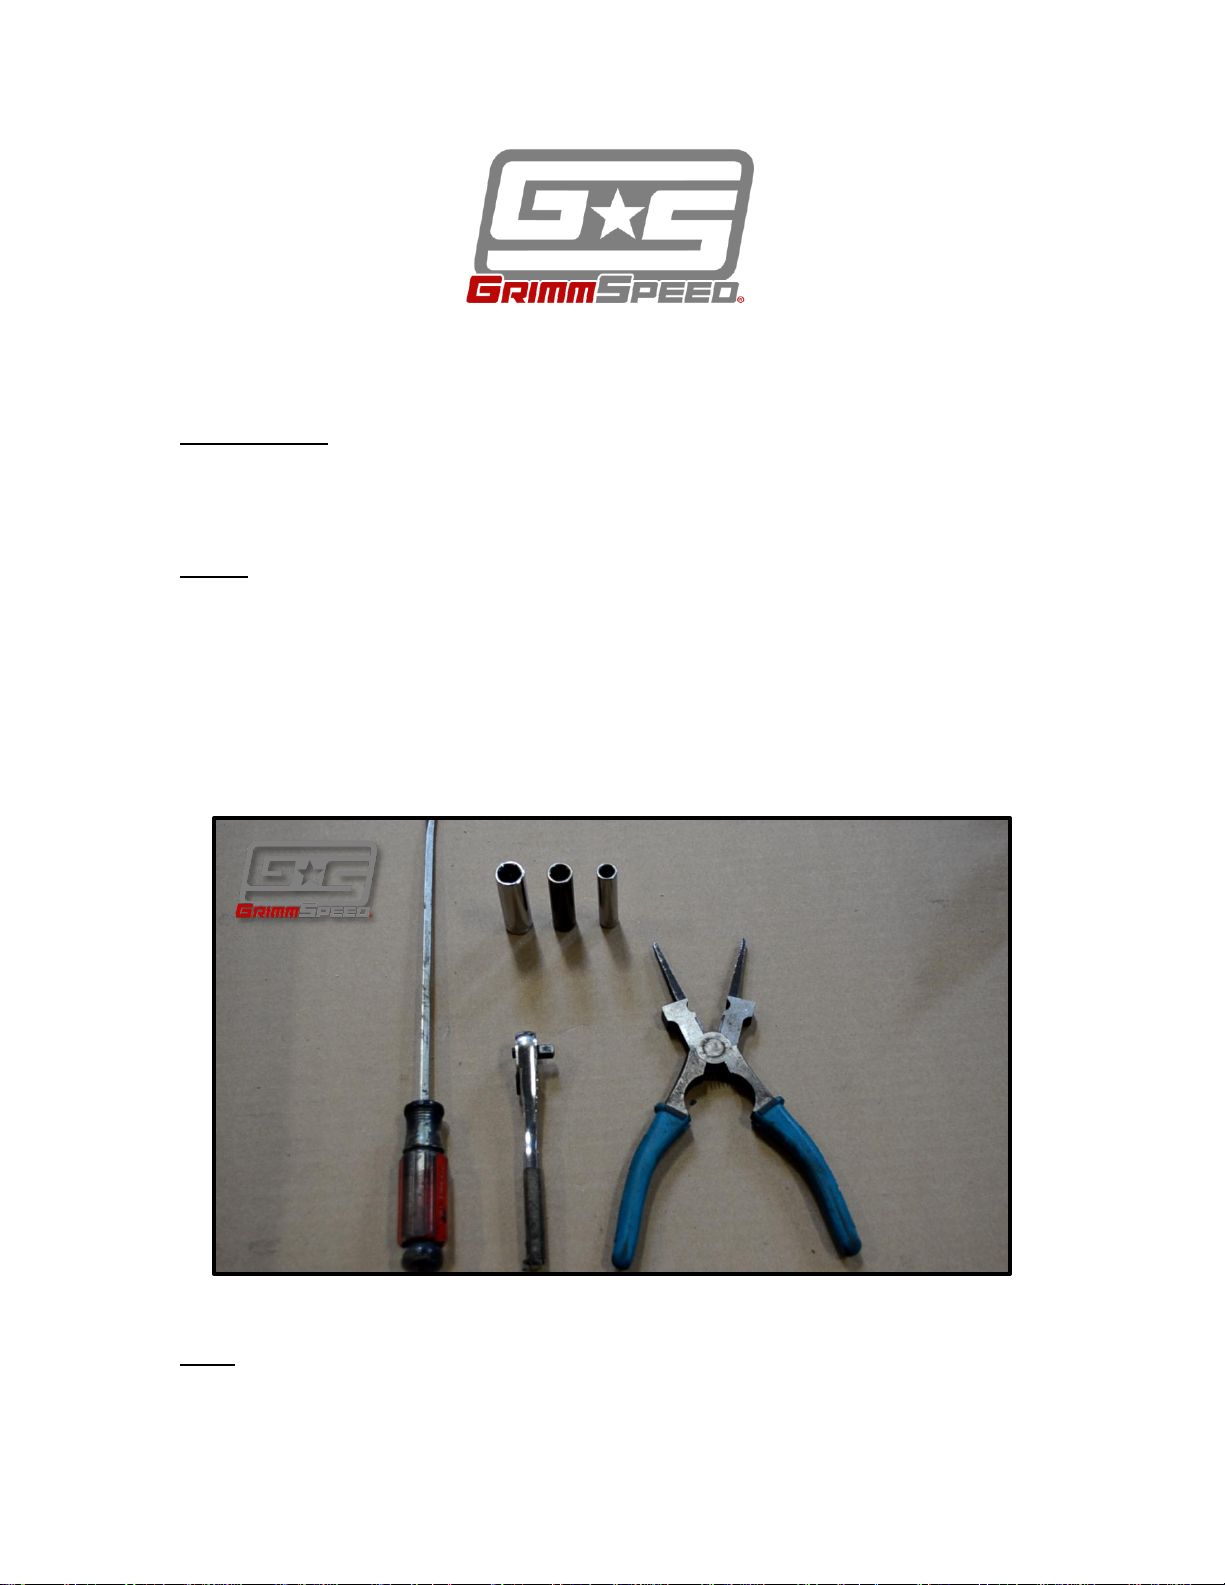
Tools: The tools listed below are suggested for this task (figure 1). Optional tools
are noted.
- Pliers
- 8mm socket (if you’re also installing the GrimmSpeed splitter)
- 10mm socket
- 12mm socket (deep-well or extension recommended)
- Ratchet
- Flathead screwdriver
Tips: Using an extension will help give you more space to spin the ratchet and avoid
damaging parts or your hands.
Figure 1: Tools
Page 2

Procedure:
Turbo Coupler
Throttle Body
BPV
Mounting Points
1. Begin by collecting your tools and popping your hood.
2. The first step will be to remove your stock/existing top mount intercooler.
There are a few primary points of connection and we’ll step through those
before pulling the TMIC. Use the figure below to identify each of these points
and familiarize yourself with the procedure.
Figure 2: TMIC Mounting Points
Page 3
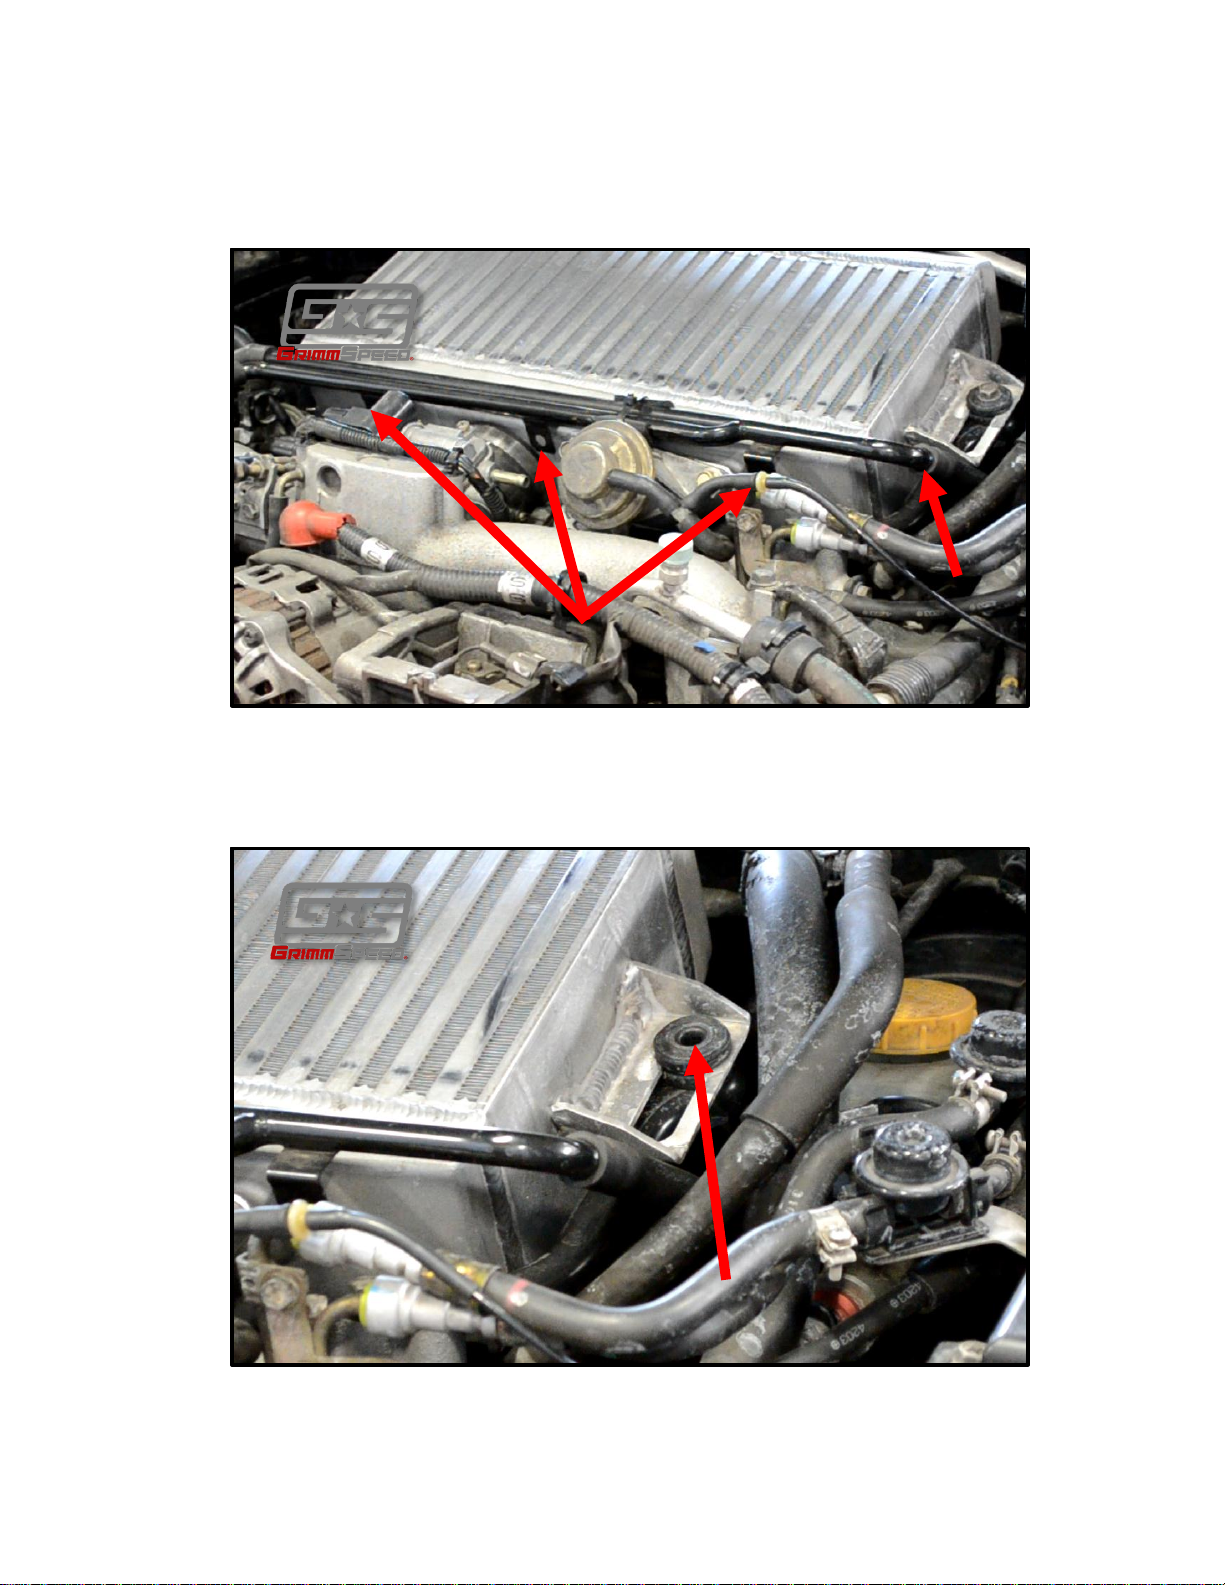
3. First, begin by removing the three (3) 10mm screws holding your valve cover
Disconnect hardline
Remove 12mm Bolt
breather hard lines to the factory TMIC. Optionally, pop the hardline out of
the hose on the driver’s side and pull it out of the way.
Figure 3: Remove OEM radiator stay brackets
4. Next, remove the two (2) 12mm bolts holding the TMIC to its brackets on
either side of the engine bay.
Figure 5: Removing 12mm bolts
Page 4
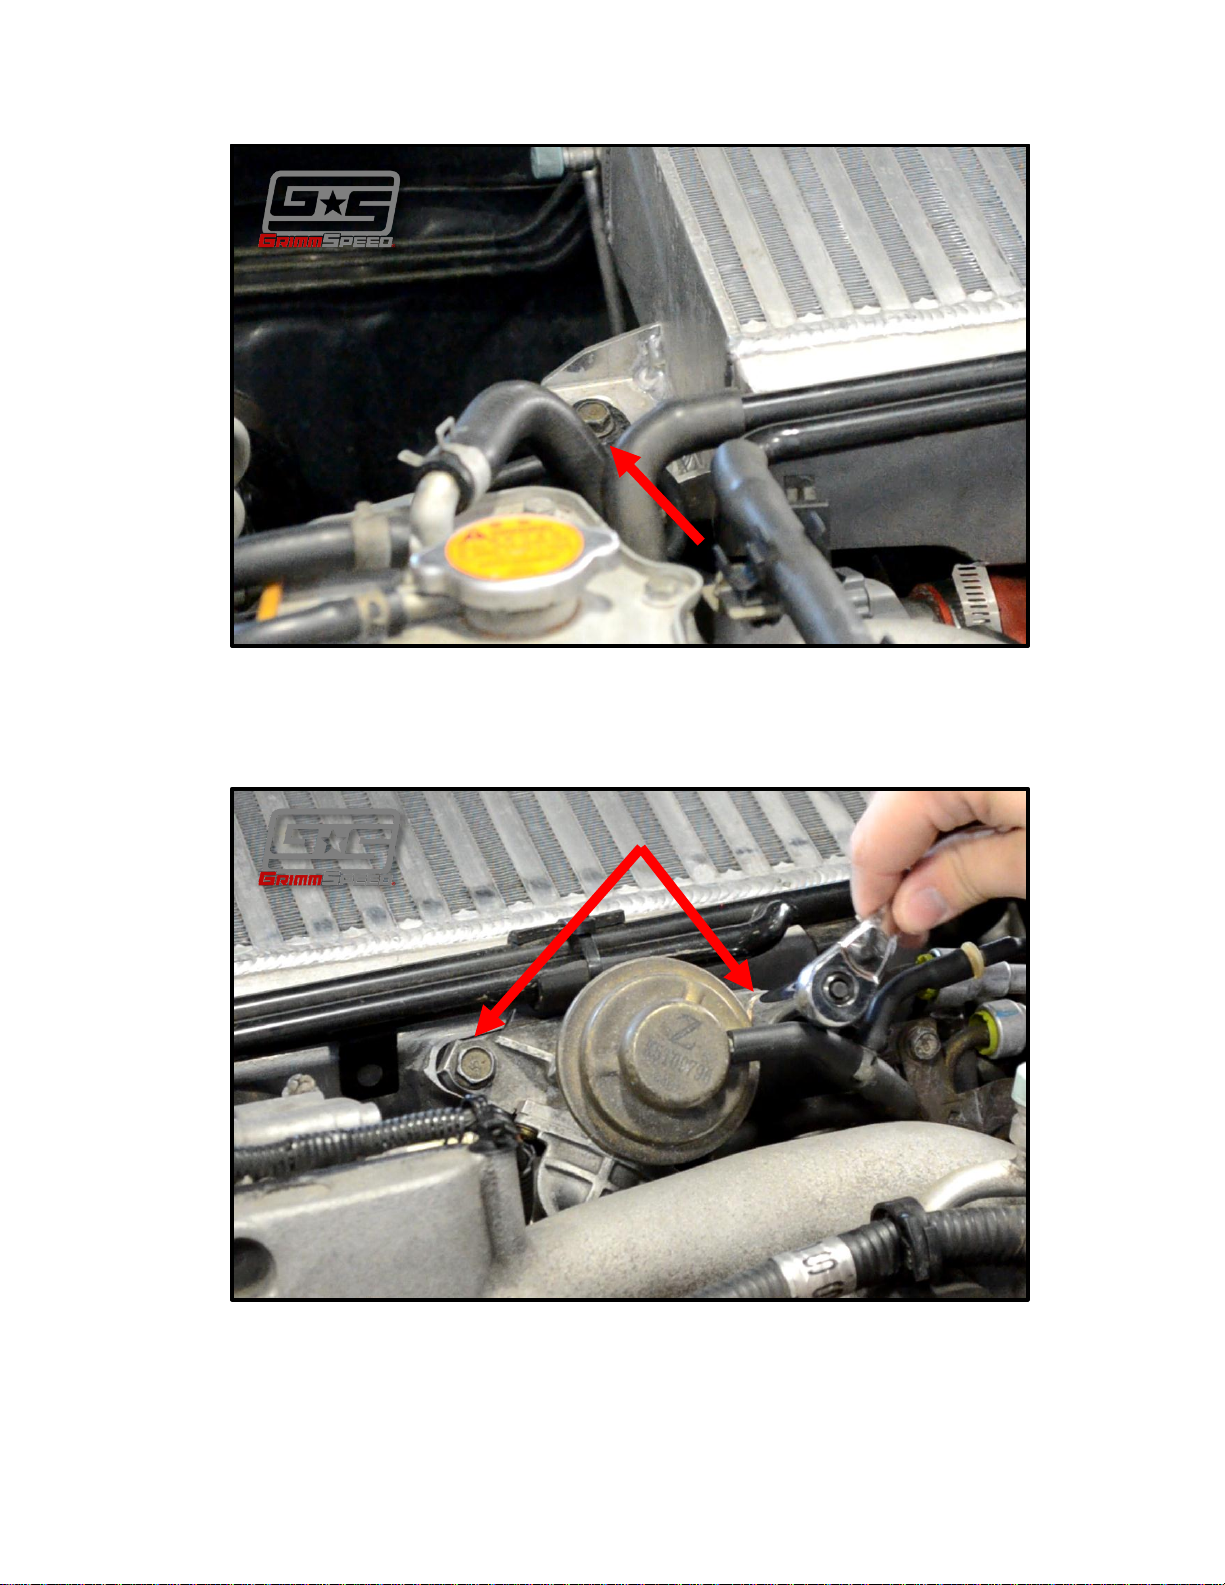
Figure 6: Remove 12mm bolts
Remove 12mm Bolts
Remove 12mm Bolt
5. Next, we’ll unbolt the stock bypass valve. Again, you’ll use your 12mm socket
to remove two bolts. Be sure to grab the gasket as you remove the bolts.
Figure 7: Remove bolts for BPV
Page 5
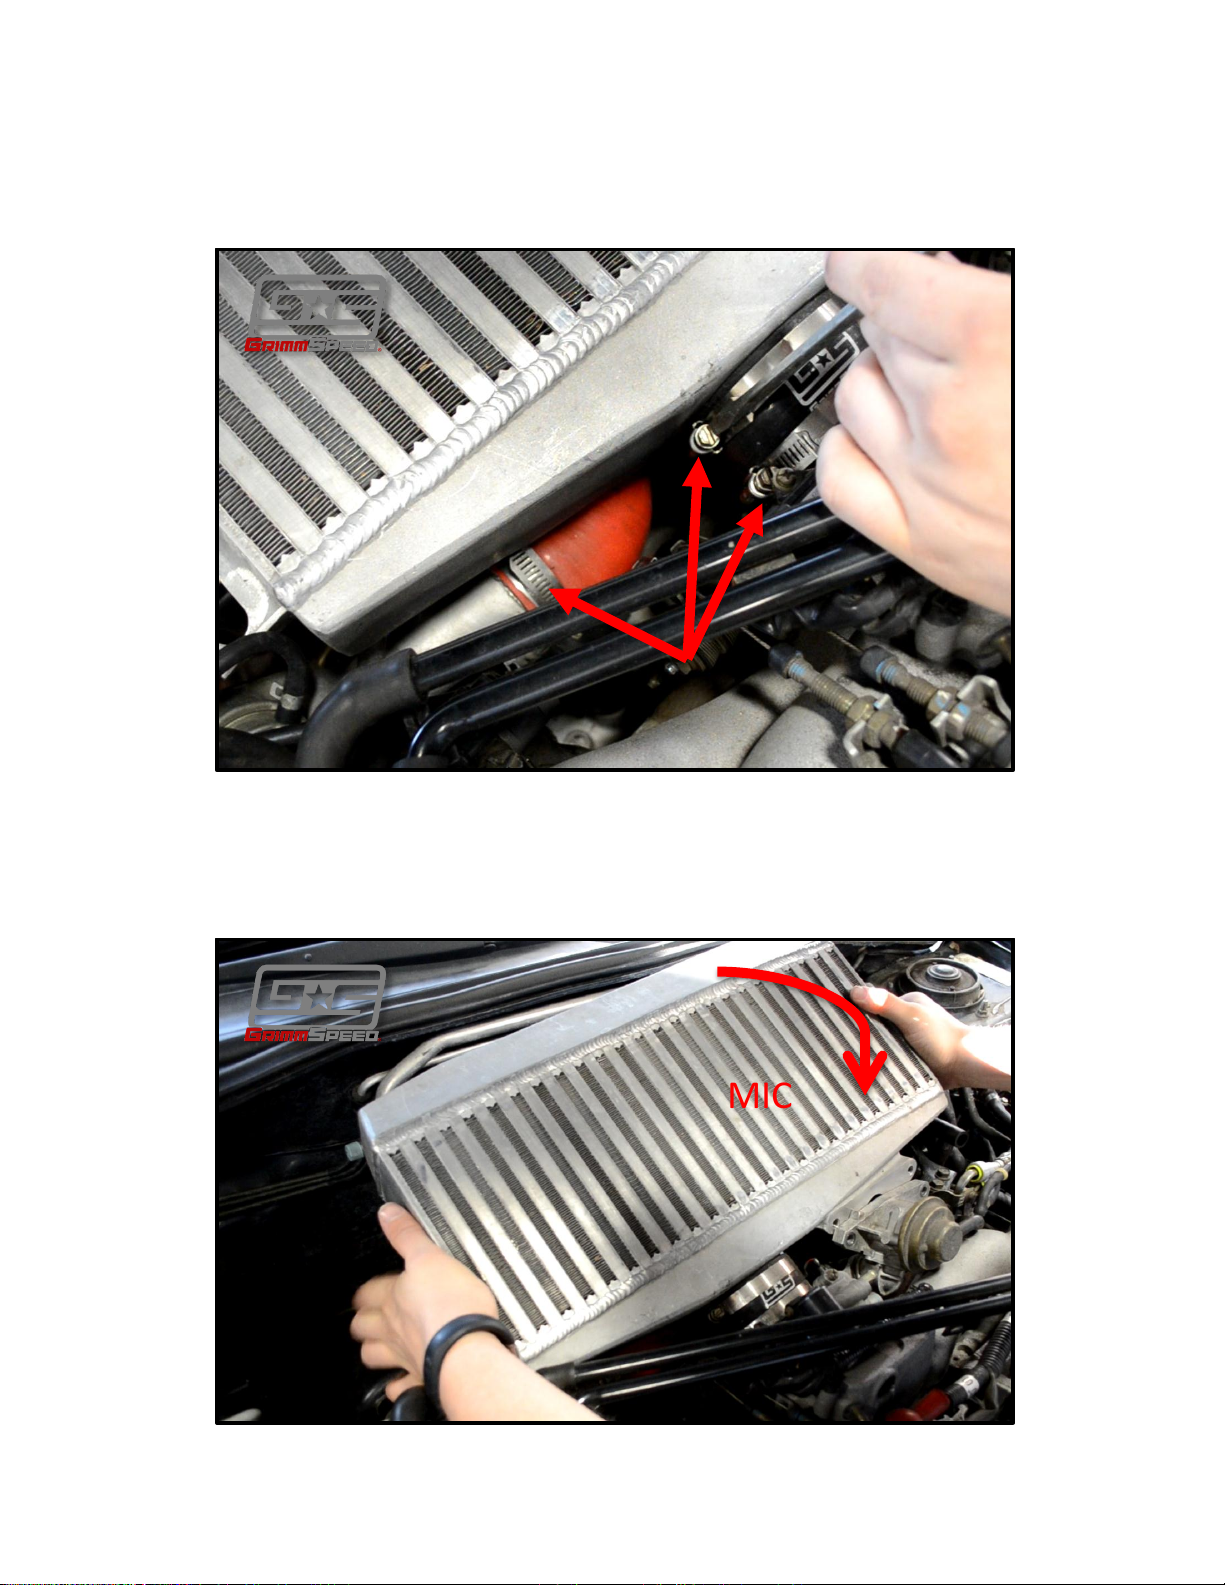
6. Lastly, loosen the hose clamps for your throttle body coupler as well as the
Loosen 3 clamps
Remove TMIC
compressor housing. Loosening both throttle body clamps will greatly easy
in uninstalling your factory TMIC.
Figure 9: Loosen stock worm gear clamps
7. Now, your intercooler should be ready to pull. This can take some finesse, but
shouldn’t be too hard. Rotate the top right corner of the TMIC towards you in
order to work the couplers off of your turbo and throttle body.
Page 6
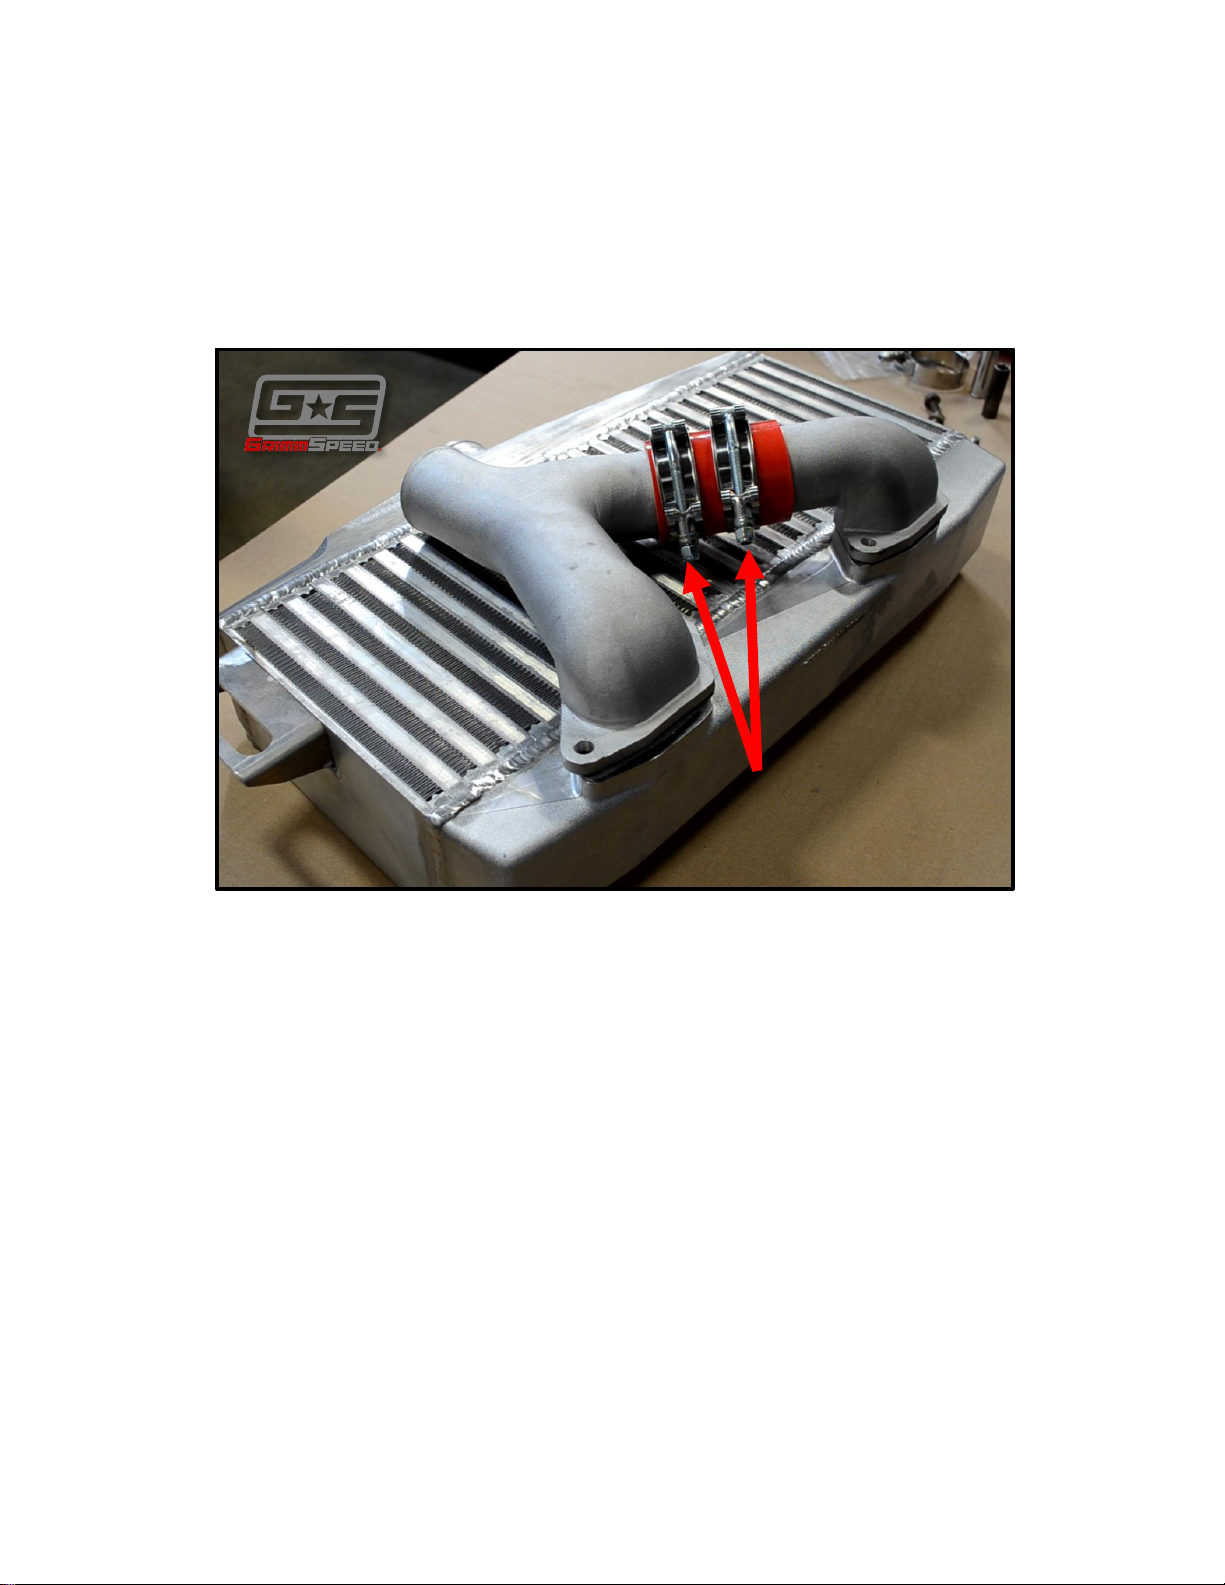
Figure 10: Remove TMIC
Loosely install clamps
8. Next, we’ll prep the GrimmSpeed unit for installation. Unbox the thing
already! Start by removing the protective seals on the inlet ports. We’ll attach
the y-pipe first. Remove the y-pipe pieces from their packaging and identify
the three (3) T-Bolt clamps marked 51-59mm. Loosely assemble them with
the straight coupler as shown below.
Figure 11: Assemble y-pipe
9. Now use the four (4) 12mm bolts from your factory intercooler to attach the
new GrimmSpeed y-pipe to the GrimmSpeed TMIC. Be sure to place one of
the included gaskets under each flange before assembly.
Page 7

Install 12mm bolts
Figure 12: Assemble y-pipe
10. At this point, you can make sure that the straight silicone coupler is centered
between the two y-pipe pieces before tightening the t-bolt clamps. Orient the
t-bolt clamps as shown below to ensure proper clearance in the engine bay.
Make sure that the t-bolt is sealing behind the bead on the cast parts, not on
the bead.
Page 8

Tighten t-bolt clamps
Figure 13: Tighten clamps
11. Attach the 90 degree coupler to the y-pipe using the third 51-59mm clamp as
shown below. Not that the longer portion of the coupler is the end connected
to the y-pipe. Depending on your particular installation, you may find that
the angle and how far you push the coupler on need adjustment. We’ve made
the couplers extra-long to allow for maximum adjustability and even
trimming, if necessary.
Page 9

Install 90 degree coupler
Install 90 degree coupler
Figure 14: Install 90 degree coupler
12. Pop the rubber bushings and steel cores out of your stock TMIC and fit them
to your shiny new GrimmSpeed TMIC. This is a very important step! You will
need to remove the steel core to be able to remove the rubber bushing and
transfer it to our TMIC. Reinstall steel core after you swap the bushing.
Page 10

Figure 15: Transfer rubber bushings
Remove stock BPV hose
13. The last step before installing your TMIC is to replace the factory BPV recirc
hose. This is the longest of the four silicone couplers in the kit. Remove your
stock unit by compressing the tension clamps on either end and sliding them
down before pulling the hose off. You may choose to reuse the stock tension
clamps on your reinstall, but we’ve also provided t-bolt clamps. It may be a
tight fit on your stock BPV connection, so be patient. It can help to wet the
coupler slightly.
Figure 16: Remove stock BPV hose
Page 11

Figure 17: Install GrimmSpeed BPV hose
Install T-Bolt here
Figure 18: Install GrimmSpeed BPV hose
Page 12

14. Remove the protective cap on the throttle body of the GrimmSpeed TMIC as
Install couplers and clamps loosely
well as the protective seal on the BOV flange. Slip the GrimmSpeed throttle
body coupler over your throttle body and loosely place the two large t-bolt
clamps over it. You’ll also need to choose whether you’d prefer to run a t-bolt
or worm gear clamp on your compressor housing. The worm gear is an easier
install and both should work just fine; it’s a matter of personal preference.
Place that clamp loosely over the coupler as well. (In this photo, I’ve chosen
to slip the second throttle body clamp on afterwards. You may choose to do
the same if you have trouble getting the TMIC into position.
Figure 19: Place coupler and clamps
15. Grab your TMIC assembly by the mounting tabs and get it into position. We
recommend tipping the TMIC towards you as shown and then working your
two coupler points into position. Get the 90 degree coupler over your
compressor housing, keeping an eye on the throttle body coupler. After
you’ve got the coupler started on the turbo, you should be able to maneuver
the TMIC onto the throttle body. Make sure the coupler is seated all the way
around, not folded in at any point. On the turbo side, you will need to
maneuver your chosen clamp into place over the coupler.
Page 13

Figure 20: Position TMIC
Figure 21: Position TMIC
16. If, like me, you opted to leave one of the throttle body clamps off, you’ll want
to remove the nut, pull it apart and sneak it around. Now is the appropriate
time to snug up your clamps on both the throttle body and the turbo,
checking again to make sure that your coupler makes a nice seal all the way
around.
Page 14

Tighten Clamps
Install 12mm Bolts
Gasket
Figure 22: Tighten Clamps
17. Now, reinstall your bypass valve using the stock fasteners. Make sure to also
use the included gasket to ensure a perfect seal. Get things snug, but no need
to go crazy. On some drive by cable vehicles, the recirculation port and your
throttle body may be a very tight fit. This is to ensure that there’s plenty of
clearance for larger valves with the intake manifold and hood.
Page 15

Figure 23: Reinstall BPV
Install 12mm Bolt
18. Finally, use the two longer 12mm bolts to bolt the entire assembly back into
place on the stock brackets. Get both bolts in loosely before tightening
anything down. The driver’s side bracket has some adjustment is you loosen
it from the intake manifold. Some cars have had these brackets adjusted over
the years, so you may need to do the same.
Figure 24: Bolt intercooler back down
Page 16

Figure 25: Bolt intercooler back down
Install 12mm Bolt
Adjustment
20. At this point, the only loose end is the hardline that we disconnected for the
valve cover breathers. You can choose to reattach it if you’d prefer, but we
recommend using the included hoses and adaptors to replace the lines with
our hose. The figure below shows the hose installation using ½” hose, ½” Tee
and a ½”- ½” union. For the sake of this guide, I’ve used a 17” piece of hose. If
you prefer, a longer piece (we include 24”) can be used to sneak the hose
below your tmic for a cleaner install.
Page 17

½” – ½” Union
½” Hose
½” Tee
Figure 26: Replace crossover hard line
That’s it! You should be all set. Take the car for a spin to listen for any leaks. As with
any modification to your engine, we recommend that you visit your tuner for
maximum gains and safety.
 Loading...