

Page 1
10, 12, 13mm
Screwdriver
1/2in
GrimmSpeed Install Guide Series
Installing the GrimmSpeed 02-07 Subaru Hood Strut Kit
Updated 12/12/13
Introduction: This guide will illustrate the installation of the GrimmSpeed Subaru
Hood Strut Kit. The difficulty here is relatively low, so take your time and enjoy the
job!
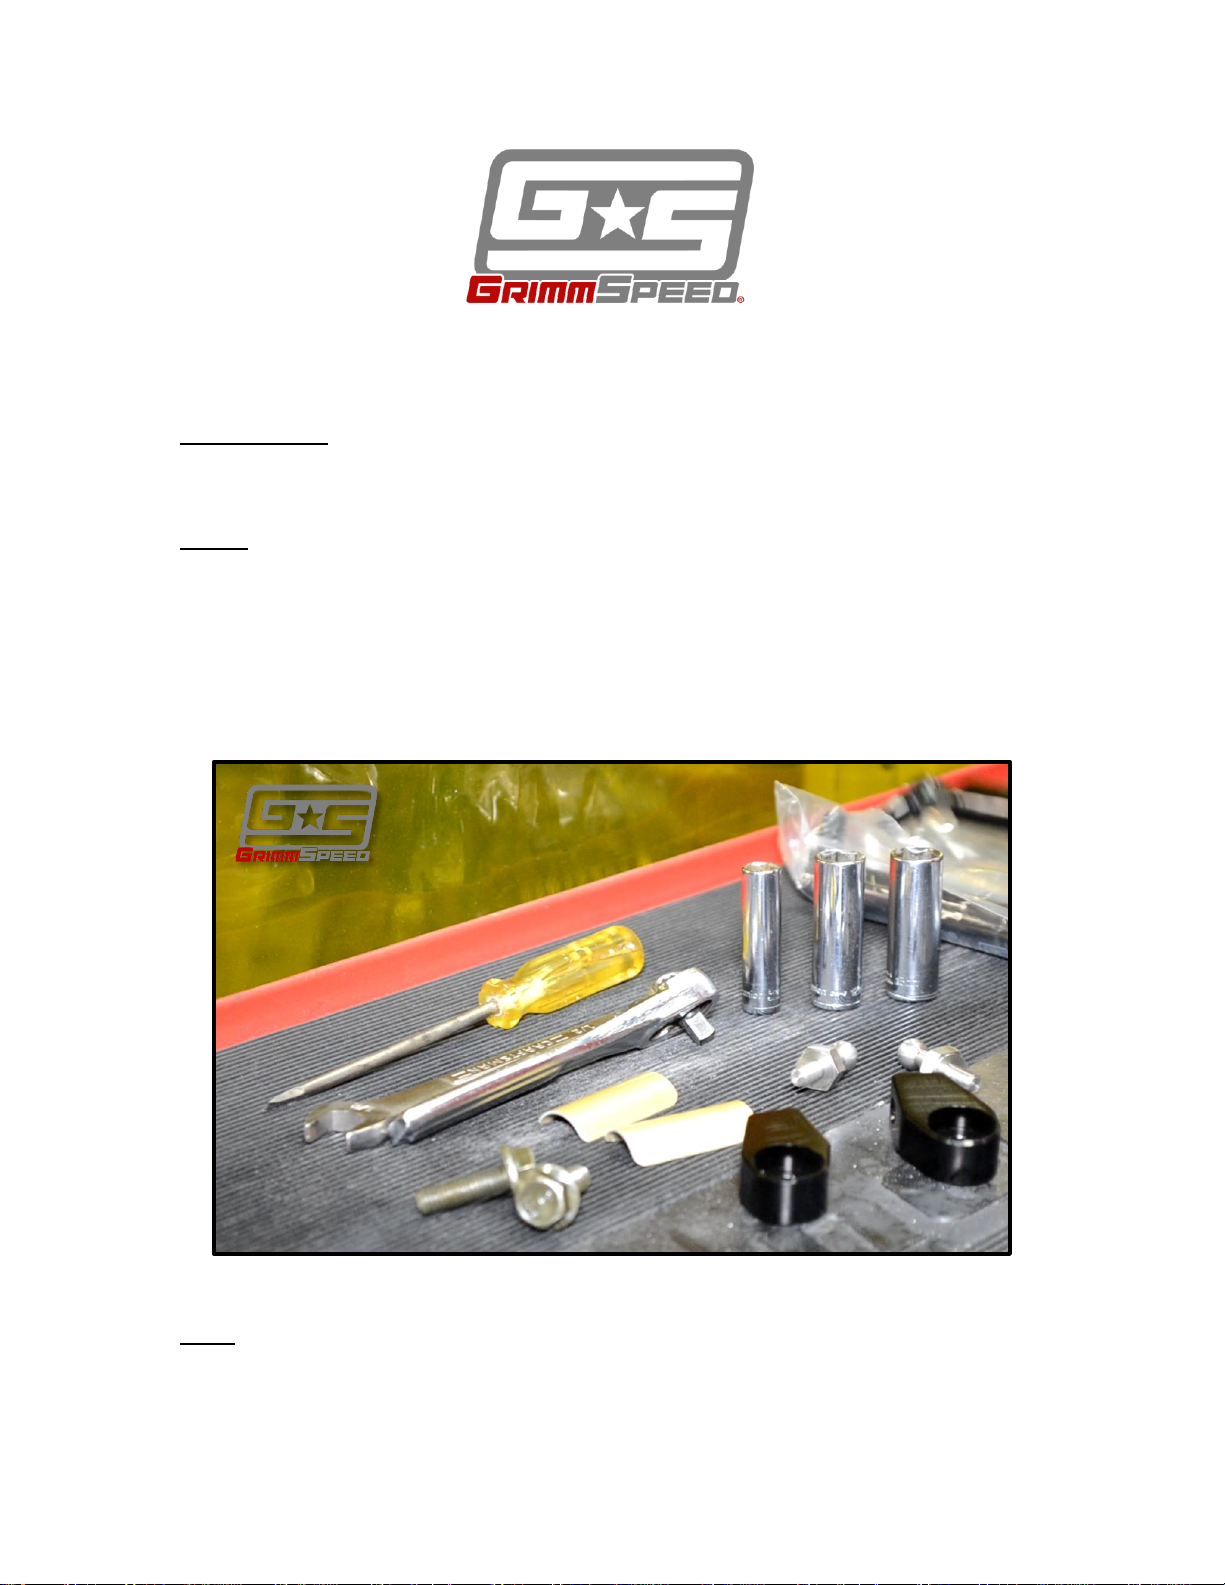
Tools: The tools listed below are suggested for this task (figure 1). Optional tools
are noted.
- 1/2in wrench
- 13mm wrench
- 10mm, 12mm, 13mm sockets
- Ratchet and extension
- Flathead screwdriver
Tips: Be careful not to drop the hood on yourself or your fingers during installation!
Figure 1: Tools
Page 2
Procedure:
Install bracket
1. Begin by collecting your tools and popping your hood. This’ll be quick!
2. Prop your hood open using your OEM hood prop. A second set of hands can help
make ‘hood management’ a little easier.
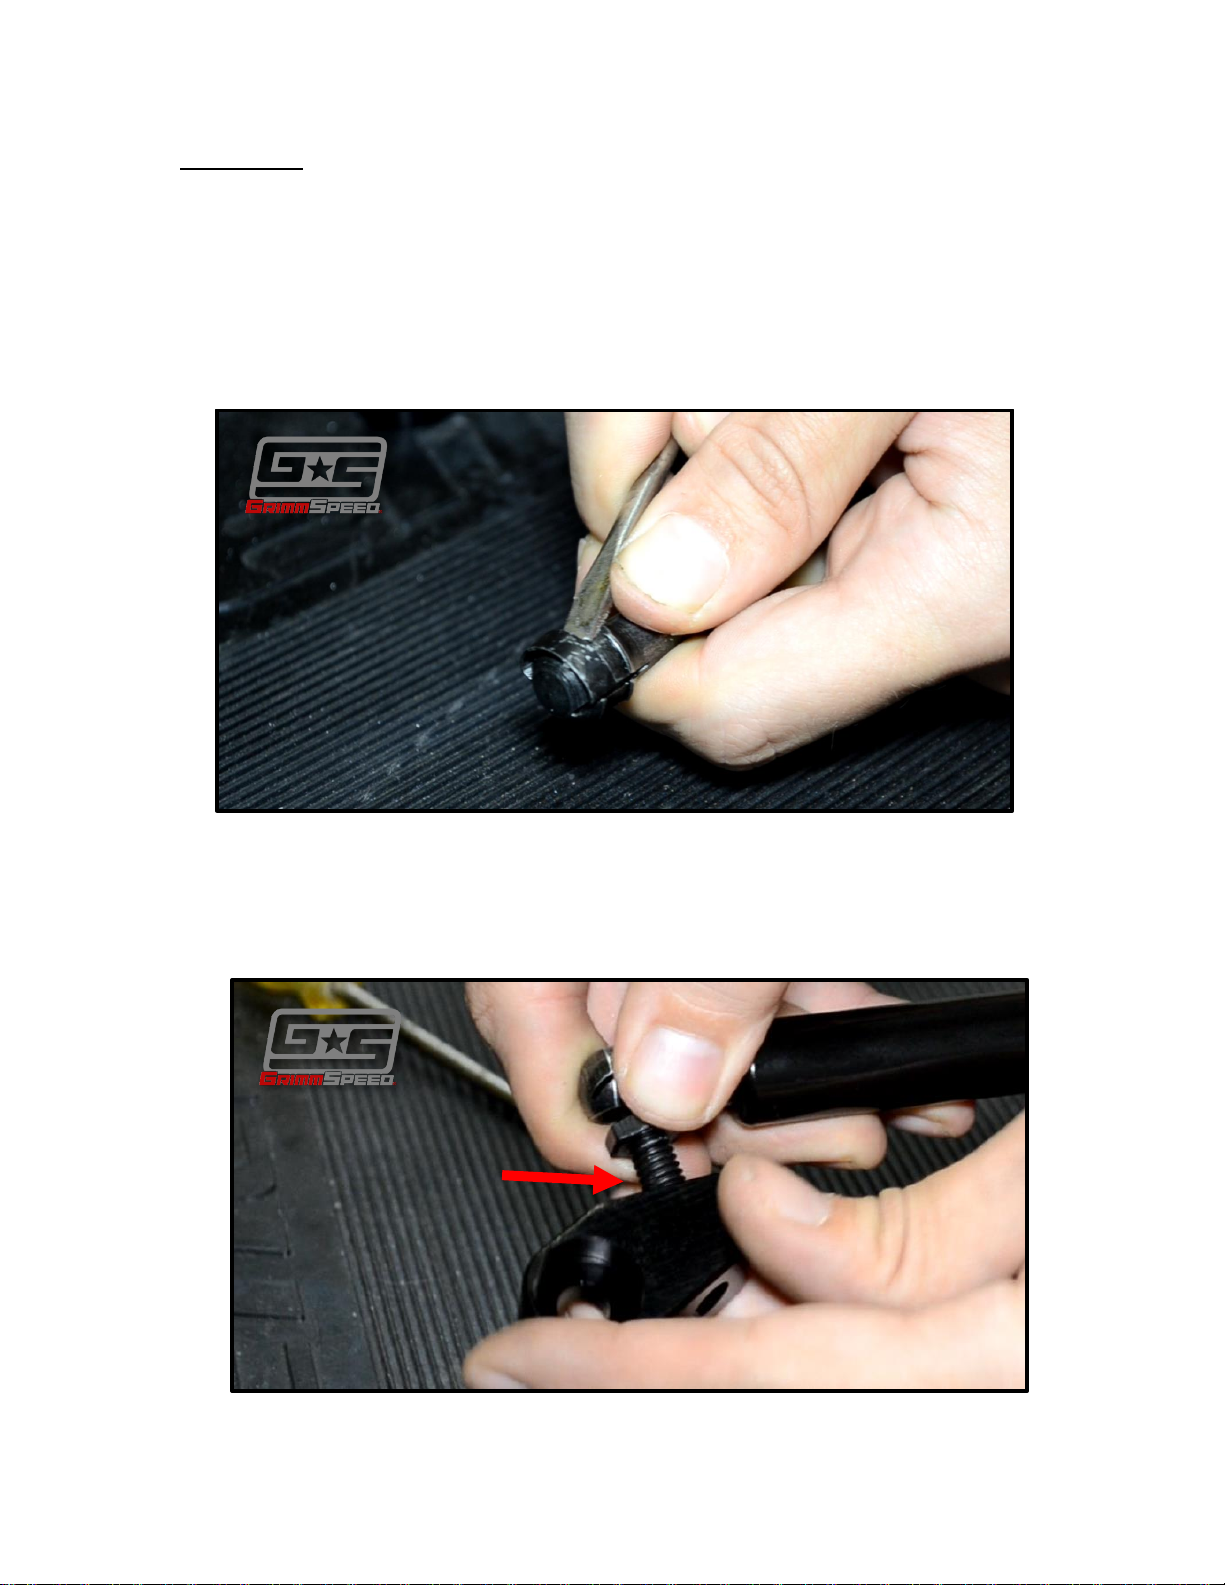
3. Begin by releasing the clips on the ‘empty’ end of each strut. This can be a
little bit tricky, but if you can get your screwdriver (or other prying tool)
under the clip, you should have no trouble. Do not remove the clip, only slide
it a bit as shown.
Figure 2: Release socket clips
4. Next, install the machined brackets on the end of each strut containing the
ball stud. Not that the ball threads into the flat side of the bracket. Use a
1/2in wrench to tighten firmly into bracket.
Figure 3: Installing rubber bumper
Page 3

5. Now we’ll begin remove the 12mm fender bolt that’s just forward of the strut
Remove 12mm
Fender Bolt
½ in ball studs
tower on each side. We won’t be reusing this bolt, so put it someplace safe.
Figure 4: Remove fender bolts
6. Next, install the stainless steel ball studs into these holes. Tighten them snug
with a 1/2in wrench, but do not over-tighten.
Figure 5: Install ball studs
Page 4

7. Continue installation by removing the upper hinge bolt using a 12mm socket
Remove 12mm bolt
Install 13mm bolt
and wrench. Set this bolt aside. We’ll be replacing it with a new bolt, but you
may want it in the future.
Figure 6: Remove upper hinge bolt
8. Finally, we’ll install the strut/bracket that we assembled earlier. Use the
provided 13mm bolt to pass through the bracket and into the hood. Note that
the ball stud points away from the vehicle. Repeat on both sides. BE VERY
CAREFUL TO NOTE THE OREINTATION OF THE BRACKET IN THE PHOTO.
Figure 7: Install hinge brackets.
Page 5

9. Lastly, lift your hood off of its prop and push the empty end of the strut down
Seat ball and socket
onto the stainless ball stud. With a little bit of pressure, it should pop right
on. After it’s fully seated, push the small metal clip back into its original
position. Repeat on both sides.
Figure 9: Complete installation.
10. Now go ahead and install the GrimmSpeed branding tags in your desired
location! Simply removing the backing and apply with firm pressure.
Figure 13: Loosen lower hood hinge bolt.
Page 6

That’s it! You should be all set to go! Double check your installation, verify proper
operation and enjoy. If you have any questions, please feel free to contact us!
 Loading...