

Page 1
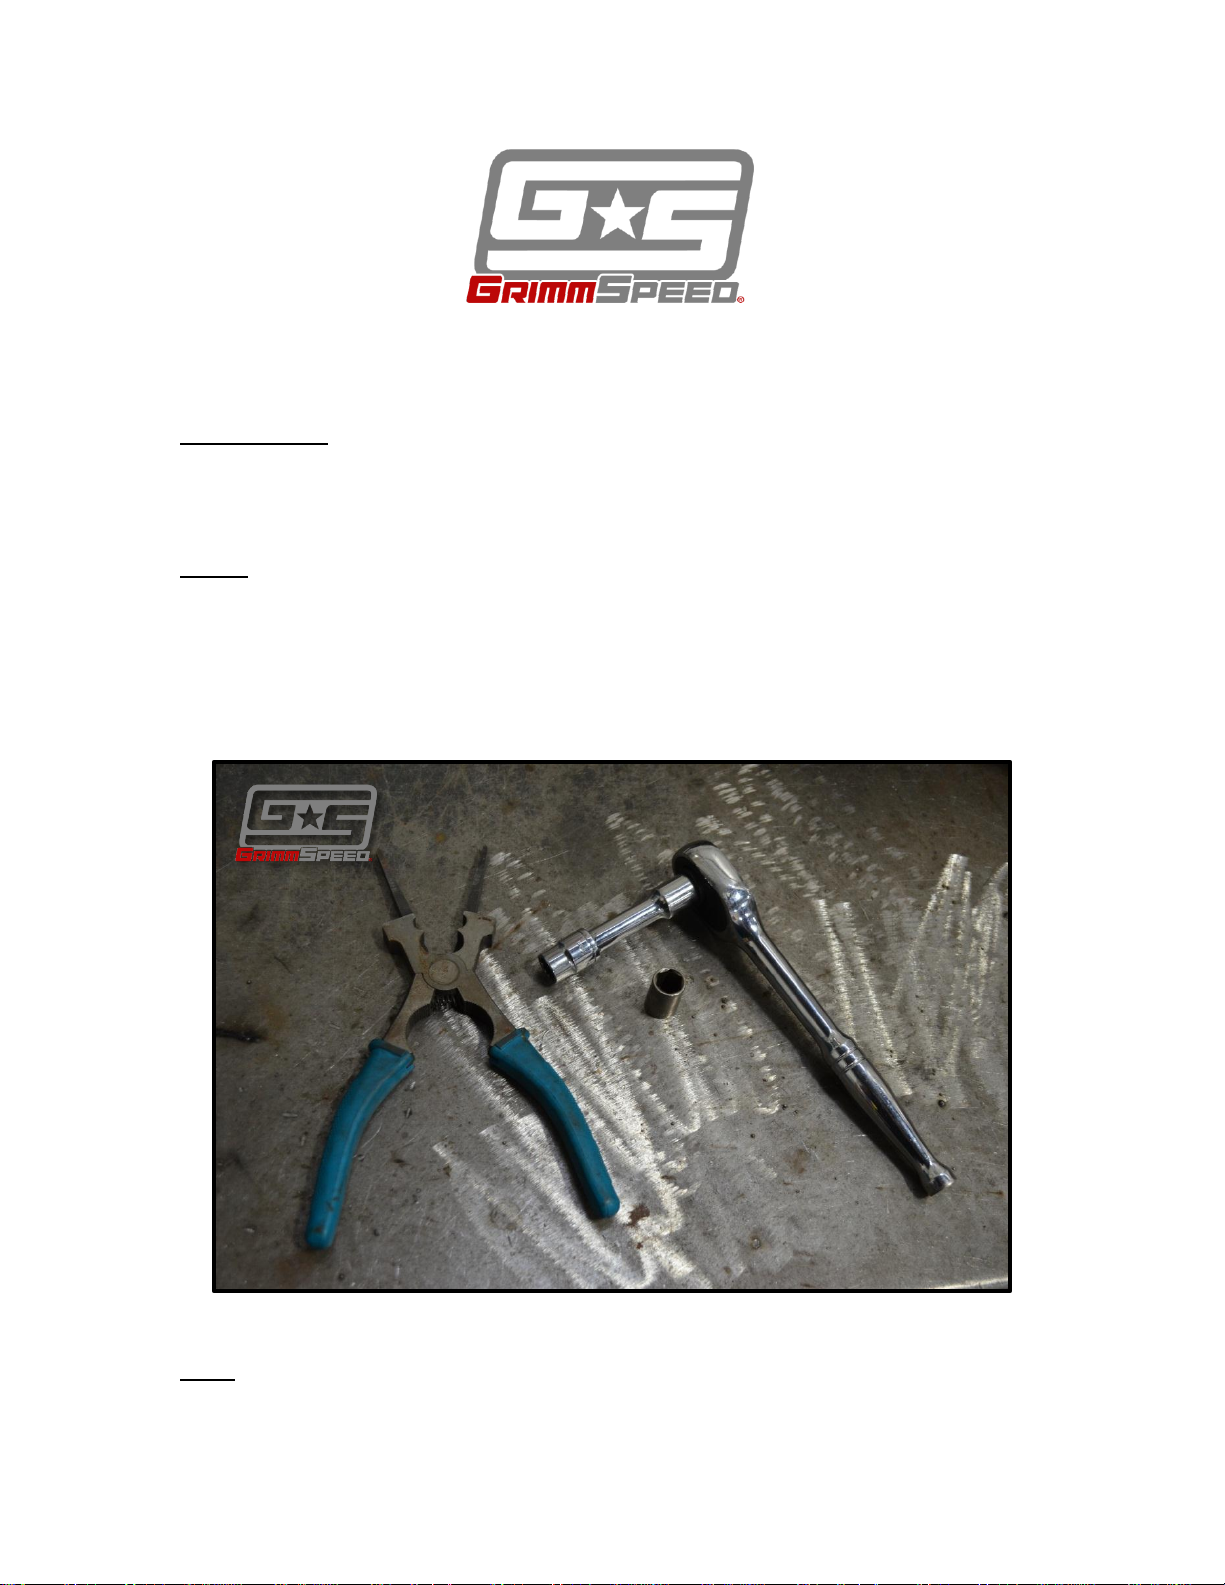
Pliers
10mm, 12mm socket
Ratchet
GrimmSpeed Install Guide Series
Installing the GrimmSpeed 02-07 and 08+ Radiator Shroud
Updated 1/21/13
Introduction: This guide will illustrate the installation of the GrimmSpeed Radiator
Shroud with integrated tool tray. The difficulty here is relatively low, so take your
time and enjoy the job! Note that installation for the 08+ shroud is very similar to
the 02-07, minus the hood prop.
Tools: The tools listed below are suggested for this task (figure 1). Optional tools
are noted.
- Pliers
- 10mm socket (removal of air scoop if equipped)
- 12mm socket (extension recommended)
- Ratchet
Tips: Using an extension will help give you more space to spin the ratchet and avoid
damaging your radiator shroud.
Figure 1: Tools
Page 2
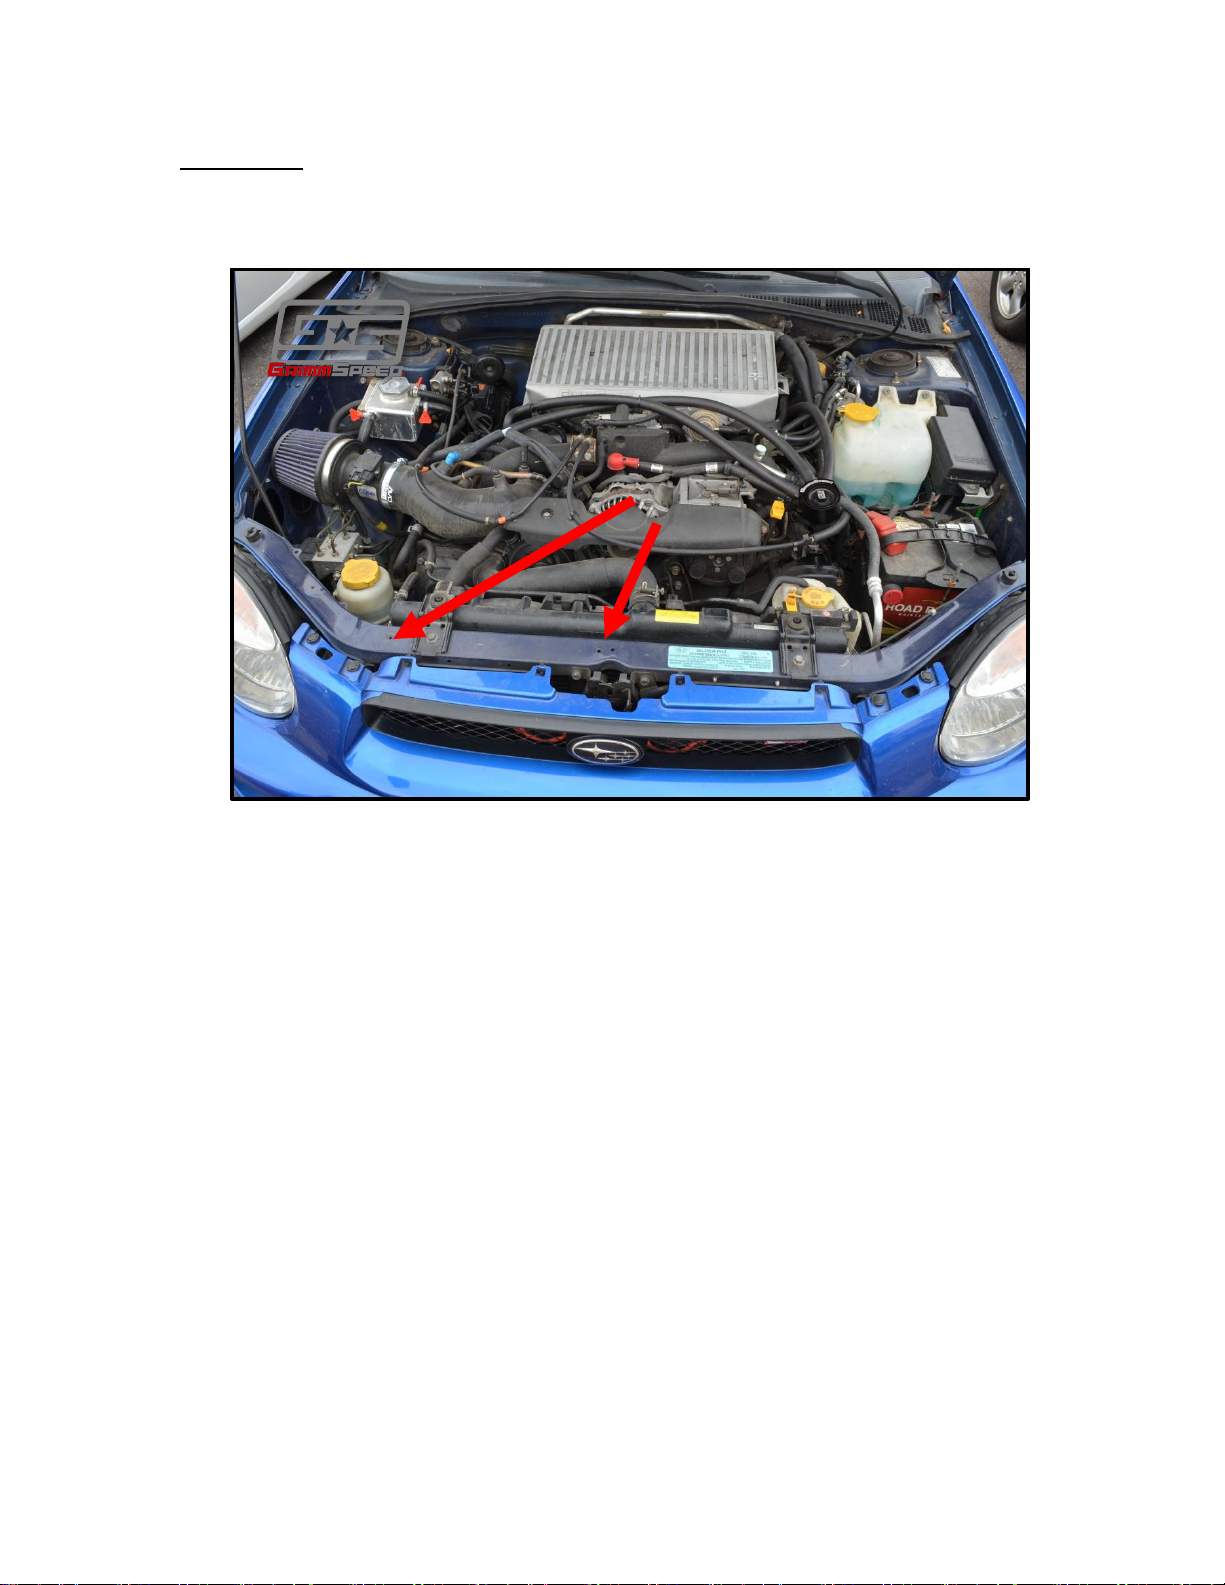
Procedure:
10mm air scoop
bolts
1. Begin by collecting your tools and popping your hood. This’ll be quick!
2. If installed, remove your OEM air scoop by removing the two (2) 10mm bolts.
Figure 2: Air scoop bolt locations
Page 3
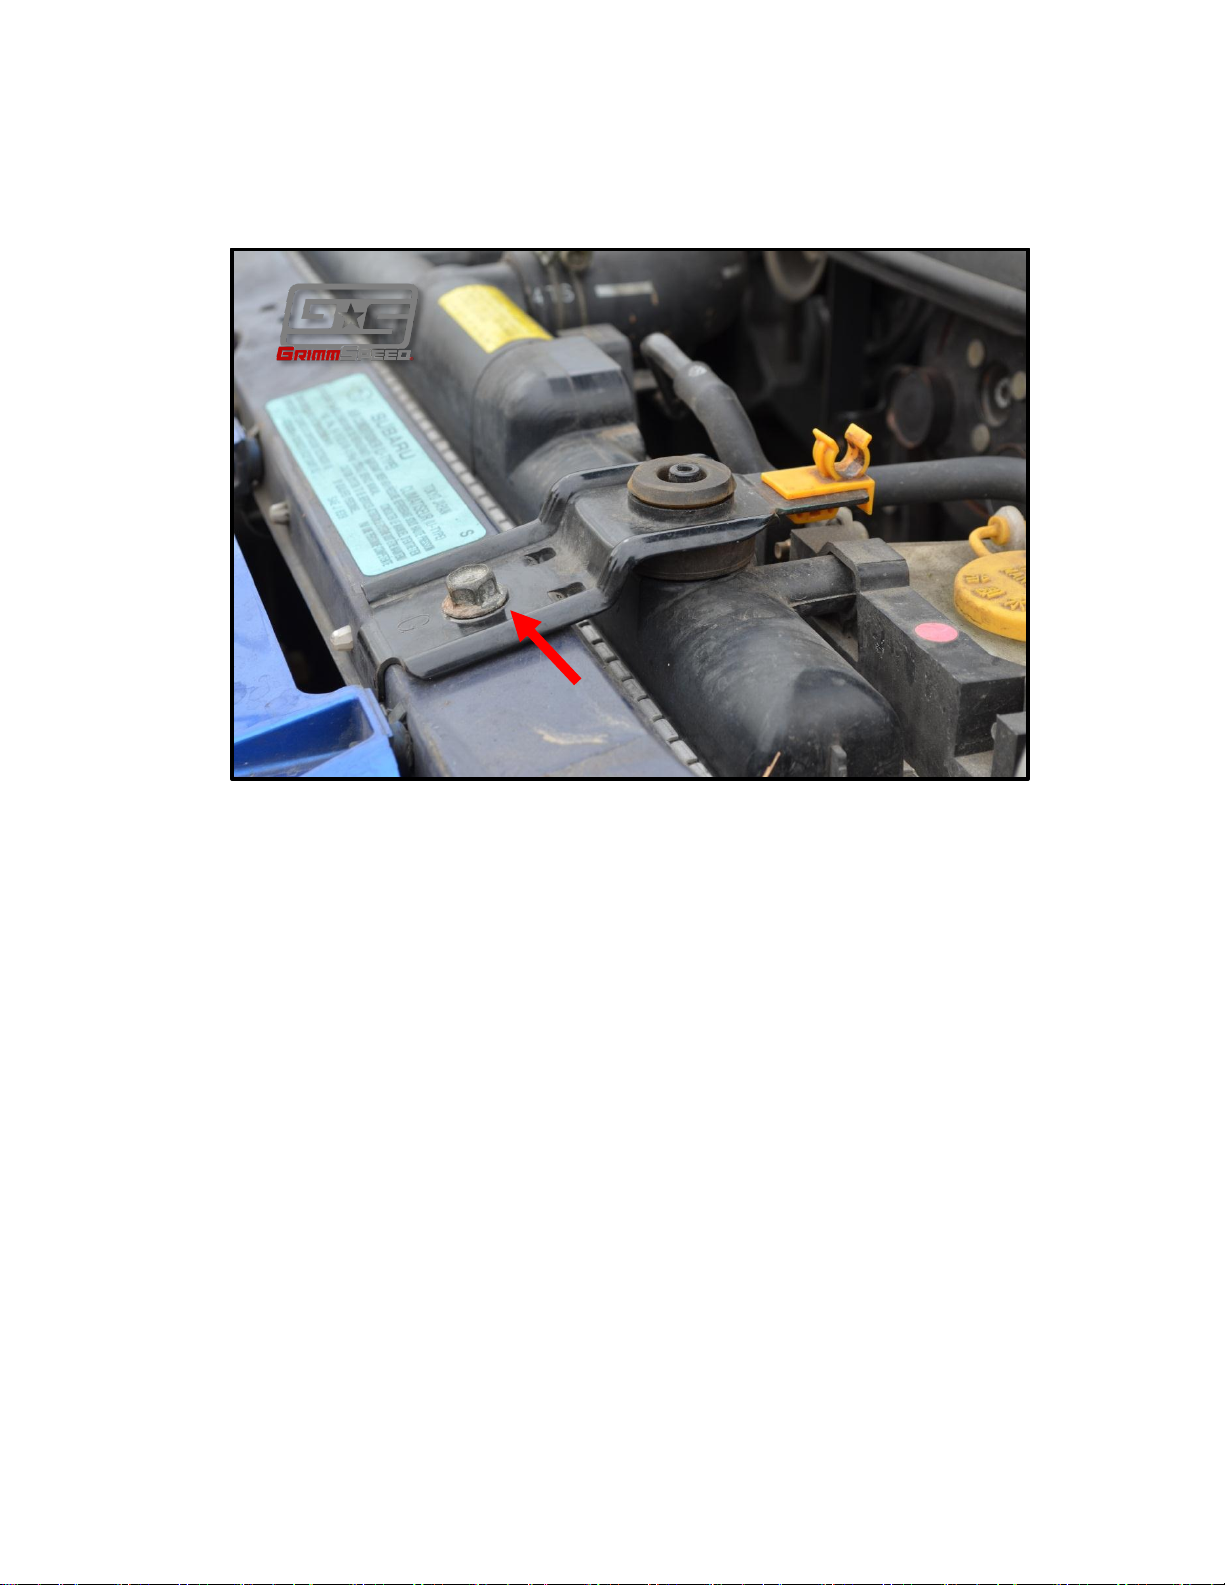
3. Using your 12mm socket and extension, remove the two (2) 12mm bolts
Remove this bolt
securing your OEM radiator stay brackets. Your radiator should stay in place
just fine for now. Keep these bolts handy, you will reuse them.
Figure 3: Remove OEM radiator stay brackets
Page 4

Remove rubber
bushing
Remove this bolt
Figure 4: Remove OEM radiator stay brackets
4. Next, pop the black rubber bushings out of each of the brackets that you just
removed. Also remove the hood prop holder (02-07 only). You will reuse
each of these three (3) parts in the installation of your new radiator shroud.
Figure 5: Removing rubber bushings
Page 5

Figure 6: Remove hood prop bracket
Install hood
prop clip
Remove Bracket
5. Now grab your shroud and locate the rectangular hole for the hood prop
bracket. Your stock bracket should pop right into it (02-07 only). Do the same
with the two (2) stock rubber bushings. Note that the larger portion of the
bushing goes on the bottom, contacting the radiator.
Figure 7: Install hood prop clip
Page 6

Install bushings
Figure 8: Install rubber bushings
Page 7

6. The final step is installation of the assembled shroud. Set the shroud in place,
Reinstall 12mm
bolts
making sure that the bushings are properly capturing the posts on your
radiator. Reinstall the two (2) 12mm bolts, using the slotted holes to both
make sure that your radiator is spaced to your liking and also to ensure that
your shroud is straight. NOTE: Depending on how you have your radiator
hose clamp oriented, some adjustment may be necessary for tool tray
clearance. Simply loosen the clamp and spin it out of the way before
tightening it again.
Figure 9: Installing radiator shroud
That’s it! Now find something fun to put in your tool tray and send us photos! We’ll
share our favorites on Facebook!
 Loading...