

Page 1
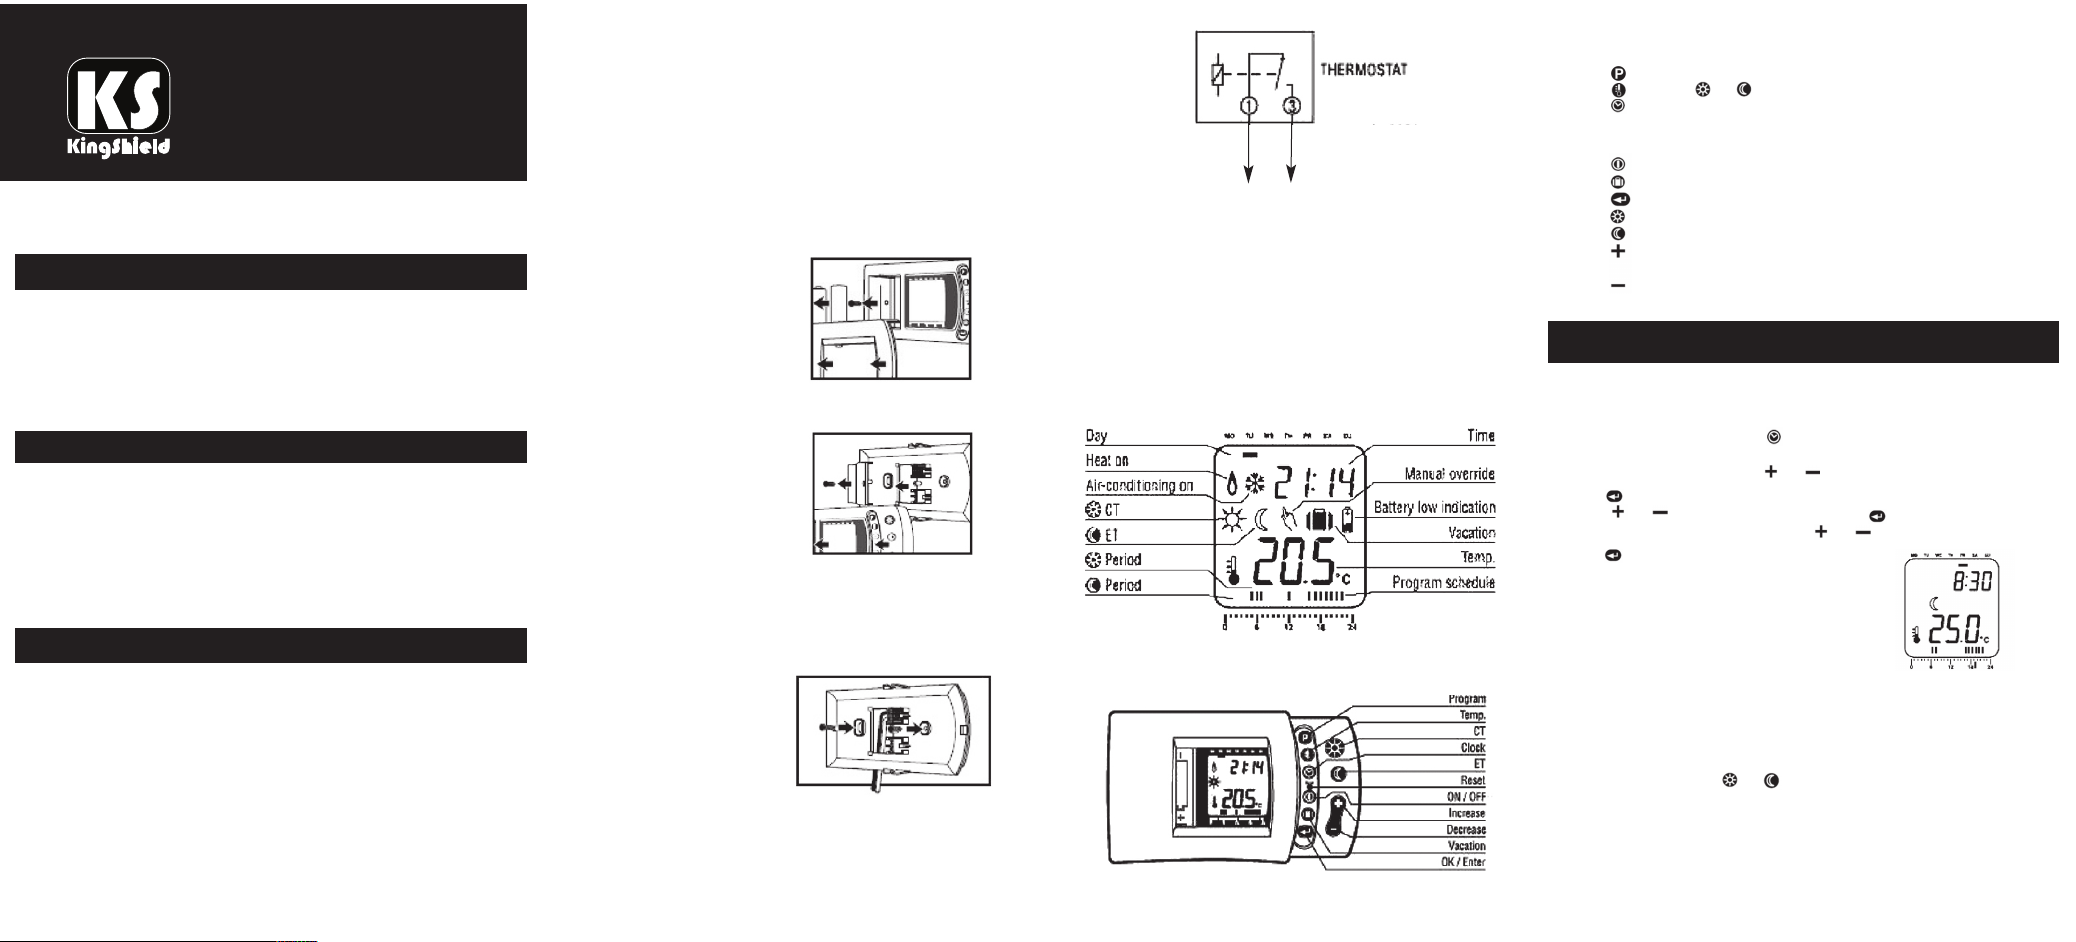
Installation / Operating
instructions for
Digital Programmable Thermostat
Model No: THP1-C
Our latest microprocessor controlled programmable thermostat
has been designed to reduce your heating and air-conditioning
bill. The THP1-C is made to be user friendly and easy to use.
SAFETY INSTRUCTIONS
Please read these instructions fully before
attempting installation.
This unit should be installed by a competent person in
accordance with the current IEE Wiring Regulations.
If in doubt consult a qualified electrician
GENERAL
The THP1-C digital programmable thermostat is battery operated
and it has a 7 days preset program which can be tailored to suit
your lifestyle.
The THP1-C is operated by 2 x AA size batteries. It can therefore
replace any mechanical wire thermostat. Please note that the
maximum resistive load is 5A.
INSTALLATION
Note: Please make sure any supply voltage is disconnected
before attempting installation.
If you have a mechanical thermostat connected with 2 wires
remove the old thermostat and replace it with the THP1-C
thermostat.
Connect the 2 wires to the terminals as shown in Fig 2, if this is
a thermostat for a new system you must install a 2 wire cable to
the heating system (see Fig 2)or you should consult a
professional electrician.
71. You should place the thermostat as following:
a. About 160cm up from the floor.
b.Only on inside walls (not on an outside wall).
c. Do not expose to direct sun light.
d.Do not position close to a heater, ventilation outlet or
close to an outside door.
2. To remove the front cover, slide off the display cover.
Unscrew the screw in the battery compartment. Lever off to
remove the front housing from the base. (See Fig 1.1)
Fig 1.1
3. Inside the base plate remove the screw that secures the
smaller protective cover
(terminal block). (See Fig 1.2)
Fig 1.2
4. Mount the base on the wall and make sure the hole on the
wall is covered by the base with wires coming in through the
base plate cover hole. (See Fig 1.3)
Fig 1.3
5. Loosen the screws of the terminal block and install the
wires into the terminals (See Fig 2)
Fig 2
To
h
e
a
tin
g
s
ys
te
m
6. Replace the protective cover onto the base and lock the
cover with the screw.
7. Put the front housing back onto the base and lock the front
housing with the screw.
8. Install 2 x AA size batteries into the battery compartment.
9. Press the RESET key once to make sure it is working,
hours/minutes will be displayed at zero..
The feature of the LCD display and keys:
THP1-C LCD display (Fig 3.1)
keys (Fig 3.2)
Description of each key function:
- To enter into program mode
- To view an Temperatures
- To enter into time and day adjustment mode
Reset - To reset the unit into initial mode
- To turn the unit on and off
- To enter into vacation mode
- To confirm setting
- To override into CT (COMFORT Temperature) mode (20
- To override into ET (ECONOMY Temperature) mode (17oC)
- Temporary temperature override mode or increase
value adjustment
- Temporary temperature override mode or decrease
value adjustment
OPERATION AND
PROGRAMMING INSTRUCTIONS
To set clock and day:
After the batteries (2 x AA size) have been installed into the
thermostat unit, or reset or key is pressed, the thermostat is
in time adjustment mode.
The hour is flashing. Press or key to adjust hour.
Press key to confirm setting. The minute is flashing.
Press or key to adjust minute. Press key to confirm
setting. The day is flashing. Press or key to adjust day,
Press key to confirm setting.
This will confirm the setting of time and day.
The display will return into running mode.
e.g. If you have set the clock at 8.30 FRIDAY
and the room temperature is 25
This will appear in the display as Fig 4.1.
To view programs:
THP1-C Thermostat is a weekly programmable thermostat, and
each day can be programmed separately.
Each hour can select or temperature. However a weekly
factory preset program is installed.
This preset program is set to suit most families life style.
See table 4.2 for factory preset program.
o
C.
Fig 4.1
o
C)
Page 2
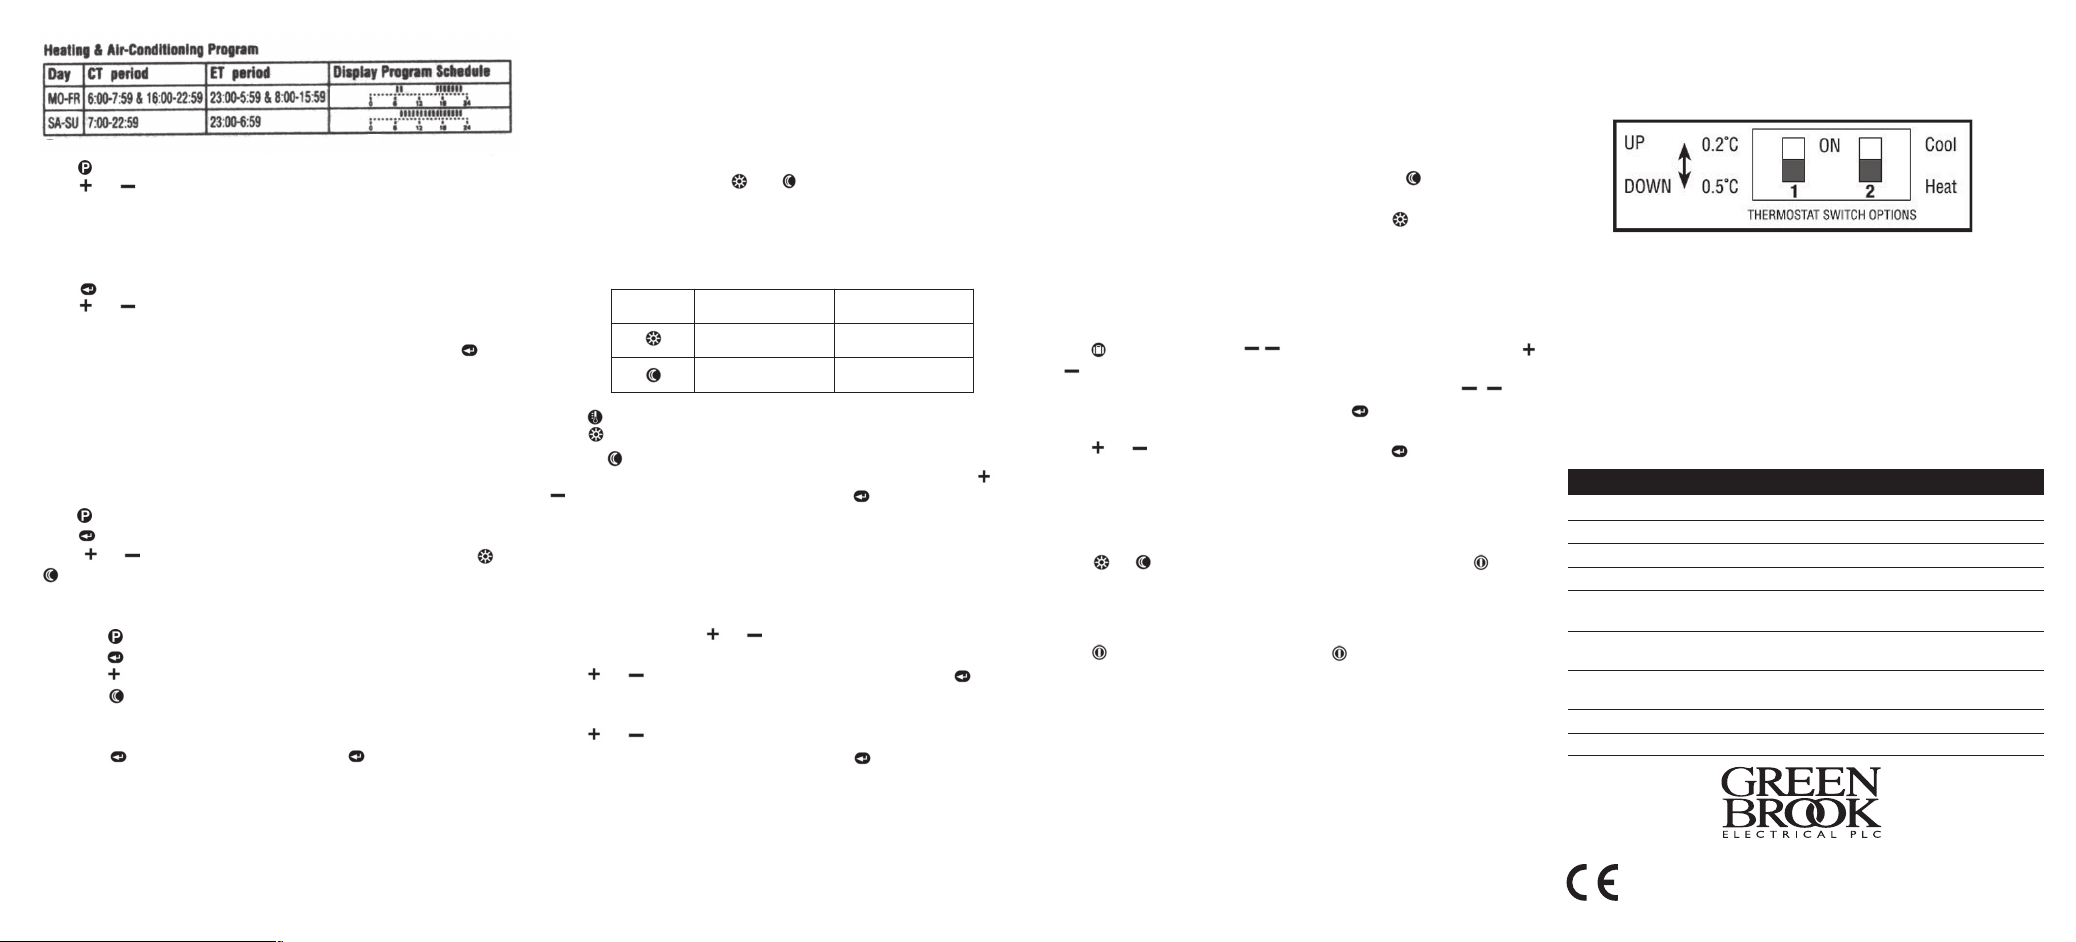
Fig 4.2
Press key, the Monday preset program at 0.00 is on display.
Press or key and the display will show the temperature
setting in each hour. e.g. Monday program show 0:00 - 5:59 and
8:00 - 15:59 are set at Economy temp.,6:00 - 7:59 and 16:00 22:59 is set at CT(Comfort temp). Note 23:00 - 0:00 is set at ET
(Economy temp).
Press key the next day preset program is displayed. Again
Press or key, this will show the temperature setting at each
hour. Repeat above steps, each preset program will display until
Sunday. Once Sunday program has been reviewed. Press key,
the display will return into running mode.
To change preset program:
The preset program may not be suitable for some families but
the program may be adjusted to suit your life style.
The following instructions will allow you to change the preset
program.
Press key to enter into program viewing mode.
Press key to select the day of program to make a change.
Press or key to select the hour to make change. Press or
to select the temperature to make change. e.g. To change
Saturday 12:00 - 16:59 from CT to 12:00 - 16:59 ET.
1. Press key to enter into program viewing mode.
2. Press key to select the day to Saturday program.
3. Press key until 12:00 with CT setting.
4. Press key to change CT period to ET period.
5. Repeat step 3 & 4 to change 13:00 - 14:00 from CT period to
ET period.
6. Press key to confirm setting. Press key to return into
running mode.
Important
Note: Do not set the beginning and end of the program to 0:00
due to the thermostat needing this time for its reference use.
Therefore you must set the beginning or end time at 23:00 or
01:00.
To view and change or temperature:
The CT and ET temperature is preset to the temperatures in the
below table for heating and air-conditioning mode:
Mode
Air-conditioning Heating
23oc 20oc
28oc 17oc
Press key to view CT and ET temperature mode.
Press to change the viewing of CT setting from ET setting
or press key to change the viewing of ET setting from CT
setting. The temperature is flashing at this moment. Press or
key to change CT or ET setting. Press key to confirm the
setting and return to running mode.
To set temporary manual override temperature:
This function allows you to change the present temperature
setting to a temporary temperature setting from the next 1 hour
up to 48 hours. Press or to enter the manual override
temperature mode and temperature is flashing.
Press or key to select override temperature. Press key
to confirm temperature setting.
H1 will be flashing.
Press or key to select hours for overriding time.
This is for a maximum of 48 hours. Press key to confirm
setting.
To set temporary override program temperature:
This function allows you to temporarily override the CT
temperature from the ET temperature settings, until the next CT
setting (or vice versa).
Program temperature setting until next ET setting.
The unit is running at CT program period. Press to change from
CT to ET setting (until the next CT program period).
The unit is running at ET program hour. Press to change from
ET to CT setting (until next ET program hour).
To set vacation or permanent override temperature:
This function allows you to set your vacation temperature from
1 to 99 days or to set a permanent override temperature forever.
Press key the two bars “ ” will flash under “SA SU” Press
or key to select the number of days for your vacation period.
The maximum selection is up to 99 days. If you choose the
period will be permanent override. Press key to confirm the
vacation period.
Press or key to select temperature. Press key to confirm
the override setting.
To cancel manual, temporary, vacation or permanent
override:
Press or key to return into running mode. Or press key to
turn off the unit.
To switch the unit ON and OFF:
Press key to turn off from on. Press key to turn on from off.
To reset the unit:
Press the reset key to reset the unit into initial clock setting mode.
All previous programs will reset to factory preset settings.
User Optional Selection:
Lever off the the back panel to reaveal the circuit board, the DIP
SWITCH is where the user can select following option:
DIP SWITCH 1 - SWING CYCLE - ON = 0.2OC
OFF = 0.5OC
DIP SWITCH 2 - HEATING OR AIR-CONDITIONING
System setting
ON = AIR CONDITIONING
OFF = HEATING
Sensor:
This thermostat (THP1-C) uses the most advance temperature
sensing element located on the lower right side of the cast under
the grill. If the sensor is touched accidentally you must allow few
minutes for sensor to come back to normal temperature.
The temperature is measured every minute.
TECHNICAL INFORMATION
Temperature range: 5-30oC
Differential: +/- 0.5oC from set temperature.
Temperature accuracy: +/- 0.5oC
Batteries: 2 x AA (1.5VDC) size batteries
Receiver Rated switching 230V, 50Hz
power: 5A resistive, 2A Inductive
Minimum on time in
heating mode: 1 minute
Minimum off time in
air-conditioning mode: 3 minutes
RF Frequency: 433MHz
Contacts: Volts free change over contacts
Issue no: 703759
Note: The first hour of override (H1) will only run for maximum
of 45 minutes. However from the second hour onwards will run
for full hour timing. e.g. If you select 2 hours override the
maximum time of override will be 1 hour and 45 minutes.
WEST ROAD . HARLOW
ESSEX . CM20 2BG . UK
sa les@ gree nbro ok.c o.u k
W W W. G R EE N B R O OK . C O . UK
 Loading...