

Page 1
Orion Range’
‘
Infra-red Motion Sensor - Ceiling Slimline
Model: OD101
Important Safety Instructions
• Please read these instructions carefully before installation and keep safe for future
reference.
IMPORTANT
This product should be installed by a competent person and in accordance with
the current IET Wiring Regulations and Building Regulations.
If in doubt,consult a qualified electrician.
• Always turn off the mains supply before commencing work.
T
h
i
s
p
r
od
u
ct
u
s
es
a
n
i
n
f
r
a
-
r
ed
h
ea
t
d
et
ect
or
.
T
h
e
d
et
ect
or
s
en
s
es
‘
w
a
r
m
t
h
m
ov
em
en
t
’
i
n
t
h
s
u
r
r
ou
n
d
i
n
g
a
r
ea
w
h
en
i
t
i
s
d
a
r
k
.
Wh
en
m
ov
em
en
t
i
s
d
et
ect
ed
t
h
e
s
en
s
or
i
s
a
ct
i
v
a
t
r
i
gger
s
t
h
e
con
n
ect
ed
l
oa
d
.
I
t
h
a
s
a
b
u
i
l
t
i
n
p
h
ot
o-
cel
l
t
h
a
t
ca
n
i
d
en
t
i
f
y
d
a
y
a
n
d
n
i
g
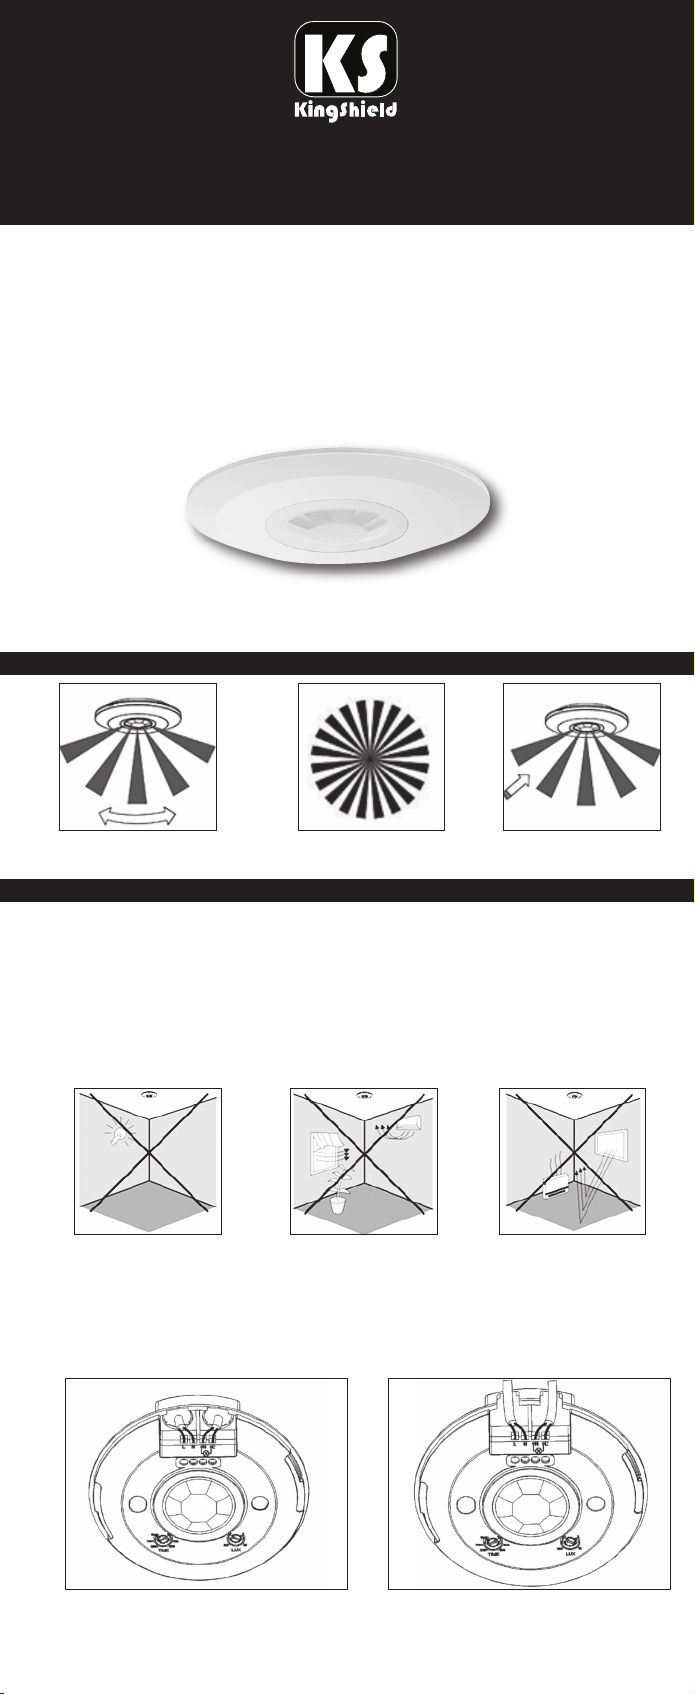
FIELD OF DETECTION
e
t
ed
a
n
d
h
t
.
Detecti
o
n fro
G
o
o
d
Sensi
ti
vi
ty
m
A
bo
ve
P
o
o
r Sensi
ti
vi
ty
INSTALLATION
As the detector responds to changes in temperature, avoid the following situations:-
• Avoid pointing the detector towards objects with highly reflective surfaces, such
as mirrors etc.
• Avoid mounting the detector near heat sources, such as heating vents, air
conditioning units, lights etc.
• Avoid pointing the detector towards objects that may move in the wind, such as
curtains, tall plants etc.
Switch the mains supply OFF first to prevent electric shock.
1. Remove the cover by rotating anti-clock wise.
2. Connect the mains in and load out wires according to Dia: 3, using the rear
entry or side entry knock-outs as required see Dia:1 and 2.
Dia:1 Dia:2
Side-entry KnockoutsRear-entry Knockouts
Page 2
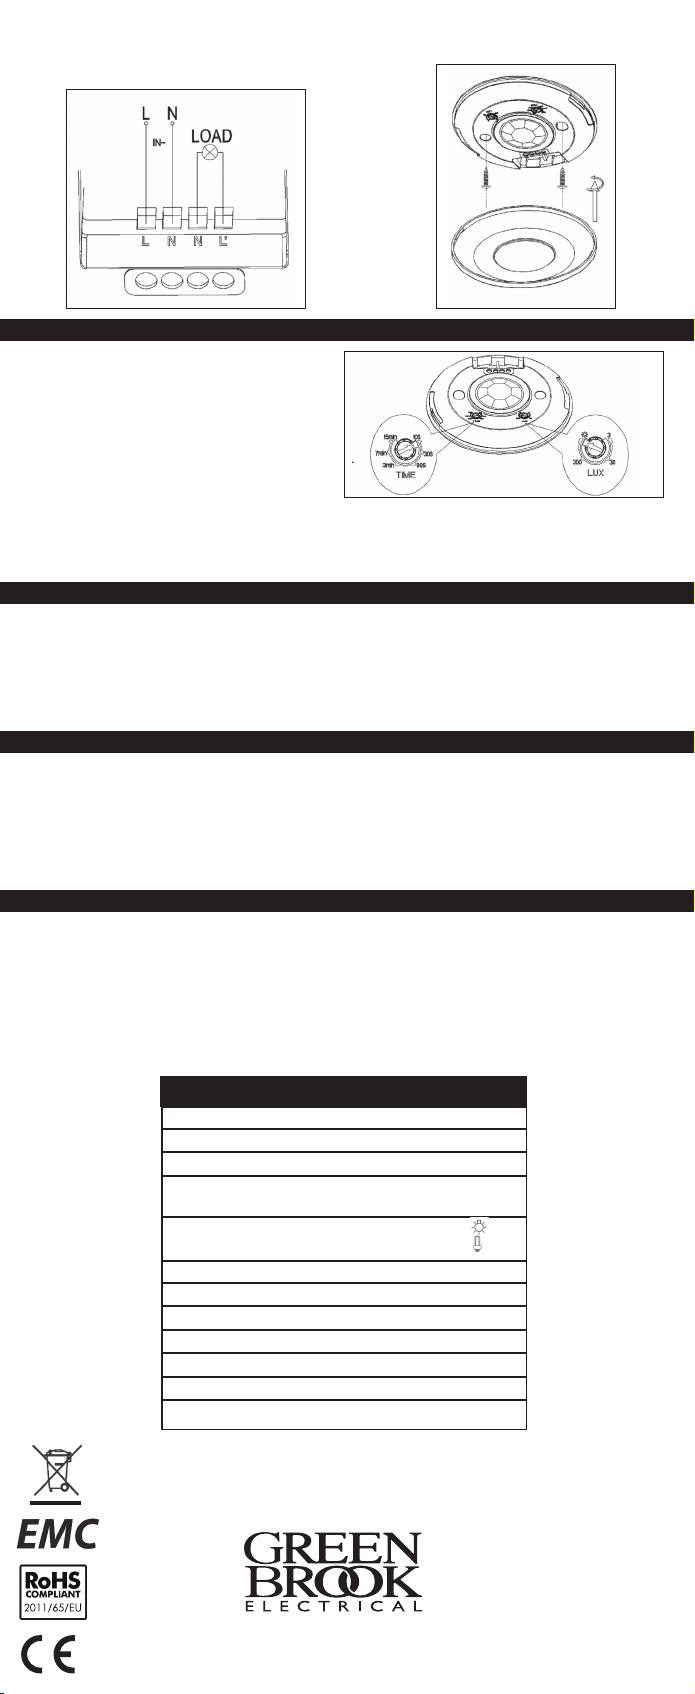
. Secure the sensor to the ceiling using two wood screws (ensure there is no
3
wiring/gas/water services directly behind the screws) refer to Dia:4.
Dia:3
ESTING
T
Dia:4
1. Turn ‘Time’ control fully anti-clockwise
and ‘Lux’ control fully clock wise, refer
to Dia: 5.
Dia:5
2. Re-connect mains supply, allow 30 seconds for the sensor to warm-up, and then
perform a walk-by in front of the sensor; lamp should turn on and stay on for
pproximately 10 seconds, and will go off if no further movement is detected.
a
ADJUSTING THE ‘LUX’ CONTROL
1. Turning Lux control fully clock wise, the sensor will operate in both daylight and
darkness.
2. Turning Lux control fully anti-clockwise, the sensor will operate in darkness only.
3. Set control to operate at your required daylight level.
ADJUSTING THE ‘TIME ON’ CONTROL
1. Turning the time control fully anti-clock wise will set the on duration to 10 seconds
+/- 3 seconds.
2. Turning the time control fully clock wise will set the on duration to 15 minutes +/- 2
minutes.
3. Set control to your required time setting.
TROUBLE SHOOTING
Light not coming on
• Check that lamp is good.
• Check there is nothing obscuring the PIR sensor.
Intermittent operation
• Check there are no curtains that can move in the wind.
• Check there are no heating vents nearby.
TECHNICAL INFORMATION
Rated Voltage: 230V~50Hz
IP Rating: IP20
Ambient Light: <3-2,000 LUX (Adj)
Time Delay: Min 10 sec ± 3 sec
Max 15 min ± 2 min
Rated Load: Max 2000W
Max 1000W
Detection Range: 360°
Detection Distance: 6M max (<24°C)
Working Temp: -20° - + 40°C
Working Humidity: <93%RH
Power Consumption: 0.5W approx
Installation Height: 2.2 - 4M
Detection Moving Speed: 0.6 - 1.5m/s
PLEASE KEEP THESE INSTRUCTIONS
SAFE FOR FUTURE REFERENCE
/LED
WEST ROAD . HARLOW
ESSEX . CM2 0 2BG . UK
i n fo @ g re e n b ro o k .c o . u k
w ww. g re en b r o ok .c o .u k
Issue No: 704276
 Loading...