

Page 1
Installation Instructions
for ‘Libra’ Dimmable LED Ribbon Range
rs:
umbe
N
odel
M
3000K
igh
Gre
igh
ite
t 6000
Bl
/
n
e
ite
t 6000
K
ue
3000K
K
Warm Wh
P67
P67
Day L
d/
Re
Warm Wh
Day L
IP20
EDRIB20DWW
L
EDRIB20DDL
L
LEDRIB20RGB
LEDRI
LEDRI
• Please read these instructions carefully before
installation and keep safe for future reference.
IMPORTANT
This product should be installed by a competent
person and in accordance with the current IET Wiring
Regulations and Building Regulations.
If in doubt,consult a qualified electrician.
• Always turn off the mains supply before commencing
work.
• Before installation or maintenance,ensure that the
mains supply to the ribbon is switched off and the
circuit supply fuses are removed or circuit breaker
turned off.
B67WW
B67DL
IP20
IP20
I
I
SAFETY INFORMATION
Important Safety Instructions
Cut
Here
Dia:1
Clip Connector
Dia:2
INSTALLATION INSTRUCTIONS - IP67
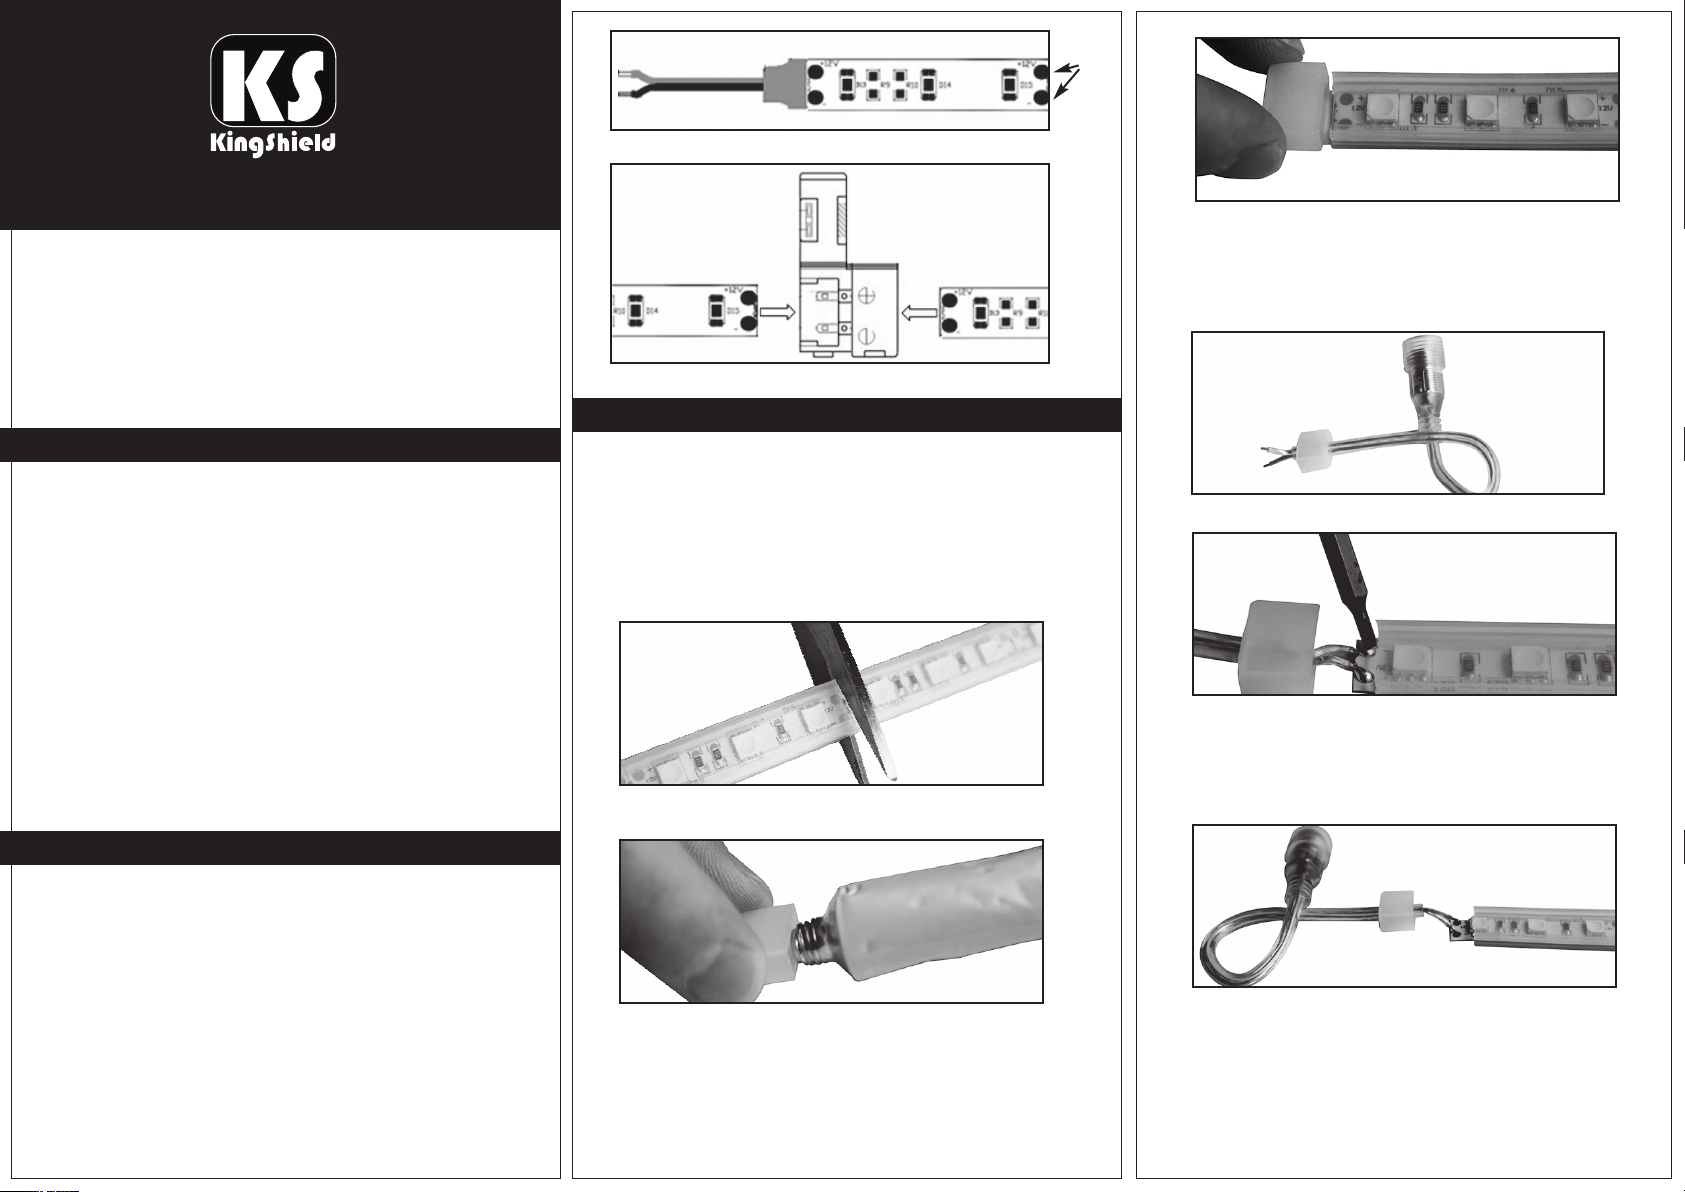
1. If ribbon does NOT require cutting please refer to
point 1 as shown in Installation Instructions for IP20.
2. To shorten LED ribbon, only cut along the black line between
discs, located every 200mm along the ribbon. Inject the
silicone sealant into the end cap without holes.
(Supplied with connector kit LEDRIB667CON).
See Dia: 3- 5.
Dia:3
Dia:5
To Add a Power Supply Connector
1. Put the connector wire through the end cap with hole.
Dia:6
Dia:6
Dia:7
2. Solder the wire onto the LED ribbon. Dia:7
3. Once the wires have been soldered, carefully push
the strip into the end cap with wires. Dia:8.
INSTALLATION INSTRUCTIONS - IP20
1. Remove 3M backing tape, place ribbon on flat clean,
grease free surface and press firmly in place.
2. If LED ribbon requires cutting, only cut ribbon across the
twin copper coloured pads. Dia:1.
3. Ribbons can be joined using the clip connectors contained
in the connector kit (RGB 12mm version LEDRIB12CON
or 8mm LEDRIB8CON). Dia:2.
Dia:4
3. Push the strip into the end cap and let the silicone
sealant dry for 1 hour. Dia:5 Overleaf.
Dia:8
4. Inject the silicone glue at the end of the strip and cap.
Dia:9 Overleaf.
Page 2
POWER SUPPLY - for IP20 / IP67
POWER SUPPLY - for RGB
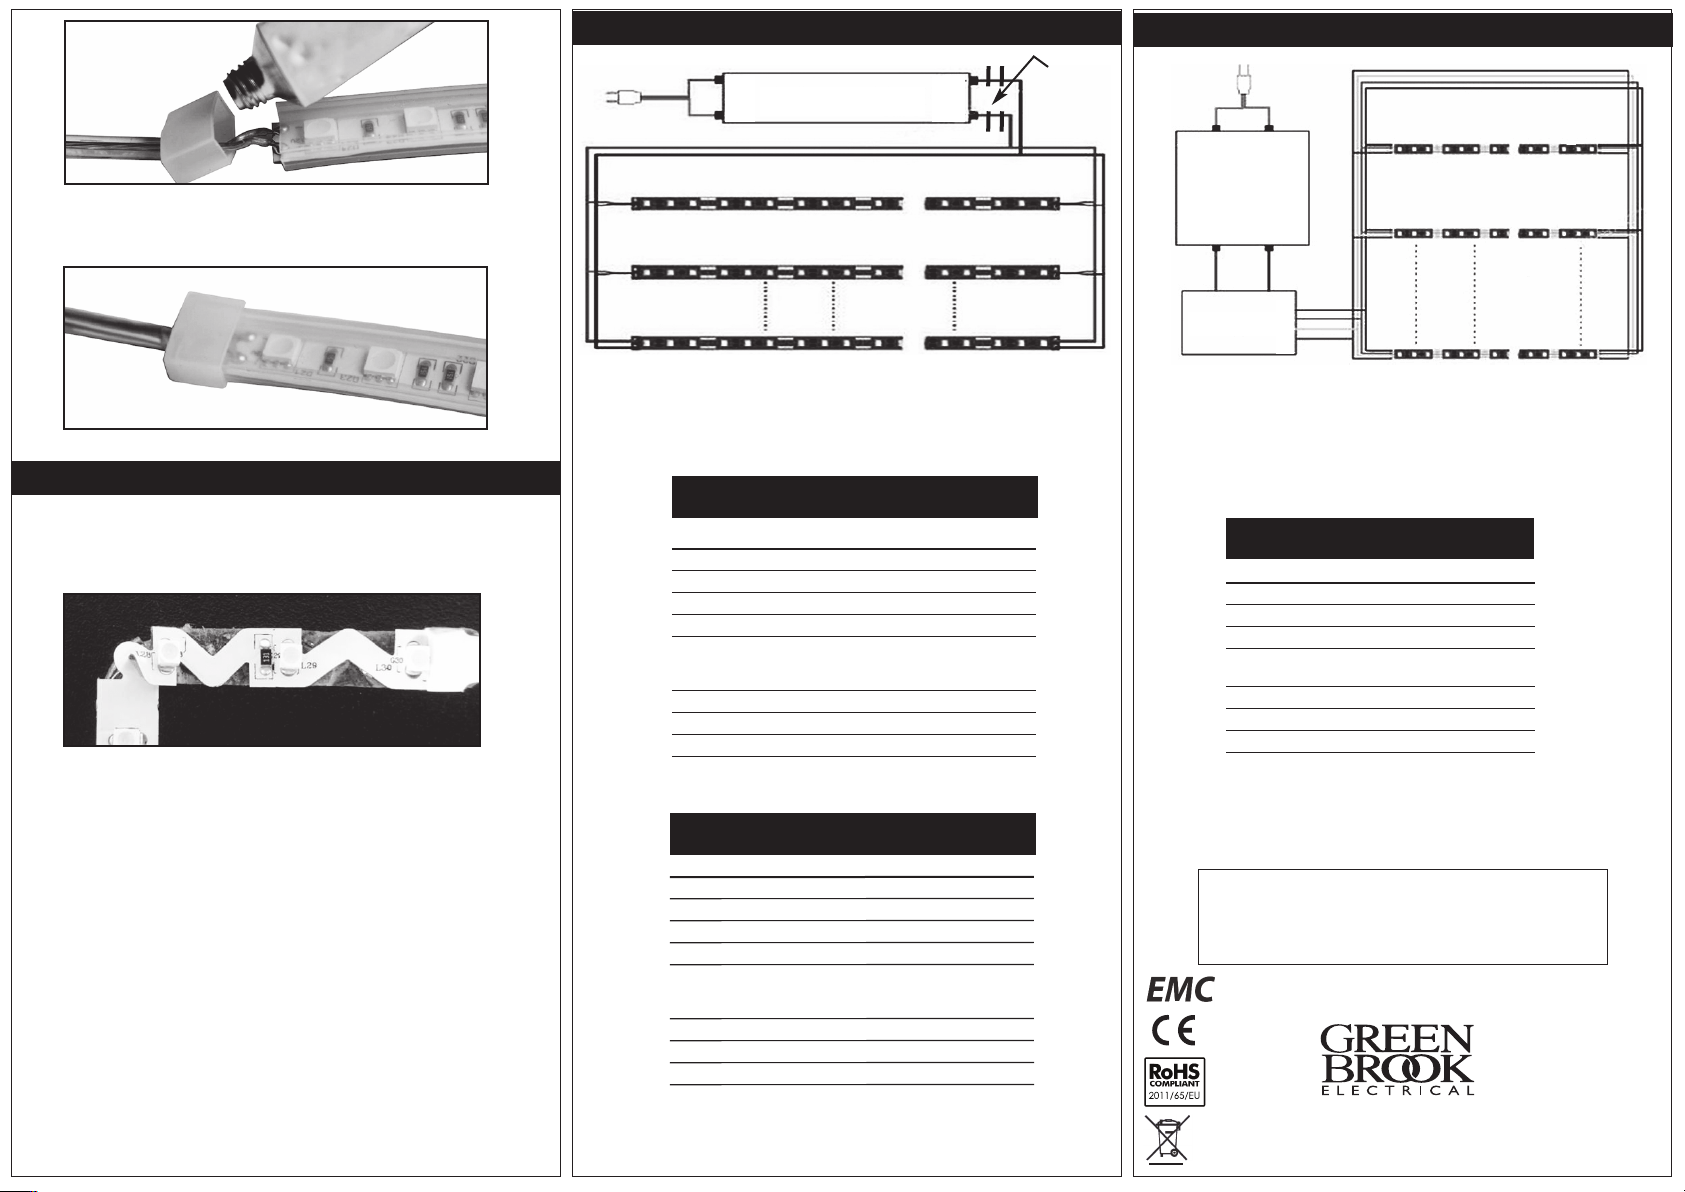
Dia:9
5. Make sure the end cap and strip are connected well
and leave to dry for 1 hour. Dia:8.
Dia:8
HOW TO BEND THE RIBBON - for IP20
1. The ribbon can be bent to a maximum 90° as shown
below, please note the corner is NOT to be squashed
flat, otherwise the flexible ribbon will be damaged.
Power Supply
IN
AC230V
12V DC
OUT
or dimming
F
nsert dimmer
i
module here
(LEDRIBDIM)
Note:
If ribbon is supplied from one end only the
furthest LED’s will be dimmer due to volt drop.
TECHNICAL DATA - LEDRIB67WW & LEDRIB67DL
For 5M Ribbon
Voltage: 12V DC
Wattage: 24W
Current: 400mA (per 1M approx)
IP Rating: IP67
Lumens Output:
LEDRIB67WW 1800, 75 lm/W
LEDRIB67DL 2100, 87 lm/W
LED Qty: 300pcs SMD LED
CRI: >80
Life Span: 30,000 hours
Note:
‘Material Safety Data Sheet’ for Silicone sealant is available on our website.
TECHNICAL DATA - LEDRIB20DWW & LEDRIB20DDL
AC230V IN
Power Supply
12V DC OUT
+ -
V
Controller
R
G
B
Note:
If ribbon is supplied from one end only the
furthest LED’s will be dimmer due to volt drop.
TECHNICAL DATA - LEDRIB20RGB
For 5M Ribbon
Voltage: 12V DC
Wattage: 50W
Current: 850mA (per 1M approx)
Lumens Output: White Light
IP Rating: IP20
LED Qty: 210pcs SMD LED
Life Span: 30,000 hours
Lumens - 4200, 84lm/W
Power Supply Required:
LEDRIBPS60W - 60W
LEDRIBPS72W - 72W
For 5M Ribbon
Voltage:
Wattage:
Current:
IP Rating:
Lumens Output:
LEDRIB
LEDRIB
LED Qty:
CRI:
Life Span:
WW
67
DL
67
Power Supply Required:
LEDRIBPS30W - 36W
LEDRIBPS60W - 60W
LEDRIBPS72W - 72W
12V DC
W
24
M approx)
1
mA (per
400
IP20
1800, 75
2100, 87
300
>80
30,000
pcs
lm/W
lm/W
SMD LED
hours
Your KingShield LED Ribbon is guaranteed for 3 years
This is in addition to your statutory rights.
GUARANTEE
from the date of purchase.
WEST ROAD . HARLOW
ESSEX . CM20 2BG . UK
inf o@gr eenb ro ok. co.u k
www. g r e e n brook.c o. uk
Issue no: 704245
 Loading...