

Page 1

Operator’s Manual
CF500 and CF600
Hydraulic Cross-Fold Boom
Manufacturing, Inc.
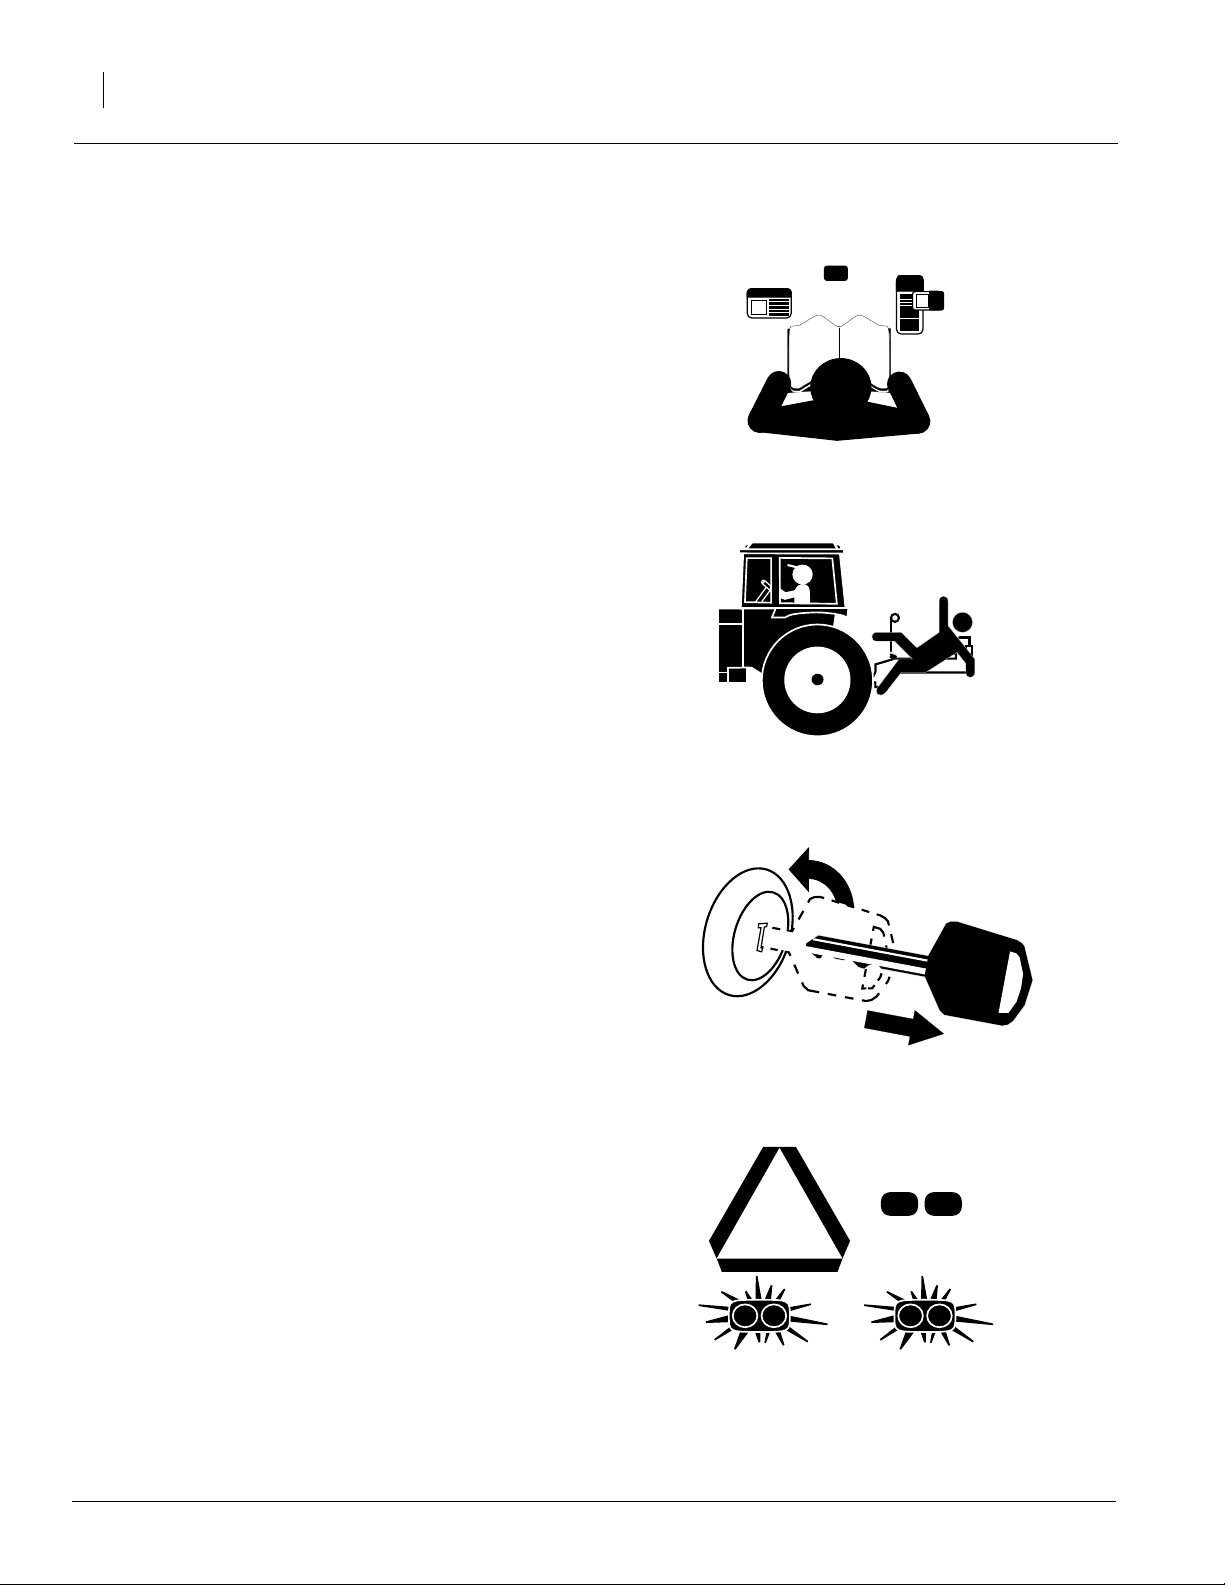
Read the operator’s manual entirely. When you see this symbol, the subsequent
instructions and warnings are serious - follow without exception. Your life and
!
the lives of others depend on it!
Cover illustration may show optional equipment not supplied with standard unit.
© Copyright 2012 Printed 2012-04-20 506-582M
Page 2

Table of Contents
Important Safety Information. . . . . . . . . . . . . . . 1
Safety Decals . . . . . . . . . . . . . . . . . . . . . . . . . 8
Introduction. . . . . . . . . . . . . . . . . . . . . . . . . . . . 13
Description of Unit . . . . . . . . . . . . . . . . . . . . 13
Intended Usage . . . . . . . . . . . . . . . . . . . 13
Using This Manual . . . . . . . . . . . . . . . . . . . . 13
Definitions . . . . . . . . . . . . . . . . . . . . . . . 13
Owner Assistance . . . . . . . . . . . . . . . . . . . . 14
Preparation and Setup . . . . . . . . . . . . . . . . . . . 15
Prestart Checklist . . . . . . . . . . . . . . . . . . . . . 15
Hitching Tractor to Boom . . . . . . . . . . . . . . . 15
Leveling Boom . . . . . . . . . . . . . . . . . . . . . . . 17
Operating Instructions . . . . . . . . . . . . . . . . . . . 18
Prestart Checklist . . . . . . . . . . . . . . . . . . . . . 18
Field Operation. . . . . . . . . . . . . . . . . . . . . . . 18
Electric-Hydraulic Control. . . . . . . . . . . . . . . 20
Transporting . . . . . . . . . . . . . . . . . . . . . . . . . 21
Parking . . . . . . . . . . . . . . . . . . . . . . . . . . . . . 22
Adjustments . . . . . . . . . . . . . . . . . . . . . . . . . . . 23
Hydraulic Elevator . . . . . . . . . . . . . . . . . . . . 23
Boom Height . . . . . . . . . . . . . . . . . . . . . . . . 23
Leveling Boom . . . . . . . . . . . . . . . . . . . . . . . 23
Locking System . . . . . . . . . . . . . . . . . . . . . . 24
Break Away Spring. . . . . . . . . . . . . . . . . . . . 24
Spring Arm Tension . . . . . . . . . . . . . . . . . . . 25
Wing Folding . . . . . . . . . . . . . . . . . . . . . . . . 25
Troubleshooting . . . . . . . . . . . . . . . . . . . . . . . . 26
Maintenance and Lubrication . . . . . . . . . . . . . 27
Maintenance. . . . . . . . . . . . . . . . . . . . . . . . . 27
Cables and Rollers. . . . . . . . . . . . . . . . . 28
Optional Hydraulic Elevator . . . . . . . . . . 28
Optional Electric-Hydraulic Control . . . . 28
Storage. . . . . . . . . . . . . . . . . . . . . . . . . . . . . 29
Center Section Pivots . . . . . . . . . . . . . . 30
Wing Joint Pivots . . . . . . . . . . . . . . . . . . 30
Swing Plates . . . . . . . . . . . . . . . . . . . . . 30
Lubrication . . . . . . . . . . . . . . . . . . . . . . . . . . 30
Options . . . . . . . . . . . . . . . . . . . . . . . . . . . . . . . 31
Electric-Hydraulic Control. . . . . . . . . . . . . . . 31
Specifications and Capacities . . . . . . . . . . . . . 32
Appendix . . . . . . . . . . . . . . . . . . . . . . . . . . . . . . 33
Torque Values Chart. . . . . . . . . . . . . . . . . . . 33
Warranty. . . . . . . . . . . . . . . . . . . . . . . . . . . . 34
© Copyright 1999, 2003, 2006, 2012 All rights Reserved
Great Plains Manufacturing, Inc. provides this publication “as is” without warranty of any kind, either expressed or implied. While every precaution
has been taken in the preparation of this manual, Great Plains Manufacturing, Inc. assumes no responsibility for errors or omissions. Neither is any
liability assumed for damagesresulting from the use of the information contained herein. Great Plains Manufacturing, Inc. reserves the right to revise
and improve its products as it sees fit. This publication describes the state of this product at the time of its publication, and may not reflect the product
in the future.
Trademarks of Great Plains Manufacturing, Inc. include: Singulator Plus, Swath Command, Terra-Tine.
Registered Trademarks of Great Plains Manufacturing, Inc. include:
Air-Pro, Clear-Shot, Discovator, Great Plains, Land Pride, MeterCone, Nutri-Pro, Seed-Lok, Solid Stand,
Terra-Guard, Turbo-Chisel, Turbo-Chopper, Turbo Max, Turbo-Till, Ultra-Till, Ver ti-Till, Whirlfilter, Yield-Pro.
Brand and Product Names that appear and are owned by others are trademarks of their respective owners.
Printed in the United States of America
506-582M 2012-04-20
Page 3

Important Safety Information
Look for Safety Symbol
The SAFETY ALERT SYMBOL indicates there is
a potential hazard to personal safety involved and
extra safety precaution must be taken. When you
see this symbol, be alert and carefully read the
message that follows it. In addition to design and
configuration of equipment, hazard control and
accident prevention are dependent upon the
awareness, concern, prudence and proper training of personnel involved in the operation,
transport, maintenance and storage of
equipment.
Important Safety Information
!
1
Be Aware of Signal Words
Signal words designate a degree or level of hazard seriousness.
DANGER indicates an imminently hazardous situation which, if not avoided, will result in death or
serious injury. This signal word is limited to the
most extreme situations, typically for machine
components that, for functional purposes, cannot
be guarded.
WARNING indicates a potentially hazardous situation which, if not avoided, could result in death or
serious injury, and includes hazards that are exposed when guards are removed. It may also be
used to alert against unsafe practices.
CAUTION indicates a potentially hazardous situation which, if not avoided, may result in minor or
moderate injury. It may also be used to alert
against unsafe practices.
DANGER!
!
WARNING!
!
CAUTION!
!
2012-04-20
506-582M
Page 4
CF500 and CF600
2
Be Familiar with Safety Decals
Read and understand “Safety Decals,” page 8,
thoroughly. Read all instructions noted on the
decals.
Keep Riders Off Machinery
Riders obstruct the operator’s view. Riders could
be struck by foreign objects or thrown from the
machine.
▲ Never allow children to operate equipment.
▲ Keep all bystanders away from machine dur-
ing operation.
Shutdown and Storage
▲ Park boom in the unfolded position.
▲ Lower boom, put tractor in park, turn off
engine, and remove the key.
▲ Detach and store boom in an area where chil-
dren normally do not play. Secure boom using
blocks and supports provided.
Use Safety Lights and Devices
▲ Slow-moving tractors and towed implements
can create a hazard when driven on public
roads. They are difficult to see, especially at
night.
▲ Flashing warning lights and turn signals are
recommended whenever driving on public
roads. Use lights and devices provided with
implement.
OFF
506-582M
2012-04-20
Page 5
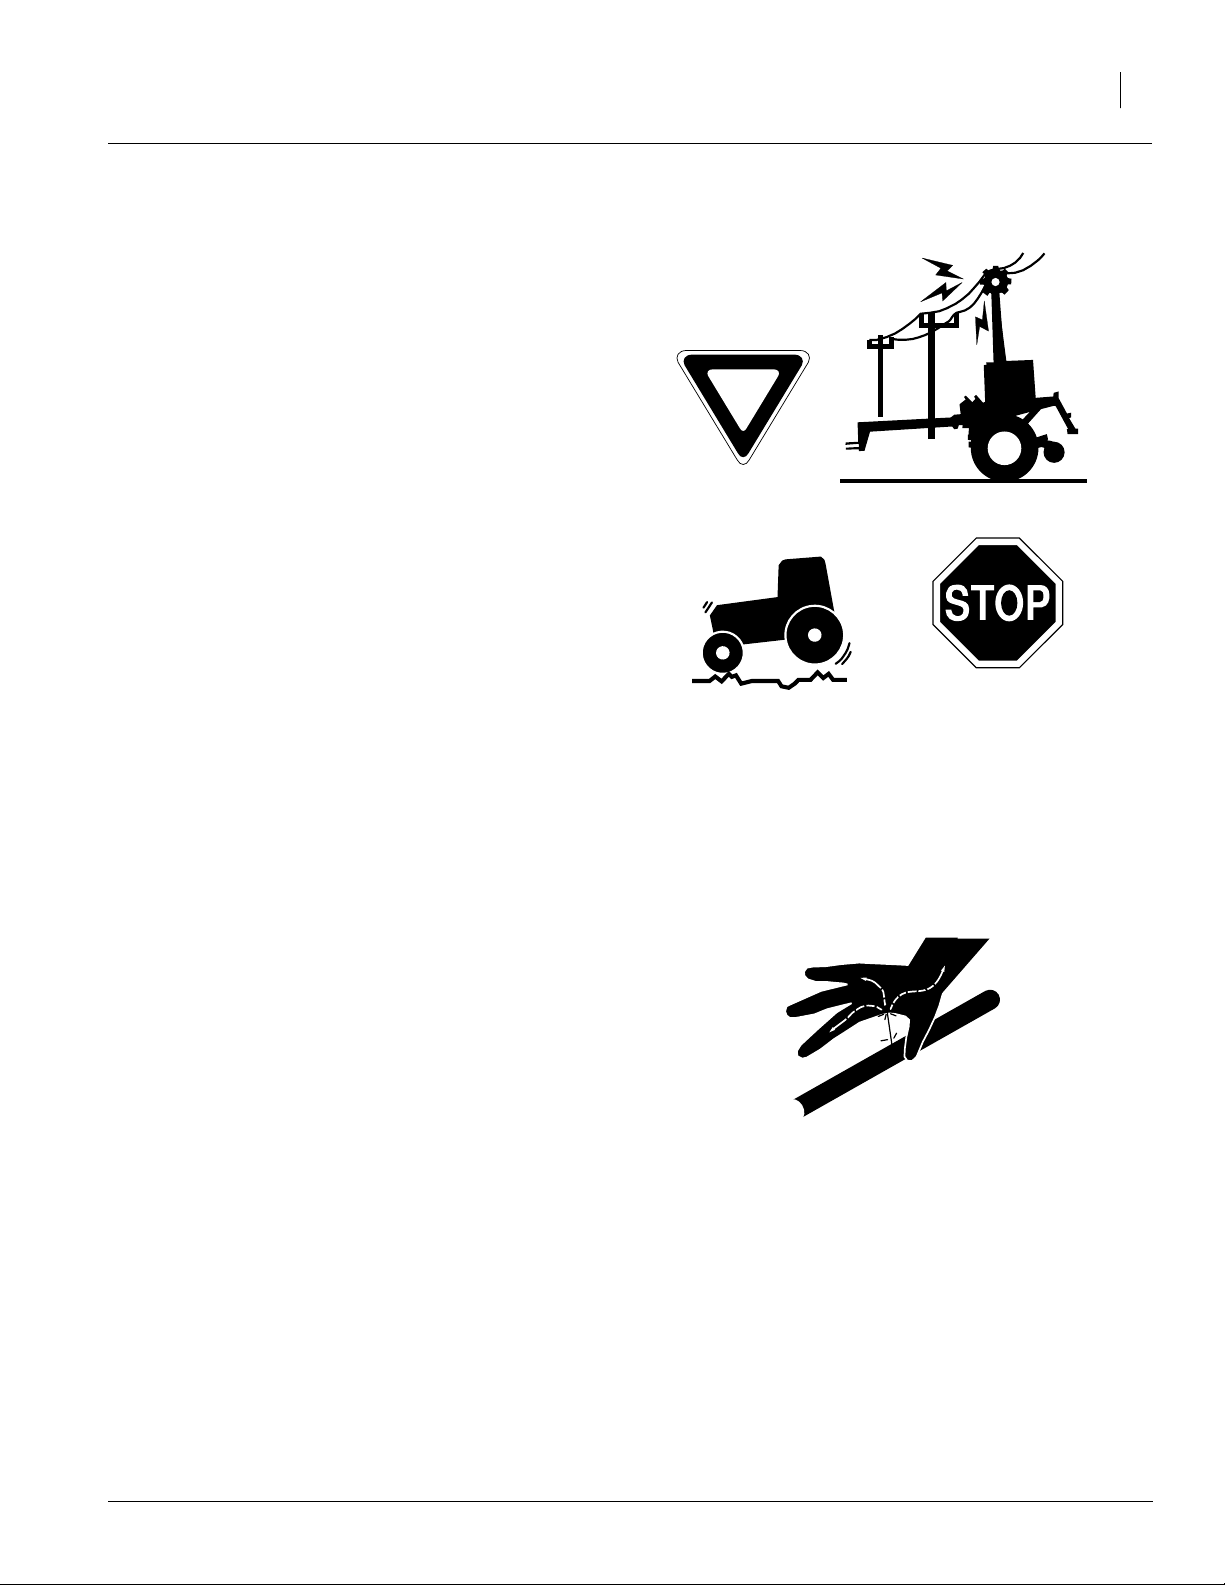
Transport Machinery Safely
▲ Comply with state and local laws.
▲ Maximum transport speed for implement is 20
mph. DO NOT EXCEED. Never travel at a
speed which does not allow adequate control
of steering and stopping. Some rough terrains
require a slower speed.
▲ Sudden braking can cause a towed load to
swerve and upset.
▲ Do not tow a sprayer that, when fully loaded,
weighs more than 1.5 times the weight of the
towing vehicle.
▲ Do not transport sprayer when filled with
chemicals.
▲ Carry reflectors or flags to mark boom and
sprayer in case of breakdown on the road.
Important Safety Information
3
▲ Keep clear of overhead power lines and other
obstructions when transporting. Refer to transport dimensions under “Specifications and
Capacities,” page 32.
▲ Do not fold or unfold the boom while the trac-
tor is moving.
Avoid High Pressure Fluids
▲ Escaping fluid under pressure can penetrate
the skin, causing serious injury.
▲ Avoid the hazard by relieving pressure before
disconnecting hydraulic lines.
▲ Use a piece of paper or cardboard, NOT
BODY PARTS, to check for suspected leaks.
▲ Wear protective gloves and safety glasses or
goggles when working with hydraulic systems.
▲ If an accident occurs, see a doctor immedi-
ately. Any fluid injected into the skin must be
surgically removed within a few hours or gangrene may result.
2012-04-20
506-582M
Page 6

CF500 and CF600
4
Practice Safe Maintenance
▲ Understand procedure before doing work. Use
proper tools and equipment. Refer to this manual for additional information.
▲ Work in a clean, dry area.
▲ Lower the boom, put tractor in park, turn off
engine, and remove key before performing
maintenance.
▲ Make sure all moving parts have stopped and
all system pressure is relieved.
▲ Allow sprayer to cool completely.
▲ Do not work on hoses, nozzles or plumbing
components (with the exception of throttling
valve and chemical inductor) while pump is
running or hoses are pressurized. Disengage
pump and release hose pressure by turning
boom section switches on before working on
individual components.
▲ Do not grease or oil sprayer while it is in oper-
ation.
▲ Disconnect battery ground cable (-) before
servicing or adjusting electrical systems or
before welding on sprayer.
▲ Inspect all parts. Make sure parts are in good
condition and installed properly.
▲ Remove buildup of grease, oil or debris.
▲ Remove all tools and unused parts from
sprayer before operation.
Prepare for Emergencies
▲ Be prepared if a fire starts.
▲ Keep a first aid kit and fire extinguisher handy.
▲ Keep emergency numbers for doctor, ambu-
lance, hospital and fire department near
phone.
911
506-582M
2012-04-20
Page 7

Important Safety Information
5
Handle Chemicals Properly
▲ Read and follow chemical manufacturer’s
instructions.
▲ Wear protective clothing.
▲ Handle all chemicals with care.
▲ Agricultural chemicals can be dangerous.
Improper use can seriously injure persons,
animals, plants, soil and property.
▲ Inhaling smoke from any type of chemical fire
is a serious health hazard.
▲ Store or dispose of unused chemicals as
specified by the chemical manufacturer.
▲ Before adding chemical to the tank, make
sure tank is at least half full. Do not pour concentrate into an empty tank.
▲ Never leave fill hose attached to the sprayer
after filling tank. Chemicals in tank can siphon
out of tank and contaminate freshwater
source.
▲ Always keep hand-wash tank filled with clean
water and have soap available in case of an
emergency. Immediately and thoroughly flush
any area of the body that is contaminated by
chemicals.
▲ Spray only with acceptable wind conditions.
Wind speed must be below 5 mph. Make sure
wind drift of chemicals will not affect any surrounding land, people or animals.
▲ Never wash out the sprayer tank within 100
feet of any freshwater source or in a car wash.
▲ Rinse out the tank. Spray rinse water on last
field sprayed.
▲ Do not touch sprayer components with mouth
or lips.
▲ If chemical is swallowed, carefully follow the
chemical manufacturer’s recommendations
and consult with a doctor.
▲ If persons are exposed to a chemical in a way
that could affect their health, consult a doctor
immediately with the chemical label or container in hand. Any delay could cause serious
illness or death.
▲ Dispose of empty chemical containers prop-
erly. By law rinsing of the used chemical container must be repeated three times. Puncture
the container to prevent future use. An alternative is to jet-rinse or pressure rinse the container.
▲ Wash hands and face before eating after
working with chemicals. Shower as soon as
spraying is completed for the day.
2012-04-20
506-582M
Page 8

CF500 and CF600
6
Safety at All Times
Thoroughly read and understand the instructions
in this manual before operation. Read all instructions noted on the safety decals.
▲ Be familiar with all sprayer and boom func-
tions.
▲ Operate machinery from the driver’s seat only.
▲ Do not leave sprayer or boom unattended with
tractor engine running.
▲ Use only water without pesticides added to
calibrate the sprayer.
▲ Do not exceed the calibrated sprayer speed
and pressure when operating.
▲ Do not dismount a moving tractor. Dismount-
ing a moving tractor could cause serious injury
or death.
▲ Do not stand between the tractor and boom
during hitching.
▲ Keep hands, feet and clothing away from
power-driven parts.
▲ Wear snug-fitting clothing to avoid entangle-
ment with moving parts.
▲ Watch out for wires, trees, etc., when folding
and raising boom. Make sure all persons are
clear of working area.
▲ Turning tractor too tight may cause sprayer to
ride up on wheels. This could result in injury or
equipment damage.
▲ When using a PTO pump, be sure that PTO
shield is in place on the tractor, PTO coupler
bolts are torqued to the correct specification,
and torque bar is properly chained to tractor
drawbar.
▲ Spray with the boom in the unfolded position
only.
▲ Do not modify the boom for use with sprayers
other than Great Plains units. Do not modify
boom for use with tillage attachments. Do not
mount the boom on a tandem-axle sprayer.
▲ The boom has many pinch points during field
operation and folding. Keep all bystanders
away.
506-582M
2012-04-20
Page 9

Wear Protective Equipment
Great Plains advises all users of chemical pesticides or
herbicides to use the following personal safety
equipment.
▲ Waterproof, wide-brimmed hat
▲ Waterproof apron
▲ Face shield, goggles or full face respirator.
▲ Goggles with side shields or a full face respirator is
required if handling or applying dusts, wettable powders, or granules or if being exposed to spray mist.
▲ Cartridge-type respirator ap-proved for pesticide
vapors unless label specifies another type of respirator.
▲ Waterproof, unlined gloves. Neoprene gloves are
recommended.
Important Safety Information
7
▲ Cloth coveralls/outer clothing changed daily; water-
proof items if there is a chance of becoming wet with
spray
▲ Waterproof boots or foot coverings
▲ Do not wear contaminated clothing. Wash protective
clothing and equipment with soap and water after
each use. Personal clothing must be laundered separately from household articles.
▲ Clothing contaminated with certain pesticides must
be destroyed according to state and local regulations. Read chemical label for specific instructions.
▲ Wear clothing and equipment appropriate for the job.
Avoid loose-fitting clothing.
▲ Prolonged exposure to loud noise can cause hear-
ing impairment or loss. Wear suitable hearing protection such as earmuffs or earplugs.
▲ Avoid wearing radio headphones while operating
machinery. Operating equipment safely requires the
full attention of the operator.
2012-04-20
506-582M
Page 10

CF500 and CF600
8
Safety Decals
Your implement comes equipped with all safety
decals in place. They were designed to help you
safely operate your implement.
1. Read and follow decal directions.
2. Keep all safety decals clean and legible.
3. Replace all damaged or missing decals. Order new decals from your Great Plains dealer.
Refer to this section for proper decal placement.
4. When ordering new parts or components,
also request corresponding safety decals.
5. To install new decals:
a. Clean the area on which the decal is to be
placed.
b. Peel backing from decal. Press firmly on
surface, being careful not to cause air
bubbles under decal.
818-055C
Slow Moving Vehicle Label
838-265C
Amber Reflectors
Front of nozzle tube, both ends of tube; two reflectors total
16921
506-582M
2012-04-20
Page 11
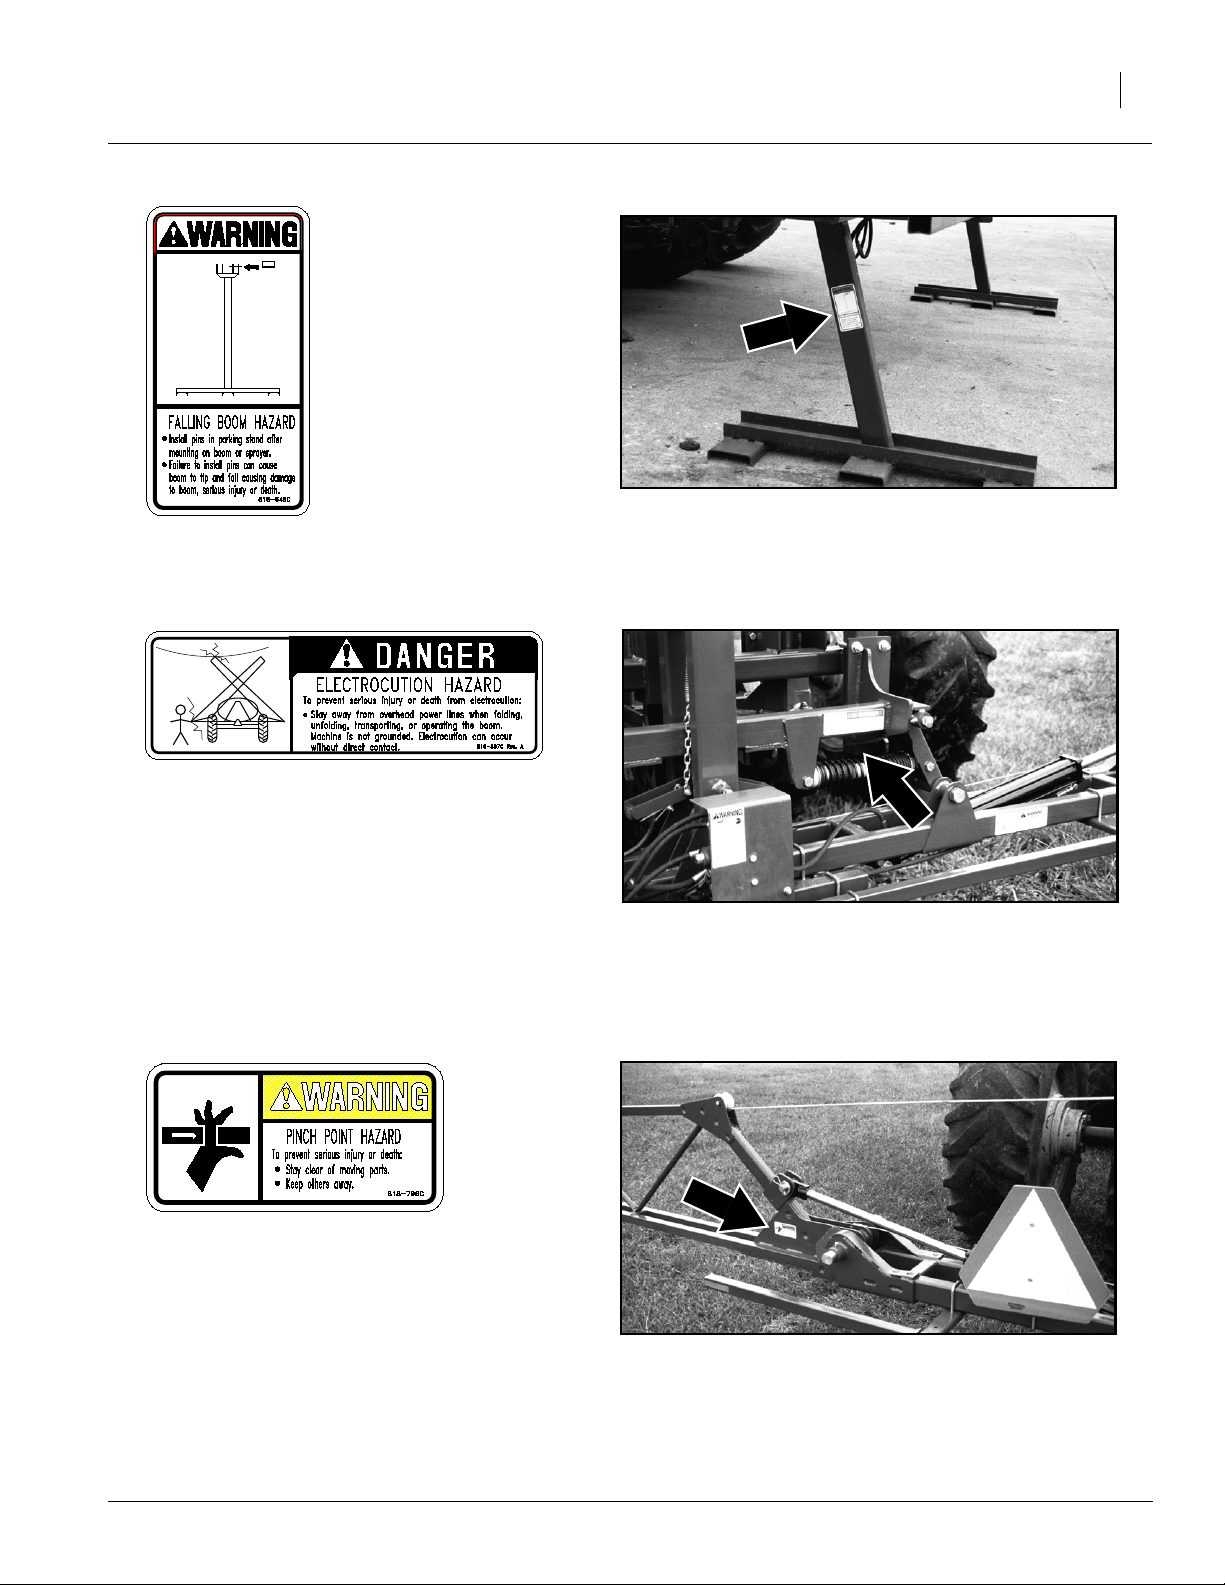
818-648C
Warning Boom Parking Pin
One decal on each parking
stand (Stands sold with
3P300 and three-point
mounts only.)
Important Safety Information
16918
9
818-367C
Danger Power Line Hazard
818-798C
Warning Pinch Point
Decals at wing hinge points, front and back of
boom; eight decals total
17008
17007
2012-04-20
506-582M
Page 12
CF500 and CF600
10
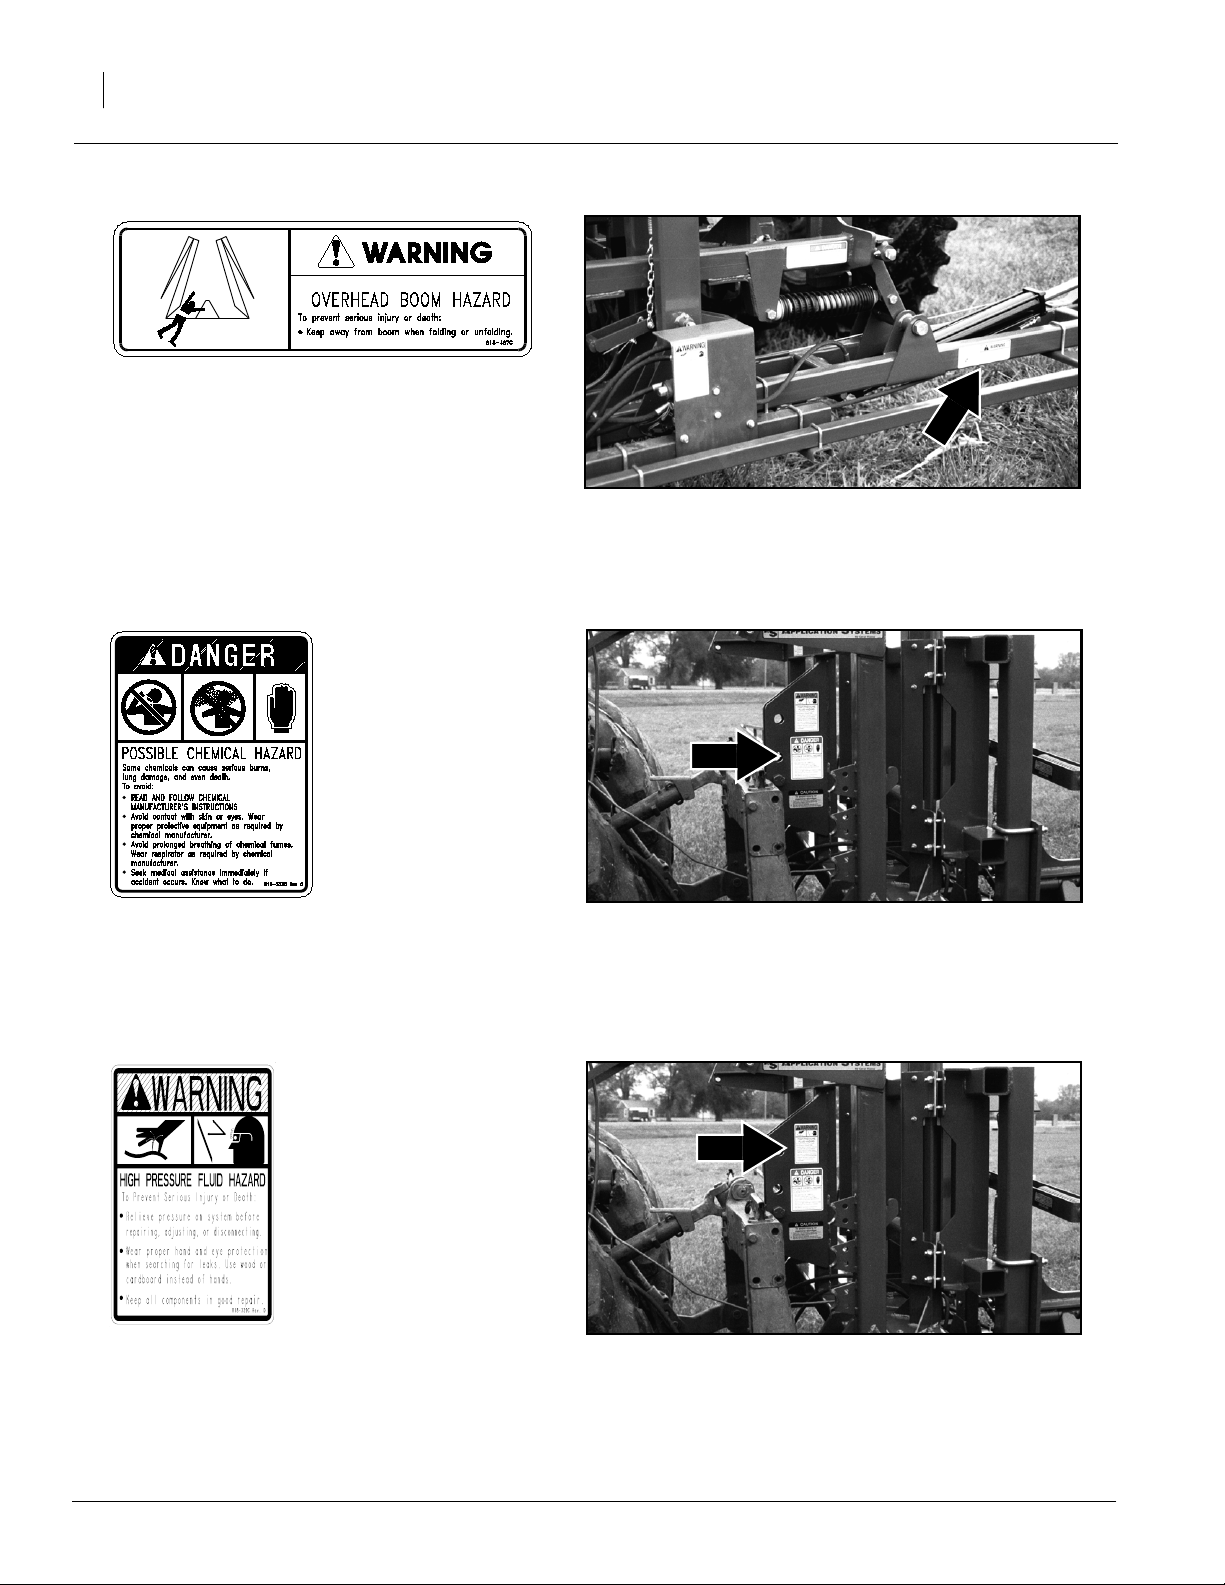
818-467C
Warning Overhead Boom
Front and rear of boom; two decals total
818-323C
Danger Chemical
Hazard
16920
818-339C
Warning High Pressure
SML
16922
16922
506-582M
2012-04-20
Page 13

Important Safety Information
11
818-466C
Caution Hitching Sprayer
818-648C
Warning Boom Parking Pin
One decal on each parking
stand
16922
818-367C
Danger Power Line Hazard
2012-04-20
506-582M
Page 14

CF500 and CF600
12
818-647C
Warning Unfold Boom
818-864C
Danger Crushing Hazard
818-339C
Warning High Pressure SML
Optional Elevator
16919
17008
506-582M
2012-04-20
Page 15

Introduction
Great Plains welcomes you to its growing family of
new product owners. This boom has been designed with care and built by skilled workers using
quality materials. Proper setup, maintenance and
safe operating practices will help you get years of
satisfactory use from the machine.
Description of Unit
The CF500 and CF600 are non-turf type, crossfolding sprayer booms. The booms hydraulically
unfold to an operating width of 50 or 60 feet. The
booms can be mounted on an Great Plains trailer
sprayer, three-point sprayer or three-point mount.
Introduction
13
Intended Usage
Use these booms as part of a pressurized sprayer
system to apply liquid pesticides, herbicides or
fertilizers to production-agriculture crops only.
Mount booms on Great Plains trailer sprayers,
three-point sprayers or three-point hitches only.
Do not modify the boom or use the boom with any
tillage attachments.
Using This Manual
This manual will familiarize you with safety, assembly, operation, adjustments, troubleshooting
and maintenance. Read this manual and follow
the recommendations to help ensure safe and efficient operation.
The information in this manual is current at printing. Some parts may change to assure top
performance.
Definitions
Right-hand and left-hand as used in this manual
are determined by facing the direction the machine will travel while in use unless otherwise
stated.
2012-04-20
IMPORTANT: A crucial point of information related to the preceding topic. For safe and correct operation, read and follow the directions
provided before continuing.
NOTE: Useful information related to the preceding topic.
506-582M
Page 16

CF500 and CF600
14
Owner Assistance
If you need customer service or repair parts, contact your Great Plains dealer. They have trained
personnel, repair parts and equipment specially
designed for Great Plains products.
Refer to Figure 1
Your boom’s parts were specially designed and
should only be replaced with Great Plains parts.
Always use the serial and model number when ordering parts from your Great Plains dealer.
Your Great Plains dealer wants you to be satisfied
with your new machine. If you do not understand
any part of this manual or are not satisfied with the
service received, please take the following
actions.
1. Discuss the matter with your dealership service manager. Make sure they are aware of
any problems so they can assist you.
16972
Figure 1
Serial Number Plate
2. If you are still unsatisfied, seek out the owner
or general manager of the dealership.
3. For further assistance write to:
Product Support
Service Department
Great Plains Mfg. Inc.
PO Box 5060
Salina, KS 67402-5060
506-582M
2012-04-20
Page 17

Preparation and Setup
This section will help you prepare your boom for
use with your tractor andsprayer. Before using the
boom in the field, you must hitch your tractor to
your sprayer or three-point mount and check that
the boom is level.
Read and understand the operator’s manual for
the sprayer you will be using with the boom.
Prestart Checklist
Perform these checks before setting up your
cross-fold boom.
4. Read and understand “Important Safety Information,” beginning on page 1.
Preparation and Setup
15
5. Check that all working parts are moving freely, bolts are tight, and cotter pins are spread.
6. Check that all grease fittings are in place and
lubricated. Refer to “Lubrication,” page 30.
7. Check that all safety decals and reflectors are
correctly located and legible. Replace if damaged. Refer to “Safety Decals,” page 8.
Hitching Tractor to Boom
!
DANGER!
Electrocution hazard. To prevent serious injury or
death from electric shock, keep clear of overhead power lines when transporting, folding or unfolding boom.
Boom is not grounded. Electrocution can occur without direct contact. Refer to transport dimensions under
“Specifications and Capacities”, page 32. Do not fold
or unfold boom while tractor is moving.
!
WARNING!
You could be seriously injured or killed by being
crushed between the tractor and boom. Do not stand
or place any body part between the tractor and boom
while the tractor is in motion. Stop and shut off tractor
before inserting hitch pins.
18098
2012-04-20
506-582M
Page 18

CF500 and CF600
16
!
WARNING!
Hitch the CF500 or CF600 to an Great Plains trailer,
single-axle or three-point sprayer or a three-point
mount only. Hitching the boom to any other sprayer
can result in negative tongue weight which can lead to
serious injury or death.
If your cross-fold boom is mounted on an Great
Plains sprayer, refer to your sprayer operator’s
manual for hitching instructions.
Refer to Figure 2
If your cross-fold boom is mounted on a threepoint mount, attach three-point mount to tractor
with correct pinmountings determined from figure
2.
IMPORTANT: Adjust top three-point link so
boom frame is level. If frame is not level boom
may hit tractor cab when folded.
NOTE: The category IV narrow hitch (CAT IV-N)
spacers are not standard boom equipment.
Figure 2
11939
Pin and Spacer Configurations
506-582M
2012-04-20
Page 19

Leveling Boom
!
WARNING!
Pinch point hazard. Your fingers, hands or arms could
be severely injured or severed if caught in the folding
boom sections. Shut off tractor and remove key before
adjusting shims.
The boom sections must be level across the span
for even spraying.
Refer to Figure 3
To adjust an inner arm, fold boom and loosen
bolts (A) holding shims (B). Add or remove shims
as necessary.
Preparation and Setup
Figure 3
Level Inner Arm
17
16916
Refer to Figure 4
To expose shims for outer arm, fold wings and
band together arms, then disconnect cable from
spring arm and unfold wings while arms are still
banded together. Add or remove shims (A) by
loosening bolt (B).
NOTE: Boom arms are disassembled in figures
for illustration purposes only.
16917
Figure 4
Level Outer Arm
2012-04-20
506-582M
Page 20

CF500 and CF600
18
Operating Instructions
This section covers general operating procedures. Experience, machine familiarity and the
following information will lead to efficient operation and good working habits. Always operate
farm machinery with safety in mind.
Prestart Checklist
1. Read and follow “Important Safety Information,” beginning on page 1.
2. Read and follow the chemical manufacturer’s
instructions. Consider how you will store and
dispose of the chemical.
3. When working with agricultural chemicals, alwayswear protective, waterproof clothing that
covers the body.
4. Have soap and water available to wash any
exposed areas. Check that hand-wash tank is
full of clean water.
5. Lubricate boom as indicated under “Lubrication,” page 30.
6. Check boom for loose bolts, pins and hose
clamps. Check hoses, pumps, valves and fittings for leaks. Tighten all bolts as specified
under “Torque Value Chart,” page 33.
Field Operation
!
DANGER!
Electrocution hazard. To prevent serious injury or
death from electric shock, keep clear of overhead power lines when transporting, folding or unfolding boom.
Boom is not grounded. Electrocution can occur without direct contact. Refer to transport dimensions under
“Specifications and Capacities,” page 32. Do not fold
or unfold boom while tractor is moving.
18098
506-582M
2012-04-20
Page 21

!
WARNING!
Crushing and pinching hazard. During folding, the
boom has many pinch points. Bystanders could be injured by the moving sections. Hydraulic failure could
cause the boom to fall on bystanders. To eliminate the
hazard, keep all bystanders awayduring boomfolding.
Fold the boom only when the tractor is parked. Do not
allow riders on the boom.
!
WARNING!
Escaping fluid under pressure can penetrate the skin
causing serious injury. Check all hydraulic lines and
fittings before applying pressure.Use paper or cardboard, NOT BODY PARTS, to check for suspected
leaks. Wear protective gloves and safety glasses or
goggles when working with hydraulic systems. If an
accident occurs, see a doctor immediately. Any fluid
injected into the skin must be surgically removed within a few hours or gangrene will result.
18107
Operating Instructions
17273
19
!
CAUTION!
Operate boom only whenboom is unfolded completely.
Spraying chemicals with the boom partially folded increases the risk of sprayer and chemical-exposure accidents.
1. Remove parking stands before folding, transporting or operating boom.
2. Fill sprayer tank half full with water.
3. Unfold boom in field where you will spray.
4. Check nozzles for streaks and non-uniformity.
Clean or replace nozzles as necessary.
5. Calibrate sprayer. Refer to calibration procedures in the Application Guide.
6. Adjust boom to proper height. For proper nozzle height, refer to nozzle tables in the Appli-
cation Guide.
7. Add chemicals to sprayer and finish filling with
water. Never open chemical containers with
bare hands.
8. Rinse chemical container three times. Puncture containers to prevent future use. Dispose
of containers as recommended by the chemical manufacturer.
2012-04-20
506-582M
Page 22

CF500 and CF600
20
9. Start sprayer pressurizing system to work up
to desired pressure.
10. When applying chemicals in the field, your
goals are accuracy, efficiency and safety. To
reduce expenses and risks to human health:
• Apply spray when wind is 5 mph or less.
• Take note of adjoining crops, houses or
persons.
• Minimize drift by using nozzle tips with the
largest practical opening and by operating
boom at the lowest practical height.
• Work crosswise to the wind. Start from the
down-wind side of the field to avoid heading
directly into chemical fumes.
• When turning at the end of field, make sure
boom will not overlap previously sprayed
crop.
• While spraying, monitor pressure closely.
Maintain a constant tank pressure for even
and accurate spraying.
• Periodically check hoses, connections and
nozzles. Release pressure before working
on sprayer or boom. Always wear rubber
gloves when making repairs or adjustments.
11. When finished spraying, empty tank and flush
sprayer with water, including the pump, nozzles and valve-bypass line. Store or dispose
unused chemicals as recommended by the
chemical manufacturer.
Electric-Hydraulic Control
Refer to Figure 5
The optional electric-hydraulic valve allows you to
control boom folding and elevator lift on the same
hydraulic circuit. To select a hydraulic function,
depress its colored button on the joystick controller or flip its switch on the control box. Hydraulic
functions are coded as follows.
• Yellow Button or Light: Elevator
• Green Button or Light: Left Wing
• Red Button or Light: Right Wing
For more information on the optional electric-hydraulic control, refer to “Troubleshooting,” page
26, and “Maintenance and Lubrication,” page 27.
Figure 5
Electric-Hydraulic Control
506-582M
18114
2012-04-20
Page 23

Transporting
!
DANGER!
Electrocution hazard. To prevent serious injury or
death from electric shock, keep clear of overhead power lines when transporting, folding or unfolding boom.
Boom is not grounded. Electrocution can occur without direct contact. Refer to transport dimensions under
“Specifications and Capacities,” page 32.
!
WARNING!
Crushing and pinching hazards. During folding, the
boom has many pinch points. Bystanders could be injured by the moving sections. Hydraulic failure could
cause the boom to fall on bystanders. To eliminate the
hazard, keep all bystanders awayduring boomfolding.
Fold the boom only when the tractor is parked.
18107
Operating Instructions
17273
21
Before transporting boom, check and practice
these items:
No chemicals. Do not transport sprayer with
chemicals in tank.
Remove parking stands. Remove parking
stands from boom before transporting.
Maximum Speed. Do not exceed 20 mph when
transporting.
Bystanders. Check that no one is in the way
before moving tractor. Do not allow anyone to
ride on boom or sprayer.
Clearance. Know dimensions of folded boom.
Refer to “Specification and Capacities,” page
32. Follow a route that provides adequate clearance from all obstructions. Be especially observant of low overhead power lines.
Road Rules. Comply with all federal, state and
local laws when transporting on public roads.
2012-04-20
506-582M
Page 24

CF500 and CF600
22
Parking
!
WARNING!
Crushing hazard. The parked boom could fall and
cause serious injury or death. Always park boom in
unfolded position. Always secure parking stands under
three-point mount and boom when parking boom.
If parking a boom that is mounted on an Great
Plains sprayer, refer to your sprayer manual for
parking instructions. For information on long-term
storage, refer to “Storage,” page 29.
Refer to Figure 6
To park a three-point boom, follow these steps:
1. Flush sprayer with water in last field sprayed.
Flush pump, nozzles and bypass line from
valves.Store or dispose unused chemicalsas
recommended by the chemical manufacturer.
2. Park boom on a level, flat area that is protected from wind gusts and direct sunlight. Park
boom in an area where children do not play. If
possible, store boom inside for longer machine life.
3. Unfold boom.
4. Position parking stands under three-point
mount and center section of boom frame.
Make sure parking stands are positioned over
level, firm ground so boom will be stable from
front to rear. If the groundis soft, place boards
under parking stands to increase ground-contact area.
5. Lower tractor hitch so mount and boom rest
on parking stands. Secure stands to mount
and boom with wire pins.
6. Unhook PTO pump or unplug hydraulic lines
from hydraulic pump.
7. Unhook cam-lock connectors and hydraulic
hoses from boom and position on frame.
8. Remove three-point pins from tractor. Pull
away from boom.
17615
Figure 6
Position Stands Under Parked Boom
506-582M
2012-04-20
Page 25

Adjustments
!
WARNING!
Crushing hazard. The boom could fall and cause serious injury or death. Before performing any maintenance, secure boom to parking stands if provided.
Hydraulic Elevator
Refer to Figure 7
Periodically check the slide pads (A) for wear. As
the pads wear, tighten 1/2-inch bolts (B) on both
sides of elevator frame (C) until pads just touch
frame.
Adjustments
23
Boom Height
After calibrating sprayer for your nozzles, desired
pressure and tractor speed, the main field adjustment is boom height. Set boom height to achieve
correct overlap for your nozzle. If the crop canopy
is taller in some fields than others, adjust boom
height accordingly.
Refer to nozzle tables in the Application Guide to
determine correct boom height.
Leveling Boom
For even application, the sprayer boom must be
level across the span. The boom is initially leveled
during assembly. After a period of normal use, you
may need to level the boom.
If necessary, refer to “Leveling Boom,” page 17.
17000
Figure 7
Hydraulic Elevator
2012-04-20
506-582M
Page 26

CF500 and CF600
24
Locking System
Refer to Figure 8
The CF500 and CF600 have a locking system for
automatic boom locking during folding and transport. For proper folding, the boom-lock cable must
be tight enough that the lock arms (A) just clear
their stops when unfolded (B) and rest secure
against the stop when folded (C).
A
Refer to Figure 9
To adjust the tension on the boom-lock cable,
loosen jam nut and turn clevis.
B
Locking System
Boom-Lock Cable
C
Figure 8
Figure 9
17003
17614
Break Away Spring
Refer to Figure 10
Periodically check that break-away springs are
compressed to 6 inches. Adjust spring by turning
mounting nut under spring.
Figure 10
Break-Away Spring
506-582M
17001
2012-04-20
Page 27

Spring Arm Tension
Refer to Figure 11
Periodically check that spring is compressed to a
length of 10 1/4 inches. Check spring compression with boom unfolded. To compress spring,
tighten spring nut (A). Lock with second nut (B).
Adjustments
25
Wing Folding
Refer to Figure 12
Normal boom use may cause wing misalignment.
If the inner- and outer-arm sections are out of
alignment, the outer arm (A) will miss the fold
bracket (B) on the inner arm when boom is folded.
To realign wing sections, loosen 1/2-inch bolts at
arm joint. Swing outer-arm section until it is
aligned with inner-arm section. Retighten bolts.
Normal boom use may also shift the folding brackets along the inner-arm section. When properly
adjusted, the outer arm will meet the fold bracket
at the stop (C). Loosen u-bolts and reposition
brackets as necessary.
Figure 12
Aligning Wing Sections
16946
Figure 11
Spring-Arm Tension
2012-04-20
16997
506-582M
Page 28

CF500 and CF600
26
Troubleshooting
Problem Solution
Excessive cable wear
Pressure increases
Optional electric-hydraulic control not
working
Restricted oil flow to optional electrichydraulic control
No oil flow and no clicking sound
from valve on optional electrichydraulic control
Check cable and roller for obstruction or wear. Remove obstructions.
Check that roller is turning properly. Replace roller or roller bushing if
necessary.
If necessary, replace worn cable.
Check for clogging in boom hoses. Remove obstruction.
Check if boom hoses are pinched. Use cable ties to keep hoses from
kinking.
If valve does not work and indicator lights are not lit, check for a blown
fuse, damaged wiring or a bad switch.
If valve does not work but indicator lights are lit, check that system is
properly grounded. Ground valve by running a wire from the tractor
frame to the coil nut on top of the valve.
Do not mix and match styles of tips and couplers.
Check that hydraulic hoses are not blocked, damaged or kinked.
Check valve cartridge for internal contamination. Before removing cartridge, relieve all hydraulic pressure and remove all hydraulic hoses
from ports. Contact your Great Plains dealer for cartridge-cleaning
instructions.
506-582M
2012-04-20
Page 29

Maintenance and Lubrication
Maintenance
!
DANGER!
Some chemicals will cause serious burns, lung damage
and death. Avoid contact with skin or eyes. Wear proper protective equipment as required by chemical manufacturer. Avoid prolonged breathing of chemical
fumes. Wear respirator as required by chemical manufacturer. Seek medical assistance immediately if accident occurs. Know what to do in case of an accident.
!
WARNING!
Crushing hazard. The boom could fall and cause serious injury or death. Before performing any maintenance, secure boom to parking stands if provided.
Maintenance and Lubrication
18108
18109
27
!
WARNING!
Crushing and pinching hazards. During boom folding,
the boom has many pinch points. Bystanders could be
injured by moving sections. Hydraulic failure could
cause boom to fall on bystanders. To eliminate the hazards, keep all bystanders away during boom folding.
Fold boom only when the tractor is parked.
!
WARNING!
Escaping fluid under pressure can penetrate the skin
causing serious injury. Check all hydraulic lines and
fittings before applying pressure.Use paper or cardboard, NOT BODY PARTS, to check for suspected
leaks. Wear protective gloves and safety glasses or
goggles when working with hydraulic systems. If an
accident occurs, see a doctor immediately. Any fluid
injected into the skin must be surgically removed within a few hours or gangrene will result.
Proper service and maintenance is the key to long
implement life. With careful and systematic inspection, you can avoid costly maintenance,
downtime and repair.
17273
18107
2012-04-20
506-582M
Page 30

CF500 and CF600
28
Always turn off and remove the tractor key before
making any adjustments or performing any
maintenance.
1. Release system pressure by flipping boomsection switches on and off without pump running.
2. Clean nozzles with an air hose with less than
30 psi. Periodically replace nozzles.
3. Check hoses, pumps, valves and fittings for
leaks. Always wear rubber gloves when making repairs or adjustments.
4. Check sprayer for loose bolts, pins and hose
clamps.
Cables and Rollers
Refer to Figure 13
Inspect cables and rollers for proper rolling. If a
roller does not turn, inspect roller for dirt or other
imperfections on bearing surface.
Rollers have a self-lubricating bearing. Do not lubricate bearings with oil. Lubricating bearing with
oil may cause dirt accumulation that jams roller.
Keep cables tight and spring compressed to
10 1/4 inches. See “Spring Arm Tension,” page
25.
Optional Hydraulic Elevator
Keep slide pads properly adjusted as explained
under “Hydraulic Elevator,” page 23. Do not
grease slide pads. Lubricating slide pads with
grease may cause dirt accumulation that jams elevator. If necessary, use silicone spray on slide
pads.
Optional Electric-Hydraulic Control
Periodically inspect electrical connections for corrosion, wear or damage. Replace terminals as
necessary.
Inspect control harness for damage. Make sure
the harness has not shifted into a position where it
could be damaged by boom or elevator operation.
Inspect hydraulic hoses and fittings for leaks. Replace any hoses that show signs of failure.
Tighten any leaking fittings.
17007
Figure 13
Cable and Roller
506-582M
2012-04-20
Page 31

Storage
Store boom where children do not play. If possible, store boom inside for longer life.
1. Empty solution from sprayer tank and store or
dispose chemicals as recommended by the
chemical manufacturer.
2. Change filters in tractor cab.
3. Wash boom exterior thoroughly using a safe
solvent or soap and water.
4. Flush out boom with antifreeze to prevent
freeze damage.
5. Inspect all parts for wear and rust.
6. Repair and paint parts as necessary.
7. Park boom in a dry area away from direct sunlight.
Maintenance and Lubrication
29
8. Follow instructions for parking boom as listed
under “Parking,” page 22.
9. Make sure all personal safety equipment is
stored in an easily accessible place and protected from potential contamination from dust
or chemicals.
2012-04-20
506-582M
Page 32

CF500 and CF600
30
Lubrication
Multipurpose
spray lube
Multipurpose
grease lube
30
Center Section Pivots
Both ends of center section – four zerks total.
Type of Lubrication: Grease
Quantity = Until resistance is felt
30
Multipurpose
oil lube
50
Intervals at which
lubrication is required
17002
Wing Joint Pivots
One zerk on each wing – two zerks total
Type of Lubrication: Grease
Quantity = Until resistance is felt
10
Swing Plates
Zerks on each end of plates – four zerks total
Type of Lubrication: Grease
Quantity = Until resistance is felt
17001
16998
506-582M
2012-04-20
Page 33

Options
Electric-Hydraulic Control
With the optional electric-hydraulic control, you
can operate boom folding and elevator lift on the
same hydraulic circuit. The controller mounts in
your tractor cab for convenient switching between
hydraulic functions.
The control is available with a joystick controller
for tractors with hydraulic levers or a switch-box
controller for tractors with hydraulic switches.
To order the electric-hydraulic control, contact
your Great Plains dealer.
Electric-Hydraulic Control Part Number
Options
17608
31
with Joystick Controller 506-584A
with Switch-Box Controller 506-585A
2012-04-20
506-582M
Page 34

CF500 and CF600
32
Specifications and Capacities
CF500 CF600
Nozzle Spacing
Nozzles Per Boom
Weight
Working Width
Transport Width (Folded)
Transport Height (Folded)
Tractor Requirements
20 inches 30 inches 20 inches 30 inches
30 21 36 25
895 pounds 935 pounds
50 feet 60 feet
12 feet 9 inches 12 feet 9 inches
12 feet 2 inches 12 feet 2 inches
Two remote valves; Category II, III or IV-N for three-point-mounted
booms
506-582M
2012-04-20
Page 35

Appendix
Torque Values Chart
Appendix
33
Bolt
Size
in-tpi
1
⁄4-20
1
⁄4-28
5
⁄16-18
5
⁄16-24
3
⁄8-16
3
⁄8-24
7
⁄16-14
7
⁄16-20
1
⁄2-13
1
⁄2-20
9
⁄16-12
9
⁄16-18
5
⁄8-11
5
⁄8-18
3
⁄4-10
3
⁄4-16
7
⁄8-9
7
⁄8-14
1-8
1-12
1
⁄8-7
1
1
1
⁄8-12
1
1
⁄4-7
1
1
⁄4-12
3
⁄8-6
1
3
1
⁄8-12
1
1
⁄2-6
1
1
⁄2-12
Bolt Head Identification
Grade 2 Grade 5 Grade 8 Class 5.8 Class 8.8 Class 10.9
a
b
d
ft-lb
N-m
7.4 11 16
8.5 13 18
15 24 33
17 26 37
27 42 59
31 47 67
43 67 95
49 75 105
66 105 145
75 115 165
95 150 210
105 165 235
130 205 285
150 230 325
235 360 510
260 405 570
225 585 820
250 640 905
340 875 1230
370 955 1350
480 1080 1750
540 1210 1960
680 1520 2460
750 1680 2730
890 1990 3230
1010 2270 3680
1180 2640 4290
1330 2970 4820
N-m N-m
5.6 8 12
61014 5 811
11 17 25 12 19 27
13 19 27 13 21 29
20 31 44 24 39 53
22 35 49 29 45 62
32 49 70 42 67 93
36 55 78 44 70 97
49 76 105 66 77 105
55 85 120 68 105 150
70 110 155 73 115 160
79 120 170 105 165 230
97 150 210 115 180 245
110 170 240 145 230 300
170 265 375 165 260 355
190 295 420 205 325 450
165 430 605 230 480 665
185 475 670 355 560 780
250 645 910 390 610 845
275 705 995 705 1120 1550
355 795 1290 785 1240 1710
395 890 1440 1270 1950 2700
500 1120 1820 1380 2190 3220
555 1240 2010
655 1470 2380
745 1670 2710
870 1950 3160
980 2190 3560
Bolt Head Identification
Bolt
Size
ft-lb ft-lb ft-lb ft-lb ft-lb
mm x pitch
M 5 X 0.8
M 6 X 1
M 8 X 1.25
M 8 X 1
M10 X 1.5
M10 X 0.75
M12 X 1.75
M12 X 1.5
M12 X 1
M14 X 2
M14 X 1.5
M16 X 2
M16 X 1.5
M18 X 2.5
M18 X 1.5
M20 X 2.5
M20 X 1.5
M24 X 3
M24 X 2
M30 X 3.5
M30 X 2
M36 X 3.5
M36 X 2
a. in-tpi = nominal thread diameter in inches-threads per inch
b. N· m = newton-meters
c. mm x pitch = nominal thread diameter in mm x thread pitch
d. ft-lb = foot pounds
c
5.8 8.8 10.9
N-m N-m N-m
357
71115
17 26 36
18 28 39
33 52 72
39 61 85
58 91 125
60 95 130
90 105 145
92 145 200
99 155 215
145 225 315
155 240 335
195 310 405
220 350 485
280 440 610
310 650 900
480 760 1050
525 830 1150
960 1510 2100
1060 1680 2320
1730 2650 3660
1880 2960 4100
946
Torque tolerance + 0%, -15% of torquing values. Unless otherwise specified use torque values listed above.
2012-04-20
25199
506-582M
Page 36

CF500 and CF600
34
Warranty
Great Plains Manufacturing, Incorporated warrants to the original purchaser that this spraying equipment will be free from defects in material
and workmanship for a period of one year from the date of original purchase when used as intended and under normal service and conditions
for personal use; 90 days for commercial or rental purposes. This Warranty is limited to the replacement of any defective part by Great Plains
Manufacturing, Incorporated and the installation by the dealer of any
such replacement part. Great Plains reserves the right to inspect any
equipment or part which are claimed to have been defective in material
or workmanship.
This Warranty does not apply to any part or product which in Great
Plains’ judgement shall have been misused or damaged by accident or
lack of normal maintenance or care, or which has been repaired or altered in a way which adversely affects its performance or reliability, or
which has been used for a purpose for which the product is not designed. This Warranty shall not apply if the product is towed at a speed
in excess of 20 miles per hour.
Claims under this Warranty must be made to the dealer which originally
sold the product and all warranty adjustments must by made through
such dealer. Great Plains reserves the right to make changes in materials or design of the product at any time without notice.
This Warranty shall not be interpreted to render Great Plains liable for
damages of any kind, direct, consequential, or contingent, to property.
Furthermore, Great Plains shall not be liable for damages resulting from
any cause beyond its reasonable control. This Warranty does not extend to loss of crops, losses caused by harvest delays or any expense
or loss for labor, supplies, rental machinery or for any other reason.
No other warranty of any kind whatsoever, express or implied, is
made with respect to this sale; and all implied warranties of merchantability and fitness for a particular purpose which exceed
the obligations set forth in this written warranty are hereby disclaimed and excluded from this sale.
This Warranty is not valid unless registered with Great Plains Manufacturing, Incorporated within 10 days from the date of original purchase.
506-582M
2012-04-20
Page 37

Page 38

Great Plains Manufacturing, Inc.
Corporate Office: P.O. Box 5060
Salina, Kansas 67402-5060 USA
 Loading...