

Page 1
Triton Plus
ANALOG STEREO AUDIO ROUTERS
User Manual
Revision 13
JANUARY 2009
Page 2
Affiliate with the N.V. KEMA in The Netherlands
CERTIFICATE
Certificate Number: 510040.001
The Quality System of:
Grass Valley, Inc.
400 Providence Mine Road
Nevada City, CA 95945
United States
15655 SW Greystone Ct.
Beaverton, OR 97006
United States
10 Presidential Way
3
rd
Floor, Suite 300
Woburn, MA 01801
United States
Nederland B.V.
4800 RP BREDA
The Netherlands
Weiterstadt, Germany
Brunnenweg 9
D-64331 Weiterstadt
Germany
Rennes, France
Rue du Clos Courtel
Cesson-Sevigne, Cedex
France
Technopole Brest Iroise
CS 73808
29238 Brest Cedex 3
France
17 rue du Petit Albi-BP 8244
95801 Cergy Pontoise
Cergy, France
2300 South Decker Lake Blvd.
Salt Lake City, UT 84119
United States
7140 Baymeadows Way
Suite 101
Jacksonville, FL 32256
United States
Including its implementation, meets the requirements of the standard:
ISO 9001:2000
Scope:
The design, manufacture and support of video hardware and software products and
related systems.
This Certificate is valid until: June 14, 2009
This Certificate is valid as of: August 30, 2006
Certified for the first time: June 14, 2000
H. Pierre Sallé
President
KEMA-Registered Quality
The method of operation for quality certification is defined in the KEMA General Terms
And Conditions For Quality And Environmental Management Systems Certifications.
Integral publication of this certificate is allowed.
KEMA-Registered Quality, Inc.
4377 County Line Road
Chalfont, PA 18914
Ph: (215)997-4519
Fax: (215)997-3809
CRT 001 073004
A
ccredited By:
ANAB
Page 3
Triton Plus
ANALOG STEREO AUDIO ROUTERS
User Manual
Revision 13
JANUARY 2009
Page 4
Contacting Grass Valley
International
Support Centers
Local Support
Centers
(available
during normal
business hours)
France
24 x 7
Australia and New Zealand: +61 1300 721 495 Central/South America: +55 11 5509 3443
Middle East: +971 4 299 64 40 Near East and Africa: +800 8080 2020 or +33 1 48 25 20 20
Europe
+800 8080 2020 or +33 1 48 25 20 20
+800 8080 2020 or +33 1 48 25 20 20
Hong Kong, Taiwan, Korea, Macau: +852 2531 3058 Indian Subcontinent: +91 22 24933476
Asia
Southeast Asia/Malaysia: +603 7805 3884 Southeast Asia/Singapore: +65 6379 1313
China: +861 0660 159 450 Japan: +81 3 5484 6868
Belarus, Russia, Tadzikistan, Ukraine, Uzbekistan: +7 095 2580924 225 Switzerland: +41 1 487 80 02
S. Europe/Italy-Roma: +39 06 87 20 35 28 -Milan: +39 02 48 41 46 58 S. Europe/Spain: +34 91 512 03 50
Benelux/Belgium: +32 (0) 2 334 90 30 Benelux/Netherlands: +31 (0) 35 62 38 42 1 N. Europe: +45 45 96 88 70
Germany, Austria, Eastern Europe: +49 6150 104 444 UK, Ireland, Israel: +44 118 923 0499
Copyright © Thomson. All rights reserved.
This product may be covered by one or more U.S. and foreign patents.
United States/Canada
24 x 7
+1 800 547 8949 or +1 530 478 4148
Grass Valley Web Site
The www.thomsongrassvalley.com web site offers the following:
Online User Documentation — Current versions of product catalogs, brochures,
data sheets, ordering guides, planning guides, manuals, and release notes
in .pdf format can be downloaded.
FAQ Database — Solutions to problems and troubleshooting efforts can be
found by searching our Frequently Asked Questions (FAQ) database.
Software Downloads — Download software updates, drivers, and patches.
4 Triton Plus - Analog Stereo Audio - User Manual
Page 5

Contents
Triton Plus Analog Stereo Audio Router. . . . . . . . . . . . . . . . . . . . . . . . . . . . . . . . . 7
Product Overview. . . . . . . . . . . . . . . . . . . . . . . . . . . . . . . . . . . . . . . . . . . . . . . . . . . . . . 7
Product Versions . . . . . . . . . . . . . . . . . . . . . . . . . . . . . . . . . . . . . . . . . . . . . . . . . . . . . 8
Connection Details . . . . . . . . . . . . . . . . . . . . . . . . . . . . . . . . . . . . . . . . . . . . . . . . . . . . 10
Power Supply Pinouts . . . . . . . . . . . . . . . . . . . . . . . . . . . . . . . . . . . . . . . . . . . . . . . 11
Configuration. . . . . . . . . . . . . . . . . . . . . . . . . . . . . . . . . . . . . . . . . . . . . . . . . . . . . . . . . 12
Router Level . . . . . . . . . . . . . . . . . . . . . . . . . . . . . . . . . . . . . . . . . . . . . . . . . . . . . . . . 12
Router Mode. . . . . . . . . . . . . . . . . . . . . . . . . . . . . . . . . . . . . . . . . . . . . . . . . . . . . . . . 13
Router Mode on NxN Square Routers . . . . . . . . . . . . . . . . . . . . . . . . . . . . . . . . 13
Power Alarm . . . . . . . . . . . . . . . . . . . . . . . . . . . . . . . . . . . . . . . . . . . . . . . . . . . . . . . 22
Power-up Mode . . . . . . . . . . . . . . . . . . . . . . . . . . . . . . . . . . . . . . . . . . . . . . . . . . . . . 22
Configuring Output on Single Bus Panels. . . . . . . . . . . . . . . . . . . . . . . . . . . . . . . 22
LED Status Indication. . . . . . . . . . . . . . . . . . . . . . . . . . . . . . . . . . . . . . . . . . . . . . . . . . 23
Start Up . . . . . . . . . . . . . . . . . . . . . . . . . . . . . . . . . . . . . . . . . . . . . . . . . . . . . . . . . . . . 23
Alarm States . . . . . . . . . . . . . . . . . . . . . . . . . . . . . . . . . . . . . . . . . . . . . . . . . . . . . . . . 23
Router Communication . . . . . . . . . . . . . . . . . . . . . . . . . . . . . . . . . . . . . . . . . . . . . . . . 24
Serial Connection. . . . . . . . . . . . . . . . . . . . . . . . . . . . . . . . . . . . . . . . . . . . . . . . . . . . 24
Maximum Cable Length (RS-232) . . . . . . . . . . . . . . . . . . . . . . . . . . . . . . . . . . . . 25
NCB Connection . . . . . . . . . . . . . . . . . . . . . . . . . . . . . . . . . . . . . . . . . . . . . . . . . . . . 25
Connecting Control Panels. . . . . . . . . . . . . . . . . . . . . . . . . . . . . . . . . . . . . . . . . . 25
Pinout and Cable Type . . . . . . . . . . . . . . . . . . . . . . . . . . . . . . . . . . . . . . . . . . . . . 25
Termination Plug . . . . . . . . . . . . . . . . . . . . . . . . . . . . . . . . . . . . . . . . . . . . . . . . . . 26
Control Bus Structure . . . . . . . . . . . . . . . . . . . . . . . . . . . . . . . . . . . . . . . . . . . . . . 27
Maximum Distance Between NCB Devices. . . . . . . . . . . . . . . . . . . . . . . . . . . . 27
Connecting Signals to the Triton Plus Router. . . . . . . . . . . . . . . . . . . . . . . . . . . . . . 28
Audio Signals . . . . . . . . . . . . . . . . . . . . . . . . . . . . . . . . . . . . . . . . . . . . . . . . . . . . . . . 28
Control Panel Operation . . . . . . . . . . . . . . . . . . . . . . . . . . . . . . . . . . . . . . . . . . . . . . . 31
Button Description . . . . . . . . . . . . . . . . . . . . . . . . . . . . . . . . . . . . . . . . . . . . . . . . . . 31
A/V Toggle. . . . . . . . . . . . . . . . . . . . . . . . . . . . . . . . . . . . . . . . . . . . . . . . . . . . . . . 31
Panel Enable . . . . . . . . . . . . . . . . . . . . . . . . . . . . . . . . . . . . . . . . . . . . . . . . . . . . . . 32
Take On/Off . . . . . . . . . . . . . . . . . . . . . . . . . . . . . . . . . . . . . . . . . . . . . . . . . . . . . . 32
Take . . . . . . . . . . . . . . . . . . . . . . . . . . . . . . . . . . . . . . . . . . . . . . . . . . . . . . . . . . . . . 32
Output . . . . . . . . . . . . . . . . . . . . . . . . . . . . . . . . . . . . . . . . . . . . . . . . . . . . . . . . . . . 32
Input. . . . . . . . . . . . . . . . . . . . . . . . . . . . . . . . . . . . . . . . . . . . . . . . . . . . . . . . . . . . . 32
Specifications . . . . . . . . . . . . . . . . . . . . . . . . . . . . . . . . . . . . . . . . . . . . . . . . . . . . . . . . . 33
Triton Plus - Analog Stereo Audio - User Manual 5
Page 6

Contents
6 Triton Plus - Analog Stereo Audio - User Manual
Page 7

Triton Plus Analog Stereo
Audio Router
Product Overview
Thomson Grass Valley is proud to present the second generation of the
compact small and medium routing switcher family – Triton Plus. With
Triton Plus, Thomson Grass Valley now provides a stable and proven
product line including the most complete signal format and size offering
available.
With the new ultra-slim, multi-format and flexible product range, Triton
Plus fulfils the most demanding requirements from the professional broad
cast market.
This User Manual presents the features listed below, installation and operation procedures of the Analog Stereo Audio routers of the Triton Plus
range.
-
• Router range from 8x8 to 64x64
• RS-232 and NCB Control (RJ-45)
• Multi- single- and dual-bus control panels
• Ultra-slim frame depth
• Low power, high reliability design
• Redundant power supply system with front indicators
• Interoperability with existing Triton Plus routers
• Future-proof and flexible product range
Triton Plus provides many of the powerful control features that drove the
Triton Modular range to success. Triton Plus is ideal for general purpose
facilities, on-air routing, mobile outside broadcast applications, and sophisticated A/V applications.
Triton Plus - Analog Stereo Audio - User Manual 7
Page 8
Product Overview
Product Versions
The following versions of the Triton Plus Analog Stereo Audio Routers are
available:
• Analog Stereo Audio – 19 in., 1 RU, Depth - 5 cm (see Tab le 1)
• Analog Stereo Audio – 19 in., 2 RU, Depth - 5 cm (see Tab le 2)
• Analog Stereo Audio – 19 in., 4 RU, Depth - 5 cm (see Tab le 3)
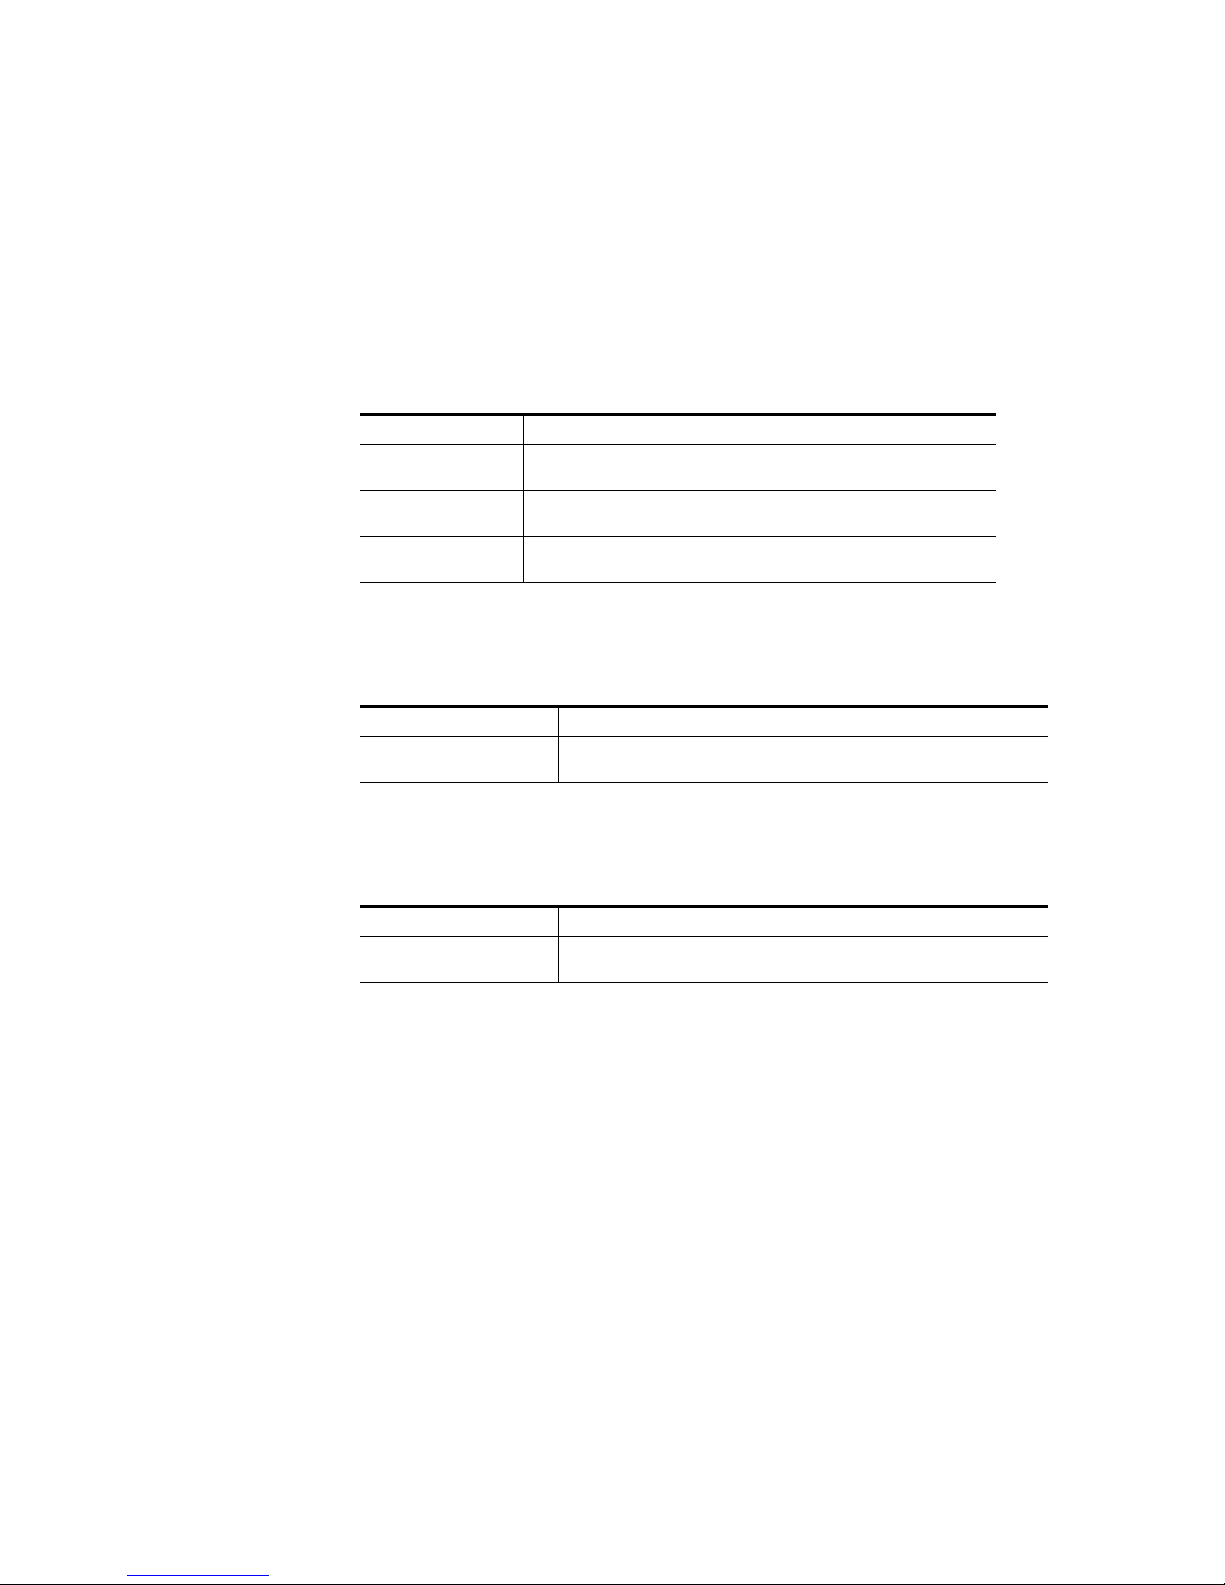
Table 1. Analog Stereo Audio – 19 in., 1 RU, Depth - 5 cm
Model Description
TPS-A0808/
TPS-A0808CP
TPS-A1616 /
TPS-A1616CP
TPS-A1602 /
TPS-A1602CP
8x8 Analog Stereo Audio Router (100MHz). Balanced audio in/out, router
partitioning, X-Y control panel (on CP version)
16x16 Analog Stereo Audio Router (100MHz). Balanced audio in/out, router
partitioning, X-Y control panel (on CP version)
16x2 Analog Stereo Audio Router (100MHz). Balanced audio in/out, router
partitioning, dual bus control panel (on CP version)
Table 2. Analog Stereo Audio – 19 in., 2 RU, Depth - 5 cm
Model Description
TPS-A3232/
TPS-A3232CP
Table 3. Analog Stereo Audio – 19 in., 4 RU, Depth - 5 cm
Model Description
TPS-A6464/
TPS-A6464CP
32x32 Analog Stereo Audio Router (100MHz). Balanced audio in/out, router partitioning, X-Y control panel (on CP version)
64x64 Analog Stereo Audio Router (100MHz). Balanced audio in/out, router partitioning, X-Y control panel (on CP version)
8 Triton Plus - Analog Stereo Audio - User Manual
Page 9
Product Overview
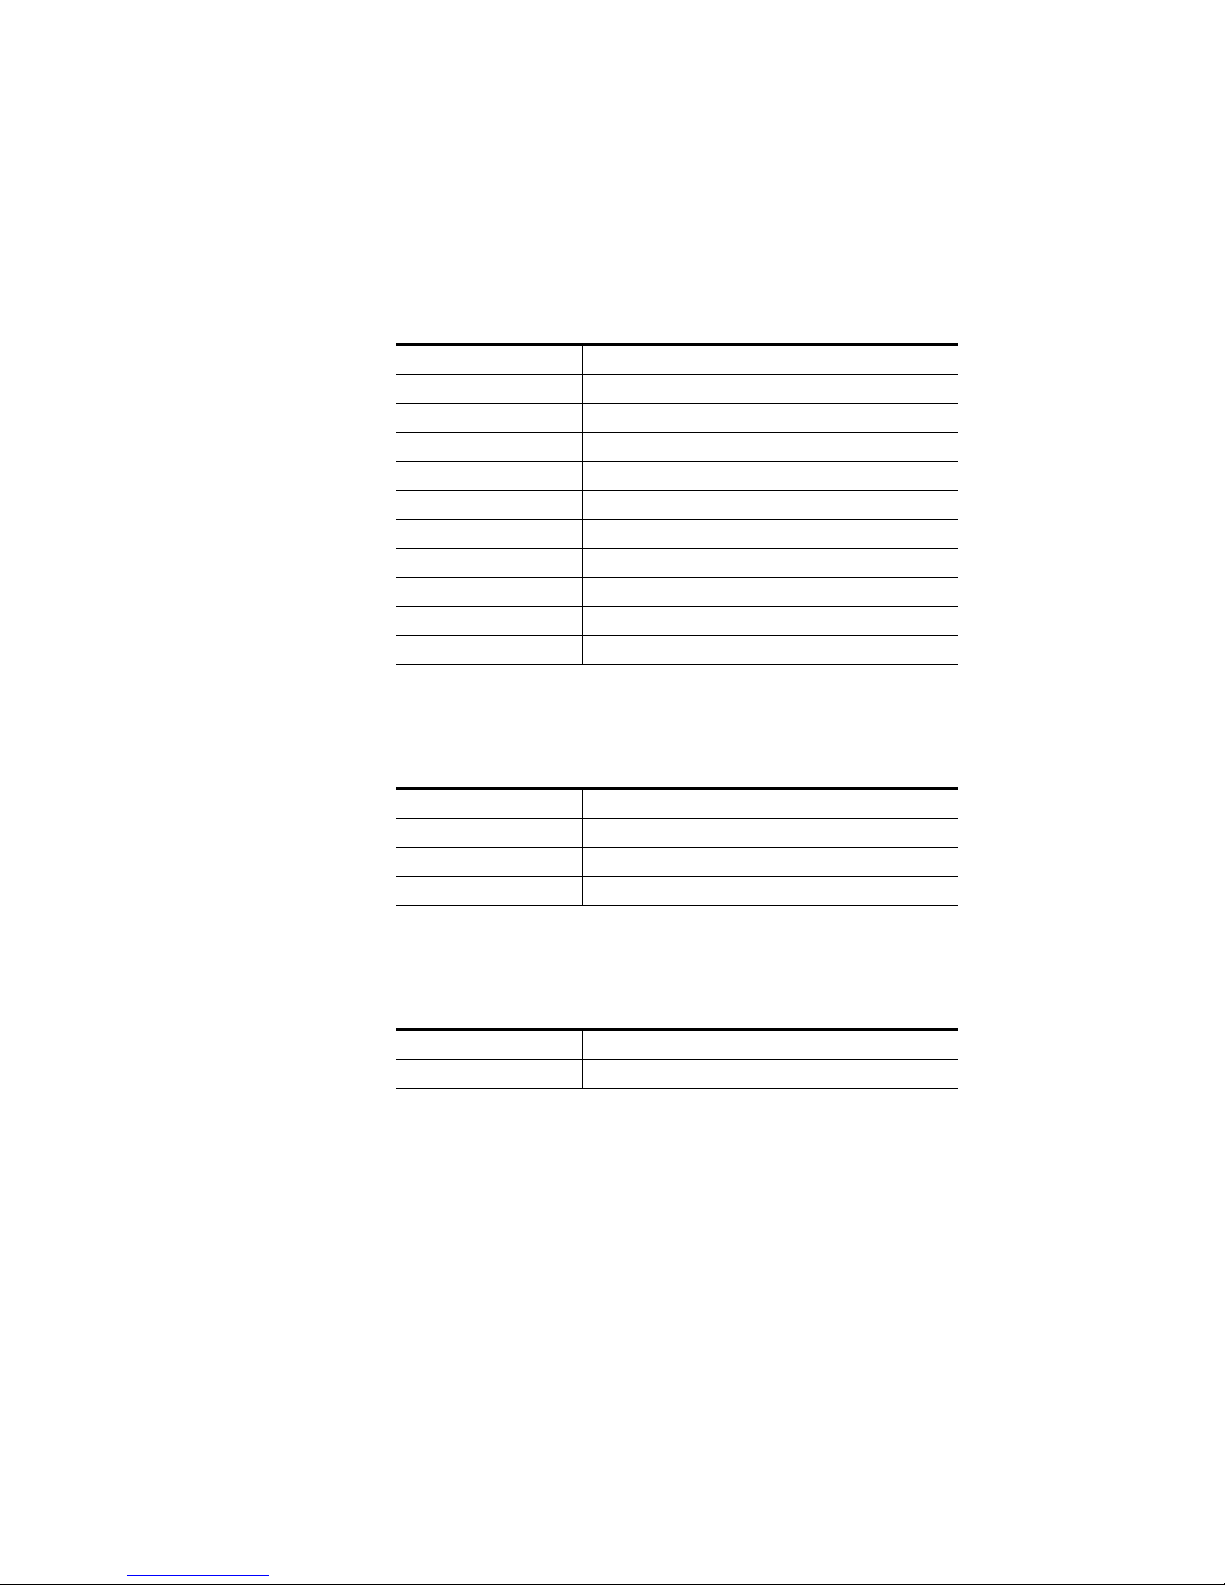
The following control panel versions are available for the Triton Plus series:
• 19 in. 1 RU (Tabl e 4 )
• 19 in. 2 RU (Tabl e 5 )
• 19 in. 4 RU (Tabl e 6 )
Table 4. 19 in. 1 RU Control Panels
Control Panel Model Descriptions
TPS-16XY-CP Multi bus X-Y 16x16 panel
TPS-8XY-CP Multi bus X-Y 8x8 panel
TPS-16D-CP Dual bus 16x2 panel
TPS-32S-CP Single bus 32x1 panel
TPS-32S-CP-GPI Single bus 32x1 panel with GPI/Joystick/Tally interface
TPS-16S-CP Single bus 16x1 panel
TPS-16S-CP-GPI Single bus 16x1 panel with GPI/Joystick/Tally interface
TPS-8S-CP Single bus 8x1 panel
TPS-8S-CP-GPI Single bus 8x1 panel with GPI/Joystick/Tally interface
TPS-16XY-CP Multi bus X-Y 16x16 panel
Table 5. 19 in. 2 RU Control Panels
Control Panel Model Descriptions
TPS-32XY-CP Multi bus X-Y 32x32 panel
TPS-64S-CP Single bus 64x1 panel
TPS-64S-CP-GPI Single bus 64x1 panel with GPI/Joystick/Tally interface
Table 6. 19 in. 4 RU Control Panels
Control Panel Model Descriptions
TPS-64XY-CP Multi bus X-Y 64x64 panel
Triton Plus - Analog Stereo Audio - User Manual 9
Page 10
Connection Details
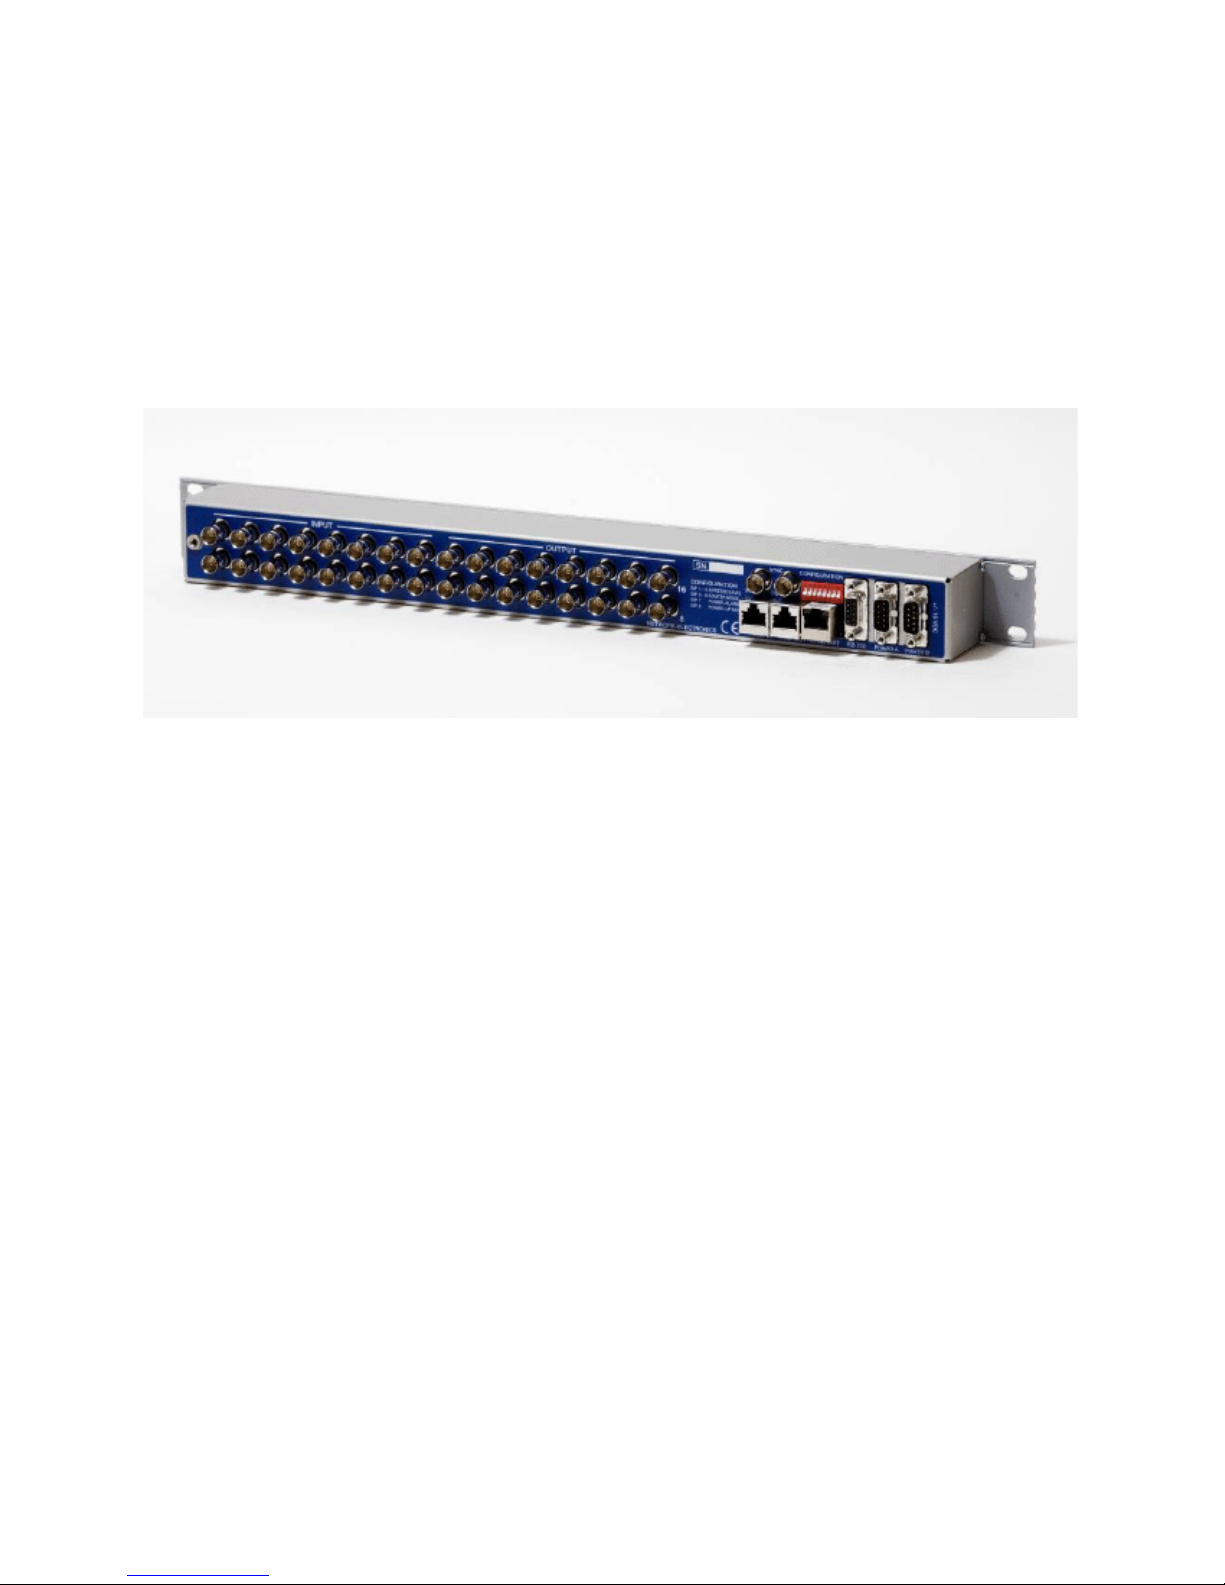
Connection Details
Available connectors at the back panel of the Triton Plus Routers are shown
Figure 1.
in
Note Figure 1 shows a 1 RU Triton Plus router. However, the connectors are iden-
Figure 1. Triton Router Connectors
tical to the 1 RU also on the 2 RU and 4 RU units. The only connectors that
differ are the applicable signal connectors.
• SYNC: Synchronization signal (in). Black burst/composite/tri-level
sync reference input with passive loop-through for vertical interval
switching.
• LOOP: Synchronization signal (out). Loop-through of SYNC input.
• NCB IN: Network Control Bus Input. The protocol of this bus is equal,
and compatible to the MIDI bus protocol.
• NCB OUT: Network Control Bus Output.
• ETHERNET: Not supported at this time.
• RS-232: RS-232 for external control protocols.
• POWER A: ±15VDC Power Input.
• POWER B: ±15VDC Power Input, redundant supply.
• CONFIGURATION: Configuration switches (8 pcs).
10 Triton Plus - Analog Stereo Audio - User Manual
Page 11

Power Supply Pinouts
The DB9 power pinouts for Triton Plus routers and Control Panels are
given in
Table 7. Power Supply Pinouts
Pin Number Description
Tab le 7.
1GND
2 Not Connected
3 Not Connected
4 +15 VDC
5 Not Connected
6 Not Connected
7 Not Connected
8-15 VDC
9 Not Connected
Connection Details
Triton Plus - Analog Stereo Audio - User Manual 11
Page 12

Configuration
Configuration
Router Level
In order to get an overview of the parts that form the Triton Plus Analog
Stereo Audio Router, this section highlights some of the main components.
Switches 1-4 on the configuration switch set the router’s level for communication with the Router Management System and other units in the NCB
system. The panels on the NCB dedicated to operate with the router must
be configured to the same level as that router.
If several routers are combined to form an Audio Follow Video, RGB or
similar system, these routers must be configured to the same level.
The levels can be switched according to the patterns given in Ta bl e 8. The
default level is 1.
Table 8. Level Switch Patterns
SW 1 SW 2 SW 3 SW 4 Level NCB Address
Off Off Off Off 1 0
Off Off Off
Off Off
Off Off
Off
Off
Off
Off
On
On
On
On
On On
On On
On On On
On On On On
On
On
On On
On On On
Off Off Off 9 8
Off Off
Off
Off
On
On On
Off Off 5 4
Off
On
On On
Off Off 13 12
Off
On
Off 3 2
On
Off 7 6
On
Off 11 10
On
Off 15 14
21
43
65
87
10 9
12 11
14 13
16 15
12 Triton Plus - Analog Stereo Audio - User Manual
Page 13

Router Mode
Router Mode on NxN Square Routers
Configuration
The Triton Plus A/V router allows switching in different modes.
For a 1 RU Triton Plus router you can choose among the modes given in
Tab le 9 .
Table 9. 1 RU Triton Plus Modes
Router Layers 8x8 Router 16x16 Router
1 layer 8x8 16x16
2 layers 4x4 8x8
3 layers N/A 5x5
4 layers 2x2 4x4
For a 2 RU Triton Plus router you can choose among the modes given in
Tab le 1 0.
Table 10. 2 RU Triton Plus Modes
Router Layers 32x32 Router
1 layer 32x32
2 layers 16x16
3 layers 10x10
4 layers 8x8
For a 4 RU Triton Plus router you can choose among the modes given in
Tab le 11.
Table 11. 4 RU Triton Plus Modes
Router Layers 32x32 Router
1 layer 64x64
2 layers 32x32
3 layers 21x21
4 layers 16x16
Triton Plus - Analog Stereo Audio - User Manual 13
Page 14

Configuration
Switches 5 - 6 on the configuration switch set the router’s mode. The Router
Management System software must be configured according to the mode
chosen on the router.
The default mode is 1 router layer (SW 5 and SW 6 off).
The modes can be switched according to the pattern given in Tab le 1 2
Table 12. SW 5 and SW 6 Router Modes
SW 5 SW 6 Router Mode
Off Off 1 router layer
Off On 2 router layers
On Off 3 router layers
On On 4 router layers
.
Based on the configuration above, the I/O is connected to the router
according to the following schemes in Tabl e 13 through Tab le 2 4 where the
physical limitations depend on the type of router that is purchased (8x8,
16x16, 32x32, or 64x64). Each table title identifies the number of router
layers based on the router type:
Table 13. 1 Router Layer
Signal Input Signal Output
1111
2222
3333
4444
5555
6666
7777
8888
... ... ... ...
16 16 16 16
17 17 17 17
... ... ... ...
32 32 32 32
33 33 33 33
... ... ... ...
64 64 64 64
14 Triton Plus - Analog Stereo Audio - User Manual
Page 15

Configuration
Table 14. 2 Router Layers Based on an 8x8 Router
Layer 1 Input Layer 1 Output
1111
2222
3333
4444
Layer 2 Input Layer 2 Output
1515
2626
3737
4848
Table 15. 2 Router Layers Based on an 16x16 Router
Layer 1 Input Layer 1 Output
1111
2222
3333
4444
5555
6666
7777
8888
Layer 2 Input Layer 2 Output
1919
210210
311311
412412
513513
614614
715715
816816
Triton Plus - Analog Stereo Audio - User Manual 15
Page 16

Configuration
Table 16. 2 Router Layers Based on an 32x32 Router
Layer 1 Input Layer 1 Output
1111
2222
3333
... ... ... ...
8888
... ... ... ...
... ... ... ...
16 16 16 16
Layer 2 Input Layer 2 Output
117117
218218
319319
... ... ... ...
824824
925925
... ... ... ...
16 32 16 32
Table 17. 2 Router Layers Based on an 64x64 Router
Layer 1 Input Layer 1 Output
1111
2222
3333
... ... ... ...
16 16 16 16
... ... ... ...
... ... ... ...
32 32 32 32
Layer 2 Input Layer 2 Output
133133
234234
335335
... ... ... ...
16 48 16 48
17 49 17 49
... ... ... ...
32 64 32 64
16 Triton Plus - Analog Stereo Audio - User Manual
Page 17

Table 18. 3 Router Layers Based on an 16x16 Router
Layer 1 Input Layer 1 Output
1111
2222
3333
4444
5555
Layer 2 Input Layer 2 Output
1616
2727
3838
4949
510510
Layer 3 Input Layer 3 Output
111111
212212
313313
414414
515515
Configuration
Table 19. 3 Router Layers Based on an 32x32 Router
Layer 1 Input Layer 1 Output
1111
2222
3333
... ... ... ...
10 10 10 10
Layer 2 Input Layer 2 Output
111111
212212
313313
... ... ... ...
10 20 10 20
Layer 3 Input Layer 3 Output
121121
222222
323323
... ... ... ...
10 30
1
Inputs/Outputs 31 and 32 are not used in this setup.
1
10 30
1
Triton Plus - Analog Stereo Audio - User Manual 17
Page 18

Configuration
Table 20. 3 Router Layers Based on an 64x64 Router
Layer 1 Input Layer 1 Output
1111
2222
3333
... ... ... ...
21 21 21 21
Layer 2 Input Layer 2 Output
122122
223223
324324
... ... ... ...
21 42 21 42
Layer 3 Input Layer 3 Output
143143
244244
345345
... ... ... ...
21 63
1
Input/Output 64 is not used in this setup.
1
21 63
1
Table 21. 4 Router Layers Based on an 8x8 Router
Layer 1 Input Layer 1 Output
1111
2222
Layer 2 Input Layer 2 Output
1313
2424
Layer 3 Input Layer 3 Output
1515
2626
Layer 4 Input Layer 4 Output
1717
2828
18 Triton Plus - Analog Stereo Audio - User Manual
Page 19

Configuration
Table 22. 4 Router Layers Based on an 16x16 Router
Layer 1 Input Layer 1 Output
1111
2222
3333
4444
Layer 2 Input Layer 2 Output
1515
2626
3737
4848
Layer 3 Input Layer 3 Output
1919
210210
311311
412412
Layer 4 Input Layer 4 Output
113113
214214
315315
416416
Triton Plus - Analog Stereo Audio - User Manual 19
Page 20

Configuration
Table 23. 4 Router Layers Based on an 32x32 Router
Layer 1 Input Layer 1 Output
1111
2222
... ... ... ...
8888
Layer 2 Input Layer 2 Output
1919
210210
... ... ... ...
816816
Layer 3 Input Layer 3 Output
117117
218218
... ... ... ...
824824
Layer 4 Input Layer 4 Output
125125
226226
... ... ... ...
832832
20 Triton Plus - Analog Stereo Audio - User Manual
Page 21

Configuration
Table 24. 4 Router Layers Based on an 64x64 Router
Layer 1 Input Layer 1 Output
1111
2222
... ... ... ...
16 16 16 16
Layer 2 Input Layer 2 Output
117117
218218
... ... ... ...
16 32 16 32
Layer 3 Input Layer 3 Output
133133
234234
... ... ... ...
16 48 16 48
Layer 4 Input Layer 4 Output
149149
250250
... ... ... ...
16 64 16 64
Triton Plus - Analog Stereo Audio - User Manual 21
Page 22

Configuration
Power Alarm
Power-up Mode
The power alarm can be switched with SW 7 according to the pattern given
in
Tab le 25. The default setting is power alarm disabled.
Table 25. SW 7 – Power Alarm
SW 7 Power Alarm
Off Disables power alarm
On Enables power alarm
Switch SW 8 on the configuration switch defines the power up mode on
NxN square routers. The Triton Plus router provides two modes for pow
ering up the system. The power up options can be switched according to
the following pattern given in
Table 26. SW 8 – Power Up Mode
SW 8 Power Up Mode
Off
On Switches all outputs to input 1.
Switches all outputs according to the buffered information in
the routers processor system.
Ta bl e 26:
-
Default setting switches all outputs according to the buffered information
in the routers processor system.
Configuring Output on Single Bus Panels
Refer to Input on page 32 for more information on configuring default
output to be controlled from a single bus control panel.
22 Triton Plus - Analog Stereo Audio - User Manual
Page 23

LED Status Indication
Start Up
The LED located at the front of the router indicates the status of the router.
At start-up, the LED will alternate between red (R) and green (G) every
500ms for about two seconds. After the start-up sequence the LED will
indicate the Alarm state of the router.
Alarm States
The LED can either be red (R), green (G), or have no light (N).
The LED state is described in Tab le 2 7 below with twenty letters, each representing 100ms, which totals an alarm sequence of two seconds. The X
indicates that the LED keeps the color it has the moment the alarm
sequence begins (green or no light).
LED Status Indication
Table 27. LED Alarm States
Description LED State Alarm Comment
Continuous Green Light GGGGG GGGGG GGGGG GGGGG
Long Red Blinking RRRRR NNNNN RRRRR NNNNN Power is too low
One Short Red Blink RXXXX XXXXX XXXXX XXXXX Power A failed
Two Short Red Blinks XXXXX XXXXX RXRXX XXXXX Power B failed
No Alarm
Status OK
Only active if power alarm
DIP is set.
Triton Plus - Analog Stereo Audio - User Manual 23
Page 24

Router Communication
Router Communication
You gain access to router for communication purposes by connecting the
router’s serial port to your computer.
Serial Connection
Connection can by made trough the serial port(s) of the router; see also Con-
nection Details on page 10 for connection details.
The communication parameters are configurable. Please refer to the protocol documentation of the appropriate communication/control protocol.
Example: The protocol parameters of the Triton Plus Compact routers are
as follows:
• Bit rate: 19200 bit/s
• Data bits: 8 bits
• Stop bits: 1
• Parity: No parity
For further detail concerning this protocol, please refer to the following
manual: Compact Router Control Protocol.
The DB9 female connector for the serial port(s) of the router has the following pinout (Tab le 2 8):
Table 28. Serial Connection Pinout
Pin # RS-232 Mode
1Not in use
2Tx
3Rx
4Not in use
5GND
6GND
7RTS
8CTS
9 Do Not Connect!
Note If the standard RS-232 cable specification (DCE) is followed:
A cable with Male+Male or Female+Female connectors at the cable ends is
used for Rx/Tx crossed connection.
A cable with Male+Female connectors at the cable ends is used for a straight
through connection.
24 Triton Plus - Analog Stereo Audio - User Manual
Page 25

Maximum Cable Length (RS-232)
IEEE has specified the maximum cable length for an RS-232 connection to
15m. Longer distances can be installed depending on the environmental
conditions of the installation site. It is the responsibility of the
installer/user to secure a proper installation of the RS-232 connection.
NCB Connection
Via the Network Control Bus system, several routers and control panels can
be interconnected.
Up to 16 levels of routers, or combinations of routers, can be controlled. The
NCB system and all RS-232 ports interchange the system status. This means
that any control system, either from Grass Valley, or from a third party
manufacturer, connected to any RS-232 port in the NCB loop, will have
access to all communication data on the bus.
Connecting Control Panels
Router Communication
To get a control panel working with a specific router, configure the control
panel to the same level as the router. Several panels can be configured to
control the same router. Panels can also be connected to a router via the
RS-232 interface. Please refer to your control panel manual for installation.
Pinout and Cable Type
Triton Plus routers and Control Panels use RJ-45 connectors for the
Network Control Bus ports. The following pinout shown in
used:
Table 29. RJ-45 Connector Pinouts
Pin # Description Illustration
1 Not Connected
2 Not Connected
3 Data (retour)
4Data
5Data
6 Data (retour)
7 Not Connected
8 Not Connected
Ta bl e 29 is
Triton Plus - Analog Stereo Audio - User Manual 25
Page 26

Router Communication
Pin 3 is connected to Pin 4 Pin 5 is connected to Pin 6
Termination Plug
The following connection example (Figure 2) shows connection of four
Triton Plus devices with RJ-45 connectors and bus termination:
Figure 2. Four Devices Connected Together Using RJ-45
Note Each device at the end of the chain has a termination plug, indicated with the
letter T. This termination plug must be inserted in the correct connection port.
If not, no NCB communication is possible.
The termination plug that is mentioned in the previous chapter is necessary
when you want to avoid closing the loop with a (long) cable.
The termination plug is a standard RJ-45 plug with the following internal
wiring shown in Figure 3.
Figure 3. RJ-45 Termination Plug Wiring
26 Triton Plus - Analog Stereo Audio - User Manual
Page 27

Control Bus Structure
The Network Control Bus structure follows the standard MIDI bus definition. The NCB is defined as a closed chain of units. This means that the NCB
OUT of the last unit must be connected to the NCB IN of the first unit in the
NCB chain. To avoid problems with the control of Triton Plus units the
installer/user has to assure that the bus structure is installed according to
this definition.
Note The total number of Triton Plus devices in an NCB chain is limited to 50.
Maximum Distance Between NCB Devices
The standard MIDI definition allows a maximum cable length of 200-250
meters between two devices. Longer distances can be made with MIDI
repeater units. To avoid grounding problems all NCB ports have opto-cou
pled inputs.
Router Communication
-
Triton Plus - Analog Stereo Audio - User Manual 27
Page 28

Connecting Signals to the Triton Plus Router
Connecting Signals to the Triton Plus Router
Audio Signals
The standard pinout for DB25 audio contacts is given in Tab le 30. This
pinout is used for both analog and digital audio routers.
Table 30. Standard Pinout for DB25 Audio Connector
Channel # DB25 Pin #
Hot + Cold (-) GND
1241225
2102311
321922
47208
518619
64175
715316
81142
All audio contacts used on the routers are female type.
The following tables indicate the order of the connectors on the rear of the
audio routers:
• Tab le 3 1: TPS-A6464 Audio Cabling (page 29)
• Tab le 3 2: TPS-A3232 Audio Cabling (page 29)
• Tab le 3 4: TPS-A0808 Audio Cabling (page 29)
• Tab le 3 5: A/V Toggle Button (page 31)
• Tab le 3 6: Pinout for OUTPUT CH.1-2 of TPS-A1602/A1602-CP
(page 30)
• Tab le 3 7: Pinout for Unbalanced Audio Connection (page 30)
28 Triton Plus - Analog Stereo Audio - User Manual
Page 29

Connecting Signals to the Triton Plus Router
Table 31. TPS-A6464 Audio Cabling
57-64 57-64 57-64 57-64
INPUT CH.1 OUTPUT CH.1 INPUT CH.2 OUTPUT CH.2
49-56 49-56 49-56 49-56
41-48 41-48 41-48 41-48
INPUT CH.1 OUTPUT CH.1 INPUT CH.2 OUTPUT CH.2
33-40 33-40 33-40 33-40
25-32 25-32 25-32 25-32
INPUT CH.1 OUTPUT CH.1 INPUT CH.2 OUTPUT CH.2
17-24 17-24 17-24 17-24
9-16 9-16 9-16 9-16
INPUT CH.1 OUTPUT CH.1 INPUT CH.2 OUTPUT CH.2
1-8 1-8 1-8 1-8
Table 32. TPS-A3232 Audio Cabling
25-32 25-32 25-32 25-32
INPUT CH.1 OUTPUT CH.1 INPUT CH.2 OUTPUT CH.2
17-24 17-24 17-24 17-24
9-16 9-16 9-16 9-16
INPUT CH.1 OUTPUT CH.1 INPUT CH.2 OUTPUT CH.2
1-8 1-8 1-8 1-8
Table 33. TPS-A1616 Audio Cabling
9-16 9-16 9-16 9-16
INPUT CH.1 OUTPUT CH.1 INPUT CH.2 OUTPUT CH.2
1-8 1-8 1-8 1-8
Table 34. TPS-A0808 Audio Cabling
CH.2 1-8 CH.2 1-8
INPUT OUTPUT
CH.1 1-8 CH.1 1-8
Triton Plus - Analog Stereo Audio - User Manual 29
Page 30

Connecting Signals to the Triton Plus Router
Table 35. TPS-A1602 Audio Cabling
1-2 9-16 9-16
OUTPUT CH.1-2
1
Note the pinout for OUTPUT CH.1-2 of the TPS-A1602/A1602-CP in Table 36 below.
Table 36. Pinout for OUTPUT CH.1-2 of TPS-A1602/A1602-CP
Channel # DB25 Pin #
Left CH.1 24 12 25
Left CH.2 10 23 11
Right CH.1 21 9 22
Right CH.2 7 20 8
If you want to use the Triton Plus audio router with unbalanced audio
signals you connect these signals according to Tabl e 37 .
1
Hot + Cold (-) GND
INPUT CH.1 OUTPUT CH.2
1-8 1-8
Table 37. Pinout for Unbalanced Audio Connection
Triton Plus
Device
+Audio
(-) Shield
GND Shield
Unbalanced Signal Connection
30 Triton Plus - Analog Stereo Audio - User Manual
Page 31

Control Panel Operation
Note This chapter is only applicable for routers with the optional local control
panel.
All local control panels are given a default configuration, which includes
the buttons
Output buttons are pre-configured.
Button Description
A/V Toggle
The A/V Toggle button enables/disables audio and video on a specified
address. The address can either be read from the DIP switches or be fixed.
The button toggles between three states.
Note If the button is pressed for more than 1 second, it will go into a fourth state
A/V Toggle, Panel Enable, Take On/Off, and Tak e. In addition, Input and
where both audio and video are disabled.
Control Panel Operation
In this state the button will be dimmed. If the button is pressed for more
than 1 second again, it will enable both audio and video if present. Refer to
Tab le 3 8.
Table 38. A/V Toggle Button
Button Color Video Enabled Audio Enabled
Yel low Yes Yes
Green Yes No
Red No Yes
Dimmed No No
If neither audio nor video is present, it will be marked as disabled and the
toggle state will not be used.
Toggle status changes will be stored in flash and used when the panel is
powered up later.
Triton Plus - Analog Stereo Audio - User Manual 31
Page 32

Control Panel Operation
Panel Enable
Take On/Off
Take
The panel will start up in a disabled state. In this state the button will be red
and all the other buttons will be disabled. When pressing the button the
panel will be enabled and the color will change to green. A status request
will also be sent to get information on active levels.
The Take On/Off button enables or disables the Take button. On first start-up
the
Take button is enabled. Later it will read the last status from the flash
memory.
The Take buttons LED is normally off. If the Take On/Off button is set to on, no
commands will be sent from the panel until the
last selected buttons and the
pressed and the command is sent from the panel.
Take button will blink, until the Take button is
Take button is pressed. The
Output
Input
An Output button is used for selecting an output. Selecting an output activates it, so that it is switched to the next input that is selected.
An Input button switches the active output to the selected input. If the Take
button is enabled, the switch will not be executed until
When switching using the Input button, all enabled audio- and video-levels
will be switched from the selected input to the active output.
Note The Input button can also be used to select the active output. This is useful
on single bus panels. When the panel is enabled, press the Panel Enable
button and hold it while selecting the active output by pressing an Input
button. Then release the Panel Enable button. The panel will now be disabled. Press the Panel Enable button again to enable it.
Take is pressed.
32 Triton Plus - Analog Stereo Audio - User Manual
Page 33

Specifications
Specifications
Note All specifications are subject to change without notice.
Table 39. Triton Plus Analog Stereo Audio Router Specifications
Parameter Value
Analog Audio
Supported Formats
Broadcast • N10, Pflichtenheft Nr. 3/5 1995
• Balanced analog audio 20Hz to 20kHz
• LTC time code
Electrical Signals
Frequency response
Gain
Crosstalk • < -100dB to 20kHz for 8x8 –32x32 routers
Click noise
THD+N • < 0.01% at +6dBu (40Hz to 20kHz)
Connector
Input impedance > 10k ohm
Input CMRR > 60dB up to 15kHz
Output impedance
Reference Inputs
(Synchronization of an audio router is not necessary, but an available feature for users who intend to switch this router
synchronized to video, using video synchronization signals).
Connector
Return loss • > 40dB (100kHz to 5MHz)
Signal format
Signal level
Switching field
Timing PAL: 30us ±5us after Hsync in Line 6
Power Supply
TPS-PWR-40 40W power supply unit for 8x8 – 16 x16 versions
TPS-PWR-90 90W power supply unit for 32x32 and 64x64 versions
AC supply voltage range
AC mains connector
DC output • +15V, max. 2.2A/-15V, max 1.35A. Maximum 43W for 8x8 – 16x16 versions
DC connector
Status monitoring Via LED in front of router/CP
20Hz to 20kHz: ±0.5dB
0dB ±0.3dB
• < -90dB up to 20kHz (< -100dB up to 5kHZ) for TPS-A6464/TPDS/A6464-CP
routers
< 50dBu
• < 0.01% at +22dBu (40Hz to 20kHz)
• DB25 female
< 66 ohm
75 ohm BNC female, loop-through
• > 35dB (5 to 10MHz
NTSC or PAL Black Burst
Nominal 1.0V p-p
Field 1
NTSC: 30us ±5us after Hsync in Line 10
100-240VAC, 50-60Hz
Max 1.6A (TPS-PWR-40)/Max 3W (TPS-PWR-90)
IEC 320
• +15V, max. 4A/-15V, max 2.5A. Maximum 90W for 32x32 and 64x64 versions
DB9, female
Triton Plus - Analog Stereo Audio - User Manual 33
Page 34

Specifications
Table 39. Triton Plus Analog Stereo Audio Router Specifications
Parameter Value
Control
Standard Features
Serial port
Connector DB9, female
NCB ports For integration with Triton Plus compact router configuration
Connectors (2) RJ-45 (1 in/1 out)
Ethernet 10/100BaseT Ethernet is not supported at this time
Connector RJ-45
Synchronization • Analog Black Burst, Looped; Both PAL and NTSC supported
Connector(s)
Optional Features
Control panel • Optional, built-in control panel available
Environmental
Equipment will meet guaranteed performance specifications under the following conditions:
Operating room temperature range 0º C to 45º C
Operating relative humidity range < 95% (non-condensing)
Equipment will operate without damage under the following conditions:
Temperature range -10º C to 55º C
Relative humidity range < 95% (non-condensing)
Mechanical
Dimensions HxWxD = 44x483x50mm (19 in., 1 RU)
Safety/Emission standards Compliant with CE EN55103-1 and 2
RS-232 for protocol conversion, to Triton Plus compact control protocol, or to
3rd party protocols
• Tri-level, Looped; For HD signal formats only
• Distribution of synchronization signals between several routers
BNC
• External control panels available
HxWxD = 88x483x50mm (19 in., 2 RU)
HxWxD = 176x483x50mm (19 in., 4 RU)
34 Triton Plus - Analog Stereo Audio - User Manual
 Loading...