

Page 1

Thunder User Guide
4026-99M00-100
9 April 2015
Page 2

Notices
Copyright and Trademark Notice
Copyright © 2014 - 2015, Grass Valley. All rights reserved.
Belden, Belden Sending All The Right Signals, and the Belden logo are trademarks or
egistered trademarks of Belden Inc. or its affiliated companies in the United States and
r
other jurisdictions. Grass Valley and Thunder are trademarks or registered trademarks of
Grass Valley. Belden Inc., Grass Valley, and other parties may also have trademark rights in
other terms used herein.
Terms and Conditions
Please read the following terms and conditions carefully. By using Thunder documentation,
you agree to the following terms and conditions.
Grass Valley hereby grants permission and license
product manuals for their own internal business use. Manuals for Grass Valley products may
not be reproduced or transmitted in any form or by any means, electronic or mechanical,
including photocopying and recording, for any purpose unless specifically authorized in
writing by Grass Valley.
A Grass Valley manual may have been revised to reflect changes made to the product
during its manufac
product. Care should be taken to ensure that one obtains the proper manual version for a
specific product serial number.
Information in this document is subject to change without
commitment on the part of Grass Valley.
Warranty information is available in the Support section of the Grass Valley Web site
(w
ww.grassvalley.com).
turing life. Thus, different versions of a manual may exist for any given
to owners of Thunder to use their
notice and does not represent a
Title Thunder User Guide
Part Number 4026-99M00-100
Revision 9 April 2015, 9:35 am
ii
Page 3

Safety Compliance
The power supplies in this equipment comply with the stated requirements:
Supply for the TNR-FRAME (power supply model ESC60US12)
This equipment complies with the requirements of:
The power cord supplied with this equipment meets the appropriate national standards for
ountry of destination.
the c
Conformité aux normes de sécurité
Cet équipement est conforme aux exigences de:
TUV EN 60950-1, A11: 2009
IEC 60601-1, 3rd edition
CSA/UL 60950-1, 2nd edition.
Thunder
User Guide
TUV EN 60950-1, A11: 2009
IEC 60601-1, 3rd edition
CSA/UL 60950-1, 2nd edition
Les cordons d'alimentation fournis avec l’appareil répondent aux normes nationales
ap
propriées du pays destinataire.
[es] Conformidad en seguridad eléctrica
Este equipo cumple con las exigencias de la
TUV EN 60950-1, A11: 2009
IEC 60601-1, 3rd edition
CSA/UL 60950-1, 2nd edition
Los cables de alimentación incluidos con el equipo cumplen
apropiadas para el país de destino.
[pt] Conformidade de segurança elétrica
Este equipamento está em conformidade com os requisitos da:
TUV EN 60950-1, A11: 2009
IEC 60601-1, 3rd edition
CSA/UL 60950-1, 2nd edition.
Os cabos de alimentação fornecidos com est
nacionais adequadas para o país de destino.
e equipamento encontram as normas
con las normas nacionales
iii
Page 4

Notices
Supply for the TNR-BP-AAMP-TX16 panel (power supply model ECL30UT02-P)
This equipment complies with the requirements of:
TUV EN 60950-1, A12: 2011
IEC 60950-1, 2nd edition
CSA/UL 60950-1, 2nd edition
The power cord supplied with this equipment meets the appropriate national standards for
ountry of destination.
the c
[fr] Conformité aux normes de sécurité
Cet équipement est conforme aux exigences de:
TUV EN 60950-1, A12: 202011
IEC 60950-1, 2nd edition
CSA/UL 60950-1, 2nd edition.
Les cordons d'alimentation fournis avec l’appareil répondent aux normes nationales
propriées du pays destinataire.
ap
[es] Conformidad en seguridad eléctrica
Este equipo cumple con las exigencias de la
TUV EN 60950-1, A12: 202011
IEC 60950-1, 2nd edition
CSA/UL 60950-1, 2nd edition.
Los cables de alimentación incluidos con el equipo cumplen
apropiadas para el país de destino.
[pt] Conformidade de segurança elétrica
Este equipamento está em conformidade com os requisitos da:
TUV EN 60950-1, A12: 202011
IEC 60950-1, 2nd edition
CSA/UL 60950-1, 2nd edition.
Os cabos de alimentação fornecidos com est
nacionais adequadas para o país de destino.
Safety of Laser Modules
This equipment incorporates modules containing Class 1lasers. These modules
are certified by the manufacturer to comply with:
– IEC/EN 60825-1 Safety of laser products
– IEC 60950-1 Safety of information technology equipment
con las normas nacionales
e equipamento encontram as normas
iv
Page 5
Thunder
User Guide
[fr] Sécurité laser
L’appareil comprend des modules laser de classe 1. Ces modules sont certifiés conformes
aux normes suivantes par le fabricant
:
– IEC/EN 60825-1 Sécurité des appareils à laser
– IEC 60950-1 Sécurité du matériel informatique
[es] Seguridad por los módulos laser
Este equipo incorpora módulos láser de la Clase 1.
Estos módulos están certificados por el fabricante para cumplir con:
– IEC/EN 60825-1 Seguridad de los productos láser
– IEC 60950-1 Seguridad de los equipos de tecnología de la información
[pt] Segurança por módulo de laser
Este equipamento incorpora módulos que contêm laser da classe 1. Estes módulos são
certificados pelo fabricante em conformidade com:
– IEC/EN 60825-1 Segurança de equipamentos laser
– IEC 60950-1 Segurança de equipamento de tecnologia da informação
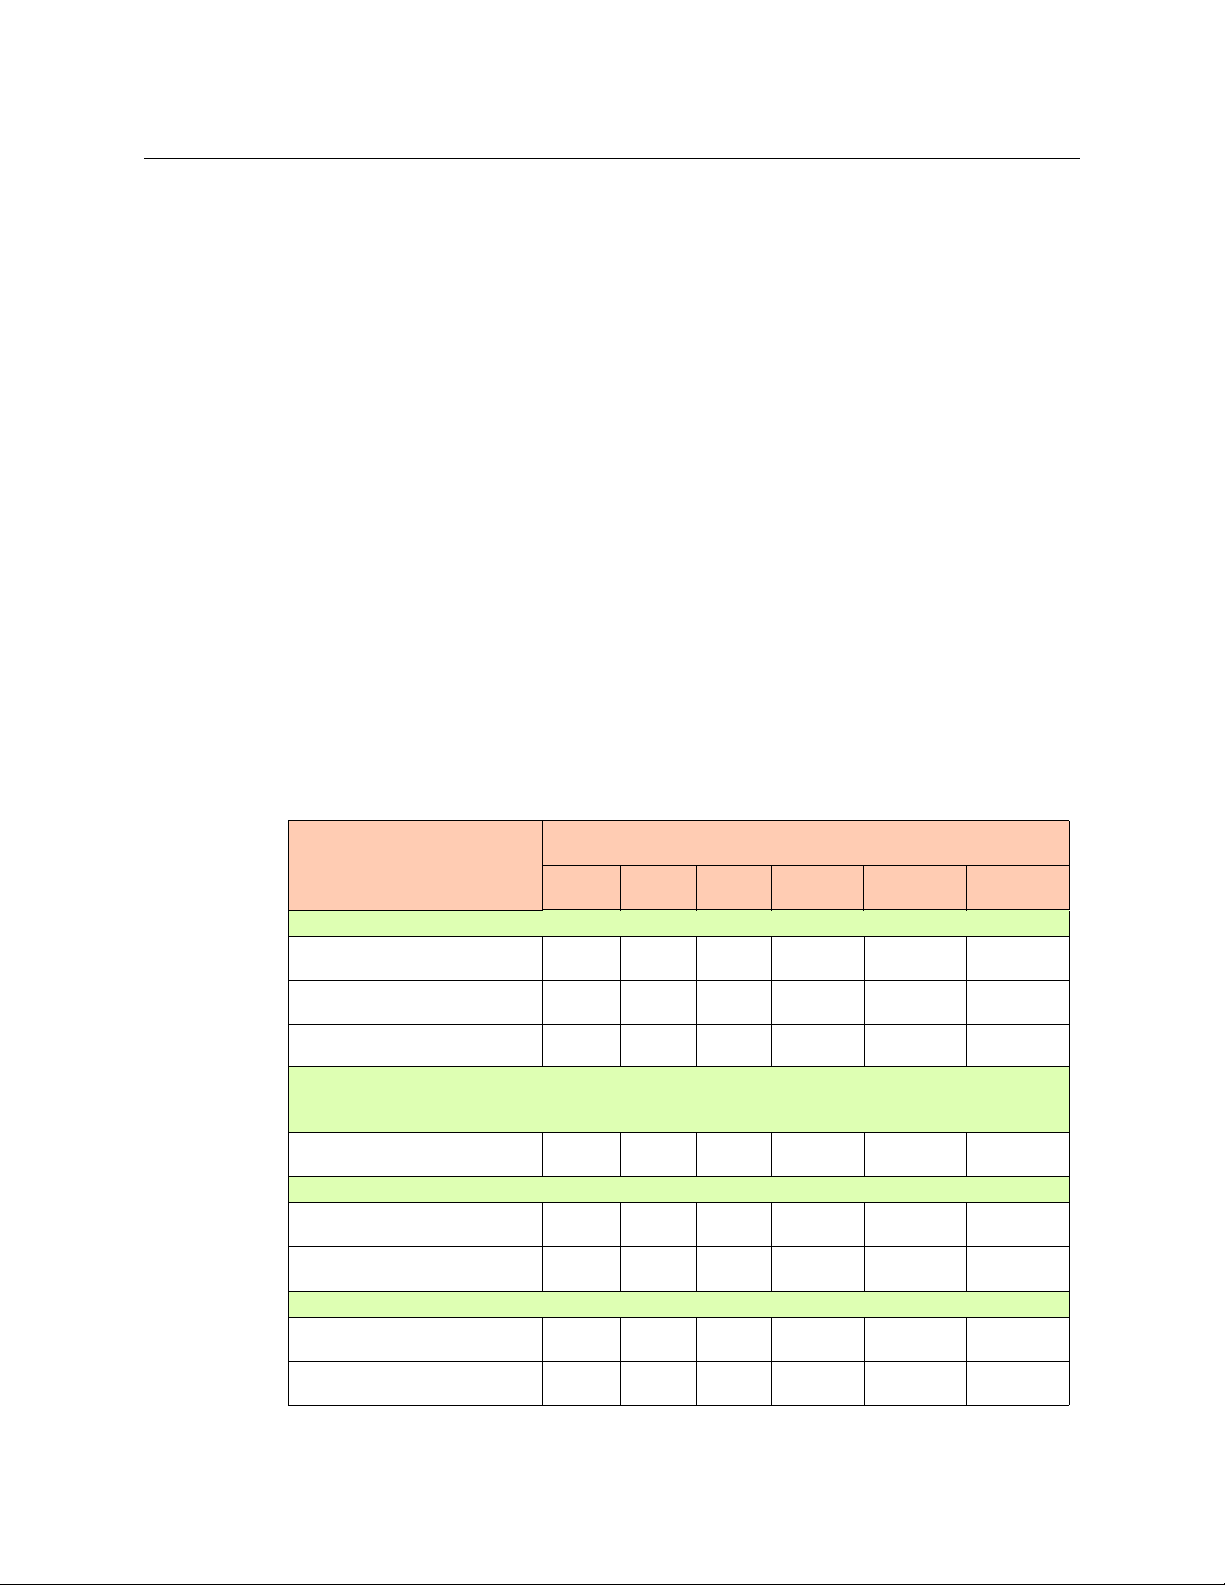
Restriction on Hazardous Substances (RoHS)
部件名称
Part name
ADAP-AC12V-DIN
电缆及电缆组件
Cables and Cable Assemblies
电路模块
Circuit Modules
塑料和聚合物零件
Plastic and Polymeric Parts
CA-D25F-8XLR3M, CA-D25M-8XLR3F, CA-D25MM-40, CA-D25MM-80, CA-HD26MF-80, UFP-2LC, UFP2SC, UFP-2SCA, UFP-2ST, UFP-4LC, UFP-4SC, UFP-4SCA, UFP-4ST, UFP-MX2, UFP-NOC2, UFPNOC4
电缆及电缆组件
Cables and Cable Assemblies
TNR-BC-AA-RX8, TNR-BC-DATA-4 , TNR-BC-GPI-8, TNR-BP-AAMP-TX16, TNR-BP-AAMP-TX8
电缆及电缆组件
Cables and Cable Assemblies
电路模块
Circuit Modules
TNR-BC-AA-TX8, TNR-BP-ICM-8
电缆及电缆组件
Cables and Cable Assemblies
电路模块
Circuit Modules
铅
(Pb)
XOO O O O
XOO O O O
XOO O O O
XOO O O O
XOO O O O
XOO O O O
XOO O O O
XOO O O O
Toxic or Hazardous Substances and Elements
汞
(Hg)
有毒有害物质或元素
镉
(Cd)
六价铬
(Cr6)
多溴联苯
(PBB)
多溴二苯
(PBDE)
v
Page 6
Notices
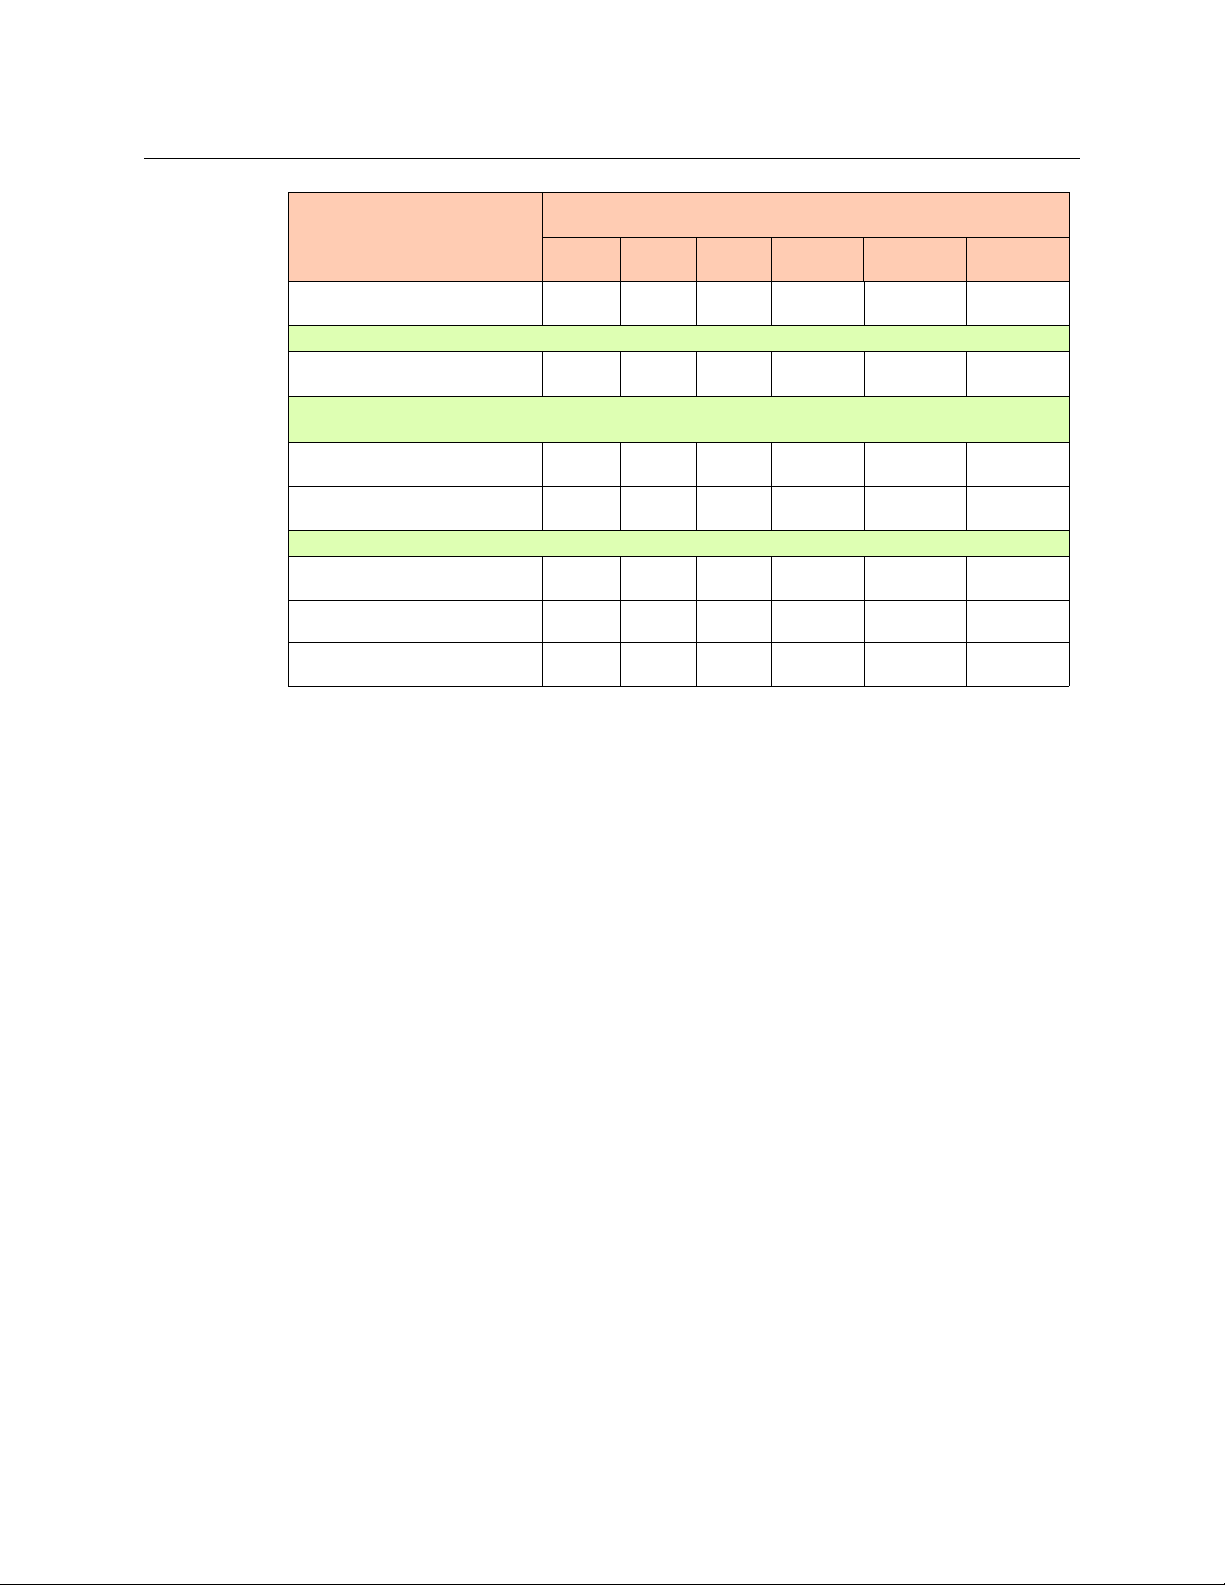
有毒有害物质或元素
部件名称
Part name
金属零件
Metal Parts
TNR-BC-AES-RX4 , TNR-BC-AES-TX4
电路模块
Circuit Modules
TNR-BP-AA-RX16, TNR-BP-AA-RX8, TNR-BP-AA-TR16, TNR-BP-AA-TX16, TNR-BP-AA-TX8, TNR-BPAES-RX-4BNC, TNR-BP-AES-TR-8BNC, TNR-BP-AES-TX-4BNC, TNR-BP-DATA-48, TNR-BP-DATA-88
电路模块
Circuit Modules
金属零件
Metal Parts
TNR-FRAME
电缆及电缆组件
Cables and Cable Assemblies
组装装置
Fan Assemblies
金属零件
Metal Parts
O: 表示该有毒有害物质在该部件所有均质材料中的含量均在 SJ/T 11363-2006 规定的限量要求以下。
O: Indicates that this toxic or hazardous substance contained in all of the homogeneous materials for this part is
below the limit requirement in SJ/T11363-2006.
X: 表示该有毒有害物质至少在该部件的某一均质材料中的含量超出 SJ/T 11363-2006 规定的限量要求。
X: Indicates that this toxic or hazardous substance contained in at least one of the homogeneous materials for
this part is above the limit requirement in SJ/T11363-2006.
铅
(Pb)
XOO O O O
XOO O O O
XOO O O O
XOO O O O
XOO O O O
XOO O O O
XOO O O O
Toxic or Hazardous Substances and Elements
汞
(Hg)
镉
(Cd)
六价铬
(Cr6)
多溴联苯
(PBB)
多溴二苯
(PBDE)
This statement is based on information provided by suppliers of our components and
collected through Grass Valley’s environmental management system. Grass Valley believes
this environmental information to be correct but cannot guarantee its completeness or
accuracy, as it is based on data received from sources outside the company. All
specifications are subject to change without notice.
技术条款解释:
此声明所依据之数据由 Grass Valley 环境管理部门向我们的部件供应商获取。Grass Valley
公司相信此信息的正确性,但由于数据来源于公司外部,我们无法保证它的完整和准确。
所有这些特性可能在未获通知的情况下更改。
Important Safeguards and Notices
This section provides important safety guidelines for operators and service personnel.
Specific warnings and cautions appear throughout the manual where they apply. Please
read and follow this important information, especially those instructions related to the risk
of electric shock or injury to persons.
[fr] Mesures de sécurité et avis importants
La présente section fournit des consignes de sécurité importantes pour les opérateurs et le
personnel de service. Des avertissements ou mises en garde spécifiques figurent dans le
vi
Page 7
Thunder
User Guide
manuel, dans les sections où ils s’appliquent. Prenez le temps de bien lire les consignes et
assurez-vous de les respecter, en particulier celles qui sont destinées à prévenir les
décharges électriques ou les blessures.
[es] Medidas de seguridad y avisos importantes
Esta sección proporciona pautas de seguridad importantes para los operadores y el
personal de servicio. Advertencias y precauciones específicas aparecen en el manual para
su aplicación. Por favor, lea y siga esta importante información, especialmente aquellas
instrucciones relacionadas con el riesgo de descarga eléctrica o lesiones a las personas.
[pt] Salvaguardas e avisos importantes
Esta seção fornece diretrizes de segurança importantes para os operadores e pessoal de
serviço. Avisos e cuidados específicos estão listados no manual para sua aplicação. Por
favor, leia e siga esta informação importante, especialmente aquelas instruções
relacionadas ao risco de choque elétrico ou ferimentos.
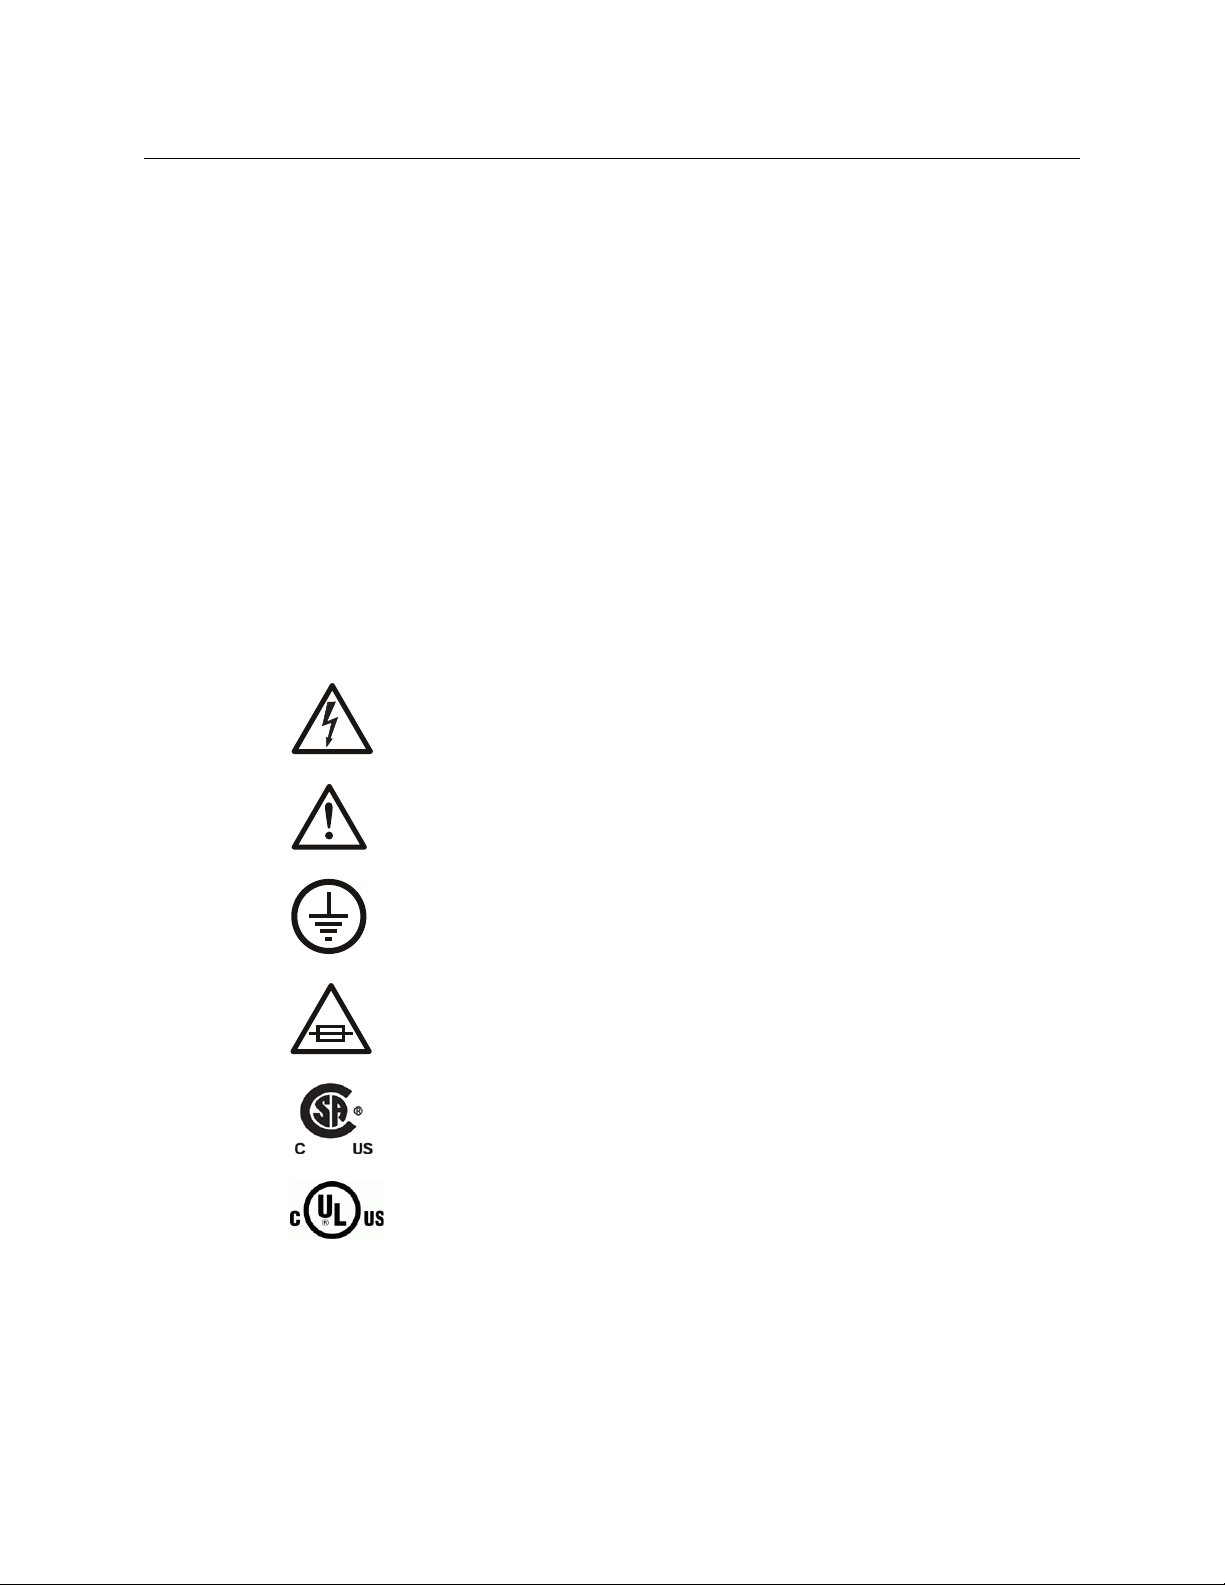
Symbols and Their Meanings
The lightning flash with arrowhead symbol within an equilateral triangle alerts the
user to the presence of dangerous voltages within the product’s enclosure that
may be of sufficient magnitude to constitute a risk of electric shock to persons.
The exclamation point within an equilateral triangle alerts the user to the
presence of important operating and maintenance/service instructions.
The earth ground symbol represents a protective grounding terminal. Such a
terminal must be connected to earth ground prior to making any other
connections to the equipment.
The fuse symbol indicates that the fuse referenced in the text must be replaced
with one having the ratings indicated.
The presence of this symbol in or on Grass Valley equipment means that it has
been designed, tested and certified as complying with applicable Canadian
Standard Association (CSA) regulations and recommendations for USA/Canada.
The presence of this symbol in or on Grass Valley equipment means that it has
been designed, tested and certified as complying with applicable Underwriters
Laboratory (UL) regulations and recommendations for USA/Canada.
vii
Page 8
Notices
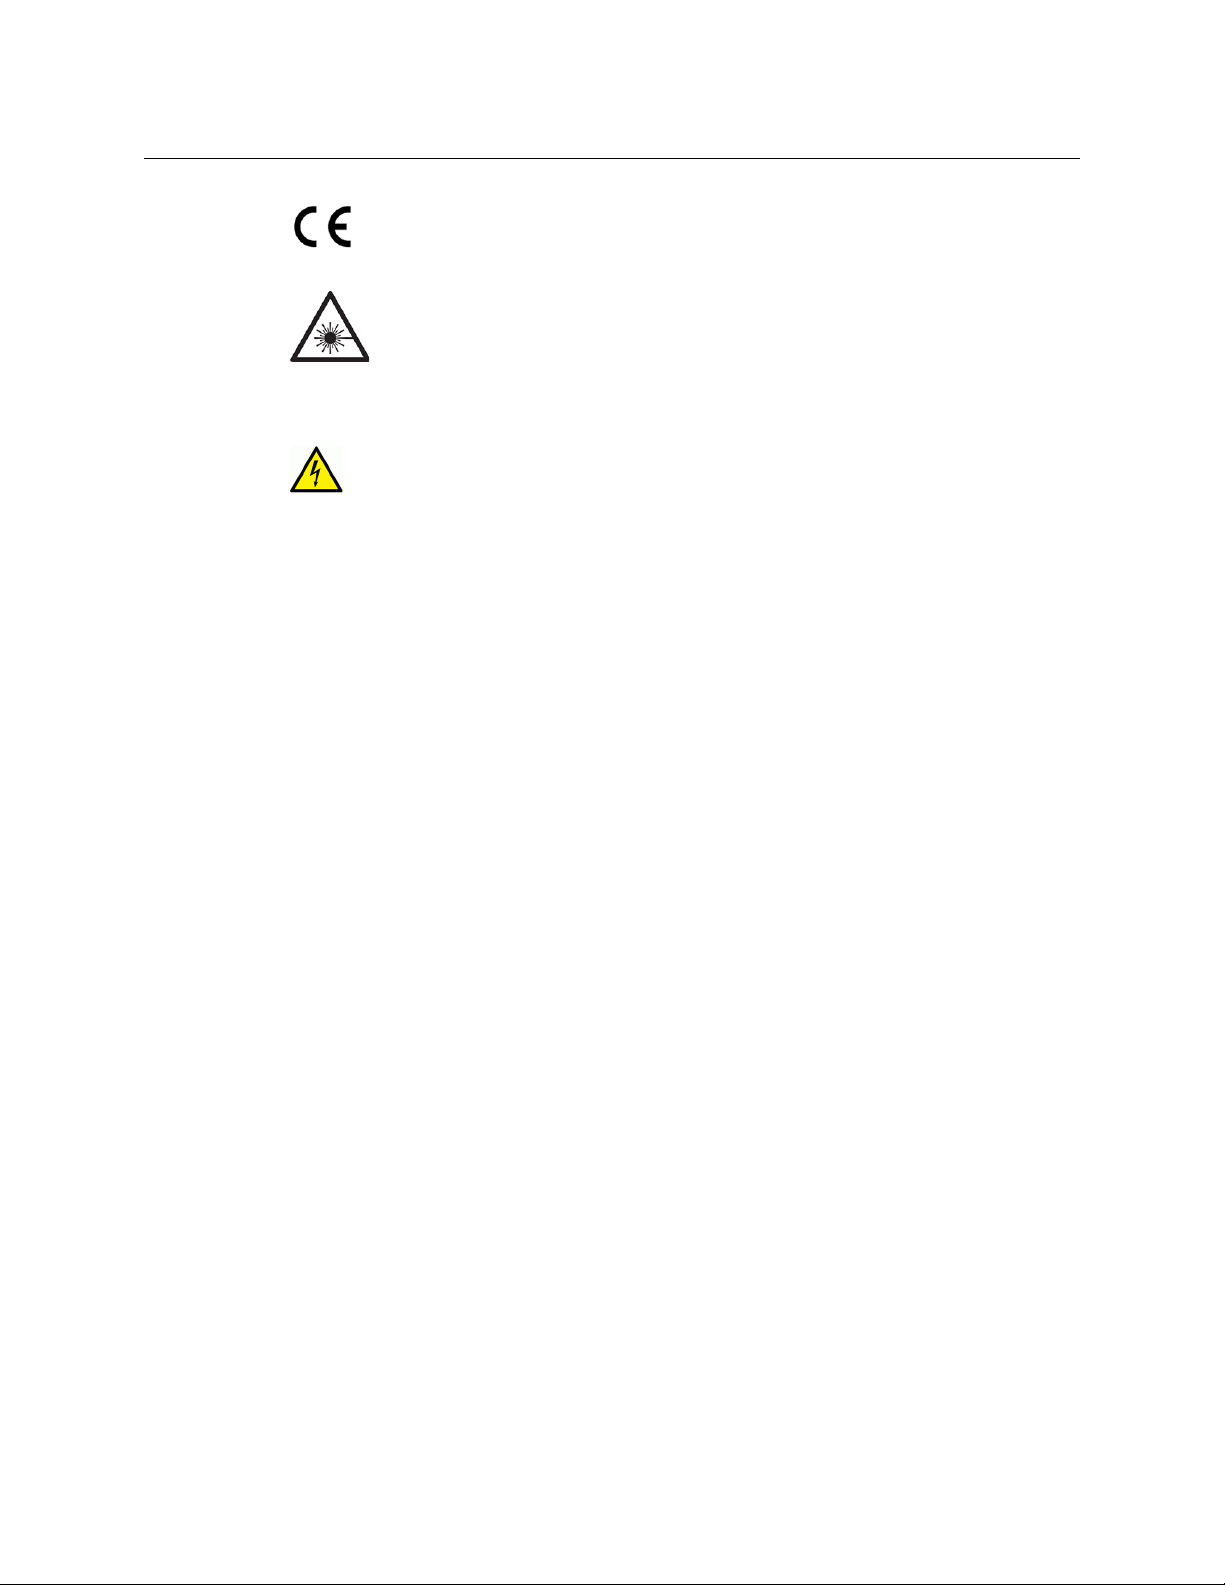
The presence of this symbol in or on Grass Valley equipment means that it has
been designed, tested and certified as essentially complying with all applicable
European Union (CE) directives.
The presence of this symbol in or on Grass Valley product means that it complies
with safety of laser product applicable standards.
Warnings
A warning indicates a possible hazard to personnel, which may cause injury or
death. Observe the following general warnings when using or w
equipment:
• Appropriately listed/certified mains sup
ply power cords must be used for the
connection of the equipment to the mains voltage at either 120 V AC or 240 V AC.
• This product relies on the building's installation for short-circuit (over-current)
pr
otection. Ensure that a fuse or circuit breaker for 120 V AC or 240 V AC is used on the
ase conductors.
ph
• Any instructions in this manual that requir
e opening the equipment cover or enclosure
are for use by qualified service personnel only.
• Heed all warnings on the unit and in the operating instructions.
• Do not use this equipment in or near water.
• This equipment is grounded through the grounding conductor of the power cords. To
a
void electrical shock, plug the power cords into a properly wired receptacle before
connecting the equipment inputs or outputs.
• Route power cords and other cables so they ar
e not likely to be damaged.
• Disconnect power before cleaning the equipment. Do not use liquid or aerosol
cleaners; use only a damp cloth.
• Dangerous voltages may exist at several points in this equipment. To avoid injury, do
not touch exposed connec
• Do not wear rings or wristwatches when troubleshoot
tions and components while power is on.
ing high current circuits such as
the power supplies.
• To avoid fire hazard, use only the specified fuses with the correct type number, voltage
and curr
ent ratings as referenced in the appropriate locations in the service
instructions or on the equipment. Always refer fuse replacements to qualified service
personnel.
• To avoid explosion, do not operate this equipment in an explosive atmosphere.
• Have qualified service personnel perform safety checks after any service.
orking on this
viii
[fr] Avertissements
• Un cordon d’alimentation dûment homologué doit être utilisé pour connecter
l’appareil à une tension de secteur de 120 V CA ou 240 V CA.
• La protection de ce produit contre les cour
ts-circuits (surintensités) dépend de
l’installation électrique du bâtiment. Assurez-vous qu'un fusible ou un disjoncteur pour
120 V CA ou 240 V CA est utilisé sur les conducteurs de phase.
Page 9

Thunder
User Guide
• Dans le présent manuel, toutes les instructions qui nécessitent d’ouvrir le couvercle de
l’équipement sont destinées exclusivement au personnel technique qualifié.
• Respectez tous les avertissements figurant sur l’appareil et dans les instructions
d’utilisation.
• Ne pas utiliser cet appareil dans l’eau ou à proximité d’un point d’eau.
• Cet équipement est mis à la terre par le conducteur de mise à la terre des cordons
d’alimentation. Pour éviter les chocs électriques, branchez les cordons d’alimentation
sur une prise correctement câblée avant de brancher les entrées et sorties de
l’équipement.
• Acheminez les cordons d’alimentation et autres câbles de façon à ce qu’ils ne risquent
pas d’être endommagés.
• Coupez l’alimentation avant de nettoyer l’équipement. Ne pas utiliser de nettoyants
liquides ou en aérosol. Utilisez uniquement un chiffon humide.
• Des tensions dangereuses peuvent exister en plusieurs points dans cet équipement.
Pour éviter toute blessure, ne touchez pas aux connexions ou aux composants exposés
lorsque l’appareil est sous tension.
• Avant de procéder à toute opération d’entretien ou de dépannage visant des circuits à
courant élevé (e.g., les blocs d’alimentation), enlevez tous vos bijoux (notamment vos
bagues et votre montre).
• Pour éviter tout risque d’incendie, utilisez uniquement les fusibles du type et du calibre
indiqués dans la documentation ou sur l’équipement. Confiez le remplacement de
fusibles au personnel technique qualifié.
• Ne pas utiliser cet appareil dans une atmosphère explosive.
• Après tout travail d’entretien ou de réparation, faites effectuer des contrôles de sécurité
par le personnel technique qualifié.
[es] Advertencias
• Un cable de alimentación aprobado deberá ser utilizado para la conexión del equipo a
la tensión de red de 120
V CA o 240 V CA.
• Este producto depende de la instalación del edificio para la protección de
cortocircuitos (sobre-corriente). Asegúrese que un fusible o un interruptor térmico de
V CA o 240 V CA se utiliza en los conductores de fase.
120
• Todas las instrucciones de este manual que requieren abrir la tapa del equipo se llevará
a cabo por personal técnico calificado.
• Respete todas las advertencias en el equipo y las instrucciones de funcionamiento.
• No utilice este producto en el agua o cerca de este.
• Este equipo está conectado a tierra a través del conductor de puesta a tierra de los
cables de alimentación. Para evitar una descarga eléctrica, enchufe el cable de
alimentación a un tomacorriente debidamente instalado antes de conectar las
entradas y salidas del equipo.
• Instale los cables de alimentación y otros cables de forma de evitar ser dañados.
• Desconecte la alimentación antes de limpiar el equipo. No use limpiadores líquidos o
aerosoles, utilizar un paño húmedo.
ix
Page 10

Notices
• Pueden existir tensiones peligrosas en varios puntos de este equipo. Para evitar
lesiones, no toque las conexiones y componentes expuestos cuando la unidad está con
alimentación.
• No use anillos o relojes al solucionar problemas de circuitos de alta corriente como
fuen
tes de alimentación.
• Para evitar el riesgo de incendios, utilice sólo el fusible in
dicado con el número de tipo
correcto, el voltaje y la corriente que se hace referencia en los lugares apropiados en las
instrucciones de los servicios o el equipo. Siempre consulte el reemplazo del fusible a
personal calificado.
• Para evitar explosiones, no utilice este equipo en una atmósfera explosiva.
• Deje al personal calificado realizar las v
erificaciones de seguridad después de un
servicio.
[pt] Advertências
• Um cabo de alimentação aprovado deve ser utilizado para ligar o equipamento à
tensão da rede de 120 V CA ou 240 V CA.
• Este produto baseia-se na instalação do edifício para proteção por curto-circuito
(
sobrecarga de corrente). Certifique-se de que um fusível ou disjuntor para 120 V CA ou
0 V CA é utilizado nos condutor
24
es de fase.
• Todas as instruções contidas neste manual, que exigem a abertura da tampa do
equipamen
• Preste atenção a todos os avisos no equipament
to será realizada por pessoal qualificado.
o e instruções de operação.
• Não use este produto em ou perto da água.
• Este equipamento é aterrado através do condutor de aterramento do cabo de
alimenta
ção. Para evitar choque elétrico, conecte o cabo de alimentação a uma tomada
devidamente instalada antes de ligar as entradas e saídas do dispositivo.
• Instale os cabos de alimentação e os outros cabos de modo a evitar danos.
• Desligue a alimentação antes de limpar o equipamento
. Não use detergentes líquidos
ou aerossóis, usar um pano úmido.
• Tensões perigosas podem existir em vários po
ntos deste equipamento. Para evitar
ferimentos, não toque as conexões e componentes expostos quando o aparelho está
ligado.
• Não usar anéis ou relógios ao solucionar pr
oblemas de circuitos de alta tensão, tais
como fontes de alimentação.
• Para evitar o risco de incêndio, utilize apenas o
número especificado de fusível de tipo
correto de tensão e corrente a que se refere o manual de serviço adequado. Referem-se
sempre trocar o fusível por pessoal qualificado.
• Para evitar a explosão, não utilize este equipamento em uma atmosfera explosiva.
• Deixe o pessoal qualificado executar verific
ações de segurança depois de um serviço.
Cautions
A caution indicates a possible hazard to equipment that could result in equipment
damage. Observe the following cautions when operating or working on this
ment:
equip
x
Page 11

Thunder
User Guide
• This equipment is meant to be installed in a restricted access location.
• When installing this equipment, do not attach the power cord to building surfaces.
• To reduce the risk of electric shock, do not perform any servicing other than that
contained in the operating instructions unless you are qualified to do so. Refer all
servicing to qualified service personnel. Servicing should be done in a static-free
environment.
• To prevent damage to equipment when replacing fuses, locate and correct the
problem that caused the fuse to blow before re-applying power.
• Use only the specified replacement parts.
• Follow static precautions at all times when handling this equipment.
• Products that have no on/off switch, and use an external power supply must be
installed in proximity to a main power outlet that is easily accessible.
[fr] Mises en garde
• L’appareil est conçu pour être installé dans un endroit à accès restreint.
• Au moment d’installer l’équipement, ne fixez pas les cordons d’alimentation aux
surfaces intérieures de l’édifice.
• Pour réduire le risque de choc électrique, n'effectuez pas de réparations autres que
celles qui sont décrites dans le présent manuel, sauf si vous êtes qualifié pour le faire.
Confiez les réparations à un technicien qualifié. La maintenance doit se réaliser dans un
milieu libre d’électricité statique.
• Pour éviter d'endommager l'équipement lors du remplacement de fusibles, localisez la
source de la panne et corrigez la situation avant de rétablir le courant.
• Employez uniquement les pièces de rechange recommandées par le fabricant.
• Veillez à toujours prendre les mesures de protection antistatique appropriées quand
vous manipulez l’équipement.
• Les produits qui n'ont pas d’interrupteur marche-arrêt et qui disposent d’une source
d’alimentation externe doivent être installés à proximité d'une prise de courant facile
d’accès.
[es] Precauciones
• Este equipo está destinado a ser instalado en un lugar de acceso restringido.
• Al instalar este equipo, no sujete el cable de alimentación a la superficie del edificio.
• No realice reparaciones que no se encuentren en las instrucciones de funcionamiento a
menos que esté calificado para hacerlo. Confíe las reparaciones a personal técnico
calificado. El mantenimiento debe realizarse en un ambiente libre de estática.
• Para evitar daños en el equipo al sustituir los fusibles, primero localizar y corregir el
problema que causó que el fusible se funda antes de aplicar la alimentación de nuevo.
• Utilice únicamente repuestos específicos.
• Siga las precauciones DES en todo momento al manipular este equipo.
• Los productos que no tienen interruptor de encendido/apagado, y utilizan una fuente
de alimentación externa deben instalarse cerca de una toma de corriente de fácil
acceso.
xi
Page 12

Notices
[pt] Precauções
• Este material destina-se a ser instalado em um acesso restrito.
• Quando instalar o equipamento
, não fixar o cabo de alimentação em superfícies do
edifício.
• Não faça reparações que não estão no manual
de instruções, a menos que você estiver
qualificado. Solicite a assistência de pessoal qualificado. A manutenção deve ser
realizada em um ambiente livre de estática.
• Para evitar danos ao equipamento ao substituir fusív
eis, primeiro localizar e corrigir o
problema que causou o fusível fundir antes de aplicar energia novamente.
• Use unicamente partes específicas.
• Siga as precauções DES em todos os momentos ao manusear este equipamento.
• Os produtos que não têm um
interruptor de ligar/desligar, e usam uma fonte de
alimentação externa devem ser instalados perto de uma tomada elétrica de fácil
acesso.
Electrostatic Discharge (ESD) Protection
Electrostatic discharge occurs when electronic components are improperly
handled and can result in intermittent failur
affecting an electrical circuit. When you remove and replace any card from a frame
always follow ESD-prevention procedures:
• Ensure that the frame is electrically connected
or any other means if available.
• Wear an ESD wrist strap ensuring that it makes good skin contact. Connect the
ounding clip to an unpainted surface of the chassis frame to safely ground unwanted
gr
ESD voltages. If no wrist strap is available, ground yourself by touching the unpainted
metal part of the chassis.
• For safety, periodically check the resistance value of the antistatic strap, which should
between 1 and 10 megohms.
be
• When temporarily storing a car
d make sure it is placed in an ESD bag.
• Cards in an earth grounded metal frame or casing do not require any special ESD
pr
otection.
e or complete damage adversely
to earth ground through the power cord
xii
[fr] Protection contre les décharges électrostatiques (DES)
Une décharge électrostatique peut se produire lorsque des composants électroniques ne
sont pas manipulés de manière adéquate, ce qui peut entraîner des défaillances
intermittentes ou endommager irrémédiablement un circuit électrique. Au moment de
remplacer une carte dans un châssis, prenez toujours les mesures de protection
antistatique appropriées :
• Assurez-vous que le châssis est relié électriquement à la terre par le cordon
d'
alimentation ou tout autre moyen disponible.
• Portez un bracelet antistatique et assur
ez-vous qu'il est bien en contact avec la peau.
Connectez la pince de masse à une surface non peinte du châssis pour détourner à la
terre toute tension électrostatique indésirable. En l’absence de bracelet antistatique,
déchargez l’électricité statique de votre corps en touchant une surface métallique non
peinte du châssis.
Page 13

Thunder
User Guide
• Pour plus de sécurité, vérifiez périodiquement la valeur de résistance du bracelet
antistatique. Elle doit se situer entre 1 et 10 mégohms.
• Si vous devez mettre une carte de côté, assurez-vous de la ranger dans un sac
protecteur antistatique.
• Les cartes qui sont reliées à un châssis ou boîtier métallique mis à la terre ne
nécessitent pas de protection antistatique spéciale.
[es] Protección contra descargas electrostáticas (DES)
La descarga electrostática se produce cuando los componentes electrónicos se manipulan
de forma incorrecta pudiendo causar una falla intermitente o total afectando un circuito
eléctrico. Al quitar y reemplazar una tarjeta de un chasis siempre siga los procedimientos
para prevenir la DES:
• Asegúrese de que el chasis está conectado eléctricamente a tierra a través del cable de
alimentación o cualquier otro medio si está disponible.
• Use una pulsera de DES asegurando que tiene buen contacto con la piel. Conecte la
pinza de puesta a tierra a una superficie sin pintar del chasis para desviar a tierra
cualquier voltaje de DES indeseable. Si ninguna pulsera está disponible, conéctese a
tierra tocando la parte metálica sin pintar del chasis.
• Para su seguridad, verifique periódicamente el valor de la resistencia de la pulsera
antiestática, que debe estar entre 1 y 10 megaohmios.
• Al guardar temporalmente una tarjeta electrónica asegúrese que está colocado en una
bolsa de DES.
• Las tarjetas que están conectadas a un chasis de o caja de metal a tierra, no requieren
una protección especial para la DES.
[pt] Proteção contra descargas eletrostáticas (DES)
DES ocorre quando os componentes eletrônicos são manipulados de forma inadequada e
pode causar falha intermitente ou completa afetando um circuito elétrico. Remover e
substituir um cartão eletrônico do chassi siga sempre os procedimentos para evitar DES:
• Certifique-se de que o chassi é eletricamente aterrado através do cabo de alimentação
ou qualquer outro meio, se disponível.
• Utilize uma pulseira DES assegurando que você tenha um bom contato com a pele.
Conecte o clipe à terra a uma superfície não pintada do chassi para desviar qualquer
tensão indesejável de DES. Se nenhuma pulseira está disponível, faça o aterramento
tocando a parte metálica não pintada do chassi.
• Por segurança, verificar periodicamente o valor da resistência da pulseira antiestática,
que deve ser entre 1 e 10 megohms.
• Por temporariamente salvar um cartão eletrônico, certifique-se de que ele é colocado
em um saco de DES.
• As cartas que estão ligados a um chassis ou caixa de metal ligada à terra, não
necessitam de proteção especial para o DES.
xiii
Page 14

Notices
Electromagnetic Compatibility
This equipment has been tested for verification of compliance with FCC Part 15,
Subpart B requirements for class A digital devices.
Note: This equipment has been tested and found to comply with the limits
for a Class A digital device, pursuant to Part 15 of the FCC rules. These limits
are designed to provide reasonable protection against harmful interference
when the equipment is operated in a commercial environment. This
equipment generates, uses, and can radiate radio frequency energy, and, if
not installed and used in accordance with the instruction manual, may cause
harmful interference to radio communications. Operation of this equipment
in a residential area is likely to cause harmful interference in which case the
user will be required to correct the interference at his own expense.
This equipment has been tested and found to comply with the requirements of
the EMC directive 2004/108/EC:
• EN 55022 Class A Radiated and conducted emissions
• EN 61000-4-2 Electrostatic discharge immunity
• EN 61000-4-3 Radiated, radio-frequency, electromagnetic field immunity
• EN 61000-4-8 Power frequency magnetic field immunity
• EN 61000-4-11 Voltage dips, short interruptions and voltage variations
immunit
y
xiv
Page 15

Table of Contents
1 Introduction to Thunder . . . . . . . . . . . . . . . . . . . . . . . . . . . . . . . . 1
Introduction. . . . . . . . . . . . . . . . . . . . . . . . . . . . . . . . . . . . . . . . . . . . . . . . . . . . . . . . . . . . . . . . . . . . . . . 1
Key Features and Benefits . . . . . . . . . . . . . . . . . . . . . . . . . . . . . . . . . . . . . . . . . . . . . . . . . . . . . . . . . 2
System Overview . . . . . . . . . . . . . . . . . . . . . . . . . . . . . . . . . . . . . . . . . . . . . . . . . . . . . . . . . . . . . . . . . 2
System Components . . . . . . . . . . . . . . . . . . . . . . . . . . . . . . . . . . . . . . . . . . . . . . . . . . . . . . . . . . 3
2 Thunder System Components . . . . . . . . . . . . . . . . . . . . . . . . . . . 7
Thunder Frame. . . . . . . . . . . . . . . . . . . . . . . . . . . . . . . . . . . . . . . . . . . . . . . . . . . . . . . . . . . . . . . . . . . . 7
ThunderBolt Cards and Breakout Panels . . . . . . . . . . . . . . . . . . . . . . . . . . . . . . . . . . . . . . . . . . . . 8
Analog Audio IN . . . . . . . . . . . . . . . . . . . . . . . . . . . . . . . . . . . . . . . . . . . . . . . . . . . . . . . . . . . . . . 8
Analog Audio OUT . . . . . . . . . . . . . . . . . . . . . . . . . . . . . . . . . . . . . . . . . . . . . . . . . . . . . . . . . . . . 9
DATA IN/OUT . . . . . . . . . . . . . . . . . . . . . . . . . . . . . . . . . . . . . . . . . . . . . . . . . . . . . . . . . . . . . . . .11
GPI IN/OUT . . . . . . . . . . . . . . . . . . . . . . . . . . . . . . . . . . . . . . . . . . . . . . . . . . . . . . . . . . . . . . . . . .12
Breakout Panels . . . . . . . . . . . . . . . . . . . . . . . . . . . . . . . . . . . . . . . . . . . . . . . . . . . . . . . . . . . . . . . . . .13
Analog Audio Breakout Panels - Passive . . . . . . . . . . . . . . . . . . . . . . . . . . . . . . . . . . . . . .13
Analog Audio Breakout Panels - Active Inputs . . . . . . . . . . . . . . . . . . . . . . . . . . . . . . . . .13
Data and GPI Breakout Panels 14
Intercom . . . . . . . . . . . . . . . . . . . . . . . . . . . . . . . . . . . . . . . . . . . . . . . . . . . . . . . . . . . . . . . . . . . . . . . . .14
4-wire (balanced). . . . . . . . . . . . . . . . . . . . . . . . . . . . . . . . . . . . . . . . . . . . . . . . . . . . . . . . . . . . .15
Clear-Com . . . . . . . . . . . . . . . . . . . . . . . . . . . . . . . . . . . . . . . . . . . . . . . . . . . . . . . . . . . . . . . . . . .16
Nulling Procedure . . . . . . . . . . . . . . . . . . . . . . . . . . . . . . . . . . . . . . . . . . . . . . . . . . . . . . . .16
Powered (Wet) and Unpowered (Dry) Intercom Systems . . . . . . . . . . . . . . . . . . .17
RTS Telex. . . . . . . . . . . . . . . . . . . . . . . . . . . . . . . . . . . . . . . . . . . . . . . . . . . . . . . . . . . . . . . . . . . . .17
Breakout Panel . . . . . . . . . . . . . . . . . . . . . . . . . . . . . . . . . . . . . . . . . . . . . . . . . . . . . . . . . . . . . .18
Installing/Removing Intercom Modules . . . . . . . . . . . . . . . . . . . . . . . . . . . . . . . . . . . . . . .18
3 System Implementation . . . . . . . . . . . . . . . . . . . . . . . . . . . . . . . 21
Installation . . . . . . . . . . . . . . . . . . . . . . . . . . . . . . . . . . . . . . . . . . . . . . . . . . . . . . . . . . . . . . . . . . . . . .21
Connection Details . . . . . . . . . . . . . . . . . . . . . . . . . . . . . . . . . . . . . . . . . . . . . . . . . . . . . . . . . . . . . . .22
Operation . . . . . . . . . . . . . . . . . . . . . . . . . . . . . . . . . . . . . . . . . . . . . . . . . . . . . . . . . . . . . . . . . . . . . . . .29
User Interface . . . . . . . . . . . . . . . . . . . . . . . . . . . . . . . . . . . . . . . . . . . . . . . . . . . . . . . . . . . . . . . .29
Active Analog Audio Breakout Panels - Adjustment . . . . . . . . . . . . . . . . . . . . . . . . . . .33
4 Specifications . . . . . . . . . . . . . . . . . . . . . . . . . . . . . . . . . . . . . . . . . 37
Thunder Frame Specifications . . . . . . . . . . . . . . . . . . . . . . . . . . . . . . . . . . . . . . . . . . . . . . . . . . . .37
General . . . . . . . . . . . . . . . . . . . . . . . . . . . . . . . . . . . . . . . . . . . . . . . . . . . . . . . . . . . . . . . . . . . . . .37
Data/GPI I/O on rear panel connector . . . . . . . . . . . . . . . . . . . . . . . . . . . . . . . . . . . . . . . . .37
Electro-Optical . . . . . . . . . . . . . . . . . . . . . . . . . . . . . . . . . . . . . . . . . . . . . . . . . . . . . . . . . . . . . . .39
Mechanical/Environmental . . . . . . . . . . . . . . . . . . . . . . . . . . . . . . . . . . . . . . . . . . . . . . . . . . .40
Audio Specifications . . . . . . . . . . . . . . . . . . . . . . . . . . . . . . . . . . . . . . . . . . . . . . . . . . . . . . . . . . . . .40
Analog Audio IN Bolt . . . . . . . . . . . . . . . . . . . . . . . . . . . . . . . . . . . . . . . . . . . . . . . . . . . . . . . . .40
Analog Audio OUT Bolt . . . . . . . . . . . . . . . . . . . . . . . . . . . . . . . . . . . . . . . . . . . . . . . . . . . . . .41
xv
Page 16

Table of Contents
Analog Audio End-to-End Performance . . . . . . . . . . . . . . . . . . . . . . . . . . . . . . . . . . . . . . .41
Active Audio Input Breakout Panel . . . . . . . . . . . . . . . . . . . . . . . . . . . . . . . . . . . . . . . . . . .41
Intercom Expansion Panel . . . . . . . . . . . . . . . . . . . . . . . . . . . . . . . . . . . . . . . . . . . . . . . . . . . .44
Data Specifications . . . . . . . . . . . . . . . . . . . . . . . . . . . . . . . . . . . . . . . . . . . . . . . . . . . . . . . . . . . . . . .45
Data Bolt Card . . . . . . . . . . . . . . . . . . . . . . . . . . . . . . . . . . . . . . . . . . . . . . . . . . . . . . . . . . . . . . .45
GPI Bolt Card . . . . . . . . . . . . . . . . . . . . . . . . . . . . . . . . . . . . . . . . . . . . . . . . . . . . . . . . . . . . . . . .46
Contact Us . . . . . . . . . . . . . . . . . . . . . . . . . . . . . . . . . . . . . . . . . . . . . . . 49
Grass Valley Technical Support . . . . . . . . . . . . . . . . . . . . . . . . . . . . . . . . . . . . . . . . . . . . . . .49
Corporate Head Office . . . . . . . . . . . . . . . . . . . . . . . . . . . . . . . . . . . . . . . . . . . . . . . . . . . . . . .49
xvi
Page 17

This chapter provides an introduction to the Thunder system.
Introduction . . . . . . . . . . . . . . . . . . . . . . . . . . . . . . . . . . . . . . . . . . . . . . . . . . . . . . . . . . . . . . . . . . . . . . . . . . 1
Key Features and Benefits . . . . . . . . . . . . . . . . . . . . . . . . . . . . . . . . . . . . . . . . . . . . . . . . . . . . . . . . . . . . . 2
System Overview . . . . . . . . . . . . . . . . . . . . . . . . . . . . . . . . . . . . . . . . . . . . . . . . . . . . . . . . . . . . . . . . . . . . . . 2
System Components . . . . . . . . . . . . . . . . . . . . . . . . . . . . . . . . . . . . . . . . . . . . . . . . . . . . . . . . . . . . . . . . . . 3
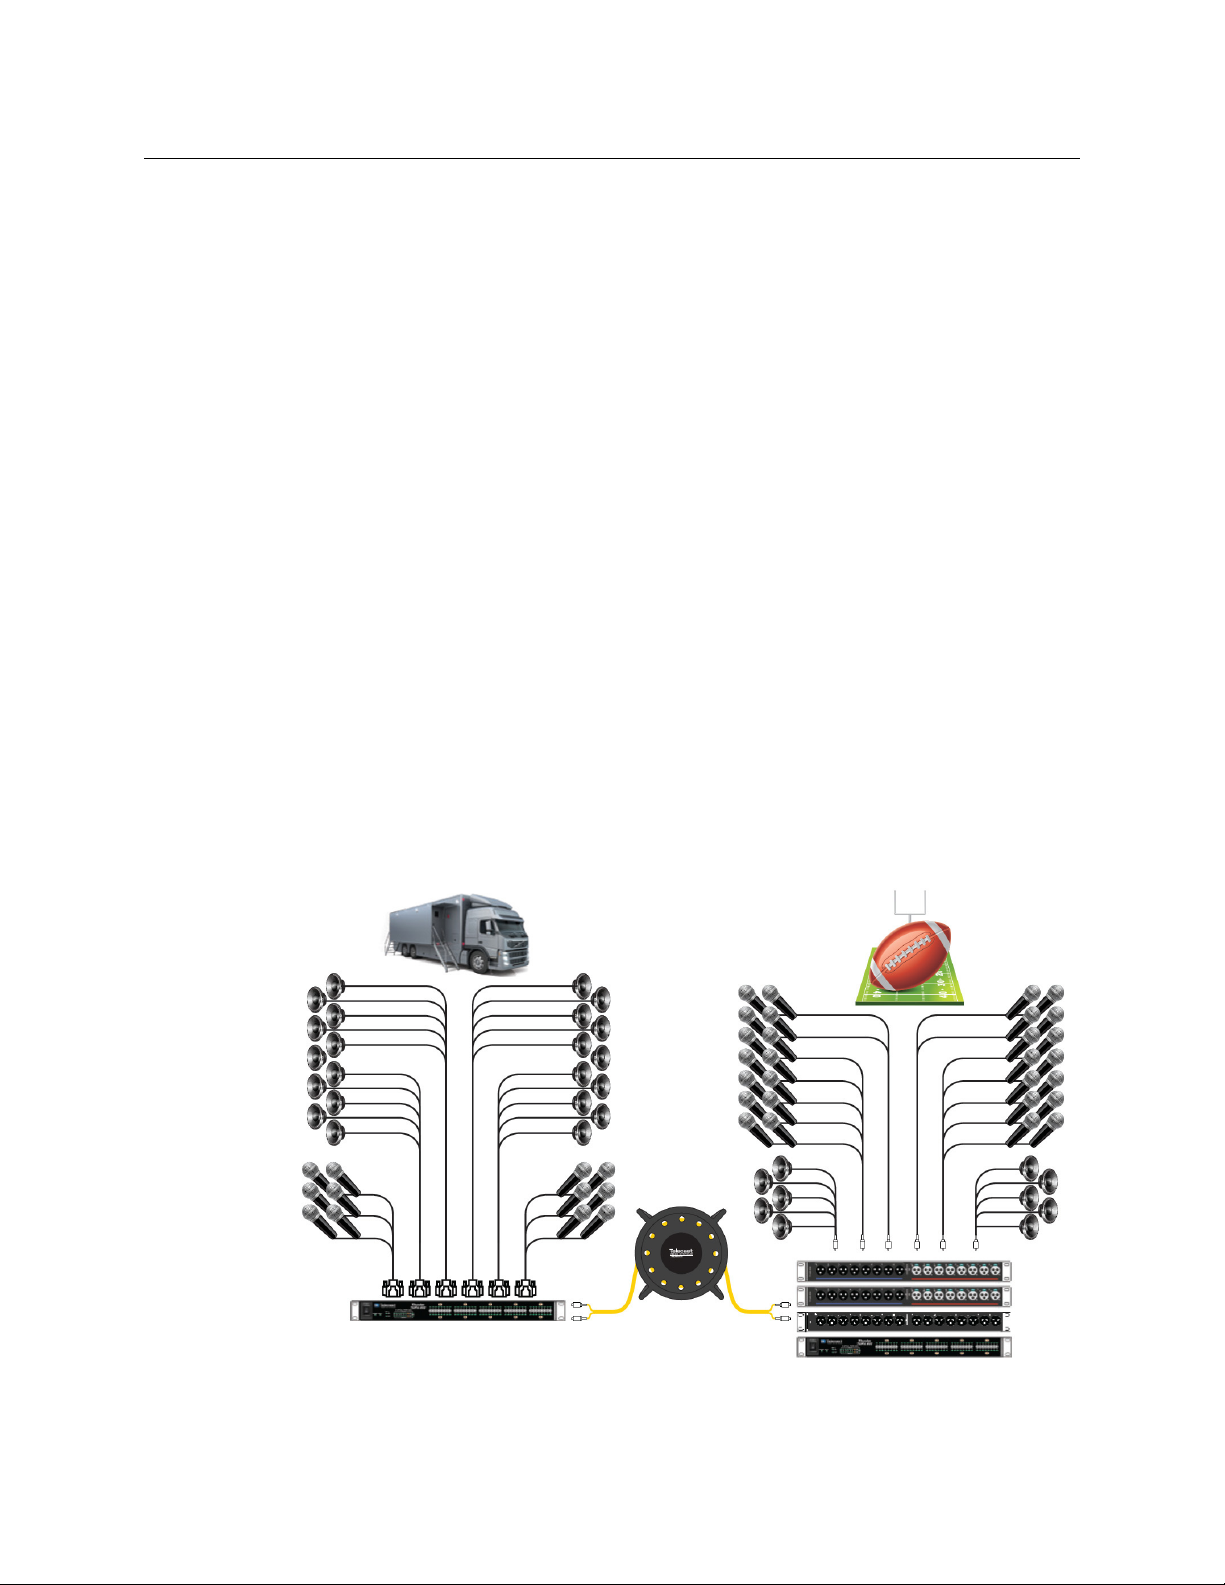
Introduction
Thunder is the newest generation high-volume audio/data/intercom transport link from
Grass Valley, a Belden Brand. Thunder transports up to 80 audio, intercom, or data paths,
configurable in 8-path groups (10 groups total), all on one or two strands of fiber, at the
lowest price and most compact size ever available.
Simply equip the compact 1RU frame with the appropriate Thunder Bolt I/O cards to create
a fiber optic link that can solve virtually any audio/intercom/data connectivity situation in
the teleproduction environment.
You buy only the components that you need. Individual analog and AES breakout panels as
well as data and intercom devices can be configured in any combination to create an audio
system that is perfectly suited to your particular application.
Introduction to Thunder
Whether you need a system that requires all 80 channels of audio, a mix of audio, data or
GPI channels, or even all data or GPI channels, Thunder provides maximum flexibility and
convenience.
Analog audio signals can even be converted to AES format, and vice versa, by just
configuring Thunder with an analog input or output Bolt card at one end of the system and
an AES I/O Bolt card at the other.
Up to ten internal Bolt I/O cards can be installed in a frame.
Six Bolt cards are available:
• Analog Audio Input; 8 channels
• Analog Audio Output; 8 channels
• AES Input; 4 channels (8 analog when decoded)
• AES Output; 4 channels (8 analog when decoded)
• Multiformat digital (RS-232/422/485); 4 channels, bidirectional
• GPI (general purpose, dry contact, SPST remote switch closures); 8 channels,
bidirectional
1
Page 18
Introduction to Thunder
Introduction
Key Features and Benefits
• Up to 40 km (24.85 mi.) range (20 dB link budget) on one or two single-mode fiber
strands with DFB SFPs.
• Up to 80 audio or 40 data paths, configurable
• Superior audio quality
• 1 RU Thunder main chassis plus 1
• 8 or 16 channels per breakout panel
• 1 RU Thunder main chassis also provides two additional bidirectional channels of
multif
ormat data (RS-232/422/485), one channel of GPI and a BNC input connector for
synchronizing AES audio output cards in the Thunder chassis to house clock timing
• Breakout panels can be mounted in front or behind the Thunder main chassis
interconnected with DB-25 cables (supporting 8 channels each)
• Optional redundant fiber IN and OUT ports, both
• Integral optical power monitoring for local and remote signal strength
in 8/4-path groups (10 groups total)
RU and 1.5 RU breakout panels
, and
System Overview
The primary element in Grass Valley’s Thunder system is a single 1RU frame that
incorporates all of the signal processing required to consolidate up to 80 audio or data
paths onto a single fiber strand; a second output for a redundant backup fiber is available.
The frame contains cards for each signal format that will be processed. Associated with the
frame are breakout panels with connectors providing access to the system for the various
formats that can be carried.
A complete system requires a frame with processing cards and breakout panels at each end
of the link.
2
Page 19
System Components
The available Thunder system components are listed in the tables below.
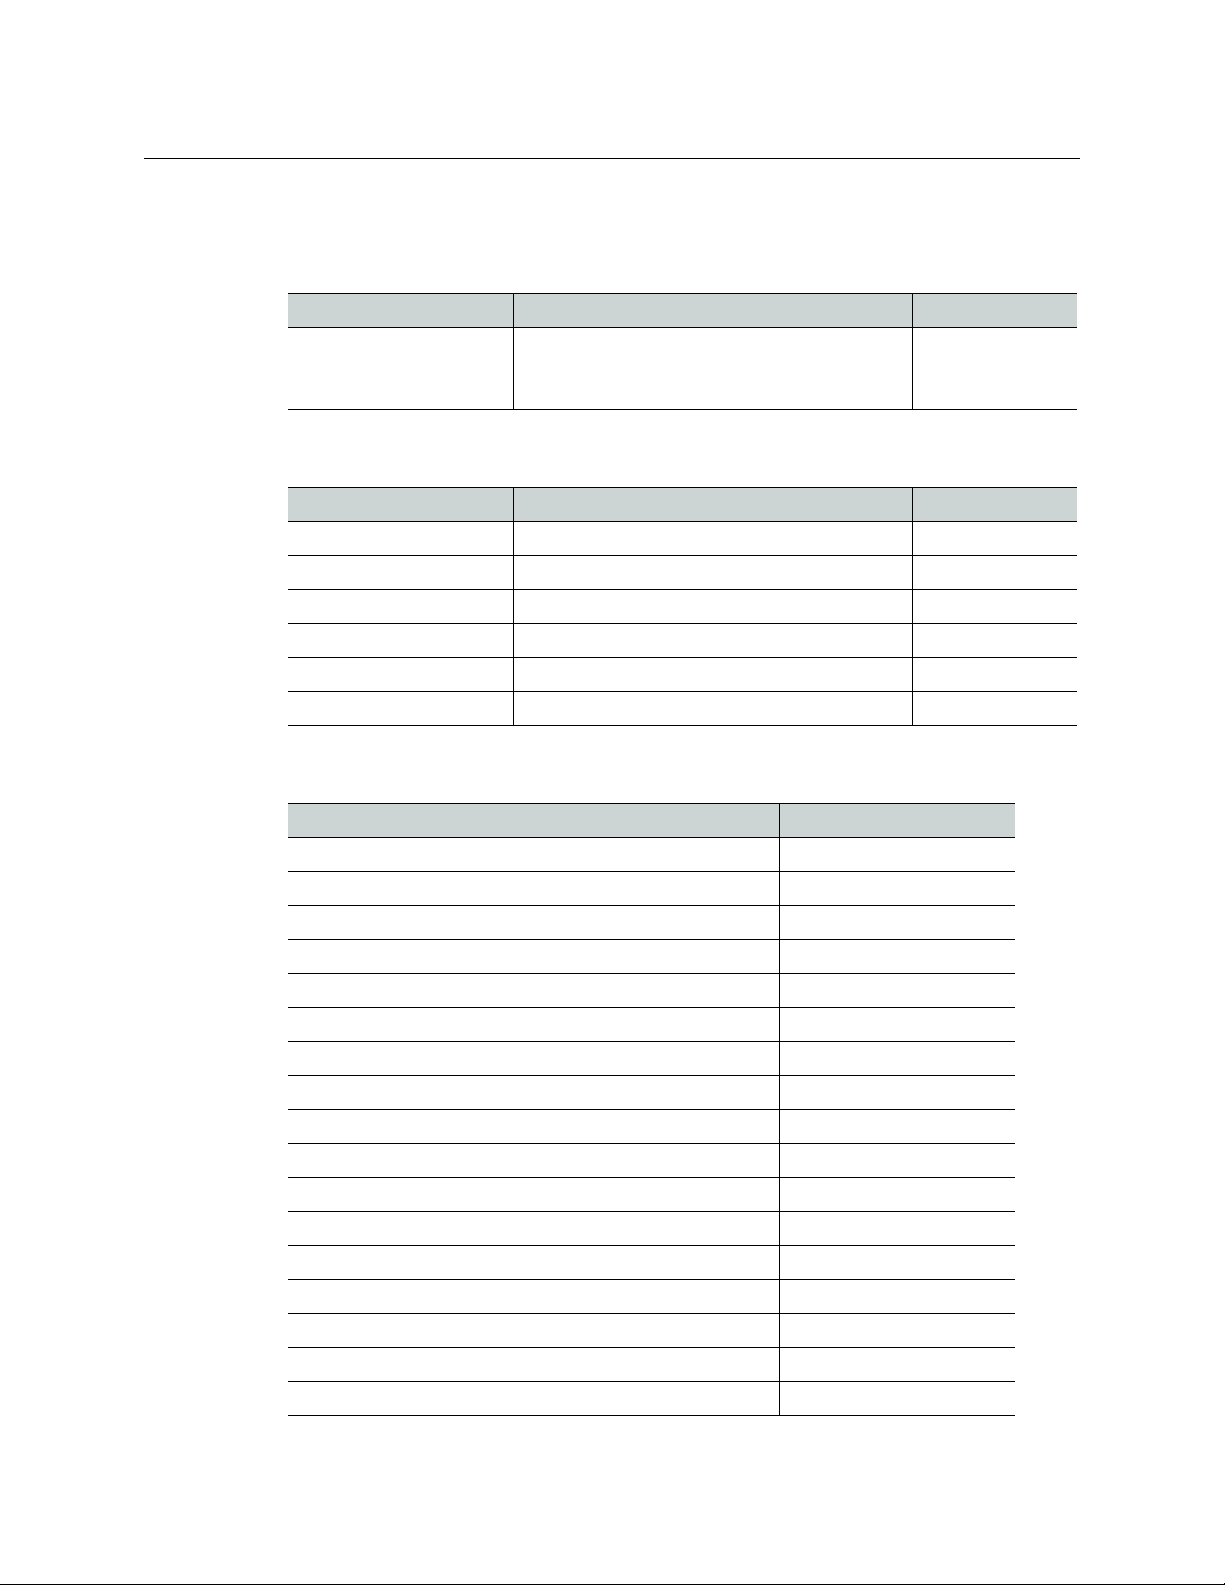
Frame
Description Function Part Number
Thunder
User Guide
Thunder Frame Thunder 1RU Frame, holds up to 10 Bolt Cards.
data, 1 GPI/O pair, two SFP slots and one
2
fiber I/O panel
TNR-FRAME
Processing Cards
Format / Function Thunder Bolt Processing Card / connector Part Numbers
Analog Audio IN Analog 8 ch Audio IN / db25 female TNR-BC-AA-TX8
Analog Audio OUT Analog 8 ch Audio OUT / db25 male TNR-BC-AA-RX8
AES EBU Audio IN Digital 4 ch Audio IN / db25 female TNR-BC-AES-TX4
AES EBU Audio OUT Digital 4 ch Audio OUT / db25 male TNR-BC-AES-RX4
Data (bidirectional) Data, 4 bi-directional / HD26 female TNR-BC-DATA-4
GPI (bidirectional) GPI, 8 GPI/O pairs (8 Tx, 8 Rx) / HD26 male TNR-BC-GPI-8
Breakout Panels
Description Part No.
Passive Audio Panels
8 ch line level analog OUT XLR3M TNR-BP-AA-RX8
16 ch line level analog OUT XLR3M TNR-BP-AA-RX16
8 ch line level analog IN XLR3F TNR-BP-AA-TX8
16 ch line level analog IN XLR3F TNR-BP-AA-TX16
8x8 line level analog IN XLR3F, OUT XLR3M TNR-BP-AA-TR16
4 ch digital AES unbalanced OUT BNC TNR-BP-AES-RX-4BNC
4 ch digital AES unbalanced IN BNC TNR-BP-AES-TX-4BNC
4 ch digital AES unbalanced IN BNC, 4 ch OUT BNC TNR-BP-AES-TR-8BNC
Active audio panels
8 ch mic/line level analog IN XLR3F TNR-BP-AAMP-TX8
16 ch mic/line level analog IN XLR3F TNR-BP-AAMP-TX16
Data panels
4 DB9 TNR-BP-DATA-48
8 DB9 TNR-BP-DATA-88
Intercom panel
Panel for 4 Aux modules TNR-BP-ICM-8
3
Page 20
Introduction to Thunder
System Components
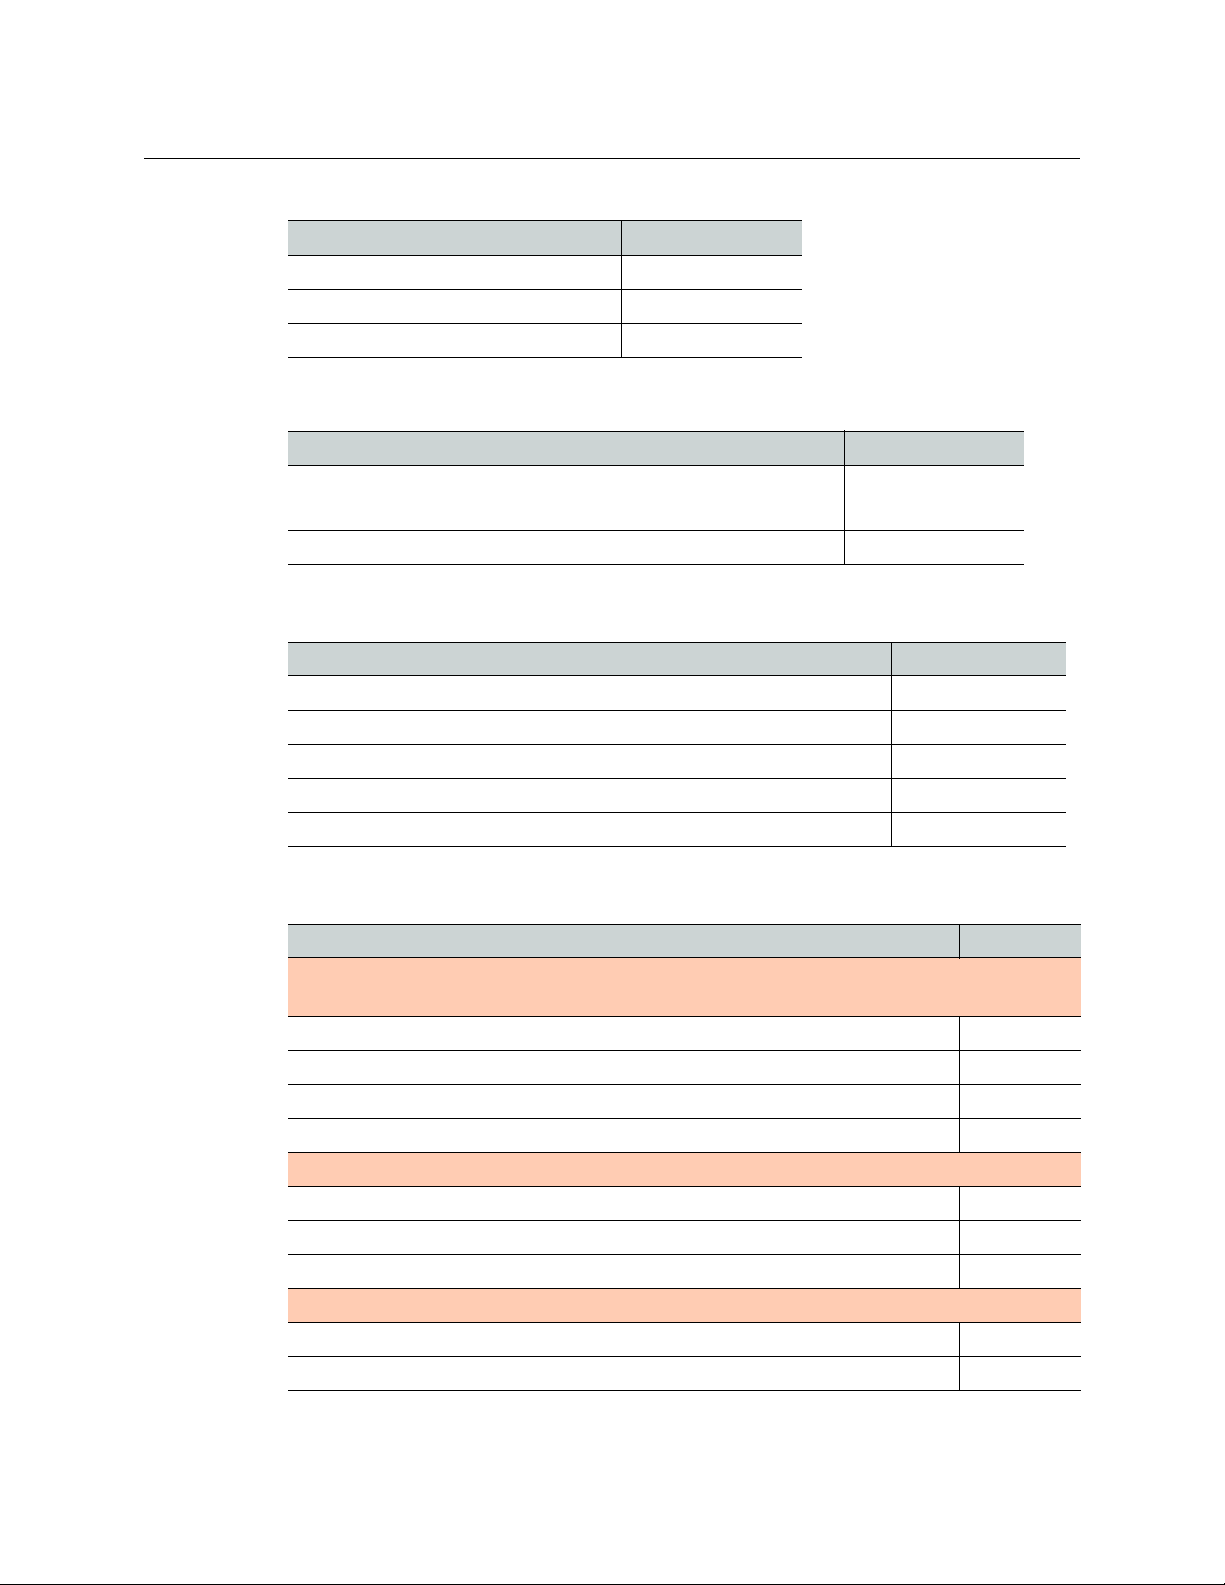
Intercom Modules
Intercom Format Part Number
Intercom module - 4 wire each end ADDR-AUX-4W
Intercom module - ClearCom each end ADDR-AUX-CC
Intercom module - RTS each end ADDR-AUX-RTS
Power Supply
Description Part Number
Universal AC to DC power supply for intercom modules.
ADAP-AC30V-X4
• Included with TNR-BP-ICM-8
Redundant AC to DC power supply for main frame, 12 VDC output ADAP-AC12V-DIN
Cables
Description Part Number
Thunder Audio Out Breakout Cable, DB25M, 8 XLR3 Male CA-D25F-8XLR3M
Thunder Audio In Breakout Cable, DB25M, 8 XLR3 Female CA-D25M-8XLR3F
Thunder Audio interconnect cables, DB25M to DB25M, 40cm length CA-D25MM-40
Thunder Audio interconnect cables, DB25M to DB25M, 80cm length CA-D25MM-80
Thunder Data/GPI interconnect cable, HD26M to HD26F, 80cm length CA-HD26MF-80
Fiber Connector Plates
Description Part Number
Fiber connector plates with dual fibers; use for non-redundant systems and redundant systems
with WDMs:
2 ST fiber connectors UFP-2ST
2 SC fiber, ultra polished UFP-2SC
2 SC fiber, angle polished UFP-2SCA
Dual LC connector
Fiber connector plates with dual fiber connector; use for non-redundant systems only
Neutrik OpticalCon Duo 2 Fibers UFP-NOC2
MX dual fiber UFP-MX2
Neutrik OpticalCon Quad 4 Fibers
Fiber connector plates with quad fiber connectors; use for redundant systems without WDM
4 ST fiber connectors UFP-4ST
4 SC fiber, ultra polished UFP-4SC
4
UFP-2LC
UFP-NOC4
Page 21

Thunder
User Guide
Fiber Connector Plates
Description Part Number
4 SC fiber, angle polished UFP-4SCA
2 Dual LC connectors UFP-4LC
5
Page 22

Introduction to Thunder
System Components
6
Page 23

This chapter introduces the various components that comprise the Thunder 80-channel
audio/data/intercom link.
Thunder Frame . . . . . . . . . . . . . . . . . . . . . . . . . . . . . . . . . . . . . . . . . . . . . . . . . . . . . . . . .
ThunderBolt Cards and Breakout Panels . . . . . . . . . . . . . . . . . . . . . . . . . . . . . . . . . . . . . . . . . . . . .
Analog Audio IN . . . . . . . . . . . . . . . . . . . . . . . . . . . . . . . . . . . . . . . . . . . . . . . . . . . . . . . .
Analog Audio OUT . . . . . . . . . . . . . . . . . . . . . . . . . . . . . . . . . . . . . . . . . . . . . . . . . . . . . . . . .
DATA IN/OUT . . . . . . . . . . . . . . . . . . . . . . . . . . . . . . . . . . . . . . . . . . . . . . . . . . . . . . . . . . .
GPI IN/OUT . . . . . . . . . . . . . . . . . . . . . . . . . . . . . . . . . . . . . . . . . . . . . . . . . . . . . . . . . . . . .
Intercom . . . . . . . . . . . . . . . . . . . . . . . . . . . . . . . . . . . . . . . . . . . . . . . . . . . . . . . . . . . . . . .
Thunder Frame
The Thunder Frame is a 1 RU device. It incorporates these features and functions:
• Optical/Electrical conversion (bidirectional) - transitions up to 80 channels of audio and
da
signal.
• Electrical channel I/O and processing - the frame contains up to 10 ThunderBolt cards,
each ded
and outgoing audio/data signals to ensure seamless integration between the electrical
and optical signal formats.
• Channel status monitoring - each channel is monitor
functional and that the signal levels are satisfactory. The channel and link status is
displayed on the frame front panel.
Thunder System Components
. . . . . . . . . . . . . . . 7
. . 8
. . . . . . . . . . . . . . . 8
. . . . . . . . . . . 9
. . . . . . . . . . . . . . 11
. . . . . . . . . . . . . . 12
. . . . . . . . . . . . . . 14
ta between electrical formats (analog/AES/data) and a single multiplexed optical
icated to a specific audio format. These interface cards process the incoming
ed to ensure that the link is
Fig. 2-1: Thunder frame - front panel
Fig. 2-2: Thunder frame - rear panel
7
Page 24

Thunder System Components
ThunderBolt Cards and Breakout Panels
ThunderBolt Cards and Breakout Panels
ThunderBolt cards plug into the ten available slots in the Thunder frame, and serve as the
interface between the incoming and outgoing audio / data formats and the electro-optical
conversion functionality of the frame’s central processing.
Six different cards are available, and may be mixed and matched to accomodate the desired
system configur
Each ThunderBolt card slot in the Thunder frame is associated with a DB-25 pin connector
on the r
of a breakout panel. The breakout panel mounts in the frame, and has a matching DB-25
connector on the back, and audio/data/GPI connectors on the front. Each card type is
matched with an appropriate breakout panel.
ear panel of the frame. Access to the card via this connector is provided by the use
ation.
For quick recognition, front-panel connectors or c
colored graphic:
• RED designates INPUT
• Blue designates OUTPUT
• Green designates BI-DIRECTIONAL
Analog Audio IN
Card
onnector groups are identified by a
The Analog Audio IN card accepts eight channels of analog audio.
Breakout Panel
The breakout panel for analog audio inputs comes in two formats - passive and active.
• The passive version has XLR connectors, and
• The active version also uses XLR connectors, but has built
mic-level signals. It is provided with gain controls on the front panel, and requires AC
power on the rear panel.
8
is intended for line-level signals.
-in gain, and is intended for
Page 25

Thunder
User Guide
Both passive and active breakout panels are available in 8-channel (supporting one
Thunder Bolt card) and 16-channel (supporting two Thunder Bolt cards) versions. The front
panel controls and the rear-panel DB-25 connectors on the 16-ch version are labeled A and
B to distinguish between the supported cards.
Fig. 2-3: Analog audio IN panel - active, 16 channels - front view
Fig. 2-4: Analog audio IN panel - active, 16 channels - rear view
Because a breakout panel has space for 16 XLR connectors, it is possible to share a single
breakout panel between an analog input ThunderBolt card and an analog output
ThunderBolt card.
Fig. 2-5: Analog audio panel - 8 CH IN and 8 CH OUT - front view
The INPUTS are marked with a red line, and the outputs with a blue line.
Analog Audio OUT
Card
The Analog Audio OUT card supplies 8 channels of output audio.
9
Page 26

Thunder System Components
ThunderBolt Cards and Breakout Panels
The Analog Audio OUT card
Breakout Panel
Analog Audio OUT breakout panels are available in two formats:
1 8 channels of analog audio on XLR male connectors - supports one Bolt card
2 16 channels of analog audio on XLR male connectors - supports two Bolt cards
10
The rear panel has a DB25 connector for each input.
Page 27

DATA IN/OUT
Card
Thunder
User Guide
The Data IN/OUT card supports four channels of data, in RS232, RS422 or RS485 format.
The formats for the four channels ar
e individually selectable; see page 25 for details.
Breakout Panel
DATA cards (either one or two) and the GPI card share a single breakout panel. For data, the
rear of the breakout panel has one or two DB26HD connectors, one for each Data Bolt card.
They are labeled A and B, and each carries 4 channels of data. The front of the breakout
panel has four or eight DB9 connectors as appropriate; the 8-ch version is shown in the
figure.
Fig. 2-6: Data-GPI breakout panel (8-ch version)- front.JPG
Fig. 2-7: Data-GPI panel - rear.JPG
In the 8-ch version, the two groups of four are graphically separated and labeled as DATA
RS-232 / 422 / 485 A and DATA RS-232 / 422 / 485 B.
11
Page 28

Thunder System Components
ThunderBolt Cards and Breakout Panels
GPI IN/OUT
Card
The GPI IN/OUT card supports 8 GPIOs.
Breakout Panel
The GPI card and the DATA card share a single breakout panel.
Fig. 2-8: Data-GPI breakout panel - front.JPG
Fig. 2-9: Data-GPI panel - rear.JPG
The GPI section of the front of the breakout panel has a single DB-25 female connector,
labeled as GPI, while the rear has a single DB-25 female connector, also labeled GPI.
12
Page 29

Breakout Panels
Analog Audio Breakout Panels - Passive
Five versions of this panel are available:
1 Audio IN, 8 channels, XLR female connectors. Red patch beneath the connectors.
2 Audio IN, 16 channels (2 banks of 8, labeled A and B), XLR female connectors. Red patch
benea
th the connectors.
3 Audio OUT, 8 channels, XLR male connectors
4 Audio OUT, 16 channels, (2 banks of 8, labeled A and B), XLR male c
patch beneath the connectors.
5 Audio IN, 8 channels (labeled A), plus Audio OUT, 8 channels (labeled B). Audio IN has
emale connectors, with a red patch beneath. Audio OUT has XLR male connectors,
XLR f
with a blue patch beneath.
Thunder
User Guide
. Blue patch beneath the connectors
onnectors. Blue
Analog Audio Breakout Panels - Active Inputs
These panels are intended for use as microphone input panels, and are equipped with gain
and phantom power controls for each audio channel.
Two versions of this panel are available:
1 Audio IN, 8 channels, XLR female connectors. Red patch beneath the connectors.
2 Audio IN, 16 channels (2 banks of 8, labeled A and B), XLR female connectors. Red patch
th the connectors.
benea
13
Page 30

Thunder System Components
Breakout Panels
See , on page 32 for operating instructions.
Data and GPI Breakout Panels
These panels provide I/O connections for DataBolt cards (either one or two) and one GPI
Bolt card.
Two versions of this panel are available:
1 Data I/O, 4 channels, DB9 female connectors, plus GPI I/O
2 Data I/O, 8 channels, DB9 female connectors, plus GPI I/O
Intercom
14
Intercom I/O to the Thunder system is provided by modules installed in a breakout panel.
There is no dedicated card type for the intercom signals; they are routed through a pair of
analog audio Bolt cards - one Audio IN and one Audio OUT.
The Thunder Intercom panel can house up to four intercom modules. Three types are
ilable:
ava
•Balanced 4-wire
•Clear-Com 2-wire
• RTS/Telex compatible 2-wire
Fig. 2-10: Intercom Breakout Panel with Intercom Modules
Page 31

Intercoms can be of any type in any location in the assembly. However, for proper operation
of the intercom channels, the same placement order must be followed at the other side of
the system. A 2-wire system can be interconnected with a 4-wire system at another Adder
II, but not all intercom functions will work (for example, calling).
4-wire (balanced)
4-wire Auxiliary (balanced) intercoms use an individual 5-pin XLR on each of the two
channels in each module. XLR pin functions are given in the following table. Intercom
Module Gain is 0 dB.
PIN FUNCTION IMPEDENCE SIGNALS
1 Ground
2 Input (+) 600 Ohm input Line: +8 dBm
3 Input (-) 600 Ohm input Mic: -32 dBm
4 Out (+)
600 Ohm load +8 dBm
Thunder
User Guide
5 Out (-) 60
Fig. 2-11: Intercom Module: 4-Wire Auxiliary (balanced)
0 Ohm load +8 dBm
15
Page 32

Thunder System Components
Clear-Com
Clear-Com
Clear-Com intercom modules have a 3-pin XLR connector for each of the A and B channels.
This Grass Valley module fully supports the Clear-Com signaling protocol and signal levels.
The Clear-Com Intercom Connections are listed in the table below.
Fig. 2-12: Clear Com module
Pin Description
1 Ground
2 +VDC Power
3 Power
• The units null by plugging in a 1/8-inch (3.5mm) stereo headset (not a TS-1) into the
connector located in the center of the unit and then adjusting the top set of pots for
optimum null.
• The second set of pots, labeled GA
•The POWER switch contr
stations that might be plugged into the module.
•The MODE switch
ols whether 30VDC is applied to beltpacks and/or remote
should always be set to CC for Clear-Com intercom systems.
IN, adjust the receive gain for that channel +/-3db.
Nulling Procedure
Note: A stereo audio headset and a tweaker are needed to null these modules.
Inserting the 1/8” sub-mini stereo headset jack into the Clear-Com module turns on a tone
that nulls the system. It is important that the nulling procedure be done when all beltbacks
and other interfaces are in place. If you add additional beltpacks, it is likely that the nulling
procedure should be repeated.
As indicated on the module faceplate, the right ear se
Channel B. Do not listen to both ears at the same time as this will not allow you to carefully
discern the tone.
rves Channel A and the left ear serves
16
While listening to the right side, turn the adjustmen
headset jack. The goal is to eliminate and/or minimize the nulling tone. Once you have
gotten the adjustment so that the tone is as quiet as possible, then change ears and do
Channel B while using the top right adjustment pot.
t pot on the top left above the mini
Page 33

RTS Telex
Thunder
User Guide
Powered (Wet) and Unpowered (Dry) Intercom Systems
The Grass Valley Clear-Com interface is compatible with powered or unpowered belt packs
as well as fixed equipment . Switch the Module to WET (down) when you want to use
Thunder to provide power to one or more intercom beltpacks and/or remote intercom
stations. The module will provide adequate power for approximately 4 beltpacks or 2
remote stations, or a combination thereof.
If you are supplying power to your intercom system externally with an intercom power
supply
can be added if powered externally. Refer to your intercom manufacturer’s documentation
for additional system details.
RTS modules provide a two-channel intercom on a single 3-pin XLR connector. This module
fully supports the RTS signaling protocol and signal levels.
or “Master” intercom station, switch the Module to DRY (up). Many more belt packs
Note: When powering a Clear-Com intercom system with an external power supply,
be sure to set the Thunder intercom module to “dry” to prevent noise, oscillation or
motor-boating.
RTS channel operation is optimized by the use of fr
Figure 2-13 and listed below.
• Input Gain, ± 10 dB
•Output Gain, ± 10 dB
•Null
Fig. 2-13: Intercom Module: RTS Telex
The following table lists the RTS Telex pin numbers and intercom connections. Switches are
also provided for the channel pair for:
• Dry unpowered (d), or Wet powered (w) PORTS
• 200 Ohm ON or OFF terminations TERM
Pin Description
1 Ground
2 +VDC Power & Chan 1 Audio
ont panel adjustments as shown in
3 Chan 2 Audio
17
Page 34

Thunder System Components
Installing/Removing Intercom Modules
The interface is compatible with powered or unpowered belt packs, as well as fixed
equipment. You may power up to five belt packs with each intercom module. Refer to your
intercom manufacturer’s documentation for additional system details.
For operation with a belt pack, adjust the following:
• set the PORTS to w (powered)
• the TERM to ON
• center each of the INPUT gain, OUTPUT gain, and NULL controls
Readjust these controls to optimize performance as required.
Breakout Panel
The Intercom breakout panel has four bays for installing intercom modules.
Within the panel, the various intercom signals are arranged and packaged into an input
group and an output group. These are presented on the rear panel on two DB25
connectors. The inputs (Rx) are connected to an Audio IN Bolt card, while the outputs (Tx)
are connected to an Audio OUT bolt card.
In addition to the audio I/O connectors, the rear panel has two 30 VDC intercom power
inputs - a primary input, and a secondary redundant input.
Installing/Removing Intercom Modules
Before attemping any module exchange, the Intercom breakout panel should be powered
OFF .
Two multi-conductor cable harnesses are built into the Intercome breakout panel and run
b
ehind the module locations. These cables connect the intercom modules to power and
signal sources. There are AMP-MTA type connectors for each module on this harness; the
connector fits all module types.
• Signal is 8-pin
•Power is 2-pin
18
Page 35

Thunder
User Guide
To change an intercom module in the breakout panel:
1Turn the power OFF.
2 Remove the four screws that hold the module in the panel.
3 Gently pull the intercom module away from the panel until you can see and remove the
tw
o cable harnesses.
4 Replace with new module and reconnect in reverse order.
5Turn the power ON.
Fig. 2-14: Replacing Intercom Modules
19
Page 36

Thunder System Components
Installing/Removing Intercom Modules
20
Page 37

System Implementation
This chapter describes the installation, setup and configuration of the Thunder 80-channel
audio/data/intercom link.
Installation . . . . . . . . . . . . . . . . . . . . . . . . . . . . . . . . . . . . . . . . . . . . . . . . . . . . . . . . . . . . .
Connection Details . . . . . . . . . . . . . . . . . . . . . . . . . . . . . . . . . . . . . . . . . . . . . . . . . . . . . . . . .
Operation . . . . . . . . . . . . . . . . . . . . . . . . . . . . . . . . . . . . . . . . . . . . . . . . . . . . . . . . . . . . . .
Installation
Each end of a Thunder audio/data/intercom link requires an identical equipment package.
This comprises a rack containing:
• A Thunder frame (1 RU), with installed ThunderBolt cards
•Either:
• Breakout panels as required for the instal
• Cables connecting the frame to the breakout panels.
•Or:
• Snake cables (DB25 to 8 XLR)
• Power source as available at the site
led ThunderBolt cards
. . . . . . . . . . . . . . 21
. . . . . . . . . . 22
. . . . . . . . . . . . . . 29
Interconnections within the rack are made using multiconductor ribbon cables.
• Each ThunderBolt card within the Frame is ass
rear panel. Each card and its associated connector handle signals for eight channels.
• Each breakout panel has a connector that carries 8 channels of data.
ociated with a connector on the frame’s
21
Page 38

System Implementation
• Some audio breakout panels provide inputs/outputs for two banks of 8 channels. These
carry one connector for each 8-channel bank, and are associated with one ThunderBolt
card for each bank.
• The Data/GPI breakout PANEL may support either one or two Data Bolt cards in
addition to the GPI Bolt card.
Fiber inputs and outputs connecting the two ends of
the frame’s rear panel.
• The entire bidirectional data package is carried on dual fibers.
• A second fiber plate carrying the same data pac
redundant signal path can be established to protect the integrity of the program.
• WDM SFP cartridges are available, allowing bidirectional communication over a single
.
fiber
Connection Details
All connections to the Thunder frame are located on the rear panel.
The 10 connectors on the left-hand side of the rear
installed in the frame.
the system together are located on
kage is available so that a back-up,
panel are associated with the Bolt cards
22
A - Analog Audio Bolt Card Connectors
Analog audio Boltcards connect to their associat
equipped with DB25 connectors. These use standard “Tascam” pinouts for analog audio, as
shown in the following figure.
Fig. 3-1: Tascam DB25 pinouts for analog audio
The connector pinout is shown in the figure and the table.
ed breakout panels via a ribbon cable
Page 39

Function Pin # Signal
24 Audio Ch 1 - H (+)
Thunder
User Guide
Audio Ch1
Audio Ch 2
Audio Ch 3
Audio Ch 4
Audio Ch 5
Audio Ch 6
Audio Ch 7
12 Audio Ch 1 - C (–)
25 Audio Ch 1 - GND
10 Audio Ch 2 - H (+)
23 Audio Ch 2 - C (–)
11 Audio Ch 2 - GND
21 Audio Ch 3 - H (+)
9 Audio Ch 3 - C (–)
22 Audio Ch 3 - GND
7 Audio Ch 4 - H (+)
20 Audio Ch 4 - C (–)
8 Audio Ch 4 - GND
18 Audio Ch 5 - H (+)
6 Audio Ch 5 - C (–)
19 Audio Ch 5 - GND
4 Audio Ch 6 - H (+)
17 Audio Ch 6 - C (–)
5 Audio Ch 6 - GND
15 Audio Ch 7 - H (+)
3 Audio Ch 7 - C (–)
16 Audio Ch 7 - GND
1 Audio Ch 8 - H (+)
Audio Ch 8
14 Audio Ch 8 - C (–)
2 Audio Ch 8 - GND
Not connected 13 No signal
23
Page 40

System Implementation
B - Data Bolt Card Connector
The Data Bolt card, which supports four data channels with selectable formats, uses a
DB26HD connector (also called DA26).
The connector pinout is shown in the figure and the table.
Function Pin # Signal
9 Data 1: RS422 OUT (+) / RS232 OUT
18 Data 1: RS422 OUT (-)
Data 1
RS232/422/485
Data 2
RS232/422/485
Ground 25
Data 3
RS232/422/485
Data 4
RS232/422/485
8 Data 1: RS422 IN (-)/ RS485 I/O (-)
17 Data 1: RS422 IN (+) / RS485 I/O (+) / RS232 IN
26 Data 1 Format Select
7 Data 2: RS422 OUT (+) / RS232 OUT
16 Data 2: RS422 OUT (-)
6 Data 2: RS422 IN (-)/ RS485 I/O (-)
15 Data 2: RS422 IN (+) / RS485 I/O (+) / RS232 IN
24 Data 2 Format Select
GND (data 1/2)
5 Data 3: RS422 OUT (+) / RS232 OUT
14 Data 3: RS422 OUT (-)
4 Data 3: RS422 IN (-)/ RS485 I/O (-)
13 Data 3: RS422 IN (+) / RS485 I/O (+) / RS232 IN
23 Data 3 Format Select
3 Data 4: RS422 OUT (+) / RS232 OUT
12 Data 4: RS422 OUT (-)
2 Data 4: RS422 IN (-)/ RS485 I/O (-)
11 Data 4: RS422 IN (+) / RS485 I/O (+) / RS232 IN
21 Data 4 Format Select
24
Page 41

Thunder
User Guide
Function Pin # Signal
Ground 22 GND (data 3/4)
Format bias 10 Format bias +12 VDC
The four data channels can be configured individually to use any of the supported formats,
by using the appropriate Format Select pin (21, 23, 24, 26) as identified in the table.
Format Select pin: Floating for RS-422 or TTL
Tied to any GND pin for RS-232
Tied to +12 VDC bias (pin #10) for RS-485
C - GPI Bolt Card Connector
The GPI Bolt card, which supports eight GPIs, uses a
Function Pin # Signal
1 GPI 1 - IN
GPI 1
11 GPI 1 - OUT A
19 GPI 1 - OUT B
2 GPI 2 - IN
GPI 2
12 GPI 2 - OUT A
DB26HD connector (also called DA26).
GPI 3
20 GPI 2 - OUT B
3 GPI 3 - IN
13 GPI 3 - OUT A
21 GPI 3 - OUT B
25
Page 42

System Implementation
Function Pin # Signal
4 GPI 4 - IN
GPI 4
GPI 5
GPI 6
GPI7
GPI 8
14 GPI 4 - OUT A
22 GPI 4 - OUT B
5 GPI 5 - IN
15 GPI 5 - OUT A
23 GPI 5 - OUT B
6 GPI 6 - IN
16 GPI 6 - OUT A
24 GPI 6 - OUT B
7 GPI 7 - IN
17 GPI 7 - OUT A
25 GPI 7 - OUT B
8 GPI 8 - IN
18 GPI 8 - OUT A
26 GPI 8 - OUT B
Format Bias 10 +5 VDC
Ground 9 GND
D - AES Clock
Required for internal signal processing. BNC connector.
E - Frame Data Connector
This DB15HD connector carries data and GPI associated with the frame, and is not related to
the Data Bolt or the GPI Bolt card.
26
Page 43

Function Pin # Signal
3 Data 1: RS422 OUT (+) / RS232 OUT
11 Data 1: RS422 OUT (-)
Data 1
RS232/422/485
Data 2
RS232/422/485
Ground 5
Format bias 15 Format bias +12 VDC
GPI
12 Data 1: RS422 IN (-)/ RS485 I/O (-)
9 Data 1: RS422 IN (+) / RS485 I/O (+) / RS232 IN
10 Data 1 Format Select
6 Data 2: RS422 OUT (+) / RS232 OUT
1 Data 2: RS422 OUT (-)
2 Data 2: RS422 IN (-)/ RS485 I/O (-)
8 Data 2: RS422 IN (+) / RS485 I/O (+) / RS232 IN
7 Data 2 Format Select
GND
4 GPI 1 input
14 GPI OUT A
13 GPI OUT B
Thunder
User Guide
The two data channels can be individually configured to use any of the supported formats,
by using the appropriate Format Select pin (7 or 10):
• Floating for RS-422 or TTL
• Tied to GND (pin 5) for RS-232
• Tied to +12 VDC bias (pin 15) for RS-485
27
Page 44

System Implementation
F - Auxilliary Power Input
The auxiliary power input is connected to +10 to +30 VDC via a KPJX-4S-S connector.
G - Optical connection Panels
A variety of optical fiber connector plates are a
vailable for the Thunder frame, in order to
support most available fiber plugs:
AB C D EF
Fig. 3-2: Fiber Connector Plates
A - ST single
B - ST2 - Dual STs for redundant input/output
C - ST4
D - MX
E - OpticalCON Duo
F - OpticalCON quad
Laser sources are available at 1310 nm, 1550 nm WDM, and at the various CWDM
elengths.
wav
28
H - AC Power input
100-240 VAC mains, 50-60 Hz.
Page 45

Operation
User Interface
The Thunder front panel incorporates a series of LEDs that are used to display the system
status to the user.
Primary Display
The primary display on the left side has LED indicators for: Power, Optical input 1 and 2
status conditions (channel in use/un-used channel “readiness”), System Link, Data
Activity (for data channels 1 and 2 on the mainboard only), and 2 “Local” / “Remote” bar
graphs with 9 segments, 3dBm/segment, each representing optical input power applied to
both the local and remote Thunder chassis’.
Thunder
User Guide
Power
Indicates the input power conditions of the Thunder chassis:
• Unlit when the power switch is turned off.
• Illuminates solid yellow (red/green mix) when powered on and the primary power (AC
Lin
e Input) source only is being supplied to the chassis.
• Illuminates solid green when powered on and both the primary (AC Line) and
sec
ondary (10Vdc to 30Vdc) power sources are being supplied to the chassis.
• Illuminates solid red when powered on, but the primar
chassis is now operating on the secondary (back-up) power source.
y power has failed and the
OPT - IN 1
Indicates status/conditions of the primary SFP optical receiver.
29
Page 46

System Implementation
Operation
Condition 1 – No optical signal present
• Illuminates solid red in the absence of optical power to the primary SFP receiver.
Condition 2 – Channel in use
• Illuminates solid green when a valid optical signal is applied to the primary SFP
receiver, and indicates that the primary channel is the one currently in use for
communication with the remote Thunder Chassis.
Condition 3 – Channel not in use, but optical signal present. This feature informs the user
that optical power is available on the unused channel, making them aware that if an
automatic redundancy switchover should occur, the backup optical power is ready and
available.
• Flickers briefly at ≈2 second intervals to indicate the presence of optical power to the
primary SFP receiver. The color of the flicker indicates the level of optical power being
received (color will match that of the “Optical Power Meter” display if it is currently
being used for this channel).
a Red flash: -24 to -27dBm input
b 66% red/33% green flicker: -21 to -23dBm input
c 33% red/66% green flicker: -18 to -20dBm input
d Green flash: ≥-15dBm input
Condition 4 – SFP not installed
• Flashes red at ≈2 times per second when the SFP used in the primary (top) dock of the
dual SFP cage is either faulty or not installed correctly.
OPT - IN 2
Indicates status/conditions of the secondary (backup) SFP optical receiver.
Condition 1 – No optical signal present
• Illuminates solid red in the absence of optical power to the secondary (backup) SFP
receiver.
Condition 2 – Channel in use
• Illuminates solid green when a valid optical signal is applied to the secondary (backup)
SFP receiver, and indicates that the secondary (backup) channel is the one currently in
use for communication with the remote Thunder Chassis.
Condition 3 – Channel not in use, but optical signal present. This feature informs the user
that optical power is available on the unused channel, making them aware that if an
automatic redundancy switchover should occur, the backup optical power is ready and
available.
• Flickers briefly at ≈2 second intervals to indicate the presence of optical power to the
secondary (backup) SFP receiver. The color of the flicker indicates the level of optical
power being received (color will match that of the “Optical Power Meter” display if it is
currently being used for this channel).
a Red flash: -24 to -27dBm input
b 66% red/33% green flicker: -21 to -23dBm input
c 33% red/66% green flicker: -18 to -20dBm input
d Green flash: ≥-15dBm input
30
Page 47

Thunder
User Guide
Condition 4 – SFP not installed
• Unlike the primary (OPT - IN 1) indicator, this indica
tor will be extinguished when the
SFP used in the secondary (bottom) dock of the dual SFP cage is either faulty or not
installed correctly. This is to avoid any false indication when a Thunder System is
purchased without the redundant optical backup SFP installed.
Link
Indicates that proper communication has been established with the processing electronics
of the remote Thunder Chassis.
• Illuminates solid red when there is either no link, or excessive errors in the fiber optic
le path are preventing proper communication with the remote Thunder Chassis.
cab
• Illuminates solid green when error-free communication has been established with the
emote Thunder Chassis.
r
Data
Indicates the presence of RS-232/RS-422/RS-485 data activity on the rear panel, mainboard
mounted DB-15HD connector.
• Unlit with no data activity
• Illuminates green with data activity. Int
ensity varies with data packet density.
Rx Optical Power (dBm)
Two 9-segment bar graphs that display both “LOCAL” and “REMOTE” optical power levels
presented to the fiber optic input port that is currently in use, by the Thunder chassis at
either end of the system. The functionality of the 2 meters is identical:
Display Input Power
No optical power applied
-24 dBm
-21 dBm
-18 dBm
-15 dBm
-12 dBm
-9 dBm
-6 dBm
31
Page 48

System Implementation
Operation
Status Display for Installed Bolt Cards
Each of the ten slots in the frame that can accept a Bolt card is associated with a front panel
display that shows the Bolt card type, and signal presence on its channels. These displays
occupy the right-hand section of the front panel.
Display Input Power
-3 dBm
0 dBm or more - overload condition - flashing red
SFP module overload, or corrupt/non-conformant input
data - flashing red
32
Page 49

Active Analog Audio Breakout Panels - Adjustment
These panels are intended for use as microphone input panels.
They incorporate two front-of-panel controls for each XLR connector.
Thunder
User Guide
The switches are self centering, 3 position momen
“PH/PWR” switches, the throw is either momentary left (phantom power off) or momentary
right (phantom power on) from the center position. For the “GAIN” switches the throw is
either momentary down (lower gain setting) or momentary up (higher gain setting). The
operation of these switches is explained more thoroughly below. A single Expansion Panel
is available with either one or two 8 channel banks installed for a total of up to16 channels.
The “Extended” switch functions explained below (switches that perform operations on
multiple channels) pertain to single banks of 8. Numbers shown in parenthesis () are for a
second 8 channel bank (if so equipped).
The “PH/PWR” and “GAIN” switches on the Thunder MIC Input Expansion Panel work in the
ollowing manner:
f
tary action types. In the case of the
Phantom Power Switches
Single Switch Functions (Any Channel)
• Press “PH/PWR” toggle left momentarily – Phantom Power is
disabled, “OFF” on the appropriate channel.
• Press “PH/PWR” toggle right momentarily
applied, “ON”, to the appropriate channel.
Extended Switch Functions (All 8 channels “ON”, All 8 channels
FF”)
“O
• Press and hold CH1 (CH9) “PH/PWR” toggle left, Press CH8
CH16) “PH/PWR” toggle left momentarily – Phantom Power to
(
all 8 channels is disabled simultaneously; “OFF”
• Press and hold CH1 (CH9) “PH/PWR” toggle right, Press CH8
(
CH16) “PH/PWR” toggle right momentarily – Phantom Power to all 8 channels is
applied simultaneously; “ON”
– Phantom Power is
Gain Switches
Single Switch Functions (Any Channel)
33
Page 50

System Implementation
Operation
1 Press “GAIN” toggle down momentarily – lowers gain by 10dB from the previous
setting (assuming the previous gain setting was already > “UNITY”) on the appropriate
channel.
2 Press “GAIN” toggle down and hold – after the initial 10dB step down when the toggle
is actuated, there is a pause of 750mSec and then the unit will automatically continue
to increment the gain downward (again assuming the previous gain was set to a higher
value) at a rate of 250mSec/step until it settles at “UNITY”. At any point the toggle can
be released and the unit will remain at the gain setting indicated.
3 Press “GAIN” toggle up momentarily – raises gain by 10dB from the previous setting
(assuming the previous gain setting was already lower) on the appropriate channel.
4 Press “GAIN” toggle up and hold – after the initial 10dB step up when the toggle is
actuated, there is a pause of 750mSec and then the unit will automatically continue to
increment the gain upward (again assuming the initial gain was set to a lower value) at
a rate of 250mSec/step until it settles at “50dB”. At any point the toggle can be released
and the unit will remain at the gain setting indicated.
Note: As the gain is either raised or lowered, there is no “wrap around” to the
adjustment. If the gain steps are increased, the display will NOT return to “UNITY” after
the “50dB” setting is reached. Likewise, if the gain steps are decreased, the display will
NOT return to “50dB” after the “UNITY” setting is reached. This action provides a better
“feel” to the operator when making adjustments and eliminates the possibility of
excessive audio levels when cycling through gains as could be the case when holding
the “GAIN” toggle down in an effort to lower the audio level.
Extended Switch Functions (All-Reset to “UNITY”, All-Increment Up, All-Increment Down)
1 Press and hold CH1 (CH9) “GAIN” toggle down, Press CH8 (CH16) “GAIN” toggle down
momentarily – Gain on all 8 channels is simultaneously reset to “UNITY”.
2 Press and hold CH1 (CH9) “PH/PWR” toggle left, Press CH8 (CH16) “GAIN” toggle up
momentarily – Gain on all 8 channels is simultaneously incremented to the next higher
gain setting. Holding the CH8 (CH16) “GAIN” toggle up, while still holding the CH1
(CH9) “PH/PWR” toggle left, will automatically increment the gain settings on all 8
channels simultaneously as described above in the Single Switch Functions (Any
Channel) section.
3 Press and hold CH1 (CH9) “PH/PWR” toggle left, Press CH8 (CH16) “GAIN” toggle down
momentarily – Gain on all 8 channels is simultaneously decremented to the next lower
gain setting. Holding the CH8 (CH16) “GAIN” toggle down, while still holding the CH1
(CH9) “PH/PWR” toggle left, will automatically decrement the gain settings on all 8
channels simultaneously as described above in the Single Switch Functions (Any
Channel) section.
Extra Notes:
1 All Phantom Power and Gain setting changes are immediate and seamless upon
actuation of the switches. There is no delay or hesitation for the required result when
the operator makes a change to one of these settings.
2 All settings are retained in non-volatile memory when the Expansion Panel is powered
down, so setup time is minimal if power is lost or the system is moved to an alternate
location.
34
Page 51

Thunder
User Guide
35
Page 52

System Implementation
Operation
36
Page 53

Thunder Frame Specifications
General
Transmission Method ........................................... Digital Time Division Multiplexing (TDM)
Aggregate Data Rate through optical fiber... 150 Mbps
Data/GPI I/O on rear panel connector
Data
RS-232 Mode
Input Voltage Range: ....................................... >±3VP-P to <±25VP-P (.5V internal hysteresis)
Input Bias current: ............................................ ±100μA maximum
Specifications
Input Impedance: ............................................. 33kΩ ±5%
ESD tolerance: .................................................... ±15kV Air-Gap, ±8kV Contact, ±15kV HBM
Output Voltage: ................................................. ±5.5VP-P @ ±5%, R
Data Rate: ............................................................ DC to 160k
(High speed limit determined by
asynchronous sampling rate. Jitter is fixed @
320nSec. Higher data rates are possible if
equipment driven has greater jitter tolerance.
Up to 1M
RS-422, RS-485 Modes
Input Voltage Range: ....................................... 100mV to 12V differentially across “+” and “-“
data input pins or 50mV to 6V on either input
with respect to GND (50mV internal hysteresis)
Input Common Mode Range: ...................... +1.65Vdc ±10%
Input Bias current: ............................................ ±600μA maximum
Input Impedance: ............................................. 33kΩ ±5%
(For data rates ≥20kb/Sec and/or multi-drop
applications with longer cable lengths, an
external 110Ω resistor is recommended across
the “+” and “–“ data inputs of the unit furthest
from the driving source to properly terminate
baud
maximum).
baud
load
≥3KΩ
37
Page 54

Specifications
General
the line. This will minimize random bit errors
induced by cable reflections.)
ESD tolerance: .................................................... ±15kV Air-Gap,
±8kV Contact,
±15kV HBM
Output Voltage: ................................................. 0-3.3Vper output unloaded,
0-1.85Vper output at R
load
54Ω.
6.6VP-P output differential unloaded,
3.7VP-P output differential at R
Data Rate: ............................................................ DC to 200k bits/Sec
(High speed limit determined by
asynchronous sampling rate. Jitter is fixed @
320nSec. Higher data rates are possible if
equipment driven has greater jitter tolerance.
Up to 1M bits/Sec. maximum).
Time delay after a transmitted data
burst before a return message can be
accepted at the receiver (RS-485 only): .... 16.4μSec
load
110Ω
Data Format Inputs (Pins 7 and 10 on the DB-15 HD Data I/O connector):
RS-422 Mode: ..................................................... No connection, input pin left “floating”
RS-232 Mode: ..................................................... Input pin either hardwired to ground (pins 22
and 25) or switched to ground by a remote GPI
closure
Voltage on Floating Input Pin: ................ 3.3V ±2%
Input Resistance when pulled
to ground: ...................................................... 100kΩ ±5%
RS-485 Mode: ..................................................... Input pin either hardwired to “Format Bias”
(pin 15) or switched to “Format Bias” by a
remote GPI closure
Voltage on Floating Input Pin: ................ 3.3V ±2%
Input Resistance when pulled
to “Format Bias”: .......................................... 9.1kΩ ±5%
Format Bias Output (Pin 15 on the DB-26 HD Data I/O connector):
Output Voltage: ........................................... 12Vdc ±5%
Output Current Limit: ................................ 300mAdc maximum
38
GPI
Inputs (Pin 4 on the DB-15 HD Data I/O connector. GND on pin 5):
Voltage on Floating Input Pin: ..................... 3.3V ±2%
Input Voltage for
Page 55

Remote Contact Activation: .......................... ≤1Vdc
(typically grounded through GPI contacts,
TTL/HCMOS level drive also suitable)
Input Resistance when pulled
to ground (GPI output activated): ..............5kΩ ±1%
Output Contact Pairs (Pins 13&14)
Contact Format: ................................................ 1 Form A (non-activated condition)
Contact Resistance: .......................................... 100mΩ
Switching Voltage: ........................................... 125Vac, 110Vdc maximum
Contact Rating: .................................................. 2A @ 30Vdc,
0.3A @ 125Vac (resistive load)
Maximum Toggle Rate: ................................... ≈5Hz
Breakdown Voltage:
Between Open Contacts: ......................... 750Vrms for 1minute
Between Contact and Coil: ...................... 1500Vrms for 1 minute
Thunder
User Guide
Format Bias Output (Pin 10 on the DB-26 HD Data I/O connector):
Output Voltage: ................................................. 5Vdc ±5%
Output Current Limit: ...................................... 300mAdc maximum
Electro-Optical
Operating Wavelength:
Standard ............................................................... 1300 nm
Others available ................................................. CWDM wavelength 1270-1660nm
TX Laser output power .................................... -6 dBm
RX Sensitivity:
270MB/s ................................................................ -24 dBm
1.5 Gb/s ................................................................. -22 dBm
3.0 Gb/s ................................................................. -20 dBm
Fiber Compatibility................................................. Single Mode only
Note: Aside from providing a bias voltage for the data format options, the “Format Bias”
pin also provides a DC voltage source for low power loads that may be switched by the
GPI output contacts, such as LED’s for Tally use etc.
Distance Limitations: (1.5Gb/s) .......................... 16 db optical loss (30 km, nominal*)
Optical Connector Options: ................................ ST, MX, OpticalCON, SMPTE 304M
* The maximum cable length varies due to optical loss that can depend on cable quality,
dirt/dust/contamination on connectors, and the number of cable connectors.
39
Page 56

Specifications
Mechanical/Environmental
Mechanical/Environmental
Dimensions (WxLxD)
Frame (1 RU)........................................................ 19” x 6.5” x 1.75”
Panels (1 RU)........................................................ 19” x 6.5” x 1.75”
Panel (active audio in - 2 RU)......................... 19” x 4.75” x 2.7”
Weight:
Frame with 10 Bolt cards ................................ 2.5 lb
Panels (1 RU)........................................................ 2.5 lb
Panel (active audio IN - 2 RU) ........................3.5 lb
Power
Mains...................................................................... 100-240 VAC, 50-60 Hz, max 60 W
Auxilliary ............................................................... 10-18 VDC on 4-pin XLR
Temperature Range................................................ -25° to +55°C
Humidity Range....................................................... 0 to 95% RH, non-condensing
Audio Specifications
Analog Audio IN Bolt
Connector pin-out protocol: .............................. Tascam® standard 8 channel balanced analog
Input Impedance: ................................................... 20kΩ ±1% @1kHz, balanced, AC coupled
Maximum Input Level (clip): ............................... +24dBu +.4/-0dB, 20Hz to 20kHz
Frequency Response: ............................................ +0/-3dB, 1.6Hz to 100Hz;
Signal to Noise Ratio, ref. +24dBu: ................... >104dB unweighted, 20Hz to 20kHz;
Total Harmonic Distortion: ................................. ≤.005% @ 1kHz @20dBu;
Intermodulation Distortion: ............................... ≤.001% @ 20dBu, SMPTE-DIN Method
Common Mode Rejection Ratio: ....................... ≥45dBu, 20Hz to 20kHz
Adjacent Channel Crosstalk, ref.+24dBu: ...... ≥104dB, 20Hz to 20kHz
A/Dconversion:
Sample Resolution: .......................................... 24 bits
audio, 25 pin DB-25 socket
+0/-.07dB, 100Hz to 20kHz
>107dB, A-weighting
≤.02%, 20Hz to 20kHz
40
Sample Rate: ....................................................... 48.83kHz
Analog Audio Input Level
for 0dBFS Digital Output: ............................... 24dBu ±.2dB
Page 57

Analog Audio OUT Bolt
Connector pin-out protocol: .............................. Tascam® standard 8 channel balanced analog
Output Impedance: ............................................... 33Ω ±5% @ 1kHz, balanced, AC coupled
Maximum Output Level (clip): ........................... +24dBu, ±.2dB
Frequency Response: ............................................ +0/-3dB @ 12Hz to 100Hz;
Signal to Noise Ratio, ref. +24dBu: ................... >104dB unweighted, 20Hz to 20kHz;
Total Harmonic Distortion: ................................. ≤.005% @ 1kHz @20dBu;
Intermodulation Distortion: ............................... ≤.001% @ 20dBu, SMPTE-DIN Method
Adjacent Channel Crosstalk, ref. +24dBu: ..... ≥104dB, 20Hz to 20kHz
D/A conversion:
Sample Resolution: .......................................... 24 bits
audio, 25 pin DB-25 socket
+0/-.07dB, 100Hz to 20kHz @ R
>107dB, A-weighting
≤.02%, 20Hz to 20kHz
load
Thunder
User Guide
≥600Ω
Sample Rate: ....................................................... 48.83kHz
Analog Audio Output Level
for 0dBFS Digital Input: .................................. 24dBu ±0.2dB
Analog Audio End-to-End Performance
Analog IN to Analog OUT Level Deviation: ... ≤ ±0.2dB @1kHz
Maximum Throughput Level: ............................ +24dBu, +0.4/-0dB, 20Hz to 20kHz
Frequency Response: ............................................ +0/-3dB @ 12Hz to 100Hz;
Signal to Noise Ratio, ref.+24dBu: .................... >104dB unweighted, 20Hz to 20kHz;
Total Harmonic Distortion: ................................. ≤.005% @ 1kHz @ 20dBu;
Intermodulation Distortion: ............................... ≤.001% @ 20dBu, SMPTE-DIN Method
Adjacent Channel Crosstalk, ref. +24dBu: ..... ≥104dB, 20Hz to 20kHz
Audio Signal Propagation Delay: ..................... ≤1mSec
Active Audio Input Breakout Panel
+0/-.07dB, 100Hz to 20kHz @ R
>107dB, A-weighting
≤.05%, 20Hz to 20kHz
load
≥600Ω
Audio Input Connectors: 3 pin XLR socket
Pin 1: ...................................................................... Signal/Chassis Ground
Pin 2: ...................................................................... “Hot”, In phase input
Pin 3: ...................................................................... “Cold”, Inverted phase input
Input Impedance: ................................................... 6kΩ ±5% @1kHz, balanced, AC coupled
41
Page 58

Specifications
Mechanical/Environmental
Gain Setting: Unity
Maximum Input Level: ......................................... +24dBu, 20Hz to 20kHz
Input to Output Level Deviation: ................ ±.2dB @1kHz
Frequency Response: ...................................... +0/-.12dB, 20Hz to 100Hz;
Signal to Noise Ratio, ref. +24dBu: ............. ≥115dB unweighted, 20Hz to 20kHz;
Total Harmonic Distortion: ............................ ≤.005% @ 1kHz @ 20dBu;
Intermodulation Distortion: ......................... ≤.002% @ 20dBu, SMPTE-DIN Method
Common Mode Rejection Ratio:.................. ≥40dBu, 20Hz to 20kHz
Adjacent Channel Crosstalk, ref. +24dBu: ≥110dB, 20Hz to 20kHz
Gain Setting: +10dB
Maximum Input Level: .................................... +14dBu, 20Hz to 20kHz
Input to Output Level Deviation: ................ +10dB ±.2dB @1kHz
±.015dB, 100Hz to 20kHz
≥120dB, A-weighting
≤.02%, 20Hz to 20kHz @ 20dBu
Frequency Response: ...................................... +0/-.12dB, 20Hz to 100Hz;
±.015dB, 100Hz to 20kHz
Signal to Noise Ratio, ref.+14dBu: .............. ≥105dB unweighted, 20Hz to 20kHz;
≥110dB, A-weighting
Total Harmonic Distortion: ............................ ≤.006% @ 1kHz @ 10dBu;
≤.03%, 20Hz to 20kHz @ 10dBu
Intermodulation Distortion: ......................... ≤.005% @ 10dBu, SMPTE-DIN Method
Common Mode Rejection Ratio:.................. ≥40dBu, 20Hz to 20kHz
Adjacent Channel Crosstalk, ref. +24dBu: ≥105dB, 20Hz to 20kHz
Gain Setting: +20dB
Maximum Input Level: .................................... +4dBu, 20Hz to 20kHz
Input to Output Level Deviation: ................ +20dB ±.2dB @1kHz
Frequency Response: ...................................... +0/-.12dB, 20Hz to 100Hz;
±.015dB, 100Hz to 20kHz
Signal to Noise Ratio, ref. +4dBu: ................ ≥115dB unweighted, 20Hz to 20kHz;
≥118dB, A-weighting
Total Harmonic Distortion: ............................ ≤.002% @ 1kHz @ 0dBu;
≤.01%, 20Hz to 20kHz @ 0dBu
42
Intermodulation Distortion: ......................... ≤.001% @ 0dBu, SMPTE-DIN Method
Common Mode Rejection Ratio:.................. ≥60dBu, 20Hz to 20kHz
Adjacent Channel Crosstalk, ref.+24dBu: .≥110dB, 20Hz to 20kHz
Page 59

Gain Setting: +30dB
Maximum Input Level: .................................... -6dBu, 20Hz to 20kHz
Input to Output Level Deviation: ................ +30dB ±.2dB @1kHz
Frequency Response: ...................................... +0/-.12dB, 20Hz to 100Hz;
±.015dB, 100Hz to 20kHz
Signal to Noise Ratio, ref. -6dBu: .................≥105dB unweighted, 20Hz to 20kHz;
≥110dB, A-weighting
Total Harmonic Distortion: ............................ ≤.003% @ 1kHz @ -10dBu;
≤.01%, 20Hz to 20kHz @ -10 dBu
Intermodulation Distortion: ......................... ≤.002% @ -10dBu, SMPTE-DIN Method
Common Mode Rejection Ratio:.................. ≥60dBu, 20Hz to 20kHz
Adjacent Channel Crosstalk, ref. +24dBu: ≥105dB, 20Hz to 20kHz
Gain Setting: +40dB
Maximum Input Level: .................................... -16dBu, 20Hz to 20kHz
Input to Output Level Deviation: ................ +40dB ±.3dB @1kHz
Thunder
User Guide
Frequency Response: ...................................... +0/-.12dB, 20Hz to 100Hz;
±.015dB, 100Hz to 20kHz
Signal to Noise Ratio, ref. -16dBu: ............... ≥108dB unweighted, 20Hz to 20kHz;
≥110dB, A-weighting
Total Harmonic Distortion: ............................ ≤.002% @ 1kHz @ -20dBu;
≤.005%, 20Hz to 20kHz @ -20 dBu
Intermodulation Distortion: .......................... ≤.001% @ -20dBu, SMPTE-DIN Method
Common Mode Rejection Ratio:.................. ≥80dBu, 20Hz to 20kHz
Adjacent Channel Crosstalk, ref. +24dBu: ≥105dB, 20Hz to 20kHz
Gain Setting: +50dB
Maximum Input Level: .................................... -26dBu, 20Hz to 20kHz
Input to Output Level Deviation: ................ +50dB ±.2dB @1kHz
Frequency Response: ...................................... +0/-.12dB, 20Hz to 100Hz;
±.015dB, 100Hz to 20kHz
Signal to Noise Ratio, ref. -26dBu: ............... ≥100dB unweighted, 20Hz to 20kHz;
≥102dB, A-weighting
Total Harmonic Distortion: ............................ ≤.004% @ 1kHz @ -30dBu;
≤.01%, 20Hz to 20kHz @ -30 dBu
Intermodulation Distortion: ......................... ≤.001% @ -30dBu, SMPTE-DIN Method
Common Mode Rejection Ratio:.................. ≥80dBu, 20Hz to 20kHz
Adjacent Channel Crosstalk, ref. +24dBu:. ≥100dB, 20Hz to 20kHz
Output Connector pin-out protocol: ..............Tascam® standard 8 channel balanced analog
audio, 25 pin DB-25 socket
43
Page 60

Specifications
Mechanical/Environmental
Output Impedance: ......................................... 33Ω ±5% @ 1kHz, balanced, AC coupled
Maximum Output Level (clip): .....................+24dBu, ±.2dB
Frequency Response: ...................................... +0/-3dB @ 12Hz to 100Hz @ R
Note: Frequency response values stated in the “Unity to +50dB” gain(s) section above
can be achieved when the output load impedance is high, i.e. ≥10kΩ
Phantom Power, Switchable
Output Voltage: ................................................. 48Vdc ±10%
Output Current: ................................................. 2mA ±10% typical per input connector
Output Short Circuit Current: ....................... 10mAdc maximum per input connector
Source Resistance: ............................................ 6.8kΩ ±1% per leg
Power Consumption
AC Line Input Voltage: .................................... 90Vac to 240Vac @ 50/60 Hz
AC Line Input Current: .................................... 100mAac maximum @ 120Vac
Intercom Expansion Panel
4-Wire Module
Input Impedance: ................................................... 600Ω ±5% @ 1kHz, Balanced, AC Coupled
Maximum Input Level (clip): ............................... +10dBm ±.5dB @1kHz
load
≥600Ω
Frequency Response: ............................................ ±.5dB, 50Hz to 20kHz
Signal to Noise Ratio, Referred to +10dBm: .>85dB unweighted, 20Hz to 20kHz;
>100dB, A-weighting
Total Harmonic Distortion: ................................. ≤.01% @ 1kHz @ +6dBm;
≤.05%, 20Hz to 20kHz
Intermodulation Distortion: ............................... ≤.003% @ 20dBu, SMPTE-DIN Method
Common Mode Rejection Ratio: ....................... ≥50dBu, 20Hz to 20kHz
2-Wire Module
Clear-Com/TW (2-wire) Module
Standard Clear-Com® Party Line Interface; “CC” “MODE” selected
Channel 1 audio on XLR-A pin 3, Channel 2 audio on XLR-B pin 3
Audio Level (properly nulled): ................ 2VP-P ±5%, 70Hz to 20kHz
Channel 1 ....................................................... 30Vdc +0/-8Vdc on XLR-A pin 2,
Channel 2 ....................................................... 30Vdc +0/-8Vdc on XLR-B pin 2, only when the
“Power” switch is in the “WET” position
Termination: .................................................. ≈200 ohm; termination engaged only when
the “Power” switch is in the “WET” position
44
Page 61

Standard TW (RTS®) Party Line Interface; “TW” “MODE” selected
Channel 1 audio and 30Vdc power on XLRs-A&B pin 2, Channel 2 audio on XLRs-A&B
Audio Level (properly nulled): ................ 2VP-P ±5%, 70Hz to 20kHz
30Vdc ............................................................... +0/-8Vdc on XLRs-A&B pin 2 only when the
Termination: .................................................. ≈200 ohm termination engaged only when the
Data Specifications
Data Bolt Card
RS-232 Mode
Input Voltage Range: ....................................... >±3VP-P to <±25VP-P (.5V internal hysteresis)
Thunder
User Guide
pin 3
“Power” switch is in the “WET” position
“Power” switch is in the “WET” position
Input Bias current: ............................................ ±100μA maximum
Input Impedance: ............................................. 33kΩ ±5%
ESD tolerance: .................................................... ±15kV Air-Gap,
±8kV Contact,
±15kV HBM
Output Voltage: ................................................. ±5.5VP-P @ ±5%, R
Data Rate: ............................................................ DC to 160k
(High speed limit determined by
asynchronous sampling rate. Jitter is fixed @
320nsec. Higher data rates (up to 1M
maximum) are possible if equipment driven
has greater jitter tolerance).
RS-422, RS-485 Modes
Input Voltage Range: ....................................... 100mV to 12V differentially across “+” and “-“
data input pins or 50mV to 6V on either input
with respect to GND (50mV internal hysteresis)
Input Common Mode Range: ...................... +1.65Vdc ±10%
Input Bias current: ............................................ ±600μA maximum
Input Impedance: ............................................. 33kΩ ±5%
(For data rates ≥20kb/Sec and/or multi-drop
applications with longer cable lengths, an
external 110Ω resistor is recommended across
the “+” and “–“ data inputs of the unit furthest
from the driving source to properly terminate
the line. This will minimize random bit errors
induced by cable reflections.).
baud
load
≥3KΩ
baud
45
Page 62

Specifications
Mechanical/Environmental
ESD tolerance: .................................................... ±15kV Air-Gap,
Output Voltage: ................................................. 0-3.3V per output unloaded,
Data Rate: ............................................................ DC to 200k bits/Sec
Time delay after a transmitted data
burst before a return message can be
accepted at the receiver (RS-485 only): .... 16.4μSec
Data Format Inputs (Pins 21, 23, 24 and 26 on the DB-26 HD Data I/O connector):
RS-422 Mode: ..................................................... No connection, input pin left “floating”
±8kV Contact,
±15kV HBM
0-1.85V per output at R
load
54Ω.
6.6VP-P output differential unloaded,
3.7VP-P output differential at R
load
110Ω
(High speed limit determined by
asynchronous sampling rate. Jitter is fixed @
320nSec. Higher data rates (up to 1M bits/Sec.
maximum) are possible if equipment driven
has greater jitter tolerance).
Format Bias Output (Pin 10 on the DB-26 HD Data I/O connector):
GPI Bolt Card
Inputs (Pins 1, 2, 3, 4, 5, 6, 7 and 8 on the DB-26 HD Data I/O connector. GND on pin9):
RS-232 Mode: ..................................................... Input pin either hardwired to ground (pins 22
and 25) or switched to ground by a remote GPI
closure
Voltage on Floating Input Pin: ................ 3.3V ±2%
Input Resistance
when pulled to ground: ............................ 100kΩ ±5%
RS-485 Mode: ..................................................... Input pin either hardwired to “Format Bias”
(pin 10) or switched to “Format Bias” by a
remote GPI closure
Voltage on Floating Input Pin: ................ 3.3V ±2%
Input Resistance
when pulled to “Format Bias”: ................ 9.1kΩ ±5%
Output Voltage:.................................................. 12Vdc ±5%
Output Current Limit: ...................................... 300mAdc maximum
46
Voltage on Floating Input Pin: ..................... 3.3V ±2%
Input Voltage
for Remote Contact Activation: ................... ≤1Vdc
(typically grounded through GPI contacts;
TTL/HCMOS level drive also suitable)
Page 63

Thunder
User Guide
Input Resistance when pulled
to ground (GPI output activated): ..............5kΩ ±1%
Output Contact Pairs (Pins 11&19, 12&20, 13 &21, 14&22, 15&23, 16&24, 17&25 and 18&26)
Contact Format: ................................................ 1 Form A (non-activated condition)
Contact Resistance: .......................................... 100mΩ
Switching Voltage: ........................................... 125Vac, 110Vdc maximum
Contact Rating: .................................................. 2A @ 30Vdc,
0.3A @ 125Vac (resistive load)
Maximum Toggle Rate: ................................... ≈5Hz
Breakdown Voltage:
Between Open Contacts: ......................... 750Vrms for 1minute
Between Contact and Coil: ...................... 1500Vrms for 1 minute
Format Bias Output (Pin 10 on the DB-26 HD Data I/O connector):
Output Voltage: ................................................. 5Vdc ±5%
Output Current Limit: ...................................... 300mAdc maximum
Note: The “Format Bias” pin is provided to supply a DC voltage source for low power
loads that may be switched by the GPI output contacts, such as LED’s for Tally use etc.
47
Page 64

Specifications
Mechanical/Environmental
48
Page 65

Grass Valley Technical Support
For technical assistance, contact our international support center, at
1-800-547-8949 (US and Canada) or +1 514 333 1772.
To obtain a local phone number for the support center nearest you, please consult the
Contact Us section of Grass Valley’s Web site (
An online form for e-mail contact is also available from the Web site.
Corporate Head Office
Grass Valley
3499 Douglas-B.-Floreani
St-Laurent, Quebec H4S 2C6
Canada
Telephone: +1 514 333 1772
Fax: +1 514 333 9828
www.grassvalley.com
Contact Us
www.grassvalley.com).
49
 Loading...