

GRASS VALLEY AURORA EDIT - RELEASE NOTES AND UPGRADE INSTRUCTIONS V7.1.0, Aurora Edit, Aurora Edit LD Upgrade Instructions
Page 1

071-8625-11
Aurora Edit and Edit LD
Version 7.1.0
Release Notes & Upgrade Instructions
These release notes contain the most recent information and supersede previous
publications, as of 18 October 2010. Check the Grass Valley website at
www.grassvalley.com/docs for an u
information.
pdated version that co ntains additi onal i mport ant
Copyright © Grass Valley, Inc. All rights reserved. Printed in the Un ited States of America. Porti ons of software © 2000 – 2010 , M icrosoft Cor pora ti on. All right s r eserve d. T his
document may not be copied in whole or in part, or other wi se reproduce d except as specifica lly permitted under U.S. copyright law, without the prior written consen t of Grass
Valley, Inc., P.O. Box 59900, Nevada City, California 95959-7900. This product may be covered by one or more U.S. and foreign patents.Product options and specifications
subject to change without notice. The information in this manual is furnished for informational use only, is subject to change without notice, and should not be construed as a
commitment by Grass Valley, Inc. Grass Valley, Inc. assumes no responsibility or liability for any errors or inaccuracies that may appear in this publication.Grass Valley, K2,
Aurora, Summit, Dyno, Solo, Infinity, Turbo, Profile, Profile XP, NetCentral, NewsBrowse, NewsEdit, NewsQ, NewsShare, NewsQ Pro, and Media Manager are either
registered trademarks or trademarks of Grass Valley, Inc. in the United States and/or other countries. Grass Valley, Inc. products are covered by U.S. and foreign patents,
issued and pending. Additio nal in form ation reg arding Gr ass V alley, Inc. trademarks and other p ropr ietar y r ights may be found at www.gra ssvalley.com. Other tradema rks and
logos used in this document are either registered trademarks or trademarks of the manufacturers or vendors of the associated products, such as Microsoft® Windows®
operating system, Windows Media® player, Internet Explorer® internet browser, and SQL Server™. QuickTime and the QuickTime logo are trademarks or registered
trademarks of Apple Computer, Inc., used under license therefrom.
Page 2

Contents
Grass Valley Product Support.....................................................................................................4
Release Summary......................................................................................................................6
What's new in version 7.1.0.....................................................................................................6
Version 7.1.0........................................................................................................................6
Changes and features in previous releases............................................................................6
Version 6.5.1.440...............................................................................................................10
Version 6.5.........................................................................................................................10
Older versions....................................................................................................................11
Version compatibility.................................................................................................................12
System specifications............................................................................................................12
HP workstation board assignments.......................................................................................17
Compatible DSM components...............................................................................................20
Compatible Grass Valley products.........................................................................................20
Compatible third party products............................................................................................21
Upgrading Aurora Edit and Aurora Edit LD systems.................................................................23
Upgrading Aurora Edit and Edit LD devices with SiteConfig.................................................23
About upgrading Aurora Edit and Aurora Edit LD with SiteConfig.....................................23
Make recovery images.......................................................................................................24
Prepare for upgrade...........................................................................................................24
Upgrading Aurora Edit and Edit LD devices with SiteConfig.................................................25
Prepare SiteConfig for software deployment.....................................................................25
Install prerequisite files on the control point PC.................................................................26
Upgrade K2 systems.........................................................................................................26
Set up K2 Aurora FTP........................................................................................................26
Distribute devices into deployment groups........................................................................29
Install High Priority Windows updates (recommended).....................................................30
Manually upgrade systems................................................................................................30
Check all currently installed software on Aurora Edit devices............................................30
Add software package to deployment group for Aurora Edit devices.................................31
Setting deployment options................................................................................................33
Upgrade software on shared storage Aurora Edit workstations.........................................35
Upgrade software on Aurora Edit devices..........................................................................39
Upgrade NAS systems......................................................................................................42
Upgrade Browse and MediaFrame systems......................................................................42
Make recovery images.......................................................................................................42
Manually Installing Aurora Edit/Aurora Edit LD Software..........................................................44
Third Party Software Installation...............................................................................................46
Licensing Grass Valley products...............................................................................................47
About software licensing.......................................................................................................47
Requesting a license.............................................................................................................47
Adding a license....................................................................................................................49
Deleting licenses...................................................................................................................50
Archiving licenses..................................................................................................................50
New topics................................................................................................................................51
New Topics in 7.1..................................................................................................................51
New topics in 7.0.0................................................................................................................51
2 Aurora Edit and Edit LD Version 7.1.0 Release Notes and Upgrade Instructions 18 October 2010
Page 3

Keyboard Overview...............................................................................................................51
Tool selection keys.............................................................................................................51
Transport command keys...................................................................................................52
Editing and clip/track selection keys..................................................................................53
Mark point keys..................................................................................................................54
Track selection keys...........................................................................................................56
Other Aurora Edit keys.......................................................................................................56
The Orad Graphics Tool .......................................................................................................58
Moving Orad MOS objects into Aurora Edit.......................................................................59
The VizRT Graphics Tool ......................................................................................................60
Moving VizRT MOS objects into Aurora Edit......................................................................60
Create VizRT Graphic within Aurora Edit...........................................................................62
Linking video MOS objects to the Timeline...........................................................................64
Editing using offline proxy media...........................................................................................66
Preserving ANC Data............................................................................................................67
Operation considerations..........................................................................................................69
Known Issues............................................................................................................................75
18 October 2010 Aurora Edit and Edit LD Version 7.1.0 Release Notes and Upgrade Instructions 3
Page 4

Grass Valley Product Support
Grass Valley Product Support
T o get technical assistance, check on the status of a question, or to report a ne w issue,
contact Grass Valley Product Support via e-mail, the Web, or by phone or fax.
Web Technical Support
To access support information on the Web, visit the product support Web page on the
Grass Valley Web site. You can download software or find solutions to problems.
World Wide Web: http://www.grassvalley.com/support/
Technical Support E-mail Address: gvgtechsupport@grassvalley.com
Telephone Support
Use the following information to contact Product Support by phone.
International Support Centers
Our international support centers are available 24 hours a day, 7 days a week.
Authorized Local Support Representative
A local support representative may be available in your country. To locate a support
center during normal local business hours, refer to the following list. This list is
regularly updated on the website for Grass Valley Product Support
(http://www.grassvalley.com/support/contact/phone/)
After–hours local phone support is also available for warranty and contract customers.
In countryToll freeSupport Center
+33 1 48 25 20 20+800 80 80 20 20France
+1 530 478 4148+1 800 547 8949United States
TelephoneCountryRegion
+86 10 5883 7575ChinaAsia
4 Aurora Edit and Edit LD Version 7.1.0 Release Notes and Upgrade Instructions 18 October 2010
+852 2531 3058Hong Kong, Taiwan, Korea,
Macau
+81 3 6848 5561Japan
+603 7492 3303Southeast Asia - Malaysia
Page 5

South America
Grass Valley Product Support
TelephoneCountryRegion
+65 6379 1313Southeast Asia - Singapore
+91 22 676 10324India
1 300 721 495AustraliaPacific
0800 846 676New Zealand
+61 3 8540 3650For callers outside Australia
or New Zealand
+55 11 5509 3440AllCentral America,
North America
Africa
North America, Mexico,
Caribbean
France
Eastern Europe
Tadzhikistan, Ukraine,
Uzbekistan
Near East and Africa
+1 800 547 8949;
+1 530 478 4148
+44 1189 230 499UK, Ireland, IsraelEurope
+31 (0) 35 62 38 421Benelux – Netherlands
+32 (0) 2 334 90 30Benelux – Belgium
+800 80 80 20 20;
+33 1 48 25 20 20
+49 6150 104 444Germany, Austria,
+7 495 258 09 20Belarus, Russia,
+45 404 72 237Northern Europe
+39 06 87 20 35 28Southern Europe – Italy
+34 91 512 03 50Southern Europe – Spain
+971 4 299 64 40Middle EastMiddle East, Near East,
+800 80 80 20 20;
+33 1 48 25 20 20
18 October 2010 Aurora Edit and Edit LD Version 7.1.0 Release Notes and Upgrade Instructions 5
Page 6

Release Summary
Release Summary
What's new in version 7.1.0
Version 7.1.0
• Windows 7 support — The Aurora Edit client supports the Windows 7 operating
system for 32-bit and 64-bit versions.
• Installing or updating SNFS and Generic iSCSI — SNFS and Generic iSCSI
cab files no longer bundled together. Check the Version Compatibility section to
determine the version compatible with your system.
Changes and features in previous releases
The following sections describe changes and features in past releases.
Version 7.0.0
• New Look — Like the rest of the Aurora Suite, Aurora Edit and Aurora Edit LD
now have a new look, which matches the Grass Valley Alloy look and feel.
• New terminology — The MediaFrame server will now be referred to as K2
BaseCamp. (The scaled-down version of the Aurora Browse/MediaFrame system
is still referred to as K2 BaseCamp Express.)
• Improved Render and Transcode Performance — Due to underlying changes
to the playback architecture, this version of Aurora Edit will perform renders and
transcodes faster than the previous version. Transferred sequences that require
these functions will appear faster to the user, especially with the new class
workstations. The Conform server performance is also improved.
• Animated graphics now allowed on graphics track — Aurora Edit 7.0 now
allows for animated graphics to be placed on the graphics track. Due to this change,
previously imported sequential .tga files will need to be reimported.
• New Hot Keys and Keyboard Keycaps — The keyboard layout for Aurora Edit
functions has been modified. A set of color -coded ke ypad stickers is included with
each Aurora Edit softw are disk. The keypad sticker set allo ws any standard ke yboard
to be updated to an Aurora Edit k eyboard. Also use the stickers to update an existing
Aurora Edit keyboard that already has permanent colored-coded keypads if
necessary.
Along with the new sticker keycaps, some buttons functions have changed as
described below:
The 9 key has changed from Input Tools to View Metadata.
6 Aurora Edit and Edit LD Version 7.1.0 Release Notes and Upgrade Instructions 18 October 2010
Page 7

Release Summary
The M key has changed from Select Previous Clip to Match Frame to Bin.
The < key has changed from Select Next Clip to Mark Area.
The > key has changed from Select Previous Track to Show Search Results (local).
The ? key has changed from Select Next track to Find (local).
Refer to the following section for a complete description of the new ke yboard look
Keyboard Overview on page 51.
• Orad Graphics Integration — Aurora Edit and Aurora Edit LD have an end-to-end
workflow with the Orad graphics system. This includes integration from the
journalists desktop directly to playout on air. From the journalist desktop, Orad
has a standard plug-in that allows operators to access, add, or modify graphics that
can be linked to scripts as MOS objects. From Aurora Edit or Aurora Edit LD,
editors can link to scripts and copy graphics directly to the Timeline. The graphic
can be previewed by double-clicking the graphic on the T imeline to open the Orad
plug-in where the editor can make changes. Once a sequence has been sent with
graphics from Orad in the Timeline, Aurora Edit will embed timing information
for graphics triggering from Aurora Playout. Refer to The Or ad Gr aphics Tool on
page 58 in New Topics for more information on using Orad.
• VizRT Graphics Integration — A new workflow has been introduced with this
release to provide integration with the VizRT graphics system. This includes
integration from the journalist desktop directly to the T imeline in both Aurora Edit
and Aurora Edit LD. From the journalist desktop, VizRT has a standard plug-in
that allows operators to access, add, or modify graphics that can then be linked to
scripts as MOS objects. From Aurora Edit, editors can link to scripts and copy
graphics directly to the Timeline. The graphic can be previewed by double-clicking
the object in the Timeline to launch the VizRT plug-in. Editors have the same
add/modify capabilities as the journalist do within the VizRT plug-in. Once a
graphic is ready on the Timeline, the operator retrieves the graphic to pull it from
the VizRT graphics server as a video file with alpha. The editor can then transfer
to playout with the burned in graphic already on the Timeline. Refer to The VizRT
Graphics Tool on page 60 in New Topics for more information on using VizRT.
• Linking Video MOS objects to Timeline — Within the Aurora Suite, both feed
events and finished stories become MOS Objects within the newsroom computer
system. The MOS Objects may be searched on and linked to stories for use within
Aurora Edit. Once a feed has been started in the Aurora Ingest Scheduler application,
the video become searchable within ENPS. This provides a fast method of finding
feed and placing it into a news story as a MOS object that can easily be brought
into Aurora Edit and edited as desired. Refer to Linking video MOS objects to the
Timeline on page 64 In New Topics for an overview of this feature.
• Graphics import in Aurora LD — As a basic addition to Aurora Edit LD,
operators can access the File Import Graphic option for importing still graphics
such as .tga and .bmp files. This is the same functionality as the high-resolution
Aurora Edit, but Aurora Edit LD must import the file into a directory that it has
access to. If it is not attached to the high-resolution directory (V), then it must
import to a directory that it has access to. Note that only still graphics may be
imported; animated sequential .tga files are not supported for Aurora Edit LD.
• All Animations and .tga Sequences now on Graphics Track — Due to graphics
changes, all animations and .tga sequences will now be on the Graphics (G) track.
They will no longer be on the FX and V2 tracks as the y were in previous releases.
18 October 2010 Aurora Edit and Edit LD Version 7.1.0 Release Notes and Upgrade Instructions 7
Page 8

Release Summary
Previous animations and .tga sequences will need to be re-imported to the Graphics
track.
• 24-Bit Audio — Aurora Edit now has 24-bit audio support within the application.
To configure the application for 24-bit audio, go to Tools | Options | Audio/Video.
A new Audio Format pulldown allows for the selection of both 16- and 24-bit
audio. The operator can mix and match 16- and 24- bit audio within the same
Timeline. Records will take on the bit depth of the configured setting, but media
import will preserve the current bit depth of the source media. Sending will flatten
audio to the bit depth of the sequence.
• Offline Proxy Support — Aurora Edit and Aurora Edit LD can preview and edit
with proxy media that is associated with offline archived hi-resolution video. This
feature allows editors to use archived offline assets within a Timeline as if they
were present in the online news database. The offline assets become available in
the bin by doing a MediaFrame search. Finding offline assets can be accomplished
by setting up filters in the Aurora search tool or by searching for a kno wn archi ved
asset. Once the search is done, the asset search results are placed in the Aurora Edit
or Aurora Edit LD bin, identified by an orange dot next to the name, and become
available as editable material on the T imeline. Refer to Editing using offline proxy
media on page 66 in New Topics for using this feature.
• Preserve ANC Data — Sequences created in Aurora Edit have a Preserve ANC
Data checkbox that when selected will allow ancillary data in clips sent to a
Smartbin from a K2 or Summit storage device to be preserved on the Timeline.
The closed captioning present in the ancillary data of a clip can be displayed on
the SDI output of an optional AJA Breakout Box (BOB) (LHi version only). When
incoming feeds with closed captioned data are recorded to a K2 or Summit storage
device, the K2 or Summit will put this data into an ancillary data track when the
generate ancillary data option is turned on on the K2 or Summit device. This is
done in Audio/Video configuration under Data Track Setup on the K2 or Summit.
When clips with this data are fed to an Aurora Edit Smartbin, the ancillary data
can be expected to be preserved in the clip (Preserve ANC Data checkbox must be
selected for the sequence) and allow any closed captioning in the data track to be
monitored on the SDI output of an AJA Breakout Box (BOB) option. Refer to
Preserving ANC Data on page 67 in New Topics for more detailed information
on this feature.
• Real-Time Preview with AJA Breakout Box (BOB) — Effects, transitions, and
graphics can be previewed prior to rendering with the AJA Breakout Bos option.
The SDI output of the Breakout Box is always av ailable, so no enabling is required.
• Increased Maximum Long GOP Send Bit Rate — When sending as MPEG2
Long GOP , the HD maximum bit rate has been increased from 80mbits to 100mbits.
• XDCAM EX Support — XDCAM EX files will show up in the removable media
bin of Aurora Edit. These will be part of the supported XDCAM series from Son y.
JVC also had the ability to encode in the XDCAM EX format. These files import
correctly with both Aurora Edit and RMI. Not all forms of XDCAM EX are
supported. For instance, 24fps is not supported and does not display in the removable
media bin if found on disk. "View as Tape" will not mix and match XDCAM HD
and XDCAM EX media. They are treated as different formats, even if the
characteristics of the file formats are similar.
• XDCAM 720 Support— 720p is now part of the supported file formats for
XDCAM HD.
8 Aurora Edit and Edit LD Version 7.1.0 Release Notes and Upgrade Instructions 18 October 2010
Page 9

Release Summary
• AVC-Intra Timeline — As an addition to the playback support of AVC-Intra in
version 6.5, version 7.0 now has the option to create both AVCI-50 and AVCI-100
sequences, which completes the end-to-end support fo this format as it will transfer
to the K2 Summit. To set this up, Tools | Options | Audio/Video includes an option
for AVCI when the video format is set to an HD format. Due to the intensity of
AVCI-100 playback, some lesser performing systems, such as laptops, may have
a hard time playing this format.
• Multi-tiered SmartBins — SmartBins have been modified to detect and monitor
bins within bins in the new Summit/K2 database.
• Elimination of Media Import SmartBins — With the advent of the K2 hotbin,
the Aurora Edit Media Import Smartbins ha ve become redundant within the Aurora
system, even for Final Cut Pro workflows. Therefore there is no longer a Media
Import SmartBin option within the bin properties dialog. Pre-existing Media Import
SmartBins will continue to function, but support has been removed from the 7.0
system.
• Elimination of Caching — Although a cache service still exists for Aurora Edit
7.0, the process of caching files locally or trickling back to the shared volume has
been removed. No changes to setup or configuration are required. In addition, cache
directories may still be entered at the time of install, but this information will be
ignored by the application.
• Use Configured Web Proxy Setting — A new setting to bypass the configured
web proxy has been added to each application within the Aurora Suite. This
checkbox pertains to environments that have MediaFrame enabled. For Aurora
Edit, the checkbox is found in Tools | Options | General and will become active
only with MediaFrame turned on. When checked, the application will continue to
go through the configured Web Proxy settings in order to communicate with
MediaFrame services. When not selected, web calls through MediaFrame services
will bypass the configured settings.
• Updated SmartBins setup options -- The SmartBins setup tool has additional
configuration options:
Configured Web Proxy -- If this option is selected, the application bypasses the
configured web proxy. If not selected, the web calls through the MediaFrame
service bypass the configured settings.
Ignore Subclips option -- If this option is selected, SmartBins do not act on
subclips.
Wink K2 Generated Quicktime Files -- If this option is selected, SmartBins will
wink K2 generated Quicktime files when clips are winked to the News system.
Version 6.5.2
• SiteConfig support — Network configuration and software deployment across
all Aurora products is supported by SiteConfig, Grass Valley's system management
tool.
• Administrator password – The default administrator account on Aurora devices
has credentials as follows:
• Username: administrator
• Password: adminGV!
18 October 2010 Aurora Edit and Edit LD Version 7.1.0 Release Notes and Upgrade Instructions 9
Page 10

Release Summary
Version 6.5.1.440
Version 6.5
SiteConfig expects these credentials by default.
• Hot keys – There are modified or new keyboard shortcuts for Aurora Edit
functionality, as specified in topics later in this document.
• K2 Summit compatible – The Aurora suite of software, including Aurora Edit,
is compatible with the K2 Summit software.
• NOTE: Aurora Edit 6.5 now requires you to hav e an A urora Sys license running
on the license manager , typically the DSM, for shared connectivity as well linking
to story via Aurora Playout tools.
• DV100 Support – Aurora Edit 6.5 includes support for DV100 media, either via
record or removable media import from P2. Note that transfers of DV100 media
to the Summit are supported, while transfers to K2 server are not.
• MPEG Long GOP Support – XDCAM HD, as well as Long GOP K2 records,
can be used natively within Aurora Edit timelines.
• Agile Timeline – Users can mix and match various formats (e.g. HD/SD,
1080i/720p, DV/MPEG, etc.) in real time within the timeline without having to
media convert up front.
• Send as MPEG2 – As an enhancement to the previous Long GOP Send capability
that was supported in previous versions of Aurora Edit, 6.5 now allows transfers
to transcode to MPEG I-Frame as well as MPEG Long GOP and XDCAM HD
formats.
• More Audio Channels – Aurora Edit now supports 16 channels of audio within
a file for playback, 8 channels of audio for recording, 16 tracks of audio within the
timeline, and up to 16 channels of output when sending to a server.
• MediaFrame Integration – New search and metadata tools have been embedded
in numerous areas within the application. These changes represent practical
improvements to the product as well as providing overarching workflow
enhancements to the workflow.
• Final Cut Pro Enhancements – Aurora Edit 6.5 has added special support for the
Leopard OS for Apple. In addition to setup changes, DV100 and XDCAM HD
workflows are fully supported.
NOTE: Previous Apple operating systems are not supported in Aurora Edit 6.5.
• System Information Utility – The Help->About box now includes a System
Information Utility.
• Render and Send via Conform Server – Aurora Edit can now of f load sequences
to a conform server for rendering, transcoding, and sending jobs, just like Aurora
Edit LD has supported in the past.
• HDV – HDV media can be ingested with the Record to Bin feature of Aurora Edit.
• Write-back to SD XDCAM – Sequences and clips can be exported to an XDCAM
disk in the SD format.
10 Aurora Edit and Edit LD Version 7.1.0 Release Notes and Upgrade Instructions 18 October 2010
Page 11

• Native Timecode Support – Media that is recorded on the K2 will have its
timecode preserved, even if discontinuous, with shared SmartBin environments.
• Improved Aspect Ratio Conversion – Users can adjust aspect ratio settings in
real time prior to adding clips to the timeline. The resulting clip can be used on the
timeline prior to the actual conversion process.
• AVC-Intra Support – AVC-Intra clips can be imported and placed on the timeline
in its native format. These will be transcoded on sending to the K2 server.
• JPEG2K Support – JPEG2K clips can be imported and placed on the timeline in
its native format. These will be transcoded on sending to the K2 server.
• Online Help – Users can access online help from Aurora Edit, which is an
improvement upon the help manuals of the past.
Older versions
For information about older software versions not listed in these release notes, refer
to the release notes for those versions.
Release Summary
18 October 2010 Aurora Edit and Edit LD Version 7.1.0 Release Notes and Upgrade Instructions 11
Page 12

Version compatibility
Version compatibility
Versions qualified for compatibility with this release of software are summarized in
the following sections.
System specifications
This section describes the hardware requirements that customers should use when
purchasing equipment for this release. The minimum spec describes the bare minimum
requirement for running Aurora, which may reduce the quality of user experience,
depending on the task. The expected lifespan of minimum spec equipment is also less
than that of recommended spec equipment, since it lacks head room for future growth.
NOTE: Minimum specs for SD configurations are provided only for existing SD
customers upgrading to this release. New customers should use HD configurations.
Aurora Edit SD laptop
Graphics
Media Drive(s)
Aurora Edit HD laptop
MINIMUM Spec
Intel Core 2 Dual Core 2.4 GHzProcessor
2 GBMemory
Integrated or discrete graphics with 128 MB
of memory and support for Direct3D 9 and
Shader Model 3.0
80 GB 7200 RPM SATASystem Drive
7200 RPM SATA if 2nd drive is available;
otherwise order a larger system drive
CD/DVDOptical Drive
Gigabit EthernetNetwork
As neededFirewire/1394
Windows XP Pro 32 SP3 or Windows 7OS
RECOMMENDED SpecMINIMUM Spec
Processor
12 Aurora Edit and Edit LD Version 7.1.0 Release Notes and Upgrade Instructions 18 October 2010
Intel Core 2 Dual Core 2.4
GHz
Intel Core 2 Quad Core 2.53
GHz
3 GB3 GBMemory
Page 13

Version compatibility
RECOMMENDED SpecMINIMUM Spec
Graphics
Media Drive(s)
OS
Notes
Integrated or discrete
graphics with 256 MB of
Integrated or discrete
graphics with 256 MB of
memory and support formemory and support for
Direct3D 9 and Shader
Model 3.0
Direct3D 9 and Shader
Model 3.0
80 GB 7200 RPM SATA80 GB 7200 RPM SATASystem Drive
7200 RPM SATA if 2
nd
drive is available; otherwise
order a larger system drive
7200 RPM SATA if 2
drive is available; otherwise
order a larger system drive
nd
CD/DVDCD/DVDOptical Drive
Gigabit EthernetGigabit EthernetNetwork
As neededAs neededFirewire/1394
Windows XP Pro 32 SP3 or
Windows 7
Windows XP Pro 32 SP3 or
Windows 7
Editing HD on laptop systems may result in some
performance difficulties compared to desktop systems. This
includes potentially choppy playback, particularly during
un-rendered effects or when playing multiple streams of
video. In addition, render performance on a laptop is affected
by inherently slower drive performance within laptops.
Aurora Edit SD desktop
Processor(s)
Graphics
Notes
MINIMUM Spec
Intel Core 2 Dual Core 2.33 GHz OR Intel
Xeon 5140 Dual Core 2.33 GHz OR AMD
Opteron 270 Dual Core 2.0 GHz
2 GBMemory
Discrete graphics w/ 128 MB of dedicated
memory and support for Direct3D 9 and
Shader Model 3.0
80 GB 7200 RPM SATASystem Drive
2 x 250 GB 7200 RPM SATA stripedMedia Drives
CD/DVDOptical Drive
Gigabit Ethernet (2)Network
As neededFirewire/1394
Windows XP Pro 32 SP3 or Windows 7OS
A Gigabit Ethernet card and a Firewire/1394
card shall NOT be installed on the same PCI
18 October 2010 Aurora Edit and Edit LD Version 7.1.0 Release Notes and Upgrade Instructions 13
Page 14

Version compatibility
MINIMUM Spec
bus segment (e.g. adjacent PCI slots), since
this can cause very poor performance.
Aurora Edit HD desktop
RECOMMENDED SpecMINIMUM Spec
Processor(s)
Graphics
Media Drives
OS
Notes
Intel Core 2 Quad Core 2.33
GHz OR Two Intel Xeon
5160 Dual Core 3.0 GHz
Discrete graphics w/ 256
MB of dedicated memory
and support for Direct3D 9
and Shader Model 3.0
2 x 250 GB 7200 RPM
SATA striped
Windows XP Pro 32 SP3 or
Windows 7
A Gigabit Ethernet card and a Firewire/1394 card shall NO T
be installed on the same PCI bus segment (e.g. adjacent PCI
slots), since this can cause very poor performance. It is the
customer's responsibility to insure that the system has
sufficient number and type of expansion slots to meet the
intended use. (For example, to accommodate network and/or
FireWire cards.)
Two Intel Xeon 5410 Quad
Core 2.33 GHz
3 GB3 GBMemory
Discrete graphics w/ 384
MB of dedicated memory
and support for Direct3D 9
+ 10 and Shader Model 4.0
80 GB 7200 RPM SATA80 GB 7200 RPM SATASystem Drive
2 x 250 GB 7200 RPM
SATA striped
CD/DVDCD/DVDOptical Drive
Gigabit Ethernet (2)Gigabit Ethernet (2)Network
As neededAs neededFirewire/1394
Windows XP Pro 32 SP3 or
Windows 7
Aurora Edit HDR (AJA) desktop / rackmount
Model
Processors
Memory
14 Aurora Edit and Edit LD Version 7.1.0 Release Notes and Upgrade Instructions 18 October 2010
REQUIRED Spec
HP z800 workstation (850 W chassis)
Two Intel Xeon 5540 Quad Core 2.53
GHz
4 GB (4 x 1 GB)
Page 15

REQUIRED Spec
Version compatibility
Graphics
System Drive
Media Drives
Optical Drive
Network
Firewire/1394
Optional
OS
NVIDIA FX1800 768 MB graphics
(Direct3D 10 and Shader Model 4.0)
250 GB 7200 RPM SATA
2 x 250 GB 7200 RPM SATA striped
(RAID 0 Data Array)
CD/DVD
Gigabit Ethernet (2) (built into
motherboard)
(2) (built into motherboard)
Rack mount kit
Windows XP Pro 32 SP3
Windows 7 ( Only AJA based Aurora
Edit on the HP z800)
Notes
System shall be equipped EXACTLY as
specified above, except as follows:
• Customer may order faster quad core
CPUs if desired.
• Customer may order larger/faster
system drive and/or larger/faster
media drives if desired.
• Customer may order additional
network interfaces as needed.
• Customer may order additional 1394
card if needed.
Y ou might need to update the firmware on the AJ A LHi board, since some early boards
from AJA might have shipped with an older firmware. Aurora Self Test should notify
you if the wrong firmware is installed.
To update the firmware, follow these steps:
1. Open a command prompt with Administrator privileges
2. Type: cd "C:\Program Files\Grass Valley\Aurora\AJA Drivers\HD (for LH and
LHi)"
3. Type: spiflash top_pike_01_39.bit
4. Wait for it finish flashing (it can take upwards of a minute or so)
5. Restart.
18 October 2010 Aurora Edit and Edit LD Version 7.1.0 Release Notes and Upgrade Instructions 15
Page 16

Version compatibility
Aurora Conform Server (SD)
MINIMUM Spec
Dell PowerEdge R610Model
Intel Xeon 1.0 GHzProcessor(s)
2 GBMemory
Integrated graphicsGraphics
36 GB 7200 RPM SATA or SASSystem Drive
CD/DVDOptical Drive
Gigabit Ethernet (2)Network
Windows Server 2003 32 SP2OS
Aurora Conform Server (HD)
RECOMMENDED SpecMINIMUM Spec
Model
Processor(s)
System Drive
OS
Aurora Edit LD
Processor(s)
2950
Intel Xeon Dual Core 1.0
GHz OR T wo Intel Xeon 1.0
GHz
36 GB 7200 RPM SATA or
SAS
Windows Server 2003 32
SP2
Intel Pentium 4 2.4 GHz OR
Intel Pentium Dual Core 1.6
GHz OR Intel Core 2 2.0
GHz OR Intel Core 2 Dual
Core 1.6 GHz
Dell PowerEdge R610Dell PowerEdge 2850 or
Two Intel Xeon E5520 2.26
GHz
4 GB3 GBMemory
Integrated graphicsIntegrated graphicsGraphics
160 GB 7200 RPM SATA
or SAS
CD/DVDCD/DVDOptical Drive
Gigabit Ethernet (2)Gigabit Ethernet (2)Network
Windows Serv er 2003 R2 32
SP2
RECOMMENDED SpecMINIMUM Spec
Intel Core 2 Dual Core 2.0
GHz
Graphics
16 Aurora Edit and Edit LD Version 7.1.0 Release Notes and Upgrade Instructions 18 October 2010
Integrated or discrete
graphics with 64 MB of
2 GB1 GBMemory
Discrete graphics with 128
MB of memory and support
Page 17

Version compatibility
RECOMMENDED SpecMINIMUM Spec
memory and support for
Direct3D 9 and Shader
Model 3.0
OS
Notes
Windows XP Pro 32 SP3 or
Windows 7
Customers with legacy systems that do not meet the
minimum specifications should expect performance
problems, including timeline disruptions on playback,
sluggish edits for cuts, transitions, and effects, and delays
while scrubbing video and audio.
HP workstation board assignments
This section lists the supported Aurora Edit workstations and the corresponding slot
assignments.
HP xw8600 Workstation Board Assignment
for Direct3D 9 and Shader
Model 3.0
80 GB 7200 RPM SATA80 GB 7200 RPM SATASystem Drive
CD/DVDCD/DVDOptical Drive
Gigabit EthernetGigabit EthernetNetwork
Windows XP Pro 32 SP3 or
Windows 7
Slot TypeSlot #
PCI1
PCI-e x162
HP xw8400 Single-CPU Workstation Board Assignment
PCI1
Comtrol RS-422
(optional) OR
Comtrol RS-422 (optional)
OR additional IEEE 1394
(optional)
NVIDIA Quadro FX3700
graphics
Empty (use as needed)PCI-e x8 (x4)3
Empty (use as needed)PCI-e x16 (x16 or x8)4
Empty (use as needed)PCI-e x8 (x1 or x8)5
Empty (use as needed)PCI-e x8 (x4)6
SDR/HDR I/O boardPCI-X7
SDFXSD/SDRSlot TypeSlot #
Comtrol RS-422
(optional) OR
18 October 2010 Aurora Edit and Edit LD Version 7.1.0 Release Notes and Upgrade Instructions 17
Page 18

Version compatibility
SDFXSD/SDRSlot TypeSlot #
additional IEEE
1394 (optional)
PCI-e2
NVIDIA Quadro
FX1500 graphics
PCI-X6
HP xw8400 Dual-CPU Workstation Board Assignment
PCI1
Comtrol RS-422
(optional) OR
additional IEEE
1394 (optional)
PCI-e2
NVIDIA Quadro
FX1500 graphics
additional IEEE
1394 (optional)
NVIDIA Quadro
FX560 graphics
Network InterfaceNetwork InterfacePCI-e3
Network InterfaceNetwork InterfacePCI-e4
SDFX I/OSDR I/OPCI-X5
SDFX Audio
Adapter
Fibre ChannelFibre ChannelPCI-X7
HDFXHD/HDRSlot TypeSlot #
Comtrol RS-422
(optional) OR
additional IEEE
1394 (optional)
NVIDIA Quadro
FX1500 graphics
PCI-X6
HP xw9300 Workstation Single-CPU Board Assignment
SD/SDRSlot TypeSlot #
PCI-e1
NVIDIA
Quadro FX1400
graphics
PCI2
Comtrol
RS-422
additional IEEE
1394 (optional)
SDFX (Option
1)
NVIDIA
Quadro FX1500
graphics
Comtrol
RS-422
additional IEEE
1394 (optional)
Network InterfaceNetwork InterfacePCI-e3
Network InterfaceNetwork InterfacePCI-e4
HDFX I/OHDR I/OPCI-X5
HDFX Audio
Adapter
HDFX EffectsFibre ChannelPCI-X7
SDFX (Option
2)
NVIDIA
Quadro FX1400
graphics
Comtrol
RS-422
(optional) OR(optional) OR(optional) OR
additional IEEE
1394 (optional)
18 Aurora Edit and Edit LD Version 7.1.0 Release Notes and Upgrade Instructions 18 October 2010
Page 19

Version compatibility
SD/SDRSlot TypeSlot #
SDFX (Option
1)
inactiveinactivePCI-e3
PCI-X4
Network
Interface, Fibre
SDFX Audio
Adapter
Channel, or
RS422
PCI-X5
Interface
HP xw9300 Dual-CPU Workstation Board Assignment
PCI-e1
NVIDIA Quadro
FX3450 graphics
PCI2
Comtrol RS-422
(optional) OR
additional IEEE
1394 (optional)
SDFX (Option
2)
SDFX Audio
Adapter
Network
Interface
SDFX I/OSDFX I/ONetwork
SDFX Effects—SDR I/OPCI-X6
HDFXHD/HDRSlot TypeSlot #
NVIDIA Quadro
FX3450 graphics
Comtrol RS-422
(optional) OR
additional IEEE
1394 (optional)
PCI-X4
PCI-X5
HP z800 Workstation Board Assignment
PCI-e Gen2 x8 (x4)1
PCI-e Gen2 x162
PCI-e x8 (x4)3
PCI-e Gen 2 x165
Network Interface or
Fibre Channel
Fibre Channel
UseSlot TypeSlot #
Empty (can be used as
needed)
NVIDIA Quadro FX1800
graphics
Empty (can be used as
needed)
HDR I/O board (optional)PCI-e Gen 2 x16 (x8)4
Empty (can be used as
needed)
Network InterfaceNetwork InterfacePCI-e3
HDFX Audio
Adapter
HDFX I/ONetwork Interface or
HDFX EffectsHDR I/OPCI-X6
18 October 2010 Aurora Edit and Edit LD Version 7.1.0 Release Notes and Upgrade Instructions 19
Page 20

Version compatibility
UseSlot TypeSlot #
PCI6
PCI-e Gen2 x16 (x8)7
Compatible DSM components
The following components reside on the DSM and are compatible with this release
of software as listed in the following table. Compatible versions are pre-installed on
the DSM when you receive it new from Grass Valley.
2005 SP3SQL
Compatible Grass Valley products
Grass Valley products are compatible with this release of software as follows:
Comtrol 422 (optional) OR
2 nd 1394 (optional)
Empty (can be used as
needed)
CommentsVersionProduct
CommentsVersionProduct
Server
(AJA)
(Matrox)
7.1.0.8Aurora Browse client
7.1.0.18Aurora Browse MediaFrame
7.1.0.68Aurora Ingest
7.1.0.39Aurora Playout
Windows XP SP3 and
Windows 7
With compatible version of
SQL
Windows Server 20037.1.0.15Aurora Proxy Encoder
With compatible version of
SQL
With compatible version of
SQL
Windows Server 20037.1.0.273Aurora Conform Server
—7.1.0.20Aurora SDR/HDR Driver
—DSX.utils 6.1.0.70Aurora SDFX/HDFX Driver
Windows Server 20037.1.0.273Aurora SmartBins
20 Aurora Edit and Edit LD Version 7.1.0 Release Notes and Upgrade Instructions 18 October 2010
Page 21

Version compatibility
CommentsVersionProduct
Generic iSCSI Installer
GVG_MLib Installer
K2 system software
—3.3.2.1401 for K2 Media
Client
7.2.7.1397 for K2
Summit Production
Client
—3.3.2.1401 for K2 Media
Client
7.2.7.1397 for K2
Summit Production
Client
—3.3.2.1401 for K2 Media
Client
7.2.7.1397 for K2
Summit Production
Client
—7.1.0.273K2-Aurora FTP
—2.0.13.567M-Series system software
—1.4.0.451 or higherSiteConfig application
1.1.188SiteConfig Discovery Agent
3.5.2.1b15620StorNext File System
(SNFS)
1.0.0Grass Valley prerequisite
files
Compatible third party products
Products by manufacturers other than Grass Valley are compatible with this release
of software as follows:
5.21Chyron Lyric Software
9.0cDirectX
6.00.0042ENPS
3.1iNews
6.0Octopus
Compatible with K2 version
3.3.2.1401 and K2 Summit
version 7.2.7.1397
The prerequisite files must be
installed on the SiteConfig
control point PC.
CommentsVersionProduct
18 October 2010 Aurora Edit and Edit LD Version 7.1.0 Release Notes and Upgrade Instructions 21
Page 22

Version compatibility
CommentsVersionProduct
1.18HP z800 BIOS
2.37HP xw8400 BIOS
1.35HP xw8600 BIOS
2.09HP xw9300 BIOS
1.0.2176.1JLCooper USB Driver
Microsoft Windows
Player
XP with Service Pack 3,
Windows 7
10 or greaterMicrosoft Windows Media
191.78NVIDIA driver
3.0.4.10cOrad FrameworkXP
1.3.3.210Orad HASPdriver
5.0.12.1513Orad RenderEngine
5.2.0.472bOrad ReTalkXML
5.2.0.1646Orad PageBrowserAx
7.6 or greaterQuickTime
2.6.1.4SabreTooth
Windows 7 supported on the
Edit client
Contact Panasonic for driver2.03.0002Panasonic P2 Driver
Contact Sony for driver2.04Sony XDCAM FAM Driver
www.vizrt.comContact VizRTVizRT Requirements
22 Aurora Edit and Edit LD Version 7.1.0 Release Notes and Upgrade Instructions 18 October 2010
Page 23

Upgrading Aurora Edit and Aurora Edit
LD systems
This section contains the tasks necessary for the upgrade to this release of software
using both the SiteConfig application for an Aurora Edit or Aurora Edit LD system
in a shared configuration or installing the application manually in Local mode.
Upgrading Aurora Edit and Edit LD devices with SiteConfig
This section contains the tasks for using SiteConfig to upgrade Aurora Edit and Aurora
Edit LD devices to this release of software. Work through the tasks sequentially to
complete the upgrade.
NOTE: These upgrade instructions assume that current software is at version 6.5
or higher. If you have a lower version of software, contact Grass Valley Support
before upgrading.
NOTE: When upgrading from a version lower than 6.5, the software installs with
a 30 day trial license. You need a permanent license to operate beyond the trial
period.
CAUTION: If you upgrade and then decide you do not want to stay with this
version of software, you must use the recovery disk image process to do wngrade
to your previous version.
About upgrading Aurora Edit and Aurora Edit LD with SiteConfig
With the upgrade instructions in this document, you use SiteConfig from a network
connected control point PC and remotely upgrade software simultaneously on your
Aurora product devices. This is the recommended process for software upgrades.
NOTE: Do not use the upgrade instructions in this document if upgrading with
SiteConfig for the first time.
If SiteConfig was not used for your previous software upgrade, do not use the upgrade
instructions in these release notes. Instead, use the SiteConfig Migration Instructions.
Before you upgrade software using SiteConfig, each of your Aurora product devices
must be migrated to become a SiteConfig managed device. This includes installing
SiteConfig support on the device, manually uninstalling any and all Aurora components,
and qualifying the device for communication with SiteConfig. These instructions are
in the SiteConfig Migration Instructions. Also refer to the SiteConfig User Manual or
SiteConfig Help Topics.
The upgrade instructions in this document apply to the following devices:
• Aurora Edit workstation of any storage option: Shared storage, NAS storage, and
stand-alone.
• Aurora Edit LD computer
18 October 2010 Aurora Edit and Edit LD Version 7.1.0 Release Notes and Upgrade Instructions 23
Page 24

Upgrading Aurora Edit and Aurora Edit LD systems
• DSM
• Conform Server
• SmartBin Server
• FTP Server
T o upgrade software using SiteConfig, you must first hav e SiteConfig set up for system
management and software deployment in your facility. These upgrade instructions
assume that you have already done that for your K2 SAN. Then you add your Aurora
product devices to the SiteConfig system description that you are using for your K2
SAN.
NOTE: Do not attempt to upgrade software incrementally across the devices of a
K2 SAN while media access is underway. Online software upgrading is not supported.
The following installation tasks provide information specifically for the upgrade to
this version of software. Read the information in these sections carefully before
attempting any upgrade to software.
NOTE: If adding a new 64 bit Windows 7 device in SiteConfig, select x64 as the
platform type. This enables the 64 bit versions of iSCSI and SNFS to be installed
instead of the default 32 bit versions. For Aurora Edit to work with Windows 7, the
Windows 7 administrator account must be enabled.
Make recovery images
Do not do this task if:
• You previously made a recovery image at the current software version for each
computer you are upgrading.
Do this task if:
• You do not have a recovery image at the current software version for one or more
of the computers you are upgrading.
The recommended procedure is to make a recovery image immediately after a software
upgrade. If you neglected to do this when you last upgraded software you should make
the recovery image now, before upgrading to the new version.
CAUTION: If you upgrade and then decide you do not want to stay with this
version of software, you must use the recovery disk image process to do wngrade
to your previous version.
Prepare for upgrade
Before upgrading, do the following:
• Procure the software installation files for this release via the appropriate distibution
method, such as download, CD-ROM, network drive, or external drive.
• Start up the devices you are upgrading, if they are not already started.
• Stop all media access on the devices you are upgrading.
24 Aurora Edit and Edit LD Version 7.1.0 Release Notes and Upgrade Instructions 18 October 2010
Page 25

Upgrading Aurora Edit and Aurora Edit LD systems
• Shut down all applications on the devices you are upgrading.
Upgrading Aurora Edit and Edit LD devices with SiteConfig
This section contains the tasks for using SiteConfig to upgrade Aurora Edit and Aurora
Edit LD devices to this release of software. Work through the tasks sequentially to
complete the upgrade.
NOTE: These upgrade instructions assume that current software is at version 6.5
or higher. If you have a lower version of software, contact Grass Valley Support
before upgrading.
NOTE: When upgrading from a version lower than 6.5, the software installs with
a 30 day trial license. You need a permanent license to operate beyond the trial
period.
CAUTION: If you upgrade and then decide you do not want to stay with this
version of software, you must use the recovery disk image process to do wngrade
to your previous version.
Prepare SiteConfig for software deployment
Do the following to prepare SiteConfig for the software upgrade.
1. Make the following files accessible to the SiteConfig control point PC:
• AuroraSuite software installation (*.cab) file
• AuroraEditLD software installation (*.cab) file
• NewsShare software installation (*.cab) file
• ConformServer software installation (*.cab) file
• SNFS software installation *.cab file
(SNFS_nonK2_x86<versionnumber>.cab for the 32-bit and
SNFS_nonK2_x64<versionnumber>.cab for the 64-bit.)
• Generic iSCSI software installation (*.cab) files
(GenericiSCSI_x86<versionnumber>.cab for the 32-bit and
GenericiSCSI_x64<versionnumber>.cab for the 64-bit.)
• GVGMLib software installation (*.cab) file
• PCmonitoring software installation (*.cab) file
2. If a newer version of SiteConfig is available for upgrade and you have not yet
upgraded SiteConfig, do the following:
a) From Windows Add/Remove programs, uninstall the current version of
SiteConfig from the control point PC.
b) Install the new version of SiteConfig on the control point PC.
18 October 2010 Aurora Edit and Edit LD Version 7.1.0 Release Notes and Upgrade Instructions 25
Page 26

Upgrading Aurora Edit and Aurora Edit LD systems
Install prerequisite files on the control point PC
Some software components, such as those for Aurora products, share common
prerequisite software. Y ou must install a prerequisite softw are package on the control
point PC to make the prerequisite software available for software deployment to
devices.
1. Check release notes for the required version of prerequisite files, if any.
2. On the SiteConfig control point PC, open Windows Add/Remove programs and
look for Grass Valley Prerequisite Files, then proceed as follows:
• If the required version of prerequisite files is installed, do not proceed with this
task.
• If prerequisite files are not installed or are not at the required version, proceed
with this task.
3. Procure the required prerequisite software installation file. The file name is
Prerequisite Files.msi.
4. On the SiteConfig control point PC, run the installation file. The installation program
copies prerequisite files to C:\Program Files\Grass Valley\Prerequisite
Files.
Upgrade K2 systems
Prerequisites for this task are as follows:
• If upgrading a K2 SAN, all SAN clients must be offline (all media access stopped)
or shut down. Depending on your system design, this could include devices such
as K2 clients, K2 appliances, Aurora Proxy (Advanced) Encoders, MDI server,
Aurora Edit clients, Aurora Ingest clients, Aurora Playout clients, and generic
clients.
Upgrade your K2 systems to the compatible version of K2 system software. This
includes K2 SAN systems and stand-alone K2 Media Client and K2 Summit
Production Client systems. Refer to K2 Release Notes for procedures.
Set up K2 Aurora FTP
Do the following tasks if you use K2-Aurora FTP.
Adding K2-Aurora FTP software role to K2 Media Server
Use the following SiteConfig procedure to add the K2-Aur ora FTP role to the K2 Media
Server that you use as your K2-Aurora FTP server, if you have not already done so.
The K2 Media Server that you use as your K2-Aurora FTP server must also have the
role of K2 FTP Server.
26 Aurora Edit and Edit LD Version 7.1.0 Release Notes and Upgrade Instructions 18 October 2010
Page 27
Upgrading Aurora Edit and Aurora Edit LD systems
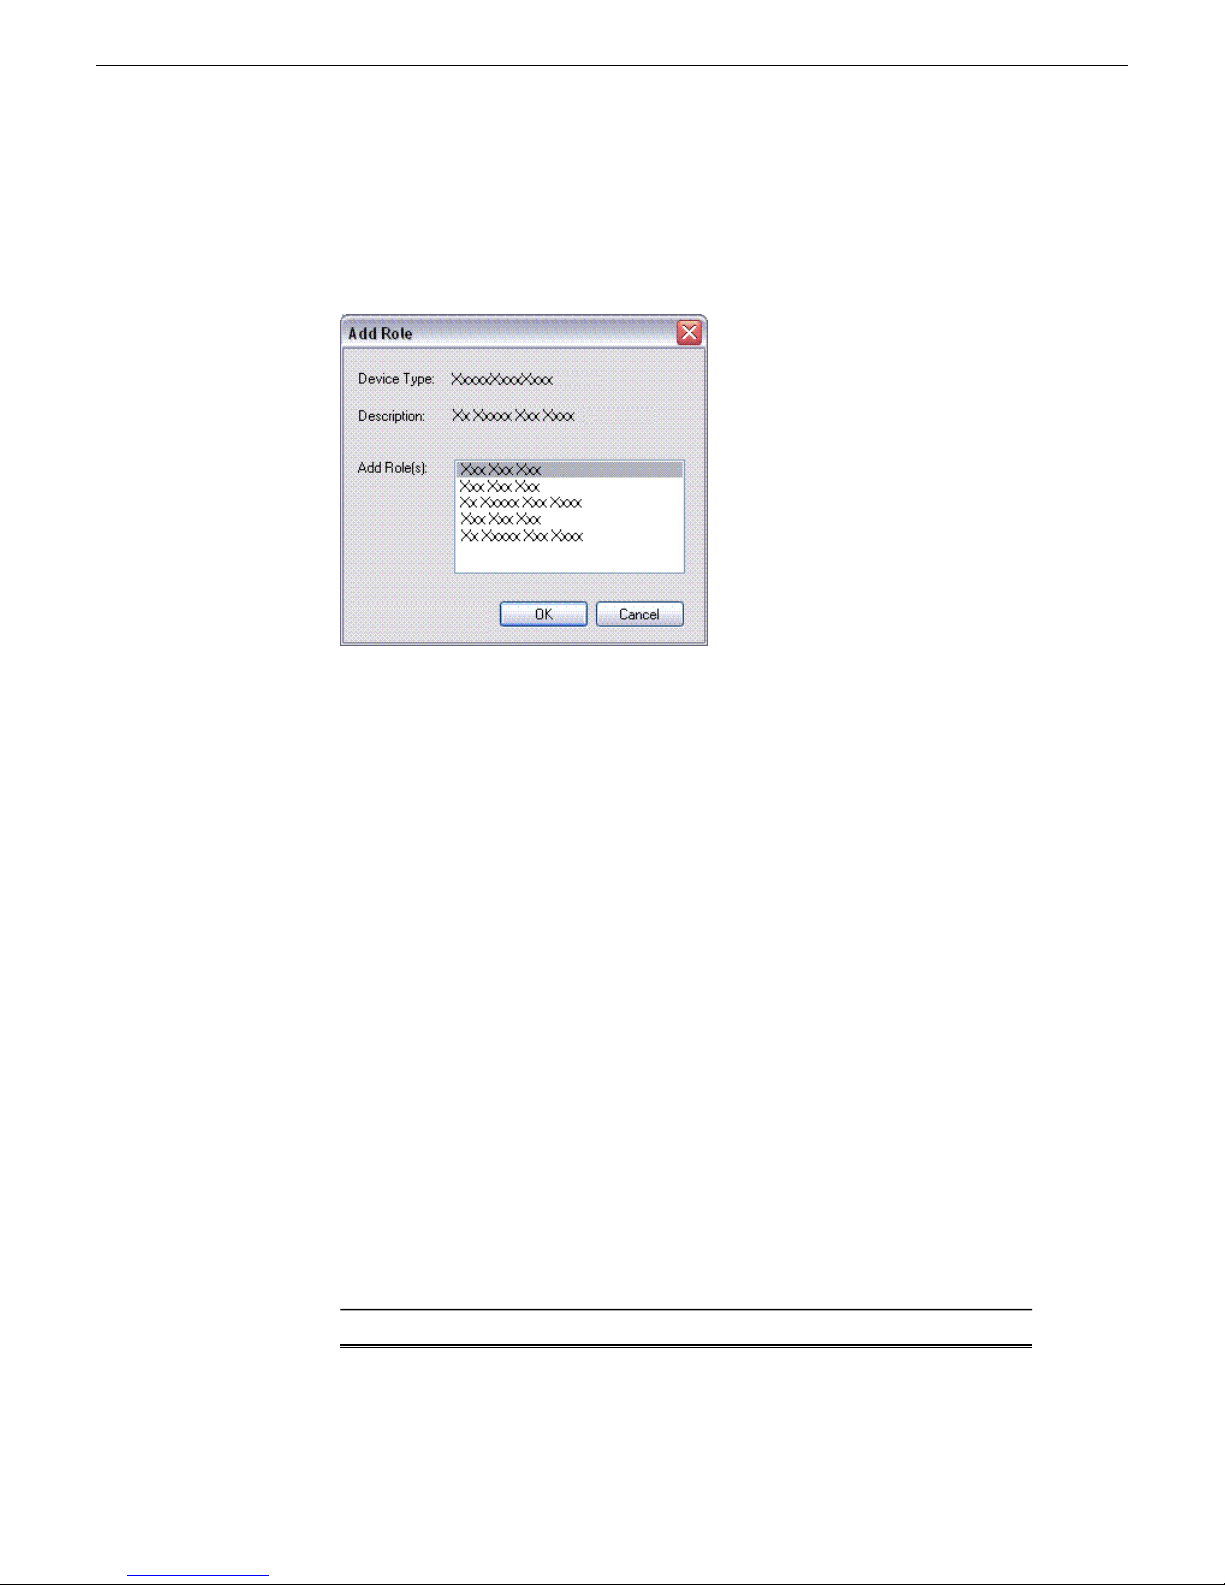
1. In the Software Deployment | Devices tree view, right-click the device and select
Add Role.
The Add Role dialog box opens.
The Add Role dialog box displays only those roles that SiteConfig allows for
the selected device type.
2. Select the role or roles that you want to add to the device. Use Ctrl + Click or Shift
+ Click to add multiple roles.
3. Click OK to save settings and close.
The new role or roles appear under the device in the tree view.
Install and configure K2-Aurora FTP
1. In SiteConfig, check software on the the deployment group that contains your K2
Media Servers.
2. In SiteConfig, add the K2AuroraFTP_x.x.x.xxx.cab file to the deployment group
that contains your K2 Media Servers.
3. Proceed with next steps to set deployment options for K2-Aurora FTP software.
4. Do one of the following to set deployment options:
• Double-click the task.
• Select the task and click the Options button.
A wizard opens.
5. Work through the wizard and set deployment options as follows:
Software
K2-Aurora
FTP
18 October 2010 Aurora Edit and Edit LD Version 7.1.0 Release Notes and Upgrade Instructions 27
Deployment options
Page 28

Upgrading Aurora Edit and Aurora Edit LD systems
Software
Deployment options
Enter Database server(DSM), Shared AV Files, Shared AV Drives.
6. Deploy the following tasks:
Managed PackageDeploy
Action
K2-Aurora FTP x.x.x.xxx
Uninstall (if upgrading K2-Aurora
FTP)
InstallK2-Aurora FTP x.x.x.xxx
7. Click the Start Deployment button.
8. When the Status or Details columns indicate next steps, identify the software in
the row, then do one of the following:
• For K2 software, when Details displays a Restart required link, click the link
and when prompted "...are you sure...", click Yes.
• If the Details column does not prompt you, restart the K2 Media Server manually.
28 Aurora Edit and Edit LD Version 7.1.0 Release Notes and Upgrade Instructions 18 October 2010
Page 29

Upgrading Aurora Edit and Aurora Edit LD systems
The K2 Media Server restarts. This restart is required.
9. On the K2 Media Server, to enable port range limits for passive transfers, create
the following two DWORDs in the registry at
HKEY_LOCAL_MACHINE/SOFTWARE/Grass Valley Group/Streaming/:
• FtpPasvStart (starting port number, inclusive : DWORD)
• FtpPasvEnd (ending port number, inclusive : DWORD)
10. Open MediaFrame Configuration and for the News MDI, configure the transfer
server to the K2 Media Server that is your K2-Aurora FTP server.
Distribute devices into deployment groups
You can gather devices of different types into a SiteConfig deployment group. This
allows you to deploy software to all the devices in the deployment group at the same
time, as part of the same deployment session. Based on the roles you have assigned
to the devices, SiteConfig deploys the proper software to each device. This increases
the efficiency of your software deployment with SiteConfig.
If you have not already done so, configure your deployment groups. The recommended
deployment group distribution is as follows. Depending on your system design, your
system might not have all the device types listed.
• In a deployment group named "Aurora_Edit_Ingest_Playout", place the following
devices:
• Aurora Edit workstation of any storage options: Shared storage, NAS storage,
and stand-alone.
• Aurora Edit LD computer
• DSM
• Conform Server
• SmartBin Server
• FTP Server
• Aurora Ingest Platform
• IEP
• Aurora Playout Platform
• In a deployment group named "Aurora_Browse_MediaFrame", place the following
devices:
• MediaFrame server
• MDI server
• Aurora Proxy Encoder
• K2 Basecamp Express
• If you have a K2 Nearline SAN (NAS), in a deployment group named for the SAN
system, place the following devices:
• The Nearline SAN's K2 Media Servers.
18 October 2010 Aurora Edit and Edit LD Version 7.1.0 Release Notes and Upgrade Instructions 29
Page 30

Upgrading Aurora Edit and Aurora Edit LD systems
Install High Priority Windows updates (recommended)
• Windows “High Priority” updates are recommended, but not required. While you
have devices in an offline state to upgrade software, you should check to see if
there are any new updates that you need to install. Use standard Windows
procedures.
CAUTION: Only “High Priority Updates” should be installed. Do not
install other Windows or driver updates unless specifically directed by
product documentation or by Grass Valley Support.
Manually upgrade systems
Some tasks that might be required with the upgrade to this release are not supported
for SiteConfig management and/or software deployment. For these tasks you must
manually upgrade and/or configure the device before using SiteConfig to upgrade
software. Refer to the tasks in this section as appropriate for your system.
Upgrade Microsoft SQL Server 2005 Standard Edition
Microsoft SQL Server 2005 Standard Edition is installed on devices as follows:
• Aurora DSM – SQL Server 2005 Standard Edition is required.
• Ingest Server – Either Microsoft SQL Express 2005 or Microsoft SQL Server 2005
Standard Edition is required.
Use the following steps to manage upgrades to Microsoft SQL Server 2005 Standard
Edition.
1. Determine if you have Microsoft SQL Server 2005 Standard Edition installed on
one or more of your system devices, If installed, continue with next steps.
2. Check version compatibility information in these release notes and determine if
this release of software requires an upgrade to Microsoft SQL Server 2005 Standard
Edition.
3. If an upgrade is required, go to the local device and upgrade Microsoft SQL Server
2005 Standard Edition.
Check all currently installed software on Aurora Edit devices
Prerequisites for this task are as follow:
• The device is assigned in the SiteConfig system description and network
connectivity is present.
• SiteConfig is able to log in to the device using the username/password credentials
assigned to the device.
• The SiteConfig control point PC does not have a network drive mapped to an
administrative share (such as C$) on a de vice on which you are checking software.
30 Aurora Edit and Edit LD Version 7.1.0 Release Notes and Upgrade Instructions 18 October 2010
Page 31

Upgrading Aurora Edit and Aurora Edit LD systems
• If the SiteConfig Network Configuration Kit and/or Discovery Agent at version
lower than 1.1.0.185 is currently installed, it must be manually uninstalled and
updated. For more information refer to SiteConfig Migration Instructions.
• If Aurora product software at a version lower than 6.5.2 is currently installed, it
must be manually uninstalled. For more information refer to SiteConfig Migration
Instructions.
Do the following steps on the devices that you are upgrading.
1. In the Software Deployment | Deployment Groups tree vie w , right-click the top-most
node for the group or any individual device and select Check Software.
NOTE: If you have access problems, v erify that the adminstrator account on
the device has credentials as currently configured in SiteConfig. By default
credentials on the device should be administrator/adminGV! for A urora devices
and Administrator/adminK2 for K2 devices.
The Check Software dialog box appears. SiteConfig searches for software on
the selected device or devices and gathers information. Progress is reported.
2. When the check is complete for the selected device or devices, close the Check
Software dialog box.
An updated list of all currently installed software is displayed in the Software
Deployment | Devices | Installed Software list view . If softw are is a SiteConfig managed
software package, information is displayed in the Managed Package and Deployment
Group columns.
Related Links
About installing SiteConfig
Add software package to deployment group for Aurora Edit devices
Prerequisites for this task are as follows:
• You can access the software package file from the SiteConfig control point PC.
• The devices to which you are deploying software are in a deployment group.
Use the following procedure to add one or more software package installation files to
the deployment group that contains the devices in the following list. Depending on
your system design, you might not have all of the device-types listed:
• Aurora Edit Workstation
• Aurora Edit LD computer
• DSM
• Conform Server
• SmartBin Server
• FTP Server
For this release of software, identify and add software package installation files as
follows:
18 October 2010 Aurora Edit and Edit LD Version 7.1.0 Release Notes and Upgrade Instructions 31
Page 32

Upgrading Aurora Edit and Aurora Edit LD systems
Depending on the K2 software version of your K2 SAN, also add software package
installation files as follows:
NOTE: Add files for either 3.x OR 7.x. Do not add files for both 3.x AND 7.x.
• If your devices access storage on a K2 software version 3.x K2 SAN, add software
package installation files as follows:
File nameSoftware compatible with 3.x K2 SAN
GenericISCI_x86_3.3.x.cabGeneric iSCSI client for 32 bit systems
GenericISCI_x64_3.3.x.cabGeneric iSCSI client for 64 bit systems
GVG_MLib_3.3.x.cabGVG MLib
SNFS for 32 bit systems
SNFS for 64 bit systems
SNFS_nonK2_x86_x.x.x.xxx.cab (Use
version compatible with your K2 software)
SNFS_nonK2_x64_x.x.x.xxx.cab (Use
version compatible with your K2 software)
• If your devices access storage on a K2 software version 7.x K2 SAN, add software
package installation files as follows:
File nameSoftware compatible with 7.x K2 SAN
GenericISCI_x86_7.2.x.cabGeneric iSCSI client for 32 bit systems
GenericISCI_x64_7.2.x.cabGeneric iSCSI client for 64 bit systems
GVG_MLib_7.2.x.cabGVG MLib
SNFS for 32 bit systems
SNFS for 64 bit systems
SNFS_nonK2_x86_x.x.x.xxx.cab (Use
version compatible with your K2 software)
SNFS_nonK2_x64_x.x.x.xxx.cab (Use
version compatible with your K2 software)
You can add files for both 32 bit and 64 bit systems because when SiteConfig deploys
software it automatically deploys the 32 bit or 64 bit software appropriate for the target
device. You must install SNFS as a separate cab file. SNFS is not bundled with the
Generic iSCSI cab file.
1. In the Software Deployment | Deployment Groups tree view, select a deployment
group.
2. Click the Add button.
The Add Package(s) dialog box opens.
3. Do one of the following to select the software package:
• Select from the list of packages then click OK.
• Click Browse, browse to and select the package, then click Open.
32 Aurora Edit and Edit LD Version 7.1.0 Release Notes and Upgrade Instructions 18 October 2010
Page 33

4. If one or more EULAs are displayed, accept them to proceed. If you do not accept
a EULA, the associated software is not assigned to the deployment group.
SiteConfig adds the package to the deployment group.
The package appears in the Managed Packages list for the selected deployment group.
SiteConfig creates new software deployment tasks for the package and displays them
in the Tasks list view.
Setting deployment options
Pre-requisites for this procedure are as follows:
• A software package has been assigned to the deployment group and applicable
deployment tasks are now displayed in the Tasks area.
1. In the Software Deployment | Deployment Groups tree view, select a deployment
group.
2. In the T asks list vie w , view tasks and determine if you must set deplo yment options.
Tasks that need to have deployment options set display in the Details column a
message stating "Deployment options required."
If you select a task that needs to have its deployment options set, the Start
Deployment button is disabled and the message is displayed next to the b utton.
Upgrading Aurora Edit and Aurora Edit LD systems
3. Proceed with next steps to set deployment options for the following:
• GVG_MLib
• Conform Server
• Aurora Edit LD
4. Do one of the following to set deployment options:
• Double-click the task.
• Select the task and click the Options button.
A wizard opens.
5. Work through wizards and set deployment options as follows:
Software
GVG_MLib
Conform
Server
Aurora
Suite
Deployment options
Enter the name(s) of the K2 Media Server(s) with role of file system
server (FSMs)
Database server, Shared AV Files (e.g. V:\xreAVFiles), Shared AV
Drives, and the Media Frame Server
18 October 2010 Aurora Edit and Edit LD Version 7.1.0 Release Notes and Upgrade Instructions 33
Page 34

Upgrading Aurora Edit and Aurora Edit LD systems
Software
Deployment options
Enter Database server(DSM), Shared AV Files, Shared AV Drives.
Aurora Edit
LD
34 Aurora Edit and Edit LD Version 7.1.0 Release Notes and Upgrade Instructions 18 October 2010
Enter Local AV Files, Cache Files.
Page 35

Upgrading Aurora Edit and Aurora Edit LD systems
Software
Deployment options
Enter MediaFrame Server and NAS Media Path.
6. If you have multiple devices of the same type, you can enter deployment options
for one of them using the wizard. Then, when you bring up the same wizard on
every de vice, you can choose the Use options fr om radio b utton and select the first
device for which you set options.
SiteConfig copies the options you set for the first device and fills in the blanks
on the wizard.
Upgrade software on shared storage Aurora Edit workstations
Do not do this task if:
• Y ou do not ha v e an y shared storage (Ne wsShare) Aurora Edit systems. Skip to the
next task to upgrade software on other Aurora Edit devices.
Do this task if:
• You have shared storage (NewsShare) Aurora Edit systems. Use this procedure to
upgrade their software.
Prerequisites for this task are as follows:
• The devices that you are upgrading are in a deployment group.
• For the software you are upgrading, you have added a newer v ersion of that managed
software package to the deployment group.
• Prerequisite files are installed on the control point PC.
• Y ou ha ve recently done the SiteConfig "Check Softw are" operation on the devices
you are upgrading.
If you are upgrading multiple software components for which there is a required
sequence, you must check and uncheck tasks and run multiple deployment sessions
18 October 2010 Aurora Edit and Edit LD Version 7.1.0 Release Notes and Upgrade Instructions 35
Page 36

Upgrading Aurora Edit and Aurora Edit LD systems
to control the sequence. For some software components, SiteConfig aids you by
enforcing dependencies. For each individual software component, SiteConfig enforces
an uninstall of the current version of software before installing the upgrade version.
SiteConfig provides uninstall deployment tasks and install deployment tasks to indicate
the taskflow. SiteConfig can do the uninstall/install in a single deployment session.
For shared storage Aurora Edit devices, use the upgrade sequence as specified in the follo wing
procedure.
1. In the Software Deployment | Deployment Groups tree vie w, select the device or the
group of devices to which you are deploying software.
The corresponding software deployment tasks are displayed in the Tasks list
view.
2. For the software you are deploying, select the Deploy check box in the row for the
uninstall task.
NOTE: If you manually uninstalled or installed software, the uninstall task
might not appear or it might appear with a different package name.
Uninstall software as follows:
Managed PackageDeploy
GenericISCI x86 xxxx.xxxx
GenericISCI x64 xxxx.xxxx
Action
UninstallAuroraSuite xxxx.xxxx
UninstallNewsShare xxxx.xxxx
Uninstall
Uninstall
UninstallGVGMLib xxxx.xxxx
Also, you must upgrade SNFS with this release, so uninstall as follows:
Managed PackageDeploy
SNFS nonK2 x86 xxxxxx
SNFS nonK2 x64 xxxxxx
Action
Uninstall
Uninstall
3. Check the area next to the Start Deployment button for a message.
If a message instructs you to upgrade the Discovery Agent, on the control point
PC go to the directory to which SiteConfig is installed, find the
36 Aurora Edit and Edit LD Version 7.1.0 Release Notes and Upgrade Instructions 18 October 2010
Page 37

Upgrading Aurora Edit and Aurora Edit LD systems
DiscoveryAgent_x.x.x.x.cab file, add it to the deployment group, and deploy
the Discovery Agent software as well.
4. Click the Start Deployment button.
Deployment tasks run and software is uninstalled. Progress is reported and next
steps are indicated in both the Status and Details columns. If an error appears
regarding prerequisite software, install the prerequisite files on the control point
PC and then repeat this step.
5. When the Status or Details columns indicate next steps, identify the software in
the row, then do one of the following:
• When Details displays a Restart required link, click the link and when prompted
"...are you sure...", click Yes.
The device restarts.
6. For the software you are installing, select the Deploy check box in the row for the
install task.
Install software as follows:
Managed PackageDeploy
GenericISCI x86 xxxx.xxxx
(version must be compatible with
K2 SAN)
GenericISCI x64 xxxx.xxxx
(version must be compatible with
K2 SAN)
must be compatible with K2 SAN)
Action
Install
Install
InstallGVGMLib xxxx.xxxx (version
Also, you must upgrade SNFS with this release, so deploy the following tasks
at the same time:
18 October 2010 Aurora Edit and Edit LD Version 7.1.0 Release Notes and Upgrade Instructions 37
Managed PackageDeploy
SNFS nonK2 x86 (version must be
compatible with K2 SAN)
Action
Install
Page 38

Upgrading Aurora Edit and Aurora Edit LD systems
Managed PackageDeploy
SNFS nonK2 x64 (version must be
compatible with K2 SAN)
Action
Install
NOTE: If there are dependencies, SiteConfig can enforce that some tasks be
deployed together.
7. Check the area next to the Start Deployment button for a message.
If a message instructs you to upgrade the Discovery Agent, on the control point
PC go to the directory to which SiteConfig is installed, find the
DiscoveryAgent_x.x.x.x.cab file, add it to the deployment group, and deploy
the Discovery Agent software as well.
8. Click the Start Deployment button.
Deployment tasks run and software is installed. Progress is reported and next
steps are indicated in both the Status and Details columns.
9. When the Status or Details columns indicate next steps, identify the software in
the row, then do one of the following:
• When Details displays a Restart required link, click the link and when prompted
"...are you sure...", click Yes.
The device restarts.
10. The shared media drives on the Aurora Edit workstations should ha ve been mapped
in the previous software installation.
The install program checks for mapped drive status, so if the shared media dri ves
are not mapped, you will be notified by the application to do this.
11. For the software you are installing, select the Deploy check box in the row for the
install task.
Install Aurora Suite software as follows:
Managed PackageDeploy
Action
InstallAuroraSuite 7.1.0.xxxx
12. Click the Start Deployment button.
Deployment tasks run and software is uninstalled. Progress is reported and next
steps are indicated in both the Status and Details columns. If an error appears
regarding prerequisite software, install the prerequisite files on the control point
PC and then repeat this step.
38 Aurora Edit and Edit LD Version 7.1.0 Release Notes and Upgrade Instructions 18 October 2010
Page 39

Upgrading Aurora Edit and Aurora Edit LD systems
13. When the Status or Details columns indicate next steps, identify the software in
the row, then do one of the following:
• When Details displays a Restart required link, click the link and when prompted
"...are you sure...", click Yes.
The device restarts.
14. Monitor progress as indicated by both the Status and Details column. When finished,
the Status column indicates complete.
Upgrade software on Aurora Edit devices
Do not do this task if:
• You are upgrading shared storage (NewsShare) Aurora Edit workstations. Use the
previous task instead.
Do this task if:
• You are upgrading software on the following types of the devices:
• Stand-alone Aurora Edit workstation
• Aurora Edit LD computer
• DSM
• Conform Server
• SmartBin Server
• FTP Server
Prerequisites for this task are as follows:
• The devices that you are upgrading are in a deployment group.
• For the software you are upgrading, you have added a newer v ersion of that managed
software package to the deployment group.
• Prerequisite files are installed on the control point PC.
• Y ou ha ve recently done the SiteConfig "Check Softw are" operation on the devices
you are upgrading.
If you are upgrading multiple software components for which there is a required
sequence, you must check and uncheck tasks and run multiple deployment sessions
to control the sequence. For some software components, SiteConfig aids you by
enforcing dependencies. For each individual software component, SiteConfig enforces
an uninstall of the current version of software before installing the upgrade version.
SiteConfig provides uninstall deployment tasks and install deployment tasks to indicate
the taskflow. SiteConfig can do the uninstall/install in a single deployment session.
1. In the Software Deployment | Deployment Groups tree vie w, select the device or the
group of devices to which you are deploying software.
The corresponding software deployment tasks are displayed in the Tasks list
view.
18 October 2010 Aurora Edit and Edit LD Version 7.1.0 Release Notes and Upgrade Instructions 39
Page 40

Upgrading Aurora Edit and Aurora Edit LD systems
2. For the software you are deploying, select the Deploy check box in the row for the
uninstall task.
NOTE: If you manually uninstalled or installed software, the uninstall task
might not appear or it might appear with a different package name.
3. For the software you are installing, select the Deploy check box in the row for the
install task.
For upgrading Aurora Edit devices to this release, deploy the following tasks:
Managed PackageDeploy
GenericISCI x86 xxxx.xxxx
GenericISCI x86 xxxx.xxxx
(version must be compatible with
K2 SAN)
GenericISCI x64 xxxx.xxxx
GenericISCI x64 xxxx.xxxx
(version must be compatible with
K2 SAN)
Action
UninstallAuroraSuite xxxx.xxxx
InstallAuroraSuite 7.1.0.xxxx
UninstallAuroraEditLD xxxx.xxxx
InstallAuroraEditLD 7.1.0.xxxx
UninstallNewsShare xxxx.xxxx
InstallNewsShare 7.1.0.xxxx
UninstallConformServer xxxx.xxxx
InstallConformServer 7.1.0.xxxx
Uninstall
Install
Uninstall
Install
Also, you must upgrade SNFS with this release, so deploy the following tasks
at the same time:
40 Aurora Edit and Edit LD Version 7.1.0 Release Notes and Upgrade Instructions 18 October 2010
must be compatible with K2 SAN)
Managed PackageDeploy
SNFS nonK2 x86 xxxxxx
UninstallGVGMLib xxxx.xxxx
InstallGVGMLib xxxx.xxxx (version
InstallPCmonitoring x.x.x.xx
Action
Uninstall
Page 41

Upgrading Aurora Edit and Aurora Edit LD systems
Managed PackageDeploy
SNFS nonK2 x86 xxxxxx
SNFS nonK2 x64 xxxxxx
SNFS nonK2 x64 xxxxxx
Action
Install
Uninstall
Install
NOTE: If there are dependencies, SiteConfig can enforce that some tasks be
deployed together.
4. Check the area next to the Start Deployment button for a message.
If a message instructs you to upgrade the Discovery Agent, on the control point
PC go to the directory to which SiteConfig is installed, find the
DiscoveryAgent_x.x.x.x.cab file, add it to the deployment group, and deploy
the Discovery Agent software as well.
5. Click the Start Deployment button.
Deployment tasks run and software is uninstalled. Progress is reported and next
steps are indicated in both the Status and Details columns. If an error appears
regarding prerequisite software, install the prerequisite files on the control point
PC and then repeat this step.
6. When the Status or Details columns indicate next steps, identify the software in
the row, then do one of the following:
• For K2 software, when Details displays a Restart required link, click the link
and when prompted "...are you sure...", click Yes.
The device restarts.
Deployment tasks run and software is installed. Progress is reported and next
steps are indicated in both the Status and Details columns.
18 October 2010 Aurora Edit and Edit LD Version 7.1.0 Release Notes and Upgrade Instructions 41
Page 42

Upgrading Aurora Edit and Aurora Edit LD systems
7. When the Status or Details columns indicate next steps, identify the software in
the row, then do one of the following:
• For K2 software, when Details displays a Restart required link, click the link
and when prompted "...are you sure...", click Yes.
8. Monitor progress as indicated by both the Status and Details column. When finished,
the Status column indicates complete.
Upgrade NAS systems
Prerequisites for this task are as follows:
• K2 systems are upgraded to the compatible version of K2 system software.
• Aurora Edit, Ingest, and Playout systems are upgraded to the compatible versions
of software.
Upgrade the MediaFrame Proxy NAS (K2 Nearline SAN) to the compatible version
of K2 software. Use SiteConfig and deploy software, using steps similar to those
for other systems.
a) Check software on the Nearline SAN's K2 Media Servers.
b) Add software *.cab file to the deployment group that contains the K2 Media
Servers.
c) Upgrade software on K2 Media Servers via a SiteConfig deployment session.
Upgrade Browse and MediaFrame systems
Prerequisites for this task are as follows:
• K2 systems are upgraded to the compatible version of K2 system software.
• Aurora Edit, Ingest, and Playout systems are upgraded to the compatible versions
of software.
• K2 Nearline SAN (NAS) systems are upgraded to the compatible version of K2
system software.
Upgrade your Browse and MediaFrame systems to the compatible versions of
software. Refer to Aurora Browse Release Notes for procedures.
Make recovery images
After you have upgraded software as instructed in these procedures and verified
that your system is working properly, you should always make a recovery image
of each of your upgraded computers. Use a sequence of tasks similar to those you
followed for upgrading software so that as you take systems offline you manage
redundancy, servers, and clients, as appropriate for your system.
42 Aurora Edit and Edit LD Version 7.1.0 Release Notes and Upgrade Instructions 18 October 2010
Page 43

Upgrading Aurora Edit and Aurora Edit LD systems
Refer to the Grass Valley product's Service Manual for recovery image
procedures.
18 October 2010 Aurora Edit and Edit LD Version 7.1.0 Release Notes and Upgrade Instructions 43
Page 44

Manually Installing Aurora Edit/Aurora Edit LD Software
Manually Installing Aurora Edit/Aurora
Edit LD Software
If you are not using SiteConfig to install software, this section describes the steps to
install the Aurora Edit and Aurora Edit LD applications manually.
The Aurora Edit software is available on the CD included with the application.
1. Uninstall any previous version of Aurora Edit software using the Windows Add or
Remove Programs program in Start/Settings/Control Panel.
2. Find the AuroraSetup directory on the CD pro vided and double-click on Setup.exe.
Wait for the Aurora Suite Installation Wizard to appear.
3. When the Welcome screen appears, select Next>.
4. Review the License agreement and click I accept the license agreement and Ne xt>.
5. Click the X next to Aurora Edit or Aurora Edit LD and select Entire feature will be
installed on local hard drive.
Click Next>.
6. If you are installing a local Aurora Edit workstation, select Local and click Next>.
For a Local install, skip to step 13.
7. If you are installing a shared Aurora Edit or Aurora Edit LD, select Shared and
click Next>.
In the Select Shared Server field, enter the name of the database server that you
are using for the Shared database and select Next>.
8. In the Select Shared A V Files Directory, select the directory where the Aurora Suite
Video and Audio files are to be saved. This should be a directory located on a high
speed AV disk drive.
Click Next> to accept the default directory, V:\VibrintAVFiles or select the main
shared AV files location you plan on using.
9. In the Select Local AV Files Directory, select the directory where the local Aurora
video and audio files are to be saved. This should be a directory located on a high
speed AV disk drive, on your local system.
Click Next> to accept the default D:\VibrintAVFiles.
10. In the Select AV Cache Files Directory, select the directory where the Aurora AV
Cache file are to be saved. This should be a directory located on a high speed AV
disk drive, on your local system.
Click Next> to accept the default D:\VibrintCache.
11. In the Select Shared Drives window, enter the letter drives, separated by a comma,
of the shared AV drives used by the system.
44 Aurora Edit and Edit LD Version 7.1.0 Release Notes and Upgrade Instructions 18 October 2010
Page 45

Manually Installing Aurora Edit/Aurora Edit LD Software
Select Next>.
12. For Aurora LD only, a MediaFrame Server Settings window will come up and ask
for the name or IP address of the MediaFrame server you will be using. You must
also enter the NAS Media Path for the NAS storage that will be used for media.
Select Next>.
13. Click Next> to install the application.
Wait for the install to completely finish. It will take a few minutes to complete.
18 October 2010 Aurora Edit and Edit LD Version 7.1.0 Release Notes and Upgrade Instructions 45
Page 46

Third Party Software Installation
Third Party Software Installation
Aurora Edit and Aurora Edit LD application interf ace with man y third party products
that are manufactured by other vendors (ENPS for example). Many of these products
require installing plug-in or driver software. Refer to the A ur or a Edit and A urora Edit
LD Installation Manual for instructions on installing software for any third party
products. Many of these products may also include installation instructions. Be sure
to use these instructions for proper installation. Please note it is very important to
check the Compatible third party products software table in these release notes so you
use the validated software or driver version required for this release.
Related Links
46 Aurora Edit and Edit LD Version 7.1.0 Release Notes and Upgrade Instructions 18 October 2010
Page 47

Licensing Grass Valley products
The following sections contain instructions for managing Grass Valley product licenses.
About software licensing
Aurora Edit is licensed via Grass Valley's SabreTooth License Manager. When the
software is initially installed, it will have a 30 day temporary license (Aurora Edit
HD) that can be used during the setup phase. It is important to run the License Request
Wizard found on the system desktop in order to retrieve a permanent license. Once
the permanent license is in place, you may then delete the temporary license from the
License Manager application.
Licenses are requested through the License Wizard and managed through the
SabreTooth License Manager, which is installed on the Grass Valley product with the
Grass Valley software. The License Wizard and SabreTooth License Manager must
be located on the Grass Valley product.
License information is stored in text files that you can manage just like any other file
on your system. Licenses are unique to the system for which they are requested and
cannot be used on any other machine. You should back up the license text files to a
separate drive or as part of a recovery image.
Licenses are based on your system’s unique identifier, which is partially derived from
your system’s Media Access Control (MAC) address. If you change your system’s
MAC address by performing operations such as changing the System Processor card,
you must obtain a new license based on the new MAC address.
Requesting a license
This topic applies to Grass Valley Sabretooth licenses. Software licenses are unique
to the system for which they are purchased. They cannot be used on an y other system.
This requires that you provide a generated unique ID for the desired system to Grass
Valley, which is then used to create your unique license.
1. Log on to the device that you want to license.
You must log in as a Windo ws administrator with a local account, not a domain
account.
2. Open the License Request Wizard.
Find the License Request Wizard shortcut on the Windows desktop.
The License Request Wizard displays.
3. Read the on-screen instructions, then click Next.
18 October 2010 Aurora Edit and Edit LD Version 7.1.0 Release Notes and Upgrade Instructions 47
Page 48

Licensing Grass Valley products
The Customer dialog box displays.
4. Enter the information requested on this page then click Next.
You must provide a valid email address to receive your license file.
The Sales Number dialog box displays.
5. Enter the Sales Order Number in the field then click Next.
Typically the Sales Order Number is found on the Software License sheet that
you received with your Grass Valley product.
The Summary dialog box displays.
6. Review the License Request information and click Finish.
A License Request text file, License_Request_<SalesNumber>.txt, is generated
and saved to the Windows Desktop.
NOTE: If you are requesting licenses for more than one application, be sure
to modify the name of the first License Request text file before saving it to
your desktop. (In Notepad, use the Save As command.) Otherwise, the second
License Request text file will overwrite it.
7. If you have K2 Summit Production Client or K2 Solo Media Server and if the write
filter is currently enabled, be aware that files on the desktop are lost on restart.
Therefore do one of the following:
• Save the License Request text file(s) to a different location.
• Keep the K2 system running (do not restart) until after you have requested the
license(s).
8. Do one of the following:
• Attach the License Request text file to an email.
• Paste the text directly into an email message.
You might want to keep a copy of the message for your records.
9. Send the email as instructed by the License Request Wizard.
An email will be sent from Grass Valley to the return email address you specified;
your SabreTooth software license will be provided as a text file.
10. Save this email in case you ever need to re-image this machine.
Next add the license to the SabreTooth License Manager.
48 Aurora Edit and Edit LD Version 7.1.0 Release Notes and Upgrade Instructions 18 October 2010
Page 49

If you encounter difficulties when requesting a license
If you encounter difficulties running the License wizard, or the License wizard is not
available, try this alternate method:
1. Generate a unique ID of the device where you will install software, as follows:
a) Click on the License Manager icon on the Windows Desktop.
The SabreTooth License Manager opens.
b) Choose File | Generate Unique Id the License Manager.
c) Click Copy to clipboard to copy the generated ID, and OK to exit.
2. Prepare an email that includes the following information:
• Customer Name
• Customer Email
• Sales Order Number
• Unique ID of the device where you will install software.
3. Send the email to AuroraLicenses@grassvalley.com.
Licensing Grass Valley products
The SabreTooth license number will be emailed to the email address you specified.
Adding a license
Your software license, Licenses_<SalesNumber>.txt, is provided as a text file. Use
the License Manager to add this file to your system and enable the desired feature.
1. Click on the License Manager icon on the Windows Desktop.
The SabreTooth License Manager opens.
2. Do one of the following:
• Choose File | Import License and navigate to the file location to open the text
file.
• Drag and drop the text file onto the License Manager.
You will now see the permanent license in SabreTooth, as well as any other
licenses, permanent or temporary, that have been installed on this machine.
Once you have added the permanent license, you can delete the temporary license. If
the temporary license is still in SabreT ooth you will continue to get temporary license
notifications, even with the permanent license installed, unless you delete the temporary
license.
You should save the permanent license to a backup system.
18 October 2010 Aurora Edit and Edit LD Version 7.1.0 Release Notes and Upgrade Instructions 49
Page 50

Licensing Grass Valley products
Deleting licenses
Deleting a license disables the feature that it enabled. You might want to delete a
temporary license prior to its expiry if you have decided not to purchase the feature.
You can delete a temporary license after the permanent license has been installed
without disabling the licensed product.
1. Select the license in the SabreTooth License Manager.
2. Use the Delete key on your keyboard or right click with your mouse and select
Delete.
Archiving licenses
You can archive your licenses to a secure external location. This allo ws you to quickly
re-install a license should it be deleted or should you have to downgrade and then
re-license the software. You can archive multiple licenses at the same time.
NOTE: If you downgrade to an earlier v ersion of the licensed software, make sure to archiv e
the licenses first.
1. In the SabreTooth License Manager, select the license or licenses.
2. Choose File | Export License to open the Save As dialog box.
3. Assign a meaningful name to the file, and save it to the desired location. Grass
V alle y recommends saving the license file to a USB dri ve or other external location.
50 Aurora Edit and Edit LD Version 7.1.0 Release Notes and Upgrade Instructions 18 October 2010
Page 51

New topics
This section contains new or modified topics associated with this release of software.
New topics in 7.1.0
Windows 7 is supported on the Aurora Browse, Edit, Ingest and Playout clients.
New topics in 7.0.0
Keyboard Overview
As detailed earlier in the version 7.0.0 new features, some of the keyboard functions
for Aurora Edit have changed and the keyboard has a new look with sticker keypads.
The following sections show the ne w ke yboard look for all ke ycaps. This information
and a full listing of keyboard functionality is included in the current Aurora Edit and
Aurora Edit LD User Guides.
Tool selection keys
The eight light blue keys at the top of the keyboard activate the Aurora Edit tools.
FunctionNameKeypad
Selects and moves items on the TimelineTimeline Tool
Views the sourceSource Tool
Trims Mark In and Mark Out points in clipsTrim Tool
18 October 2010 Aurora Edit and Edit LD Version 7.1.0 Release Notes and Upgrade Instructions 51
Page 52

New topics
FunctionNameKeypad
Cut Point Edit Tool
Audio Effects Tool
Video Effects Tool
Transport command keys
The light purple keys act as transport controls for playing sequences and remote
sources. The green keys control movement within a clip. The red key F12 starts a
record.
Trims the cut points between adjacent clips (Edit
HD only)
Add transition effects to clipsTransition Tool
Adjust the audio tracks in clipsAudio Mixer Tool
Adjusts the Audio EQ in clips and disguises v oices
(Edit HD only)
Creates video effects to use on clips, such as blurs
and Picture-in-Picture
52 Aurora Edit and Edit LD Version 7.1.0 Release Notes and Upgrade Instructions 18 October 2010
Fast Forward
FunctionNameKeypad
Plays the Timeline, source or clipPlay
Plays sequence or clip starting at the beginningPlay From Start
Plays the Timeline, source or clipPlay
Rewinds the footage for both T imeline and sourceRewind
Fast forwards the footage for both Timeline and
source
Page 53

New topics
FunctionNameKeypad
Starts recording from source or source binRecord
Moves cursor one frame back on the TimelineBack 1 Frame
Moves cursor one frame forward on the TimelineForward 1 Frame
Moves cursor 10 frames back on the TimelineBack 10 Frames
Moves cursor 10 frames forward on the TimelineForward 10 Frames
Moves cursor to the previous cut pointPrevious Cut Point
Editing and clip/track selection keys
The tan keys perform trims. The blue ke ys represent edit modes for o v erwrite, splice,
and fit-to-fill. The dark gray key performs copy to Timeline. The purple keys control
clips. The gray keys are used with Aurora Edit local seaches (not MediaFrame).
Trim Mark Out
Moves cursor to the next cut pointNext Cut Point
FunctionNameKeypad
Trims the Out point in the Cut Point Edit Tool;
changes the duration of the sequence (Edit HD
only)
18 October 2010 Aurora Edit and Edit LD Version 7.1.0 Release Notes and Upgrade Instructions 53
Trim Mark In
Trims the In point in the Cut Point Edit Tool;
changes the duration of the sequence (Edit HD
only)
Page 54

New topics
FunctionNameKeypad
Trim Both
Copy To Timeline
Match Frame to Bin
Mark Area
View Search Results
Trims both the In and Out points in the Cut Point
Edit Tool; doesn't change the duration of the
sequence (Edit HD only)
Allows you to overwrite clips to the TimelineOverwrite Mode
Allows you to splice clips to the TimelineSplice Mode
Lets you create fit to fill clipsFit To Fill
Copies selected clips from Bin as well as Timeline
clip sources to the Timeline. In the Record to Bin
window, adds a clip to the Batch Capture list.
Copies selected clips from Bin as well as Timeline
clip sources to the Timeline. In the Record to Bin
window, add a clip to the Batch Capture list.
Marks an in and out around the selected areas of
the Timeline
Displays the results bin for local Aurora Edit
searches (not MediaFrame searches)
Mark point keys
The dark purple keys set and control the mark In and Out points. The gray keys are
used with keywords in MediaFrame.
Find
Searches for assets within the local Aurora Edit
database (not the MediaFrame Asset Management
database)
54 Aurora Edit and Edit LD Version 7.1.0 Release Notes and Upgrade Instructions 18 October 2010
Page 55
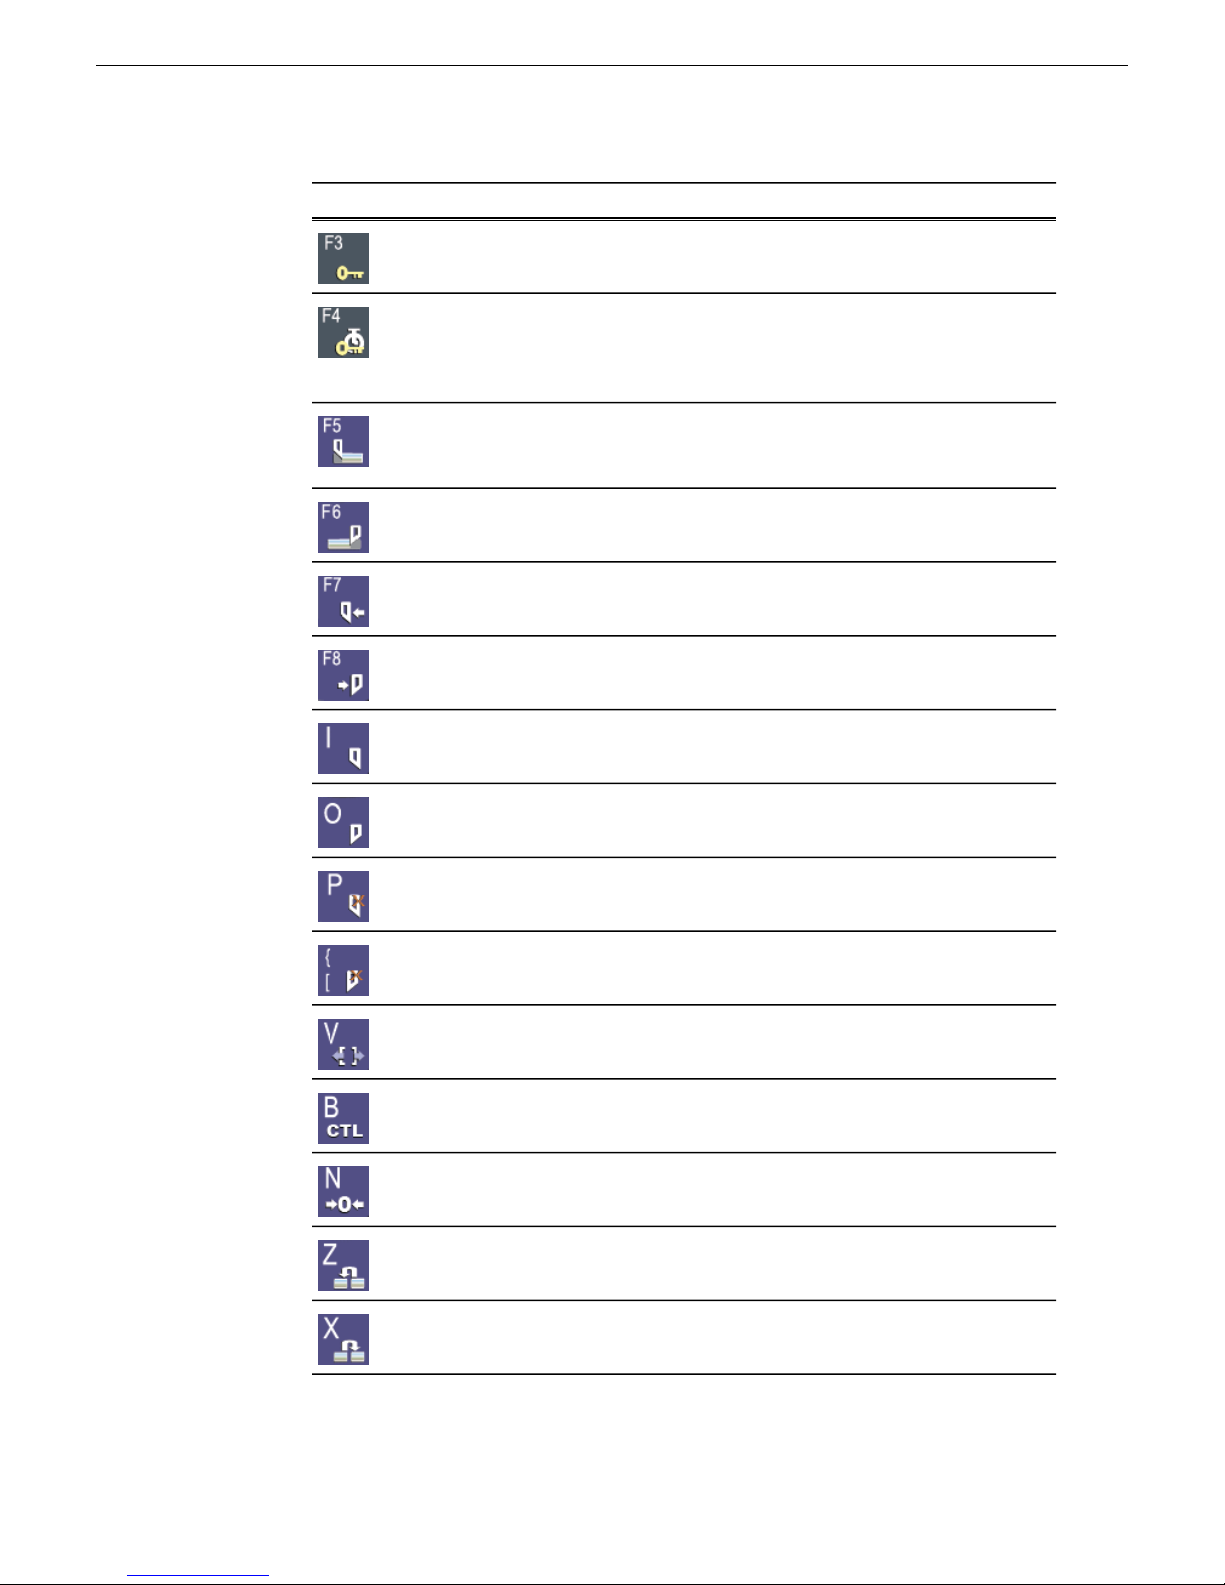
New topics
FunctionNameKeypad
Add Keyword (in
MediaFrame)
Automark Keyword
(in MediaFrame)
Cut Mark In
Refresh
Cut Mark Out
Adds a keyword into the MediaFrame metadata
view for quick recall throughout the system
Automatically marks a keyword from the current
position of the cursor along with a configurable
duration. The duration is set though the settings
option with the MediaFrame metadata view.
Cuts the beginning of the clip (the top) off the
selected clips on the Timeline; in the Bin, refreshes
bin folders and displays any newly imported files
Cuts the end of the clip (the tail) off the selected
clips on the Timeline
Moves to the Mark In pointGo to Mark In
Moves to the Mark Out pointGo to Mark Out
Marks an In pointMark In
Marks an Out pointMark Out
Extend Edit
Timecode/Control
Track
Cut Point
Point
Clears the In pointClear Mark In
Clears the Out pointClear Mark Out
Extends an edit past the end of the clip using
handles
Toggles between Timecode and Control Track
modes
Resets the Control Track to 00:00:00:00Reset Control Track
Move the seleced clip to the previous cut pointMove Clip Previous
Move the selected clip to the next cut pointMove Clip Next Cut
18 October 2010 Aurora Edit and Edit LD Version 7.1.0 Release Notes and Upgrade Instructions 55
Page 56

New topics
Track selection keys
The light gray keys zoom the Timeline in and out. The bright blue keys toggle audio
and video tracks on and off.
FunctionNameKeypad
Zooms the view in the Timeline outZoom out
Other Aurora Edit keys
The keys described below perform miscellaneous editing functions.
Zooms the view in the Timeline inZoom in
Toggles video track V1 on and offVideo 1
Toggles audio track A1 on and offAudio 1
Toggles audio track A2 on and offAudio 2
Toggles audio track A3 on and offAudio 3
Toggles audio track A4 on and offAudio 4
56 Aurora Edit and Edit LD Version 7.1.0 Release Notes and Upgrade Instructions 18 October 2010
Page 57

New topics
FunctionNameKeypad
Control +
Send
View Metadata
Collapse Sequence
Lift Selection
Insert Keyframe
Go to Start
Lets you send a clip or sequence to another
destination
Display and access MediaFrame metadata for the
loaded clip
Collapses a clip in a sequence to close a gap
between media
Lifts the selected clip out of the sequence, leaving
black and silence
Splits the selected clip at the cursor pointSplit Clip
Enables variable speed controls in the Source T oolEnable Vary Speed
In the Video Effects Tool, adds a keyframe to the
currently selected effect
Moves the position to the beginning of a clip or
sequence
18 October 2010 Aurora Edit and Edit LD Version 7.1.0 Release Notes and Upgrade Instructions 57
Previous Vary Speed
Next Vary Speed
In the Source Tool or Trimmer, selects the
previously set variable speed
Deletes the selected clip from the Bin or TimelineDelete Selection
Moves the position to the end of a clip of sequenceGo to End
In the Source Tool or Trimmer, selects the next
variable speed
Page 58

New topics
FunctionNameKeypad
Shuttle Rewind
Shuttle Fast Forward
The Orad Graphics Tool
The optional Orad Maestro Graphics tool is available with the Aurora Edit and Aurora
Edit LD systems for providing animated and still graphics in an end-to-end workflow
from the journalist desktop to playout on air.
The Orad Graphics tool is a high-end software/hardware solution that is capable of
both 2D and 3D animations and stills. In addition, the graphics department has the
ability to create simple templates for use by journalists and editors later in the workflow .
Shuttles left in increments of -50%, -75%, -1x,
-2x, -3x
Shuttles left in increments o +50%, +75%, +1x,
+2x, +3x
Resets the shuttle speed to its default speedShuttle Default Speed
Selects previous shuttle speedShuttle Prevous Speed
From the journalist desktop, Orad has a standard plug-in that allows operators to
access, add, or modify graphics that can then be linked to Orad scripts as MOS objects.
From Aurora Edit, editors can link to scripts by creating a new sequence and linking
to the Assignment List Manager to select a story. Then from the Story View, graphics
can be copied directly to the Graphics track on the Timeline. Graphics that get copied
to the Timeline will inherit the def ault graphic duration, which is configured in Aurora
Edit's Tools | Options | Graphics tab in the main menu bar.
Once a graphic is on the Timeline Graphics track, it can be trimmed or e xtended. This
will not change the path the animation will take. It will extend or trim the middle of
the graphic.
Orad graphics placed on the Timeline Graphics track can be played directly to playout
or previewed and edited by double-clicking on the graphic in the Timeline.
Double-clicking on the graphic allows the editor to make changes and run the graphic
to preview it.
NOTE: As an additional precaution, editors will not be able to trim the graphic
beyond its minimum duration, which is determined by the keyframes within the
animation.
Refer to the Orad documentation included with your Orad system for complete details
for using the Orad plug-in and other Orad features.
58 Aurora Edit and Edit LD Version 7.1.0 Release Notes and Upgrade Instructions 18 October 2010
Page 59

Moving Orad MOS objects into Aurora Edit
Once a graphic object in Orad has been saved and tagged to a story , it becomes a MOS
object available for integration into Aurora Edit. This is done by linking to the story
through a new sequence created in Aurora Edit.
1. To link to the story, create a new sequence in Aurora Edit by selecting the New
Sequence button in the Bin Contents toolbar.
2. In the New Sequence window, select the Link to Story button at the top left.
This will bring up the Aurora Edit Assignment List Manager (ALM).
3. From the Assignment List, select the story you are editing and click OK to close
the Assignment List.
The story name gets appended to the sequence title and a unique ID is assigned
from the news service. Click OK to close the sequence and open the Timeline.
4. One the Timeline is open, you can preview the script and retrie ve the MOS object
by selecting the Story View button in the top right main menu bar.
New topics
The Story View view opens listing the stories created in Orad. MOS objects
appear on the left side of the list in red .
5. At the top of the Story View window is a Copy to Timeline button. Select it to
move the MOS object onto the open Timeline Graphics track.
NOTE: Multiple MOS objects can be present in the script and all will be
copied to the Timeline at the same time.
6. The MOS object(s) can pass directly to playout without previewing or the y can be
previewed (by double-clicking on the Orad graphic to bring up the Orad preview
window) and edited if required.
18 October 2010 Aurora Edit and Edit LD Version 7.1.0 Release Notes and Upgrade Instructions 59
Page 60

New topics
The VizRT Graphics Tool
The optional VizRT Graphics tool is available with the Aurora Edit and Aurora Edit
LD systems for providing integration of graphics from the journalist desktop to the
Timeline Graphics track.
The VizRT Graphics tool is a high-end software/hardware solution that is capable of
both 2D and 3D animations and stills. In addition, the graphics department has the
ability to create simple templates for use by journalists and editors later in the workflow .
From the journalist desktop, VizRT has a standard plug-in that allows operators to
access, add, or modify graphics that can then be linked to scripts as MOS objects.
From Aurora Edit, editors can link to scripts by creating a ne w sequence and accessing
stories from the Assignment List Manager. They can then copy graphics directly to
the Graphics track on the Timeline from the Story View. Once a graphic is retrieved
(rendered) to the Timeline, it can be previewed and edited. Graphics that get copied
to the Timeline will inherit the def ault graphic duration, which is configured in Aurora
Edit's Tools | Options | Graphics tab in the main menu bar.
VizRT also allows the editor to access VizRT from within Aurora Edit or Aurora Edit
LD to create a new graphic.
Graphics on the Timeline can be trimmed or extended. This will not change the path
the animation will take. It will extend or trim the middle of the graphic.
NOTE: As an additional precaution, editors can trim the graphic until it is no longer
on the Timeline. There is no minimum duration.
Refer to the VizRT documentation included with your VizRT system for complete
details for using the VizRT plug-in and other VizRT features.
Moving VizRT MOS objects into Aurora Edit
Once a graphic object in VizRT has been saved and tagged to a story, it becomes a
MOS object available for integration into Aurora Edit. This is done by linking to the
story in the Assignment List through a new sequence created in Aurora Edit and
copying the graphic to the Timeline Graphics track from the Aurora Edit Story View.
1. To link to the story, create a new sequence in Aurora Edit by selecting the New
Sequence button in the Bin Contents toolbar.
2. In the New Sequence window, select the Link to Story button at the top left.
This will bring up the Aurora Edit Assignment List.
3. From the Assignment List, select the story you are editing and click OK.
The story name gets appended to the sequence title and a unique ID is assigned
from the news service. Click OK to close the sequence and open the Timeline.
4. Once the Timeline is open, you can view the script by selecting the Story View
button in the top left main menu bar.
60 Aurora Edit and Edit LD Version 7.1.0 Release Notes and Upgrade Instructions 18 October 2010
Page 61

New topics
The Story View view opens showing the story created in VizRT and selected
in the Assignment List. MOS objects appear on the left side of the Story View
in red .
5. At the top of the Story View window is a Copy to Timeline button. Select it to
move the MOS object(s) onto the open Timeline Graphics track. At this time, the
object is still a MOS object and must be retrieved from the VizR T graphics system
to be visible to the editor.
NOTE: Multiple MOS objects can be present in the script and all will be
copied to the Timeline at the same time.
6. T o retriev e the graphic(s), right-click on each graphic and select the Retrieve Graphic
command from the pop-up menu.
This will bring up the Importing Graphic window which will show the progress
of the graphic retrieving operation.
7. Once the graphic has been retrieved, the editor can play the graphic on the T imeline
to preview it.
Aurora Edit LD will not be able to preview the graphic. In addition, it can only
retirieve to bins that it has access to. The graphic will be rendered into the
sequence by the conform server.
18 October 2010 Aurora Edit and Edit LD Version 7.1.0 Release Notes and Upgrade Instructions 61
Page 62

New topics
NOTE: VizRT graphics may also be created by accessing the VizRT plug-in
from within Aurora Edit or Aurora Edit LD as explained in another section.
Create VizRT Graphic within Aurora Edit
With the VizRT system, an editor can create a graphic by opening the VizRT plug-in
from within Aurora Edit.
1. T o create a new graphic from within the Aurora Edit or Aurora Edit LD application,
right click on the Graphics track of the open Timeline and select the New Graphic
command in the pop-up menu.
62 Aurora Edit and Edit LD Version 7.1.0 Release Notes and Upgrade Instructions 18 October 2010
Page 63

New topics
This will bring up the VizRT NLE plug-in where the editor has the same
capabilities as the journalist to modify or create a new graphic. Once the graphic
has been created, select the Save As button at the bottom of the plug-in.
2. In the Save dialog, rename the graphic if you have modified an existing graphic
or select Save as new and name the new graphic.
18 October 2010 Aurora Edit and Edit LD Version 7.1.0 Release Notes and Upgrade Instructions 63
Page 64

New topics
This commits the new graphic to the Timeline Graphics track where it remains
a MOS object until retrieved by the editor.
3. To retrieve the graphic, right-click on the graphic and select the Retrieve Graphic
command from the pop-up menu.
This will bring up the Importing Graphic window which will show the progress
of the graphic retrieving operation.
4. Once retrieved, the graphic can be pre viewed by moving the cursor o ver the graphic
to play it on the Timeline.
Linking video MOS objects to the Timeline
Within the Aurora Suite, both feed events and finished stories become MOS Objects
within the newsroom computer system. The MOS Objects may be searched on and
linked to stories for use within Aurora Edit.
Once a feed has been started in the Aurora Ingest Scheduler application, the video
become searchable within ENPS. This provides a fast method of finding feed material
and placing it into a news story as a MOS object that can easily be brought into Aurora
Edit and edited as desired.
1. T o search for video material using ENPS, use the ENPS search function as described
in the news application. The ENPS search must account for Grass Valley clips
within the filter.
The example of an ENPS search and a script shown here uses Grass Valley as
the search criteria.
64 Aurora Edit and Edit LD Version 7.1.0 Release Notes and Upgrade Instructions 18 October 2010
Page 65

New topics
2. The ENPS operator drags and drops the Grass Valley video clip to the area below
the black line within the ENPS script.
Once video elements are saved below the black line, the y are linked to the script.
3. The editor can now link to the script by creating a new sequence, linking to the
Assignment List from the sequence, selecting the story being created and then
select the Story View button at the top left of the Aurora Edit application.
When video MOS objects are linked to the script, the Story View window will
have a Resouces tab.
18 October 2010 Aurora Edit and Edit LD Version 7.1.0 Release Notes and Upgrade Instructions 65
Page 66

New topics
4. Select the Resources tab to show the video MOS objects linked to the script.
Hovering over the MOS object sho ws a tooltip and selection hand. Information
about the clip is also included.
5. Click on the MOS object and the video, either online or offline, will load into the
Aurora Edit Clip Player.
From here, the clip can be copied to the Timeline and edited for playout.
Editing using offline proxy media
Aurora Edit and Aurora Edit LD can preview and edit with proxy media that is
associated with offline archived hi-resolution video.
This feature allows editors to use archived offline assets within a Timeline as if they
were present in the online news database. The offline assets become available in the
bin by doing a MediaFrame search. Finding offline assets can be accomplished by
setting up filters in the Aurora search tool or by searching for a kno wn archi v ed asset.
Once the search is done, the asset search results are placed in the Aurora Edit or Aurora
Edit LD bin and become available as editable material on the Timeline.
The offline assets found in the database search will be indicated by an orange dot in
the search result bin view. An offline clip can be then be loaded into the clip player,
and saved to the Timeline. Any number of archived clips can be used and can also be
mixed with online clips on the T imeline. The video can be edited in the same manner
as online video using the Timeline tools.
Once a strory is complete, the editor can restore the sequence (they must have restore
rights) with the Restore Sequence Assets button, synchronize the video (replace
the lo-res video with hi-res) with the Synchronized Restored Assets button, and
the sequence is ready to playout.
Once the story has been sent to playout, the editor has the option to unlink the online
assets with the Unlink Online Assets button and return the restored offline clips on
the Timeline to proxy references.This allows them to delete the hi-res video restored
media and preserve the Timeline for preview or future restores.
66 Aurora Edit and Edit LD Version 7.1.0 Release Notes and Upgrade Instructions 18 October 2010
Page 67

NOTE: Both the Restore and Unlink functions are undoable items. In other words,
you can use the Timeline Undo button to undo the restore or unlink action and
also use the Redo button to redo the actions.
Preserving ANC Data
Sequences created in Aurora Edit have a Preserve ANC Data checkbox that when
selected will allow ancillary data in clips sent to a Smartbin from a K2 or Summit
storage device to be preserved on the Timeline. The closed captioning present in the
ancillary data of a clip can be displayed on the SDI output of an optional AJA Breakout
Box (BOB) (LHi version only).
When incoming feeds with closed captioned data are recorded to a K2 or Summit
storage device, the K2 or Summit will put this data into an ancillary data track when
the generate ancillary data option is turned on on the K2 or Summit device. This is
done in Audio/Video configuration under Data Track Setup on the K2 or Summit.
When clips with this data are fed to an Aurora Edit Smartbin, the ancillary data can
be expected to be preserved in the clip (Preserve ANC Data checkbox must be selected
for the sequence) and allow any closed captioning in the data track to be monitored
on the SDI output of an AJA Breakout Box (BOB) option.
New topics
The general conditions for preserving and viewing closed captioning in Aurora Edit
are listed below.
• Closed captioning data is only displayed on ancillary data tracks. Closed captioning
in the VBI will not be displayed. If a clip with closed captioning data in the VBI
is rendered (to convert to another compression type, etc.) the VBI is not preserved.
• The currently supported types of closed captioning are OP-42, OP-47, EIA-608,
and EIA-708. Data must be VANC (vertical ancillary) data; closed captioning in
the HANC (horizontal ancillary data) is not supported.
• Preservation of ancillary data is available for both SD and HD SDI video (ANC
and Line 21)
The general rules for what to expect when editing clips containing ancillary data are
listed below.
• When editing with clips with an ancillary data track on the Timeline, the data can
be expected to be preserved when the Preserve ANC Data checkbox is selected
(when creating a new sequence).
• When edits are made on the Timeline, closed captioning in that frame can be
expected to be read and displayed without interruption.
• When effects and graphics are placed over the clips, ancillary data can be expected
to be preserved.
• When an effect involves two video tracks, such as a Resize effect with V2 over
V1, the clip that is on top (V2) ancillary data will be displayed. If the top clip does
not have an ancillary data track or valid closed captioning in the ancillary data
18 October 2010 Aurora Edit and Edit LD Version 7.1.0 Release Notes and Upgrade Instructions 67
Page 68

New topics
track, closed captioning will not be displayed regardless of the status of the clip
underneath.
• Ancillary data is not preserved over transitions (wipes, dissolves, etc.)
• Interlaced to progressive ancillary data conversions (and vice versa) are not
supported. If you have a progressive clip with closed captions on an interlaced
Timeline, the captions will not be displayed at the correct rate (they will most likely
play twice as fast, but they could also appear corrupt). The reverse is also true.
When the progressive clip on the interlaced timeline gets transcoded the captions
will not be preserved.
• The conform process will preserve ANC data on sends from Aurora Edit LD.
NOTE: Due to the nature of closed captioning, editing a clip with closed captions
can result in error prone closed captioning data due to crucial commands/characters
being removed.
68 Aurora Edit and Edit LD Version 7.1.0 Release Notes and Upgrade Instructions 18 October 2010
Page 69

Operation considerations
The following sections contain additional information about operating your product
systems.
Anti-Virus software
If you have Anti-Virus software installed on systems running Aurora Edit, it should
be configured to skip the following media file types:
• *.key, *.yuva, *.hdr, *.idx, *.tc, *.vid, *.pcm, *.exp
Failure to do so can adversely affect performance in Aurora Edit.
Audio
HP has released an updated Realtek sound driver for the xw8400 (v5.10.0.5433) that
resolves an audio quality problem. It can be found here:
http://h20000.www2.hp.com/bizsupport/TechSupport/
SoftwareDescription.jsp?lang=en&cc=us&prodTypeId=12454&prodSeriesId=
1844968&prodNameId=1844969&swEnvOID=1093&swLang=13&mode=2&taskId=
135&swItem=wk-51920-1
Aurora Conform Server
When sending a job that has effects that require rendering from Aurora Edit to the
Conform Server, the process will be slower than Aurora Edit. Some effects, such as
blurs or resizes, take much longer in the Conform Server due to hardware limitations.
COM ports
• Note that COM1 and COM2 on the DNP systems are reserved by default for external
GPI devices. However, these can be changed to 422 communication ports by
deselecting the Reserve COM1 and COM2 for GPIO checkbox within the Tools |
Options dialog of Aurora Edit. The Comtrol COM ports use COM3 and COM4
for 422 communications by default.
• When using either COM3 or COM4 to connect to an External Control Device, a
dipswitch on top of the Comtrol Card must be toggled to the "out" position for the
corresponding COM Port. Comtrol switches 1 and 2 belong to COM Ports 3 and
4 respectively.
• When setting up an external control device on the Controller tab in T ools | Options,
be sure to allocate a COM port that is not currently in use by a source VTR.
Display
• Aurora Edit is designed to run in the Windows Classic theme with a screen
resolution of at least 1280x1024 for standard configurations and at least 1280x800
for laptop configurations.
• The refresh rate of the monitor should be set to 60Hz.
• For reliable operation, Windows fade effects must be disabled through the display
properties. To do this, go to the Appearance tab within Display Properties and
deselect the Use the following transition effect for menus and tooltips checkbox
18 October 2010 Aurora Edit and Edit LD Version 7.1.0 Release Notes and Upgrade Instructions 69
Page 70

Operation considerations
within the Effects tool. Doing this will reduce the potential of disrupting records
through minimizing and maximizing application windows during recording.
• It is not recommended that systems, either tower or laptop, use hibernation mode
as a means to conserve power when Aurora Edit is active.
Dual monitor
• When using dual monitor displays, it is recommended that the full screen video be
set up to display on the 2nd monitor rather than on the primary display.
• Due to system resource limitations, when using the Chyron Title Tool with dual
monitor displays, you need to change a setting with the video card:
1. Open Display Properties.
2. Select Settings , then Advanced.
3. Select the Quadro Card tab.
4. Select Start the NVIDIA Control Panel.
5. If prompted for Advanced Settings or Standard Settings, select Adv anced Settings
6. On the left hand panel, expand 3D Settings and select Manage 3D Settings.
7. On the right hand panel, select Global Settings, then select Base Profile.
8. Under Settings, scroll down to find Unified back/depth buffer. Select it and
9. Select Apply.
and then select OK.
change the value from On to Off.
• When using 720p and HDR, dual monitor mode is disabled as resources needed
for processing the additional signal are unavailable.
Edit LD automatic login
To avoid logging in each time you launch Aurora Edit LD, configure your machine
for automatic login:
1. Open Internet Explorer, then go to Tools | Options.
2. Click the Security tab and select Custom Level.
3. Scroll to the bottom and select automatic logon with current username and password.
4. Click OK.
Edit LD playback
When playing to the end of a currently recording file, playback may pause or flash as
video is updated within the player.
Edit LD video card
An incompatible video card will display the following symptoms after you launch
Aurora Edit LD:
• The Timeline Video Display will be grayed out. No clips can be loaded into the
Timeline or Source Tool.
• The Timeline V ideo Display will be black even after a clip is loaded into the Source
Tool or a sequence is opened from the bin.
70 Aurora Edit and Edit LD Version 7.1.0 Release Notes and Upgrade Instructions 18 October 2010
Page 71

Operation considerations
Edit LD Windows event viewer
Aurora Edit LD automatically sets the Windows Event Viewer application and the
System Log to Overwrite Events as Needed.
HP BIOS settings
• Sleep mode settings
Many new HP systems (workstations and business PCs alike) are shipping with a
BIOS setting that interferes with proper operation of Aurora Edit LD/HD/HDR.
The symptoms include dropped frames, stuttering audio and/or video during
playback, and numerous entries in the event log with the message "W arning: Audio
Capture (vbrAudioCapture2) buffer overflowed; resetting." The BIOS on these
systems is set to allow the CPUs to aggressiv ely enter low power sleep mode. While
this saves energy, it also prevents the system from responding to critical events in
a timely manner. CPUs that are in low power sleep mode take time to exit sleep
mode, and that time delay is the source of the problem.
To resolve the problem:
1. Turn on the system and press F10 to enter the BIOS setup.
2. Select Power | OS Power Management and press Enter.
3. Select Idle Power Savings and change it from to Normal.
4. Press F10 to accept.
5. Select File | Save changes and press Enter.
6. Press F10 to accept. The system will restart.
At this time it is not known whether Dell systems have a similar setting.
• Aurora Edit SDR/HDR models
• If you are installing Aurora Edit SDR/HDR on an HP xw9300, you must make
the following BIOS change for proper operation. Failure to do so will result in
stuttering audio and video and dropped frames.
NOTE: This does NOT apply to the HP xw8400.
1. Verify that the SDR/HDR I/O board is installed in slot 6 of the xw9300
(bottom most slot).
2. Turn on the xw9300 and press F10 to enter the BIOS setup.
3. Select Advanced | Slot 6 (PCI-X 133) and press Enter.
4. Select Slot 6 Latency Timer, and change it from Default to 224.
5. Press F10 to accept.
6. Select File | Save changes and press Enter.
7. Press F10 to accept. The system will restart.
• If you are installing Aurora Edit HDR on an HP z800, you must make the
following BIOS change for proper operation. Failure to do so may result in
dropped frames.
1. Turn on the z800 and press F10 to enter the BIOS setup.
2. Select Power | OS Power Management and press Enter.
3. Select Idle Power Savings and change it from Extended to Normal.
18 October 2010 Aurora Edit and Edit LD Version 7.1.0 Release Notes and Upgrade Instructions 71
Page 72

Operation considerations
• Aurora Edit SDFX/HDFX models
• If you are installing Aurora Edit SDFX/HDFX on an HP xw9300, you must
• If you are installing Aurora Edit SDFX/HDFX on an HP xw8400, you must
4. Press F10 to accept.
5. Select File | Save changes and press Enter.
6. Press F10 to accept. The system will restart.
make the following BIOS change for proper cooling. Failure to do so may result
in overheating, which can cause unpredictable behavior and possibly hardware
failure.
1. Turn on the xw9300 and press F10 to enter the BIOS setup.
2. Select Advanced | Thermal and press Enter.
3. Select Full Speed Chassis Fans, and change it from Disable to Enable.
4. Press F10 to accept.
5. Select File | Save changes and press Enter.
6. Press F10 to accept. The system will restart.
make the following BIOS change for proper cooling. Failure to do so may result
in overheating, which can cause unpredictable behavior and possibly hardware
failure.
1. Turn on the xw8400 and press F10 to enter the BIOS setup.
2. Select Power | Thermal and press Enter.
3. Select Fan Idle Mode, and change it from 1 bar (minimum) to 7 bars
(maximum).
4. Press F10 to accept.
5. Select File | Save changes and press Enter.
6. Press F10 to accept. The system will restart.
Hyper Threading
Hyper Threading should be disabled for Intel processors that support this feature. This
is typically controlled via the system BIOS. Performance tests with Aurora Edit have
consistently demonstrated a decrease in overall performance when Hyper Threading
is enabled.
Microphone Recording
When you record to Timeline using a microphone source, the first few frames of the
sound recording incorrectly includes sound from the Timeline. This is because
Windows, by default, feeds the sound card output back into the input.
To change the Windows setting and correct this problem:
1. Go to Start | Settings | Control Panel | Sounds and Audio Devices .
2. b. Click on the Audio tab.
3. Under Sound recording, click on Volume.
4. On the Recording Control dialog, select Mute for the Stereo Mix source.
72 Aurora Edit and Edit LD Version 7.1.0 Release Notes and Upgrade Instructions 18 October 2010
Page 73

Operation considerations
If the Stereo Mix source is not shown, go to Options | Properties, click to select the
Stereo Mix source and click OK .
5. Exit the window.
6. Click OK to exit Sounds and Audio Devices.
Networking
• When using a Gigabit Ethernet card with an HP system, you must install this card
into a PCI Express or PCI-X slot to avoid conflict with the 1394 controller on the
motherboard.
• Windows XP Service Pack 3 automatically configures a Windows Firewall for the
client. For clients attached to networks with an existing Fire wall, it is recommended
that you disabled this Windows Firewall. For those without an external Firewall,
individual ports may need to have restrictions lifted as Windows will block the
unknown connection. To unblock a port, go to Start | Settings | Control Panel |
Security Center | Windo ws Fire wall | Exceptions and add Aurora Edit to the firewall
exceptions.
Performance
• The recommended Virtual Memory Allocation for all DNP systems is 2046 MB
(set at the Grass Valley factory).
• To improve system performance, adjust this setting:
1. Right-click on My Computer and select Properties.
2. Click the Advanced tab.
3. In the Performance area, click Settings.
4. Click the Adjust for best performance radio button.
5. Click OK.
Removable Media
When importing removable media from XDCAM in View as Tape mode, it will be
considerably slower than real time if the removable media is comprised of a large
number of clips. The number of clips directly affects the speed of the import. It is
recommended that you mark and import only the sections of video that you need,
rather than importing the entire duration of the source media.
XDCAM
When inserting an XDCAM disk or Panasonic P2 disk into the system, W indo ws may
begin an autorun session, which will pop up a windows explorer dialog by default.
To disable the autorun session:
1. Go to Start | Run and type in gpedit.msc.
2. Go to Administrative Templates.
3. Click System.
4. In the right hand pane, open Turn off AutoPlay.
5. Select CD-ROM drives in the dropdown menu.
6. Select Enable and click OK.
18 October 2010 Aurora Edit and Edit LD Version 7.1.0 Release Notes and Upgrade Instructions 73
Page 74

Operation considerations
System Imaging Software
Aurora systems use Acronis imaging software, version 3647, which allows you to
back up your system. When the system boots using Acronis Imaging software, select
either Safe Version, Full Version, or boot into Windows.
Safe version should normally be used to restore or create the C:\ partition from the
backup partition, drive F:\.
Full version loads additional USB drivers, which allows a user to backup or restore
with a USB drive. However, the boot process hangs unless the following parameters
are entered prior to selecting Full Version:
1. Press F11.
2. Change the boot parameters from quiet to quiet acpi=off noapic.
3. Click OK.
4. Select the Full Version to load True Image.
NOTE: Acronis imaging software recognizes Rev Pro drives.
Database Backup
Several command-line utilities are available for maintenance of the News database
that is used by Aurora Edit. These utilities automatically install on DNP machines that
host shared or embedded instances of the News database.
The utilities can be found in the \DB Maintenance\ subdirectory for the respective
Aurora Product under the C:\Program Files\Grass Valley\Aurora directory . They
must be run from the \DB Maintenance\ subdirectory of the machine whose database
is being operated upon. The user must be a member of the system's Administrators
group. For a local, stand-alone machine, run the utilities at that workstation. For the
central News database of a shared storage system (NewsShare), run the utilities at the
DSM.
For more information about the command-line utilities, refer to the
NewsDatabaseUtilities.htm document. This document is included in the DB
Maintenance subdirectory.
74 Aurora Edit and Edit LD Version 7.1.0 Release Notes and Upgrade Instructions 18 October 2010
Page 75

Known Issues
The following limitations are present in this release of software. If you want to obtain
more information about these limitations, please mention the reference numbers.
1394
When using multiple 1394 devices for input into Aurora Edit, the Firewire connections
must not be going through the same interface card. You may use the onboard 1394
input along with an additional Firewire card for this operation.
NOTE: XDCAM in FAM mode does not count as a 1394 Input device.
Audio Considerations
Description:CR107687
W orkaround:
Aurora Edit models HD/HDR
W orkaround:
Aurora Edit LD
NOTE: In the Aurora LD online help files, the section on Controlling a Deck from Aurora
Edit is not applicable for Aurora Edit LD. This functionality is only available with Aurora
Edit.
Description:CR105624
W orkaround:
Aurora Edit currently does not support the K2's mixed audio
format for mixing 16- and 24-bit audio.
Aurora Edit requires all audio tracks in a given clip to be of
the same format.
A JPEG2000 clip only displays one field in 1080i playback.Description:CR96329
Aurora Edit models HD/HDR are unable to play a single
JPEG2000 full-resolution clip in real time.
Aurora Edit LD thumbnails display as "Media Not A v ailable".
This occurs if the graphic is on the V: drive, yet the V: drive
is not connected to the Aurora Edit LD computer.
To display thumbnails of graphics on the V: drive, you must
map the V: drive on the Aurora Edit LD computer.
18 October 2010 Aurora Edit and Edit LD Version 7.1.0 Release Notes and Upgrade Instructions 75
Description:CR106275
W orkaround:
Description:CR106260
Graphics on Aurora Edit LD timeline display as black. This
occurs if the graphic is on the V: drive, yet the V: drive is not
connected to the Aurora Edit LD computer.
To display graphics on the V: drive on the Aurora Edit LD
timeline, you must map the V: drive on the Aurora Edit LD
computer. However, these graphics can be added to the
timeline and conformed on send, even when the V: drive is
not connected.
Aurora Edit LD Story line highlight feature becomes
unresponsive during playback. This occurs after an edit of a
timeline with a linked story.
Page 76

Known Issues
Close and re-open the sequence to reset the Story view.W orkaround:
Description:CR111054
W orkaround:
Aurora Edit models SDFX/HDFX
Description:CR81517
W orkaround:
Description:CR82652
Attempting to do a voice over conform causes the Conform
Server to hang up or an error message to appear on the
Conform Server.
A vbrNasDriveMap utility needs to be run so that the conform
service will see the Z: drive mapping.
Aurora Edit fails to start if the input signal is corrupt.Description:CR77369
Verify all cables are terminated if using a split signal.Workaround:
A limitation in the SDFX/HDFX I/O card generates a bad
signal in the VGA when using a 1080i source with 720p video
settings. You are able to record this bad signal and use it.
Verify that video settings in Aurora Edit are correctly set to
1080i.
Play to tape inconsistent with mark IN points.Description:CR82354
NoneW orkaround:
HDSDI output from HDFX to a Sony HDXDCAM deck with
firmware 1.62 there is no audio.
NoneW orkaround:
Description:CR83022
W orkaround:
Aurora Edit models SDR/HDR output
Aurora Edit may not launch if running under a non
Administrator account.
Modify the registry file HKEY_LOCAL_MACHINE | System
| CurrentControlSet00X | Enum. Then apply Read permission
to Everyone to the Enum key under CurrentControlSet00X.
Make the registry change as an administrator and then log in
as the non-admin and it should work fine.
Negative v arispeed video displays field sw apping on the external monitor during play
preview.
Playback of some effects, such as blur, may be choppy.Description:CR71317
Rendering the blur will alleviate the choppy playback.W orkaround:
Aurora stream
Description:CR94561
After adding a new Aurora Edit system to a K2 network, the
Self-Test fails with the error, “Stream Count Not Set”, even
though the bandwidth setting from the K2 server is correct.
76 Aurora Edit and Edit LD Version 7.1.0 Release Notes and Upgrade Instructions 18 October 2010
Page 77

Known Issues
W orkaround:
Bin behavior
Description:CR69438
W orkaround:
Description:CR91413
Breakout Box (BOB)
Description:CR109304
W orkaround:
Run AuroraStream.exe, verify that the bandwidth setting is
correct, and re-run the Self-Test.
Switching to 16:9 thumbnails during a record will result in a
thumbnail that says “Media Not Available” for the currently
recording clip.
Record the clips first and then switch to 16:9 thumbnails if
that aspect ratio is desired.
When you rename a clip in Aurora Edit, the corresponding
logical asset does not rename so that it appears when you
browse for it.
Media management should be done using MediaFrame.Workaround:
A reboot is required after the upgrade of AJA drivers used for
the Breakout Box option.
Refer to the Aurora Edit and Aurora Edit LD Installation and
Configuration Guide.
Caching
Clips
DeBug
Description:CR108752
W orkaround:
Description:CR110134
W orkaround:
Going from the HDMI audio output of the AJA Breakout Box
into the HDMI audio input of another Breakout Box is not
supported.
None, not supported by outside manufacturer.Workaround:
Caching has been disabled in version 7.0.Description:CR109539
Caching is disabled in the registry but not removed from the
Installer. It will still run in the W indows service panel (it won't
be disabled or removed).
Clip property information is being left behind after large
deletions.
If you delete a large number of clips (eg. 10,000) from a bin
in a single operation, Aurora Edit may be unresponsive for
several minutes while the delete is performed.
18 October 2010 Aurora Edit and Edit LD Version 7.1.0 Release Notes and Upgrade Instructions 77
Description:CR109093
Using DeBug view may cause application to respond very
slowly.
Page 78

Known Issues
Effects
W orkaround:
Description:CR37062
Description:CR106515
W orkaround:
Description:CR73848
W orkaround:
DebugView is a very low level utility that hooks into the OS
to intercept calls to OutputDebugString(). No other
applications do this. DebugV iew is useful, but use it with care,
and be aware that it has its limitations.
When placing an effect over an unrendered transition, which
resides over a cut point of an unrendered vary speed clip, the
transition may stutter upon playback.
Rendering the transition will resolve the problem.W orkaround:
If an effect is placed over an unrendered v ary speed clip within
the timeline, the field interpolation will be disabled and the
vary speed clip will play back as frame based.
Rendering of vary speed clips will always use field based
interpolation.
If an effect is placed over an unrendered v ary speed clip within
the timeline, the field interpolation will be disabled and the
vary speed clip will play back as frame based.
Rendering the effect will allow the system to process the video
and audio properly when playing back.
Description:CR82536
External jog/shuttle controller
There are size and shape differences between odd shape resizes
and drop-shadows between the SD/SDR/HD/HDR and
SDFX/HDFX.
NoneW orkaround:
The JLCooper ES-450 external controller with Sony knob is currently supported using
the version 1.04 or 1.05 controller chip.
Description:CR20980
W orkaround:
Description:CR50736
W orkaround:
Description:CR50763
The JLCooper ES-450 external controller will occasionally
lose its communication with Aurora Edit.
The controller must be power cycled in order to regain its
connection.
The +1/-1 buttons on the controller may creep if the Drop
Frame/Non Drop Frame settings of the tape and Aurora Edit
do not match.
T ape timecode should match the current settings found within
Tools/Options of NewsEdit.
Some VTRs do not respond properly to the external controller's
+1/-1 frame requests.
78 Aurora Edit and Edit LD Version 7.1.0 Release Notes and Upgrade Instructions 18 October 2010
Page 79

Known Issues
W orkaround:
Graphics
Hold the Shift key of the external controller down while
clicking on the Stop button. This changes the mode of the
controller from Slow Mo Step Mode to Cue Up Step Mode.
It is recommended that graphics placed adjacent to one another on the Timeline do
not have durations of less than 5 frames.
Graphics are now placed on the Graphics track of the Timeline, not the FX and V2
tracks as in previous releases.
Description:CR39360
W orkaround:
HP xw9300 workstation
Description:CR99235
Some graphics that get placed on the timeline and played back
may display field swap issues.
Right click the graphic in the Timeline and adjust the Y
position by .01. Hit OK and play the graphic again.
Playing back HD graphics may result in choppy playback.Description:CR106516
Rendering the graphic resolves the issue.Workaround:
When using Aurora Edit on the HP9300 platform, HD record
to timeline can experience output audio drop-outs (hiccups)
due to known performance limitations of the platform. In this
case, the record audio is fine when played back. In extreme
cases, audio can be dropped on the input and the user will get
the message that “Frames were dropped during record due
performance limitations.”
Record the media to bin and then add it to your timeline.W orkaround:
Description:CR108947
Import/Export media
The encoding of AVCI is not be supported for HP xw9300 or
xw8400 platforms due to performance limitations.
NoneW orkaround:
Exchanging 1080i .avi files with the K2 Media Client is not supported.
NOTE: An XML EDL export is not supported for import back into Aurora Edit. For
exporting and then importing back into Aurora Edit, it is recommended that AAF be used.
Importing media directly off of a CD can result in a failure.Description:CR48622
W orkaround:
W orkaround:
Import the media onto the local hard drive and then try
importing from that location.
Imports of WM9 files may lead to incorrect durations.Description:CR80136
Using Aurora Edit Profiles found within the options pages of
the WM9 import dialog.
18 October 2010 Aurora Edit and Edit LD Version 7.1.0 Release Notes and Upgrade Instructions 79
Page 80

Known Issues
On some systems, 1080i media fails to export as .asf.Description:CR79063
W orkaround:
Description:CR83236
W orkaround:
W orkaround:
W orkaround:
The qasf.dll should be from 8/4/2004. This can be found in
C:\Windows\System32. Contact customer support for more
information.
Aurora Edit crashes while trying export any 1080i/SD
MPEG2/IMX clip as .mov file type. This is due to using the
Quick Time 7.1.5.120 version.
Uninstall this version of Quick Time and use version 7.0.4
which is packaged with Aurora 6.3.
Importing a section of a long HD XDCAM clip failed.Description:CR85928
In Aurora Edit 6,5, two demo files from Main Concept for the
upcoming release were removed. This will cause any Media
Import/Export operation that requires a DVCPRO25,
DVCPRO50, or DVCPRO100 transcode to fail. The editor
will get a dialog to this effect.
Importing MPEG 1080i results with field swap or failure.Description:CR111430
DVD software and Aurora Edit both supply MPEG codecs,
which live side by side (one doesn't ov erwrite the other). The
Microsoft API used during MPEG import/export cannot be
told which one to use, and more often than not it picks the
DVD supplied one. Unfortunately, the DVD software codec
doesn't implement an API correctly, resulting in the
import/export failure.
iNews
Description:CR111760
Installation
Description:CR108129
W orkaround:
K2-Aurora FTP
W orkaround:
Raw-feed placeholders are not supported for iNews for
embedding in iNews scripts.
NoneW orkaround:
DirectX is not being installed during an Aurora Edit software
install. If not installed, Aurora Edit will fail to create channels.
Manually run AuroraRequired.exe which can be found
C:\Program Files\Grass Valley\Aurora\Installers.
PFC Mark-in/out TC incorrect after transfer through newsFTP.Description:CR105168
K2-Aurora FTP will need to be used with archive/restore
operations.
80 Aurora Edit and Edit LD Version 7.1.0 Release Notes and Upgrade Instructions 18 October 2010
Page 81

Known Issues
Laptop Dell 820
When using FAM mode for XDCAM file import, the Dell 820 laptop will fail the
import when the 4 pin onboard Firewire port is used. This is a problem with all Fire wire
file transfers with this version of Dell Laptop. It is recommended that a 6 Pin 1394
PCMCIA card be used for this type of Firewire transfer.
NOTE: AV/C control is not affected by this issue.
Please contact customer support for additional information.
Licensing
Link To Story
Description:CR102883
W orkaround:
Description:CR72952
W orkaround:
Fail to connect to license server on Edit as non-admin login.
This occurs if working in a shared environment on a
workgroup (not a domain).
Add "anonymous login" on the DCOM config license
server on the DSM as follows:
1. From the DSM W indows desktop click Start | Settings
| Control Panel | Administrative Tools | Component
Services | Computers | My Computer | DCOM Config.
2. Right-click License Server and select Properties.
3. On the Security tab, under the Customize on Launch
and Activation Permission area, add anonymous logon.
4. Check Allow for all listed permissions.
5. Click OK.
When linked to iNEWS scripts, Story V ie w window sometimes
gives an Internet Explorer script error. Re-sizing of this
window can cause this to happen.
Go to W indows Display Pr operties | Appearance | Effects...
and turn off the Show Window Contents While Dragging
option.
Long-GOP media
18 October 2010 Aurora Edit and Edit LD Version 7.1.0 Release Notes and Upgrade Instructions 81
Description:CR96727
W orkaround:
Description:CR98432
When exporting a sequence as AAF, with rendered long-GOP
material, the Consolidate and Embed options are greyed out.
Long-GOP consolidation is not supported in Aurora Edit 6.5,
so the Consolidate and Embed options are unavailable.
Long-GOP clips created in Aurora Edit 6.5 are incompatible
with Aurora Edit 6.3, and Aurora Edit 6.3 will crash when
trying to load a long-GOP clip created by Aurora Edit 6.5.
Page 82

Known Issues
W orkaround:
Lyric trial software
Long-GOP is not supported in Aurora Edit v ersion 6.3, so you
cannot use clips created in Aurora Edit 6.5 if you revert back
to version 6.3.
In addition to the CD containing the Plug-in and the Bit stream Fonts CD, your purchase
includes a CD containing a trial version of the full L yric application. During installation,
the system will call for a license code. Enter this sequence of characters:
ZIRSCUCVF4OQPMXKJQ39V37ZLEVXFSD33E8WW9ZP
NOTE: This trial version of the Chyron Lyric software is not the plug-in for Aurora Edit
and should never be installed on an Aurora Edit system.
The license is good for 60 days. If you wish to purchase the latest version of the full
Lyric application, contact Chyron Customer Service at 631-845-2132. A copy of the
Lyric Handbook will accompany the software.
Undo removes elements from graphics templates.Description:CR32580
Reload the original template.W orkaround:
Description:CR42775
Description:CR106517
Configuring a .lyr file to be read-only prevents Aurora Edit
from opening templates from that directory.
Lyric templates should not be configured to be read-only.Workaround:
If using Chyron Title T ool within a dual monitor en vironment,
renders will fail if the monitor resolution is set to higher than
1280x1024.
MediaFrame
Description:CR101144
Description:CR106170
Description:CR105665
Description:CR110457
W orkaround:
Set resolutions to 1280x1024.Workaround:
After uninstalling Chyron Title Tool plugin, OMFObject.dll
and TBMSlogger.dll no longer register. Systems that have
never had Chyron installed do not have this issue.
Reinstall Chyron.W orkaround:
When configuring an MDI, using the IP address for the DSM
location instead of the DSM name results in connection
difficulties.
Always configure MDIs with the name, not the IP address.W orkaround:
In the MediaFrame Event Log, the News MDI can report an
event for a non-existent object in the assetEventList.
When convenient, restart the "GV Ne ws Share MDI" service.Workaround:
Restoring a clip through the MediaFrame plug-in doesn't
account for handles
If you restore an asset from the MediaFrame plugin, not from
the Sequence itself, it will ignore the Tools/Options/Handles
82 Aurora Edit and Edit LD Version 7.1.0 Release Notes and Upgrade Instructions 18 October 2010
Page 83

MobilePre
Known Issues
Restore Handles setting. Only when Restoring from an Edit
sequence does it use this setting.
Description:CR82288
Offline Proxy Media
W orkaround:
Orad Graphics
W orkaround:
When using the MobilePre for voice/audio recordings,
Windows mak es it the default capture device AND the default
playout device. This should be only used for audio capture
and not for playout.
Disable Playout options for the MobilePre.W orkaround:
Should not unlink audio only when using offline proxy media.Description:CR109878
Archived assets or clips from another storage repository with
fewer audio tracks then the sequence to which they are being
added to can cause Synchronization to fail between the
lo-resolution and hi-resolution assets. To avoid this, your
sequence should have the same number of audio tracks that
your asset(s) contain.
Non-administrative users cannot preview ORAD graphics.Description:CR108239
All Orad users need read and write permissions to the ORAD
server (a W indows drive must be mapped to the Orad server).
Panasonic P2
The Panasonic P2 driver must be loaded in order for P2 media to work properly on
the Aurora Edit station.
USB 2.0 is required for the station using Panasonic P2 media. If the on-board USB is
currently 1.0, an additional USB 2.0 card must be installed in order for this feature to
work properly.
Playback
Description:CR67175
Description:CR92603
Playing back HD media while the application is currently set
to SD within Tools/Options leads to slightly murky video
output for the HD material.
Configure the application's record settings to HD.W orkaround:
Using two streams in an unrendered HD AVC-Intra sequence
results in skipped frames on playback.
Rendering effects fixes the problem.W orkaround:
18 October 2010 Aurora Edit and Edit LD Version 7.1.0 Release Notes and Upgrade Instructions 83
Page 84

Known Issues
Play to tape
The first frame is doubled when playing to tape.Description:CR85414
None at this time.Workaround:
Preserve ANC Data
Description:CR108780
Description:CR108130
Recording to Timeline
Description:CR81820
Description:CR80923
ANC data track will only be preserved and supported for AAF
and GXF media exports. F2 wink (Transfer) and gxf transfers
from Edit workflows are also supported.
NoneW orkaround:
As described in the Preserve ANC Data section of the Aurora
Edit User Guide, Interlaced to progressive conversions, and
vice-versa, does not support conv erting the anc data properly.
This ancillary data conversion is not currently supported.Workaround:
Intermittent flash frame with record to timeline
(SDR/HDR/SDFX/HDFX). Set up an in point on a tape that
is the first frame after a scene change. Go to the timeline and
set an in point in the middle of a clip or in filler. Record to
timeline. Notice that you see a flash frame of the scene before
the in point on the tape.
NoneW orkaround:
Timeline pointer skips ahead a couple of frames when reaching
the IN mark of a record to timeline (SDFX/HDFX)
NoneW orkaround:
Description:CR92196
When you are recording to a Timeline while you also have a
Record to Bin window open, you may get a Src Filter error.
This may indicate insufficient bandwidth on shared storage
or poor disk performance on local storage.
W orkaround:
Close the Record to Bin window before recording to the
Timeline.
Description:CR95207
If you click on the Storyboard while recording to the Timeline,
recording stops.
Restart your recording.W orkaround:
Record to Timeline is dropping frames.Description:CR110225
W orkaround:
Recording to an HD Timeline o ver 2 video tracks and a video
effect may fail due to dropped frames. This is a known
limitation. Work around: record to bin and then drop the clip
onto the Timeline, or render the effect before recording to
Timeline.
84 Aurora Edit and Edit LD Version 7.1.0 Release Notes and Upgrade Instructions 18 October 2010
Page 85

Known Issues
Description:CR110742
W orkaround:
Removable media
Description:CR88477
Rendering
When a clip is copied from a different SAN, it does not detect
the # of audio tracks from the source and it fails to render and
conform.
If you are using an asset from another shared storage silo, your
sequence on the current storage should have the same number
of audio tracks as the imported asset.
Playing a clip from a REV disk after it has been ejected hangs
the Aurora Edit application.
NoneW orkaround:
XDCAM 720p clips don’t open in the Removable Media Bin.Description:CR94330
720p HD XDCAM is not supported in Aurora Edit 6.5.W orkaround:
Faster than real-time variable speed clips may require rendering. If rendering has not
been done, the video output will be replaced by a “Media not Available” slate. This
will not occur if the clips have been cached locally.
Description:CR97642
When rendering a clip with an Alpha Channel, the aspect ratio
conversion doesn’t get saved.
W orkaround:
Second video display - Edit LD
W orkaround:
Sending sequences
Description:CR91896
SmartBins
Graphics and animations should be created in the same format
as the Aurora Edit timeline.
A JPEG2000 clip only displays one field in 1080i playback.Description:CR96329
Aurora Edit models HD/HDR are unable to play a single
JPEG2000 full-resolution clip in real time.
When sending a sequence to a K2 system with a non-supported
format, Aurora Edit displays a Server Busy message for
DV100, AVC-Intra, and JPEG2000 GXF transfers, and never
completes; the operation is eventually aborted.
Only use supported formats.W orkaround:
In order for SmartBins to be successful, the SmartBin server must have the shared
drive locations mapped.
18 October 2010 Aurora Edit and Edit LD Version 7.1.0 Release Notes and Upgrade Instructions 85
Page 86

Known Issues
When changing a SmartBin within Aurora Edit from a T ransfer SmartBin to a Shared
SmartBin, you need to restart the SmartBin Service in order for the change to take
effect.
The SmartBin service will occasionally display an error when stopping and restarting
the service. To resolve this, simply restart the service once again.
Description:CR44044
W orkaround:
Description:CR43144
W orkaround:
Description:CR43245
W orkaround:
Description:CR34804
W orkaround:
Cancelling a transfer to a destination bin is being monitored
as a DNP SmartBin can result in black at the end of the clip
residing in the Aurora Edit.
Cancelling transfers to bins that are monitored as SmartBins
is not recommended. Allow the transfer to complete and then
delete the clip from the media client.
Making changes to the SmartBin Setup Tool while files are
currently transferring stops the transfers.
Wait until all files have transferred prior to changing the
SmartBin setup.
Zero length clips within the SmartBin will report incorrect
video compression data until the clip's duration begins to grow .
Clips with zero length will not be available for use within
Aurora Edit. Once the file reaches 25 seconds in length, it will
ready for use.
Renaming a media client bin that is currently being monitored
as a SmartBin can lead to SmartBin disconnects in the
NewsShare database.
Renaming bins that are monitored as SmartBins is not
recommended.
Description:CR85250
Description:CR88960
W orkaround:
Description:CR94982
Description:CR109903
W orkaround:
MOV files without corresponding XML files don’t work in
Media SmartBins.
NoneW orkaround:
Transfer SmartBins do not preserve the discontinuous timecode
track.
None at this time. The first frame of the timecode from the
source clip is preserved and the timecode is continuous after
that.
Media Import SmartBins fail when a non-DV sequence is sent
from Apple’s Final Cut Pro application.
Use K2 Hotbins.W orkaround:
Media Import Smartbins will no longer be a supported feature
moving forward , including the 7.0 release.
Refer to the Aurora Edit User Guide section, Importing Media,
which now includes how to import .mov files.
86 Aurora Edit and Edit LD Version 7.1.0 Release Notes and Upgrade Instructions 18 October 2010
Page 87

Known Issues
Sony XDCAM
The Sony XDCAM FAM driver must be loaded in order for XDCAM media to work
properly on the NewsEdit station. HD XDCAM clips cannot be viewed prior to
importing. To import, simply drag and drop the HD XDCAM media directly in the
destination bin.
Not all formats of XDCAM fornats are supported, such as 24fs.
View as Tape will not mix and match XDCAM and XDCAM EX media.
Description:CR53600
Description:CR106519
W orkaround:
Description:CR106520
W orkaround:
Description:CR79687
Disconnecting the 1394 connection to the Aurora Edit system
while clips are importing from XDCAM leads to an application
error.
Don’t disconnect the 1394 source while using the XDCAM.W orkaround:
When an XDCAM clip is open in either the bin trimmer or
clip source, the XDCAM disk will not eject from the device.
Close the bin trimmer or load a non-XDCAM clip into the
clip source. Once the XDCAM is not in use, the disk will eject.
Hitting refresh (F5) on the XDCAM bin will also clear the
clip source.
Recording to timeline with XDCAM may result in choppy
playback of the XDCAM material as it plays to the timeline.
This occurs more with higher bit rates such as IMX 50 and
IMX 40.
Copying directly to timeline, instead of recording to timeline,
bypasses the issue. Note that the result of the record to timeline
will not be choppy as the clip import will succeed regardless
of play performance.
Dragging and dropping XDCAM clips of varying formats to
the bin at the same time may result in incorrect Compression
Format.
When using FAM mode for XDCAM file import, the Dell 820 laptop will fail the
import when the 4 pin onboard Firewire port is used. This is a problem with all Fire wire
file transfers with this version of Dell Laptop. It is recommended that a 6 Pin 1394
PCMCIA card be used for this type of Firewire transfer.
NOTE: AV/C control is not affected by this issue.
Please contact customer support for additional information.
18 October 2010 Aurora Edit and Edit LD Version 7.1.0 Release Notes and Upgrade Instructions 87
W orkaround:
Importing them individually will result in proper formats.W orkaround:
i2p and p2i clips showing wrong starting frame for XDCAM.Description:CR109056
Temporarily change the application format to that of the
XDCAM source material if view as tape is required. Otherwise,
importing individual clips in their native timecode format will
work directly to the bin.
Page 88

Known Issues
Sources/Recording
Description:CR29334
Switching an external SDI router while recording, may cause
video and audio to be asynchronous.
Don’t switch external SDI signals while recording.W orkaround:
Description:CR38987
Records may become corrupt when disk space on the SAN
reaches very low levels.
W orkaround:
Don’t allow the SAN to exceed 90% capacity during normal
operation.
NOTE: When configuring a VTR as both the input source and play to tape location, it is
imperative that a feedback loop not be created as doing so may disrupt standard Aurora Edit
behavior.
Description:CR84145
Capture of audio has a weird audio echo happening after
switching sources.
W orkaround:
Toggle between the source giving you this issue and another
source and back again. You should no longer hear the audio
echo.
Summit
Description:CR101388
Creating a long bin name over 32 characters causes smartbins
to fail to transfer clips to Edit.
Description:CR109626
W orkaround:
TGA sequences
Description:CR106521
W orkaround:
Transfers
Description:CR51595
Rename the bin to be 32 characters or less.Workaround:
When winking over QT files from Summit, opening them in
the vmf on FCP causes them to fail to open.
You cannot use this with growing files from Summit. If you
want to use it with growing files then you need to navigate to
the V:/Media path on the Summit server side.
Playing back HD TGA sequences may result in choppy
playback.
Render the TGA sequence.Workaround:
Media conversion of TGA sequences is not supported.Description:CR66521
It is recommended that TGA sequences get imported into
Aurora Edit in the format that they were created for.
Transferring a clip that has an apostrophe in the name will
result in a “Server Busy” error when sending to a SAN.
88 Aurora Edit and Edit LD Version 7.1.0 Release Notes and Upgrade Instructions 18 October 2010
Page 89

Known Issues
W orkaround:
Transitions
Description:CR86085
Video settings
Description:CR88077
W orkaround:
VizRTGraphics
Description:CR110832
Go to Tools/Options and check the box that says “Test for
Invalid Video Server Characters”. Once completed, resend
the clip or sequence to the SAN Profile.
Deleting a transition under an effect with a border can cause
problems with the border settings of that effect.
NoneW orkaround:
In an HD sequence, when the Title T ool is selected after V ideo
Settings are changed from SD to HD, the Aurora Edit
application crashes.
Restart the application after changing from SD to HD if using
the Title Tool.
Doing an EDL export does not tell the user that there is an
un-retrieved VizRT graphic on the Tmeline.
SiteConfig
W orkaround:
Description:PR20458
W orkaround:
VizRT graphics must be manually retrieved by the user to be
burned into the T imeline. Click on the graphic on the T imeline
and select Retrieve Graphic. If a graphic has not been
retrieved, the graphics will not be exported with an EDL.
When installing Aurora on Windows 7 clients, a pending
SiteConfig dialog can be missed.
When a dialog is pending, a blinking icon displays on the
Windows 7 task bar. Clicking on this indicator brings up the
dialog that takes you to the isolated session. If you are logged
in via remote desktop, the interactive services detection service
sends a notification about the pending dialog. If the notification
has been missed, go into Windows Services and stop and
restart the Interactive Services Detection Service. This causes
the service to send an immediate notification about the pending
dialog.
18 October 2010 Aurora Edit and Edit LD Version 7.1.0 Release Notes and Upgrade Instructions 89
 Loading...