

Page 1

After Effects Plug-in
User Manual
M852-1200-490
www.miranda.com
Page 2

Copyright & Trademark Notice
Copyright © 2014, Miranda Technologies Partnership. All rights reserved.
Belden, Belden Sending All The Right Signals, and the Belden logo are trademarks or
registered trademarks of Belden Inc. or its affiliated companies in the United States and
other jurisdictions. Miranda, Vertigo Suite, Vertigo XG and Xmedia Server are trademarks
or registered trademarks of Miranda Technologies Partnership. Belden Inc., Miranda
Technologies Partnership, and other parties may also have trademark rights in other terms
used herein.
Terms and Conditions
Please read the following terms and conditions carefully. By using the After Effects Plug-in
documentation, you agree to the following terms and conditions.
Miranda Technologies Partnership (“Miranda”) hereby grants permission and license to
owners of the Vertigo Suite to use their product manuals for their own internal business use.
Manuals for Miranda products may not be reproduced or transmitted in any form or by any
means, electronic or mechanical, including photocopying and recording, for any purpose
unless specifically authorized in writing by Miranda.
A Miranda manual may have been revised to reflect changes made to the product during its
manufacturing life. Thus, different versions of a manual may exist for any given product.
Care should be taken to ensure that one obtains the proper manual version for a specific
product serial number.
Information in this document is subject to change without notice and does not represent a
commitment on the part of Miranda.
Warranty Policies
Warranty information is available in the Support section of the Miranda Web site
(www.miranda.com).
Document Identification
Title After Effects Plug-in User Manual
Part number M852-1200-490
SW version Vertigo Suite v.4.9 GA
Page 3

Revision History
After the original release date, the After Effects Plug-in User Manual may be updated with
edits and then re-released. The following table tracks the versions of this document.
Revision date Description
March 31, 2014 Original release
Page 4

T
ABLE OF
Introducing Miranda’s After Effects Plug-in ...................................................................... 1-1
Installing Miranda’s After Effects Plug-in ........................................................................................... 1-2
Miranda Animation option................................................................................................... 2-1
Using the Miranda Animation option.................................................................................................. 2-2
Export Options panel ......................................................................................................................... 2-4
Oxtel Export tab ............................................................................................................................ 2-5
VAF Export tab ............................................................................................................................. 2-7
HMP MXF Export tab.................................................................................................................... 2-8
Logging tab ................................................................................................................................... 2-9
Miranda Animation (Merge Mode) option .......................................................................... 3-1
Workflow for pre-rendering in-show promos using the After Effects Plug-in ..................................... 3-2
Using the Merge Mode option to perform a batch export of graphics files ........................................ 3-3
Creating a spreadsheet for Merge Mode ...........................................................................................3-5
Project Name column ................................................................................................................... 3-5
Output File Name column ............................................................................................................. 3-6
Subfolder columns ........................................................................................................................ 3-7
Layer tag columns ........................................................................................................................ 3-9
Intuition Template & Intuition Template Element columns.......................................................... 3-10
Asset Lifespan column................................................................................................................ 3-10
Asset Expiry Date column........................................................................................................... 3-10
Vertigo Template, Vertigo Template Element & VAF XmediaServer columns ........................... 3-11
Handling a Project with Multiple Compositions ........................................................................... 3-12
Transcoding TGA sequences into animation and/or video files....................................................... 3-13
C
ONTENTS
After Effects Plug-in User Manual TOC-1
Page 5

1 I
N
OTE
NTRODUCING
M
IRANDA’S
A
FTER
FFECTS
E
Miranda’s After Effects Plug-in uses base After Effects projects to pre-render graphics into
animation or video clip files that can then be used on a variety of Miranda playout devices.
• .oxi - OXI animation files for Intuition Classic devices
• .oxa - OXA animation files for Imagestore 750 and LGK -3901 devices
• .vaf - VAF video clip files for Intuition XG and Vertigo XG devices
• .mxf - MXF video clip files for HMP-1801 devices
The After Effects Plug-in can also embed a .VAF inside an .OXI or .OXA file by enabling a setting
within the Oxtel Export Options in Merge Mode. This allows the asset to be used on Intuition
Classic, Intuition XG, and Vertigo XG devices. See “Embed VAF in OXI” on page 2-6.
The Affects Effects Plug-in consists of two (2) options for rendering graphics files from an
After Effects project:
• Miranda Animation - The M
• Miranda Animation (Merge Mode) - The M
P
LUG-IN
IRANDA ANIMATION
the currently loaded After Effects project to generate and save the After Effects project as
an animation or video file. See page 2-1
multiple versions of graphics by using traffic data from an Excel spreadsheet to feed an
Adobe After Effects Project template. The plug-in then combines the data and the
template to generate multiple versions of the promo, as animation or video files, for
different channels, days and times.
In addition to creating animation and video files, Merge Mode also allows you to output
an Intuition template with the newly created animation inserted based on an original
Intuition template.
Another practical use of the Merge Mode option is to transcode Targa (TGA)
sequences from disk to OXI/OXA animations and/or VAF video clip format.
See “Miranda Animation (Merge Mode) option” on page 3-1
information.
option is the basic mode that simply uses
for further instructions and information.
ERGE MODE
option allows you to prepare
for further instructions and
After Effects Plug-in User Manual 1-1
Page 6
Introducing Miranda’s After Effects Plug-in
N
OTE
N
OTE
N
OTE
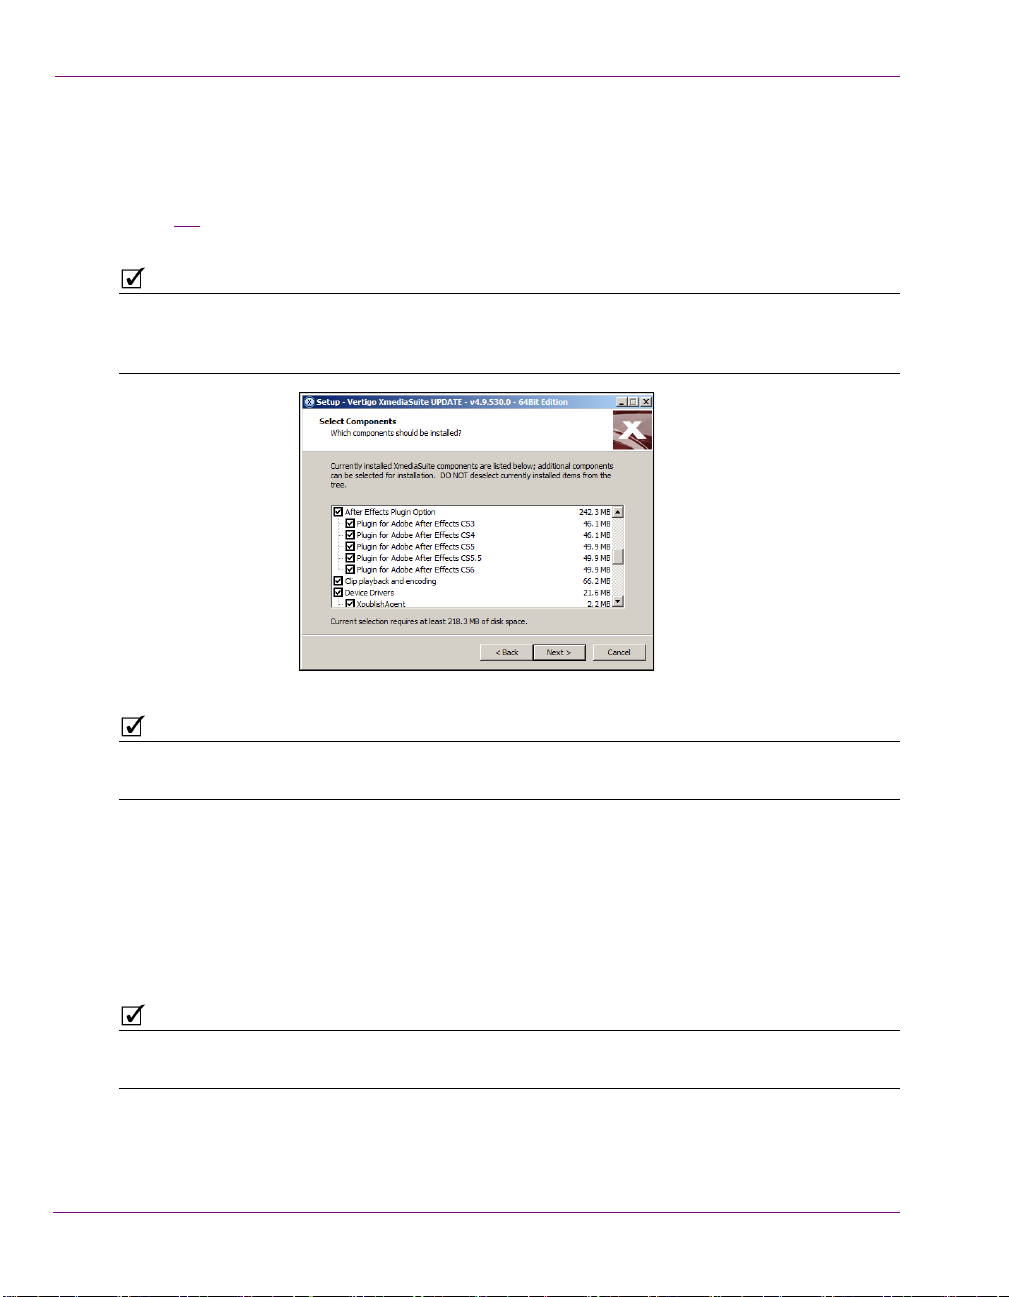
Installing Miranda’s After Effects Plug-in
The After Effects Plug-in is packaged with the Vertigo Suite software’s installation wizard. It
can be installed as part of the full installation or as an individual (standalone) component
(figure 1-1). In both cases, you simply need to run the installation wizard on the workstation
where the Adobe After Effects software is installed.
The After Effects Plug-in for CS3 and CS4 is only available from the 32-bit version of the Vertigo
Suite installer. Similarly, the After Effects Plug-in for CS5, CS5.5 and CS6 are only available in
the 64-bit version of the Vertigo Suite installer.
Figure 1-1. The Miranda After Effects Plug-in
When running Adobe After Effects and the Vertigo After Effects Plug-in on Windows 7, you
must be logged on as Administrator.
Once the After Effects Plug-in is installed, start the Adobe After Effects application and then
load or create a new After Effects project.
To verify that the Miranda After Effects Plug-in has been installed and is present in the After
Effects application:
1. Select the F
2. Confirm that both the M
commands are displayed.
The Miranda Animation command will be disabled (gray) until a valid After Effects project is
loaded and a composition is selected.
The first time that you run the After Effects Plug-in, you will be prompted for a license code.
Please contact a Miranda Technical Support representative to request an After Effects Plugin license code.
1-2 After Effects Plug-in User Manual
ILE>EXPORT
menu command.
IRANDA ANIMATION
and M
IRANDA ANIMATION
(M
ERGE MODE
)
Page 7
2 M
IRANDA
A
NIMATION OPTION
The Vertigo After Effects Plug-in’s M
the currently loaded After Effects project to generate an animation or video clip file. The
resulting file can then be saved to a specified directory as one of the following formats: OXI,
OX A , VAF, o r M XF.
Figure 2-1. The After Effect Plug-in’s Miranda Animation option
The following sections provide instructions for using the M
as descriptions of each of the Export options that are available:
• “Using the Miranda Animation option” on page 2-2
• “Export Options panel” on page 2-4
IRANDA ANIMATION
option is the basic mode that uses
IRANDA ANIMATION
option, as well
After Effects Plug-in User Manual 2-1
Page 8
Miranda Animation option
N
OTE
Using the Miranda Animation option
To use the Miranda Animation option to generate an animation or video clip file:
1. Start the Adobe After Effects application.
2. Load or create a new After Effects project.
3. Select the F
The E
ILE>EXPORT>MIRANDA ANIMATION
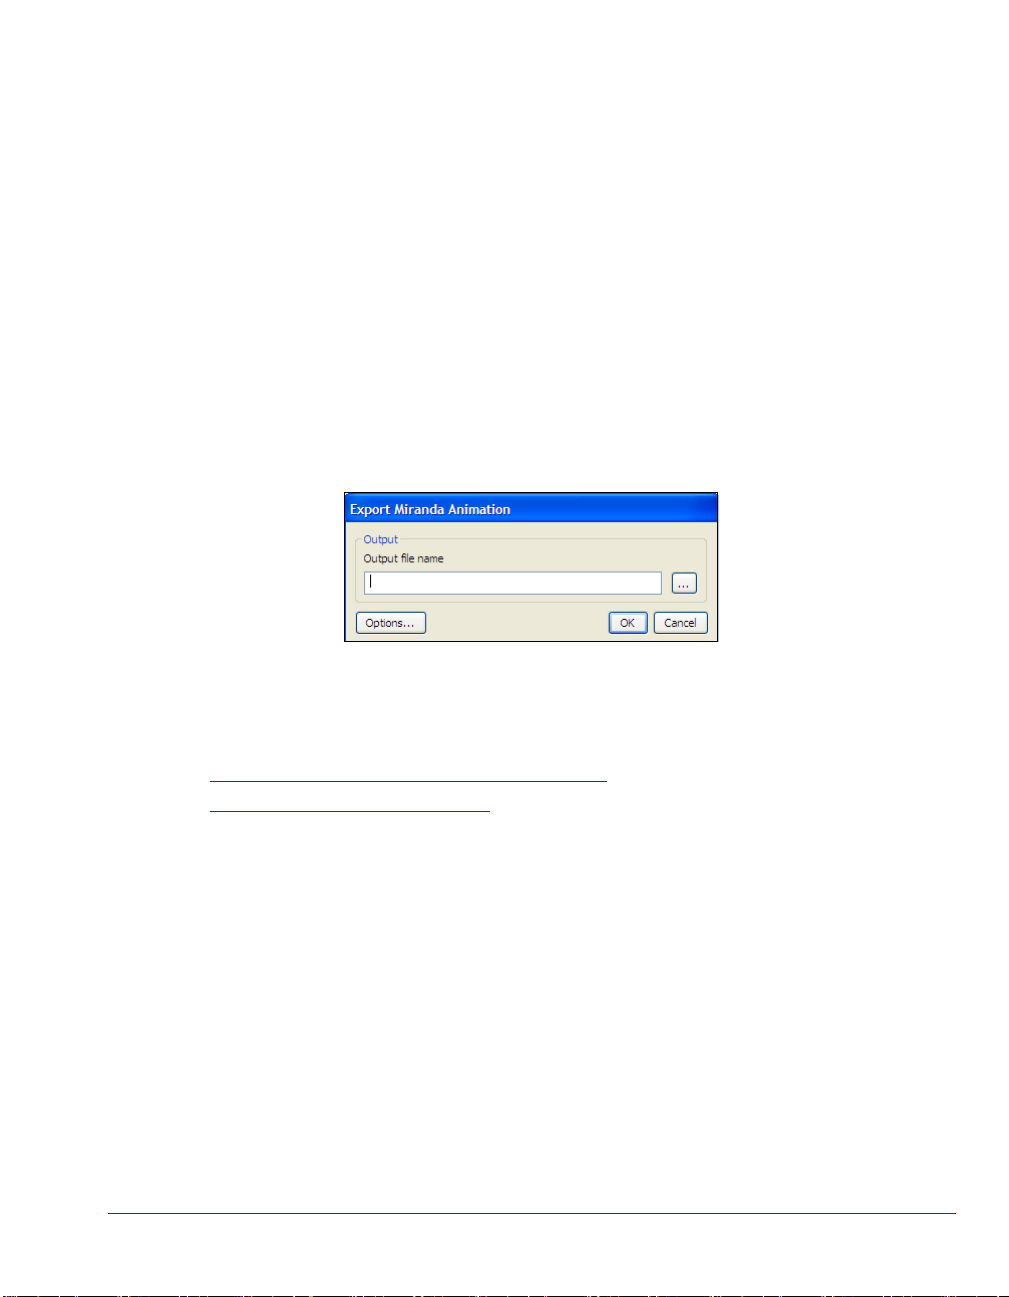
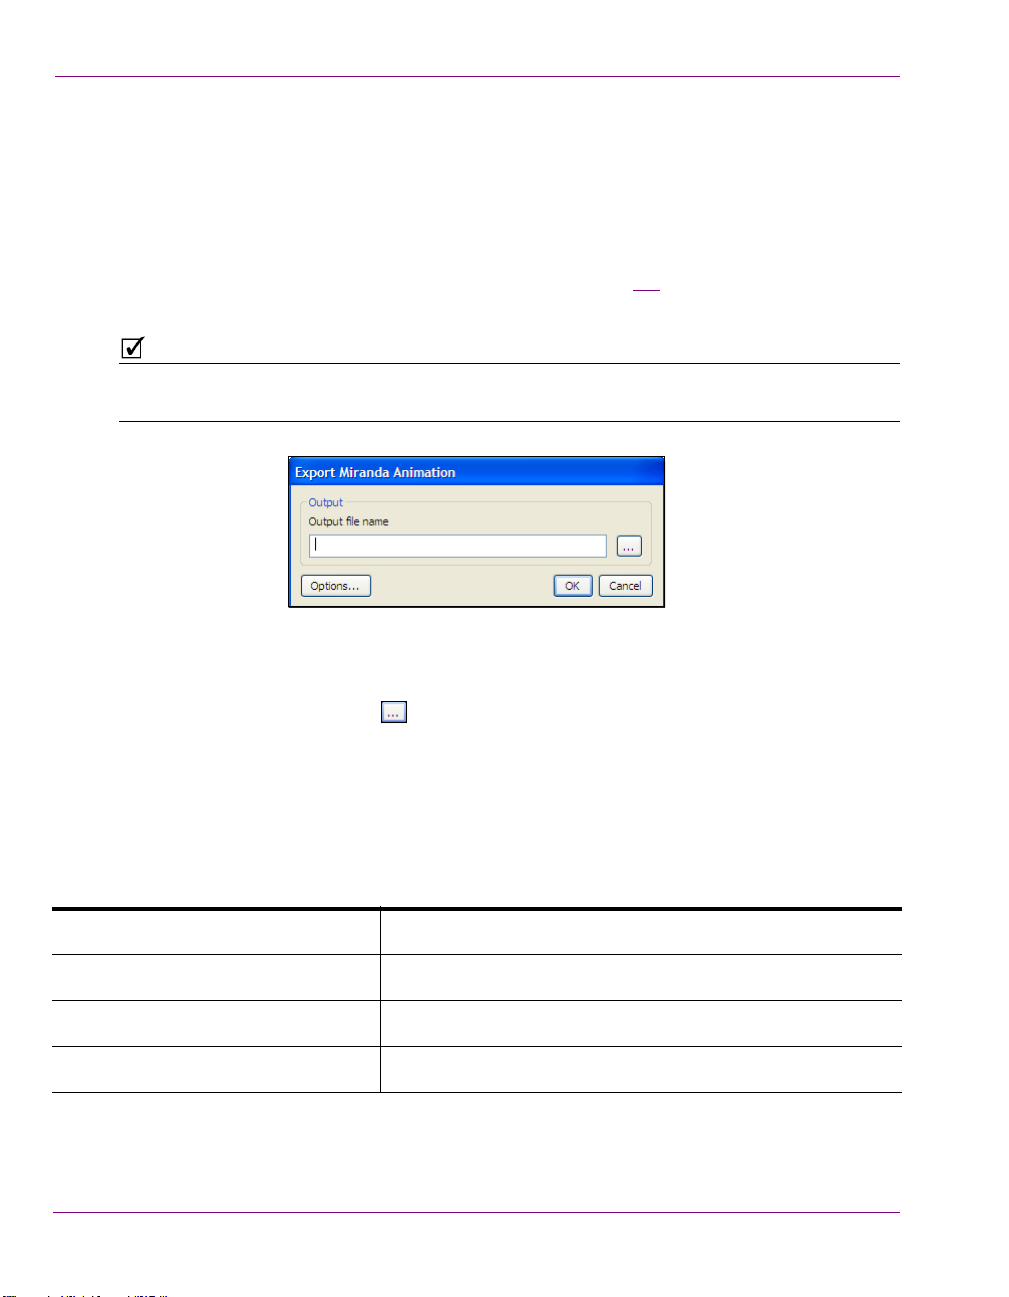
XPORT MIRANDA ANIMATION
dialog box appears (figure 2-2), which allows you to
select the output file path and the type of file to be exported.
menu command.
If the M
a composition.
4. Specify the O
O
XTEL
OXI F
IRANDA ANIMATION
option is greyed out, load a valid After Effects project and select
Figure 2-2. The Export Miranda Animation dialog box
UTPUT FILE PATH
a. Click the Ellipsis button to open the E
in which you want to save the animation or video file:
XPORT ANIMATION
dialog box.
b. Navigate to the directory location where you want to save the animation or video file.
c. In the F
ILE NAME
d. Select from the S
field, specify the name by which the file is to be saved.
AVE AS TYPE
drop-down list, the desired animation or video clip
file type. The suffix at the end of the file name defines the type of file to be
exported.
Choose one of the following file types:
ILE
(*.oxi)
Exports an animation file for Intuition Classic devices (default)
O
XTEL
OXA (*.oxa)
ERTIGO ANIMATION FILE
V
M
ATERIAL EXCHANGE FORMAT
e. Click S
AVE
(*.vaf)
(*.mxf)
.
Exports an animation file for Imagestore and LGK devices
Exports a video clip file for Intuition XG and Vertigo XG devices
Exports a video clip file for HMP-1801 devices
2-2 After Effects Plug-in User Manual
Page 9
Miranda Animation option
5. Select the O
PTIONS
button to expose advanced options, which specify how the
animation or video file will be created, including desired looping behaviors. See “Export
Options panel” on page 2-4 for more information.
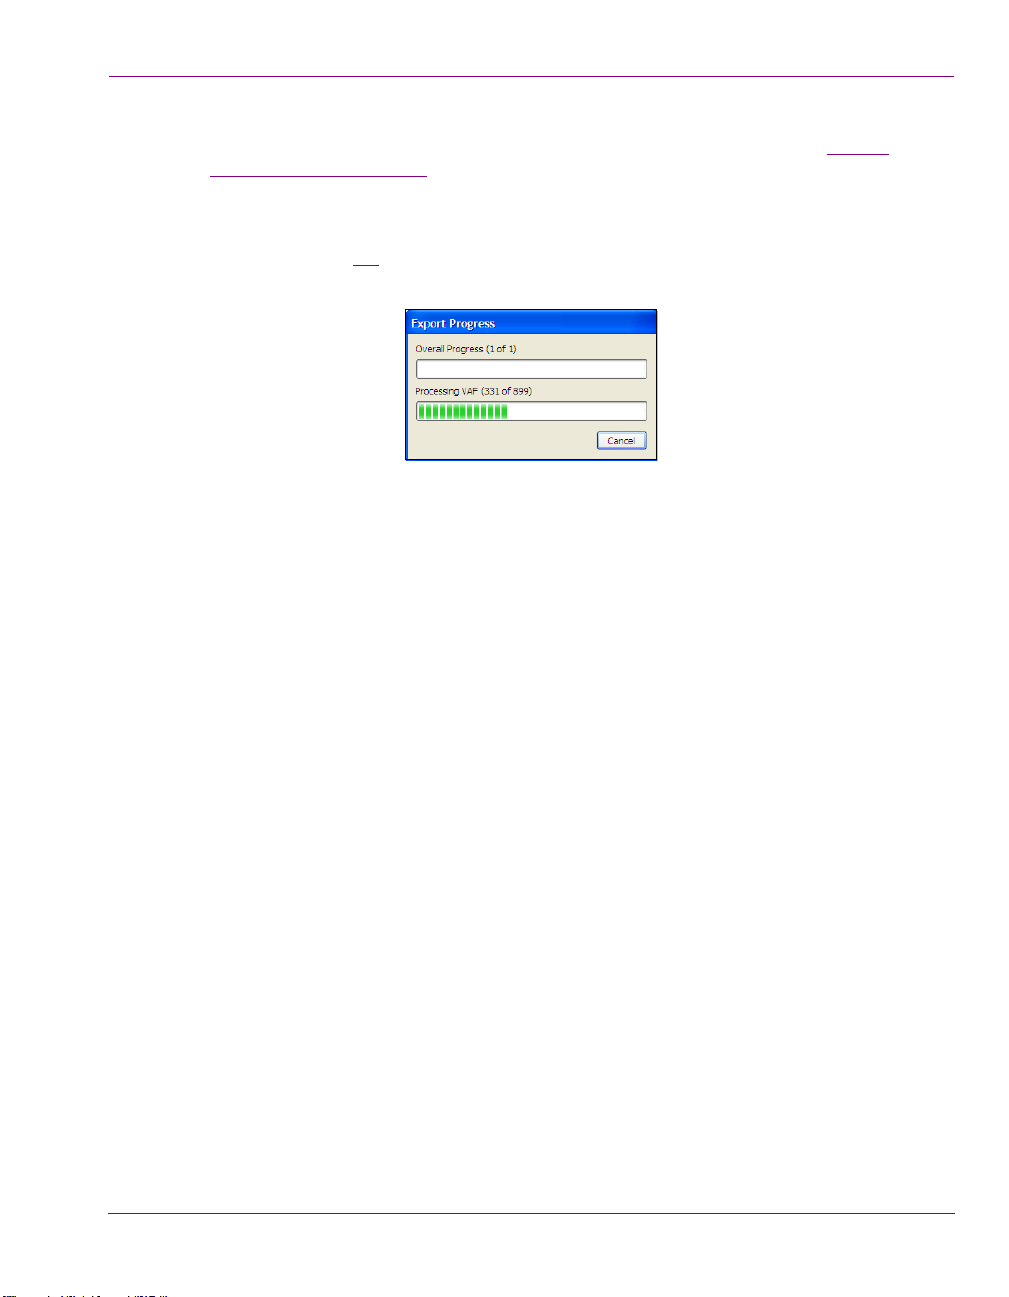
6. Launch the creation of the animation or video file by clicking OK.
XPORT MIRANDA ANIMATION
The E
dialog box (figure 2-3
) appears and tracks the progress of the procedure. Once
dialog box closes, while the E
XPORT PROGRESS
finished, the file is saved to the specific directory location.
Figure 2-3. The Export Progress dialog box
After Effects Plug-in User Manual 2-3
Page 10

Miranda Animation option
Export Options panel
The Export Options panel allows you to specify how the OXI, OXA or VAF files will be
created. As well, the Logging tab allows you to record the plug-in’s rendering activities into
a log file. Note that any changes made to the Export Options panel’s settings are saved, so
they only need to be modified as required.
Figure 2-4 demonstrates that the Export Options panel is organized into three (3) thematic
XTEL EXPORT
tabs: O
The following sections identify and describe the options on each of the Export Options
panel’s tabs:
• “Oxtel Export tab” on page 2-5
• “VAF Export tab” on page 2-7
• “Logging tab” on page 2-9
, VAF E
XPORT
and L
OGGING
.
Figure 2-4. The Export Options panel
2-4 After Effects Plug-in User Manual
Page 11
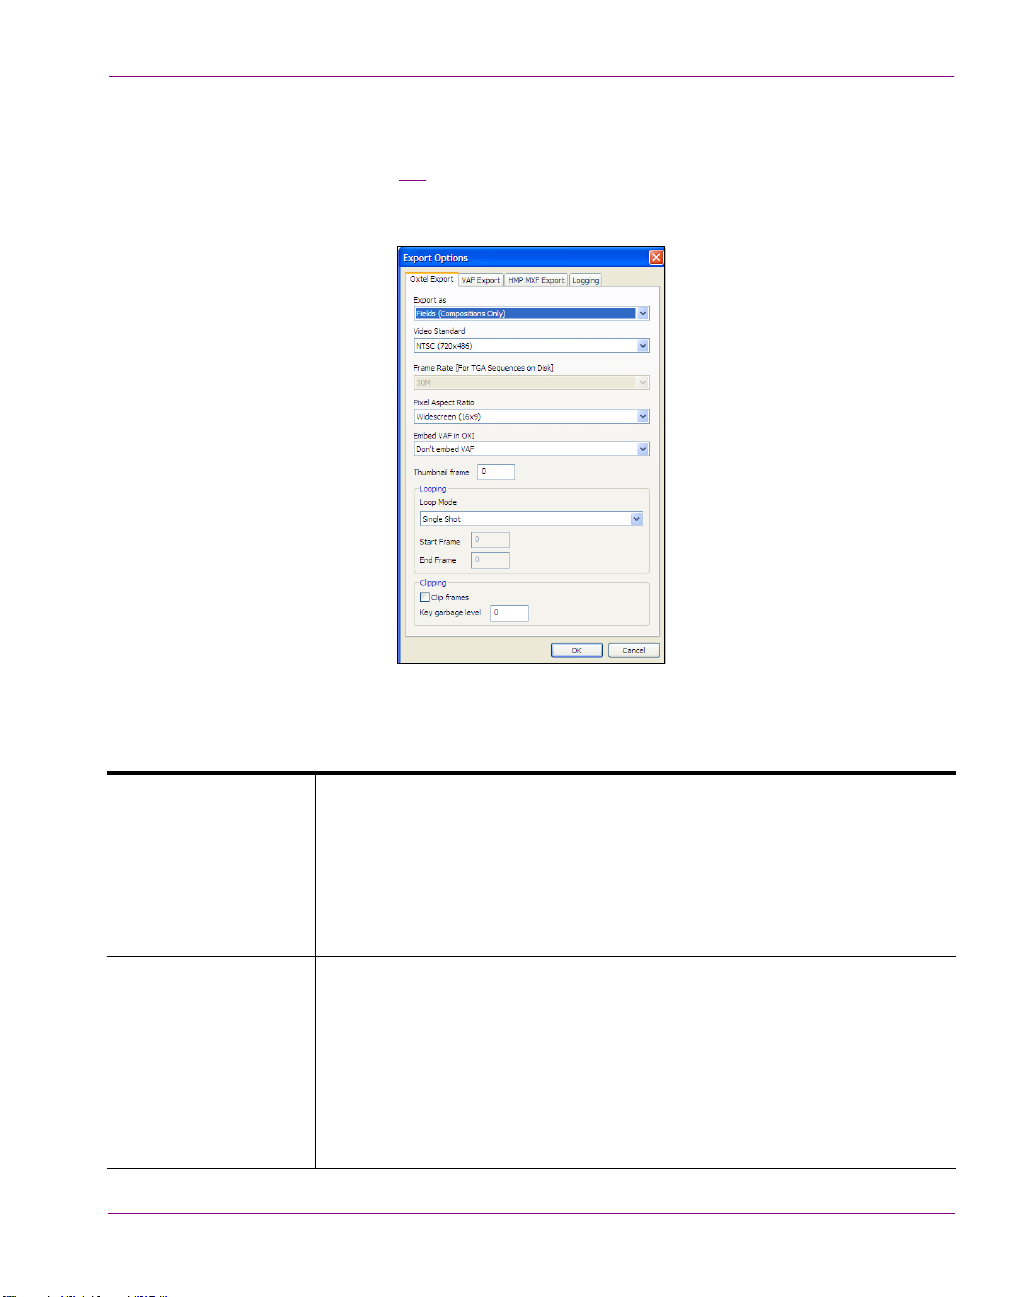
Oxtel Export tab
The Oxtel Export tab (figure 2-5) exposes a series of advanced settings which affect the
way in which the After Effects Plug-in renders OXI and OXA animation files based upon an
After Effects project.
Miranda Animation option
Figure 2-5. The Oxtel Export tab
The following table provides descriptions for each of the parameters on the Oxtel Export tab.
IELDS
(C
• F
OMPOSITIONS ONLY
): When set to F
IELDS
, each frame from the
After Effects project is split into two fields in the final animation.
RAMES
Export as
•F
: When set to F
field (when creating an interlaced file), or a whole frame (in a progressive
RAMES
, each frame becomes either an individual
standard).
When outputting to a progressive standard, this setting will be ignored and
each frame will always be treated as a frame.
Specifies the resolution format that will be used when the animation file is
rendered.
Choose from the following settings:
• PAL (720x576)
Video Standard
• NTSC (720x486)
• 720p (1280x720)
• 1080i (1920x1080)
• 1080p (1920x1080)
After Effects Plug-in User Manual 2-5
Page 12

Miranda Animation option
Frame Rate (for TGA
Sequence on Disk)
Pixel Aspect Ratio
Embed VAF in OXI
The frame rate option for TGA sequences dictates the frame rate that will be
written into the animation file. Since there is no way to store a frame rate with
a TGA sequence, it must be specified manually in this parameter.
The possible settings are dependent upon the Video Standard specified:
•PAL = 25
• NTSC = 30M
• 720p = 60, 60M, 50
• 1080i = 30, 30M, 25
• 1080p = 60, 60M, 50
Specifies the Pixel Aspect Ratio format that will be used when rendering the
animation. Choose from the following settings:
• Square Pixels
• Standard TV (4x3)
• Widescreen (16x9)
Specifies whether or not to embed the VAF payload inside the .OXI or .OXA
file. Embedding the VAF allows for the same asset to be used on the Intuition
classic, Intuition XG, and Vertigo XG.
• Don’t embed VAF
• Embed VAF in OXI/OXA file
Thumbnail frame
Looping
Clipping
This is the frame index from which the thumbnail proxy will be generated.
Loop Mode - Choose from among the following settings to specify the
animation’s loop behavior during playout.
• Cycle: The animation file will play through until the end is reached and
then loop back to the start of the animation.
• Single Shot: The animation file will be replayed just once through.
• Ping Pong: The animation plays forward and then returns in reverse.
• In Loop Out: The animation will play to the End Frame as defined in the
dialog then jump back to the Start Frame and then keep looping between
these two frames.
• Linear Control: Use this setting when the animation’s playback is
controlled by automation commands.
The following settings remove the empty parts of the animation frame (e.g. the
black areas around the edges of each frame). This is helpful as it reduces the
file size, though it takes longer for the plug-in to process each frame.
• Clip frames: Clips any solid transparent areas of the animation frame.
• Key garbage level: This setting only needs to be changed from the
default of 0 if the source material being used to generate the animation
contains noise which is interpreted as part of the image. A setting above 0
creates a threshold below which any noise is ignored. The actual garbage
level setting required depends on how much noise is included in the
source material and the appropriate level can only be found through
experimentation.
2-6 After Effects Plug-in User Manual
Page 13

VAF Export tab
The VAF Export options (figure 2-6) exposes a series of advanced settings which affect the
way in which the After Effects Plug-in renders VAF video clip files based upon an After
Effects project.
The following table provides descriptions for each of the parameters on the VAF Export tab.
Same as Oxtel Export
Settings
Miranda Animation option
Figure 2-6. The VAF Export tab
When enabled, this parameter keeps the VAF settings the same as the
OXI/OXA settings.
Note that the loop settings between OXI/OXA and VAF are different. We
interpret them as follows:
YCLE
• OXI C
• OXI S
• OXI P
• OXI I
• OXI L
= VAF Loop Entire Animation
INGLE SHOT
ING PONG
NLOOPOUT
INEAR CONTROL
= VAF Single Shot
= VAF Loop Entire Animation
= Loop Range user set start frame to user set end frame
= VAF Single Shot
The frame rate option for TGA sequences dictates the frame rate that will
Frame Rate (For TGA
Sequence on Disk)
be written into the video file. Since there is no way to store a frame rate with
a TGA sequence, it must be specified manually in this parameter.
Choose one of the following settings: 25, 30M, 30, 50, 60M or 60.
Loop Mode - Choose from among the following settings to specify the
animation’s loop behavior during playout.
• Single Shot: The video is played just once through.
Looping
• Loop Entire Animation: The video plays in its entirety, then restart
from the beginning.
• Loop Range: The video plays to the End Frame as defined in the
dialog then jump back to the Start Frame and then keep looping
between these two frames.
After Effects Plug-in User Manual 2-7
Page 14

Miranda Animation option
HMP MXF Export tab
The HMP MXF E
XPORT
tab (figure 2-7) exposes the following advanced parameters
which affect the way in which the After Effects Plug-in renders MXF video clip files that
are used by HMP-1801 devices.
Figure 2-7. The HMP MXF E
XPORT
tab was added to the After Effects Plug-in Export Options panel
Loop Enables or disables the looping of the MXF file’s playout. The number of
loops performed is set by the L
OOP COUNT
parameter.
Loop Count Specifies the number of times the rendered video clip will be looped.
The default value is 0.
Video Fade In (frame) Specifies the number of frames (duration) that it takes for the video to
fade-in on initial playout. The default value is 0 frames.
Video Fade Out (frame) Specifies the number of frames (duration) that it takes for the video to
fade-out to the ending of playout. The default value is 0 frames.
Video Hold First (frame) Specifies the time (in number of frames) to hold on the first frame of data.
The default value is 0 frames.
Video Hold Last (frame) Specifies the time (in number of frames) to hold on the last frame of data.
The default value is 0 frames.
2-8 After Effects Plug-in User Manual
Page 15
Logging tab
As the After Effects Plug-in operates, AE Plugin events are recorded to a log text file, which
is stored in the following directory location:
C:\Documents and Settings\All Users\Application Data\VertigoXmedia\Logs
Every execution of the After Effects Plug-in appends to the most recent AEPlugin log file
until it reaches the size specified in the L
and create a new file.
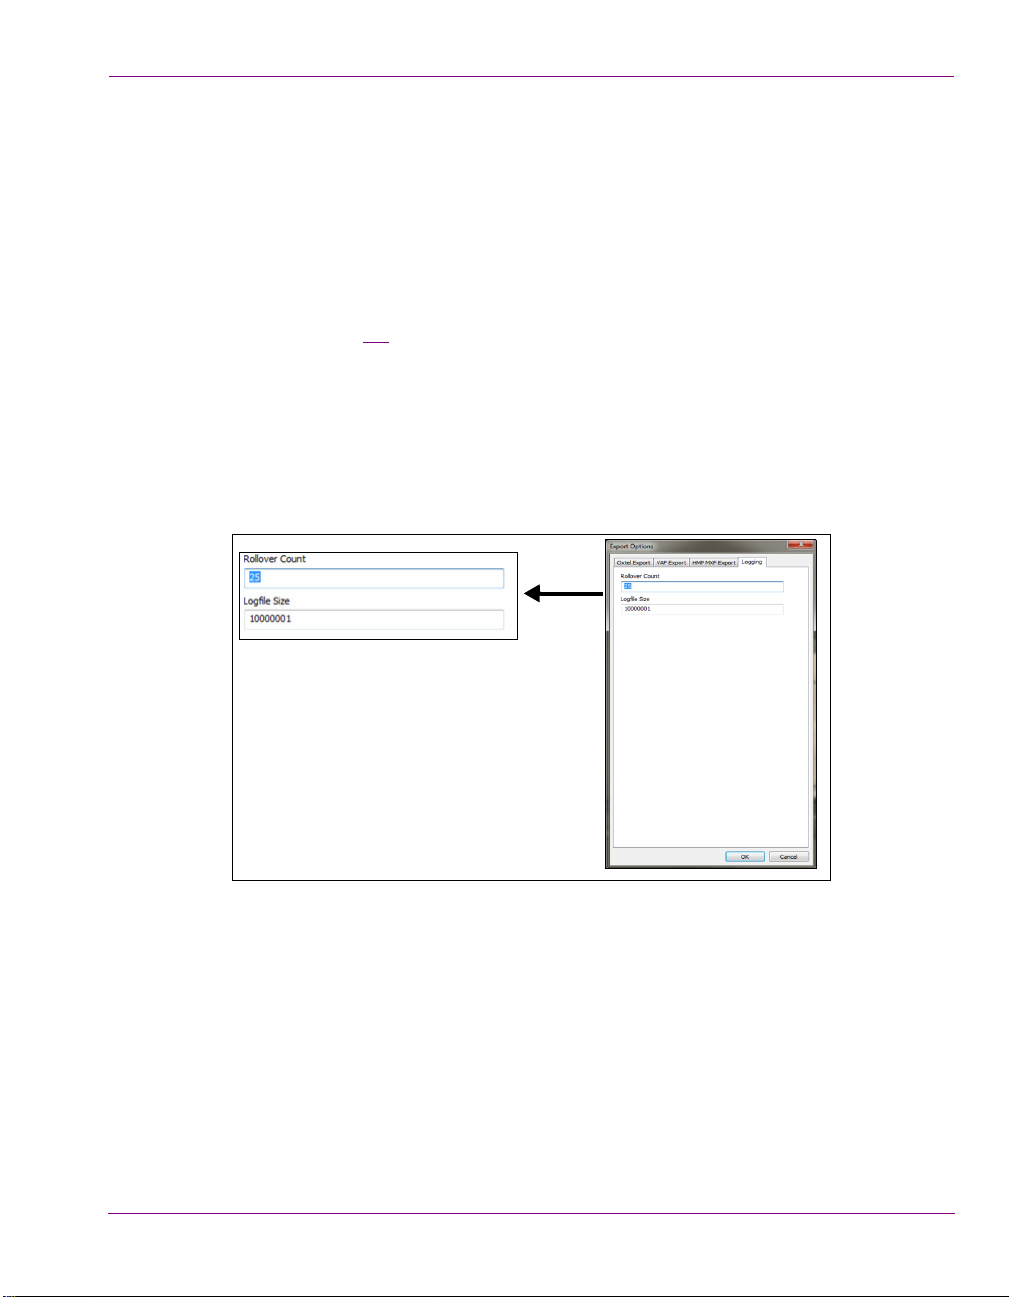
The Logging tab (figure 2-8) features two settings to control the size and number of the log
files stored:
• Rollover count - The rollover count determines the number of AEPlugin*.log files are
kept in the logging folder. Choose a large enough number so that enough relevant log
files are stored. This helps to identify of repetitive behaviors and facilitates
troubleshooting.
• Log file size - The maximum size of a log file before starting over from the beginning.
The value specified in bytes.
OGFILE SIZE
Miranda Animation option
setting at which point it will rollover
Figure 2-8. The Logging tab
After Effects Plug-in User Manual 2-9
Page 16

3 M
N
OTE
IRANDA
OPTION
Graphics which must be prepared in multiple versions, like in-show promos, can be
prepared more quickly and more accurately using the After Effects Plug-in’s M
A
NIMATION
Adobe After Effects Project composition. The plug-in combines the data and the
composition to generate multiple versions of the promo, as animation or video files, for
different channels, days and times. This approach allows quality control tasks to be
performed quickly and easily.
The following sections describe the workflow and provide instructions for using the M
NIMATION
A
graphics:
• “Workflow for pre-rendering in-show promos using the After Effects Plug-in” on page 3-2
• “Using the Merge Mode option to perform a batch export of graphics files” on page 3-3
• “Creating a spreadsheet for Merge Mode” on page 3-5
(M
ERGE MODE
(M
ERGE MODE
A
NIMATION
) option. The process uses traffic data in a spreadsheet to feed an
) option to render multiple versions of in-show promotional
(M
ERGE
M
IRANDA
ODE
IRANDA
)
By default, Miranda’s After Effects Plug-in renders the first composition in a project. See
“Handling a Project with Multiple Compositions” on page 3-12 for more information.
The Miranda Animation (Merge Mode) option also allows you to generate an Intuition
template for each exported animation containing the new animation file (the new template
is based on a specified pre-existing template file). See page 3-10 for more information.
Another practical use of the M
(TGA) sequences from disk to OXI/OXA animations and/or VAF video clip format. See
“Transcoding TGA sequences into animation and/or video files” on page 3-13
information.
After Effects Plug-in User Manual 3-1
IRANDA ANIMATION
(M
ERGE MODE
) option is to transcode Targa
for more
Page 17
Miranda Animation (Merge Mode) option
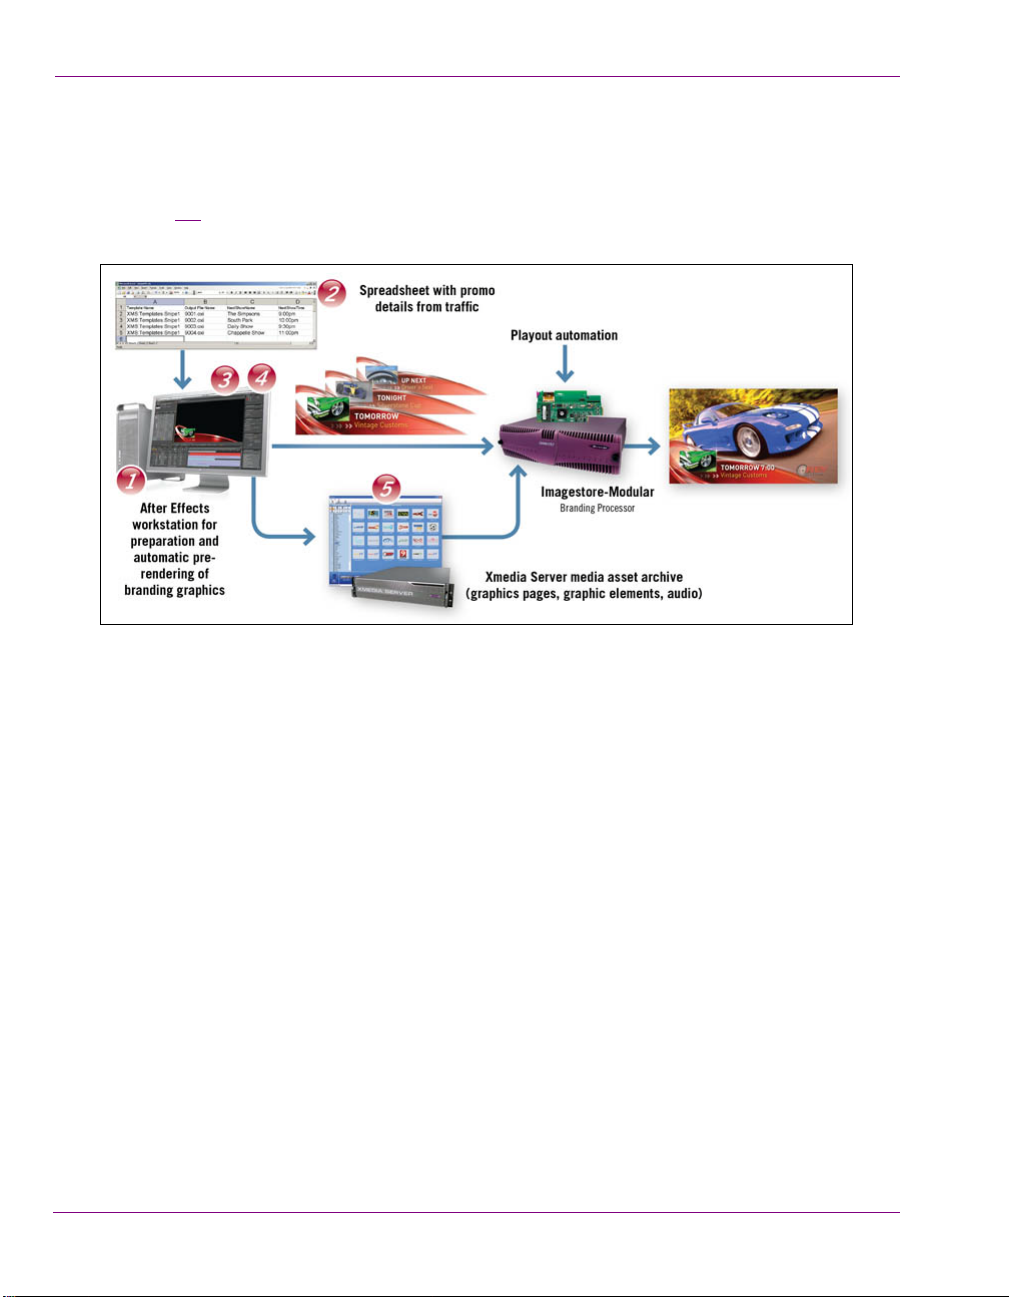
Workflow for pre-rendering in-show promos using the After Effects Plug-in
Figure 3-1 demonstrates the workflow for pre-rendering in-show promos using the After
Effects Plug-in.
Figure 3-1. Workflow for pre-rendering in-show promos using the After Effects Plug-in
1. Graphics templates are created using Adobe After Effects on a graphics workstation,
equipped with the Miranda After Effects Plug-in. The full range of After Effects text
effects can be used for the graphics because they will be flattened before playout.
2. The operator opens an Excel spreadsheet from the traffic or promo department, which
lists the details about the promos required, including the template to be used, the onair dates and times, and the show names. The file names are also provided for effective
integration with the station’s playout automation.
3. The Miranda After Effects Plug-in extracts the data from the spreadsheet and creates
a preview of the rendered graphics for quality control.
4. After quality control, the workstation automatically renders all of the promos, and
generates flattened files.
5. The completed graphics are then transferred to a Vertigo Xmedia Server for archiving,
or directly to a channel branding processor for playout under automation.
3-2 After Effects Plug-in User Manual
Page 18
Miranda Animation (Merge Mode) option
Using the Merge Mode option to perform a batch export of graphics files
To use the Miranda Animation (Merge Mode) option to generate a batch export of
animation and/or video clip files from an After Effects project:
1. Create a base template for the graphics using the After Effects application.
2. Create an Excel spreadsheet that contains the proper formatting and information to
feed the template and create multiple animation and/or video files. See “Creating a
spreadsheet for Merge Mode” on page 3-5 for more information.
3. Select the F
A message appears warning you that the project you currently have open will be closed
without saving. To continue, simply click OK.
The E
ILE>EXPORT>MIRANDA ANIMATION
XPORT MIRANDA ANIMATION
(M
ERGE MODE
) menu command.
dialog box appears (figure 3-2).
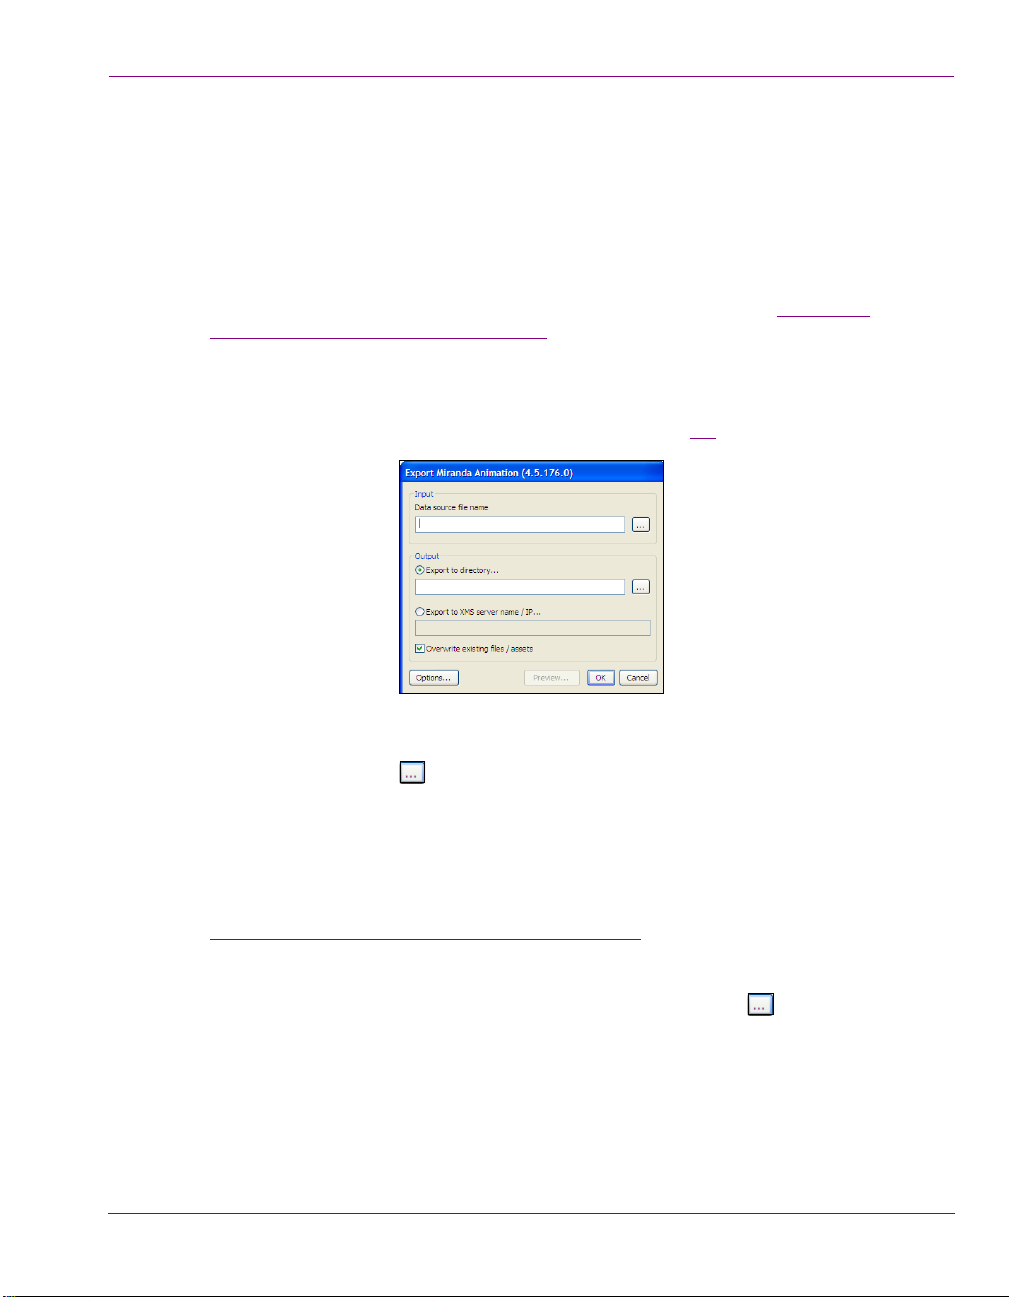
Figure 3-2. The Export Miranda Animation dialog box
4. Click the Ellipsis button in the I
NPUT
- D
ATA SOURCE FILE NAME
field to navigate to
and select an Excel spreadsheet, which contains the information for a batch export.
Each animation file that is to be created can contain different information which can be
extracted from an Excel spreadsheet. This information can replace tags within the
project file during the batch process. These tags relate to layers which can contain text,
images or clips for replacement. Layers are the basic elements of an After Effects
composition and each layer can only include one footage item as its source. See
“Creating a spreadsheet for Merge Mode” on page 3-5
for more information about
creating an appropriate spreadsheet.
5. Specify an Output destination where the animation and/or video files will be saved to.
XPORT TO DIRECTORY
• E
- Enable and then click the Ellipsis button to
navigate to and select the directory in which to save the output files.
• E
XPORT TO
XMS
SERVER NAME
/ IP - Enable and then type either the Xmedia
Server’s hostname or the IP address of the XMS device where the output files
will be ingested into.
6. Enable O
VERWRITE EXISTING FILES
/
ASSETS
if you wish to automatically replace an
existing file that may already exist using the exact same name in the exact same
location.
After Effects Plug-in User Manual 3-3
Page 19

Miranda Animation (Merge Mode) option
N
OTE
7. Select the O
PTIONS
button to expose advanced options, which specify how the
animation and video files will be created, including specifying the looping behavior. See
“Export Options panel” on page 2-4
for more information.
8. To ensure that the animation and video files are generated correctly, you can scrub the
animation or video before you generate the files and templates (if there are any setup).
To preview an animation or video:
REVIEW
a. Click the P
to expose the M
button and the E
ERGE PREVIEW
XPORT MIRANDA ANIMATION
section (figure 3-3).
dialog box expands
Figure 3-3. The Merge Preview section appears
b. To preview each of the animations or videos that will be created in the merge
process, click the or buttons or use the a slider to scrub through the
resulting files.
EJECT
c. If you choose not to process any of the animations or videos, press the R
button. R
EJECTED
is then displayed in the lower-right corner of the Merge Preview
section and when the batch process is started this file will not be generated.
9. Create the animation and/or video clip files by clicking OK.
XPORT MIRANDA ANIMATION
The E
dialog box closes and the E
XPORT PROGRESS
dialog
box appears to track the animations’ creation.
If errors occur while generating the exported animation files, an error message appears and
offers you the opportunity to see specifically what caused the export to fail. Use these
details to troubleshoot.
3-4 After Effects Plug-in User Manual
Page 20

Miranda Animation (Merge Mode) option
Creating a spreadsheet for Merge Mode
Before Merge Mode can create a batch export of animation and/or video files, you must
create and populate an Excel spreadsheet containing the proper formatting and information
(figure 3-4).
Figure 3-4. Example of a spreadsheet formatted for merge mode
The first row in the spreadsheet contains column headers for the data in the After Effects
composition. After the first row of headers, all subsequent valid rows will create an
animation or video file using the data specified in the row.
The following sections describe the mandatory and optional columns and information that
must be present in the spreadsheet for Merge Mode to function properly:
• “Project Name column” on page 3-5 (required)
• “Output File Name column” on page 3-6
• “Subfolder columns” on page 3-7
• “Layer tag columns” on page 3-9
• “Intuition Template & Intuition Template Element columns” on page 3-10
• “Asset Lifespan column” on page 3-10
• “Asset Expiry Date column” on page 3-10
• “Vertigo Template, Vertigo Template Element & VAF XmediaServer columns” on page
3-11 (optional)
(required)
(optional)
(optional)
(optional)
(optional)
(optional)
Project Name column
When using the Merge Mode to perform a batch export of animation and/or video files, the
first column in the spreadsheet must be named P
entire path to the After Effects project to be loaded for the given row of data (figure 3-5
Figure 3-5. Example of the Project Name column for exporting a batch of animation files
Figure 3-5
spreadsheet so that animations and/or videos generated from the data in one spreadsheet
can be created from different projects.
After Effects Plug-in User Manual 3-5
also demonstrates that different projects can be associated with each row of a
ROJECT NAME
. This column must contain the
).
Page 21

Miranda Animation (Merge Mode) option
N
OTE
Also note that once the project name is specified, all subsequent blank rows will use the
same project file until another file is specified (e.g. rows 3 and 4 will both use project 2).
When using the Miranda Animation Merge Mode option to transcode Targa (TGA)
sequences, the first column in the spreadsheet must still be named P
must contain the entire path to the first frame of the Targa sequence on disk (figure 3-6
See “Transcoding TGA sequences into animation and/or video files” on page 3-13
information.
Figure 3-6. Example of the Project Name column for transcoding TGA Sequences
Output File Name column
ROJECT NAME
, but it
).
for more
The second column in the spreadsheet must be named O
UTPUT FILE NAME
. This column
specifies the name and file format of the animation and/or video clip that will be created
during the batch export (figure 3-7).
Figure 3-7. Example of the second column in the spreadsheet required for Merge Mode
The suffix of the file name specifies the type of animation or video file to be created. Valid
file types are:
• .vaf - VAF animation files for Intuition XG and Vertigo XG devices
• .oxi - OXI animation files for Intuition Classic devices
• .oxa - OXA animation files for ImageStore 750 and LGK -3901 devices
• .mxf - MXF video files for HMP-1801 devices
The After Effects Plug-in can also embed a .VAF inside an .OXI or .OXA file by enabling a
setting within the Oxtel Export Options. This allows the asset to be used on Intuition
Classic, Intuition XG, and Vertigo XG devices. See “Embed VAF in OXI” on page 2-6.
By default, the animation or video file is saved to the location (directory or XMS) specified
in the O
UTPUT
field of the E
XPORT MIRANDA ANIMATION
dialog box (see page 3-1).
If, however, the file is required to be saved into a different directory, this can be specified
either in a directory relative to the O
UTPUT DIRECTORY
, or as an absolute path. Figure 3-8
3-6 After Effects Plug-in User Manual
Page 22

demonstrates that specifying the relative path Animation\3001.oxi, the animation will
N
OTE
Path relative to location
Absolute path
specified in the O
UTPUT
field
be saved to the directory c:\AE\Animation. Meanwhile, specifying the absolute path of
c:\AEAnimationFile\3001.oxi saves the file in the folder AEAnimationFile at the root
level of c:.
Figure 3-8. Example of the second column in the spreadsheet required for Merge Mode
You can automatically publish the newly rendered animation or video files to the appropriate
devices by selecting the appropriate devices within the category or subcategory properties
in the Asset Browser (Xplorer or Xstudio).
Subfolder columns
By default, the rendered animation or video files are saved to the location (directory or XMS)
specified in the O
As an alternative method to specifying a relative path in the O
(page 3-6
S
UBFOLDER X
), you can also determine exactly where the files will be stored by adding optional
name and hierarchy of the directory subfolders or XMS subcategories in which to save the
file. Subfolder columns must be sequentially numbered starting with S
Figure 3-9
UBFOLDER
S
root category. Each additional Subfolder column creates a subdirectory/subcategory below the
previous. Also note that the relative path specified in the O
is conserved and applied last. You can also add multiple subdirectories/subcategories in one
subfolder column (e.g. cat1\cat2).
UTPUT
columns to the spreadsheet. The Subfolder columns allow you to specify the
demonstrates that Subfolder columns must be sequentially numbered starting with
1 (one-level below the directory location specified in the O
field of the E
Miranda Animation (Merge Mode) option
XPORT MIRANDA ANIMATION
UTPUT FILE NAME
dialog box (see page 3-1).
UTPUT FILE NAME
UBFOLDER
UTPUT
column
1.
field or the XMS’s
column (page 3-6),
Figure 3-9. Subfolder columns
After Effects Plug-in User Manual 3-7
Page 23

Miranda Animation (Merge Mode) option
N
OTE
You can automatically publish the newly rendered animation or video files to the appropriate
devices by selecting the appropriate devices within the category or subcategory properties
in the Asset Browser (Xplorer or Xstudio).
3-8 After Effects Plug-in User Manual
Page 24

Layer tag columns
N
OTE
Merge Mode allows you to generate multiple versions of a promo for different channels, days
and times by substituting the text, image, or clip associate with a layer in the After Effects
project and then rendering each variation as a separate as animation or video file.
To make layer substitutions, you must first be sure that the layer name in the After Effects
project must contain the tag name. Figure 3-10
After Effects project must be preceded with < and followed by a />. To rename a layer in After
Effects, select the layer and press the E
Figure 3-10. Tag names for the layers in the After Effects project
Once the layer names in the After Effects project contain the properly formatted tag names,
you can add a column for each layer that is to be modified. The column headings must be
identically named to the tag names given to the layers in the After Effects project, but
without the < and />.
Each row after the header row should contain the information that will replace the current
content of the layer tag. Figure 3-11 demonstrates that the spreadsheet contains four (4) layer
tag columns and that the first animation rendered will feature the following substitutions:
• <NextShowDay/> will be replaced by Monday
• <NextShowTime/> will be replaced by 5:00pm
• <NextShowName/> will be replaced by Les Papous
• <Image/> will be replaced by ‘V001.tga’
Miranda Animation (Merge Mode) option
demonstrates that the layer’s tag name in the
NTER
key. This allows you to rename the layer.
Figure 3-11. Layer tag columns
When replacing an image or a clip, the complete path to the graphic needs to be specified. There
can be as many columns of layer tags as required, but they must be from the third column onwards.
When replacing a clip, the animation plays out the clip for the duration of the composition.
After Effects Plug-in User Manual 3-9
Page 25

Miranda Animation (Merge Mode) option
Intuition Template & Intuition Template Element columns
Merge Mode allows you to automatically take an existing base Intuition template and
substitute the animation within this template with the newly created Intuition animation file.
Figure 3-12
spreadsheet: I
The I
template will be created. The T
animation entry in the base template that the newly created animation will replace. The
newly created template will be saved in the same directory as the animation file that has
been created and will be saved with the same name as the output animation file (as a .tem
file). The templates are also ingested into the XMS and converted to scenes.
demonstrates that this is accomplished by adding two optional columns to the
NTUITION TEMPLATE
Figure 3-12. Intuition Template and Template Element columns
NTUITION TEMPLATE
column defines the path to the base template from which the new
and T
EMPLATE ELEMENT
EMPLATE ELEMENT
.
column specifies the name of an existing
Asset Lifespan column
Adding an optional A
lifespan of each animation or video file created by the After Effects Plug-in’s Merge Mode.
The value is specified in days that must elapse since the last time the new file has been
accessed before it is removed from the published device. This does not remove it from
the Xmedia Server.
If the entry for a specific row is empty, then the Xmedia Server assigns the default lifespan
of 365 days.
SSET LIFESPAN
column to the spreadsheet allows you to set the publish
Asset Expiry Date column
Adding an optional A
date of when the new animation or video file is to be deleted from the Xmedia Server. The
format for this setting must be
3-10 After Effects Plug-in User Manual
SSET EXPIRY DATE
M-D-YYYY
column to the spreadsheet allows you to set the
.
Page 26

Miranda Animation (Merge Mode) option
Vertigo Template, Vertigo Template Element & VAF XmediaServer columns
The following columns in the Merge List file (.xls) allow the VAF portion of a OXI-Embedded
VAF to be ingested into specified Xmedia Servers, while the After Effects Plug-in is
generating the OXI-Embedded VAF.
• Vertigo Template: Specifies the name and location of the base Template that the VAF
uses when loaded on the XG playout devices. This template must exist on the Main
and Backup Xmedia Servers.
• Vertigo Template Element: Specifies the name of the template element that holds the
VAF when the template is loaded.
• Vertigo Template Element: A comma separated list of Xmedia Server IPs or names
that represent where the target Xmedia Servers are defined.
Note that the VAF that is ingested into the Xmedia Servers with the same name as the OXI-
LIPS
Embedded VAF and it will be added as a clip asset in the root of the C
a Page is created based of the base template specified in the V
of the .xls Merge List. This Page has the same name as the VAF and is categorized in the
AGES
root of the P
category.
ERTIGO TEMPLATE
category. Also,
column
After Effects Plug-in User Manual 3-11
Page 27
Miranda Animation (Merge Mode) option
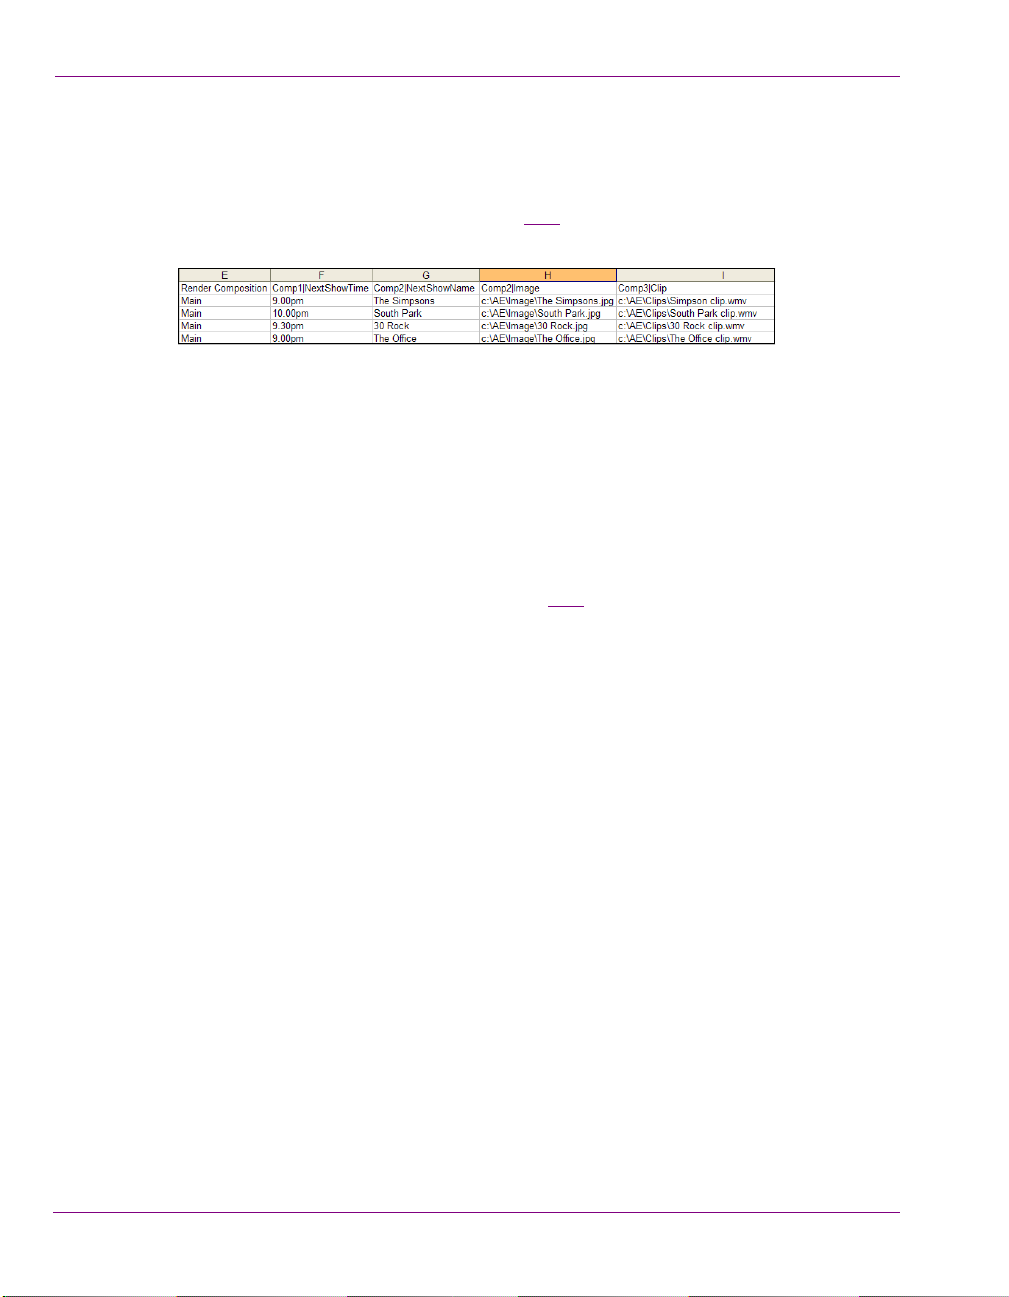
Handling a Project with Multiple Compositions
It is possible to generate an animation file from a project containing multiple compositions.
Elements within any composition can be substituted. Additionally, the composition that the
operator wishes to render can be specified. Figure 3-13
modified spreadsheet to support multiple compositions.
Figure 3-13. Rendering an animation file from a specific AE composition
The R
ENDER COMPOSITION
column specifies which composition within the project will be
rendered by the After Effects Plug-in. If this column is not included, the first (default)
composition for the project will be rendered.
To specify an element within a composition to substitute, the format of the column header
must be ‘
COMPOSITION NAME|ELEMENT NAME
’. For example, C
If only the element name is entered, then the substitution will take place on an element in
the composition specified within R
ENDER COMPOSITION
composition if this is not specified. For example, figure 3-13 shows that the first substitution
will take place in the composition called C
EXTSHOWTIME
N
.
OMP
1 and it will look for an element named
provides an example of the
OMP
1|N
column, or within the default
EXTSHOWTIME
.
3-12 After Effects Plug-in User Manual
Page 28

Miranda Animation (Merge Mode) option
Transcoding TGA sequences into animation and/or video files
Merge Mode can also be used to transcode Targa (TGA) sequences into OXI /OXA
animation file and/or VAF video clip files. The newly created files can then be saved either
to disk or ingest into an Xmedia Server, which can then be configured to automatically
publish the assets to a playout device.
Figure 3-14
disk must be specified in the spreadsheet’s P
and file type of the desired animations or video clips must be specified in the O
AME
N
To use the Miranda Animation (Merge Mode) option to transcode TGA sequences into
OXI, OXA, or VAF files:
1. Create and save an Excel spreadsheet that has a minimum of the two (2) columns:
2. Start the Adobe After Effects application.
3. Select the F
demonstrates that the entire path to the first frame of the Targa sequence on
ROJECT NAME
column. Meanwhile, the name
UTPUT FILE
column.
Figure 3-14. Transcoding Targa sequences into clip and/or cel animation assets
ROJECT NAME
• P
: Specify the entire path to the first frame of the Targa
sequence on disk.
UTPUT FILE NAME
• O
: Specify the name and file type (.oxi, .oxa, or .vaf) of the
desired animations or video clips.
ILE>EXPORT>MIRANDA ANIMATION
(M
ERGE MODE
) menu command.
A message appears warning you that the project you currently have open will be closed
without saving. To continue, simply click OK.
XPORT MIRANDA ANIMATION
The E
dialog box appears (figure 3-15).
Figure 3-15. The Export Miranda Animation dialog box
After Effects Plug-in User Manual 3-13
Page 29

Miranda Animation (Merge Mode) option
4. Click the Ellipsis button in the I
NPUT
- D
ATA SOURCE FILE NAME
field to navigate to
and select the Excel spreadsheet created in step 1.
5. Specify an Output destination where the animation files will be saved to.
XPORT TO DIRECTORY
• E
- Enable and then click the Ellipsis button to
navigate to and select the directory in which to save the output files.
• E
XPORT TO
XMS
SERVER NAME
/ IP - Enable and then type either the Xmedia
Server’s hostname or the IP address of the XMS device where the output files
will be ingested into.
6. Enable O
VERWRITE EXISTING FILES
/
ASSETS
if you wish to automatically replace an existing
video file that may already exist using the exact same name in the exact same location.
PTIONS
7. Select the O
button to expose advanced options, which specify how the
animation and video files will be created. For example, you can specify your
animation’s looping settings. See “Export Options panel” on page 2-4
for more
information.
8. To ensure that the animation files are generated correctly, you can preview the
animation before you generate the files.
To preview an animation:
REVIEW
a. Click the P
to expose the M
button and the E
ERGE PREVIEW
XPORT MIRANDA ANIMATION
section (figure 3-3).
dialog box expands
Figure 3-16. The Merge Preview section appears
b. To preview each of the animations that will be created in the merge process, click
the or buttons or use the a slider to scrub through the animation.
3-14 After Effects Plug-in User Manual
Page 30

Miranda Animation (Merge Mode) option
c. If you choose not to process any of the animations, press the R
EJECT
Rejected is then displayed in the lower-right corner of the Merge Preview section
and when the batch process is started this animation will not be generated.
9. Create the animation and/or video files by clicking OK.
XPORT MIRANDA ANIMATION
The E
dialog box closes and the E
XPORT PROGRESS
box appears to track the files’ creation.
If errors occur while generating the exported animation and/or video files, an error
message appears and offers you the opportunity to see specifically what caused the
export to fail. Use these details to troubleshoot.
button.
dialog
After Effects Plug-in User Manual 3-15
 Loading...