

Grandtech DV2 User Manual
DV2 Instruction Manual
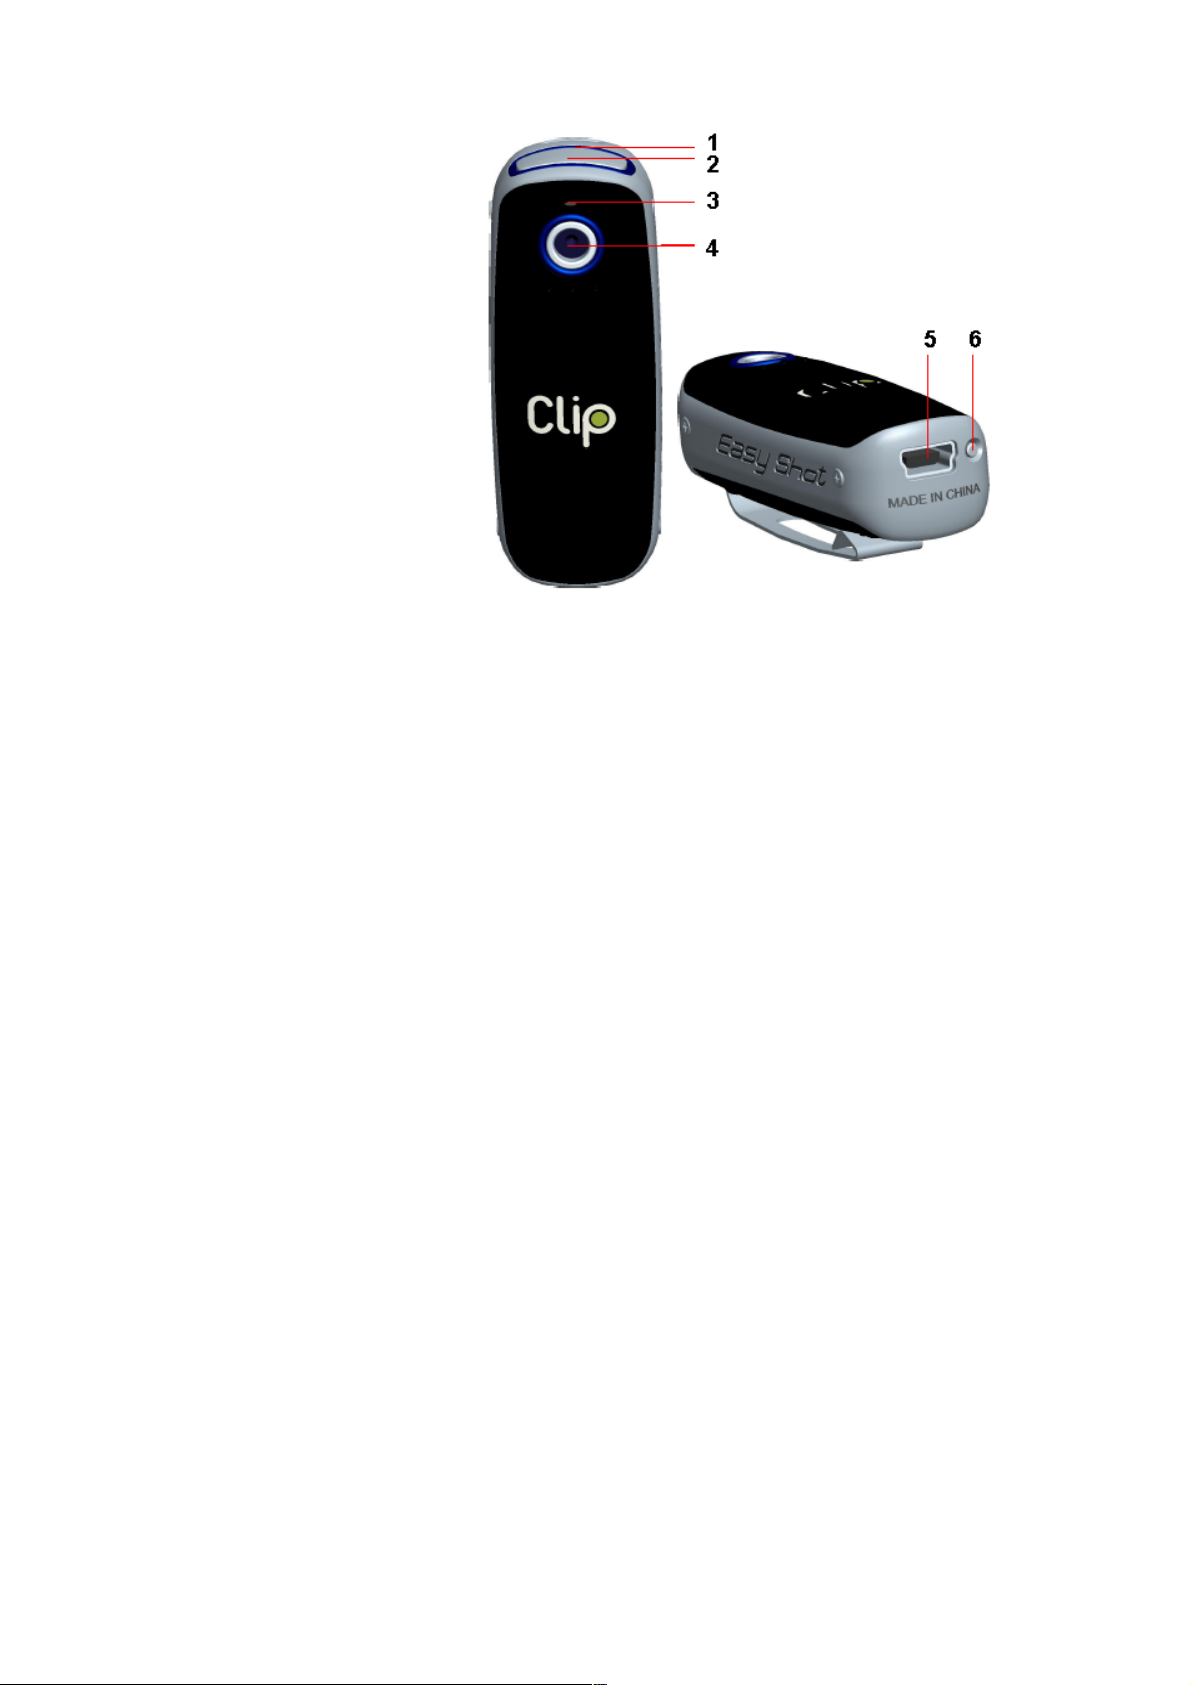
Product Description
1. Blue/Orange Indicator
2. Power/Record button
3. Microphone
4. Lens
5. USB port
6. Reset button
Power On & Off
To turn on the DV, press and hold the Power/Record button until the Blue Indicator lights
up. To turn off the DV, press and hold the Power/Record button until the Blue Indicator goes off.
If the DV is idle for 1 minute or the battery is low, it will power off automatically.
Note: If Power-off by holding the Power/Record button fails, press the Reset button to power off
the DV.
Taking Video
After switching on the DV, press ( and not hold ) the Power/Record button to start recording,
press it again to stop. The Orange indicator will light up during video recording.
When memory full, Orange indicator won't light up.
To delete some video clip, first of all, the unit should be connected to computer, refer to the
“Connected to Computer” for the details.
Note: The video clip will lose if the Reset button is pressed during video recording.
Connected to Computer
To playback or delete the video clips, the DV should be connected to the computer through
the USB port. There will be a New Removable Disk Device. Click it and Open the “DCIM” folder.
Your video clips are all in this folder. You can do deleting and playback right here. At the same
time, the Blue indicator is flashing, it means the battery is charging too.
Charging Battery
To charge the battery, connect the DV to the USB port. It will start charging automatically,
and the Blue indicator is flashing. When the battery is fully charged, the Blue indicator lights up and
stop flashing.
P. 1

Specification
Video Resolution 640 x 480 (VGA), 30 fps
Storage Included 2GB built in memory. Store up to 2 hours video clips
File Format AVI
Weight (inc. battery) 18g
Dimensions 57mm x 21mm x 18mm
This device complies with Part 15 of the FCC Rules. Operation is subject to the following two
conditions: (1) this device may not cause harmful interference, and (2) this device must accept any
interference received, including interference that may cause undesired operation.
Caution:
Changes or modifications not expressly approved by the party responsible for compliance
could void the user's authority to operate the equipment.
Note: This equipment has been tested and found to comply with the limits for a Class B digital
device, pursuant to Part 15 of the FCC Rules. These limits are designed to provide reasonable
protection against harmful interference in a residential installation. This equipment generates, uses
and can radiate radio frequency energy and, if not installed and used in accordance with the
instructions, may cause harmful interference to radio communications. However, there is no
guarantee that interference will not occur in a particular installation. If this equipment does cause
harmful interference to radio or television reception, which can be determined by turning the
equipment off and on, the user is encouraged to try to correct the interference by one or more of the
following measures:
-- Reorient or relocate the receiving antenna.
-- Increase the separation between the equipment and receiver.
-- Connect the equipment into an outlet on a circuit different from that to which the receiver is
connected.
-- Consult the dealer or an experienced radio/TV technician for help.
P. 2
 Loading...